

Rega Planar two Quick Start Manual
quick start guide
English
Français
Deutsche
Español
Rega Research. Made in England
English
Please follow this quick set up guide to ensure
optimum performance and perfect operation.
Failure to do so may invalidate your warranty.
For more information on this product
please visit www.rega.co.uk
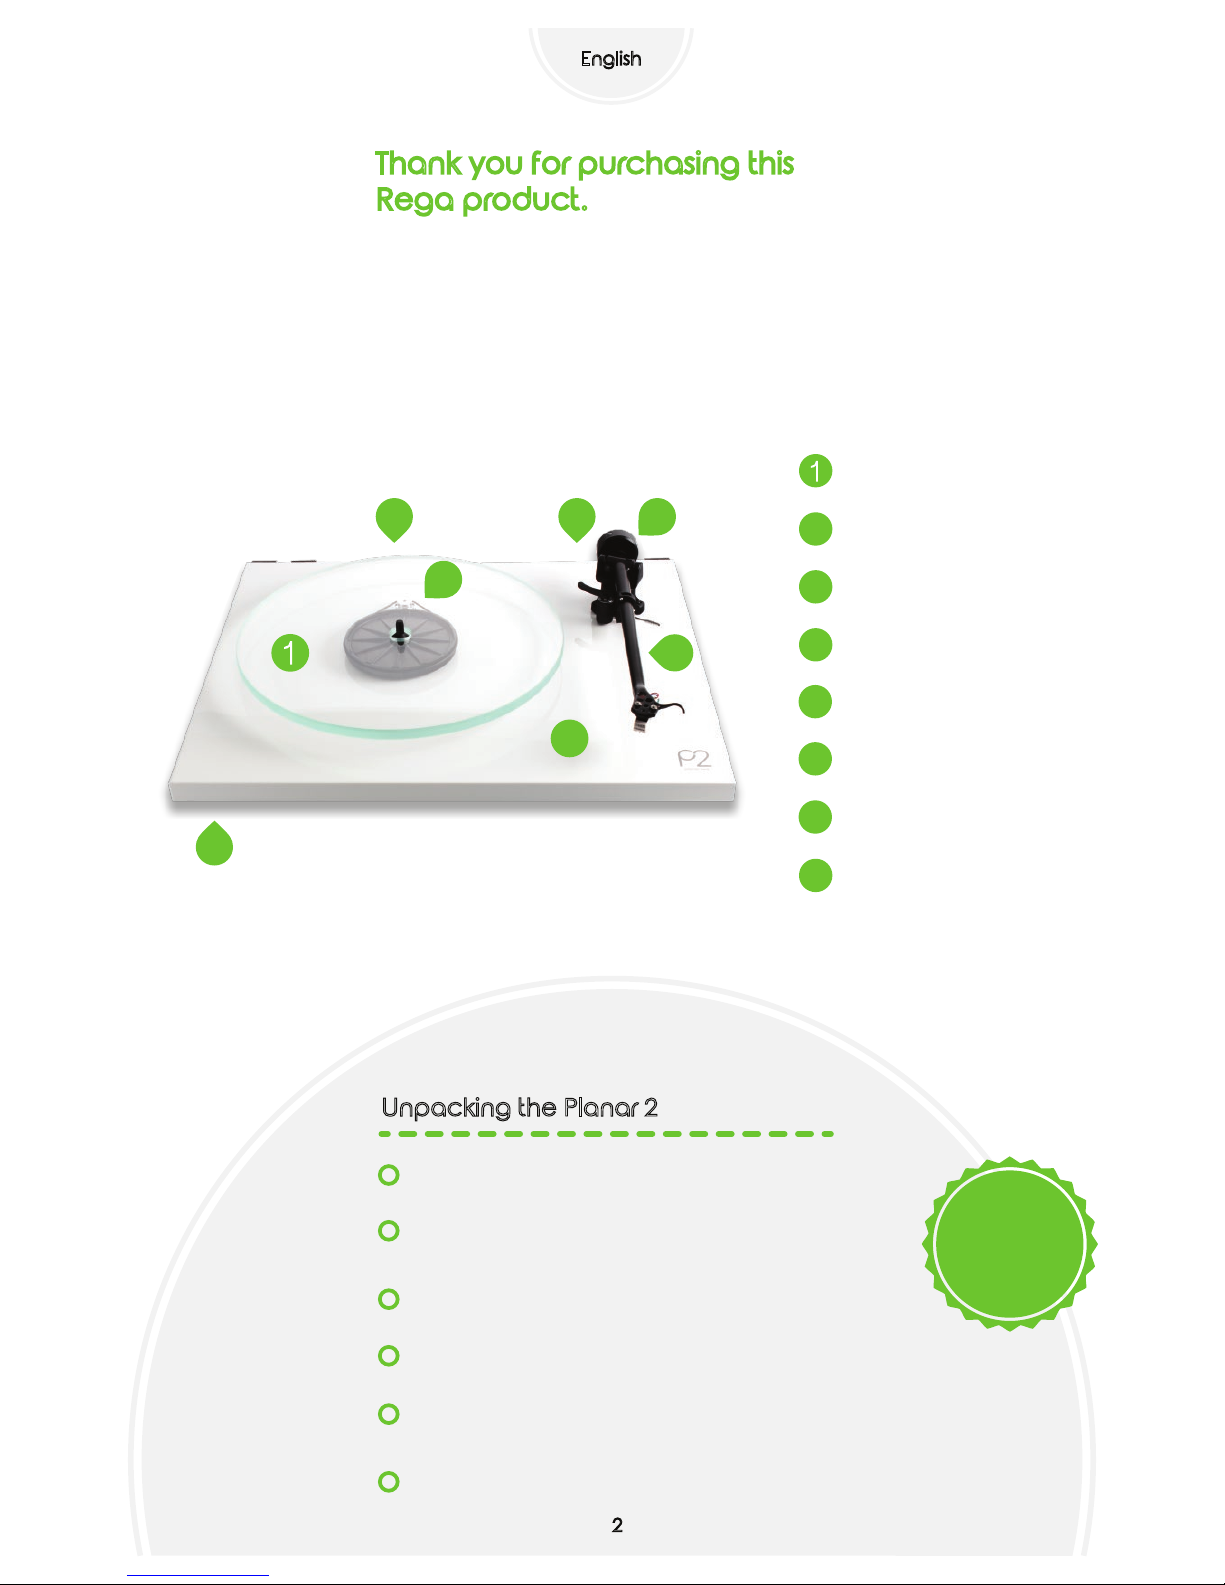
Thank you for purchasing this
Rega product.
8
3
5
2
6
7
4
Platter
2
Drive belt & pulley
3
Tonearm
5
Plinth
6
Power input
7
Phono output
8
On/Off switch
(underneath plinth)
4
Balance weight
Unpacking the Planar 2
Always keep the turntable flat.
Follow the packing guide printed inside the front of the
box.
Save the packaging in case you need to transport your
turntable in the future.
Ensure the drive belt is in place and remove the
transport hub card from beneath the sub platter.
Carefully place the glass platter on the hub and fit the
turntable mat.
Place the turntable on a rigid level surface.
*
2
*
The Rega
turntable wall
bracket is the
ideal solution.
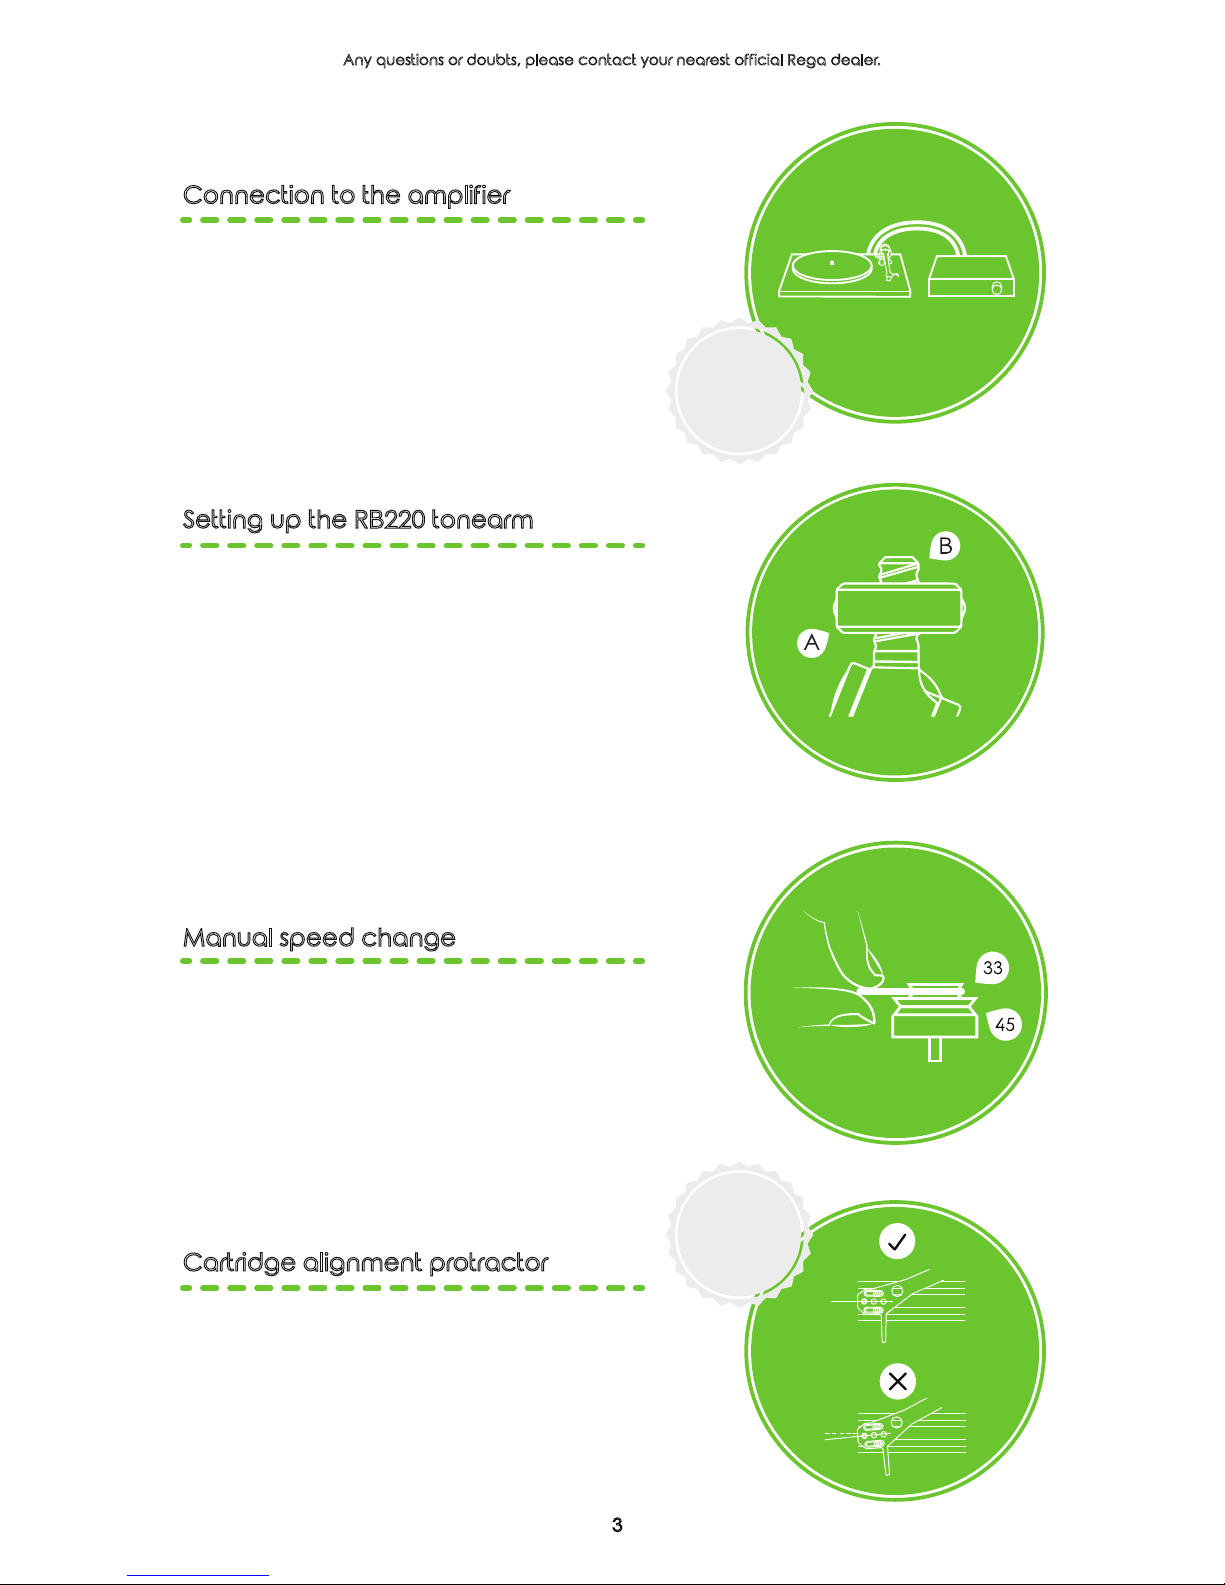
Cartridge alignment protractor
The Planar 2 comes with the Rega Carbon cartridge
aligned ready for play. If you need to replace or upgrade
the cartridge please use the cartridge alignment
protractor provided along with the cartridge
manufacturers guidelines.**
Manual speed change
You can change playing speed by simply removing the
glass platter and moving the drive belt between either the
33 ⅓rpm or 45rpm wheels of the drive pulley as shown.
Any questions or doubts, please contact your nearest official Rega dealer.
The tonearm external phono leads must be connected to
a suitable phono stage.
Connect as follows: Red=right channel. Black=left channel.
If your amplifier does not have an integrated phono stage
you will require an external stage.*
Connection to the amplifier
To set up the RB220 tonearm, screw on the balance
weight (A) along its shaft (B) until the stylus is floating
1mm clear of a record on the platter. Tracking force can
now be applied, half a turn of the weight (180 degrees) = 1
gram of force. Turn the weight to the suggested force of
your cartridge manufacturer’s guidelines. The suggested
force for the supplied Carbon cartridge is 2 grams (360
degrees). Use the plastic plugs on the weight as a guide.
Bias adjustment is automatic on the RB220 tonearm.
Setting up the RB220 tonearm
*
Rega
Phono stages
are sold
separately.
**
Upgrade
with the Rega
performance
pack.
3
Nous vous invitons à suivre ce guide rapide de
mise en route. Il vous aidera à obtenir les
meilleures performances de votre platine.
L’ignorer pourrait invalider la garantie.
www.rega.co.uk
Nous vous remercions d’avoir
acheté ce produit Rega.
Français
Déballage et installation de la Planar 2
Maintenez toujours la platine à plat.
Suivez le croquis de déballage imprimé sur le rabat du
carton.
Conservez l’emballage pour le cas où vous seriez obligé
de transporter la platine à l’avenir.
Vérifiez que la courroie est en place et que vous avez
enlevé le carton protecteur du sous-plateau.
Placez soigneusement le plateau sur le sous-plateau et
mettez le tapis feutre.
Installez la platine sur une surface horizontale et rigide.
*
4
*
Le support
mural Rega est
la solution
idéale.
Plateau
2
Courroie et poulie
3
Bras de lecture
5
Socle
6
Alimentation
7
Cordon de modulation
8
Interrupteur M/A
(sous le socle)
4
Contrepoids
8
3
5
2
6
7
4
 Loading...