

Reece Kado Lussi Series, Kado Lussi Installation Instructions Manual
Kado Lussi Heated Towel Rail Hardwired Wall Mount
HYDROTHERM
MILAN HEATED WALL MOUNT TOWEL RAILS
page 3 of 5
1030 x 500mm Chrome
WIRING OPTIONS
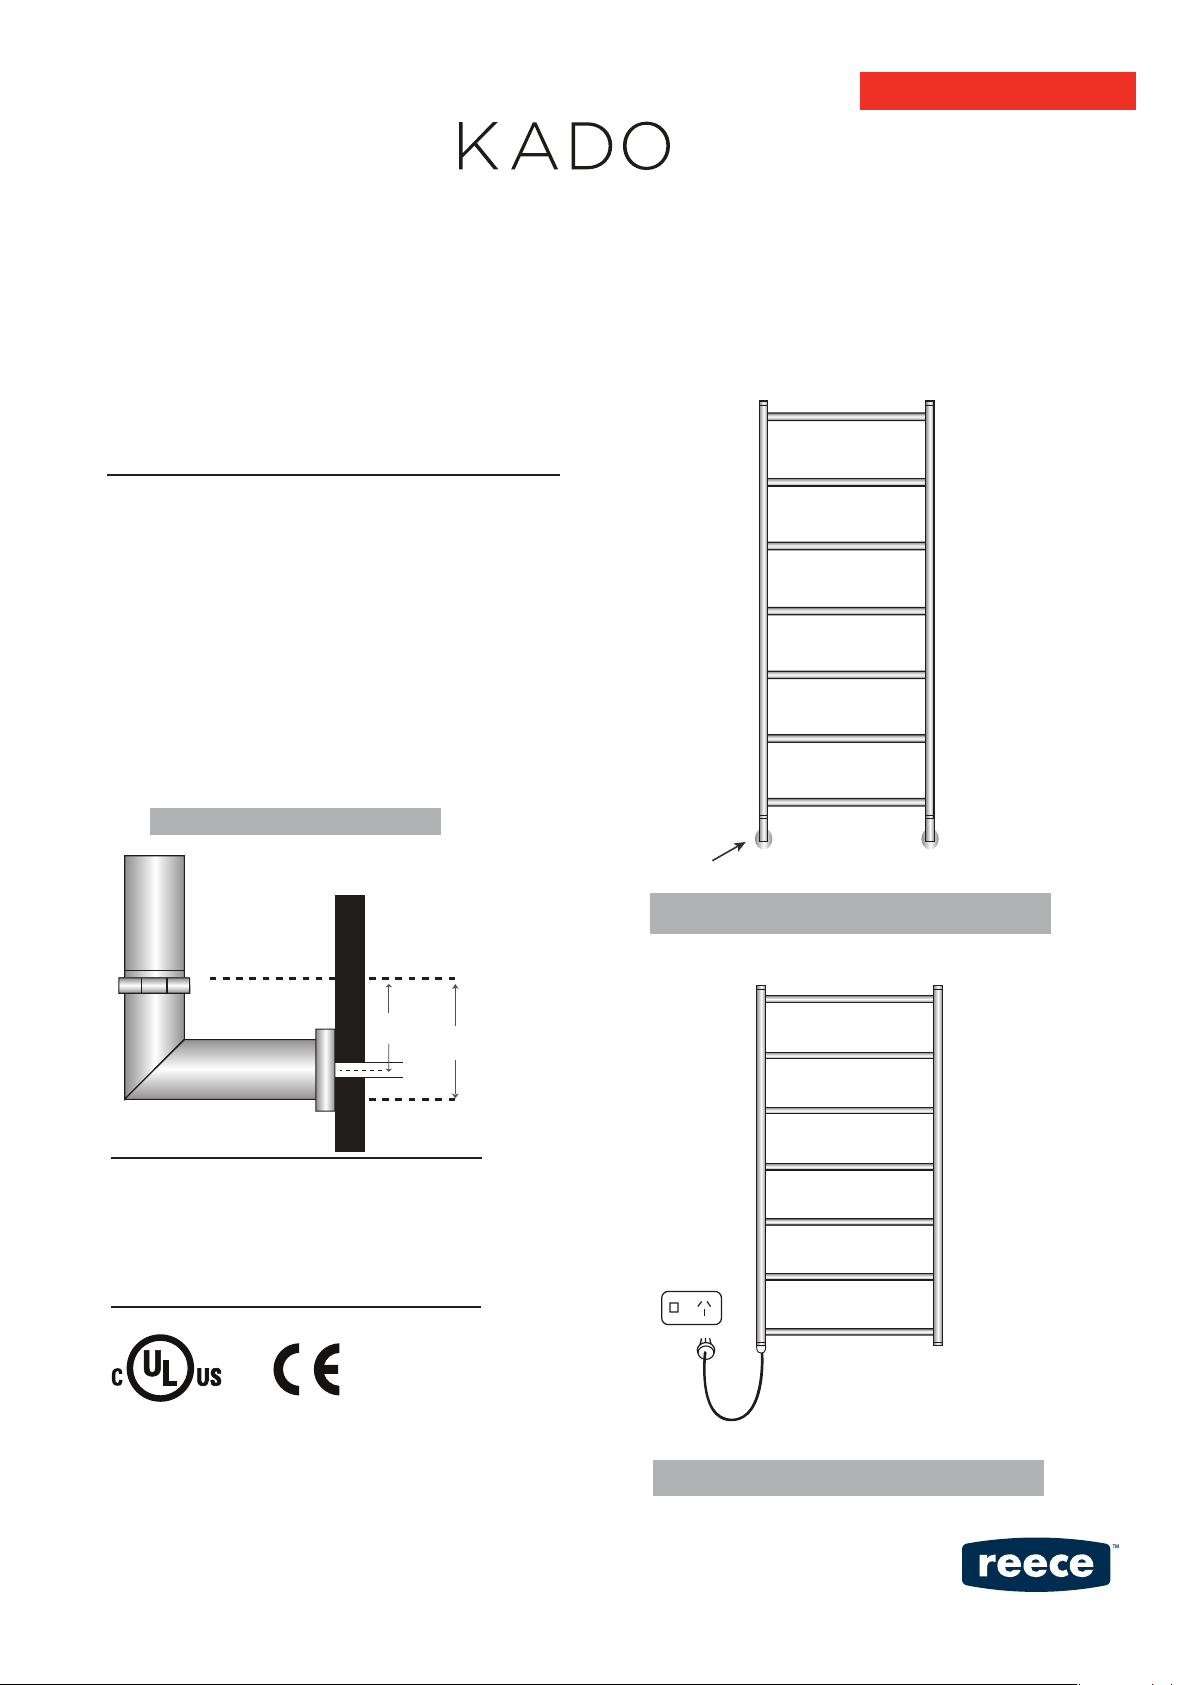
The Kado Lussi Wall Mount Series Electric Towel Rails come pre
filled with water, and with electric elements already fitted
(standard on the left unless otherwise specified)
HARD WIRED - STANDARD OPTION
(See Fig.1 )
The cable may be hard-wired into the wall with an
element attachment. This attachement must be installed
by a qualified electrician.
Two attachments are provided for both the cable side, and non-cable side
so to allow for a symmetrical apperance (see Fig.1).
All hard-wired elements achieve an IPX Rating of IP55.
(IPX5) for use in wet areas. We recommend all electric towel rails be
connected to a timer for convenience, as well as to prolong the life
of the replaceable electric element.
Installation instructions
HARD-WIRE ATTACHMENT
(FIG.2)
L L AW
50mm
70mm
Cord
PLUG IN OPTION - REQUEST ONLY
(See Fig. 2)
Plug is supplied with element cable (1200mm long).
Cable may be cut and plug attached to required length.
(See Fig 2)
This option is only available by request.
All Hydrotherm Elements carry the following approvals.
®
IP55
Hard wire
attachment
DOUBLE HARD-WIRED VERSION
HARD-WIRED VERSION
(FIG.1)
(FIG.2)
Elements have a built in thermostat and internal cut out ensuring
safety and energy efficiency.
All Kado Lussi electric elements can be supplied as 240v or 110v
All electric elements are replaceable and can be easily
changed over.
PLUG IN VERSION
Page 1 of 3
Installation Instructions (continued)
HYDROTHERM
MILAN HEATED WALL MOUNT TOWEL RAILS
page 4 of 5
Kado Lussi Heated Towel Rail Hardwired Wall Mount
1030 x 500mm Chrome
HARD WIRING
It is recommended that all hard-wired heated towel rails
be connected to a light switch or digital timer. Connecting hard-wired
heated towel rails to a light switch or a timer will prolong the life
of the electric element and reduce energy consumption.
CHANGING ELEMENTS
To change an element from one side to the other, or to replace
an old element is a very simple process.
There are Four Basic Steps:
Remove towel rail from brackets (if already installed),
1.
and slip o Hard Wire Attachments
2. Turn the towel rail upside down and with a spanner loosen
the hex nut of the electric element. When the element is
loose, unscrew it by hand. If you are changing the element
from left to right (or vice versa) the internal plug on the
opposite side must also be removed and swapped over with
the
element.
3. Swap the element and screw in place.
4. Turn the towel rail the right way up and position back into
brackets and ret grub screws to secure
Please note:
It is advised that the unit be removed from the wall and
turned upside down to ensure that water does not spill.
E
nsure element always remains at bottom of towel rail.
Element
on left side
1.
Turn rail
upside down
we r c s n u
2.
Swap
element over
t u ow e r c s n u
n iwe r c s
n i we r c s
3.
Element
on right side
4.
Page 2 of 3
 Loading...