

Reece Franke Designer Series Installation Instructions Manual
FRANKE
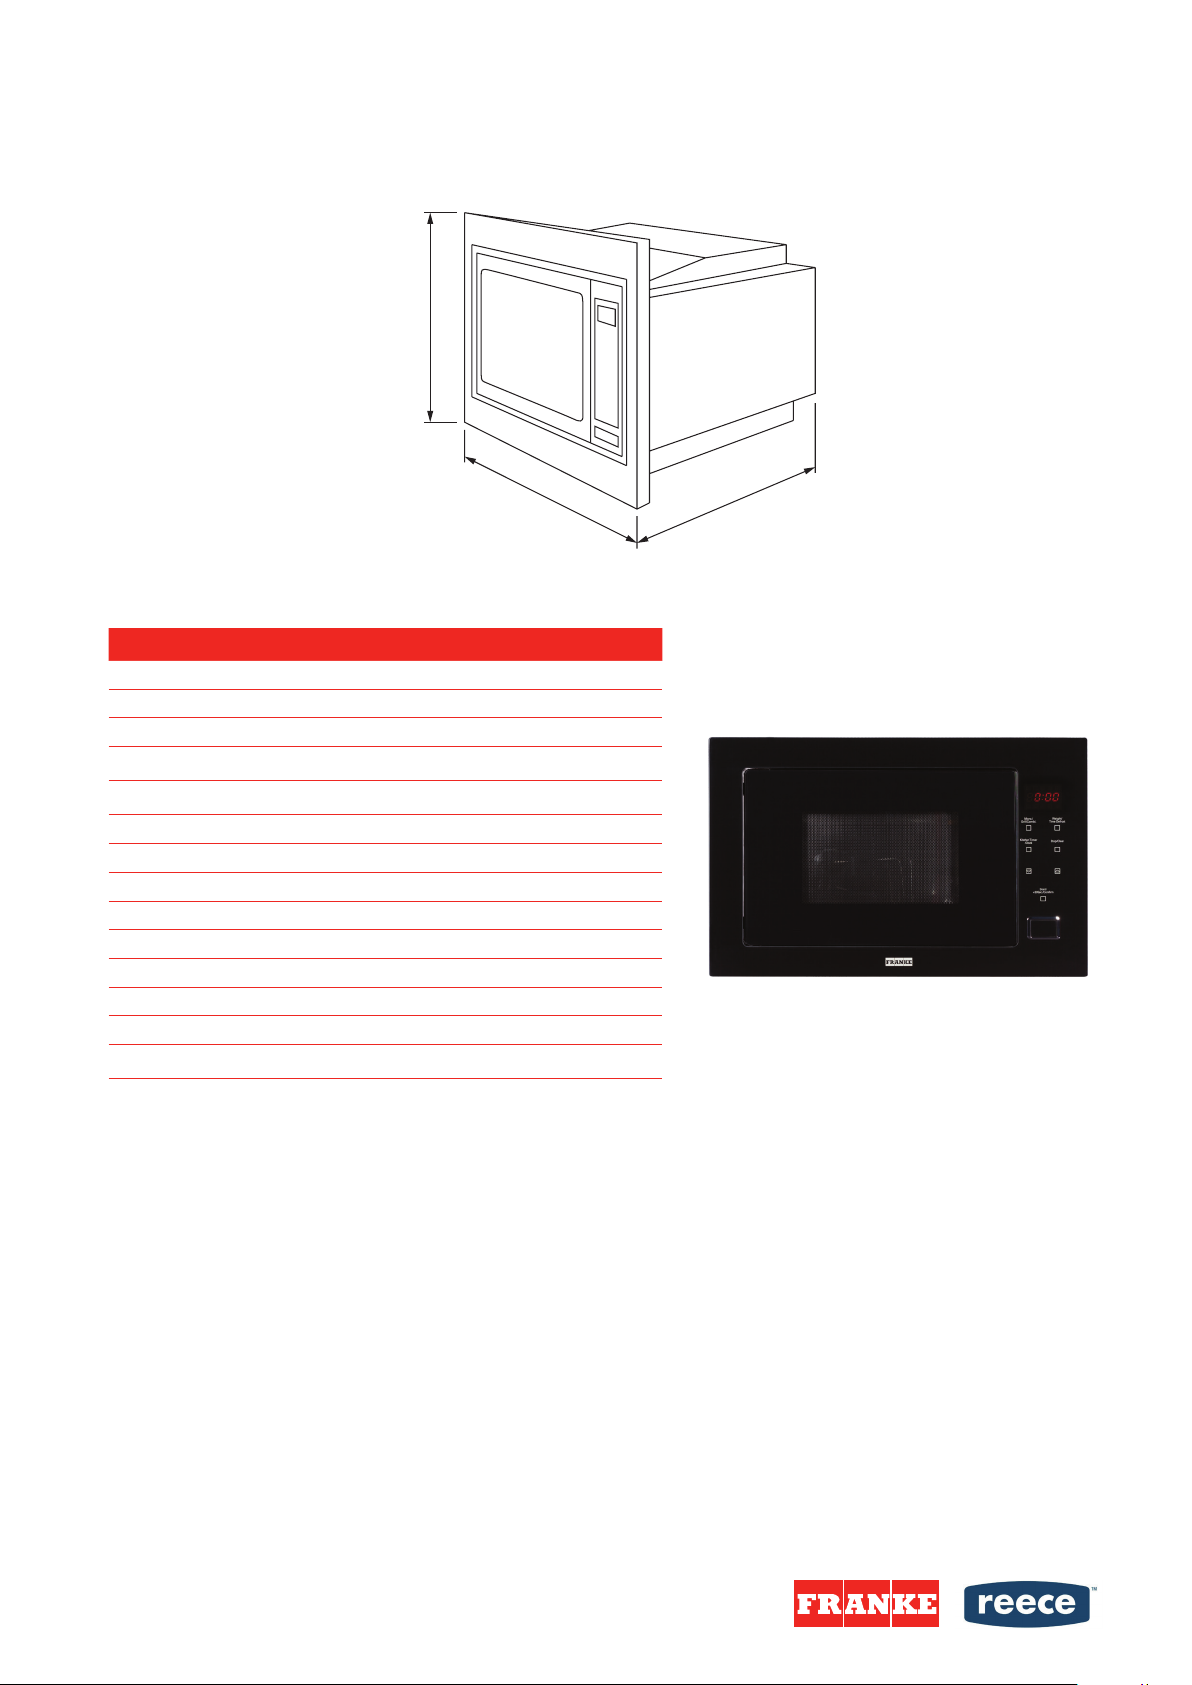
400
DESIGNER BUILT IN MICROWAVE OVEN
388
595
Dimensions are nominal measurements only.
page 1 of 7
SPECIFICATIONS
Recommended use
Material
Colour availability
Weight
Dimensions
Capacity
Voltage
Fuse
Door opening
Turntable diameter (mm)
Auto menus
Cavity material
Electronic clock
Child safety lock
Domestic
Black glass
Black
19kg
594 x 410 x 388mm
25L
230-240V - 50Hz
20A plug
Side opening
315mm
8
Enamel
Yes
Yes
To see the complete FRANKE range go to
www.reece.com.au/bathrooms
CLEANING RECOMMENDATIONS
With careful care and cleaning your microwave oven will retain its looks and remain good order. We will explain here
how you should care for and clean your appliance correctly.
Disclaimer: Products in this specication manual must by regulation be installed by licensed and registered trade people. The manufacturer/distributor
reserves the right to vary specications or delete models from their range without prior notication. Dimensions are nominal measurements only.
Dimensions and set-outs listed are correct at time of publication however the manufacturer/distributor takes no responsibility for printing errors.
Tech Page Version 1

FRANKE
DESIGNER BUILT IN MICROWAVE OVEN
CARE AND CLEANING
Area Cleaning Agents
Appliance front Hot soapy water:
Clean with a dish cloth and dry with a soft cloth. Do not use
glass cleaners or metal or glass scrapers for cleaning.
Appliance front with stainless steel Hot soapy water:
Clean with a dish cloth and dry with a soft cloth. Remove
ecks of limescale, grease, starch and albumin (e.g. egg
white) immediately. Corrosion can form under such residues.
Special stainless steel cleaning agents can be obtained from
the after-sales service or from specialist shops. Do not use
glass cleaners or metal or glass scrapers for cleaning.
Cooking compartment Hot soapy water or vinegar solution:
Clean with a dish cloth and dry with a soft cloth.
If the oven is very dirty: Do not use oven spray or other
aggressive oven cleaners or abrasive materials. Scouring
pads, rough sponges and pan cleaners are also unsuitable.
These items scratch the surface. Allow the interior surfaces
to dry thoroughly.
Recess in cooking compartment Damp cloth:
Ensure that no water seeps through the turntable drive into
the appliance interior.
Wire racks Hot soapy water:
Clean using stainless steel cleaning agent or in the
dishwasher.
Door panels Glass cleaner:
Clean with a dish cloth. Do not use a glass scraper.
Seal Hot soapy water:
Clean with a dish cloth, do not scour. Do not use a metal or
glass scraper for cleaning.
page 2 of 7
Plumbers, please ensure a copy of the installation instructions
is left with the end user for future reference
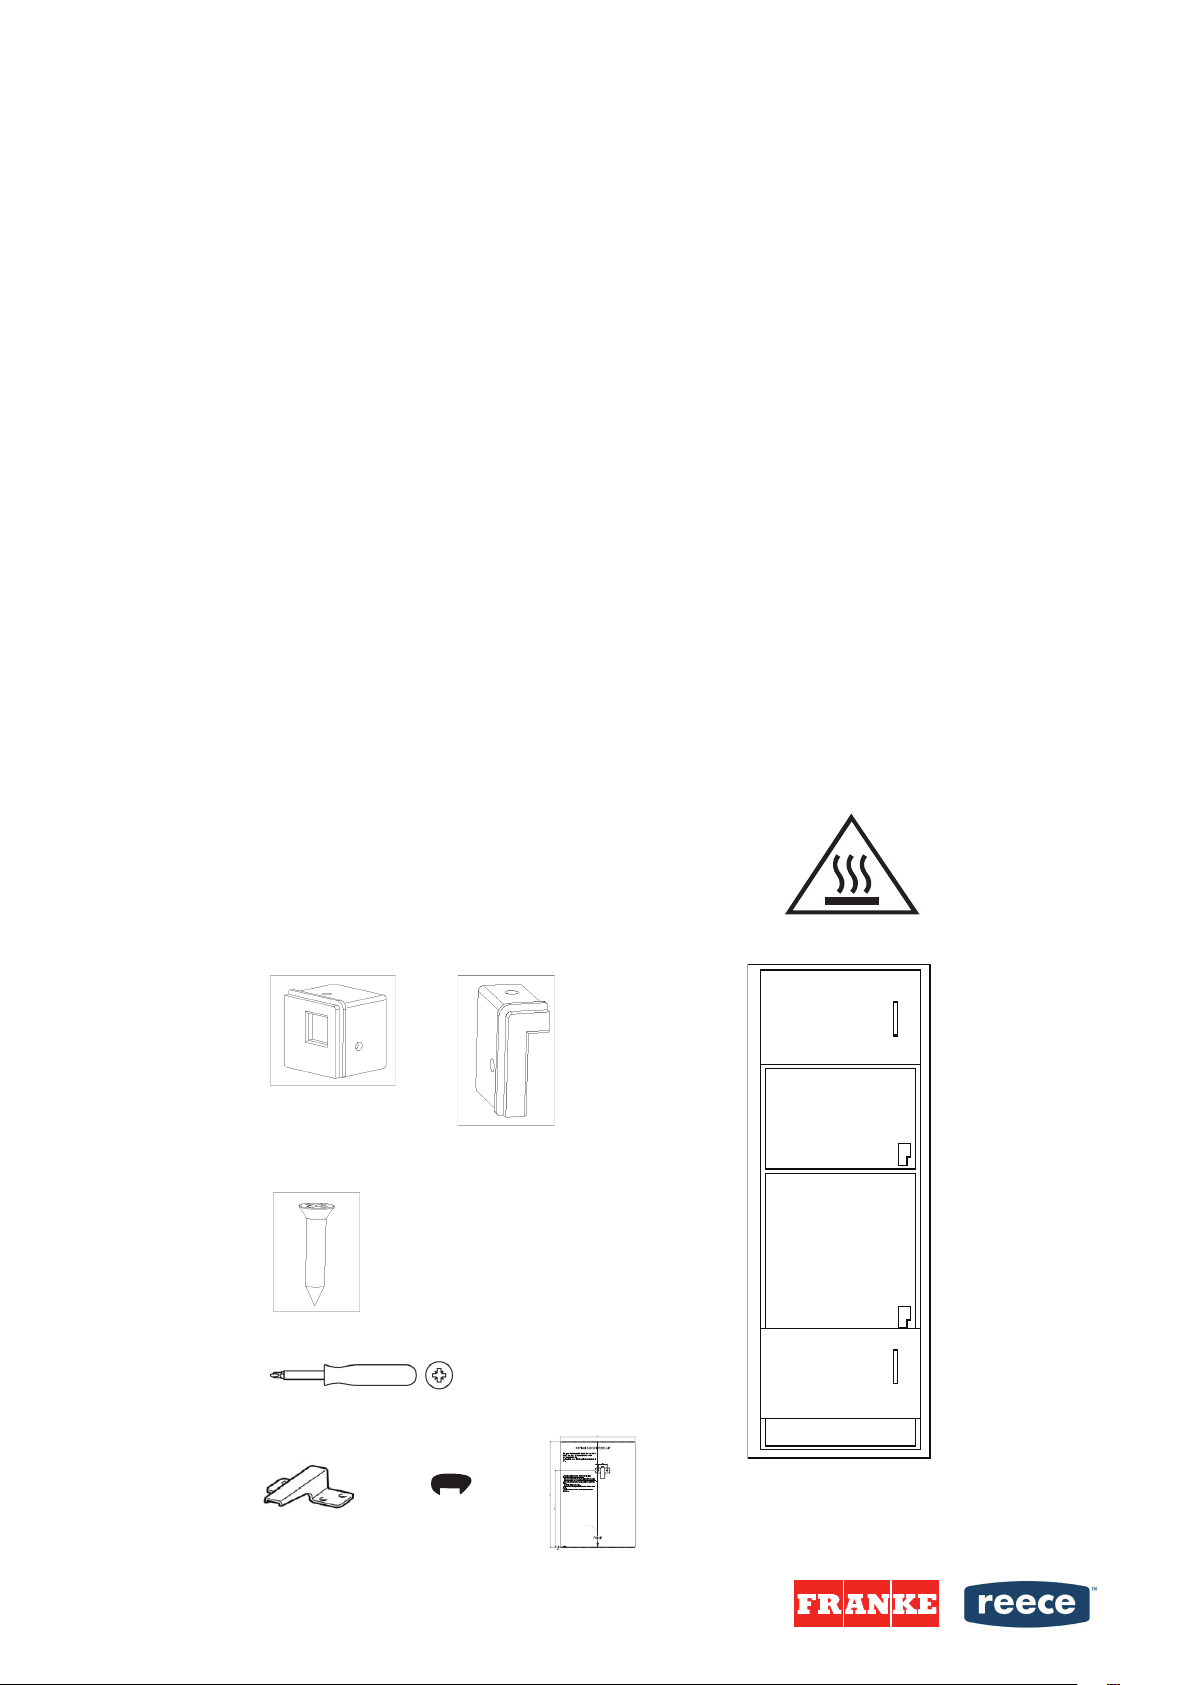
A x 2
B x 2
page 3 of 7
FRANKE
DESIGNER BUILT IN MICROWAVE OVEN
INSTALLATION INSTRUCTIONS
Check the appliance for damage after unpacking it, and don’t connect the appliance if it has been damaged in transport.
Ensure there is adequate air flow around the rear of the microwave and there is a gap between the microwave and
kitchen unit.
INSTALLATION AND CONNECTION
1. This appliance has been designed exclusively for domestic use.
2. The oven in question has been designed as an integrated appliance.
3. Observe the special installation instructions.
4. The appliance can be installed in a wall-mounted cupboard in heat-resistant material, with a width of 60 cm (at least
55 cm deep and at least 85 cm from the floor).
5. The appliance is fitted with a plug and simply needs to be connected to a suitably installed socket, which in turn must
be earthed.
6. The mains voltage must correspond to the voltage specified on the appliance rating plate.
7. Socket installation and power cord replacement procedures must be carried out exclusively
by a specialised electrician. If, after installation, the plug is no longer accessible, fit an
omnipolar disconnect switch with a contact opening gap of at least 3 mm in accordance with
the wiring rules.
8. Use of adapters, multi-socket power strips and extension cables is prohibited. Any current overloads could, in fact,
cause a fire.
Acccessible surfaces can
become very hot during use.
b
a
C x 10
a
b
LEFT EDGE
CENTER LINE
FRONT EDGE
Plumbers, please ensure a copy of the installation instructions
is left with the end user for future reference
a
a
T EDGE RIGH
 Loading...