

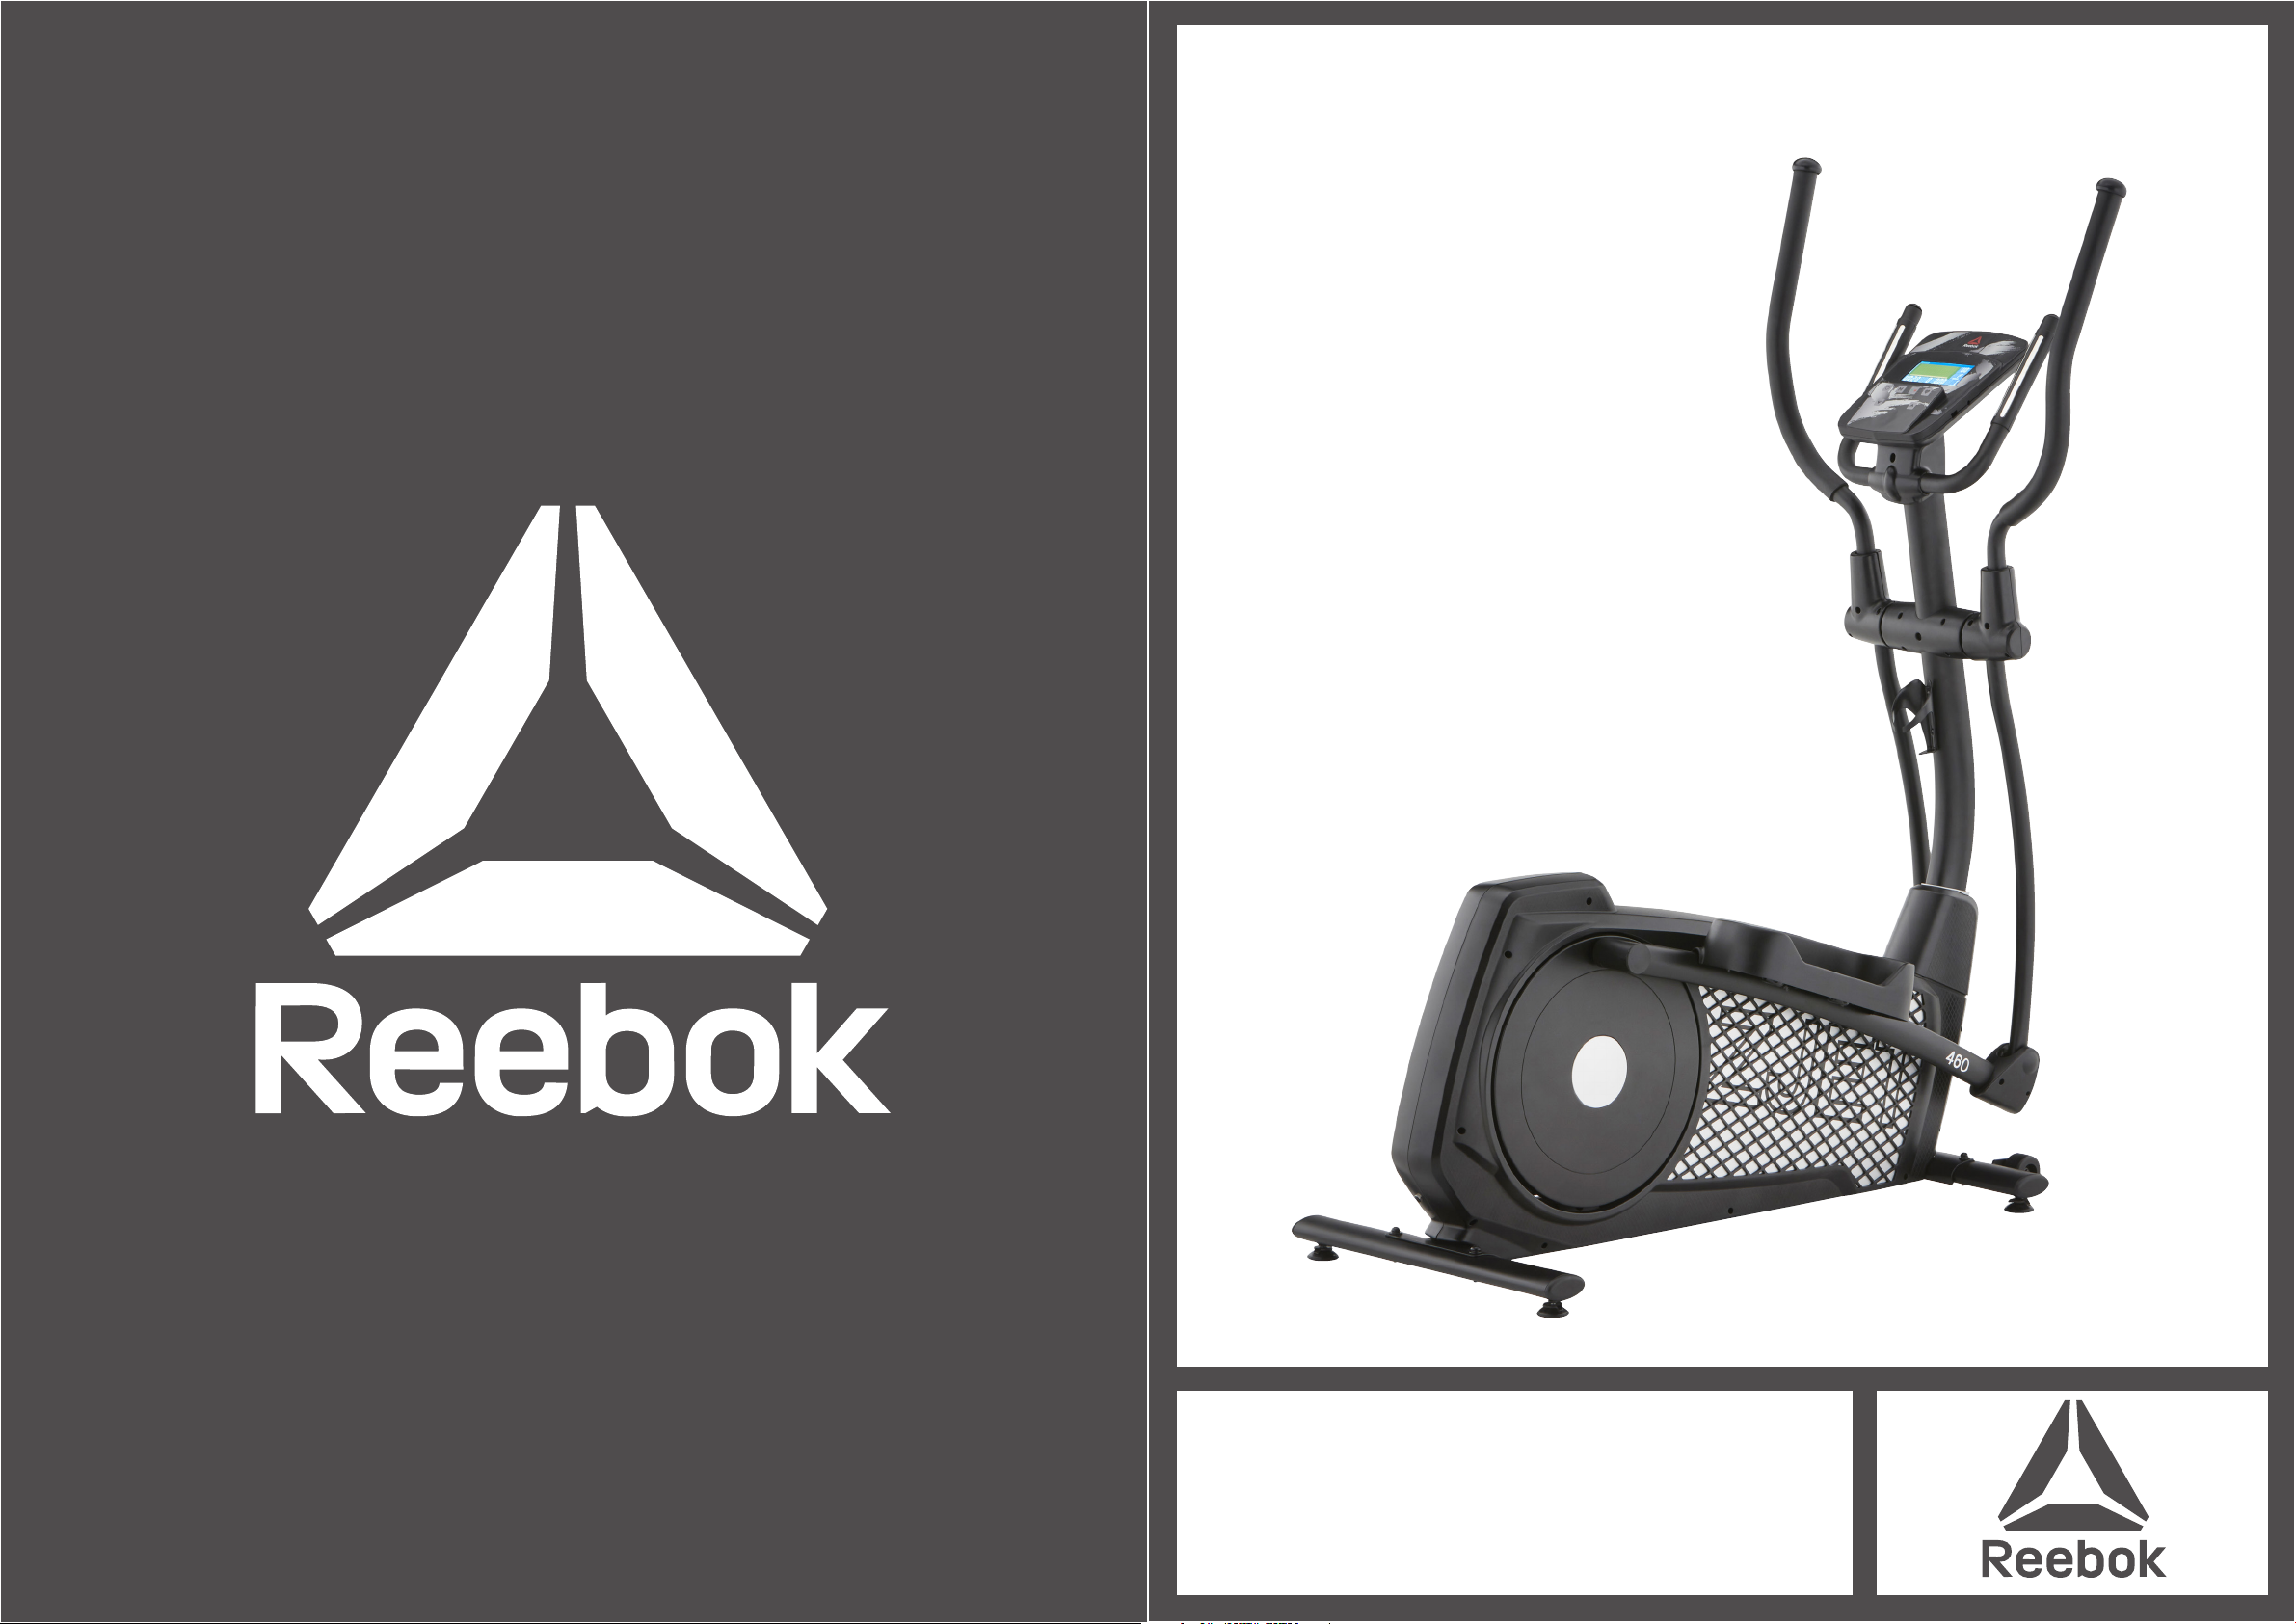
Reebok ZJET 460 ELLIPTICAL Instruction manual
reebokfitness.com
ZJET 460 ELLIPTICAL
ASSEMBLY GUIDE
ZJET 460
ASSEMBLY GUIDE
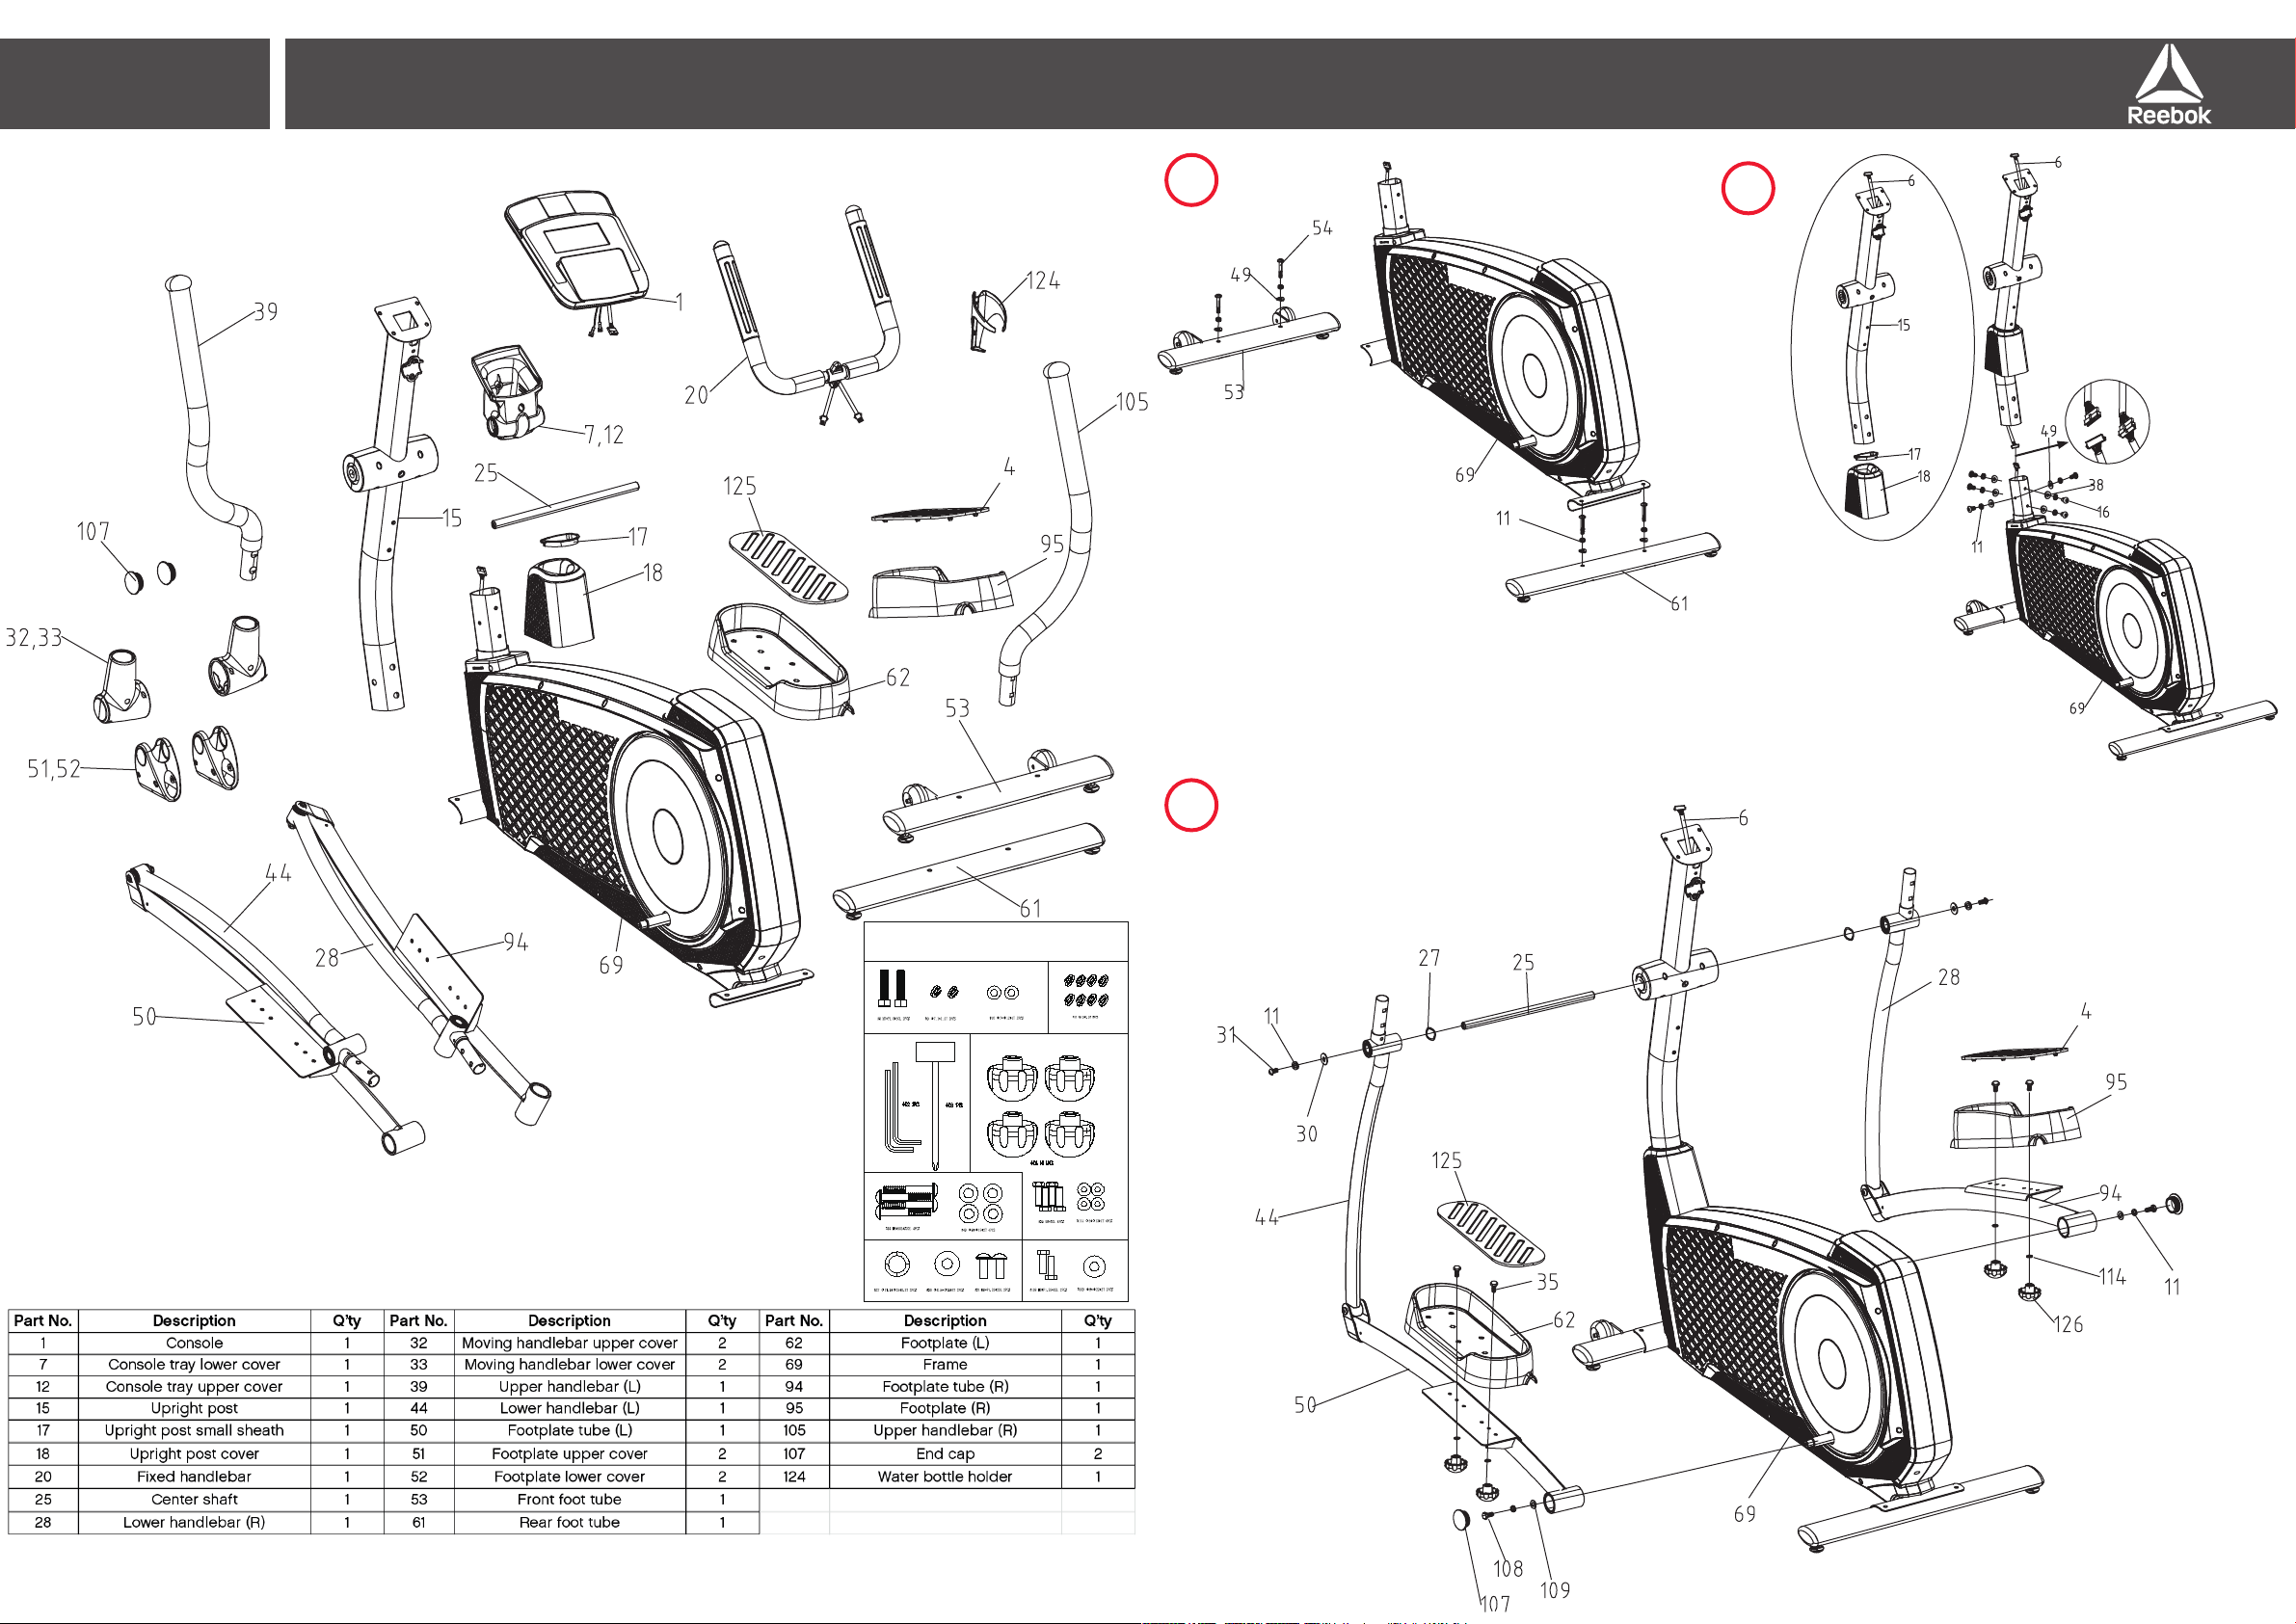
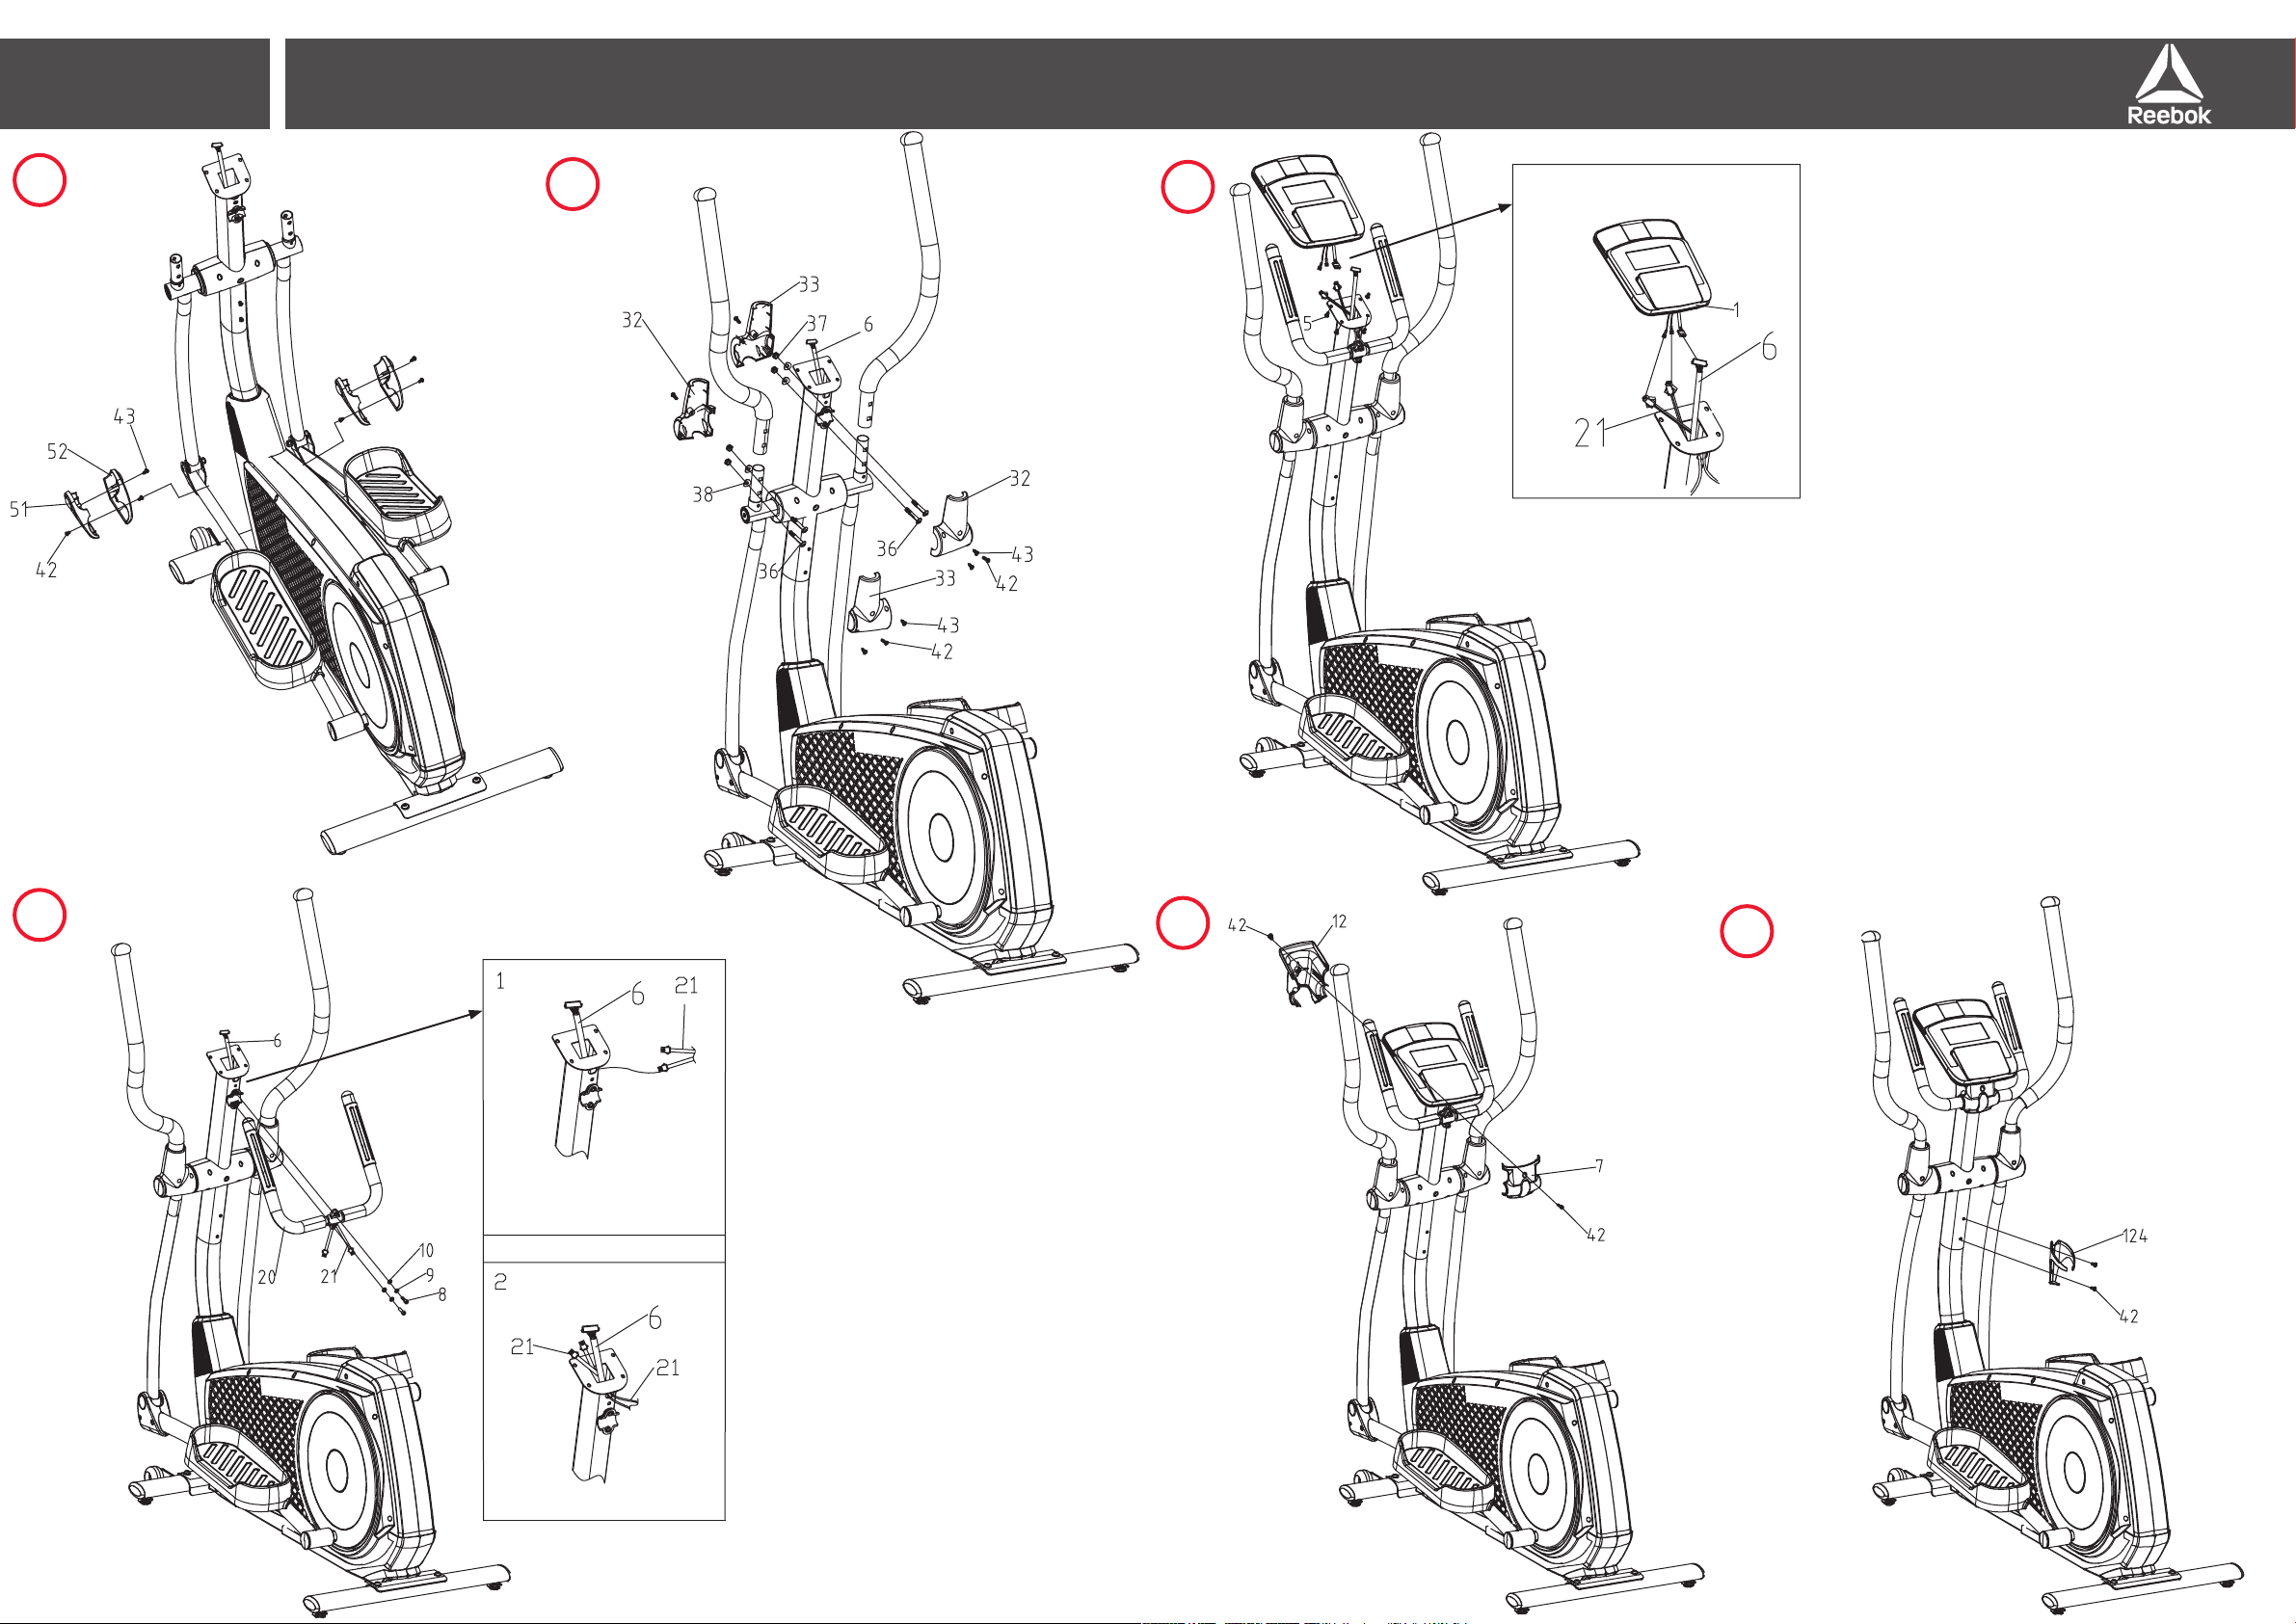
Parts Check List
1
2
ZJET 460 XT TOOLS
3
ZJET 460
ASSEMBLY GUIDE
4
5
7
6
8
9
ZJET 460
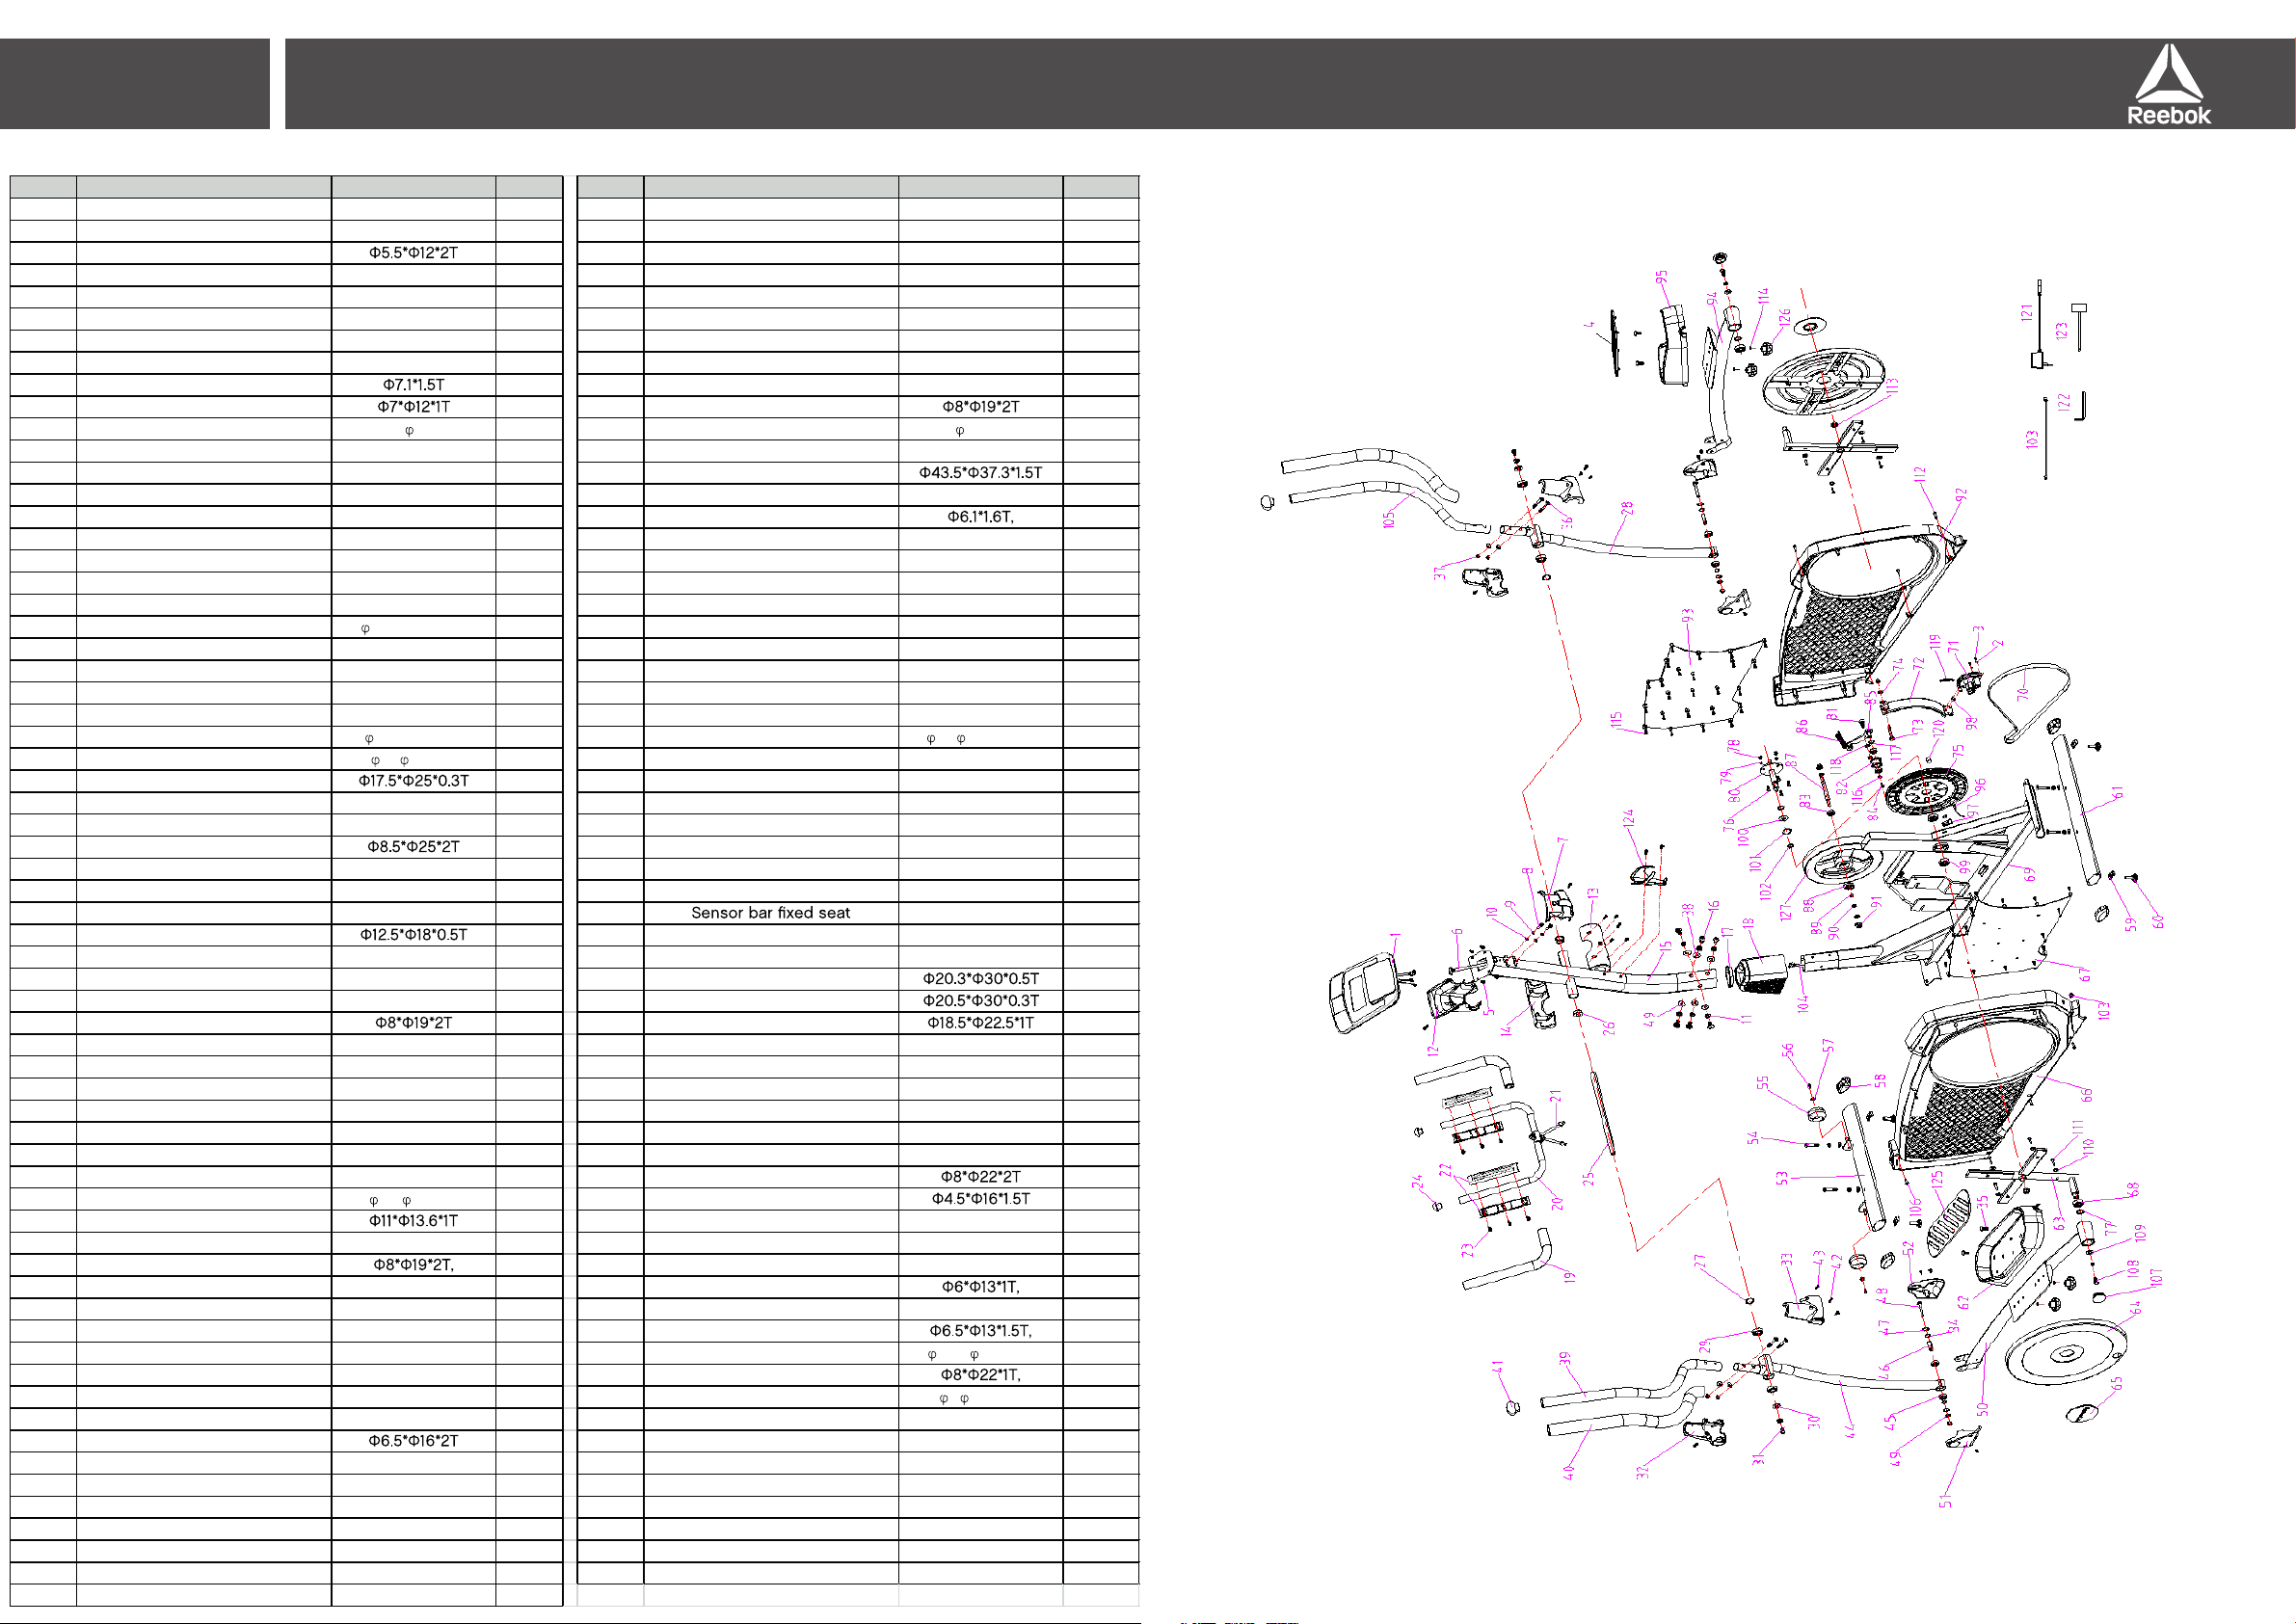
NO DescriptionSPEC. Q’ty NO DescriptionSPEC. Q’ty
1Console 165Turnplate cover2
2Screw M5*P 0.8*12 L266 Chain cover (L)1
3Flat washer 267Chain cover left trim cover1
4Footplate cushion (R)TPR70˚168 Bearing22032
5Screw M5 869Frame 1
6Upper cable170 Belt 510J 61
7Console tray lowe r cover171 Motor1
8Screw M7*P1. 0*30L272 Magnetic system 1
9Spring washer 273Screw M8*P1. 25*55L 1
10 Flat wa sher 274Flat washer 1
11 Spring wa sher 81475Belt pulley 289*61
12 Co nsole tray upper cover176 ScrewM6*P1.0*16L 4
13 Center shaft lowe r cover177 C shape clasp 2
14 Center shaft upper cover178 Nylon nutM64
15 Upright post 179Spring washer 4
16 ScrewM8*P1.25*16 L6 80 Crank axle 1
17 Upright post small sheath 181Screw M8*20L 1
18 Upright post cover182 Idler whee l1
19 Handle bar grip 283Bearing 6000 1
20 Fixe d handlebar 22 .2*2 T*900L 184Screw M6*101
21 Hand puls e wire 185Idler plate1
22 Hand puls e286 Idler spring 1
23 ScrewST2.9*2 0L 687Fly whee l axle 3/8"-26*12 6L 1
24 End cap288 Bearing63001
25 Center shaft 17 *3 50L(M8)189 6mm Plastic slee ve 10 * 15 .8*6mm 1
26 Plastic slee ve 17 * 32*15L 290Nut 3/8"-26*3.8T,3
27 Wave washer 291Nut 3/8"-26*7T,2
28 Lower handlebar (R)192 Chain cover (R)1
29 Bearing600 3493 Chain cover right trim cover1
30 Flat washer 294Footplate tube (R)1
31 ScrewM8*P1.25*20L2 95 Footplate (R)1
32 Moving handlebar upper cover296 Sensor bar1
33 Moving handlebar lowe r cover297 1
34 Wave wa sher 498Screw M5*104
35 ScrewM6*20L499 Bearing600 42
36 ScrewM8*P1.25*50L4 10 0Flat washer 1
37 Nylon nu tM8810 1Wave washer 1
38 Semicirc le washer 6102 C shape clasp 1
39 Upper handlebar (L)110 3DC wire 1
40 Upper handlebar grip 2104 Lowe r cable1
41 End cap210 5Upper handlebar (R)1
42 ScrewM5*16 13 10 6Screw 8
43 ScrewST2.9*2 010107 End cap2
44 Lowe r handlebar (L)3/16"*3 /4", 1108 Screw2
45 Bearing600 1410 9Flat washer 2
46 Slee ve 8.1* 12 *3 8L 2110Flat washer 8
47 C shape clasp 4111Screw ST3.9*20L, 8
48 ScrewM8*P1.25*55L2 112Screw 3/16 "*3/4",8
49 Flat wa sher 10 113Nut M102
50 Footplate tube (L)1114Flat washer 4
51 Footplate upper cover2115Screw ST2.9*8L,48
52 Foot plate lowe r cover2116Flat washer 1
53 Front foot tube 1117Wave washer 10 .2* 13 *0 .3T, 1
54 ScrewM8*40L*S12L 4118Fla t washer 1
55 Transport whee l2119Magnetic system spring 1* 8.5*48L1
56 ScrewM6*10 L212 0M51 Toroidal core s1
57 Flat washer 2121 Adaptor9V 1000 mA 1
58 Foot tube end cap412 2Hex wrench 6mm*30mm l*84mml1
59 Lock sheet3T412 3Socket spanner13.14 1
60 Adjustable foot padM8412 4Water bottle holder 1
61 Rear foot tube 1125 Footplate cushion (L)TPR70˚1
62 Foot plate (L)112 6Footplate knob 1
63 Turnplate cross212 7Fly whee l1
64 Turnplate2
ASSEMBLY GUIDE
Parts List
Exploded Diagram
ZJET 460
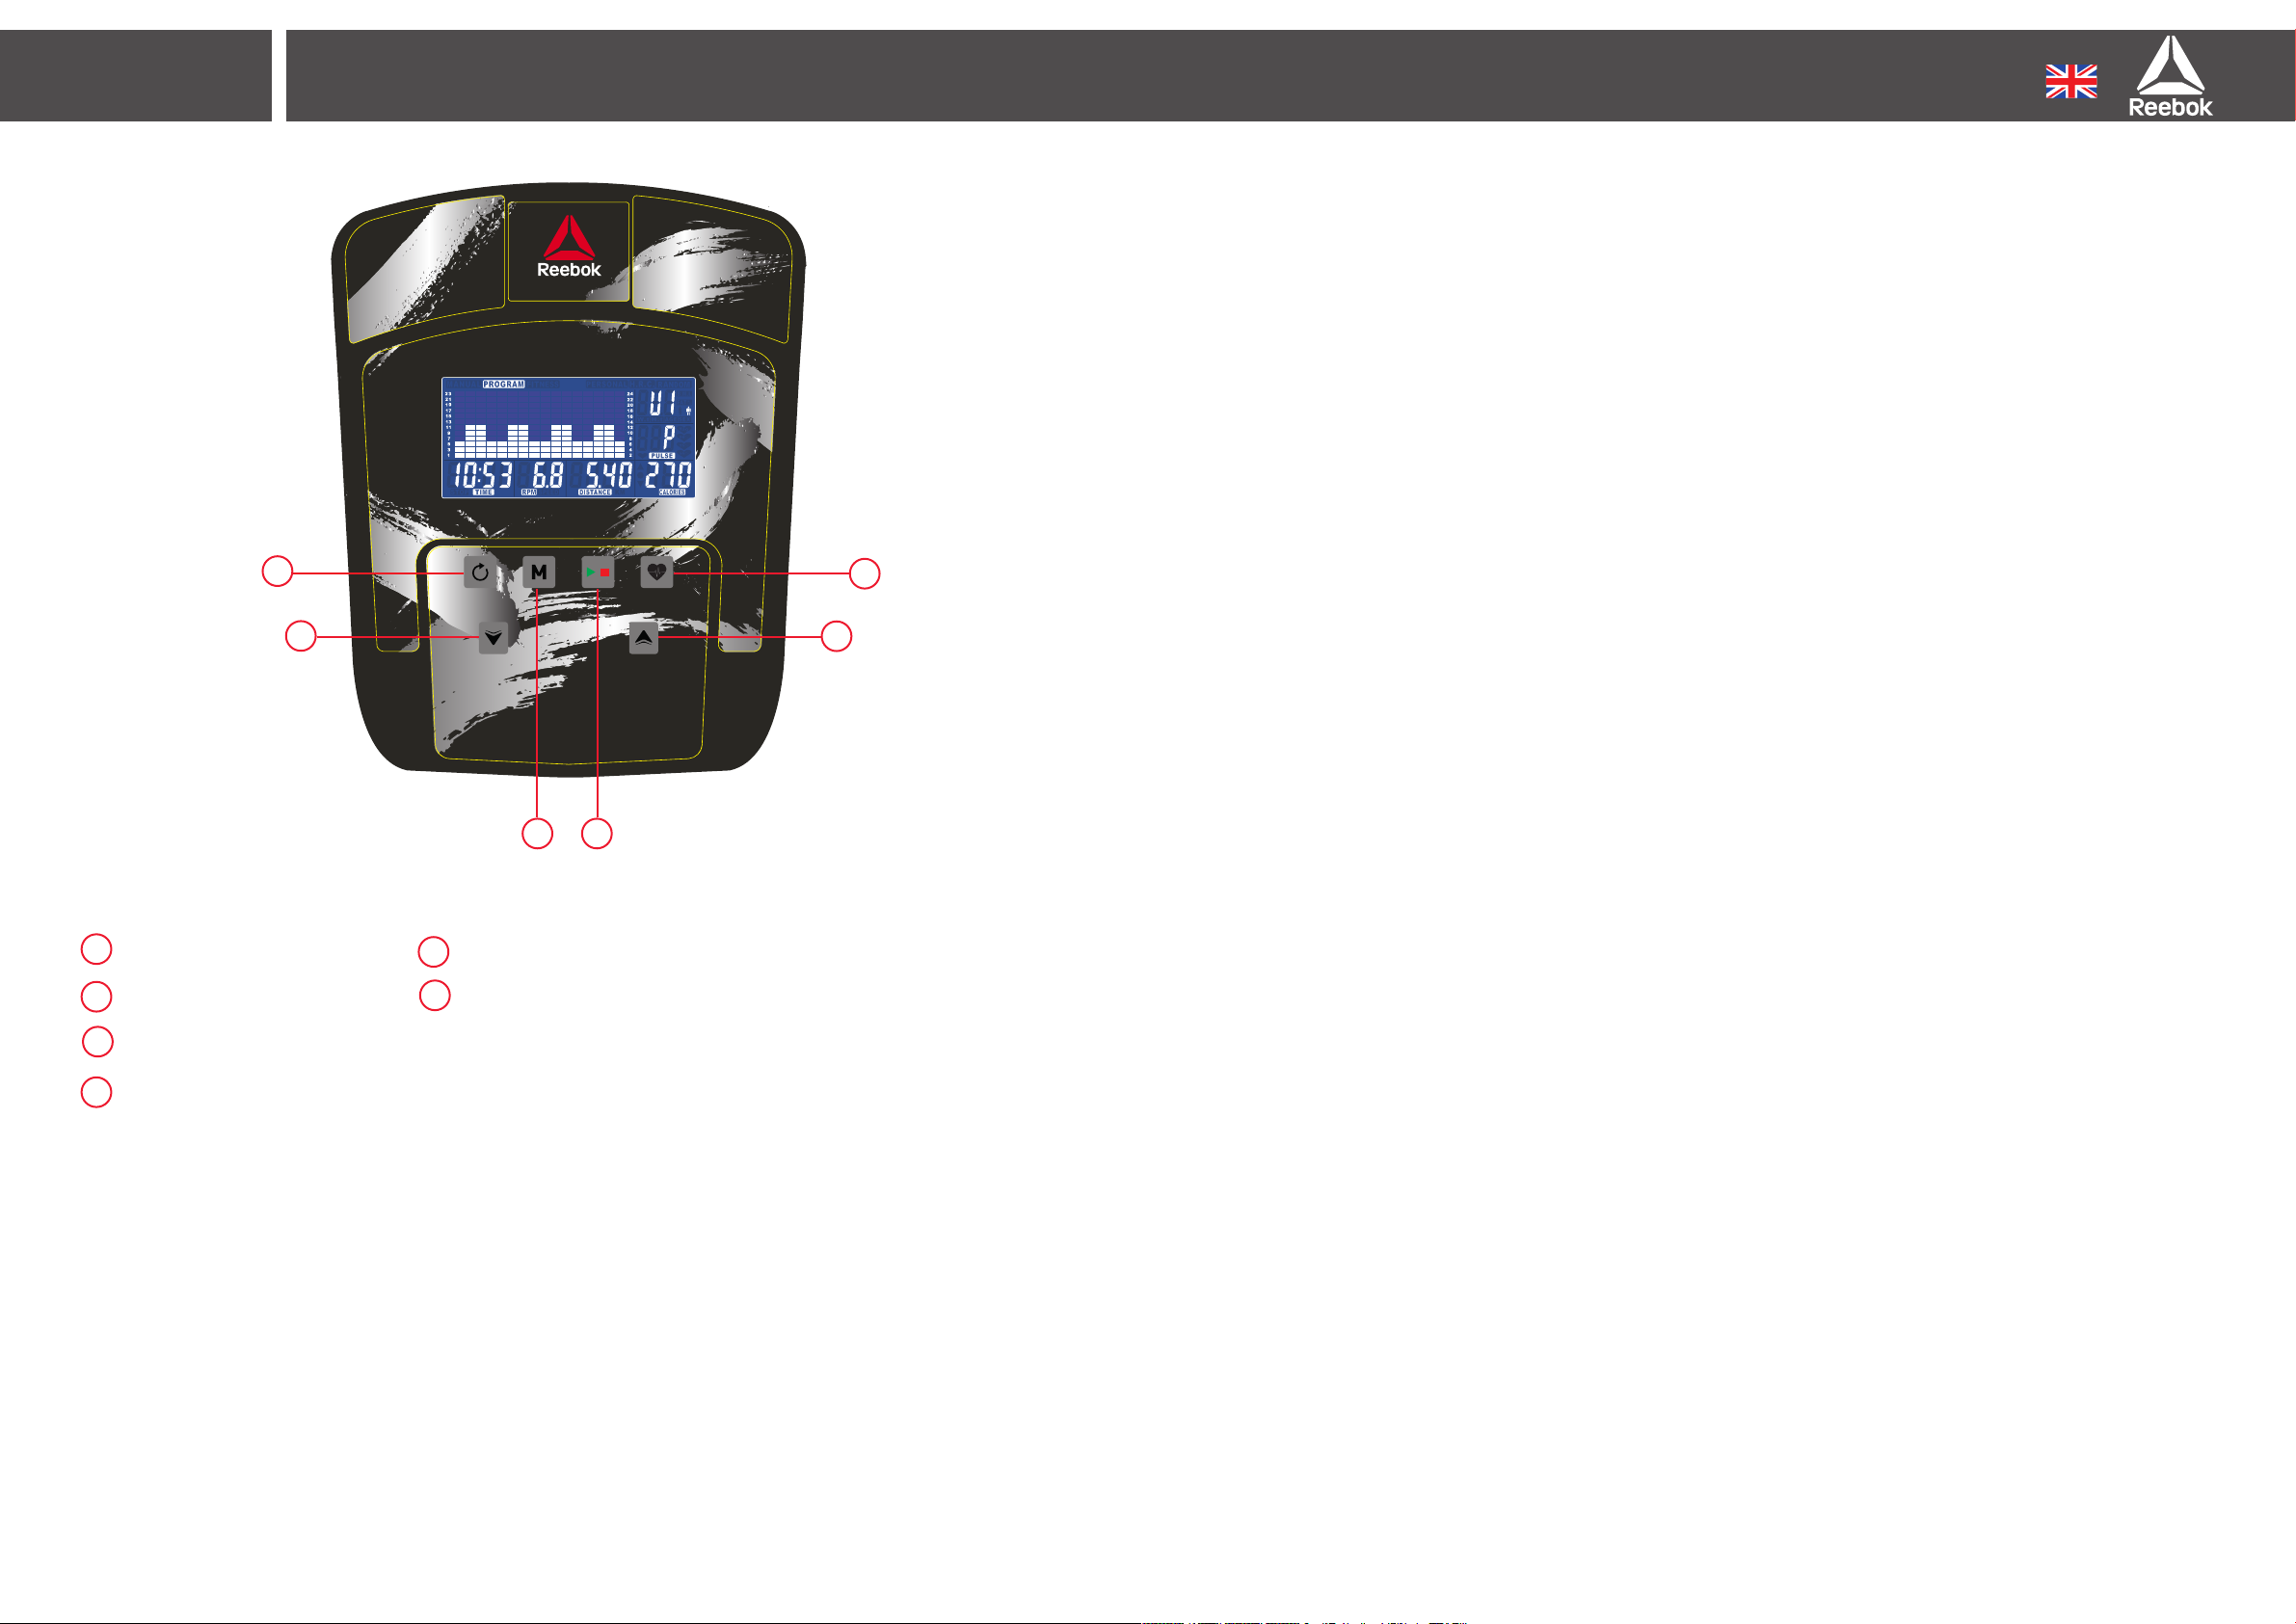
CONSOLE GUIDE
A
C
D
OPERATION
When the power supply is connected to the machine the
computer will power on with a long beep sound. .
The Main menu will be displayed. The user can press START
to begin immediately in the manual mode. All values (SPEED,
DISTANCE, TIME and CALORIES) will count up from zero.
Resistance level can be changed at any time during exercise
by pressing UP/DOWN.
Before beginning the manual exercise the user can set the
desired workout for TIME, DISTANCE, CALORIES, and PULSE.
Before beginning the manual exercise the user can set the
desired workout for TIME, DISTANCE, CALORIES, and PULSE.
B
From main menu press UP/DOWN buttons to highlight
MANUAL at the top of the screen.
Press MODE to highlight the required selection, use UP/DOWN
to alter the setting. Press
START to begin when details have been inputted. The inputted
data will now count down from the entered information.
Personal
User can create own workout profile.
• In main menu press UP/DOWN to select USER.
• Press UP/DOWN to alter resistance level in the first segment
of the profile.
• Press MODE to move to the next segment.
• Continue the above for all columns.
• Press START to begin exercise once complete.
Recovery
At any time during exercise the recovery button can be
pressed. Once pressed the user must place both hand
securely on the pulse sensors, the computer will count down
from 1 minute
After the countdown has completed the users recovery level
will be displayed, F1 – F6. The aim is to improve this level over
time which indicates the users fitness is improving.
Recovery Grade
F1 Excellent
F2 Very good
F3 Good
F4 Satisfactory
F5 Below average
F6 Poor
COMPUTER FUNCTIONS
Reset
A
B
C
D
Recovery
Down
Up
Start / Stop
E
Mode
F
BUTTON FUNCTIONS
Recovery
• After a workout can be pressed to measure the users
recovery rate.
• Once complete can be pressed again to return to the
previous display.
Down
Press to make decreasing adjustments when setting TIME,
SPEED, DISTANCE and CALORIES or the calendar/time.
Up
Pressed to make increasing adjustments when setting TIME,
SPEED, DISTANCE and CALORIES or the calendar/time.
F
E
Reset
This is used to reset all values.
Mode
Confirm your selection
Start / Stop
Program
• In main menu press UP/DOWN to highlight the program
function
• Press MODE, P1 will be displayed (After 2 seconds the
program profile will be shown)
• Use UP/DOWN to select Program P1 – P12.
• Press MODE to enter the program.
• Use UP/DOWN to change the program level.
• Press START to begin.
H.R.C (Heart Rate Control)
• In main menu press UP/DOWN to highlight H R C.
• Press MODE to select.
• Age will be displayed, press UP/DOWN to change.
• Press MODE to move to next section.
Maximum users heart rate is worked out as 220 – age = total
TARGET HEART RATE. This is the maximum your
heart rate (MHR) should be. You can then work out at 55%, 75%
or 90% of this. For example: 220 – 25 (users age) =
195 MHR, from here you can work out at the desired %.
•Computer will record the TARGET HEART RATE and allow
the user to work out within this. The resistance level will
automatically be changed.
•If no heart rate is being recorded the below will be displayed
on the screen. In this instance ensure that both hands are
securely holding the pulse sensors.
Notes
• If there is no movement detected for approximately 4
minutes the computer will switch off. Press any button or
begin pedaling to restart.
• When any preset value reaches zero the computer will
beep 8 times to alert the user. To stop this press any key.
• Speed and distance are preset to either Km or miles;
It is not possible to switch between miles and Kilometres.
REEBOKFITNESS.COM
ZJET 460
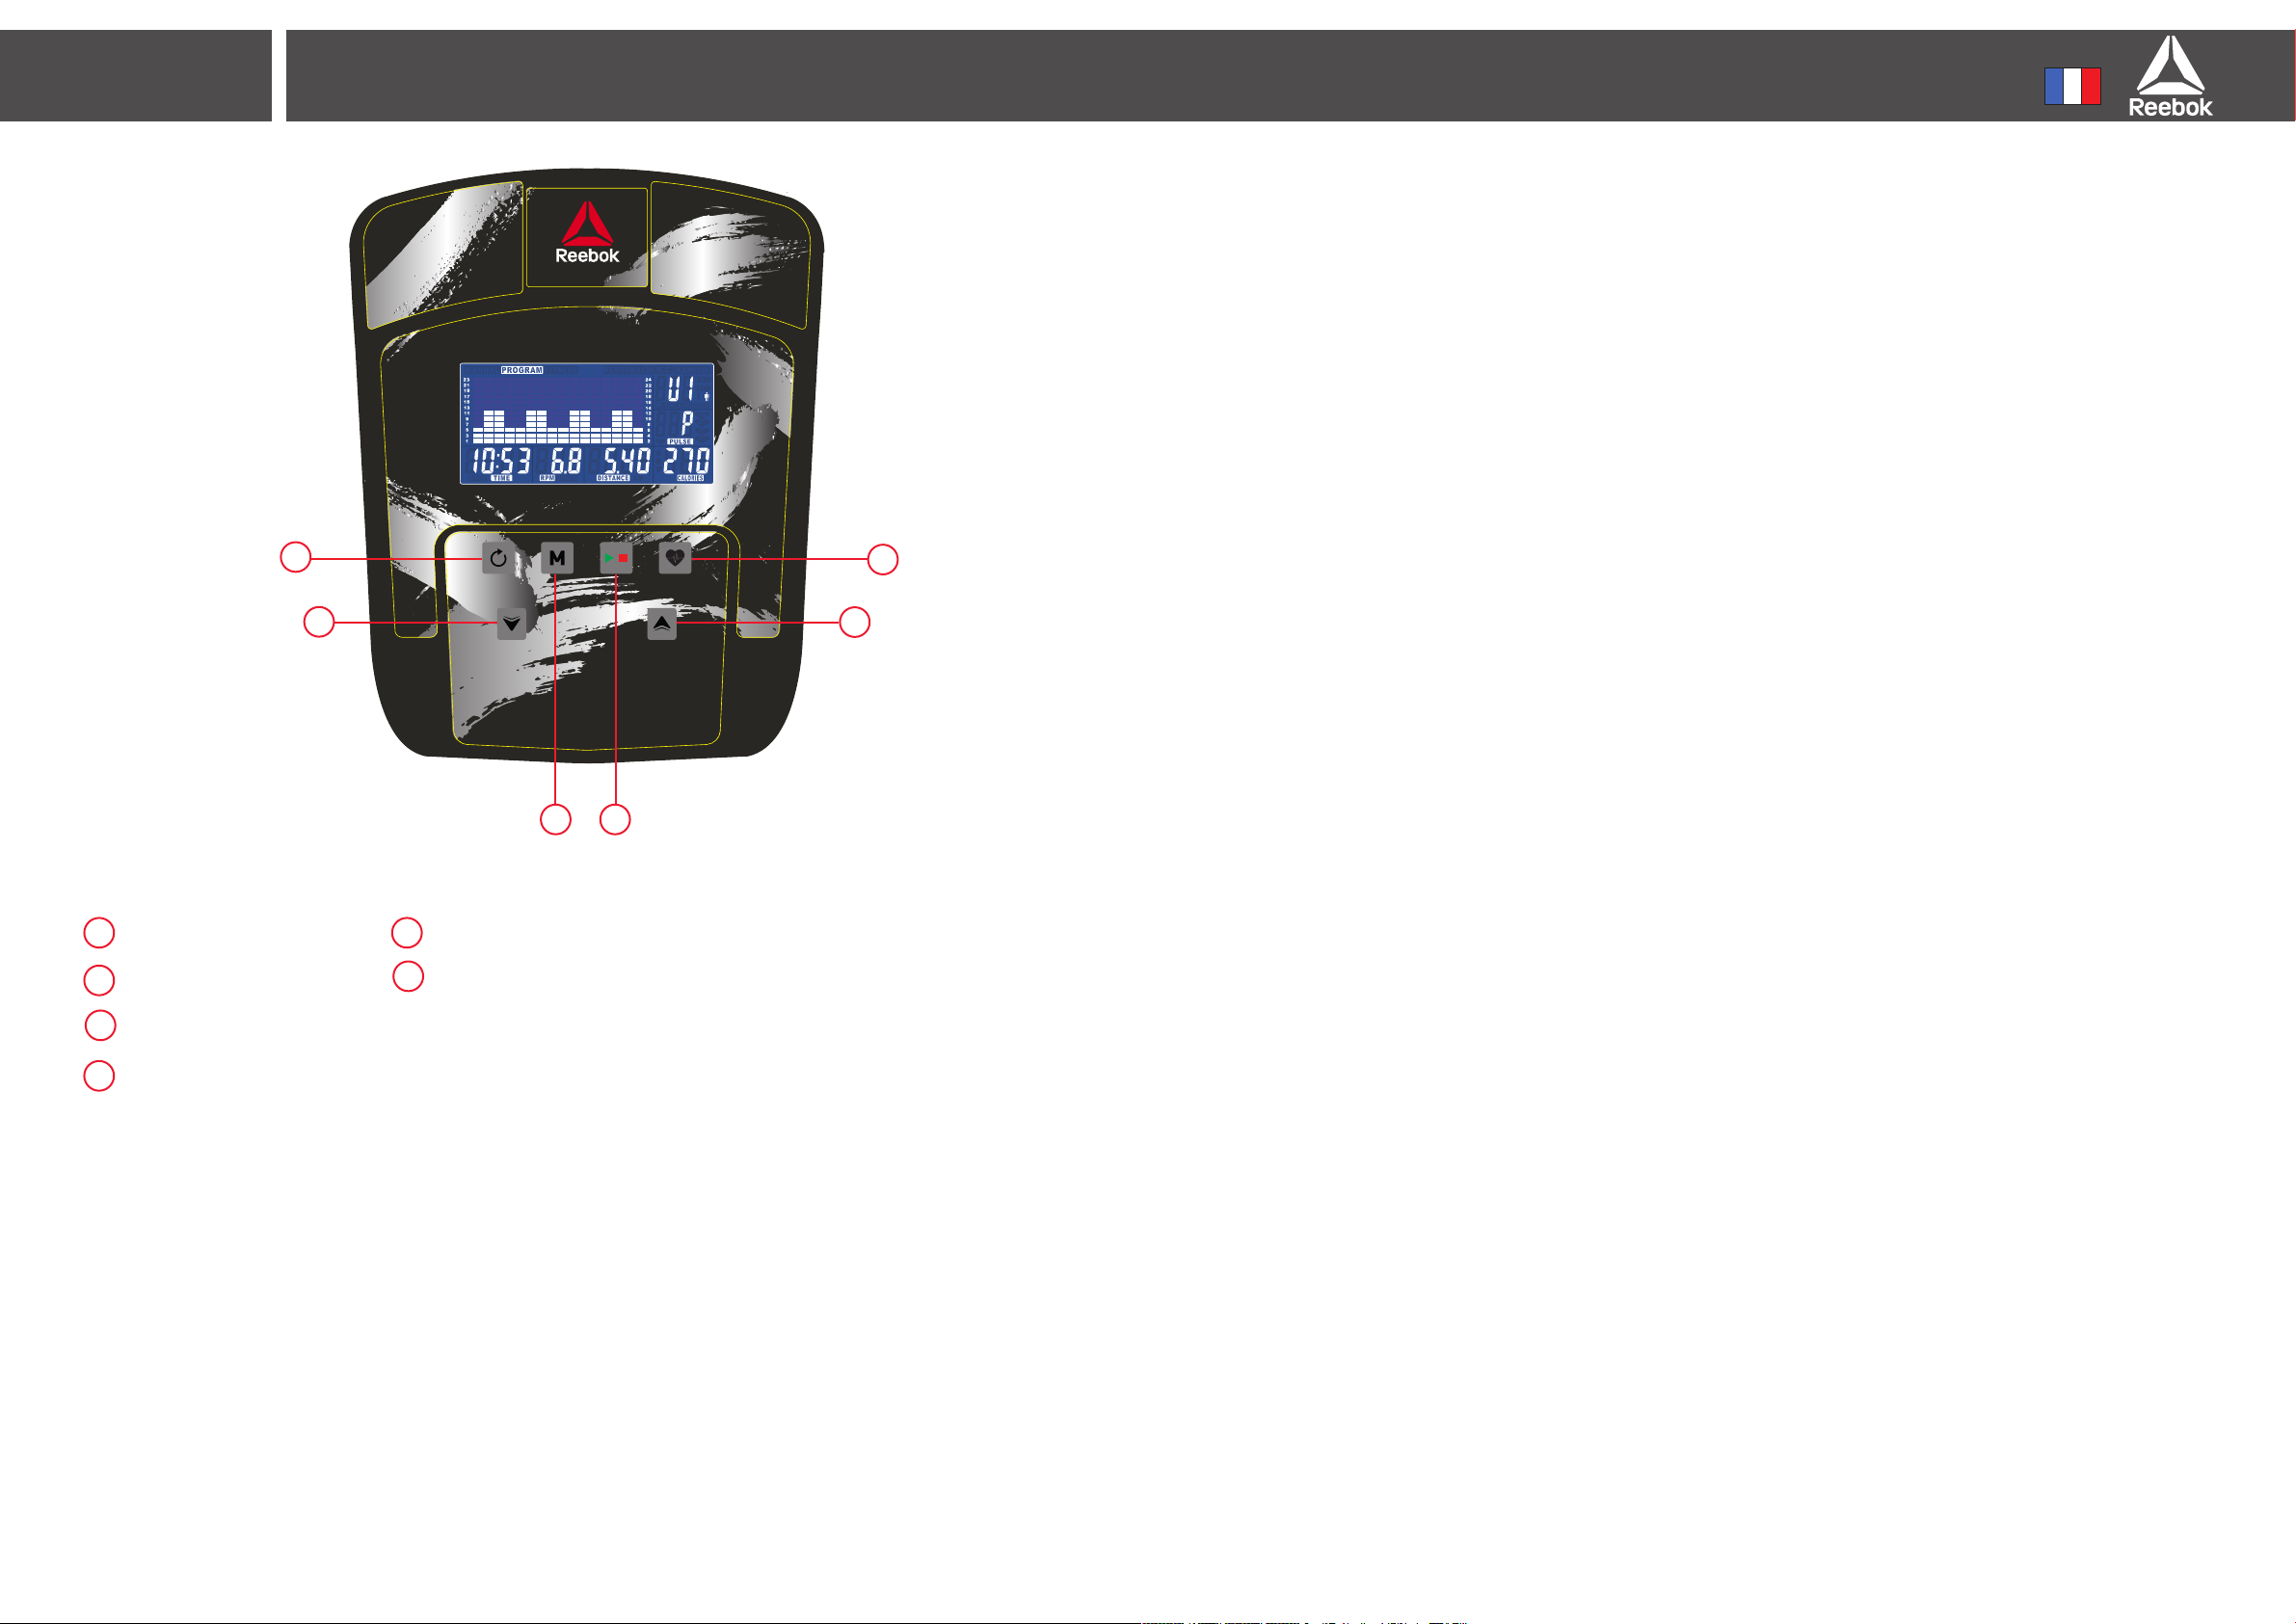
CONSOLE GUIDE
Istruzioni Guida Utente
A
C
FONCTIONS DE L’ORDINATEUR
A
Réinitialisation
Récupération
B
Démarrage/Arrêt
E
Mode
F
FONCTIONNEMENT
Lorsque le bloc d’alimentation est branché à l’appareil, l’ordinateur
se met sous tension en émettant un long signal sonore.
Le menu principal s’ache à l’écran. L’utilisateur peut appuyer
sur DÉMARRAGE pour commencer immédiatement en mode
manuel. Les calculs de toutes les valeurs (VITESSE, DISTANCE,
DURÉE) commenceront à zéro. Le niveau de résistance peut
être modifié à tout moment durant la séance d’entraînement en
appuyant sur HAUT ou BAS .
Avant de commencer l’entraînement en mode manuel, l’utilisateur
peut régler les valeurs de DURÉE, DISTANCE, CALORIES et
RYTHME CARDIAQUE souhaitées.
À partir du menu principal, appuyer sur les touches HAUT/BAS
pour afficher MANUEL en haut de l’écran. Appuyer sur Mode pour
mettre en évidence la sélection requise, utiliser HAUT/BAS pour
modifier le réglage. Appuyer sur DÉMARRAGE pour commencer
une fois les données saisies. Le compte à rebours partira des
B
données saisies.
D
Programme
• dans le menu principal, appuyer sur HAUT/BAS pour mettre en
évidence la fonction Programme ;
• appuyer sur MODE, P1 s’affiche (après 2 secondes, le profil du
programme apparaît) ;
• appuyer sur HAUT/BAS pour sélectionner les programmes P1 à
F
E
P12 ;
• appuyer sur MODE pour valider le programme choisi ;
• appuyer sur HAUT/BAS pour modifier le niveau du programme ;
• appuyer sur DÉMARRAGE pour commencer.
Personnel
L’utilisateur peut créer son propre profil d’entraînement.
• dans le menu principal, appuyer sur HAUT/BAS pour
sélectionner UTILISATEUR ;
• le profil du programme sera affiché comme ci-dessous
• appuyer sur HAUT/BAS pour modifier le niveau de résistance
dans le premier segment du profil ;
• appuyer sur MODE pour passer au segment suivant ;
• poursuivre la même procédure pour chaque colonne ;
• appuyer sur DÉMARRAGE pour commencer l’entraînement une
fois les réglages terminés
Récupération
À tout moment durant la séance d’entraînement, l’utilisateur peut
appuyer sur la touche Récupération, puis placer soigneusement
les deux mains sur les capteurs cardiaques. L’ordinateur
procédera à un compte à rebours d’une minute.
Une fois le compte à rebours terminé, le taux de récupération de
l’utilisateur est affiché, de F1 à F6. L’objectif pour l’utilisateur est
d’améliorer ce taux au fil du temps, signe d’amélioration de sa
condition physique.
Classement des taux de récupération
F1 Excellent
F2 Très bon
F3 Bon
F4 Satisfaisant
F5 Inférieur à la moyenne
F6 Mauvais
Bas
C
Haut
D
FONCTION DES TOUCHES
Réinitialisation
Permet de réinitialiser toutes les valeurs.
Récupération
• après une séance d’entraînement, l’utilisateur peut appuyer
sur cette touche pour mesurer son taux de récupération ;
• après utilisation, il suffit d’appuyer à nouveau pour revenir à
l’écran précédent.
Bas
Appuyer pour procéder à des ajustements décroissants lors du
réglage des fonctions DURÉE, VITESSE, DISTANCE et CALORIES
ou du calendrier/de l’horloge.
Mode
Pour confirmer les réglages effectués.
Haut
Appuyer pour procéder à des ajustements croissants lors du
réglage des fonctions DURÉE, VITESSE, DISTANCE et CALORIES
ou du calendrier/de l’horloge.
Démarrage/Arrêt
HRC (Contrôle du rythme cardiaque)
•• dans le menu principal, appuyer sur HAUT/BAS pour mettre en
évidence « HRC »
(OBJECTIF RYTHME CARDIAQUE) ;
• appuyer sur MODE pour sélectionner ;
• l’âge est affiché, appuyer sur HAUT/BAS pour le modifier
• appuyer sur MODE pour passer à la section suivante
Le rythme cardiaque maximal (RCM) est calculé ainsi : 220 – âge
= OBJECTIF DE RYTHME CARDIAQUE total. Il s’agit du niveau
maximal que votre rythme cardiaque ne doit pas dépasser. Vous
pouvez ensuite vous entraîner en choisissant un pourcentage de
ce rythme cardiaque maximal (55, 75 ou 90 %). Par exemple : 220
– 25 (âge de l’utilisateur) = 195 RCM, niveau à partir duquel vous
pouvez vous entraîner au pourcentage souhaité.
• l’ordinateur enregistrera l’OBJECTIF DE RYTHME CARDIAQUE
pour permettre à l’utilisateur de s’entraîner dans cette limite. Le
niveau de résistance sera automatiquement modifié ;
• si aucun rythme cardiaque n’est enregistré, l’écran ci-dessous
s’affichera. Dans ce cas, veillez à placer soigneusement les deux
mains sur les capteurs cardiaques.
NOTE
• si aucun mouvement n’est détecté pendant environ 4
minutes, l’ordinateur s’éteint. Appuyer sur n’importe quelle
touche ou commencer à pédaler pour redémarrer ;
• lorsqu’une valeur préréglée atteint zéro, l’ordinateur émet 8
signaux sonores pour alerter l’utilisateur. Pour arrêter ces
signaux, appuyer sur n’importe quelle touche ;
• Vitesse et la distance sont réglés soit à des kilomètres
ou miles; Il n’est pas possible de basculer entre miles et
kilomètres.
REEBOKFITNESS.COM
 Loading...