

Page 1
OWNER'S/OPERATOR'S
MANUAL
MODE D’EMPLOI MANUAL DE
INSTRUCCIONES
HEDGE TRIMMER
TAILLEUSE DE HAIES
CORTASETOS
115 43 11-49 (105)
WARNING
The engine exhaust from this
product contains chemicals
known to the State of California to
cause cancer, birth defects or
other reproductive harm.
WARNING
AVERTISSEMENT
AVERTISSEMENT
ADVERTENCIA
ADVERTENCIA
Before using our products,
please read this manual carefully
to understand the proper use of
your unit.
Los gases de escape del motor de
este producto contienen
sustancias químicas conocidas
por el Estado de California como
causantes de cáncer,
malformaciones en recién nacidos
y otros problemas de
reproducción.
Les échappements du moteur de
ce produit contiennent des
produits chimiques connus par
l’Etat de Californie comme étant
responsables de cancers,
d’anomalies congénitales et
d’autres atteintes à l’appareil
reproducteur.
Antes de usar nuestros productos,
lea detenidamente este manual a
fin de familiarizarse con el uso
correcto de este aparato.
Avant d’utiliser cette
ce produit
,
veuillez lire attentivement ce
manuel afin de bien comprendre le
bon fonctionnement de cet
appareil.
CHT220
CHT220L
U
S
F
R
E
S
This spark ignition system complies with
the Canadian standard ICES-002.
Ce système d’allumage par étincelle de véhicule
est conforme à la norme NMB-002 du Canada.
Este sistema de ignición por chispa de vehículo
es conforme con la norma ICES-002 del Canadá.
Page 2

Page 3
US-1
CHT220/CHT220L
U
S
OWNER'S/OPERATOR'S
MANUAL
HEDGE TRIMMER
115 43 11-49 (105)
WARNING
The engine exhaust from this
product contains chemicals
known to the State of California to
cause cancer, birth defects or
other reproductive harm.
WARNING
Before using our products,
please read this manual carefully
to understand the proper use of
your unit.
CHT220
CHT220L
This spark ignition system complies with
the Canadian standard ICES-002.
Page 4

US-2
CHT220/CHT220L
SAFETY FIRST
Instructions contained in warnings within this
manual marked with a symbol concern critical
points which must be taken into consideration to
prevent possible serious bodily injury, and for this
reason you are requested to read all such
instructions carefully and follow them without fail.
■ WARNINGS IN THE MANUAL
This mark indicates instructions which must be followed
in order to prevent accidents which could lead to serious
bodily injury or death.
This mark indicates instructions which must be followed,
or it leads to mechanical failure, breakdown, or damage.
This mark indicates hints or directions useful in the use
of the product.
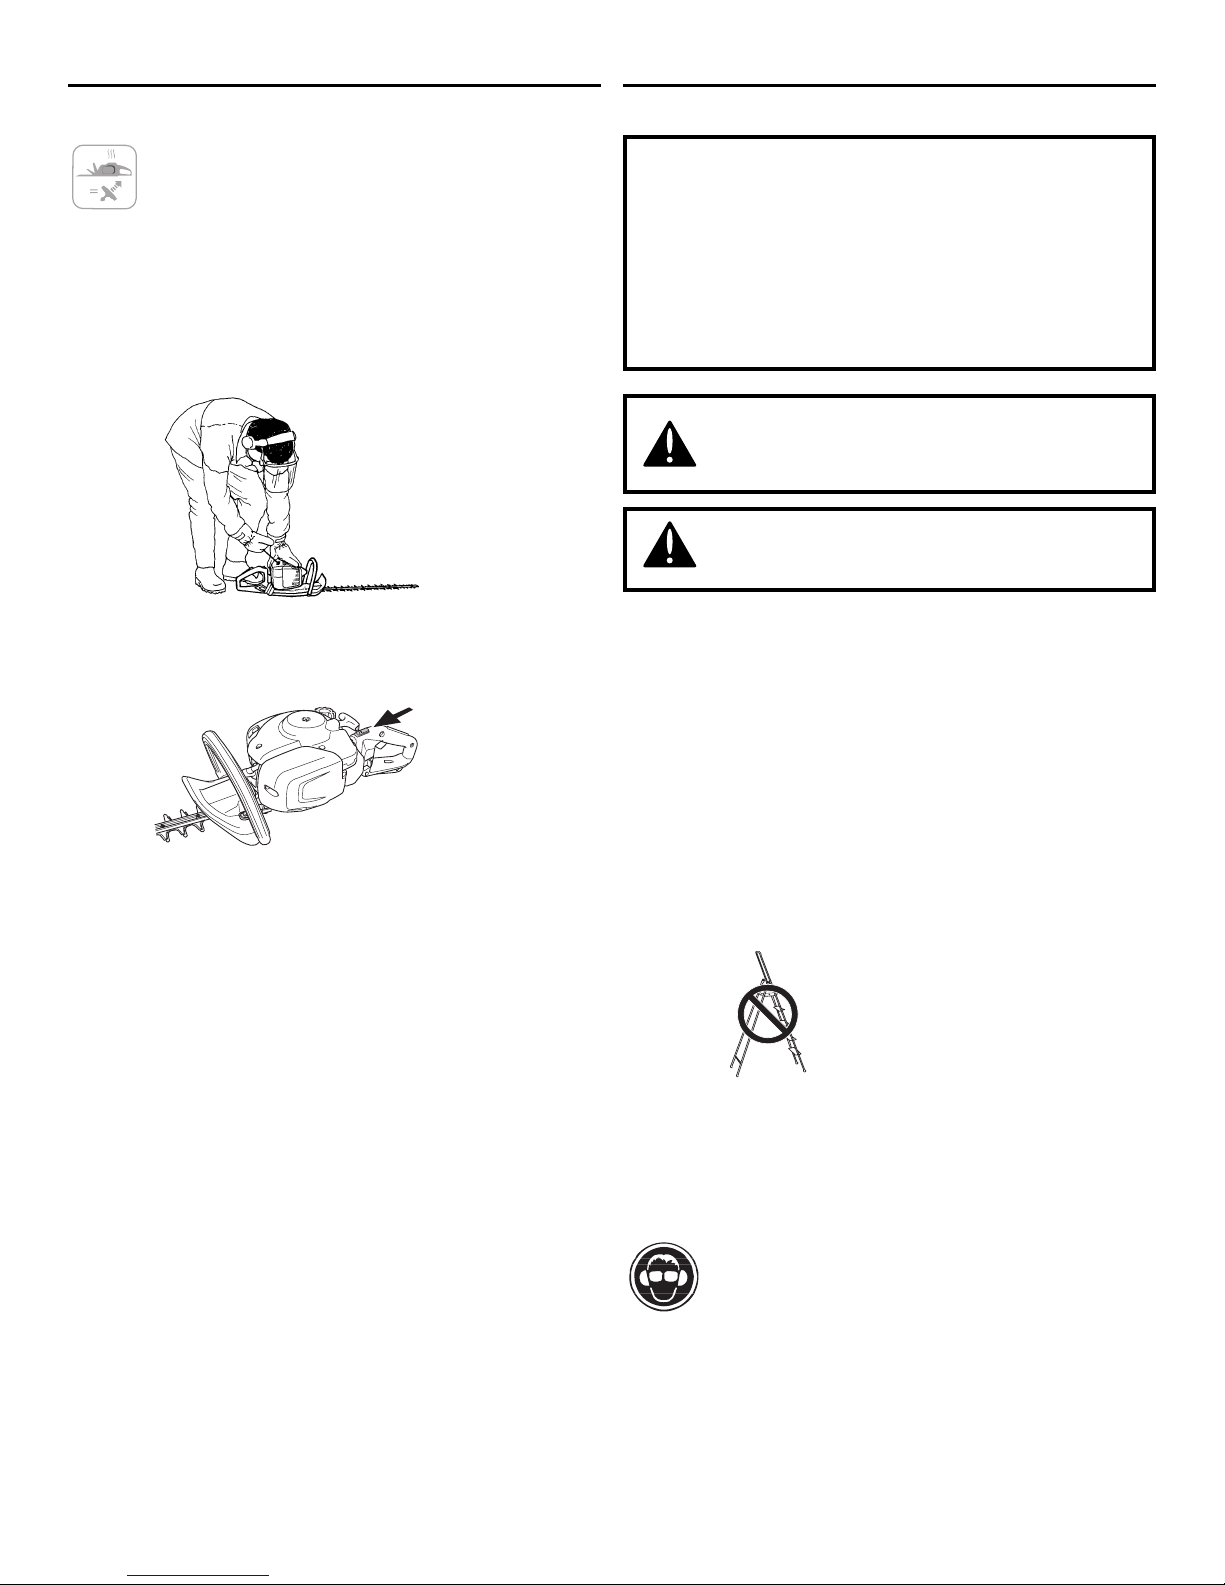
NOTE
The engine is switched off by moving the stop switch to
the stop position.
CAUTION! The stop switch automatically returns to the
start position. In order to prevent unintentional starting,
the spark plug cap must be removed from the spark
plug when assembling, checking and/or performing
maintenance.
Always wear approved protective gloves.
Regular cleaning is required.
Visual check.
Protective goggles or a visor must be worn.
WARNING
IMPORTANT
Page 5
US-3
CHT220/CHT220L
U
S
Contents
■ NOTE THE FOLLOWING BEFORE STARTING:
Please read the operator’s manual carefully.
WARNING! Long-term exposure to noise can result
in permanent hearing impairment. So always use
approved hearing protection.
WARNING! Under no circumstances may the
design of the machine be modified without the
permission of the manufacturer. Always use
genuine accessories. Non-authorized modifications
and/or accessories can result in serious personal
injury or the death of the operator or others.
Your warranty may not cover damage or liability
caused by the use of non-authorized accessories
or replacement parts.
WARNING! Incorrect or careless use of a hedge
trimmer can turn it into a dangerous tool that can
cause serious or even fatal injury. It is extremely
important that you read and understand the
contents of this operator’s manual.
1. Parts location......................................................................4
2. Specifications .....................................................................4
3. Symbols..............................................................................5
4. Emission control .................................................................5
5. For safe operation ..............................................................6
6. Fuel.....................................................................................9
7. Starting and stopping........................................................11
8. Working techniques ..........................................................12
9. Maintenance .....................................................................14
10. Storage .............................................................................18
11. Disposal............................................................................18
12. Troubleshooting guide ......................................................18
WARNING
The engine exhaust from this product
contains chemical known to the State
of California to cause cancer, birth
defects or other reproductive harm.
Page 6
US-4
CHT220/CHT220L
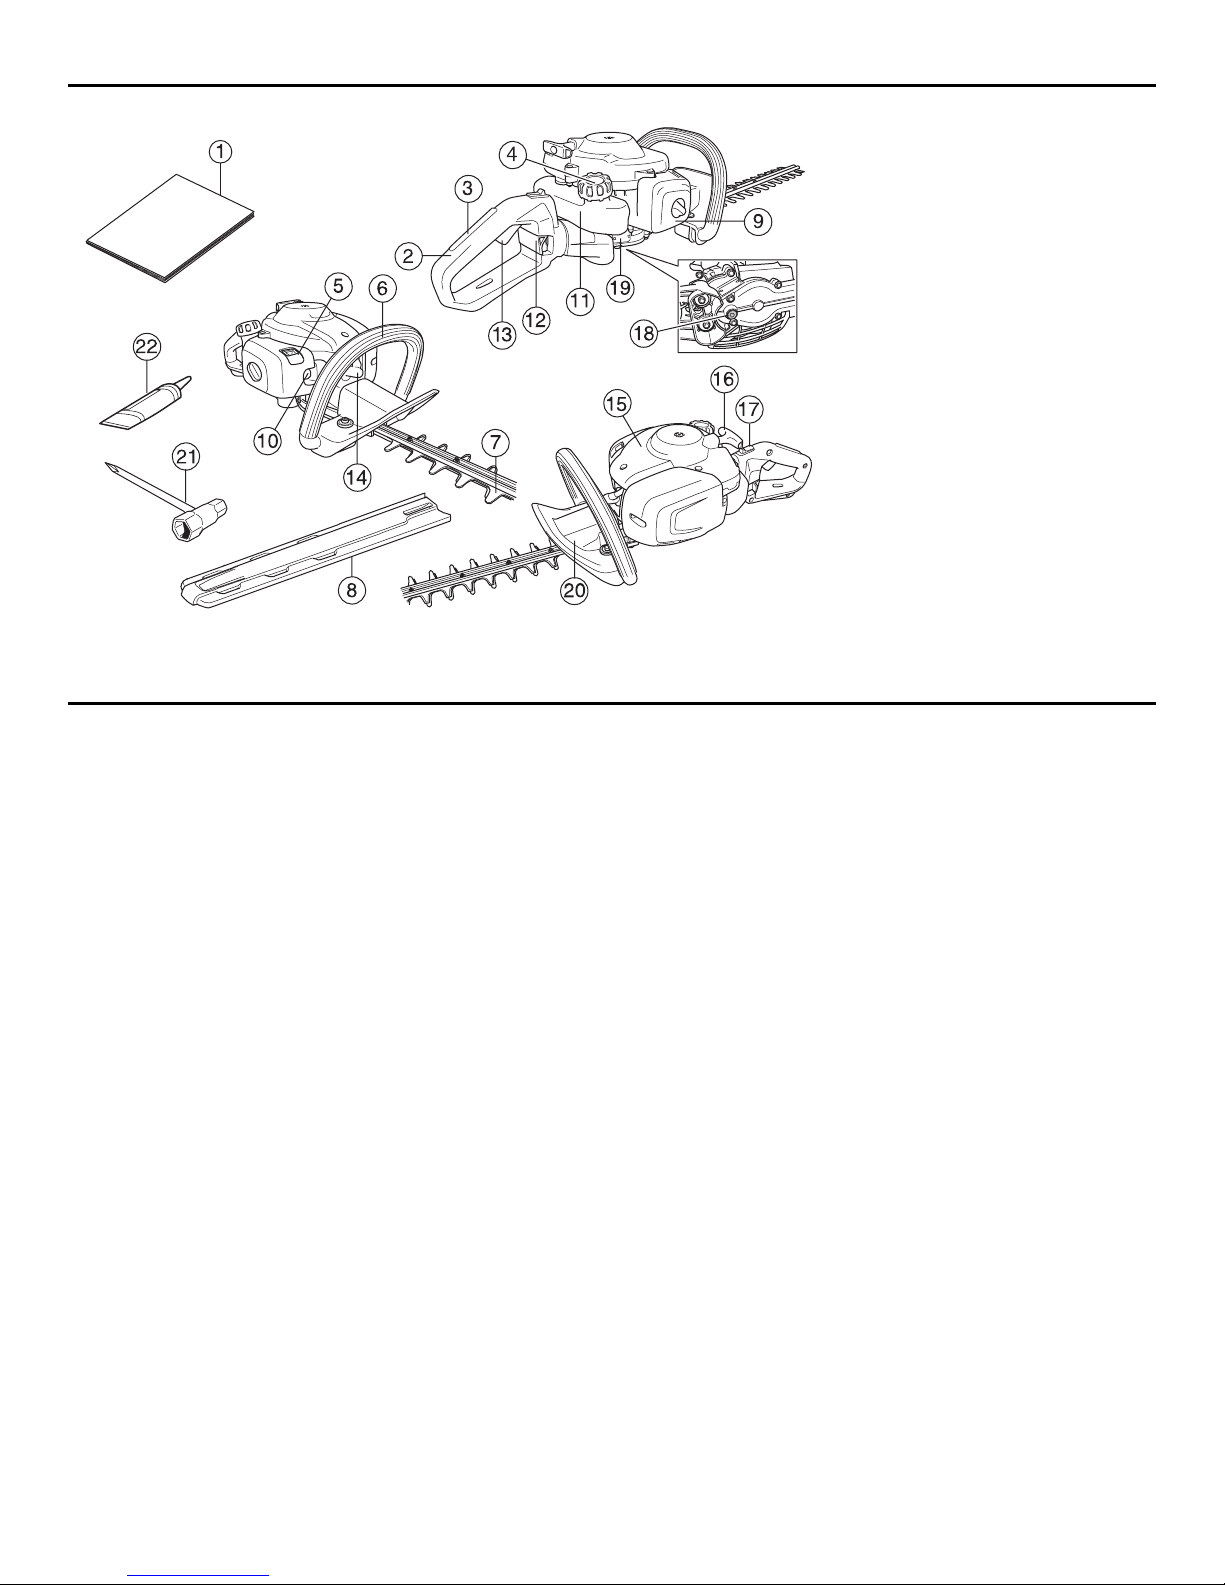
1. Parts location
1 Operator's manual
2 Handle
3 Throttle lock
4 Fuel cap
5 Choke control
6 Front handle
7 Blade and blade guard
8 Transport guard
9 Air filter cover
10 Air purge
11 Fuel tank
12 Lock for handle CHT220L
13 Throttle control
14 Spark plug cap and spark plug
15 Cylinder cover
16 Starter handle
17 Stop switch
18 Lubricant filler cap, gear
19 Gear
20 Hand guard
21 Combination spanner
22 Tube of grease
2. Specifications
Model name CHT220 CHT220L
Engine
Cylinder displacement, cu.in/cm
3
21,7 21,7
Cylinder bore, inch/mm 1,26/32 1,26/32
Stroke, inch/mm 1,06/27 1,06/27
Idle speed, rpm 2900 2900
Recommended max. speed, rpm 9000 9000
Max. engine output, acc. to ISO 8893, kW/ rpm 0,6/7800 0,6/7800
Catalytic converter muffler Yes Yes
Speed-regulated ignition system Yes Yes
Ignition system
Spark plug NGK CMR6A NGK CMR6A
Electrode gap, inch/mm 0,02/0,5 0,02/0,5
Fuel and lubrication system
Fuel tank capacity, US pint/litre 0,3 0,3
Weight
Weight without fuel, Lbs/kg 10,3/4,7 10,8/4,9
Sound levels
(see note 1)
Equivalent sound pressure level at the operator's ear,
measured according to EN ISO 10517, dB(A): 93 5, 7/94
Vibration levels
(see note 2)
Equivalent vibration levels (ahv,eq) at handles,
measured according to EN ISO 10517, m/s
2
Front/rear handles: 2,9/4,9 4,1/3,6
Blades
Type Double sided Double sided
Length, mm 450 590
Blade speed, cuts/min 4050 4050
Note 1: Reported data for equivalent sound pressure level for the machine has a typical statistical dispersion (standard
deviation) of 1 dB (A).
Note 2: Reported data for equivalent vibration level has a typical statistical dispersion (standard deviation) of 1 m/s
2
.
Page 7

US-5
CHT220/CHT220L
U
S
3. Symbols
WARNING! Incorrect or careless use of a hedge trimmer can turn
it into a dangerous tool that can cause serious or even fatal injury.
It is extremely important that you read and understand the
contents of this operator’s manual.
Please read the operator’s manual carefully and make sure you
understand the instructions before using the machine.
Always wear:
• Approved hearing protection
• Approved eye protection
Always wear approved protective gloves.
Wear sturdy, non-slip boots or shoes.
Starting instructions See the instructions under the heading Start
and stop.
Other symbols/decals on the machine refer to special
certification requirements for certain markets.
4. Emission control
The Emissions Compliance Period referred to on the Emission
Compliance label indicates the number of operating hours for
which the engine has been shown to meet Federal emissions
requirements.
An emission control label is located on the machine.
Page 8
US-6
CHT220/CHT220L
1. THIS MACHINE CAN CAUSE
SERIOUS INJURIES. Read this manual
carefully until you completely
understand and follow all safety and
operating instructions. Also, know how
to stop the machine quickly in an
emergency.
2. Keep this manual handy so that you
may refer to it later whenever any
questions arise. Also note, if you have
any questions which cannot be
answered herein, contact the dealer
from whom you purchased the product.
3. Always be sure to include this manual
when selling, lending, or otherwise
transferring the ownership of this
product.
4. Never allow children or anyone unable
to fully understand the directions given
in the manual to use the machine.
■ WORKING CONDITION
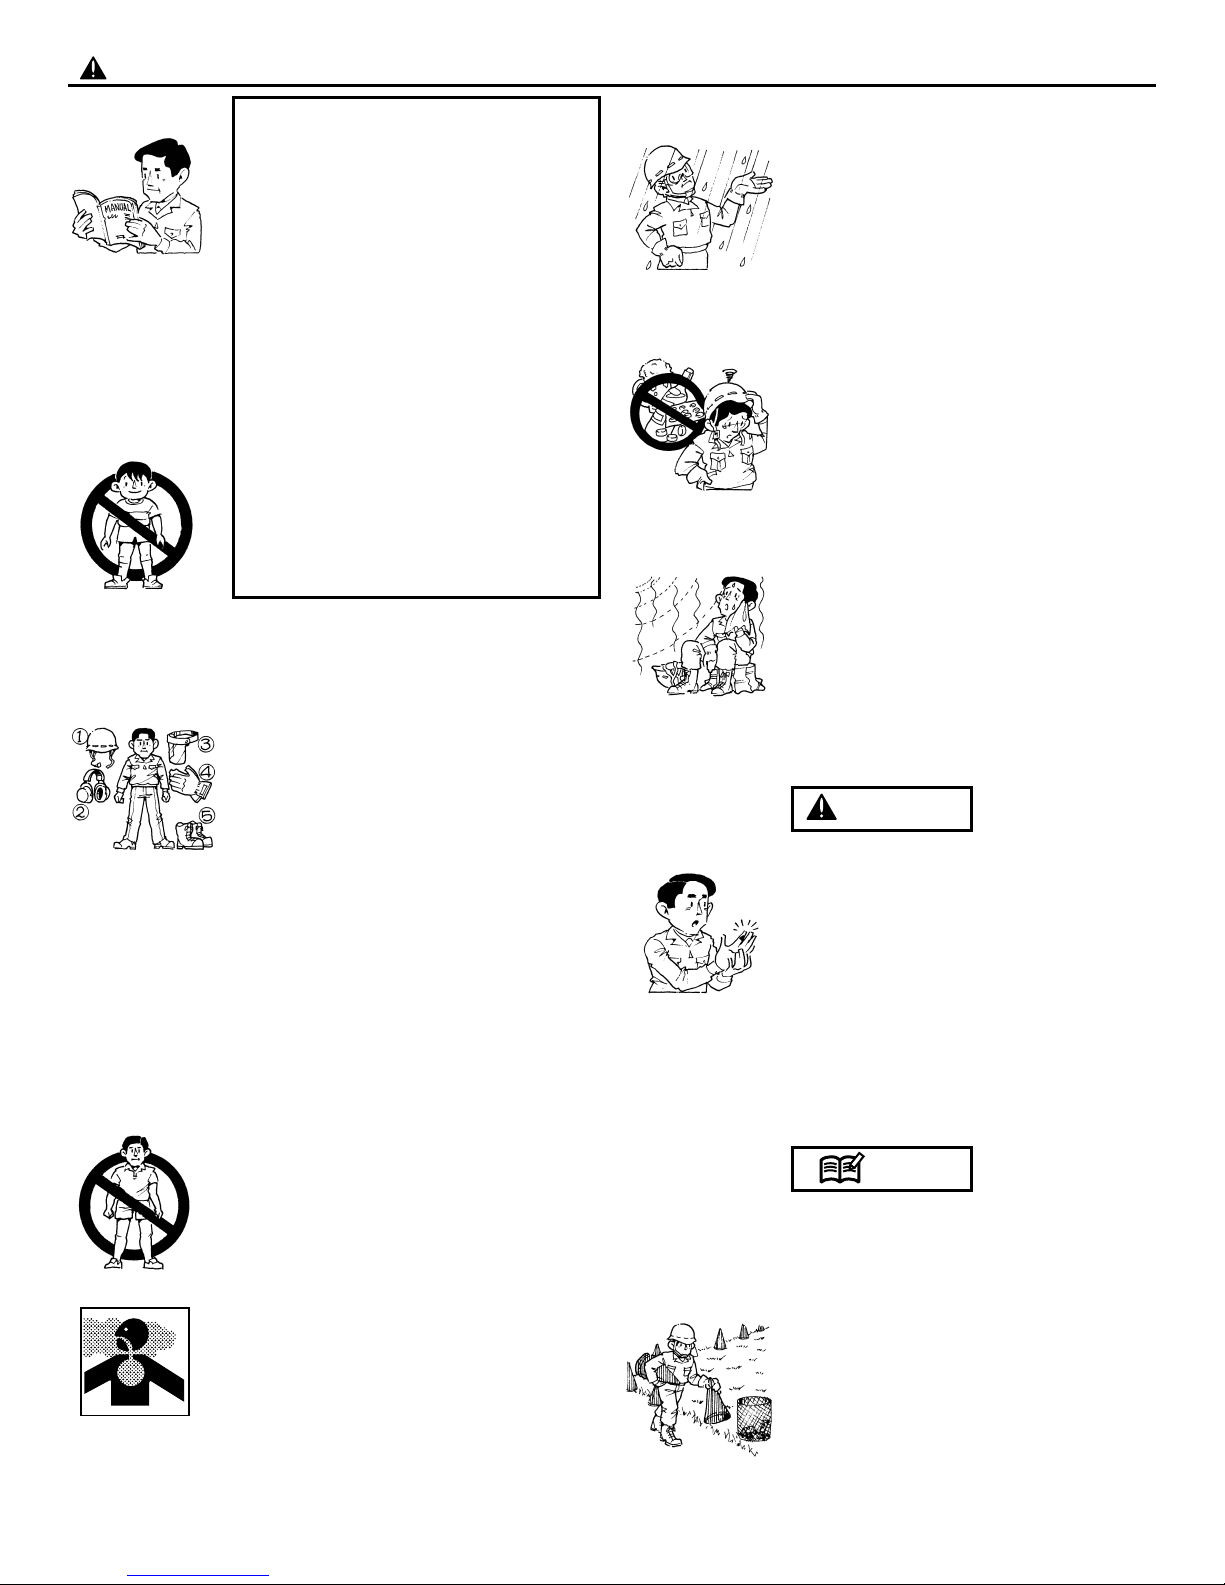
1. When using the product, you should wear
proper clothing and protective equipment.
(1) Helmet
(2) Ear protectors
(3) Protection goggles or face protector
(4) Thick work gloves
(5) Non-slip-sole work boots
2. And you should carry with you.
(1) Attached tools
(2) Properly reserved fuel
(3) Spare blade
(4) Things to notify your working area
(rope, warning signs)
(5) Whistle (for collaboration or emergency)
(6) Hatchet or saw (for removal of
obstacles)
(7) First-aid kit
3. Do not wear loose clothing, jewelry, short
trousers, sandals, or go barefoot. Do not
wear anything which might be caught by a
moving part of the unit. Secure hair so it is
above shoulder length.
■ WORKING CIRCUMSTANCE
1. Never start the engine inside a closed
room or building. Exhaust gases contain
dangerous carbon monoxide.
2. Never use the product,
a. when the ground is slippery or when
you can’t maintain a steady posture.
b. At night, at times of heavy fog, or at any
5. For safe operation
other times when your field of vision
might be limited and it would be difficult
to gain a clear view of the working area.
c. During rain storms, during lightning
storms, at times of strong or gale-force
winds, or at any other times when
weather conditions might make it
unsafe to use the product.
■ WORKING PLAN
1. You should never use the product when
under the influence of alcohol, when
suffering from exhaustion or lack of sleep,
when suffering from drowsiness as a result
of having taken cold medicine or at any
other time when a possibility exists that
your judgment might be impaired or that
you might not be able to operate the
product properly and in a safe manner.
2. When planning your work schedule, allow
plenty of time to rest. Limit the amount of
time over which the product is to be used
continuously to somewhere around 30 ~ 40
minutes per session, and take 10 ~ 20
minutes of rest between work sessions.
Also try to keep the total amount of work
performed in a single day under 2 hours or
less.
1. If you don’t observe the working time,
or working manner (See “USING THE
PRODUCT”), Repetitive Stress Injury
(RSI) could occur.
If you feel discomfort, redness and
swelling of your fingers or any other
part of your body, see a doctor before
getting worse.
2. To avoid noise complaints, in general,
operate product between 8 a.m. and 5
p.m. on weekdays and 9 a.m. to 5 p.m.
on weekends.
Check and follow the local regulations as to
sound level and hours of operations for the
product.
■ BEFORE STARTING THE ENGINE
1. The area within a perimeter of 15 m (50 ft)
of the person using the product should be
considered a hazardous area into which no
one should enter. If necessary, yellow
warning rope, warning signs should be
placed around the perimeter of the area.
When work is to be performed
simultaneously by two or more persons,
NOTE
WARNING
Page 9
US-7
CHT220/CHT220L
U
S
care should also be taken to constantly
look around or otherwise check for the
presence and locations of other people
working so as to maintain a distance
between each person sufficient to ensure
safety.
2. Check the condition of working area to
avoid any accident by hitting hidden
obstacles such as stumps, stones, cans, or
broken glass.
Remove any obstacle before beginning work.
3. Inspect the entire unit for loose fasteners
and fuel leakage. Make sure that the
cutting attachment is properly installed and
securely fastened.
■ STARTING THE ENGINE
1. Keep bystanders especially children, and
animals at least 15 m (50 ft) away from the
operating point. If you are approached,
immediately stop the engine.
2. The product is equipped with a centrifugal
clutch mechanism, so the cutting
attachment might begin to rotate as soon
as the engine is started. When starting the
engine, place the product onto the ground
in a flat clear area and hold it firmly in
place so as to ensure that neither the
cutting part nor the throttle come into
contact with any obstacle when the engine
starts.
• Never place the throttle into the high-
speed position when starting the
engine.
• Never start the engine at the cutting
attachment side.
3. After starting the engine, check to make
sure that the cutting attachment stops
rotating when the throttle is moved fully
back to its original position. If it continues
to rotate even after the throttle has been
moved fully back, turn off the engine and
take the unit to your authorized RedMax
servicing dealer for repair.
■ USING THE PRODUCT
Cut only materials recommended by the
manufacturer. And use only for tasks
IMPORTANT
5. For safe operation
explained in the manual.
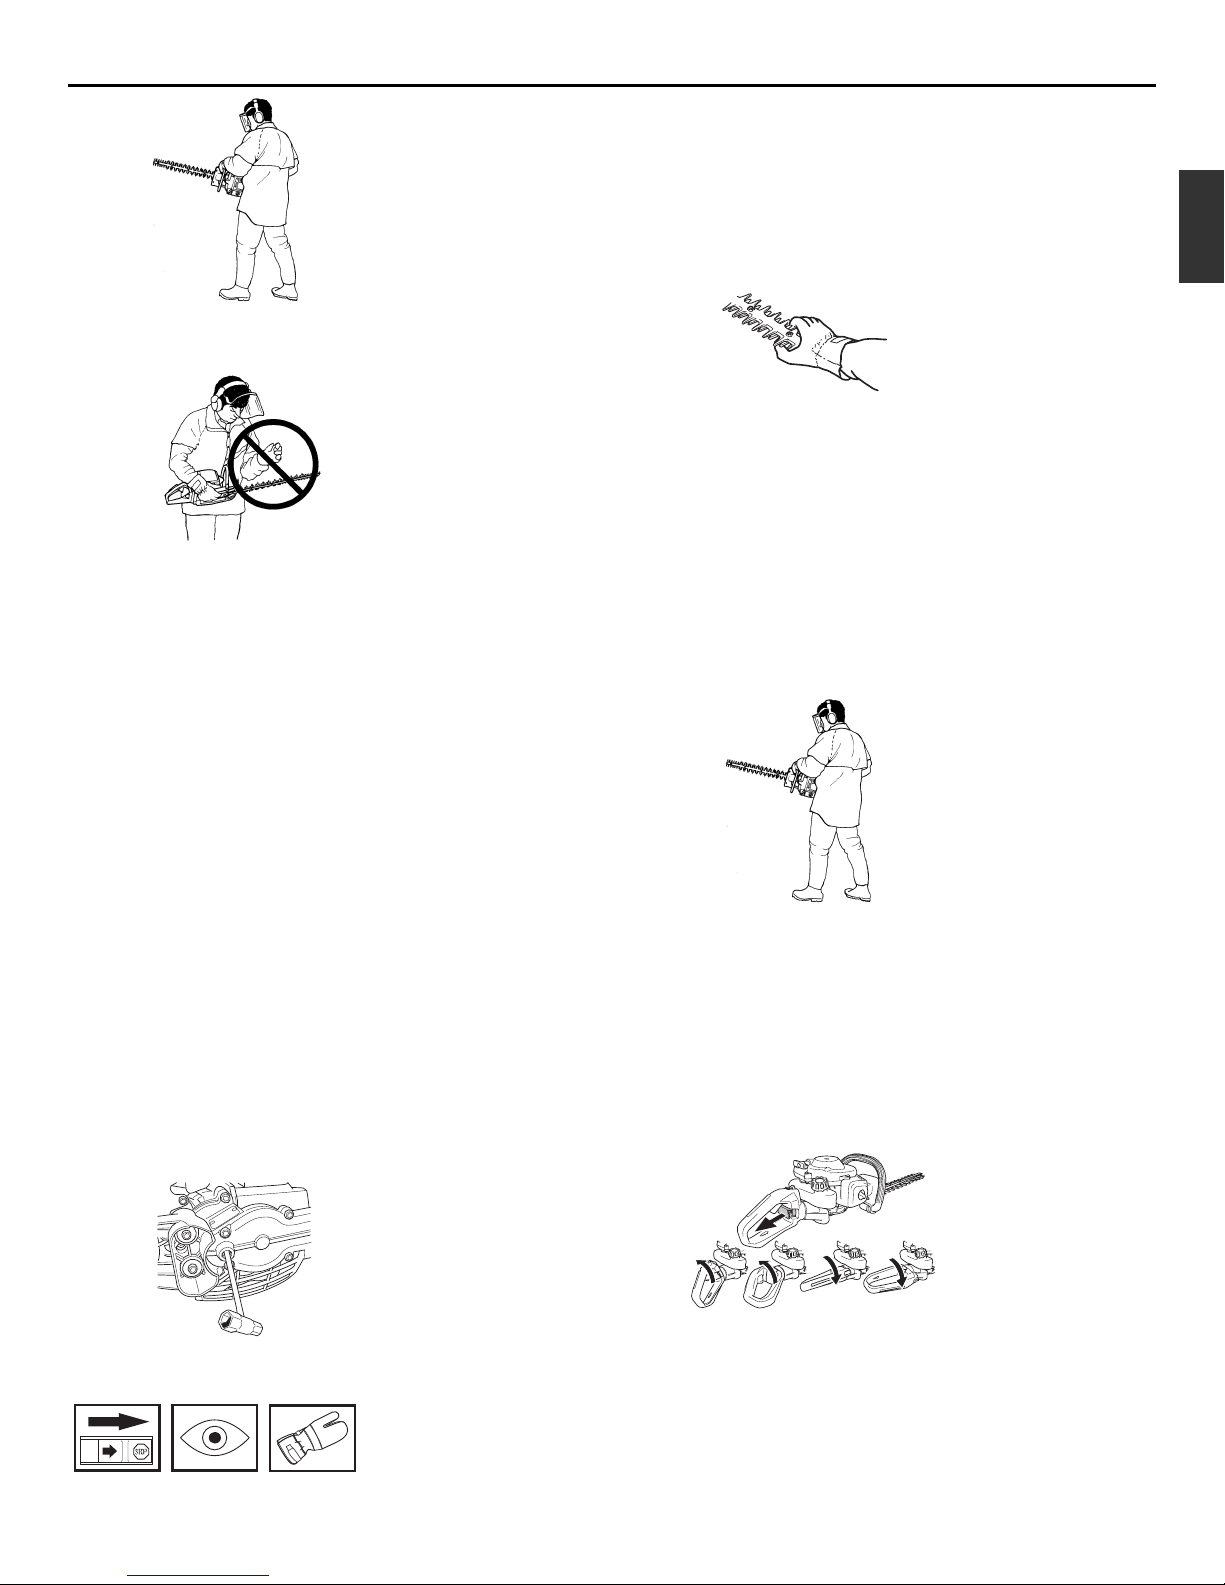
1. Grip the handles firmly with both hands
using your whole hand. Place your feet
slightly apart (slightly further apart than the
width of your shoulders) so that your
weight is distributed evenly across both
legs, and always be sure to maintain a
steady, even posture while working.
2. Maintain the speed of the engine at the
level required to perform cutting work, and
never raise the speed of the engine above
the level necessary.
3. If the unit starts to shake or vibrate, turn off
the engine and check the whole unit. Do
not use it until the trouble has been
properly corrected.
4. Keep all parts of your body away from
rotating cutting attachment and hot
surfaces.
5. Never touch the muffler, spark plug, or
other metallic parts of the engine while the
engine is in operation or immediately after
shutting down the engine. Doing socould
result in serious burns or electrical shock.
6. While operating the machine be always
sure of a safe and secure operating
position especially when using steps or a
ladder.
• IF SOMEONE COMES
1. Guard against hazardous situations at all
times. Warn adults to keep pets and
children away from the area. Be careful if
you are approached. Injury may result from
flying debris.
2. If someone calls out or otherwise interrupts
you while working, always be sure to turn
off the engine before turning around.
■ MAINTENANCE
1. In order to maintain your product in proper
working order, perform the maintenance
and checking operations described in the
manual at regular intervals.
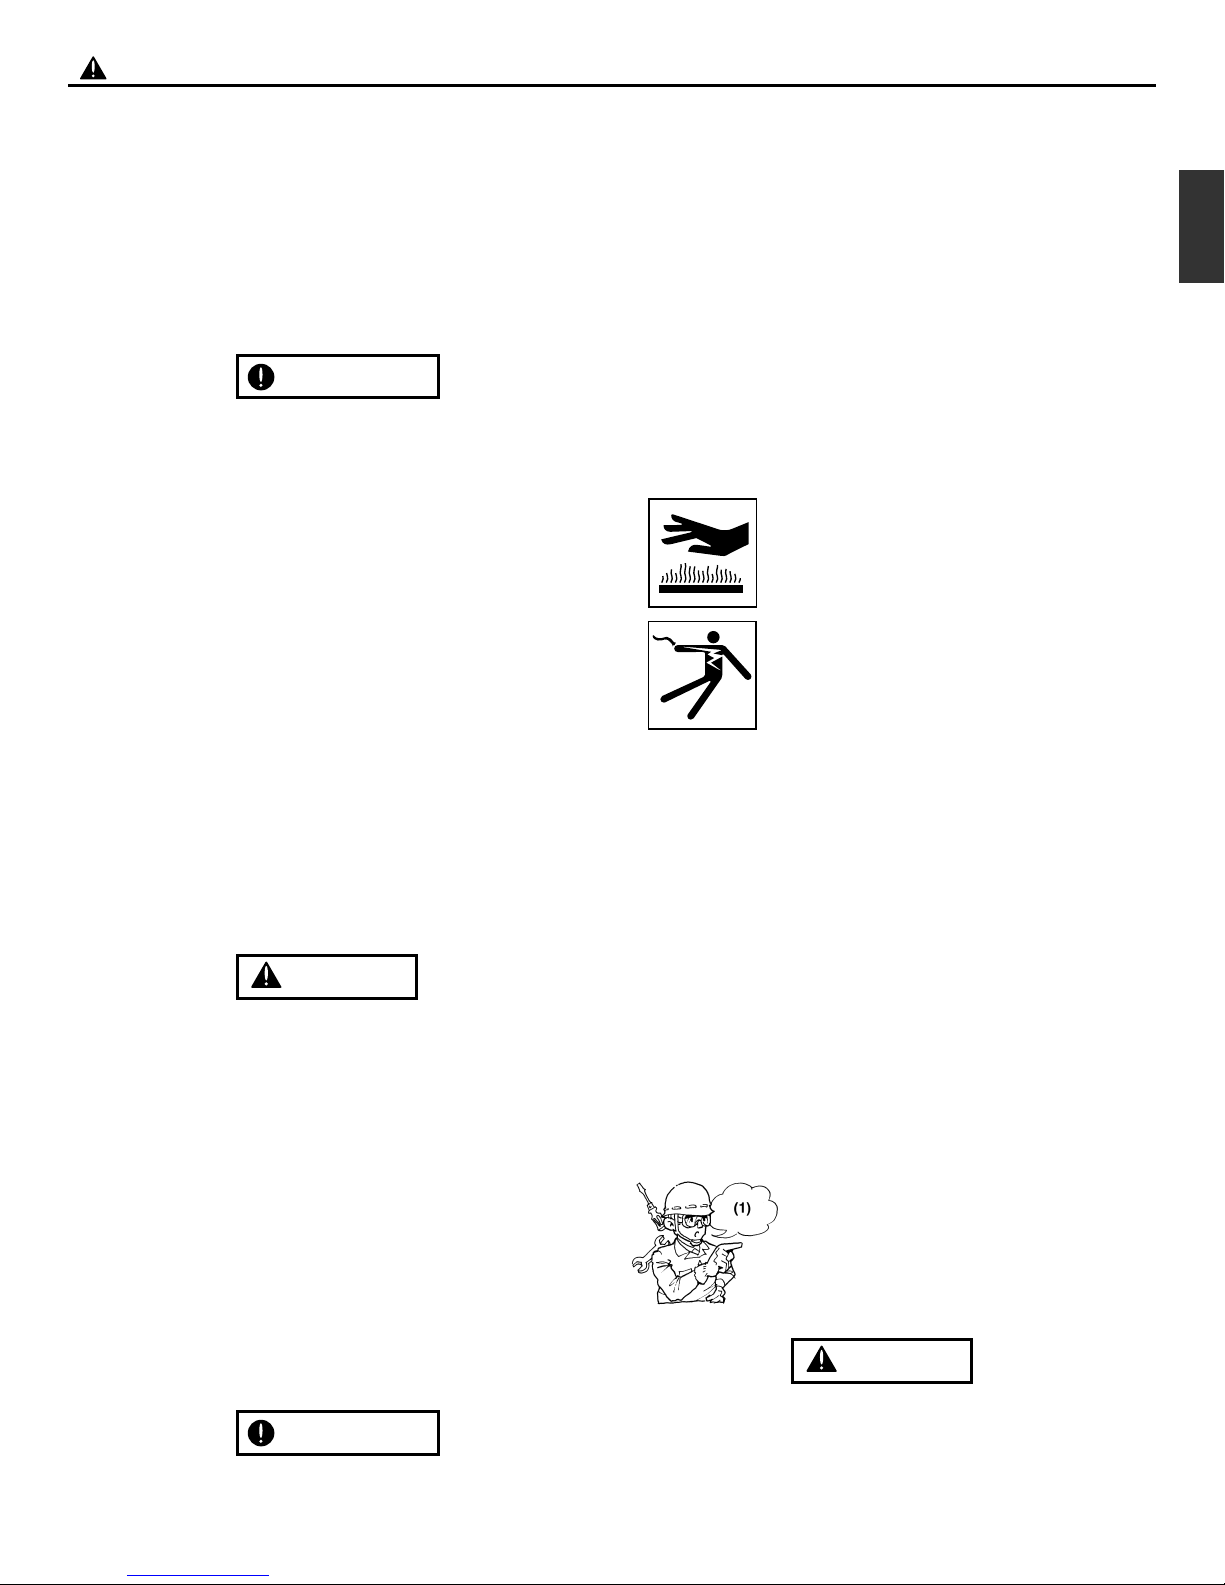
2. Always be sure to turn off the engine
before performing any maintenance,
checking procedures or working on the
machine.
(1) Check ok!
The metallic parts reach high
temperatures immediately after stopping
the engine.
3. When replacing the cutting attachment or
WARNING
IMPORTANT
WARNING
Page 10

US-8
CHT220/CHT220L
5. For safe operation
any other part, or when replacing the oil or
any lubricant, always be sure to use only
RedMax products or products which
have been certified by RedMax for use
with the RedMax product.
4. In the event that any part must be replaced
or any maintenance or repair work not
described in this manual must be
performed, please contact a representative
from the store nearest RedMax authorized
servicing dealer for assistance.
5. Do not use any accessory or attachment
other than those bearing the RedMax mark
and recommended for the unit.
6. Under no circumstances should you ever
take apart the product or alter it in any
way. Doing so might result in the product
becoming damaged during operation or the
product becoming unable to operate
properly.
■ HANDLING FUEL
1. The engine of the RedMax product is
designed to run on a mixed fuel, which
contains highly flammable gasoline. Never
store cans of fuel or refill the tank of the
unit in any place where there is a boiler,
stove, wood fire, electrical sparks, welding
sparks, or any other source of heat or fire
which might ignite the fuel.
2. Never smoke while operating the unit or
refilling its fuel tank.
3. When refilling the tank, always turn off the
engine and allow it to cool down. Take a
careful look around to make sure that there
are no sparks or open flames anywhere
nearby before refueling.
(1) Refill after cooling the engine.
4. Wipe spilled fuel completely using a dry
rag if any fuel spillage occurs during
refueling.
5. After refueling, screw the fuel cap back
tightly onto the fuel tank and then carry the
unit to a spot 3 m or more away from
where it was refueled before turning on the
engine.
6. Do not inhale fuel fumes as they are toxic.
■ TRANSPORTATION
1. When hand-carrying the product, cover
over the cutting part if necessary, lift up the
product and carry it paying attention to the
blade.
2. Never transport the product over rough
roads over long distances by vehicle
without removing all fuel from the fuel tank.
If doing so, fuel might leak from the tank
during transport.
Page 11
US-9
CHT220/CHT220L
U
S
lines or fuel tank of the engine.
• Failures caused by operating engines on gasoline with octane
rating lower than 89 are not covered
by the RedMax Two-
Stroke engine warranty.
•Alternative Fuels (Not Gasoline)
Alternative fuels, such as E-15 (15% ethanol), E-20 (20%
ethanol), E-85 (85% ethanol) are NOT classified as gasoline
and are NOT approved for use in RedMax 2-stroke gasoline
engines. Use of alternative fuels will cause major engine
performance and durability problems such as: improper
clutch engagements, overheating, vapor lock, power loss,
lubrication deficiency, deterioration of fuel lines, gaskets
and internal carburetor components, etc... Alternative fuels
cause high moisture absorption into the fuel/oil mixture
leading to oil and fuel separation.
■ OIL REQUIREMENTS
• Use only RedMax "Max Life", Synthetic blend Premium AirCooled two-stroke engine oil or oil certified to ISO-L-EGD
(ISO/CD1378) standard AND
one that is JASO-FD
registered.
RedMax Air-Cooled "Max Life", Synthetic blend Premium two
stroke engine oil and ISO-L-EGD
(ISO/CD1378) AND
JASO-FD
oils are fully compatible
with gasoline's containing 10% Ethanol.
RedMax Air-Cooled "Max Life", Synthetic blend Premium two
stroke engine oil and ISO-L-EGD
(ISO/CD1378) AND
JASO-FD
oils are Universal and should be mixed at 50:1 ratio for all 2
stroke air cooled engines sold in the past regardless of mixing
ratios specified in those manuals.
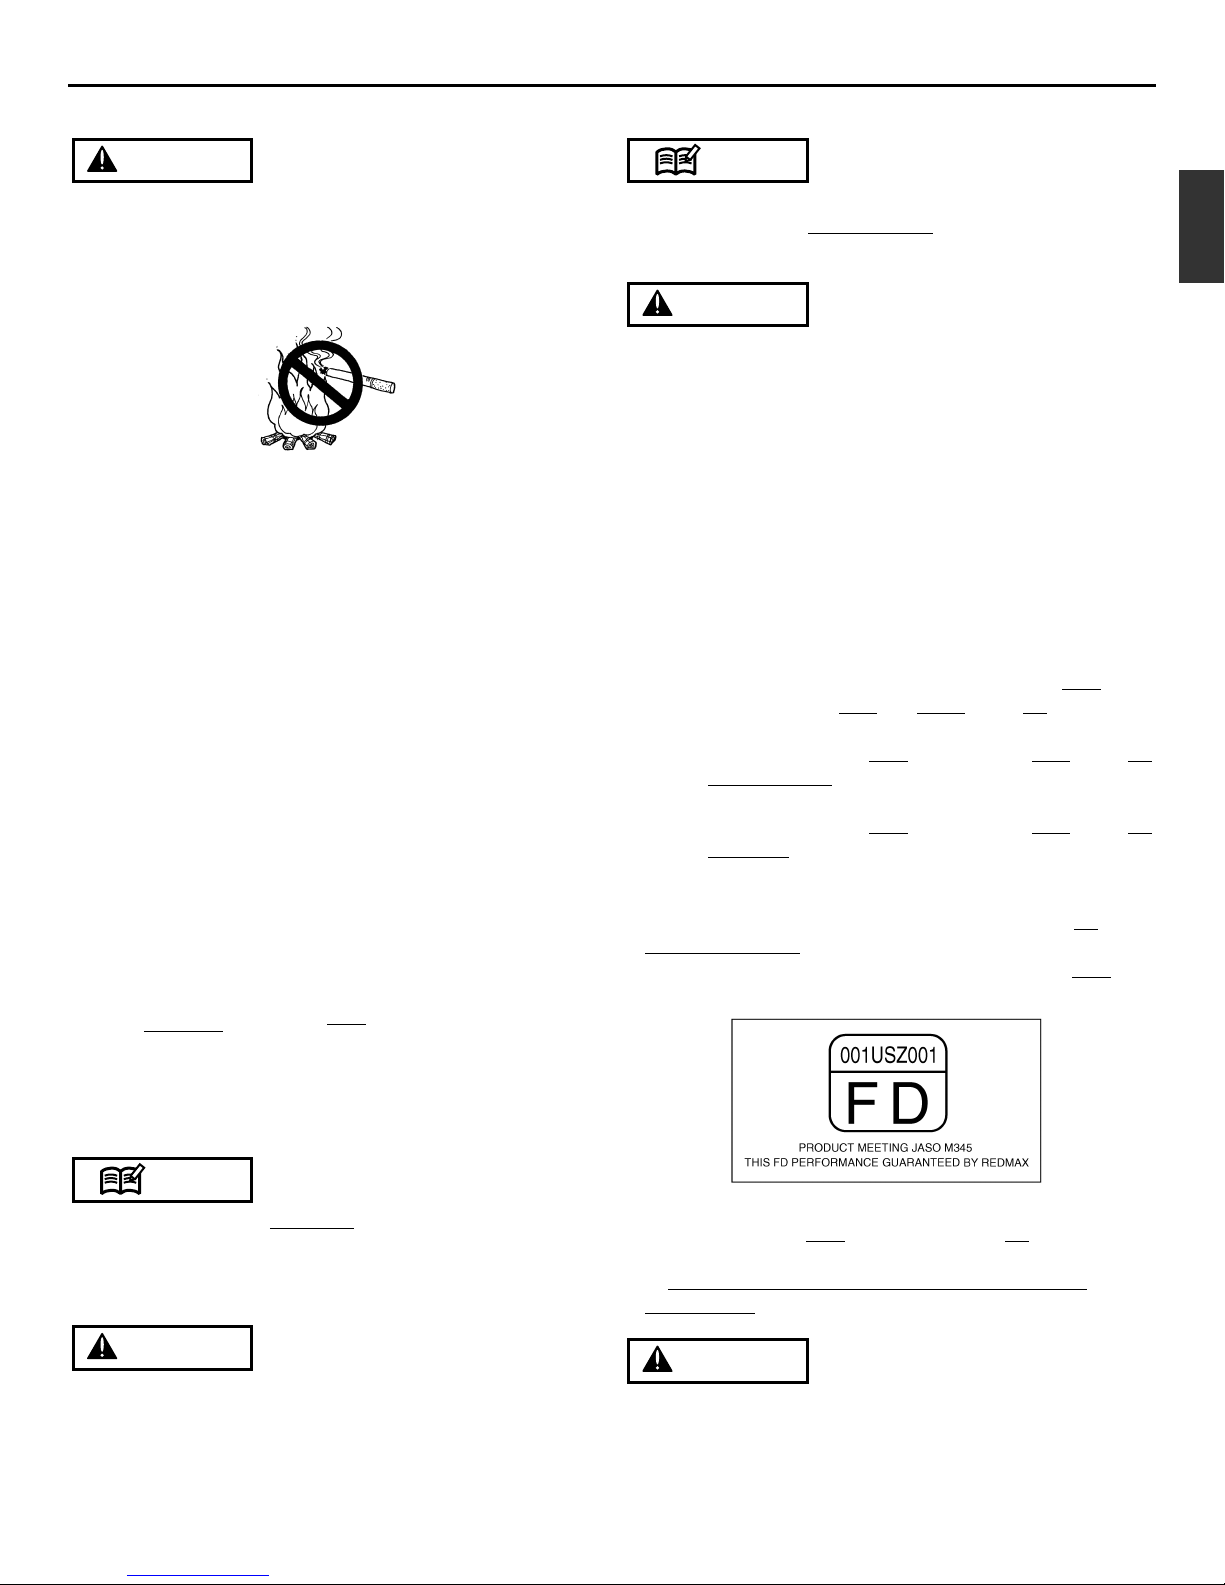
• If the oil is registered with JASO, the JASO Logo with FD
and
registration number
will be displayed on the container. The
highest JASO rating is "FD", which equals the ISO-L-EGD
rating. Lower ratings are "FC", "FB", and "FA".
• Engine problems due to inadequate lubrication caused by
failure to use ISO-L-EGD
certified and JASO FD registered oil
such as "MaxLife", RedMax Synthetic blend Premium 2-stroke
oil WILL VOID THE REDMAX TWO-STROKE ENGINE
WARRANTY.
• Do not use NMMA (National Marine Manufacturers
Association), BIA (Boating Industry Association), and TCW (two
cycle water cooled) oils designed for MoPeds or Outboard,
water cooled Marine Engines. Do not use API (American
Petroleum Institute), TC (Two Cycle) labeled oils. The API-TC
WARNING
6. Fuel
FUEL
• Gasoline is very flammable. Avoid smoking or bringing any
flame or sparks near fuel. Make sure to stop the engine and
allow it cool before refueling the unit. Select outdoor bare
ground for fueling and move at least 10 ft (3 m) away from
the fueling point before starting the engine.
■ GASOLINE REQUIREMENTS
• All 2-Stroke RedMax Products are powered by RedMax
Professional-Commercial Duty, Hi-Performance, Hi-RPM, Air
Cooled 2-Stroke engines.
RedMax – Hi-Performance 2-stroke engines produce higher HP
outputs as compared to standard Home Owner Duty or Light
Commercial Duty production engines offered by most
manufacturers.
• Exhaust emission are controlled by the fundamental engine
parameters and components (eq., carburation, ignition timing
and port timing) without addition of any major hardware or the
introduction of an inert material during combustion.
• The RedMax Engines are registered and certified with CARB
(California Air Resources Board) and EPA (Environmental
Protection Agency) to operate on CLEAN Mid-grade 89 octane
or Premium, unleaded (lead-free) gasoline and RedMax AirCooled "Max Life", Synthetic blend Premium two-stroke engine
oil mixed at 50:1 ratio.
• Unleaded gasoline is recommended to reduce the
contamination of the air for the sake of your health and the
environment.
• This Hi-Performance Air Cooled 2-stroke Engine requires the
use of Minimum
89 Octane (Mid grade or Premium)
clean gasoline. Gasoline may contain maximum of 10% Ethanol
(grain alcohol) or up to 15% MTBE (Methyl tertiary-butyl ether).
Gasoline containing Methanol (Wood Alcohol) is NOT
approved.
• IF octane rating of the Mid Grade
gasoline in your area is lower
than 89 Octane use Premium Unleaded Gasoline. The majority
of all 2-stroke engine manufacturers in the USA and Canada
recommend using gasoline with 89 Octane or higher.
• Gasoline with an octane rating lower than 89 will greatly
increase the engines operating temperature. Low octane
gasoline will cause detonation (knock) resulting in piston
seizures and major internal engine components damage.
• Poor quality gasolines or oils may damage sealing rings, fuel
WARNING
[ R+M ]
2
WARNING
NOTE
WARNING
NOTE
Page 12
US-10
CHT220/CHT220L
6. Fuel
test standard has been discontinued by API in 1995 and it no
longer exists.
• Gasoline/Oil mixture Storage Recommendations
Store your gasoline or gasoline/oil mixture in a cool dry area in
a tightly sealed approved container to limit the entry of moisture
and additional air (oxygen). Moisture and air cause the
development of varnish and gum, making the fuel stale. Stored
gasoline and gasoline/oil mixture ages and loses its octane
rating and volatility. Do not mix more gasoline/oil than you
intend to use in 30 days, and 60 days when fuel stabilizer is
added. RedMax Air-Cooled "Max Life" Synthetic blend
Premium two-stroke engine oil "Contains fuel stabilizer"
and
will automatically extend your gasoline/oil mixture life up to 60
days.
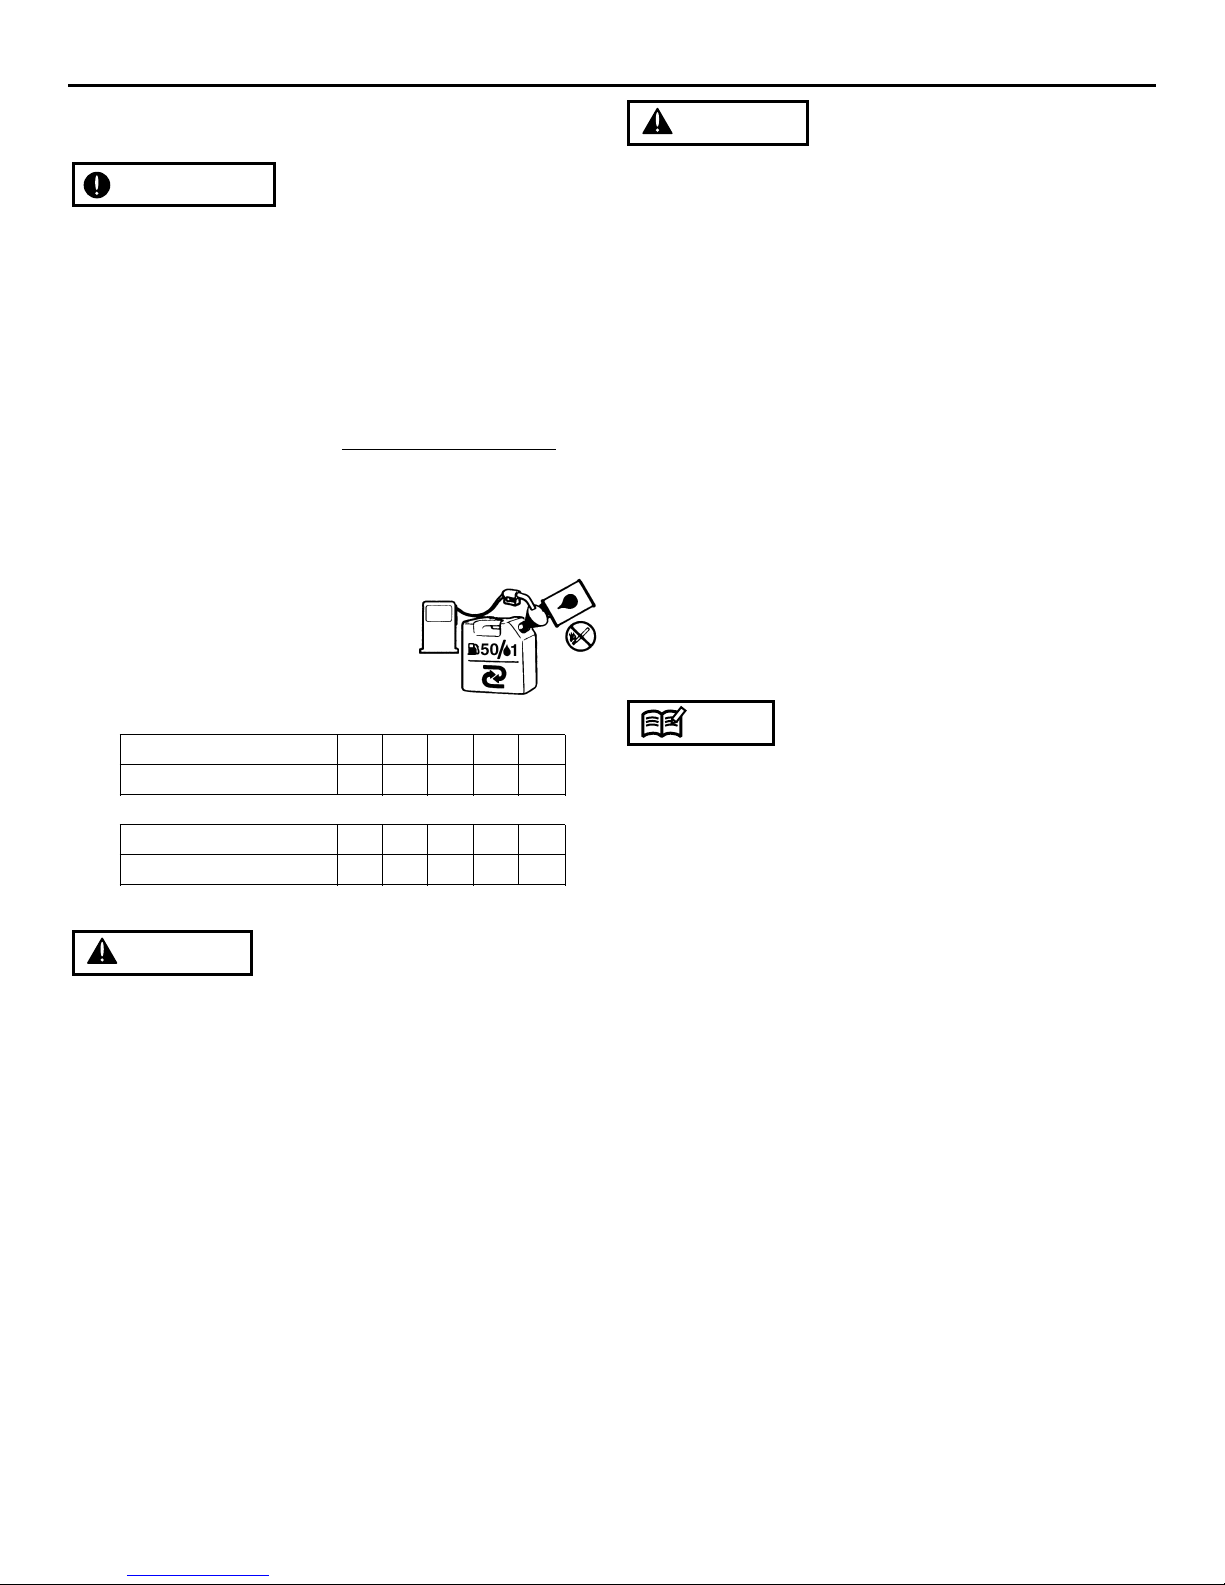
■ HOW TO MIX FUEL
RECOMMENDED MIXING RATIO
GASOLINE 50 : OIL 1
(when using RedMax Air-Cooled "Max
Life")
• Pay attention to agitation.
1. Measure out the quantities of gasoline and oil to be mixed.
2. Put some of the gasoline into a clean, approved fuel container.
3. Pour in all of the oil and agitate well for 10seconds.
4. Pour in the rest of gasoline and agitate again for at least one
minute. As some oils may be difficult to agitate depending on oil
ingredients, sufficient agitation is necessary. Be careful that, if
the agitation is insufficient, there is an increased danger of early
piston seizure due to abnormally lean mixture.
5. Place a clear indication on the outside of the container to avoid
mixing up with gasoline or other containers that dont contain oil.
6. Indicate the contents on outside of container for easy
identification.
■ FUELING THE UNIT
1. Untwist and remove the fuel cap. Rest the cap on a clean
surface.
2. Put fuel into the fuel tank to 80% of the full capacity.
3. Fasten the fuel cap securely and wipe up any fuel spillage
around the unit.
WARNING
1. Select flat and bare ground for fueling.
2. Move at least 10 feet (3 meters) away from the fueling point
before starting the engine.
3. Stop the engine before refueling the unit. At that time, be
sure to sufficiently agitate the mixed gasoline in the
container.
■ FOR YOUR ENGINE LIFE, AVOID
1. FUEL WITH NO OIL (RAW GASOLINE) – It will cause severe
damage to the internal engine parts very quickly.
2. GASOHOL – It can cause deterioration of rubber and/or plastic
parts and disruption of engine lubrication.
3. OIL FOR 4-CYCLE ENGINE USE – It can cause spark plug
fouling, exhaust port blocking, or piston ring seizure.
4. Mixed fuels which have been left unused for a period of
one month or more may clog the carburetor and result in the
engine failing to operate properly.
5. In the case of storing the product for a long period of time,
clean the fuel tank after rendering it empty. Next, Start the
engine and run the carburetor dry residual fuel.
6. In the case of scrapping the used mixed oil container, scrap it
only at an authorized depository site.
• As for details of quality assurance, read the description in the
section Limited Warranty carefully. Moreover, normal wear and
change in product with no functional influence are not covered
by the warranty. Also, be careful that, if the usage in the
instruction manual is not observed as to the mixed gasoline,
type of oil or fuel to be used. described therein, it may not be
covered by the warranty.
NOTE
50:1 MIXING CHART
GASOLINE gal. 1 2 3 4 5
2-CYCLE OIL fl.oz 2.6 5.2 7.8 10.4 13
GASOLINE liter 1 2 3 4 5
2-CYCLE OIL ml 20 40 60 80 100
IMPORTANT
WARNING
Page 13

US-11
CHT220/CHT220L
U
S
Primer bulb: Press the air purge diaphragm repeatedly
until fuel begins to fill the diaphragm (about 6 times). The
diaphragm need not be completely filled.
Starting
Hold the body of the machine on the ground using your left
hand (CAUTION! Not with your foot!). Grip the starter
handle, slowly pull out the cord with your right hand until
you feel some resistance (the starter pawls grip), now
quickly and powerfully pull the cord. Never wrap the
starter cord around your hand.
Push the choke control back to its original position as soon
as the engine fires, and continue trying to start until the
engine starts.
CAUTION! When the choke control is pushed back to its
original position, the engine runs at a heightened speed,
the so called start throttle position, and the blades then
move. Start throttle position is released by throttling using
the throttle lever.
CAUTION! Do not pull the starter cord all the way out and
do not let go of the starter handle when the cord is fully
extended. This can damage the machine.
7. Starting and stopping
■ CHECK BEFORE STARTING
• Inspect the working area. Remove any objects that could
be thrown out.
• Check the cutting attachment. Never use blades that are
dull, cracked or damaged.
• Check that the machine is in perfect working order.
Check that all nuts and screws are tight.
• Make sure the gear housing is lubricated correctly.
See instructions under the heading Gear housing.
• Check that the cutting attachment always stops when
the engine is idling.
• Only use the machine for the purpose it was intended
for.
• Make sure that the handle and safety features are in
good working order. Never use a machine that lacks a
part or has been modified outside its specifications.
• All covers must be correctly fitted and undamaged
before you start the machine.
■ STARTING AND STOPPING
WARNING! The complete gear housing must
be fitted before the machine is started,
otherwise the clutch may loosen and cause
personal injury.
Always move the machine about 3 metres
from the refuelling position before starting.
Place the machine on a firm surface.
Remember that the blades may start to move
when the engine is started. Make sure the
blades cannot come into contact with any
object. Make sure that no unauthorised
persons are in the working area, otherwise
there is a risk of serious personal injury. The
safety distance is 15metres.
Cold engine
Choke:
Set the choke control in the choke position.
Page 14
US-12
CHT220/CHT220L
7. Starting and stopping
Warm engine
Hold the body of the machine on the ground using your left
hand (CAUTION! Not with your foot!). Grip the starter
handle, slowly pull out the cord with your right hand until
you feel some resistance (the starter pawls grip), now
quickly and powerfully pull the cord. Never wrap the
starter cord around your hand.
Stopping
The engine is switched off by moving the stop switch to the
stop position.
CAUTION!
The stop switch automatically returns to the start position.In
order to prevent unintentional starting, the spark plug cap
must be removed from the spark plug when assembling,
checking and/or performing maintenance.
■ GENERAL WORKING INSTRUCTIONS
IMPORTANT!
This section takes up the basic safety precautions for
working with a hedge trimmer.
If you encounter a situation where you are uncertain how
to proceed you should ask an expert. Contact your
dealer or your service workshop.
Avoid all usage which you consider to be beyond your
capability.
WARNING! The machine can cause serious
personal injury. Read the safety instructions
carefully. Learn how to use the machine.
WARNING! Cutting tool. Do not touch the
tool without first switching off the engine.
Safety instructions regarding the surroundings
• Never allow children to use the machine.
• Observe your surroundings and make sure that there is
no risk of people or animals coming into contact with the
cutting equipment.
• Ensure that no-one comes closer than 15 m while you
are working.
• Never allow anyone else to use the machine without first
ensuring that they have understood the contents of the
operator's manual.
• Never work from a ladder, stool or any other raised
position that is not fully secured.
• Keep in mind that the operator is responsible for
accidents or hazards occuring to other people or their
property.
Safety instructions while working
• Always ensure you have a safe and stable working
position.
• Never leave the machine unsupervised with the motor
running.
• Always use both hands to hold the machine. Hold the
machine in front of your body.
8. Working techniques
Page 15
US-13
CHT220/CHT220L
U
S
8. Working techniques
cutting attachment when the machine is not in use.
• Make sure the cutting attachment has stopped before
cleaning, carrying out repairs or an inspection.
Disconnect the HT lead from the spark plug.
• Always wear heavy-duty gloves when repairing the
cutting attachment. This is extremely sharp and can
easily cause cuts.
• Store the machine out of reach of children.
• Use only original spare parts for repairs.
Basic working techniques
• Work with a swinging action from the bottom upwards
when trimming sides.
• Adjust the throttle setting to suit the load.
• When trimming a hedge the engine should always face
away from the hedge.
• Hold the machine as close to your body as possible to
get the best balance.
• Make sure that the tip does not touch the ground.
• Do not rush the work, but work steadily until all the
branches have been cut back cleanly.
CHT220L
The hedge trimmer's rear handle can be set in five
positions by pulling out the catch. See figure. When the
handle is adjusted, the hedge trimmer must be idling or not
running.
• While working the handle should always be facing
upwards irrespective of how the hedge trimmer is
directed.
• Make sure that your hands and feet do not come near
the cutting attachment when the engine is running.
• When the engine is switched off, keep your hands and
feet away from the cutting attachment until it has
stopped completely.
• Watch out for stumps of branches that can be thrown out
during cutting.
• Do not cut too close to the ground. Stones and other
objects can be thrown out.
• Check the working area for foreign objects such as
electricity cables, insects and animals, etc, or other
objects that could damage the cutting attachment, such
as metal items.
• If any foreign object is hit or if vibrations occur stop the
machine immediately. Disconnect the HT lead from the
spark plug. Check that the machine is not damaged.
Repair any damage.
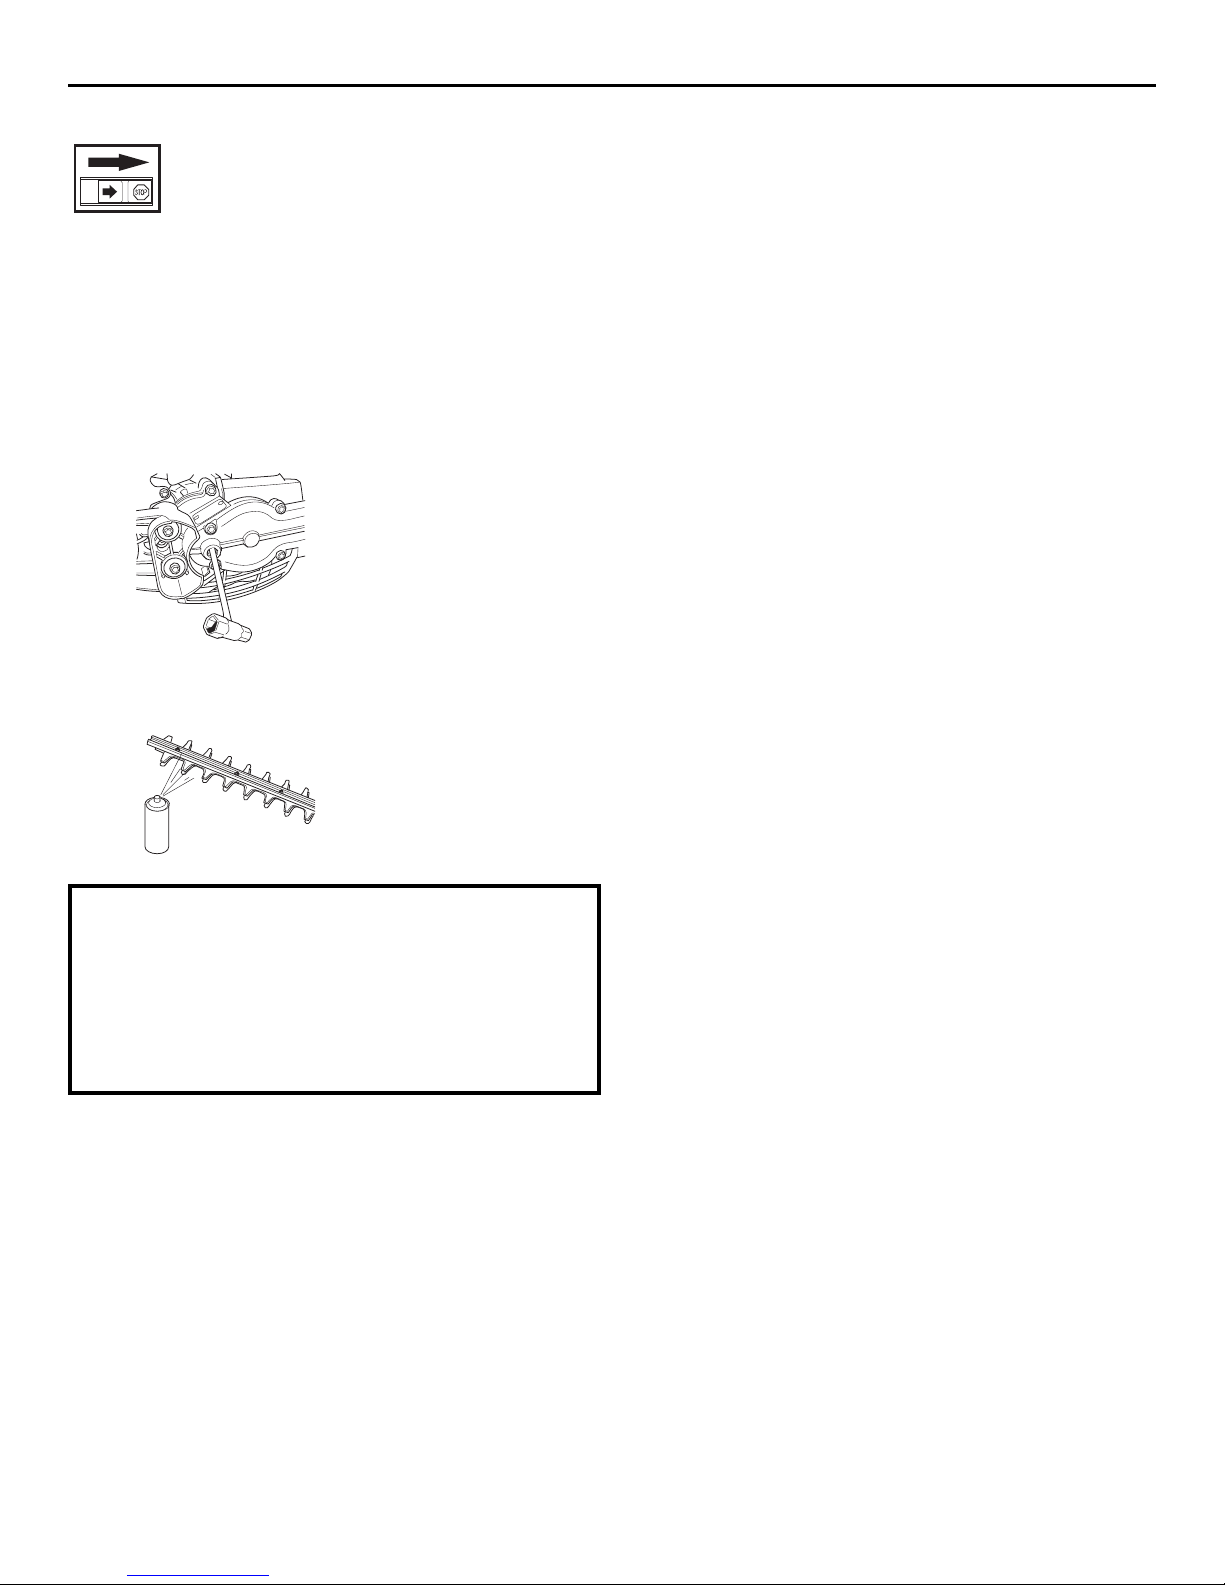
• If anything jams in the blades while you are working,
switch off the engine and wait until it has stopped
completely before cleaning the blades. Disconnect the
HT lead from the spark plug.
If the blades get stuck, they can be loosened by sticking
the combination spanner into the gear housing. Remove
the lubricant plug and stick the combination spanner into
the gearing and turn it back and forth.
Safety instructions after completing work
• The transport guard should always be fitted to the
Page 16
US-14
CHT220/CHT220L
9. Maintenance
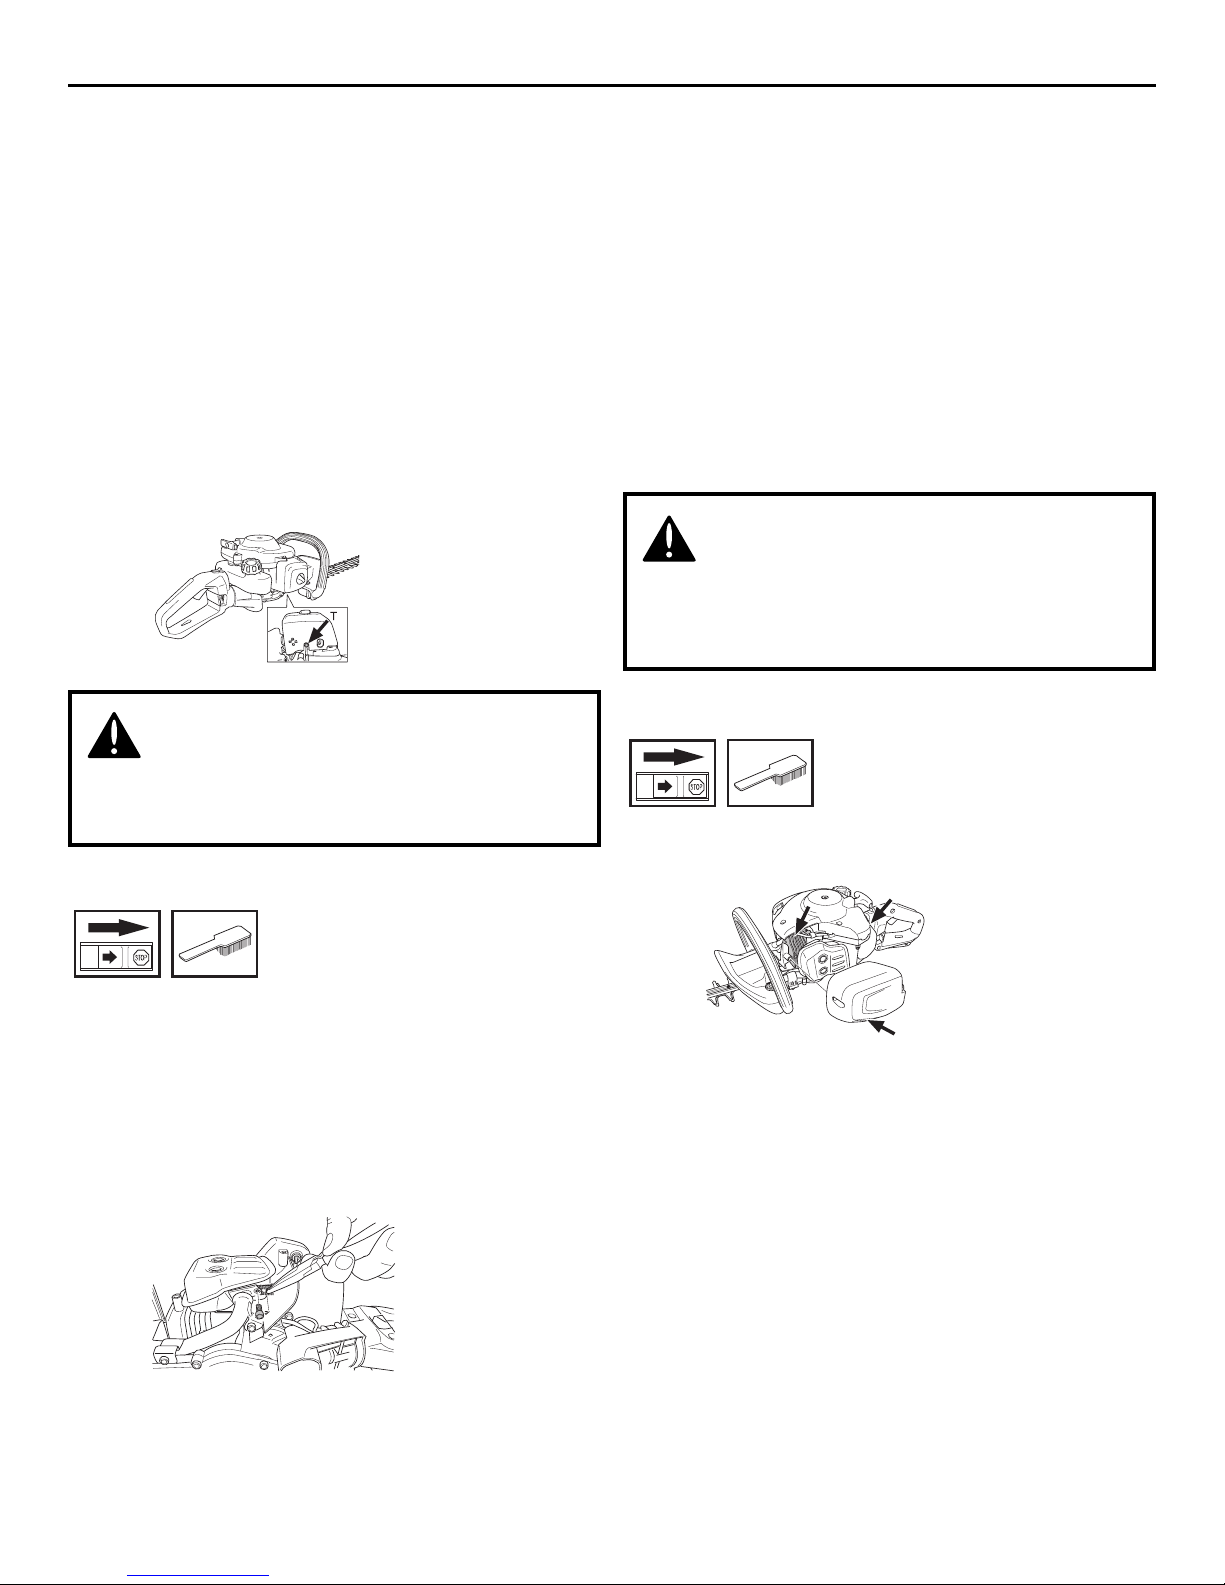
■ CARBURETOR
Adjustment of the idle speed
Before any adjustments are made, make sure that the air
filter is clean and the air filter cover is fitted. Make sure the
start throttle position is disengaged.
Adjust the idle speed using the idle adjustment screw T, if it
is necessary to readjust. First turn the T screw clockwise
until the cutting attachment starts to move. Then turn the
screw anticlockwise until the cutting attachment stops.
The idle speed is correctly adjusted when the engine runs
smoothly in every position. The idle speed should also be
well below the speed at which the cutting attachment starts
to move.
Rec. idle speed: See the Technical data section.
WARNING! If the idle speed cannot be
adjusted so that the cutting attachment
stops, contact your dealer/service workshop.
Do not use the machine until it has been
correctly adjusted or repaired.
■ MUFFLER
CAUTION! Some mufflers are fitted with a catalytic
converter. See chapter on Technical data to see whether
your machine is fitted with a catalytic converter.
The muffler is designed to reduce the noise level and to
direct the exhaust gases away from the operator. The
exhaust gases are hot and can contain sparks, which may
cause fire if directed against dry and combustible
material.
Some mufflers are equipped with a special spark arrestor
mesh. If your machine has this type of muffler, the mesh
must be cleaned. This is best done with a wire brush.
On mufflers without a catalytic converter, the mesh should
be cleaned or replaced if necessary once a week. If the
mesh is damaged it must be replaced. If the mesh is
frequently blocked, this can be a sign that the carburetor is
incorrectly adjusted or that too much oil has been mixed
with the petrol.
On mufflers fitted with a catalytic converter, the mesh must
be checked, and if necessary cleaned, monthly. If the mesh
is damaged it must be replaced. If the screen is frequently
blocked, this can be a sign that the performance of the
catalytic converter is impaired.
Contact your dealer to inspect the muffler. A blocked
screen will cause the machine to overheat and result in
damage to the cylinder and piston.
CAUTION! Never use a machine with a defective muffler.
WARNING! Mufflers fitted with catalytic
converters get very hot during use and
remain so for some time after stopping. This
also applies at idle speed. Contact can result
in burns to the skin.
Remember the risk of fire!
■ COOLING SYSTEM
To keep the working temperature as low as possible the
machine is equipped with a cooling system.
The cooling system consists of:
1 Cooling fins on the cylinder.
2 Cylinder cover (directs cold air over the cylinder).
3 Air intake through the crankcase (inside the tank).
Clean the cooling system with a brush once a week,more
often in demanding conditions. A dirty or blocked cooling
system results in the machine overheating which causes
damage to the piston and cylinder.
Page 17
US-15
CHT220/CHT220L
U
S
9. Maintenance
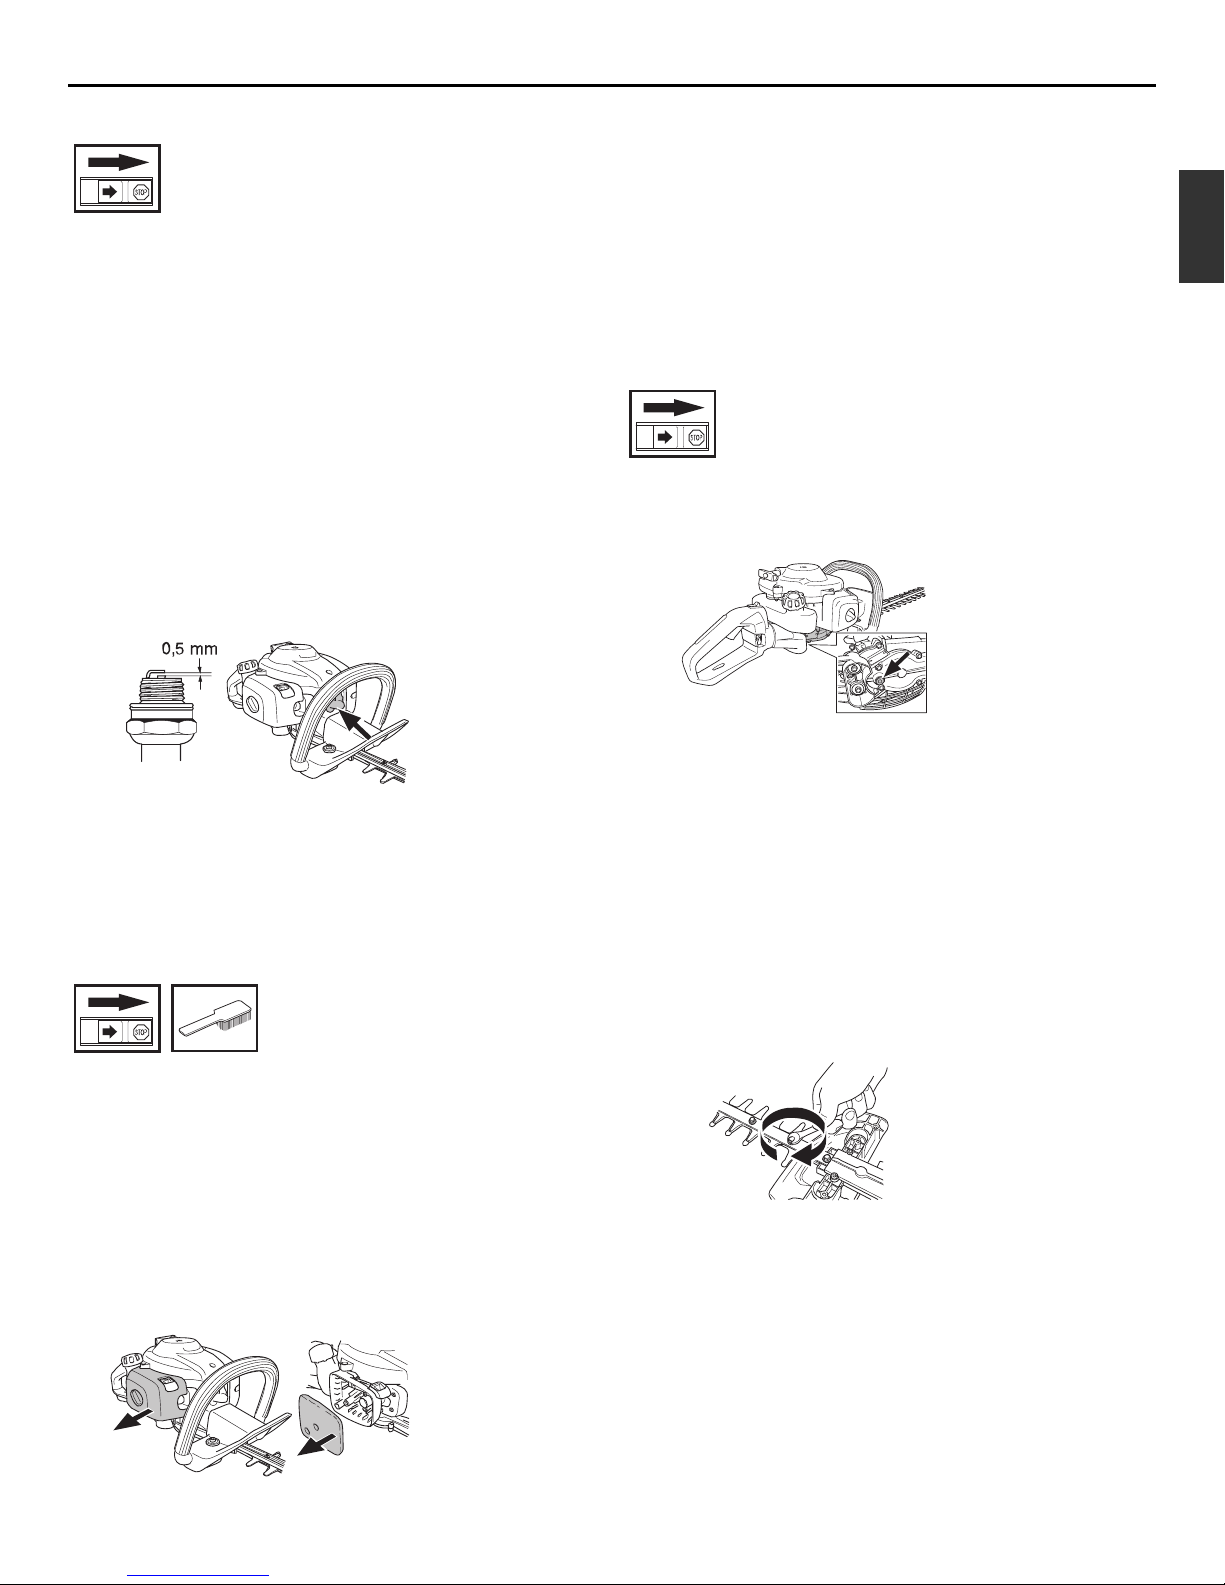
■ SPARK PLUG
The spark plug condition is influenced by:
• Incorrect carburetor adjustment.
• An incorrect fuel mixture (too much or incorrect type of
oil).
• A dirty air filter.
These factors cause deposits on the spark plug electrodes,
which may result in operating problems and starting
difficulties.
If the machine is low on power, difficult to start or runs
poorly at idle speed: always check the spark plug first
before taking any further action. If the spark plug is dirty,
clean it and check that the electrode gap is 0,5 mm
(0,020"). The spark plug should be replaced after about a
month in operation or earlier if necessary.
CAUTION! Always use the recommended spark plug type!
Use of the wrong spark plug can damage the
piston/cylinder. Check that the spark plug is fitted with a
suppressor.
■ AIR FILTER
The air filter must be regularly cleaned to remove dust and
dirt in order to avoid:
• Carburetor malfunctions
• Starting problems
• Loss of engine power
• Unnecessary wear to engine parts
• Excessive fuel consumption.
Clean the filter every 25 hours, or more regularly if
conditions are exceptionally dusty.
Cleaning the air filter
Remove the air filter cover and take out the filter. Wash it
clean in warm, soapy water. Allow the filter to dry and then
oil it in according to the instructions.
An air filter that has been in use for a long time cannot be
cleaned completely. The filter must therefore be replaced
with a new one at regular intervals. A damaged air filter
must always be replaced.
■ GEAR
There is a plug for filling lubricant on the gear housing.
Use the grease tube to fill with grease and repeat every 25
hours. Use RedMax special grease.
CAUTION! The gear housing must not be filled completely
with grease. The grease expands as the machine heats up
during operation. If the gear housing was completely filled
with grease it could damage the seals and lead to leakage
of grease.
The grease in the bevel gear does not normally need to be
changed except if repairs are carried out.
■ CUTTING UNIT
Check that the cutting units' screws are fitted correctly.
Tighten them with a tightening torque of 7-10 Nm.
Page 18
US-16
CHT220/CHT220L
9. Maintenance
■ CLEANING AND LUBRICATION
Clean any resin and plant residue from the blades using
cleaning agent 531 00 75-13 (UL22) before and after using
the machine.
Check that the blade edges are not damaged or deformed.
File away any burrs.
Check that the blades move freely. Remove the lubrication
plug in the gear housing and stick in the combination
spanner and turn back and forth.
Lubricate the blade bars with special grease, part no.
531 00 75-12 (UL 21) before long periods of storage.
IMPORTANT! Use only RedMax replacement parts.
Use of other brands of replacement parts can
cause damage to your unit or injury to the operator
or others. Your warranty does not cover damage or
liability caused by the use of accessories and/or
attachments not specifically recommended by
RedMax.
Page 19

US-17
CHT220/CHT220L
U
S
9. Maintenance
■ MAINTENANCE SCHEDULE
The following is a list of the maintenance that must be performed on the machine. Most of the items are described in the
Maintenance section. The user must only carry out the maintenance and service work described in this manual. More
extensive work must be carried out by an authorized service workshop.
Clean the outside of the machine.
Make sure the throttle trigger lock and the throttle function correctly
from a safety point of view.
In order to reduce the risk of fire, dirt, leaves and surplus lubricant, etc
must be cleaned from the muffler, exhaust pipe and engine.
Check that the stop switch works correctly.
Check that the blades do not move when the engine is idling.
Check that the blades are undamaged and show no signs of cracking
or other damage. Replace the blades if necessary.
Check that the blade guard is not damaged or distorted. Replace the
blade if the blade guard is bent or damaged.
Replace the cutting unit if it is bent or damaged.
Check that the hand guard is not damaged. Replace the guard if
damaged.
Check that nuts and screws are tight.
Check that there are no fuel leaks from the engine, tank or fuel lines.
Clean the air filter.
Clean more often if conditions are exceptionally dusty.
Check the starter and starter cord.
Check that the vibration damping elements are not damaged.
Clean the outside of the spark plug. Remove it and check the
electrode gap. Adjust the gap to 0.5 mm (.20"), or replace the spark
plug. Check that the spark plug is fitted with a suppressor.
Clean the machine's cooling system.
Clean the outside of the carburetor and the space around it.
Fill the gear housing with grease. This should be carried out
approximately every 25 working hours.
Check that the screws that hold the blades together are correctly
tightened.
Check and clean the spark arrestor screen on the muffler (only applies
to mufflers fitted with a catalytic converter).
Clean the inside of the fuel tank.
Check the inside of the fuel filter for any dirt or if the fuel hose has any
cracks or other defects. Replace if necessary.
Check all cables and connections.
Check the clutch, clutch springs and the clutch drum for wear. Replace
if necessary by an authorized service workshop.
Replace the spark plug. Check that the spark plug is fitted with a
suppressor.
After 40 After 100
Maintenance Before use:
hours in use hours in use
After each time the machine is used
(25 tim).
X
X
X
X
X
X
X
X
X
X
X
X
X
X
X
X
X
X
X
X
X
X
X
Page 20

US-18
CHT220/CHT220L
1. Oil the blade to prevent rust.
2. Empty the fuel tank and put the cap
back on.
3. Remove the spark plug, pour a small
amount of oil into the cylinder.
4. Rotate the crankshaft several times
using the starting rope in order to
distribute the oil. Put the spark plug
back in.
5. Wrap the engine with a plastic sheet.
6. Store the trimmer in a dry place,
preferably not in direct contact with the
floor and away from heat sources.
10. Storage
11. Disposal
• When disposing your machine, fuel or
oil for the machine, be sure to allow
your local regulations.
12. Troubleshooting guide
Case 1. Starting failure
CHECK PROBABLE CAUSES ACTION
fuel tank ➞ incorrect fuel ➞ drain it and with correct fuel
fuel filter ➞ fuel filter is clogged ➞ clean
carburetor adjustment screw ➞ out of normal range ➞ adjust to normal range
sparking (no spark) ➞ spark plug is fouled/wet ➞ clean/dry
➞ plug gap is incorrect ➞ correct (GAP: 0.5 mm)
spark plug ➞ disconnected ➞ retighten
Case 2. Engine starts but does not keep running/Hard re-starting.
CHECK PROBABLE CAUSES ACTION
fuel tank ➞ incorrect fuel or staled fuel ➞ drain it and with correct fuel
carburetor adjustment screw ➞ out of normal range ➞ adjust to normal range
muffler,cylinder (exhaust port) ➞ carbon is built-up ➞ wipe away
air cleaner ➞ clogged with dust ➞ wash
cylinder fin, fan cover ➞ clogged with dust ➞ clean
When your unit seems to need further service, please consult with our service shop in your area.
Page 21

US-19
CHT220/CHT220L
U
S
The EPA (U.S. Environmental Protection Agency), CARB (California Air Resources Board), Environment
Canada and RedMax are pleased to explain the emissions control system's warranty on your 2009 and later
small off-road engine. In U.S. and Canada, new equipment that use small off-road engines must be designed,
built, and equipped to meet the applicable Federal or Californian stringent anti-smog standards. RedMax must
warrant the emissions control system on your small off-road engine for the period listed below provided there
has been no abuse, neglect or improper maintenance of your equipment. Your emissions control system may
include parts such as carburetor, ignition system, catalytic converter, fuel tank, filters and other associated
components. Also, included may be hoses, belts, connectors, sensors, and other emission-related assemblies.
Where a warrantable condition exists, RedMax will repair your small off-road engine at no cost to you including
diagnosis, parts and labor.
MANUFACTURER'S WARRANTY COVERAGE
This emissions control system is warranted for two years or if the product qualifies for a longer warranty period
resulting from the type of use, that period shall prevail. If any emissions-related part on your equipment is
defective, the part will be repaired or replaced by RedMax.
OWNER'S WARRANTY RESPONSIBILITIES
As the small off-road engine owner, you are responsible for performance of the required maintenance listed in
your Owner's Manual. RedMax recommends that you retain all receipts covering maintenance on your small offroad engine, but RedMax cannot deny warranty solely for the lack of receipts or your failure to ensure the
performance of all scheduled maintenance. As the small off-road engine owner, you should however be aware
that the RedMax may deny you warranty coverage if your small off-road engine or a part has failed due to
abuse, neglect, or improper maintenance or unapproved modifications.
You are responsible for presenting your small off-road engine to a RedMax distribution center or service center
as soon as the problem exists. The warranty repairs should be completed in a reasonable amount of time, not to
exceed 30 days. If you have any questions regarding your warranty coverage, you should contact RedMax at 1800-291-8251 or via e-mail at service@redmax.com.
WARRANTY COMMENCEMENT DATE
The warranty period begins on the date the engine or equipment is delivered to an ultimate purchaser.
LENGTH OF COVERAGE
RedMax warrants to the ultimate purchaser and each subsequent owner that the engine or equipment is
designed, built, and equipped so as to conform with all applicable regulations adopted by EPA and CARB, and
is free from defects in materials and workmanship that causes the failure of a warranted part for a period of two
years.
WHAT IS COVERED
REPAIR OR REPLACEMENT OF PARTS Repair or replacement of any warranted part under the warranty
must be performed at no charge to the owner at a warranty station. Warranty services or repairs will be provided
at all RedMax distribution centers that are franchised to service the subject engines. Throughout the emissions
warranty period of two years, RedMax must maintain a supply of warranted parts sufficient to meet the expected
demand for such parts.
WARRANTY PERIOD Any warranted part that is scheduled for replacement as required in the maintenance
schedule, is warranted for the period of time prior to the first scheduled replacement point for that part. If the
part fails prior to the first scheduled replacement, the part will be repaired or replaced by RedMax at no cost.
Any such part repaired or replaced under warranty is warranted for the remainder of the period prior to the first
scheduled replacement point for the part. Any warranted part that is not scheduled for replacement as required
in the maintenance schedule, is warranted for two years or if the product qualifies for a longer warranty period
resulting from the type of use, that period shall prevail. If any such part fails during the period of warranty
coverage, it will be repaired and replaced by RedMax at no cost. Any such part repaired or replaced under the
FEDERAL AND CALIFORNIA EMISSIONS CONTROL WARRANTY
STATEMENT YOUR WARRANTY RIGHTS AND OBLIGATIONS
Page 22

US-20
CHT220/CHT220L
warranty is warranted for the remaining warranty period. Any warranted part that is scheduled only for regular
inspection in the maintenance schedule will be warranted for a period of two years. A statement in such written
instructions to the effect of "repair or replace as necessary" will not reduce the period of warranty coverage. Any
such part repaired or replaced under warranty will be warranted for the remaining warranty period.
DIAGNOSIS The owner must not be charged for diagnostic labor that leads to the determination that a
warranted part is in fact defective, provided that such diagnostic work is performed at a warranty station.
CONSEQUENTIAL DAMAGES RedMax is liable for damages to other engine components proximately caused
by a failure under warranty of any warranted part.
EMISSION WARRANTY PARTS LIST
1. Air-induction system*
2. Fuel system*
3. Ignition system*
4. Fuel tank, cap and lines as applicable*
*some components only covered up to point specified by maintenance schedule
WHAT IS NOT COVERED
All failures caused by abuse, neglect or improper maintenance are not covered.
ADD-ON OR MODIFIED PARTS
Add-on or modified parts that are not exempted by CARB or EPA may not be used. The use of any nonexempted add-on or modified parts will be grounds for disallowing a warranty claim. RedMax will not be liable to
warrant failures of warranted parts caused by the use of a non-exempted add-on or modified part.
HOW TO FILE A CLAIM
If you have any questions regarding your warranty rights and responsibilities, you should contact your nearest
authorized servicing dealer or contact RedMax at 1-800-291-8251 or via e-mail at service@redmax.com.
WHERE TO GET WARRANTY SERVICE
Warranty services or repairs are provided through all RedMax authorized servicing dealers.
MAINTENANCE, REPLACEMENT AND REPAIR OF EMISSION-RELATED PARTS
Any replacement part may be used in the performance of any warranty maintenance or repairs and must be
provided without charge to the owner. Such use will not reduce the warranty obligations of the manufacturer.
MAINTENANCE STATEMENT
The owner is responsible for the performance of all required maintenance, as defined in the operator's manual.
Page 23

US-21
CHT220/CHT220L
U
S
RedMax
STANDARD LIMITED WARRANTY STATEMENT
ALL Products Sold on or after 1/01/2010
All RedMax Brand Products
RedMax Limited Warranty, provides to the ORIGINAL
retail purchaser that this RedMax product is free from DEFECTS in MATERIAL and
WORKMANSHIP
under normal use and maintenance from the date of retail purchase. RedMax agrees to repair or replace at our discretion,
any defective product, free of charge at any authorized RedMax servicing dealer using original RedMax replacement parts, within the listed
below application time periods, limitations and exclusions. THIS LIMITED WARRANTY IS EXTENDED TO THE FIRST, ORIGINAL RETAIL
PURCHASER ONLY, AND IT IS NOT TRANSFERABLE TO SUBSEQUENT OWNERS. This warranty is separate from the Emission Control
Warranty Statement supplied with your new product. Please consult your Emission Control Warranty Statement for details.
PRODUCT WARRANTY PERIOD
PRODUCTS PURCHASED FOR NON-INCOME PRODUCING USE (Home Owner)
Complete units purchased for residential, or non-income producing use, will be covered by this limited warranty for two (2) years from the date
of retail
purchase. The electronic ignition module, the brush cutter/trimmer drive shafts, are warranted for the life* of the product on parts only.
PRODUCTS PURCHASED FOR COMMERCIAL, INSTITUTIONAL, AGRICULTURAL, INDUSTRIAL, OR INCOME
PRODUCING USE
Complete units used for commercial, institutional, agricultural, industrial, or income producing use will be covered by this limited warranty for a
period of two (2) years, from the date of retail
purchase. Chainsaws, BT280, BC280, TR2301S/2350S, CHT2200/2250, and Sprayers are
covered for one (1) year. Exceptions are Models: GZ400, BT250, BC250, HB250/280, and HE250F, CHT220/220L. These EXCEPTIONS
are
covered for ninety (90) days. The electronic ignition module and the brush cutter/trimmer drive shafts, are warranted for the life* of the product
on parts only.
RENTAL APPLICATION
Complete units for rental use will be covered against defects in material and workmanship for a period of 90 days from the date of purchase.
The following carry No Rental Warranty. They are: GZ400, BT250, BC250, TR2301S/2350S, HB250/280, CHT2200/2250 and
HE250F, CHT220/220L. These products have NO Rental Warranty.
RedMax liability under the "Lifetime" coverage is limited to furnishing parts only after the Standard Warranty coverage expires as specified
under the PRODUCT WARRANTY PERIOD section of this warranty statement. "Lifetime" free of charge parts is only for a period of seven (7)
years after the last date of the complete unit's final production.
This warranty does not cover damage other than that resulting from defects in material or workmanship
. RedMax DOES NOT OFFER AN
OVER THE COUNTER EXCHANGE PROGRAM. Any product sold, serviced or re-built by other than a RedMax Authorized Servicing Dealer, is
sold as is without
RedMax standard warranty coverage. Repair parts and accessories replaced under this warranty are warranted only for the
BALANCE
of the original unit or accessory warranty period.
All parts or products replaced under warranty become the property of RedMax.
PURCHASED REPAIR PARTS, SHORT BLOCKS AND ACCESSORIES
These items carry a 90-day residential, or non-income producing use, and 90-day commercial, institutional, agricultural, industrial, income
producing, or rental application warranty.
CUTTING ATTACHMENTS SUPPLIED WITH PRODUCTS
All original equipment cutting attachments used in residential, or non-income producing use, such as, but not limited to, bars, chains, sprockets,
blades, nylon trimmer heads, will be covered for failures due to defects in material or workmanship for a period of 60 days from the original
product purchase date. Any misuse from contact with, rocks, or other non-approved materials and/or structures is not covered by this warranty.
When used in a commercial, institutional, agricultural, industrial, income producing or rental application, the cutting attachment warranty is for 30
days.
All Maxtreme Series, Split Shaft attachments carry the same warranty duration as the units they are designed to fit.
DISCLAIMER OF IMPLIED WARRANTIES
Any implied warranty is limited to the duration of the limited warranty. Otherwise, this limited warranty is in lieu of all other expressed or implied
warranties, including any warranty of FITNESS FOR A PARTICULAR PURPOSE OR USE and any implied warranty of MERCHANTABILITY
otherwise applicable to this product. RedMax and its affiliated companies shall not be liable for any special incidental or consequential damage,
including lost profits. There are no warranties extended other than as provided herein. This warranty may be modified only by RedMax.
ATTENTION TWO-STROKE ENGINE POWERED PRODUCT OWNERS
RedMax – Hi-Performance 2-Stroke engines produce higher HP (horse power) outputs as compared to standard Home Owner Duty or Light
Commercial Duty production engines offered by most manufacturers. To help insure trouble free performance of the unit, it is required
to use oil
which meets the ISO-L-EGD Standard per ISO/CD 13738 and one that is registered under JASO M345/FD Standards. RedMax MaxLife
™
Synthetic blend Two-Stroke Oil is a premium two-stroke oil specifically formulated to meet ISO-L-EGD (ISO/CD 13738) and JASO M345/FD
Standards. The use of un-registered
oils designed for other applications, such as for outboard motors or lawnmowers, or low RPM, low HP
output engines, can result in severe engine damage, and void your two-stroke engine warranty. This Hi-Performance Air Cooled 2-Stroke
engine requires the use of MINIMUM 89 Octane (Mid grade or Premium) clean gasoline. If octane rating of the Mid Grade gasoline is lower
than 89 octane USE Premium Unleaded Gasoline. Warning: Gasoline with octane rating lower than 89 will greatly increase engines operating
temperature. Low octane gasoline will cause detonation (knock) resulting in piston seizures and major internal engine component damage.
U S
Page 24

US-22
CHT220/CHT220L
Engine Failures caused by operating engines on gasoline with octane rating lower
than 89 are not covered by the RedMax Two-Stroke engine
warranty.
(Emission related parts only
are covered for two years, regardless of two-stroke oil used, per the statement listed in the EPA or California
Emission Defect Warranty Explanation.)
THIS WARRANTY DOES NOT INCLUDE, OR COVER DAMAGE TO THE UNIT OR ENGINE CAUSED BY:
1. Lack of lubrication or engine failure, due to the use of two-stroke oils that do not meet the ISO-L-EGD (ISO/CD 13738) and are
not
registered to meet JASO M345/FD Standards. Engine problems due to inadequate lubrication caused by failure to use an ISO-L-EGD
compliant and JASO M345/FD Registered
oil, WILL VOID the RedMax two-stroke engine warranty. RedMax MaxLife
™ Synthetic blend
Two-Stroke Oil meets the ISO-L-EGD and is registered to JASO Standard M345/FD.
2. Damage caused by use of gasohol, containing methanol (wood alcohol), or gasoline containing LESS than 89 OCTANE
. Only use
gasolines which contain 89 octane or Higher. Gasohol which contains a maximum 10% ethanol (grain alcohol) or 15% MTBE
(methyl/tertiary/butyl/ether) is also approved. The prescribed mixing ratio of gasoline to oil is 50:1 and is listed on the RedMax oil label and
covered in your operator's manual.
3. Engine damage caused by use of ether or any starting fluids. Damage caused by pressure or steam cleaning the unit.
4. Overheating and Detonation damage caused by use of spark plugs other than those meeting emissions performance requirements listed in
the Operators Manual.
5. Damage caused by tampering with engine speed governor or emission components, or running engines above specified and
recommended engine speeds as listed in your operator's manual.
6. THIS WARRANTY DOES NOT COVER DAMAGE TO THE UNIT OR ENGINE CAUSED BY:
Operation of the unit with improperly installed/removed cutting shields, guards or safety devices.
7. Damage caused by removed/damaged air filter, dirt, abrasives, salt water, moisture corrosion, rust, varnish, stale fuel, or any adverse
reaction due to incorrect storage procedures.
8. Defects, malfunctions or failures resulting from abuse, misuse, neglect, modifications, alterations, normal wear, improper servicing, use of
unauthorized attachments, including failure to provide or perform required maintenance services as prescribed in the operators manual.
Preventative maintenance as outlined in the operator's manual is the owner's/ customer's responsibility
.
9. Failures due to improper set-up, pre-delivery service or repair service by anyone other than an authorized RedMax servicing dealer during
the warranty period.
10. Certain parts and other items are not warranted
, including but not limited to: spark plugs, filters, lubricants, starter cords, sprockets, and
debris bags. Overheating or carbon scoring failures due to restricted/clogged exhaust port, blocked spark arrester screen, or combustion
chamber.
11. Set-up and pre-delivery service, engine tune-ups, including natural discoloration due to ultraviolet light.
12. Adjustments after the first (30) thirty days of purchase and beyond, such as carburetor adjustment and throttle cable adjustment.
13. Damage to gears or gear cases caused by dirt contaminated grease, use of incorrect type of gear case grease, and/or failure to comply
with recommended greasing intervals.
14. Damage caused by sprayers pumping or spraying caustic or flammable materials, lack of or broken strainers.
15. Additional damage to parts or components due to continued use after operational problem or failure occurs.
Should operational problem or failure occur, the product should not
be used, but delivered as is to an authorized RedMax Servicing Dealer.
IMPORTANT OWNER'S RESPONSIBILITY
The owner shall demonstrate reasonable care and use
, and follow preventative maintenance, storage, fuel and oil usage as prescribed in the
enclosed operator's manual. Should a product difficulty occur within the applicable warranty period, you must, at your expense, deliver or ship
your RedMax unit to an authorized RedMax Servicing Dealer only for warranty repairs and arrange for pick-up or return of your unit after the
repairs have been made. If you do not know the location of your nearest authorized RedMax Servicing Dealer, consult your telephone yellow
pages or call RedMax, at 1-800-291-8251 during the hours of 8:00 am to 5:00 pm Eastern Standard time, or visit www.RedMax.com
. Should
you require assistance or have questions concerning this Warranty Statement, you may contact us at 1-800-291-8251 during the hours of 8:00
am to 5:00 pm Eastern Standard Time or contact us through the web at www.RedMax.com
.
IMPORTANT OWNER'S RESPONSIBILITY
IT IS A CUSTOMER'S AND/OR DEALER'S RESPONSIBILITY TO COMPLETE AND RETURN WITHIN 10 DAYS OF THE DATE OF
PURCHASE, THE WARRANTY REGISTRATION CARD SUPPLIED WITH YOUR REDMAX PRODUCT.
YOUR RECEIPT OF PURCHASE INCLUDING DATE, MODEL AND ENGINE
SERIAL NUMBER MUST BE MAINTAINED AND PRESENTED
TO AN AUTHORIZED RedMax SERVICING DEALER FOR WARRANTY SERVICE. PROOF OF PURCHASE RESTS SOLELY WITH THE
OWNER-CUSTOMER. SOME STATES DO NOT ALLOW LIMITATIONS ON HOW LONG AN IMPLIED WARRANTY LASTS, SO THE ABOVE
LIMITATIONS MAY NOT APPLY TO YOU. SOME STATES DO NOT ALLOW THE EXCLUSION OR LIMITATION OF INCIDENTAL OR
CONSEQUENTIAL DAMAGES, SO THE ABOVE LIMITATIONS MAY NOT APPLY TO YOU. THIS WARRANTY GIVES YOU SPECIFIC
LEGAL RIGHTS, AND YOU MAY ALSO HAVE OTHER RIGHTS WHICH VARY FROM STATE TO STATE. THIS WARRANTY IS GIVEN ONLY
BY RedMax OUR ADRESS is, 7349 Stateville Rd. Charlotte, NC 28269
1/2010
U S
Page 25

FR-1
CHT220/CHT220L
F
R
MODE D’EMPLOI
TAILLEUSE DE HAIES
115 43 11-49 (105)
AVERTISSEMENT
AVERTISSEMENT
Les échappements du moteur de
ce produit contiennent des
produits chimiques connus par
l’Etat de Californie comme étant
responsables de cancers,
d’anomalies congénitales et
d’autres atteintes à l’appareil
reproducteur.
Avant d’utiliser cette
ce produit
,
veuillez lire attentivement ce
manuel afin de bien comprendre le
bon fonctionnement de cet
appareil.
CHT220
CHT220L
Ce système d’allumage par étincelle de véhicule
est conforme à la norme NMB-002 du Canada.
Page 26

FR-2
CHT220/CHT220L
SECURITE
Les instructions contenues dans les mises en garde
de ce mode d’emploi portant le symbole
concernent les points critiques qui doivent être pris
en considération pour éviter les blessures
corporelles graves, c’est pourquoi ces précautions
doivent être rigoureusement suivies.
■ DIFFERENTS TYPES D’AVERTISSEMENT DE CE
MODE D’EMPLOI
Les instructions repérées par ce symbole doivent être
rigoureusement suivies afin d’éviter tout accident
pouvant entraîner des blessures corporelles graves ou
la mort.
Les instructions repérées par ce symbole doivent être
suivies afin d’éviter tout incident mécanique, panne ou
endommagement de la débroussailleuse.
Remarques utilisées dans des instructions ou conseils
supplémentaires pour l’utilisation de cette
débroussailleuse.
REMARQUE
Arrêter le moteur en déplaçant l’interrupteur d’arrêt en
position d’arrêt.
REMARQUE! L'interrupteur d'arrêt se remet
automatiquement en position de démarrage. Toujours
retirer le chapeau de bougie de la bougie lors du
montage, contrôle et/ou entretien, afin d'éviter tout
démarrage accidentel.
Toujours porter des gants de protection homologués.
Un nettoyage régulier est indispensable.
Examen visuel.
Porter des lunettes protectrices ou une visière.
AVERTISSEMENT
IMPORTANT
Page 27

FR-3
CHT220/CHT220L
F
R
1. Emplacement des pieces ...................................................4
2. Fiche technique ..................................................................4
3. Symboles............................................................................5
4. Mesures de lutte contre les emissions ...............................5
5. Consignes de securite ........................................................6
6. Carburant............................................................................9
7. Démarrage et arrêt ...........................................................12
8. Techniques de travail .......................................................13
9. Entretien ...........................................................................15
10. Rangement .......................................................................19
11. Mise au rebut....................................................................19
12. Guide de localisation des pannes.....................................19
Tables des matieres
■ CONTRÔLER LES POINTS SUIVANTS AVANT LA MISE EN
MARCHE:
Lire attentivement le manuel d’utilisation.
AVERTISSEMENT! Une exposition prolongée au
bruit risque de causer des lésions auditives
permanentes. Toujours utiliser des protecteurs
d'oreille agréés.
AVERTISSEMENT! Ne jamais modifier sous aucun
prétexte la machine sans l’autorisation du
fabricant. N’utiliser que des accessoires et des
pièces d’origine.
Des modifications non-autorisées et l’emploi
d’accessoires non-homologués peuvent
provoquer des accidents graves et même mortels,
à l’utilisateur ou d’autres personnes.
AVERTISSEMENT! Un taille-haie utilisé de
manière imprudente ou inadéquate peut devenir
un outil dangereux, pouvant causer des blessures
graves voire mortelles. Il est très important de lire
et comprendre le contenu de ce mode d’emploi.
Page 28

FR-4
CHT220/CHT220L
1. Emplacement des pieces
2. Fiche technique
1 Manuel d’utilisation
2 Poignée
3 Verrou d’accélérateur
4 Bouchon du réservoir de carburant
5 Commande de starter
6 Poignée avant
7 Lame et protège-lame
8 Dispositif de protection pour le
transport
9 Capot de filtre à air
10 Pompe à carburant
11 Réservoir d’essence
12 Verrou pour la poignée CHT220L
13 Commande de l’accélération
14 Chapeau de bougie et bougie
15 Capot de cylindre
16 Poignée de lanceur
17 Bouton d’arrêt
18 Bouchon de remplissage en lubrifiant,
engrenage
19 Engrenage
20 Protège-main
21 Clé universelle
22 Tube de lubrifiant
Nom du modèlele CHT220 CHT220L
Moteur
Cylindrée, po
3
/cm
3
21,7 21,7
Alésage, po/mm 1,26/32 1,26/32
Course, po/mm 1,06/27 1,06/27
Régime de ralenti, tr/min 2900 2900
Régime d’emballement maximal recommandé, tr/min 9000 9000
Puissance moteur maxi selon ISO 8893, kW/ tr/min 0,6/7800 0,6/7800
Silencieux avec pot catalytique Oui Oui
Système d’allumage réglé en fonction du régime Oui Oui
Système d’allumage
Bougie NGK CMR6A NGK CMR6A
Écartement des électrodes, po/mm 0,02/0,5 0,02/0,5
Système de graissage/de carburant
Contenance du réservoir de carburant, pint/litres 0,3 0,3
Poids
Poids, sans carburant, lb/kg 4,7 10,8/4,9
Niveaux sonores
(voir rem. 1)
Pression acoustique équivalente au niveau des oreilles
de l’utilisateur, mesurée selon EN ISO 10517, dB(A): 93 5,7/94
Niveaux de vibrations
(voir remarque 2)
Niveaux de vibrations équivalents (ahveq) mesurés au
niveau des poignées selon EN ISO 10517, en m/s
2
.
Poignées avant/arrière: 2,9/4,9 4,1/3,6
Couteaux
Type Double tranchant Double tranchant
Longueur, mm 450 590
Vitesse des couteaux, taille/min 4050 4050
Remarque 1: Les données reportées pour le niveau de pression sonore équivalent pour la machine montrent
une dispersion statistique typique (déviation standard) de 1 dB (A).
Remarque 2: Les données reportées pour le niveau de vibrations équivalent montrent une dispersion
statistique typique (déviation standard) de 1 m/s
2
.
Page 29

FR-5
CHT220/CHT220L
F
R
3. Symboles
4. Mesures de lutte contre les emissions
AVERTISSEMENT! Un taille-haie utilisé de manière imprudente
ou inadéquate peut devenir un outil dangereux, pouvant causer
des blessures graves voire mortelles. Il est très important de lire
et comprendre le contenu de ce mode d’emploi.
Lire attentivement et bien assimiler le manuel d’utilisation avant
d’utiliser la machine.
Toujours utiliser:
• Protecteurs d’oreilles homologués
• Des protège-yeux homologués
Toujours porter des gants de protection homologués.
Utiliser des bottes ou chaussures antidérapantes et stables.
Instruction de démarrage Voir les instructions au chapitre
Démarrage et arrêt.
Les autres symboles/autocollants présents sur la machine
concernent des exigences de certification spécifiques à
certains marchés.
La période de conformité des émissions à laquelle il est fait
référence sur l’étiquette de conformité des émissions indique le
nombre d’heures de fonctionnement pour lesquelles il a été établi
que le moteur répond aux exigences fédérales en matière
d’émissions.
Une étiquette de mesures de lutte contre les émissions se trouve
sur le machine.
Page 30

FR-6
CHT220/CHT220L
5. Consignes de securite
1. RISQUE ELEVE DE BLESSURE
GRAVE. Lire ce manuel attentivement
jusqu’à une compréhension totale et
suivre toutes les instructions de sécurité
et d’utilisation. Vous devez aussi être
capable d’arrêter la débrouss-ailleuse
très vite en cas d’urgence.
2. Conserver ce mode d’emploi à portée
de la main pour le consulter au moindre
doute. Si une question reste sans
réponse, contacter le revendeur où
vous avez acheté la débroussailleuse.
3. Ne pas oublier de donner le manuel
avec la machine en cas de revente ou
de prêt.
4. Ne pas laisser des enfants ou toute
personne incapable de comprendre les
instructions, utiliser cette machine.
■ CONDITIONS DE TRAVAIL
1. Lors de l’utilisation de cette machine, il est
nécessaire de porter des vêtements
appropriés et des équipements de
sécurité.
(1) Casque
(2) Casque antibruit
(3) Lunettes ou masque de protection
(4) Gants de travail épais
(5) Chaussures de sécurité à semelle
antidérapante
2. Les objets suivants doivent être emportés
sur le lieu de travail.
(1) Les outils fournis avec la machine
(2) Une réserve de carburant
(3) Une lame de rechange
(4) Matériel pour délimiter la zone de travail
(5) Un sifflet (pour collaborateur ou en cas
d’urgence)
(6) Une hache ou une scie (pour enlever
les obstacles)
(7) Boîte de secours
3. Ne pas porter de vêtements larges, de
short, de bijoux, de sandales ou travailler
pieds nus. Ne pas porter quoi que ce soit
pouvant être happé par les pièces en
mouvement de la machine. Porter les
cheveux longs noués au-dessus des
épaules.
■ CONDITIONS DE TRAVAIL
1. Ne jamais mettre la machine en marche à
l’intérieur d’une pièce ou d’un bâtiment.
Les gaz d’échappement contiennent du
monoxyde de carbone dangereux.
2. Ne jamais utiliser la machine dans les
conditions suivantes :
a. Lorsque le sol est glissant ou lorsqu’il
est impossible de se maintenir dans
une position correcte.
b. La nuit, par temps de brouillard ou
lorsque la visibilité ou le champ de
vision empêche de voir clairement la
zone de travail.
c. Pendant les averses, les orages avec
éclairs, par grands vents ou toute autre
condition climatique rendant l’utilisation
de la machine dangereuse.
■ PLAN DE TRAVAIL
1. Ne jamais utiliser la machine sous
l’influence de l’alcool ou en état de
faiblesse due à la fatigue, au manque de
sommeil, à la prise de médicament ou à
tout autre moment où l’on n’est pas
réellement capable de l’utiliser
correctement et en toute sécurité.
2. Lors de l’élaboration du plan de travail,
prévoir suffisamment de temps de repos.
Limiter la durée des périodes pendant
lesquelles la machine est utilisée sans
interruption entre 30 et 40 minutes. Se
reposer de 10 à 20 minutes entre ces
périodes. Autant que possible, essayer de
limiter ce genre de travail à 2 heures par
jour.
1. Si ce plan de travail et cette méthode de
travail ne sont pas respectés, un
accident dû au stress répétitif peut se
produire (voir “UTILISATION DE LA
MACHINE”).
Si l’on ressent un malaise ou si les
doigts ou tout autre membre rougissent
et enflent, consulter un docteur avant
que cela ne s’aggrave.
2. Pour éviter les problèmes de bruit avec
le voisinage, utiliser de préférence la
machine entre 8 et 17 heures pendant la
semaine et de 9 à 17 heures les fins de
semaine.
Vérifier et suivre la réglementation locale sur
le niveau de bruit et les horaires d’utilisation
de ce type de machine.
■ AVANT DE METTRE LE MOTEUR EN
MARCHE
1. La zone dans un rayon de 15 mètres
REMARQUE
AVERTISSEMENT
Page 31

FR-7
CHT220/CHT220L
F
R
5. Consignes de securite
autour de l’utilisateur est considérée
comme dangereuse et personne ne doit
s’y trouver. Si nécessaire, délimiter le
périmètre de la zone de travail avec du
ruban de marquage (rouge fluorescent et
blanc par exemple) et poser des panneaux
d’avertissement. Lorsque deux ou
plusieurs personnes travaillent ensemble
ou à proximité, chacune doit constamment
faire attention et garder ses distances par
rapport aux autres pour assurer une
sécurité satisfaisante.
2. Vérifier constamment l’état de la zone de
travail pour éviter tout accident dû aux
impacts avec des obstacles tels que les
souches, les pierres, les boîtes de
conserves ou débris de verre.
Retirer tout obstacle avant de commencer le
travail.
3. Vérifier que la machine ne comporte aucun
élément desserré ou qu’il n’y a pas de fuite
de carburant. S’assurer que l’outil de
coupe est monté correctement et bien
serré.
4. S’assurer que le cache de protection antidébris est fermement attaché.
5. Utiliser toujours la machine avec son
harnais. Le régler pour un confort maximal
avant de mettre le moteur en marche. Il
doit être ajusté pour que la main gauche
puisse tenir confortablement la poignée
environ à hauteur de la taille.
■ DEMARRAGE DU MOTEUR
1. Ne laissez personne approcher à moins de
15 m du lieu de travail, en particulier les
enfants et les animaux. Si quelqu’un
s’approche trop près, arrêter aussitôt le
moteur.
2. Cette débroussailleuse est équipée d’un
embrayage centrifuge : les lames
s’activent dès que le papillon des gaz est
sur la position de démarrage et que le
moteur tourne. Pour mettre le moteur en
route, poser et maintenir fermement la
machine à plat sur le sol dans un endroit
dégagé où aucun obstacle ne peut entrer
en contact avec l’outil de coupe ou la
manette d’accélérateur une fois que le
moteur sera en marche.
• Ne jamais mettre la manette de l’accé-
lérateur à fond lors de la mise en
AVERTISSEMENT
marche.
• Ne jamais démarrer le moteur en se
tenant du côté de l'outil de coupe.
3. Une fois le moteur en marche, vérifier que
l’outil de coupe s’arrête de tourner lorsque
l’accélérateur est remis à zéro. Si l’outil de
coupe continue à tourner, arrêter le moteur
et rapporter la machine chez le revendeur
agréé RedMax pour la faire réparer.
■ UTILISATION DE LA MACHINE
Ne couper avec la machine que les
matériaux recommandés par le fabricant.
Ne l’utiliser que pour les travaux décrits
dans ce mode d’emploi.
1. Tenir les poignées de la machine
fermement des deux mains. Ecarter
légèrement les jambes (pour que les pieds
reposent sur une largeur un peu plus
importante que celle des épaules), avoir
une posture de travail stable et répartir le
poids du corps également sur chaque
jambe.
2. Faire tourner le moteur à la vitesse
appropriée à la coupe sans jamais
accélérer inutilement au dessus du niveau
nécessaire.
3. Si la machine se met à vibrer ou à créer
des secousses, arrêter le moteur et
procéder à une vérification totale de la
machine. Ne pas utiliser la machine avant
que la panne ne soit réparée.
4. Se tenir à distance de l’outil de coupe ou
des parties chaudes de la machine.
5. Ne jamais toucher le silencieux, la bougie
ou toute autre partie métallique du moteur
pendant le fonctionnement ou aussitôt
après son arrêt. Dans ces circonstances,
les risques de brûlures ou d’électrocution
sont importants.
6. Veillez à ce que l’appareil soit toujours
stable et fonctionne en toute sécurité, en
particulier lorsque vous travaillez sur un
escalier ou sur une échelle.
• SI QUELQU’UN S’APPROCHE
1. Il faut se préserver des situations
dangereuses à tout moment. Avertir les
adultes de maintenir les enfants et les
animaux à distances car le risque de
recevoir des projections d’objets est
important.
2. Si quelqu’un appelle ou interrompt le
travail d’une manière ou d’une autre,
IMPORTANT
IMPORTANT
Page 32

FR-8
CHT220/CHT220L
5. Consignes de securite
arrêter le moteur avant de se tourner vers
la personne.
■ ENTRETIEN
1. De manière à conserver la machine en
parfait état de marche, effectuer à
intervalles réguliers les opérations et les
vérifications d’entretien décrites dans le
mode d’emploi.
2. N’oubliez pas de couper le moteur avant
d’entreprendre une intervention d’entretien
ou de vérification de la machine.
(1) Tout est en ordre de marche!
Les pièces métalliques atteignent leur
plus haute température aussitôt après
l’arrêt de la machine.
3. Lors du remplacement de l’outil de coupe
ou d’une autre pièce, de l’huile ou du
lubrifiant, veiller à n’utiliser que des
produits RedMax ou des produits
certifiés par RedMax.
4. Pour toute pièce devant être remplacée ou
pour toute opération d’entretien ou de
réparation non décrite dans ce manuel,
contacter le centre de SAV agréé par
RedMax le plus proche pour demander
assistance.
5. Ne pas utiliser d’accessoires ou d’outils de
marque autres que RedMax ou non
agréés.
6. Ne jamais démonter ou modifier la
machine, quelles que soient les
circonstances. Dans le cas contraire, la
machine risque d’être endommagée en
cours d’utilisation ou de ne pas fonctionner
correctement.
■ MANIPULATION DU CARBURANT
1. Le moteur de la débroussailleuse RedMax
est conçu pour fonctionner avec du
mélange contenant de l’essence
hautement inflammable. Ne jamais
entreposer de bidon de carburant ou
refaire le plein de la machine dans un local
où se trouve une chaudière, un poêle, un
feu ouvert, des étincelles, un poste à
souder électrique ou toute autre source de
chaleur ou d’étincelles pouvant enflammer
le carburant.
2. Ne jamais fumer pendant l’utilisant de la
machine ou son remplissage en carburant.
3. Avant de refaire le plein de carburant,
AVERTISSEMENT
toujours arrêter le moteur et laisser
refroidir la machine. Vérifier aussi
l’absence de flammes ou d’étincelles à
proximité avant de faire le plein.
(1) Refaire le plein après avoir laissé
refroidir la débroussailleuse.
4. Essuyer avec un chiffon toute trace de
carburant renversé lors du remplissage.
5. Une fois le plein effectué, bien resserrer le
bouchon du réservoir et éloigner la
machine à plus de 3 mètres de l’endroit où
le plein a été fait avant de la remettre en
marche.
6. Les fumées de carburant sont toxiques :
ne pas inhaler.
■ TRANSPORT
1. Pour transporter la machine, couvrir la
partie coupante si nécessaire, relever la
machine et faire attention à la lame de
coupe.
2. Ne jamais transporter la machine sur
mauvaise route et sur une grande distance
sans vider complètement le réservoir de
carburant. Sinon le carburant pourrait
s’échapper du réservoir pendant le trajet.
Page 33

FR-9
CHT220/CHT220L
F
R
CARBURANT
•L’essence est un produit hautement inflammable.
S’abstenir de fumer et ne tolérer aucun flamme ou source
d’étincelles à proximité de l’endroit où est entreposée
l’essence. Arrêter le moteur puis le laisser refroidir un peu
avant de remplir le réservoir. Remplir le réservoir à
l’extérieur sur une surface nue et éloigner le bidon
d’essence d’au moins 3 mètres avant de mettre le moteur
de la tronçonneuse en marche.
■ TYPES DE CARBURANTS REQUIS
• Tous les produits RedMax 2 temps disposent de moteurs 2
temps RedMax de notre gamme professionnelle et
commerciale, à hautes performances, RPM élevées et
refroidis par air. Les moteurs 2 temps RedMax à hautes
performances, permettent d’obtenir plus de CV en sortie par
rapport aux moteurs des gammes standard à usage personnel
ou pour une utilisation commerciale légère offertes par la
plupart des fabricants.
• La composition des gaz d’échappement est contrôlée par les
principaux paramètres et composants du moteur (comme par
ex., la carburation, le calage de l’allumage) sans avoir besoin
d’effectuer des changements de matériel ou à introduire un
produit inerte durant la combustion.
• Les moteurs RedMax ont été approuvés et certifiés par les
agences gouvernementales CARB (Office Californien des
Ressources Aériennes) et EPA (Agence de Protection de
l'Environnement) pour pouvoir fonctionner avec de l’essence
PURE de type Normal ou Super à 89 octanes, essence sans
plomb et du "Max Life" RedMax refroidi à l’air, mélange
synthétique de Super et d'huile à 50:1 pour moteurs deux
temps.
• Il est préférable d’utiliser de l’essence sans plomb afin de
réduire la pollution de l’atmosphère et de participer ainsi à la
protection de l’environnement et de votre santé.
• Ce moteur 2 temps à hautes performances et refroidi à l’air a
besoin d’une essence pure à 89 octanes au minimum
(Normal ou Super). L’essence peut contenir un maximum de
10% d’éthanol (alcool) ou jusqu’à 15% de MTBE (éther
méthyltertiobutylique). Les essences contenant du méthanol ne
peuvent PAS être utilisées.
• Si l’indice d’octane de l’essence normale
dans votre région est
inférieur à 89 octanes, utilisez de l'essence Super sans plomb.
La plupart des fabricants de moteurs à 2 temps aux USA et au
Canada recommandent d’utiliser de l’essence à 89 octanes ou
plus.
REMARQUE
• Toute essence avec un indice inférieur à 89 octanes risque
d’élever dangereusement la température du moteur. Les
essences à indice d’octane inférieur à cette valeur ont tendance
à provoquer des détonations (explosions), ce qui risque
d’endommager les pistons ou d’autres composants importants
du moteur.
• De l’essence ou de l’huile de basse qualité risque
d’endommager les joints, les conduites d’essence ou le
réservoir d’essence du moteur.
• Les dommages dûs à l’utilisation du moteur avec des essences
à indice inférieur à 89 octanes ne sont pas couverts
par la
garantie des moteurs RedMax deux temps.
•Carburants alternatifs (autres que l’essence)
Les carburants alternatifs, tels que l’E-15 (15% d’éthanol),
E- 20 (20% d’éthanol) et E-85 (85% d’éthanol) ne sont PAS
considérés comme des carburants, et leur utilisation n’est
PAS approuvée avec les moteurs à essence RedMax à 2
temps. L’utilisation de carburants alternatifs entraînera de
graves problèmes de fonctionnement et de durabilité du
moteur, tels que : mauvais engagements de l’embrayage,
surchauffes, blocages par vapeur, pertes de puissance,
défaillances de lubrification, dégradation des tuyaux de
carburant, des joints statiques et des composants internes
du carburateur, etc. Les carburants alternatifs ont de plus
tendance à aggraver l'absorption d'humidité dans le
mélange carburant/huile, ce qui entraîne une séparation de
ces deux composants.
■ Types d‘huiles requises
• N’utilisez que du RedMax "Max Life", du mélange synthétique
Super et huile moteur à deux temps refroidi à l'air, ou de l'huile
certifiée selon la norme ISO-L-EGD
(ISO\CD1378) ET une
certifiée JASO-FD
. Le RedMax "Max Life" refroidi à l’air, le
mélange synthétique Super et huile moteur à deux temps
refroidi à l'air, et l'huile ISO-L-EGD
(ISO\CD1378) ET
JASO-FD
sont entièrement compatibles avec de l’essence contenant 10%
d’éthanol. Le RedMax "Max Life" refroidi à l’air, le mélange
synthétique Super et huile moteur à deux temps refroidi à l'air,
et l'huile ISO-L-EGD
(ISO\CD1378) ET
JASO-FD
sont des
carburants universels et devraient être mélangés à un rapport
de 50:1 pour tous les moteurs à 2 temps refroidis à l’air déjà
commercialisés, indépendamment des rapports de mélange
mentionnés dans les modes d’emploi.
• Si l’huile en question est certifiée JASO, le logo JASO avec la
mention FD
ainsi que le numéro d'enregistrement
correspondant sera présent sur le récipient. La classe JASO la
plus élevée est "FD", qui correspond à la classe ISO-L-EGD
.
Les classes inférieures sont "FC", "FB" et "FA".
AVERTISSEMENT
6. Carburant
[ R+M ]
2
AVERTISSEMENT
AVERTISSEMENT
REMARQUE
Page 34

FR-10
CHT220/CHT220L
6. Carburant
• Tout dommage ou problème du moteur, dû à une lubrification
inadéquate, suite à la non utilisation d’une huile certifiée ISOLEGD
et JASO FD, comme le "MaxLife", mélange synthétique
RedMax Super et huile à 2 temps ENTRAÎNERA
L’ANNULATION DE LA GARANTIE DU MOTEUR A DEUX
TEMPS RedMax.
•Ne pas utiliser d’huiles conçues pour les cyclomoteurs ou
les moteurs hors-bord de la NMMA (Association nationale
des constructeurs de véhicules maritimes) et les moteurs
TCW (moteur deux temps refroidis à l’eau). Ne pas utiliser
d’huiles étiquetées API (American Petroleum Institute) TC
(Deux cycles). L'étalonnage de test API-TC a été annulé par
API en 1995 et n'existe plus.
• Conseils sur le stockage du mélange carburant/huile
L’essence ou le mélange d’essence/d’huile devra être conservé
au frais et à sec, dans un récipient étanche approuvé, afin de
limiter la pénétration d’humidité et d’air (oxygène). En effet,
l’humidité ainsi que l’air ont tendance à causer le
développement d’une couche de vernis et de gomme, ce qui
entraîne l’éventement de l’essence. L’essence ou le mélange
d’essence/d’huile stockée vieillit et perd donc en indice d'octane
et en volatilité. Ne mélangez donc pas plus d'essence/d’huile
qu’une quantité pour 30 jours, ou 60 jours lorsqu’un produit
stabilisateur est utilisé. Le mélange synthétique RedMax "Max
Life" refroidi à l’air Super huile moteur à deux temps "Contient
un stabilisateur pour carburant" et prolonge donc
automatiquement la durée de vie de votre mélange
d’essence/huile à 60 jours.
■ COMMENT OBTENIR UN BON MELANGE
RAPPORT DE MELANGE
RECOMMANDE
ESSENCE 50 : HUILE 1
(Lors de l’utilisation de la véritable huile
"Max Life" RedMax refroidi à l’air)
IMPORTANT
• Faire attention à ne pas trop remuer le carburant.
1. Mesurez les volumes d’essence et d’huile à mélanger.
2. Verser un peu d’essence dans un récipient à carburant propre.
3. Verser ensuite toute l’huile, puis bien remuer le tout.
4. Verser enfin le reste de l’essence, puis bien mélanger
l’ensemble pendant une minute environ. Etant donné que
certains types d’huiles sont plus fluides que d’autres en fonction
de leur composition, un brassage énergique est nécessaire afin
de garantir une bonne marche du moteur pendant longtemps.
En effet, en cas de mélange insuffisant, un risque majeur de
problèmes au niveau des cylindres peut apparaître en raison
d’un mélange hétérogène.
5. Placer une étiquette assez grande sur le récipient afin d’éviter
de le confondre avec de l’essence ou avec d’autres récipients.
6. Indiquer les composants sur cette étiquette afin d’en faciliter
l’identification.
■ REMPLISSAGE DU RESERVOIR
1. Dévisser puis retirer le bouchon de carburant. Déposer ce
bouchon sur une surface non poussiéreuse.
2. Remplir le réservoir de carburant à 80% de sa capacité totale.
3. Visser fermement le bouchon du réservoir et essuyer toute
éventuelle éclaboussure d’essence sur l’appareil.
1. Effectuer le remplissage sur une surface nue.
2. S’éloigner d’au moins 3 mètres du point de remplissage
avant de démarrer le moteur.
3. Arrêter le moteur avant de faire le plein de l’appareil. Bien
remuer à cet instant le mélange d’essence dans le
réservoir.
■
A EVITER POUR PROLONGER LA DUREE DE VIE DU MOTEUR :
1. ESSENCE SANS HUILE (ESSENCE PURE) – L’essence pure
va endommager très rapidement les pièces du moteur.
2. ESSENCE-ALCOOL – Ce mélange risque de très rapidement
détruire les pièces en caoutchouc et/ou en plastique et
d’empêcher la lubrification du moteur.
3. UILE POUR MOTEURS 4 TEMPS – Elles risquent d’encrasser
les bougies, de bloquer l’échappement ou d’endommager les
segments des pistons.
4. Les mélanges d’huile et de carburants laissés au repos
pendant une période d’un mois ou plus risquent
sérieusement d’encrasser le carburateur et d’entraîner par
conséquent une défaillance du moteur.
5. Dans l’éventualité d’une longue période d’inactivité, nettoyer le
réservoir de carburant après l’avoir vidangé. Allumer ensuite le
moteur et vider le mélange d’essence du carburateur.
6. En cas de mise au rebut du récipient contenant le mélange
d’huile, en disposer toujours dans une décharge autorisée.
Pour plus de détails sur la garantie de qualité, lire attentivement
la section à propos de la Garantie Limitée. Il est également
important de rappeler que l’usure et les dégradations normales
de l’appareil ne sont en aucun cas couvertes par cette garantie.
AVERTISSEMENT
TABLEAU DE MELANGE 50 :1
ESSENCE gal. 1 2 3 4 5
HUILE 2 TEMPS once liquide
2.6 5.2 7.8 10.4 13
ESSENCE litre 1 2 3 4 5
HUILE 2 TEMPS ml 20 40 60 80 100
AVERTISSEMENT
AVERTISSEMENT
Page 35

FR-11
CHT220/CHT220L
F
R
6. Carburant
De plus, le non-respect des instructions relatives aux
proportions des mélanges d’essence, etc. décrites dans ce
mode d’emploi risque d’entraîner un refus de couverture par la
garantie.
• Pour plus de détails sur la garantie de qualité, lire attentivement
la section à propos de la Garantie Limitée. Il est également
important de rappeler que l’usure et les dégradations normales
de l’appareil ne sont en aucun cas couvertes par cette garantie.
De plus, le non-respect des instructions relatives aux
proportions des mélanges d’essence, etc. décrites dans ce
mode d’emploi risque d’entraîner un refus de couverture par la
garantie.
REMARQUE
Page 36

■ CONTRÔLES AVANT LA MISE EN MARCHE
• Inspecter la zone de travail. Retirer tout object
susceptible d’être projeté.
• Vérifier l’équipement de coupe. Ne jamais utiliser des
couteaux émoussés, craquelés ou abîmés.
• Vérifier que la machine est en parfait état d’utilisation.
Contrôler que tous les écrous et boulons sont
correctement serrés.
• Contrôler que l’engrenage est correctement lubrifié. Voir
les instructions au chapitre Engrenage.
• Contrôler que l’équipement de coupe s’arrête toujours
au ralenti.
• Utiliser la machine uniquement pour les travaux
auxquels elle est destinée.
• Contrôler que la poignée et les dispositifs de sécurité
sont en bon état. Ne jamais utiliser une machine dont
une pièce est manquante ou ayant été modifiée
contrairement aux spécifications.
• Tous les carters doivent être correctement montés et
sans défaut avant le démarrage de la machine.
■ DÉMARRAGE ET ARRÊT
AVERTISSEMENT! Le carter complet doit
être monté avant de démarrer la machine,
sinon l’embrayage risque de lâcher et de
provoquer des blessures personnelles.
Toujours éloigner la machine d’une distance
d’environ 3 mètres de l’entroit où le
remplissage en carburant a été effectué
avant de démarrer la machine. Placer la
machine sur une surface solide. Ne pas
oublier que les couteaux commencent à
tourner dès que le moteur est mis en marche.
S’assurer que les couteaux n’entrent en
contact avec aucun objet.
S’assurer qu’aucune personne non autorisée
ne se trouve dans la zone de travail afin
d’éliminer tout risque de blessures
personnelles graves. Distance de sécurité:
15 mètres.
Moteur froid
Starter:
Tirer la commande de starter.
Pompe à carburant: Appuyer sur la poche en caoutchouc
de la pompe à carburant plusieurs fois jusqu’à ce que le
carburant commence à remplir la poche (env. 6 fois). Il
n’est pas nécessaire de remplir la poche complètement.
Démarrage
Plaquer la machine contre le sol à l’aide de la main gauche
(NOTA! Pas à l’aide du pied!). Saisir ensuite la poignée de
démarrage de la main droite et tirer lentement sur le
lanceur jusqu’à ce qu’une résistance se fasse sentir (les
cliquets d’entraînement grippent), puis tirer énergiquement
et rapidement sur le lanceur. Ne jamais enrouler la corde
du lanceur autour de la main.
FR-12
CHT220/CHT220L
7. Démarrage et arrêt
Page 37

■ MÉTHODES DE TRAVAIL
IMPORTANT!
Ce chapitre traite des consignes de sécurité de base lors
du travail avec un taille-haie.
Dans l’éventualité d’une situation rendant la suite du
travail incertaine, consulter un expert. S’adresser au
revendeur ou à l’atelier de réparation.
Évitez les tâches pour lesquelles vous ne vous sentez
pas suffisamment qualifié.
AVERTISSEMENT! La machine peut
provoquer des blessures personnelles
graves. Lire attentivement les consignes de
sécurité. Apprendre à bien utiliser la
machine.
AVERTISSEMENT! Outil coupant. Ne jamais
toucher l’outil sans avoir préalablement
arrêté le moteur.
Consignes de sécurité pour l’entourage
• Ne jamais laisser un enfant utiliser la machine.
• S’assurer que la zone de travail est bien dégagée et
qu’aucune personne et aucun animal ne risquent
d’entrer en contact avec l’équipement de coupe.
• S’assurer qu’aucune personne ne s’approche à moins
de 15 m pendant le travail.
• Ne jamais laisser d’autres personnes utiliser la machine
sans s’être assuré au préalable que ces personnes ont
bien compris le contenu du mode d’emploi.
• Ne jamais travailler debout sur une échelle, un tabouret,
ou dans toute autre position élevée n’offrant pas une
sécurité maximale.
• N’oubliez pas que l’opérateur est responsable des
accidents ou dangers aux tiers et à leurs biens.
Dès l’allumage du moteur, enfoncer le starter et continuer
les essais de démarrage jusqu’au démarrage du moteur.
REMARQUE! Lorsque le starter est renvoyé en position
initiale, le moteur tourne à une vitesse supérieure, en
position dite de ralenti accéléré, et les lames commencent
à bouger. La position de ralenti accéléré se relâche en
accélérant à l'aide du levier d'accélération.
REMARQUE! Ne pas sortir complètement la corde du
lanceur et ne pas lâcher la poignée avec la corde du
lanceur complètement sortie. Cela pourrait endommager la
machine.
Moteur chaud
Plaquer la machine contre le sol à l’aide de la main gauche
(NOTA! Pas à l’aide du pied!). Saisir ensuite la poignée de
démarrage de la main droite et tirer lentement sur le
lanceur jusqu’à ce qu’une résistance se fasse sentir (les
cliquets d’entraînement grippent), puis tirer énergiquement
et rapidement sur le lanceur. Ne jamais enrouler la corde
du lanceur autour de la main.
Arrêt
Arrêter le moteur en déplaçant l’interrupteur d’arrêt en
position d’arrêt.
REMARQUE!
L'interrupteur d'arrêt se remet automatiquement en position
de démarrage. Toujours retirer le chapeau de bougie de la
bougie lors du montage, contrôle et/ou entretien, afin
d'éviter tout démarrage accidentel.
FR-13
CHT220/CHT220L
F
R
7. Démarrage et arrêt 8. Techniques de travail
Page 38

FR-14
CHT220/CHT220L
Consignes de sécurité pendant le travail
• Toujours adopter une position de travail sûre et stable.
• Ne laissez jamais la machine sans surveillance avec le
moteur en marche.
• Toujours tenir la machine des deux mains. Tenir la
machine devant soi.
• Veiller à ce que ni les mains ni les pieds ne soient en
contact avec l’équipement de coupe quand le moteur
tourne.
• Après l’arrêt du moteur, maintenir mains et pieds à
l’écart de l’équipement de coupe jusqu’à l’arrêt total de
celui-ci.
• Attention aux éclats de bois pouvant être projetés durant
le sciage.
• Ne pas couper trop près du sol. Des pierres ou tout
autre object sont susceptibles d’être projetés.
• Étudier attentivement l’objet à scier afin de détecter les
obstacles éventuels tels que les lignes électriques, les
insectes, les animaux, etc. ou les objets pouvant
endommager l’équipement de coupe comme, par
exemple, les objets en métal.
• Arrêter immédiatement la machine si elle bute sur un
objet ou si des vibrations se produisent. Débrancher le
câble de la bougie. Vérifier que la machine n’a subi
aucun dommage. Réparer tout éventuel dommage.
• Si un objet se bloque dans les lames durant le travail,
arrêter le moteur et attendre l’arrêt total du moteur avant
de nettoyer les lames. Débrancher le câble d’allumage
de la bougie.
Si les lames se coincent, il est possible de les relâcher en
insérant la clé mixte dans le carter. Retirer le bouchon à
lubrifiant, insérer la clé mixte dans le carter et la tourner
dans un sens puis dans l'autre.
Consignes de sécurité après le travail
• La protection pour le transport doit toujours être mise sur
l’équipement de coupe quand la machine n’est pas
utilisée.
• Avant de commencer les travaux de nettoyage, de
réparation ou d’inspection, s’assurer que l’équipement
de coupe est arrêté. Débrancher le câble d’allumage de
la bougie.
• Toujours utiliser des gants de protection robustes lors de
la réparation de l’équipement de coupe. Il est très
tranchant et peut facilement provoquer des coupures.
• Ranger la machine hors de portée des enfants.
• Utiliser uniquement des pièces de rechange d’origine
pour réparer la machine.
Techniques de travail de base
• Travailler en effectuant des mouvements de balancier
de bas en haut lors de la taille des côtés.
• Régler l’accélération en fonction de la charge.
• Lors de la taille d’une haie, le moteur doit toujours être
maintenu éloigné de la haie.
• Pour un meilleur équilibre, tenir la machine le plus près
possible du corps.
• S’assurer que l’extrémité ne touche pas le sol.
8. Techniques de travail
Page 39

FR-15
CHT220/CHT220L
F
R
• Ne jamais forcer, mais adopter un rythme de travail
régulier, de sorte que toutes les branches puissent être
coupées uniformément.
CHT220L
La poignée arrière du taille-haie peut être mise sur cinq
positions différentes en tirant sur le loquet. Voir figure. Le
réglage de la poignée s’effectue lorsque le taille-haie n’est
ni en marche, ni en régime ralenti.
• Pendant le travail la poignée doit toujours être vers le
haut quel que soit le sens d’orientation du taille-haie.
■ CARBURATEUR
Réglage du régime de ralenti
Pour tous les réglages, le filtre à air doit être propre et son
couvercle posé. S'assurer que la position de ralenti
accéléré est désengagée.
Régler le régime de ralenti avec le pointeau de ralenti T si
un ajustage est nécessaire. Tourner d'abord le pointeau T
dans le sens des aiguilles d'une montre jusqu'à ce que
l'équipement de coupe commence à bouger. Tourner
ensuite le pointeau dans le sens inverse jusqu’à l’arrêt de
l’équipement de coupe. Le régime de ralenti est
correctement réglé lorsque le moteur tourne sans àcoups
dans chaque position. Il doit également y avoir une bonne
marge avant que l’équipement de coupe se mette à
bouger.
Régime de ralenti recommandé: Voir le chapitre
Caractéristiques techniques.
AVERTISSEMENT! S’il est impossible de
régler le régime de ralenti de manière à
immobiliser l’équipement de coupe, contacter
le revendeur ou l’atelier de réparation. Ne pas
utiliser la machine tant qu’elle n’est pas
correctement réglée ou réparée.
■ SILENCIEUX
REMARQUE! Certains silencieux sont dotés d’un pot
catalytique. Voir le chapitre Caractéristiques techniques
pour déterminer si la machine est pourvue d’un pot
catalytique.
Le silencieux est conçu pour atténuer le bruit et dévier le
flux des gaz d’échappement loin de l’utilisateur. Ces gaz
sont chauds et peuvent transporter des étincelles risquant
de causer un incendie si elles entrent en contact avec un
matériau sec et inflammable.
8. Techniques de travail 9. Entretien
Page 40

FR-16
CHT220/CHT220L
9. Entretien
Certains silencieux sont munis d’une grille antiflamme
spéciale. Cette grille doit être nettoyée si votre machine est
équipée d'un tel silencieux. La nettoyer de préférence à
l'aide d'une brosse métallique.
Sur les silencieux sans pot catalytique, la grille doit être
nettoyée et si nécessaire remplacée une fois par semaine.
Si la grille est abîmée, elle devra être remplacée. Si la
grille se bloque souvent, c'est peut-être signe que le
carburateur est mal réglé ou qu'une quantité trop
importante d'huile a été mélangée à l'essence.
Sur les machines dont le silencieux est muni d’un pot
catalytique, la grille devra être inspectée et si nécessaire
nettoyée une fois par mois. Si la grille est abîmée, elle
devra être remplacée. Si la grille est souvent bouchée,
ceci peut être dû à un mauvais fonctionnement du pot
catalytique. Contacter le revendeur pour effectuer un
contrôle. Une grille antiflamme bouchée provoque la
surchauffe de la machine et la détérioration du cylindre et
du piston.
REMARQUE! Ne jamais utiliser la machine si le silencieux
est en mauvais état.
AVERTISSEMENT! Un silencieux muni d’un
catalyseur est très chaud aussi bien à
l’utilisation qu’après arrêt. Ceci est également
vrai pour le régime au ralenti. Tout contact
peut causer des brûlures à la peau. Attention
au risque d’incendie!
■ SYSTÈME DE REFROIDISSEMENT
La machine est équipée d’un système de refroidissement
permettant d’obtenir une température de fonctionnement
aussi basse que possible.
Le système de refroidissement est composé des éléments
suivants:
1 Les ailettes de refroidissement sur le cylindre.
2 Le carter de cylindre (dirige l’air de refroidissement vers
le cylindre).
3 Prise d'air par le carter moteur (à l'intérieur du réservoir).
Nettoyer le système de refroidissement avec une brosse
une fois par semaine, voire plus souvent dans des
conditions difficiles. Un système de refroidissement sale
ou colmaté provoque la surchauffe de la machine,
endommageant le cylindre et le piston.
■ BOUGIE
L’état de la bougie dépend de:
• L’exactitude du réglage du carburateur.
• Mauvais mélange de l’huile dans le carburant (trop
d’huile ou huile inappropriée).
• La propreté du filtre à air.
Ces facteurs peuvent concourir à l’apparition de calamine
sur les électrodes, ce qui à son tour entraîne un mauvais
fonctionnement du moteur et des démarrages difficiles.
Si la puissance de la machine est trop faible, si la machine
est difficile à mettre en marche ou si le ralenti est irrégulier,
toujours commencer par contrôler l’état de la bougie avant
de prendre d’autres mesures. Si la bougie est encrassée, la
nettoyer et vérifier que l’écartement des électrodes est de
0,5 mm. Remplacer la bougie une fois par mois ou plus
souvent si nécessaire.
REMARQUE! Toujours utiliser le type de bougie
recommandé! Une bougie incorrecte peut endommager
le piston/le cylindre. S’assurer que la bougie est dotée
d’un antiparasites.
■ FILTRE À AIR
Le filtre à air doit être maintenu propre pour éviter:
• Un mauvais fonctionnement du carburateur
• Des problèmes de démarrage
• Une perte de puissance
• Une usure prématurée des éléments du moteur
• Une consommation anormalement élevée de carburant
Nettoyer le filtre après 25 heures de service, ou plus
souvent si les conditions de travail sont exceptionnellement
poussiéreuses.
Page 41

FR-17
CHT220/CHT220L
F
R
9. Entretien
Nettoyage du filtre à air
Déposer le capot de filtre et retirer le filtre. Nettoyer le filtre
avec de l’eau chaude savonneuse. Laisser le filtre sécher,
puis le lubrifier conformément aux instructions.
Un filtre ayant servi longtemps ne peut plus être
complètement nettoyé. Le filtre à air doit donc être
remplacé à intervalles réguliers. Tout filtre endommagé
doit être remplacé immédiatement.
■ ENGRENAGE
Le carter comporte un bouchon pour le remplissage du
lubrifiant. Utiliser le tube de graisse pour remplir de graisse
et répéter l'opération toutes les 25 heures. Utiliser une
graisse spéciale RedMax.
REMARQUE! L’engrenage ne doit pas être entièrement
rempli de lubrifiant. Le lubrifiant se dilate sous l’effet de la
chaleur qui se dégage lors du fonctionnement de la
machine. Si l’engrenage est entièrement rempli de
lubrifiant, les joints d’étanchéité risquent d’être
endommagés, entraînant des fuites de lubrifiant.
En général, il n’est pas nécessaire de remplacer le
lubrifiant du carter, sauf en cas de réparations.
■ UNITÉ DE COUPE
Vérifier que les vis de l'unité de coupe sont correctement
fixées. Les serrer avec un couple de serrage de 7-10 Nm.
■ NETTOYAGE ET GRAISSAGE
Avant et après utilisation, nettoyer les couteaux à l’aide de
l’agent de nettoyage 531 00 75-13 (UL22) pour éliminer
toute trace de résine et de sève.
Contrôler les bords des lames afin de détecter d'éventuels
dommages ou déformations. Retirer toute bavure à l'aide
d'une lime.
Vérifier que les lames bougent librement. Retirer le
bouchon de lubrification dans le carter, insérer la clé mixte
et la tourner dans un sens puis dans l'autre.
Avant une période de remisage prolongée, lubrifier les
poutres de couteaux à l’aide du lubrifiant spécial, nº
d’article 531 00 75-12 (UL 21).
IMPORTANT! N’utiliser que les pièces de rechange
RedMax. L’utilisation de pièces d’autres marques
pourrait endommager votre machine ou encore causer
des blessures à l’opérateur ou à d’autres personnes.
Votre garantie ne couvre ni les dommages ni la
responsabilité causés par l’utilisation d’accessoires et/ou
de pièces qui ne sont pas spécialement recommandés
par RedMax.
Page 42

FR-18
CHT220/CHT220L
9. Entretien
■ SCHÉMA D’ENTRETIEN
La liste ci-dessous indique l’entretien à effectuer sur la machine. La plupart des points sont décrits à la section Entretien.
L’utilisateur ne peut effectuer que les travaux d’entretien et de révision décrits dans ce manuel d’utilisation. Les mesures
plus importantes doivent être effectuées dans un atelier d’entretien agréé.
Nettoyer l’extérieur de la machine.
Contrôler le bon fonctionnement du verrou d’accélérateur et de
l’accélérateur
Afin de réduire le risque d’incendie, le silencieux, le tuyau
d’échappement et le moteur doivent être nettoyés et ne comporter ni
poussière, ni feuilles, ni excès de lubrifiant, etc.
Contrôler le bon fonctionnement du contacteur d’arrêt.
Contrôler que les couteaux ne tournent pas au ralenti.
Contrôler que les couteaux sont intacts et ne présentent ni fissures ni
autres dommages. Remplacer les couteaux si nécessaire.
Contrôler le protège-lame afin de détecter d'éventuels dommages ou
déformations. Remplacer la lame si le protège-lame est courbé ou
endommagé.
Remplacer l'unité de coupe si elle est courbée ou endommagée.
Vérifier que le protège-main n’est pas abîmé. Remplacer la protection
si nécessaire.
S’assurer que toutes les vis et tous les écrous sont bien serrés.
Vérifier qu’il n’y a pas de fuite de carburant du moteur, du réservoir ou
des conduits de carburant.
Nettoyer le filtre à air.
Nettoyez plus souvent si les conditions de travail sont
exceptionnellement poussiéreuses.
Contrôler le démarreur et son lanceur.
S’assurer que les amortisseurs ne sont pas endommagés.
Nettoyer la bougie d’allumage extérieurement. Déposer la bougie et
vérifier la distance entre les électrodes. Au besoin, ajuster la distance
de sorte qu’elle soit de 0,5 mm, ou remplacer la bougie. S’assurer que
la bougie est dotée d’un antiparasites.
Nettoyer le système de refroidissement de la machine.
Nettoyer le carburateur extérieurement, ainsi que l’espace autour.
Remplir l’engrenage d’huile. Ceci doit être effectué environ toutes les
25 heures d’utilisation.
Vérifier que les vis assemblant les couteaux sont correctement
serrées.
Contrôler et nettoyer la grille antiflamme du silencieux (valable
uniquement pour les silencieux avec pot catalytique).
Nettoyer l’intérieur du réservoir d’essence.
Vérifier que l'intérieur du filtre à carburant est exempt de toute
poussière et que le tuyau à carburant ne présente ni fissure ni
dommage. Remplacer si nécessaire.
Inspecter tous les câbles et connexions.
Vérifier l’état d’usure de l’embrayage, des ressorts d’embrayage et du
tambour d’embrayage. Faire remplacer si nécessaire dans un atelier
d’entretien agréé.
Remplacer la bougie d’allumage. S’assurer que la bougie est dotée
d’un antiparasites.
Après chaque utilisation de la machine
(25 tim).
X
X
X
X
X
X
X
X
X
X
X
X
X
X
X
X
X
X
X
X
X
X
X
Entretien
Avant chaque
utilisation:
Après 40
heures
d’utilisation
Après 100
heures
d’utilisation
Page 43

FR-19
CHT220/CHT220L
F
R
12. Guide de localisation des pannes
1. Lubrifiez la lame afin d'empêcher
qu'elle ne rouille.
2. Videz le réservoir à essence et
remettez le bouchon en place.
3. Démontez la bougie d'allumage, versez
une petite quantité d'huile dans le
cylindre.
4. Faites tourner le vilebrequin plusieurs
fois à l'aide du câble de démarreur afin
de répartir l'huile. Remontez la bougie
d'allumage.
5. Enveloppez le moteur avec un film
plastique.
6. Stockez la tailleuse dans un endroit
sec, de préférence pas en contact
direct avec le sol et à distance de toute
source de chaleur.
10. Rangement
11. Mise au rebut
• Lorsque vous mettez au rebut l’outil, le
combustible ou l’huile pour l’outil,
veillez à bien respecter la
réglementation locale.
1er cas : Défaut de démarrage
VERIFICATION CAUSES PROBABLES ACTION
réservoir de carburant ➞ carburant incorrect ➞ vidanger et remplacer le carburant
filtre à carburant ➞ filtre à carburant colmaté ➞ nettoyer
vis de réglage de carburateur ➞ déréglé ➞ refaire le réglage
allumage ➞ bougie sale ou noyée ➞ nettoyer ou sécher
➞ Jeu d’électrodes incorrect ➞ régler le jeu (0,5 mm)
Bougie d’allumage ➞ débrancher ➞ resserrer
2ème cas : Le moteur démarre mais ne reste pas en marche ou est difficile à redémarrer
VERIFICATION CAUSES PROBABLES ACTION
réservoir de carburant ➞ carburant incorrect ➞ vidanger et remplacer le carburant
vis de réglage de carburateur ➞ déréglé ➞ refaire le réglage
silencieux, cylindre ➞ dépôt de calamine ➞ retirer
filtre à air ➞ colmaté de poussière ➞ nettoyer
ailette de cylindre/flasque de ventilateur
➞ colmaté de poussière ➞ nettoyer
Si la machine nécessite des opérations d’entretien plus élaborées, contacter le centre de service après-vente le plus proche.
Page 44

FR-20
CHT220/CHT220L
L’EPA (Agence de Protection pour l’Environnement américaine), la CARB (Commission des Ressources en Air
de Californie), Canada Environnement et la SA RedMax sont heureux d’expliquer la garantie du système de
contrôle des émissions de votre petit moteur tout-terrain de 2009 et ultérieur. Aux Etats-Unis et au Canada, les
nouveaux équipements utilisant les petits moteurs tout-terrain doivent être conçus, construits et équipés pour
respecter les normes anti-pollution strictes de l’Etat fédéral ou de la Californie. La SA RedMax doit garantir le
système de contrôle des émissions de votre petit moteur tout-terrain pour la durée indiquée ci-dessous, sous
réserve qu’il n’y ait pas eu d’abus, de négligence ou d’entretien incorrect de votre appareil. Votre système de
contrôle des émissions peut comprendre des pièces telles que le carburateur, le système d’allumage, le pot
catalytique, le réservoir de carburant, les filtres et d’autres composants associés. Peuvent aussi être inclus les
durits, courroies, connecteurs, capteurs et autres assemblages liés aux émissions. Dans le cas d’une situation
où la garantie s’applique, la SA RedMax réparera votre petit moteur tout-terrain sans frais, y compris le
diagnostic, les pièces et la main d’œuvre.
COUVERTURE DE LA GARANTIE CONSTRUCTEUR
Ce système de contrôle des émissions est garanti pendant deux ans ou si le produit répond à des conditions de
période de garantie plus longue en fonction du type d’utilisation, cette période prévaudra. Si une pièce de votre
moteur liée aux émissions est défectueuse, la pièce sera réparée ou remplacée par la SA RedMax.
OBLIGATIONS DU PROPRIÉTAIRE LIÉES A LA GARANTIE
En tant que propriétaire du petit moteur tout-terrain, vous êtes responsable de la réalisation de l’entretien
indiqué dans votre mode d’emploi. La SA RedMax vous recommande de conserver tous les reçus concernant
l’entretien de votre petit moteur tout-terrain mais la SA RedMax ne peut nier la garantie uniquement à cause de
l’absence de reçus ou si vous n’avez pas pu réaliser tous les travaux d’entretien programmés. En tant que
propriétaire du petit moteur tout-terrain, vous devez cependant savoir que la SA RedMax peut nier la couverture
de la garantie si votre petit moteur tout-terrain ou une pièce sont tombés en panne à cause d’un abus, d’une
négligence, d’un entretien incorrect ou de modifications non approuvées.
Vous êtes tenu de présenter votre petit moteur tout-terrain dans un centre de distribution de la SA RedMax dès
qu’un problème survient. Les réparations sous garantie doivent être réalisées dans un délai raisonnable, ne
dépassant pas 30 jours. Si vous avez des questions concernant la couverture de votre garantie, vous devez
contacter la SA RedMax au 1-800-291-8251 ou par email à l’adresse suivante : service@redmax.com.
DATE DE DÉBUT DE LA GARANTIE
La période de garantie commence à la date à laquelle le moteur ou l’équipement est livré à l’acheteur final.
DURÉE DE LA COUVERTURE
La SA RedMax garantit à l’acheteur final et à tout propriétaire ultérieur que le moteur ou l’équipement est
conçu, construit et équipé conformément aux réglementations en vigueur adoptées par l’EPA et la CARB et est
exempt de tout défaut de matériaux et de fabrication pouvant causer la défaillance d’une pièce garantie pour
une période de deux ans.
CE QUI EST COUVERT
RÉPARATION OU REMPLACEMENT DES PIÈCES. La réparation ou le remplacement de toute pièce
couverte par la garantie sera réalisé gratuitement pour le propriétaire dans un centre agréé. Les services ou
réparations garantis sont assurés dans tous les centres de distribution de la SA RedMax franchisés pour
entretenir les moteurs concernés. Tout au long de la période de garantie des émissions de deux ans, la SA
RedMax doit assurer la fourniture de pièces garanties suffisante pour répondre à toute demande pour de telles
pièces.
PÉRIODE DE GARANTIE. Toute pièce garantie dont le remplacement est prévu dans le cadre de l’entretien
obligatoire est garantie pour la période préalable au premier remplacement prévu pour cette pièce. Si la pièce
tombe en panne avant le premier remplacement prévu, elle sera réparée ou remplacée gratuitement par la SA
RedMax. Toute pièce sous garantie ainsi réparée ou remplacée est garantie pour le reste de la période
ÉNONCÉ DE GARANTIE DE CONTROLE DES ÉMISSIONS FÉDÉRALES ET DE
CALIFORNIE VOS DROITS ET OBLIGATIONS CONCERNANT LA GARANTIE
Page 45

FR-21
CHT220/CHT220L
F
R
précédant le premier remplacement prévu de la pièce. Toute pièce garantie dont le remplacement n’est pas
prévu dans le cadre de l’entretien obligatoire est garantie pendant deux ans ou si le produit répond à des
conditions de période de garantie plus longue en fonction du type d’utilisation, cette période prévaudra. Si une
telle pièce tombe en panne pendant la période de couverture de la garantie, elle sera réparée ou remplacée
gratuitement par la SA RedMax. Toute pièce sous garantie ainsi réparée ou remplacée est garantie pour le
reste de la période de garantie. Toute pièce garantie pour laquelle est seulement prévue une inspection
périodique dans le cadre de l’entretien obligatoire, sera garantie pour une période de deux ans. Une mention
faite dans les instructions écrites concernant un « remplacement ou réparation si nécessaire » ne réduit pas la
période de couverture de la garantie. Toute pièce sous garantie ainsi réparée ou remplacée est garantie pour
le reste de la période de garantie.
DIAGNOSTIC. L'acheteur ne supportera pas le coût de main d’œuvre du diagnostic qui amène à la conclusion
qu’une pièce garantie est défectueuse si ce diagnostic est effectué dans un centre agréé.
DOMMAGES CONSÉQUENTS. La SA RedMax est responsable des dommages causés à d’autres composants
proches du moteur par une panne d'une pièce sous garantie pendant la période de garantie.
LISTE DES PIÈCES SOUS GARANTIE EN RAPPORT AVEC LES ÉMISSIONS.
1. Système d’induction d’air*
2. Système d’alimentation en carburant*
3. Système d’allumage*
4. Réservoir de carburant, bouchon et tubes*
*certains composants sont couverts de manière limitée et sont spécifiés dans le cadre de l’entretien obligatoire
CE QUI N’EST PAS COUVERT
La garantie ne s’applique pas aux unités endommagées par suite d’utilisation abusive, de négligence ou
d’entretien incorrect.
PIECES AJOUTEES OU MODIFIEES
Les pièces ajoutées ou modifiées qui ne sont pas exemptées par la CARB ou l’EPA ne peuvent être utilisées.
L’utilisation de toute pièce ajoutée ou modifiée non exemptée est un motif de rejet d’une demande de garantie.
La SA RedMax ne peut être tenue responsable des pannes sur des pièces garanties dues à l’utilisation d’une
pièce ajoutée ou modifiée non exemptée.
COMMENT DÉPOSER UNE DEMANDE DE GARANTIE
Pour toute question concernant vos droits et responsabilités concernant la garantie, contactez votre revendeur
agréé le plus proche ou la SA RedMax au 1-800-291-8251 ou par email à l’adresse suivante :
service@redmax.com.
OÙ TROUVER LE CENTRE DE SERVICE POUR FAIRE JOUER VOTRE GARANTIE
Les services de garantie ou de réparations sont dispensés par tous les revendeurs autorisés de la SA
RedMax.
ENTRETIEN, REMPLACEMENT ET RÉPARATION DE PIÈCES EN RAPPORT AVEC LES ÉMISSIONS
Toute pièce de rechange peut être utilisée pour l’entretien ou la réparation garantis et doit être fournie
gratuitement au propriétaire. Cette utilisation ne réduit pas les obligations de garantie du constructeur.
DÉCLARATION D’ENTRETIEN
Le propriétaire a pour responsabilité d’effectuer l’entretien tel que défini par le fabricant dans le manuel de
l’utilisateur.
Page 46

FR-22
CHT220/CHT220L
RedMax
DÉCLARATION STANDARD DES LIMITES DE GARANTIE
TOUS produits vendus à partir du 1/01/2010 inclus
Tous les produits de la marque RedMax
La garantie limitée RedMax assure à l’acheteur d’ORIGINE
de l’unité que ce produit RedMax, à partir de la date d’achat de l’unité, est sans
DÉFAUTS
de MATÉRIAUX ou de FABRICATION et ce pour une utilisation et maintenance normales. RedMax accepte de réparer ou
remplacer à notre discrétion, tout produit défectueux, sans frais, auprès de n’importe lequel de nos Services Après Vente agréés RedMax en
utilisant des pièces de rechange RedMax originales, en tenant compte des durées d'utilisation, des limites et des exclusions listées ci-dessous.
CETTE GARANTIE LIMITÉE NE S'APPLIQUE QU'AU PREMIER ACHETEUR D'ORIGINE DE L'UNITÉ, ET N’EST PAS TRANSFÉRABLE
AUX POSSESSEURS SUIVANTS. Cette garantie est séparée de la Déclaration de Garantie du Contrôle des Émissions fournie avec votre
nouveau produit. Veuillez consulter s’il vous plaît votre Déclaration de Garantie du Contrôle des Émissions pour plus de renseignements.
DURÉE DE GARANTIE DU PRODUIT
PRODUITS ACHETÉS POUR UNE UTILISATION NON GÉNÉRATRICE DE REVENUS (Propriétaire immobilier)
Toutes les unités complètes achetées pour une utilisation au sein du foyer, ou non génératrice de revenus, seront couvertes par cette garantie
limitée pendant deux (2) ans à partir de la date d’achat de l’unité
. Le module électronique d’allumage et les arbres de transmission avec brosse
coupante/fauchante, sont garantis pendant toute la durée de vie du produit, mais seulement pour les pièces détachées.
PRODUITS ACHETÉS POUR UNE UTILISATION COMMERCIALE, INSTITUTIONNELLE, AGRICOLE, INDUSTRIELLE OU
GÉNÉRATRICE DE REVENUS
Toutes les unités complètes achetées pour une utilisation commerciale, institutionnelle, agricole, industrielle ou génératrice de revenus, seront
couvertes par cette garantie limitée pour une période de deux (2) années, à partir de la date d’achat de l’unité
. Les tronçonneuses, BT280,
BC280, TR2301S/2350S, CHT2200/2250 et les brumisateurs sont couverts pour un (1) an. À l’exception des modèles : GZ400, BT250,
BC250, HB250/280 et HE250F, CHT220/220L. Ces EXCEPTIONS
sont couvertes pendant quatre-vingt-dix (90) jours. Le module électronique
d’allumage et les arbres de transmission avec brosse coupante/fauchante, sont garantis pendant toute la durée de vie du produit, mais
seulement pour les pièces détachées.
MISE EN LOCATION
Toutes les unités complètes destinées à une utilisation locative seront couvertes contre les défauts de matériaux et de fabrication pour une
période de 90 jours à partir de la date d’achat. Les produits suivants ne possèdent Aucune Garantie à la Location. Ce sont
les suivants: GZ400, BT250, BC250, TR2301S/2350S, HB250/280, CHT2200/2250 et HE250F, CHT220/220L. Ces produits N’ONT PAS de
garantie à la location.
La responsabilité de RedMax pour la couverture « à vie » se limite à fournir les pièces une fois seulement que la couverture de la garantie
standard arrive à expiration, comme indiqué dans la section DURÉE DE GARANTIE DU PRODUIT de cette déclaration de garantie. Les pièces
« à vie » sont fournies sans frais seulement pour une durée de sept (7) ans après la date de production finale de la dernière unité complète.
Cette garantie ne couvre pas les dommages autres que ceux résultant de défauts de matériaux ou de fabrication
. RedMax NE PROPOSE
PAS UN PROGRAMME D’ÉCHANGE AU COMPTOIR. Tout produit vendu, réparé ou reconstruit par un service après vente non agréé par
RedMax, est vendu tel quel sans
couverture par la garantie standard RedMax. Les pièces de rechange et accessoires remplacés sous cette
garantie ne sont garantis que pour LA DUREE RESTANTE
de la garantie de l'unité d'origine ou de l'accessoire. Toutes les pièces ou produits
remplacés sous la garantie deviennent la propriété de RedMax.
ACHAT DE PIECES DE REPARATION, BLOCS COURTS ET ACCESSOIRES
Ces articles s’accompagnent d’une garantie de 90 jours, pour une utilisation résidentielle ou non génératrice de revenus, et d’une garantie
commerciale, institutionnelle, agricole, industrielle, génératrice de revenus ou destiné à la location, de 90 jours.
ACCESSOIRES DE COUPE FOURNIS AVEC LES PRODUITS
Tous les accessoires de coupe d’origine destinés à un usage résidentiel ou non générateur de revenus, tels que (cette liste n’est pas
exhaustive) les barres, chaînes, pignons, lames, têtes de coupe en nylon, sont garantis contre toute panne due à des défauts de matériaux ou
de fabrication pour une période de 60 jours à compter de la date d’achat du produit d’origine. Toute mauvaise utilisation qui impliquerait un
contact avec des pierres ou d'autres matériaux et/ou structures non autorisés n’est pas couverte par cette garantie. L’accessoire de coupe est
garanti pendant 30 jours lorsqu’il est destiné à un usage commercial, institutionnel, agricole, industriel, générateur de revenus ou à la location.
Toutes les séries Maxtreme et accessoires Split Shaft s’accompagnent de la même durée de garantie que les appareils pour lesquels
ils sont conçus.
DÉMENTI DE LA GARANTIE IMPLICITE
Toute garantie implicite est limitée à la durée de la garantie limitée. Sans quoi cette garantie limitée remplace toute autre garantie implicite ou
explicite, y compris toute garantie d'ADÉQUATION À UN USAGE PARTICULIER et toute garantie implicite de VALEUR MARCHANDE qui
serait sinon applicable à ce produit. RedMax et ses sociétés affiliées ne sont en aucun cas responsables des dommages indirects ou
consécutifs, y compris la perte de profits. Il n’existe aucune garantie étendue autre que celles énoncées ci-dessus. Cette garantie ne peut être
modifiée que par RedMax.
IMPORTANT POUR LES PROPRIETAIRES DE PRODUITS A MOTEURS DEUX-TEMPS
Les moteurs deux-temps RedMax – Hi-Performance fournissent un rendement de puissance moteur CV (cheval vapeur) supérieur aux moteurs
standards Home Owner Duty ou Light Commercial Duty proposés par la plupart des constructeurs. Pour maintenir une bonne performance de
l'appareil, il est indispensable
d'utiliser une huile qui réponde aux normes ISO-L-EGD et ISO/CD 13738 et une huile qui soit agréée par la
norme JASO M345/FD. L’huile deux-temps synthétique RedMax MaxLife
™ est justement une huile deux-temps Premium mise au point pour
être conforme aux normes ISO-L-EGD (ISO/CD13738) et JASO M345/FD. L’utilisation d’une huile non agréée
conçue pour d’autres usages
tels que les moteurs hors-bord, les tondeuses à gazon ou les moteur à faible RPM et faible CV, peut gravement endommager le moteur et
entraîner l’annulation de la garantie du moteur deux-temps. Ce moteur deux-temps à refroidissement d’air Hi-Performance nécessite l’utilisation
d’une essence propre dont l’indice d’octane est AU MOINS de 89 (Ordinaire ou Premium). Si l’indice d’octane de l’essence Ordinaire est
inférieur à 89, UTILISER de l’essence Premium sans plomb. Attention : une essence dont l'indice d'octane est inférieur à 89 augmentera
considérablement la température du moteur. Une essence à indice d'octane faible causera une détonation (un bruit sourd) provoquant un
grippage des pistons et de graves dommages aux composants internes du moteur. Les pannes de moteur causées par l’utilisation d’une
F R
Page 47

FR-23
CHT220/CHT220L
F
R
essence à indice d’octane inférieur
à 89 ne sont pas couvertes par la garantie RedMax des moteurs deux-temps.
(Seules les pièces liées aux émissions
sont couvertes pendant deux ans, quelle que soit l’huile moteur deux-temps utilisée, selon l’explication
de la garantie du système antipollution EPA ou de Californie.)
CETTE GARANTIE N’INCLUT PAS ET NE COUVRE PAS LES DOMMAGES CAUSÉS AU MOTEUR OU À L’APPAREIL PAR :
1. Le manque de lubrification ou la défaillance du moteur résultant de l’utilisation d’une huile deux-temps non conforme à la norme ISO-L-
EGD (ISO/CD13738) et non agréée par la norme JASO M345/FD. Les problèmes de moteur dus à une lubrification inadaptée résultant de
la non utilisation d’une huile conforme à la norme ISO-L-EGD et agréée
par la norme JASO M345/FD ENTRAINERONT L’ANNULATION
de la garantie du moteur deux-temps RedMax. L’huile deux-temps synthétique RedMax MaxLife
™ est conforme à la norme ISO-L-EGD et
est agréée
par la norme JASO Standard M345/FD.
2. Les dommages causés par l’utilisation de gasohol contenant du méthanol (alcool méthylique), ou d’essence DONT L’INDICE
D’OCTANE EST INFÉRIEUR À 89. Utiliser exclusivement
de l’essence dont l’indice d’octane est au moins de 89
. Le gasohol
contenant un maximum de 10% d’éthanol (alcool éthylique) ou 15% de MTBE (éther méthyltertiobutylique) est également approuvé. Le
rapport de mélange essence/huile recommandé est de 50:1 et est indiqué sur l’étiquette des bidons d’huile RedMax et dans votre manuel
d’utilisation.
3. Les dommages causés au moteur par l’utilisation d’éther ou d’autres fluides d’aide au démarrage. Les dommages causés par le
nettoyage de l’appareil sous pression ou à la vapeur.
4. Les dommages de surchauffe ou de détonation causés par l’utilisation de bougies ne répondant pas aux critères de performance des
émissions préconisés dans le manuel d’utilisation.
5. Les dommages causés par l’altération du régulateur de régime du moteur ou des composants du système antipollution, ou par le
fonctionnement du moteur au dessus des régimes recommandés dans votre manuel d’utilisation.
6. CETTE GARANTIE NE COUVRE PAS LES DOMMAGES CAUSÉS A L’APPAREIL OU AU MOTEUR PAR :
Le fonctionnement de l’appareil sans que le pare-débris ou tout autre dispositif de sécurité soient correctement
installés/désinstallés.
7. Les dommages causés par un filtre à air manquant/endommagé, la poussière, des abrasifs, de l’eau salée, la moisissure, la rouille, les
vernis, du vieux carburant ou toute autre réaction négative due à une procédure de stockage incorrecte.
8. Les défauts, dysfonctionnements ou défaillances résultant d'abus, d'utilisations incorrectes, de négligences, de modifications, d'altérations,
d'usure normale, d'entretien incorrect, d'utilisation d’accessoires non autorisés, y compris le manque d’entretien selon les conseils du
manuel d’utilisation.
Il est de la responsabilité du client/propriétaire
d’effectuer les entretiens préventifs décrits dans le manuel d’utilisation.
9. Les pannes dues à des réglages incorrects, à des entretiens ou à des réparations, avant la livraison, effectués par un concessionnaire
réparateur non agréé RedMax au cours de la période de garantie.
10. Certaines pièces ou autres éléments ne sont pas garantis y compris
, entre autres : les bougies, filtres, lubrifiants, cordons de lanceur,
pignons et sacs à débris. La surchauffe ou les rayures dues à la calamine résultant d’une obstruction de l’orifice d’échappement, d’un
écran pare-étincelle ou de la chambre de combustion.
11. Les réglages et entretiens avant la livraison, les réglages du moteur, y compris la décoloration naturelle due aux ultraviolets.
12. Les réglages effectués plus de trente (30) jours après la date d’achat, notamment les réglages du carburateur et du câble d’accélérateur.
13. La détérioration des engrenages ou de la boîte de transmission résultant de la contamination de la graisse, de l’utilisation de lubrifiant de
type ou de viscosité incorrects et/ou du non respect des intervalles de lubrification et de vidange recommandés.
14. Les dommages causés par le pompage ou la pulvérisation de produits caustiques ou inflammables, l’absence de filtre ou la présence d'un
filtre endommagé.
15. Les dommages complémentaires sur des pièces ou des composant occasionnés par la poursuite de l’utilisation après qu’un problème de
fonctionnement ou une panne soient apparus. En cas de problème de fonctionnement ou de défaillance, le produit ne doit pas être utilisé
,
mais confié en l’état à un concessionnaire réparateur agréé RedMax.
RESPONSABILITÉ IMPORTANTE DU PROPRIÉTAIRE
Le propriétaire doit faire preuve d’une utilisation raisonnable et d’un entretien convenable et suivre les conseils préventifs de maintenance,
de stockage, d'utilisation de carburant et d'huile décrits dans le manuel de l’utilisateur. Si un problème survenait pendant la période de garantie,
vous devez apporter ou envoyer à vos frais votre appareil RedMax à un concessionnaire réparateur agréé RedMax pour les réparations
sous garantie et prendre vos dispositions pour venir rechercher ou vous faire envoyer l’appareil une fois les réparations terminées. Si vous
ignorez où se trouve votre concessionnaire réparateur agréé RedMax le plus proche, consultez les pages jaunes ou appelez RedMax, au 1800-291-8251 de 8h à 17h ou rendez vous sur le site www.RedMax.com
. Pour toute assistance ou question concernant cette déclaration de
garantie, vous pouvez nous contacter au 1-800-291-8251 de 8h à 17h ou via notre site web www.RedMax.com.
RESPONSABILITÉ IMPORTANTE DU PROPRIÉTAIRE
IL INCOMBE AU CONCESSIONNAIRE ET/OU A L’ACHETEUR DE REMPLIR ET DE RETOURNER LA CARTE D’ENREGISTREMENT DE
GARANTIE FOURNIE AVEC VOTRE PRODUIT REDMAX DANS LES 10 JOURS QUI SUIVENT LA DATE DE L’ACHAT.
LE REÇU DE VENTE INDIQUANT LA DATE, LE MODELE ET LE NUMERO DE SERIE DU MOTEUR
DOIT ETRE CONSERVE ET
PRESENTE AU CONCESSIONNAIRE REPARATEUR AGREE RedMax POUR TOUTE REPARTION SOUS GARANTIE. L’ACHETEUR-
PROPRIETAIRE EST LE SEUL QUI SOIT TENU DE FOURNIR UNE PREUVE D’ACHAT. CERTAINS ETATS ET PROVINCES NE
PERMETTANT PAS LA LIMITATION DE DUREE DES GARANTIES IMPLICITES, IL EST POSSIBLE QUE LES LIMITATIONS CI-DESSUS NE
VOUS SOIENT PAS APPLICABLES. CERTAINS ETATS ET PROVINCES NE PERMETTANT PAS L’EXCLUSION OU LA LIMITATION DES
DOMMAGES INDIRECTS OU CONSECUTIFS, IL EST POSSIBLE QUE LES LIMITATIONS CI-DESSUS NE VOUS SOIENT PAS
APPLICABLES. CETTE GARANTIE VOUS DONNE DES DROITS SPECIFIQUES ET VOUS POUVEZ AUSSI BENEFICIER D’AUTRES
DROITS QUI VARIENT D’ETAT A ETAT. CETTE GARANTIE EST OFFERTE EXCLUSIVEMENT
PAR RedMax NOTRE ADRESSE est la
suivante, 7349 Stateville Rd. Charlotte, NC 28269
1/2010
F R
Page 48

Page 49

ES-1
CHT220/CHT220L
E
S
MANUAL DE
INSTRUCCIONES
CORTASETOS
115 43 11-49 (105)
ADVERTENCIA
ADVERTENCIA
Los gases de escape del motor de
este producto contienen
sustancias químicas conocidas
por el Estado de California como
causantes de cáncer,
malformaciones en recién nacidos
y otros problemas de
reproducción.
Antes de usar nuestros productos,
lea detenidamente este manual a
fin de familiarizarse con el uso
correcto de este aparato.
CHT220
CHT220L
Este sistema de ignición por chispa de vehículo
es conforme con la norma ICES-002 del Canadá.
Page 50

ES-2
CHT220/CHT220L
LA SEGURIDAD PRIMERO
Las instrucciones que aparecen en este manual
bajo las advertencias marcadas con el símbolo
hacen referencia a puntos críticos que deben
tomarse en consideración para evitar posibles
lesiones físicas; por esta razón, le solicitamos que
lea detenidamente todas estas instrucciones y que
las siga estrictamente.
■ ADVERTENCIAS CONTENIDAS EN EL MANUAL
Bajo este símbolo aparecen instrucciones que se deben
seguir a fin de evitar accidentes que pueden causar
serias lesiones físicas o la muerte.
Bajo este símbolo aparecen instrucciones importantes
que se deben seguir; ignorar estas instrucciones puede
ocasionar fallos mecánicos, desperfectos o daños.
Este símbolo hace referencia a consejos o indicaciones
que son de utilidad para el uso del producto.
NOTA
El motor se para poniendo el contacto de parada en la
posición de parada.
¡NOTA! El contacto de parada retorna automáticamente
a la posición de
arranque. Por consiguiente, antes de realizar trabajos
de montaje, control y/o mantenimiento se debe quitar el
capuchón de encendido de la bujía para evitar el
arranque imprevisto.
Utilice siempre guantes protectores homologados.
La máquina debe limpiarse regularmente.
Control visual.
Debe utilizarse gafas protectoras o visor.
ADVERTENCIA
IMPORTANTE
Page 51

ES-3
CHT220/CHT220L
E
S
1. Situación de las piezas.......................................................4
2. Especificaciones.................................................................4
3. Símbolos.............................................................................5
4. Control de emisiones..........................................................5
5. Instrucciones de seguridad.................................................6
6. Combustible........................................................................9
7. Arranque y parada............................................................12
8. Tecnica de trabajo ............................................................13
9. Mantenimiento ..................................................................15
10. Almacenamiento...............................................................19
11. Eliminación .......................................................................19
12. Guía de localización y solución de problemas .................19
Contenido
■ ANTES DE ARRANCAR, OBSERVE LO SIGUIENTE:
Lea detenidamente el manual de instrucciones.
¡ATENCION! La exposición prolongada al ruido
puede causar daños crónicos en el oído, Por
consiguiente, use siempre protectores auriculares
homologados.
¡ATENCION! Bajo ninguna circunstancia debe
modificarse la configuración original de la
máquina sin autorización del fabricante. Utilizar
siempre recambios originales. Las modificaciones
y/o la utilización de accesorios no autorizadas
pueden ocasionar accidentes graves o incluso la
muerte del operador o de terceros.
Su garantía podría no abarcar daños o
responsabilidades causados por el uso de
accesorios o piezas de repuesto no autorizados.
¡ATENCION! Si se utiliza mal o de manera
negligente, un cortasetos puede ser una
herramienta peligrosa y causar daños graves,
incluso mortales. Es sumamente importante que
lea y entienda el contenido de este manual de
instrucciones.
Page 52

ES-4
CHT220/CHT220L
1. Situación de las piezas
2. Especificaciohes
1 Manual de instrucciones
2 Mango
3 Bloqueo del acelerador
4 Tapa del depósito
5 Estrangulador
6 Mango delantero
7 Hoja y protección de la hoja
8 Protección para transportes
9 Tapa del filtro de aire
10 Bomba de combustible
11 Depósito de combustible
12 Bloqueo para el mango CHT220L
13 Acelerador
14 Capuchón de encendido y bujía
15 Cubierta del cilindro
16 Empuñadura de arranque
17 Botón de parada
18 Recarga de lubricante, engranaje
19 Engranaje
20 Protección para la mano
21 Llave combinada
22 Tubo de grasa
Nome del modello CHT220 CHT220L
Motor
Cilindrada, pulgadas/cm
3
21,7 21,7
Diámetro del cilindro, pulgadas/mm 1,26/32 1,26/32
Carrera, pulgadas/mm 1,06/27 1,06/27
Régimen de ralentí, rpm 2900 2900
Régimen máximo de embalamiento recomendado, r.p.m. 9000 9000
Potencia máxima del motor según ISO 8893, kW/ rpm 0,6/7800 0,6/7800
Silenciador con catalizador Sí Sí
Sist. de encendido con reg. de veloc. Sí Sí
Sistema de encendido
Bujía NGK CMR6A NGK CMR6A
Distancia de electrodos, pulgadas/mm 0,02/0,5 0,02/0,5
Sistema de combustible y lubricación
Capacidad del depósito de gasolina, US pint/litros 0,3 0,3
Peso
Peso, sin combustible, kg 4,7 10,8/4,9
Niveles acústicos
(ver la nota 1)
Nivel de presión sonora equivalente en la oreja del
usuario, medido según EN ISO 10517, dB(A): 93 5,7/94
Niveles de vibraciones
(vea la nota 2)
Niveles de vibración equivalentes (ahv, eq) en las
empuñaduras, medidos según la norma EN ISO 10517, m/s
2
.
Mango delantero/trasero: 2,9/4,9 4,1/3,6
Cuchillas
Tipo Doble lado Doble lado
Longitud, mm 450 590
Velocidad de la cuchilla, corte/min. 4050 4050
Nota 1: Los datos referidos del nivel de presión sonora equivalente de la máquina tienen una dispersión estadística habitual
(desviación típica) de 1 dB (A).
Nota 2: Los datos referidos del nivel de vibración equivalente poseen una dispersión estadística habitual (desviación típica)
de 1 m/s
2
.
Page 53

ES-5
CHT220/CHT220L
E
S
3. Símbolos
4. Control de emisiones
¡ATENCION! Si se utiliza mal o de manera negligente, un
cortasetos puede ser una herramienta peligrosa y causar daños
graves, incluso mortales. Es sumamente importante que lea y
entienda el contenido de este manual de instrucciones.
Lea detenidamente el manual de instrucciones y asegúrese de
entender su contenido antes de utilizar la máquina.
Utilice siempre:
• Protectores auriculares homologados
• Protección ocular homologada
Utilice siempre guantes protectores homologados.
Utilice botas o zapatos antirresbalantes y fuertes.
Instrucciones de arranque Consulte las instrucciones bajo el título
Arranque y parada.
Los demás símbolos/etiquetas que aparecen en la máquina
corresponden a requisitos de homologación específicos en
determinados mercados.
El período de cumplimiento de emisiones mencionado en la
etiqueta de cumplimiento de emisiones indica el número de horas
de funcionamiento en el que el motor ha demostrado cumplir con
los requisitos federales en materia de emisiones.
La máquina lleva una etiqueta de control de emisiones.
Page 54

ES-6
CHT220/CHT220L
5. Instrucciones de seguridad
1. ESTA CÁQUINA PUEDE CARSAR
HERIDAS GRAVES. Lea este manual
atentamente hasta que lo comprenda
totalmente y siga todas las
instrucciones de seguridad y
funcionamiento. Asimismo, sepa cómo
detener la máquina rápidamente en
caso de una emergencia.
2. Mantenga este manual a mano para
que pueda consultarlo siempre que se
le plantee cualquier duda. Tenga
también presente que si tiene cualquier
duda que no pueda responder leyendo
el manual, póngase en contacto con el
distribuidor de quien adquirió el
producto.
3. Asegúrese siempre de incluir este
manual cuando venda, preste o
transfiera la propiedad del producto de
cualquier otro modo.
4. No deje nunca a los niños ni a nadie
que no entienda totalmente las
instrucciones dadas en este manual
que utilice este aparato.
■ CONDICIÓN DE TRABAJO
1.Cuando utilice este producto, deberá llevar
ropa y equipo protector adecuados.
(1) Casco
(2) Protectores auditivos
(3) Gafas protectoras o protector facial
(4) Guantes de trabajo gruesos
(5) Botas de trabajo con suela
antideslizante
2Y debería llevar consigo.
(1) Herramientas incluidas
(2) Combustible para uso especial
(3) Cuchilla de repuesto
(4) Elementos para notificar en el área de
trabajo (cuerda, señales de
advertencia)
(5) Silbato (para colaboración o
emergencia)
(6) Hacha de mano o sierra (para
eliminación de obstáculos)
(7) Botiquín
3. No lleve ropas sueltas, joyas, pantalones
cortos, sandalias ni vaya descalzo. No
lleve nada que pudiera causar que se
moviera alguna pieza de la unidad.
Recógase el cabello para que le quede por
encima de los hombros.
■ CIRCUNSTANCIAS DE TRABAJO
1. Nunca haga arrancar el motor en un lugar
cerrado o dentro de un edificio. Los gases
del escape contienen monóxido de
carbono, que es una sustancia sumamente
peligrosa.
2. No utilice nunca el producto,
a. cuando el suelo esté resbaladizo o
cuando no pueda mantener el
equilibrio.
b. Por la noche, cuando haya mucha
niebla, o en otras ocasiones cuando su
campo de visión pudiera verse limitado
y fuese difícil tener una visión clara del
área de trabajo.
c. Durante tormentas de lluvia, durante
tormentas de rayos, cuando haya aviso
de fuertes temporales o en otras
ocasiones en las que las condiciones
climatológicas pudieran hacer que no
resultara seguro utilizar este producto.
■ PLAN DE TRABAJO
1. No debería utilizar nunca este producto
bajo la influencia del alcohol, cuando esté
exhausto o falto de sueño, cuando esté
aturdido por haber tomado medicamentos
contra el resfriado o en cualquier otro
momento cuando exista posibilidad de que
su juicio se vea limitado o no sea capaz de
utilizar el producto adecuadamente de una
manera segura.
2. Cuando organice su calendario de trabajo,
asigne bastante tiempo al descanso.
Limite la cantidad de tiempo en la que
puede utilizarse el producto de manera
continuada hasta un punto entre 30 ~ 40
minutos por sesión y tome 10 ~ 20 minutos
de descanso entre las sesiones de trabajo.
Intente también mantener la cantidad total
de trabajo efectuada en un único día por
debajo de 2 horas o menos.
1. Si no respeta el horario de trabajo o la
manera de trabajar (Consulte “EMPLEO
DEL PRODUCTO”), podrían
desarrollarse lesiones por esfuerzo
repetitivo (RSI).
Si siente incomodidad, rojez e
hinchazón de los dedos o de cualquier
otra parte del cuerpo, consulte a un
médico antes de que empeore.
2. Para evitar quejas por ruido, como
norma general, utilice el producto entre
las 8 AM y las 5 PM los días laborables
y de 9 AM a 5 PM los fines de semana.
ADVERTENCIA
Page 55

ES-7
CHT220/CHT220L
E
S
5. Instrucciones de seguridad
Compruebe y siga las normativas locales en
lo que se refiere al nivel de sonido y las
horas de funcionamiento del producto.
■ ANTES DE ARRANCAR LA MÁQUINA
1. El área dentro de un perímetro de 15 m de
la persona que utilice el producto deberá
considerarse un área peligrosa con acceso
restringido. En caso necesario, deberá
llevarse ropa amarilla de advertencia y
colocarse señales de advertencia
alrededor del perímetro del área. Cuando
el trabajo lo realizan simultáneamente dos
o más personas, deberá tenerse cuidado
de mirar constantemente alrededor o, en
caso contrario, comprobar la presencia y
ubicaciones de otras personas que estén
trabajando para mantener una distancia
suficiente entre cada persona para
garantizar la seguridad.
2. Compruebe la condición del área de
trabajo para evitar accidentes al golpear
obstáculos ocultos, como tocones, piedras,
latas o cristales rotos.
Quite cualquier obstáculo antes de empezar
el trabajo.
3. Examine toda la unidad por si hubiera
abrazaderas sueltas y fugas de
combustible. Asegúrese de que el
accesorio de corte está instalado
correctamente y fijado de manera segura.
■ ARRANQUE DE LA MÁQUINA
1. Mantenga a los curiosos, especialmente
niños y animales, por lo menos 15 m
alejados del lugar de operación. Si se
acerca alguien, detenga inmediatamente la
máquina.
2. La máquina está equipada con un
mecanismo de embrague centrífugo, de tal
modo que el dispositivo de corte empieza
a rotar tan pronto como se encienda el
motor, poniendo el obturador en posición
de arranque. Cuando arranque el motor,
sitúe el producto en el suelo en un área
plana y limpia y sosténgalo firmemente
para garantizar que ni la pieza de corte ni
el acelerador entran en contacto con
ningún obstáculo cuando se arranca el
motor.
IMPORTANTE
• No coloque nunca el acelerador en la
posición de velocidad alta cuando
arranque el motor.
• No arranque nunca el motor en el lado
del accesorio de corte.
3. Después de arrancar el motor, asegúrese
de que el accesorio de corte deje de girar
cuando el acelerador se mueva totalmente
hacia atrás hasta su posición original. Si
continúa girando incluso después de que
el acelerador se haya movido totalmente
hacia atrás, desconecte el motor y lleve la
unidad al servicio técnico de RedMax para
su reparación.
■ EMPLEO DEL PRODUCTO
Corte sólo los materiales recomendados
por el fabricante. Y utilícelo sólo para las
tareas explicadas en el manual.
1. Agarre las asas firmemente con ambas
manos, no sólo con los dedos. Separe un
poco los pies (una separación ligeramente
mayor que la anchura de los hombros) a
fin de que su altura quede distribuida de
manera uniforme por ambas piernas y
asegúrese siempre de mantener una
postura equilibrada y uniforme durante el
trabajo.
2. Mantenga la velocidad del motor en el
nivel requerido para realizar el trabajo de
corte y no aumente nunca la velocidad del
motor por encima del nivel necesario.
3. Si la unidad comienza a agitarse o vibrar,
desconecte el motor y compruebe toda la
unidad. No la utilice hasta que el problema
se haya solucionado por completo.
4. Mantenga todas las partes de su cuerpo
lejos del accesorio de corte rotativo y de
las superficies calientes.
5. No toque nunca el silenciador, la bujía ni
otras piezas metálicas del motor mientras
éste esté en funcionamiento o
inmediatamente después de
desconectarlo. De lo contrario, podrían
producirse quemaduras graves o
descargas eléctricas.
6. Mientras está operando la máquina,
asegúrese de mantener siempre una
posición de operación segura,
especialmente cuando está usando
escalones o escaleras.
IMPORTANTE
NOTA
ADVERTENCIA
Page 56

ES-8
CHT220/CHT220L
5. Instrucciones de seguridad
• SI SE ACERCA ALGUIEN
1. Protéjase de situaciones peligrosas en
todo momento. Advierta a los adultos que
mantengan a las mascotas y los niños
fuera del área. Tenga cuidado de si se le
acerca alguien. Los desechos que flotan
en el aire pueden ocasionar heridas.
2. Si alguien le llama o le interrumpe durante
el trabajo, asegúrese siempre de apagar la
máquina antes de girarse.
■ MANTENIMIENTO
1. Para mantener su producto en perfectas
condiciones de funcionamiento, realice las
operaciones de mantenimiento y revisión
descritas en el manual a intervalos
regulares.
2. Asegúrese de apagar siempre el motor
antes de realizar cualquier mantenimiento,
revisar procedi-mientos o manipular la
máquina.
(1) Comprobación correcta!
Las piezas metálicas alcanzan
temperaturas altas inmediatamente
después de detener el motor.
3. Cuando sustituya el accesorio de corte o
cualquier otra pieza o cuando sustituya el
aceite o cualquier lubricante, asegúrese
siempre de utilizar sólo productos
RedMax o productos que hayan sido
certificados por RedMax para su
empleo con productos RedMax.
4. En caso de que deba sustituirse cualquier
pieza o de que deban efectuarse trabajos
de reparación o mantenimiento no
descritos en este manual, póngase, por
favor, en contacto con un representante
del servicio técnico autorizado de RedMax
más cercano en busca de ayuda.
5. No utilice ningún accesorio que no tenga la
marca RedMax y recomendado para esta
unidad.
6. Bajo ninguna circunstancia debería
desmontar el producto ni alterarlo de
ningún modo. De lo contrario, podría
dañarse el producto durante su
funcionamiento o podría no funcionar
adecuadamente.
■ MANEJO DEL COMBUSTIBLE
1. El motor del producto RedMax está
diseñado para funcionar con combustible
de mezcla que contenga gasolina
altamente inflamable. No almacene nunca
ADVERTENCIA
latas de combustible ni llene el depósito de
la unidad en cualquier lugar donde haya
un quemador, horno, fuego de lecha,
chispas eléctricas, chispas de soldadura o
cualquier otra fuente de calor o fuego que
pueda hacer prender el combustible.
2. No fume nunca mientras utiliza la unidad o
mientras llene el depósito.
3. Cuando llene el depósito, apague siempre
el motor y déjelo que se refresque. Eche
un vistazo detallado para asegurarse de
que no haya chispas ni llamas abiertas en
ningún sitio cercano antes de reponer el
combustible.
(1) Llenar una vez que el motor se haya
enfriado.
4. Limpie el combustible derramado
completamente con un trapo seco si se
derrama combustible durante la tarea de
repostar.
5. Después de repostar, vuelva a atornillar la
tapa del combustible firmemente en el
depósito de combustible y después lleve la
unidad al menos a 3 m o más de donde
haya repostado antes de encender el
motor.
6. No inhale humos combustibles; son
tóxicos.
■ TRANSPORTE
1. Cuando porte el producto, cubra la parte
cortante en caso necesario, levante el
producto y trasládelo con cuidado de la
cuchilla.
2. No transporte nunca el producto por
carreteras con baches a distancias largas
en un vehículo sin sacar todo el
combustible del depósito. De lo contrario,
el combustible podría derramarse del
depósito durante le transporte.
Page 57

ES-9
CHT220/CHT220L
E
S
6. Combustible
■ COMBUSTIBLE
• La gasolina es muy inflamable. Evite fumar o producir
cualquier llama o chispa cerca del combustible. Asegúrese
de detener el motor y dejar que se enfríe antes de repostar
la unidad. Seleccione un terreno al aire libre para el
reabastecimiento y aleje la unidad una distancia de por lo
menos 3 metros (10 pies) del punto de abastecimiento
antes de poner en marcha el motor.
■ Requerimientos de la Gasolina
• Todos los productos RedMax de 2 tiempos cuentan con la
potencia de los motores de 2 tiempos de uso comercial
producidos por RedMax Professional, que se enfrían por aire,
de altas RPM y alto rendimiento.
• Las emisiones del escape son controladas por los parámetros y
componentes fundamentales del motor (por ejemplo,
carburación, ajuste de encendido y de puerto) sin agregar
ningún software mayor o introducir un material inerte durante la
combustión.
• Los motores de 2 tiempos de alto rendimiento de RedMax
producen mayores emisiones de HP comparado con los
motores estándar para uso doméstico o para la producci_n de
uso comercial ligero ofrecidos por la mayoría de los
fabricantes.
• Los motores RedMax se encuentran registrados y certificados
por CARB (Consejo de los Recursos del Aire de California) y
EPA (Agencia de Protección Ambiental) para poder operar con
la gasolina CLEAN Mid-grade de 89 octanos o Premium, sin
plomo (libre de plomo) y con el aceite Premium "Max Life" para
motor de dos tiempos de mezcla sintética, en una relación
50:1.
• Se recomienda la gasolina sin plomo para reducir la
contaminación del aire por el bien de su salud y del
medioambiente. Este motor de 2 tiempos, alto rendimiento y
enfriado por aire requiere el uso de gasolina limpia con un
Mínimo
de 89 octanos (Mid grade o Premium). La
gasolina podría contener como máximo un 10% de etanol
(alcohol de grano) o hasta un 15% de MTBE (_ter Metil TertButílico). La gasolina con Metanol (Alcohol de madera) NO ha
sido aprobada.
• Si la clasificación de octanos de la gasolina Mid Grade
en su
área es menor de 89 Octanos utilice gasolina sin plomo
Premium. La mayoría de todos los fabricantes de motores de 2
tiempos en EE.UU. y Canadá recomiendan utilizar gasolina con
89 octanos o más,
NOTA
• Gasolina con menos de 89 octanos incrementará
considerablemente la temperatura de operación de los
motores. La gasolina de bajo octanaje ocasionará
detonaciones (golpeteo), y como resultado los pistones se
dispararán y se producirán averías serias en los componentes
internos del motor.
• Gasolinas o aceites de mala calidad puede dañar los anillos de
sellado, las líneas o el tanque de combustible del motor.
• Las averías ocasionadas por operar los motores con gasolina
con un octanaje menor de 89 no están cubiertas
por la garantía
de los motores de dos tiempos RedMax.
• Combustibles Alternativos (No Gasolina)
Los combustibles alternativos, tales como E-15 (etanol al
15%), E-20 (etanol al 20%), E-85 (etanol al 85%) NO están
clasificados como gasolina y NO están aprobados para el
uso en motores de gasolina de 2 tiempos RedMax. El uso
de combustibles alternativos ocasionará problemas serios
en el rendimiento y la durabilidad del motor como:
enganche incorrecto del embrague, sobrecalentamiento,
obstrucción de vapores, perdida de potencia, deficiencia
en la lubricación, deterioración de las líneas de
combustible, de los componentes del carburador internos
y las juntas, etc. Combustibles alternativos ocasionan que
se absorba humedad en gran cantidad en la mezcla de
combustible/aceite haciendo que el aceite y el combustible
se separen.
■ Requerimientos del aceite
• Utilice solamente aceite para motor de dos tiempos enfriado
por aire Premium de mezcla sintética, "Max Life" RedMax o
aceite certificado por los estándares ISO-L-EGD
(ISO/CD1378)
AND
y que sea JASO-FD registrado. Los aceites para motor de
dos tiempos enfriado por aire Premium de mezcla sintética,
"Max Life" RedMax y certificados por los est_ndares ISO-L-
EGD
(ISO/CD1378) AND
y que sea JASO-FD
registrado son
totalmente compatibles con gasolinas que contengan etanol al
10%. El aceite para motor de dos tiempos enfriado por aire
Premium de mezcla sintética, "Max Life" RedMax y el aceite
certificado por los estándares ISO-L-EGD
(ISO/CD1378) AND
y
que sea JASO-FD
registrado son universales y se deberán
mezclar en una relación 50:1 para todos los motores enfriados
por aire de 2 tiempos vendidos anteriormente a pesar de las
relaciones de mezcla especificadas en esos manuales.
• Si el aceite ha sido registrado por JASO, el logotipo de JASO
con FD y el número de registro, se visualizarán en el
contenedor. La clasificación más alta de JASO es "FD", el cual
es igual a la clasificación ISO-L-EGD
. Las clasificaciones
menores son "FC", "FB" y "FA".
ADVERTENCIA
[ R+M ]
2
ADVERTENCIA
ADVERTENCIA
NOTA
Page 58

ES-10
CHT220/CHT220L
6. Combustible
• Los problemas ocasionados en el motor debido a una
lubricación inadecuada por no utilizar el aceite certificado por
los estándares ISO-L-EGD
y JASO - FD tales como el aceite
de 2 tiempos Premium de mezcla sintética "MaxLife", RedMax
ANULARÁ LAGARANTÍA DEL MOTOR DE DOS TIEMPOS
RedMax.
• No utilice aceites NMMA (Asociación Nacional de Fabricantes
de Motores marinos), BIA (Asociación de la Industria Naviera) y
aceites TCW (dos tiempos enfriados con agua) diseíados para
motores marinos MoPeds o Fuera borda enfriados con agua.
No utilice aceites etiquetados con API (Instituto Americano del
Petróleo) TC (Dos tiempos).
La prueba estándar API-TC fue suspendida por API en 1995 y
ya no se encuentra disponible.
• Recomendaciones de almacenamiento de la mezcla
gasolina/aceite
Almacene la gasolina o la mezcla gasolina/aceite en un área
seca fría en un contenedor sellado aprobado para evitar la
entrada de humedad y de aire adicional (oxigeno). La humedad
y el aire pueden ocasionar el desarrollo de barniz y goma,
haciendo que el combustible se eche a perder.
La gasolina almacenada y la mezcla gasolina/aceite con el
tiempo pierde su octanaje y volatilidad. No mezcle más
gasolina/aceite de la que piensa utilizar en 30 días y 60 días
cuando agrega un estabilizador.
El aceite para motor de dos tiempos Premium de mezcla
sintética enfriado por aire "Max Life" RedMax "contiene
estabilizador de combustible" y automáticamente extenderá
la duración de la mezcla gasolina/aceite hasta para 60 días.
■ COMO MEZCLAR EL COMBUSTIBLE
PROPORCIÓN DE LA MEZCLA
RECOMENDADA
GASOLINA 50 : ACEITE 1
(al utilizar el aceite auténtico de
enfirado parair "Max Life" RedMax)
IMPORTANTE
• Preste atención en la agitación.
1. Mida las cantidades de gasolina y aceite que va a mezclar.
2. Coloque un poco de gasolina dentro de un depósito de
combustible aprobado y limpio.
3. Vierta en este todo el aceite y agítelo bien.
4. Vierta el resto de la gasolina y agite la mezcla nuevamente
durante por lo menos un minuto. La mezcla de algunos aceites
puede resultar difícil, dependiendo de los ingredientes del
aceite, es necesaria una agitación suficiente para beneficio de
la duración del motor. Tenga cuidado, si la agitación es
insuficiente, existe un aumento en el peligro de atascamiento
del pistón anticipado debido a una mezcla anormalmente
pobre.
5. Coloque una indicación o etiqueta clara en la parte exterior del
depósito para evitar que este se pueda confundir con depósitos
de gasolinas u otras sustancias.
6. Indique los contenidos en la parte exterior del deposito para
una fácil identificación.
■ ABASTECIMIENTO DE LA UNIDAD
1. Desenrosque y retire la tapa del combustible. Coloque la tapa
sobre un lugar sin polvo.
2. Coloque el combustible dentro del tanque a un 80% de la
capacidad total.
3. Fije en forma segura la tapa del combustible y limpie cualquier
derramamiento de combustible que se encuentre al rededor de
la unidad.
1. Seleccione un terreno al descubierto para el reabastecimiento.
2. Aleje la unidad una distancia de por lo menos 3 metros (10
pies) del punto de abastecimiento antes de poner en marcha el
motor.
3. Detenga el motor antes de reabastecer la unidad. En ese
momento, asegúrese de agitar en forma suficiente la gasolina
mezclada en el depósito.
■ PARA CONTRIBUIR A LA VIDA ÚTIL DEL MOTOR, EVITE:
1. COMBUSTIBLE SIN ACEITE (GASOLINA CRUDA) – Esto
ocasionará rápidamente daños graves a las partes internas del
motor.
2. GASOHOL – Este puede causar el deterioro de las piezas de
caucho y/o plásticas y una alteración en la lubricación del
motor.
3. ACEITE PARA USO EN MOTORES DE 4-TIEMPOS – Esto
puede ocasionar incrustaciones de la bujía de encendido,
bloqueo del orificio de escape o del anillo de pistón.
4. Los combustibles mezclados que se hayan dejado sin
utilizar durante un período de un mes o más pueden obstruir
el carburador y provocar una falla haciendo que el motor no
funcione correctamente.
5. En el caso de almacenamiento del producto durante un período
de tiempo prolongado, limpie el tanque de combustible
después de haberlo desocupado. Luego, active el motor y
ADVERTENCIA
CUADRO DE MEZCLA 50:1
GASOLINA gal. 1 2 3 4 5
ACEITE 2 CICLOS onz.líqu. 2.6 5.2 7.8 10.4 13
GASOLINA litre 1 2 3 4 5
ACEITE 2 CICLOS ml 20 40 60 80 100
ADVERTENCIA
ADVERTENCIA
Page 59

ES-11
CHT220/CHT220L
E
S
6. Combustible
vacíe del carburador el combustible compuesto.
6. En el caso de tener que desechar el depósito de aceite
mezclado, hágalo solo en un sitio repositorio autorizado.
• Para detalles sobre la garantía de calidad, lea cuidadosamente
la descripción que está en la sección de garantía limitada. Por
otra parte, el desgaste y cambio normal en el producto sin
influencia funcional no está cubierto por la garantía. También
tenga cuidado si en el manual de instrucciones en la parte
sobre el uso, no están contemplados detalles como la mezcla
de gasolina, etc. es posible que esto no sea cubierto por la
garantía.
NOTA
Page 60

ES-12
CHT220/CHT220L
Motor frío
Estrangulador:
Ponga el estrangulador en la posición de
estrangulamiento.
Bomba de combustible: Presione varias veces la
membrana de goma de la bomba de combustible hasta que
comience a llenarse de combustible (unas 6 veces).
No es necesario llenar completamente la membrana.
Arranque
Presione el cuerpo de la máquina contra el suelo con la
mano izquierda (ATENCION: ¡No con el pie!). Agarre la
empuñadura de arranque y tire despacio de la cuerda con
la mano derecha, hasta sentir una resistencia (los dientes
de arranque engranan), y después tire rápido y con fuerza.
Nunca enrosque el cordón de arranque alrededor de la
mano.
■ CONTROL ANTES DE ARRANCAR
• Inspeccione el área de trabajo. Retire objetos que
puedan ser lanzados.
• Controle el equipo de corte. Nunca utilice cuchillas
romas, agrietadas o dañadas.
• Controle que la máquina esté en excelentes condiciones
de funcionamiento. Verifique que todas las tuercas y
tornillos estén apretados.
• Asegúrese de que el engranaje esté suficientemente
lubricado. Consulte las instrucciones bajo el título
Engranaje.
• Compruebe que el equipo de corte siempre se detenga
en ralentí.
• Utilice la máquina solamente para el uso al que está
destinada.
• Controle que los mangos y las funciones de seguridad
estén en buenas condiciones. No utilice nunca una
máquina que carece de una pieza o que ha sido
modificada fuera de las especificaciones.
• Todas las cubiertas deben estar correctamente
montadas y en buenas condiciones antes de arrancar la
máquina.
■ARRANQUE Y PARADA
¡ATENCION! Antes de arrancar la máquina,
debe haberse montado la caja de engranajes
completa, de lo contrario el embrague se
puede aflojar y ocasionar daños personales.
Aparte siempre la máquina unos 3 metros del
lugar donde cargó de combustible antes de
arrancar. Coloque la máquina sobre una
base firme.
Recuerde que las cuchillas pueden
comenzar a moverse cuando arranca el
motor. Cerciórese de que las cuchillas no
entren en contacto con ningún objeto.
Verifique que no haya personas
desautorizadas en el lugar de trabajo, dado
que existe el riesgo de daños personales
graves. La distancia de seguridad es de 15
metros.
7. Arranque y parada
Page 61

ES-13
CHT220/CHT220L
E
S
7. Arranque y parada 8. Tecnica de trabajo
Al encender el motor, vuelva a colocar rápidamente el mando del
estrangulador en su posición inicial y repita el intento de arranque
hasta que el motor arranque.
¡NOTA! Cuando el estrangulador se empuja hacia su posición
original, el motor corre a una velocidad aumentada, la
denominada posición de aceleración de arranque, y las hojas se
mueven. La posición de aceleración de arranque se libera con la
palanca del acelerador.
¡NOTA! No extraiga el cordón de arranque al máximo, y no suelte
la empuñadura de arranque si ha extraído todo el cordón. Ello
puede ocasionar averías en la máquina.
Motor caliente
Presione el cuerpo de la máquina contra el suelo con la mano
izquierda (ATENCION: ¡No con el pie!). Agarre la empuñadura de
arranque y tire despacio de la cuerda con la mano derecha, hasta
sentir una resistencia (los dientes de arranque engranan), y
después tire rápido y con fuerza. Nunca enrosque el cordón de
arranque alrededor de la mano.
Parada
El motor se para poniendo el contacto de parada en la posición
de parada.
¡NOTA!
El contacto de parada retorna automáticamente a la posición de
arranque. Por consiguiente, antes de realizar trabajos de montaje,
control y/o mantenimiento se debe quitar el capuchón de
encendido de la bujía para evitar el arranque imprevisto.
■ INSTRUCCIONES GENERALES DE TRABAJO
¡IMPORTANTE!
Este capítulo trata de las reglas de seguridad básicas
para trabajar con el cortasetos.
Cuando se vea en una situación insegura para continuar
el trabajo, debe consultar a un experto.
Póngase en contacto con su distribuidor o taller de
servicio.
Evite todo uso para el cual no se sienta suficientemente
calificado.
¡ATENCION! La máquina puede ocasionar
lesiones graves. Lea atentamente las
instrucciones de seguridad. Aprenda a
utilizar la máquina.
¡ATENCION! Herramienta cortante. No toque
la herramienta sin apagar antes el motor.
Instrucciones de seguridad para el entorno
• No permita nunca que los niños utilicen la máquina.
• Observe el entorno y asegúrese de que no haya riesgo
de tocar a personas o animales con el equipo de corte.
• Controle que nadie se acerque a menos de 15 metros
durante el trabajo.
• Nunca deje que terceros utilicen la máquina sin
asegurarse primero de que hayan entendido el
contenido de este manual de instrucciones.
• No trabaje nunca desde una escalera, taburete u otra
posición elevada que no tenga un apoyo completamente
seguro.
• Debe tenerse en cuenta que el operador es responsable
de los accidentes o riesgos que ocurran a otras
personas o a su propiedad.
Instrucciones de seguridad durante el trabajo
• Cerciórese siempre de tener una posición de trabajo
segura y firme.
• No abandonar nunca la máquina sin vigilar, con el motor
en marcha.
Page 62

ES-14
CHT220/CHT220L
8. Tecnica de trabajo
• Utilice siempre las dos manos para sostener la máquina.
Mantenga la máquina delante del cuerpo.
• Cerciórese de mantener las manos y los pies alejados
del equipo de corte mientras el motor está en marcha.
• Al apagar el motor, mantenga las manos y los pies
alejados del equipo de corte hasta que el motor se
detenga por completo.
• Tenga cuidado con los trozos de rama que pueden salir
despedidos durante el corte.
• No corte demasiado cerca del suelo. Pueden salir
lanzadas piedras u otros objetos.
• Controle el objeto a cortar para cerciorarse de que no
tiene elementos extraños como cables de electricidad,
insectos, animales, etc., u elementos que puedan dañar
el equipo de corte, por ejemplo objetos de metal.
• Si choca con algún objeto o si se producen vibraciones
fuertes, pare la máquina. Desconecte el cable de
encendido de la bujía. Controle que la máquina no esté
dañada. Repare posibles averías.
• Si las cuchillas se atascan en algún objeto durante el
corte, apague primero el motor y espere a que las
cuchillas se detengan completamente antes de despejar
el objeto. Desconecte el cable de encendido de la bujía.
Si las hojas se atascan es posible soltarlas colocando la
llave combinada en la caja de engranajes. Retire el
tapón del lubricante, introduzca la llave combinada en
los engranajes y gírela hacia atrás y adelante.
Instrucciones de seguridad después del trabajo
• Si la máquina no se utiliza, coloque siempre la
protección para transporte sobre el equipo de corte.
• Antes de la limpieza, reparación o inspección,
cerciórese de que el equipo de corte se haya detenido.
Desconecte el cable de encendido de la bujía.
• Utilice siempre guantes resistentes al reparar el equipo
de corte. Éste es muy filoso y puede ocasionar cortes
con facilidad.
• Guarde la máquina fuera del alcance de los niños.
• Para las reparaciones, utilice solamente repuestos
originales.
Técnica básica de trabajo
• Trabaje con movimientos pendulares de abajo hacia
arriba al cortar los costados.
• Adapte la aceleración a la carga.
• Al recortar un seto, el motor siempre debe estar dirigido
hacia afuera del seto.
• Para lograr un buen equilibrio, mantenga siempre la
máquina lo más cerca posible del cuerpo.
• Tenga cuidado de que la punta no toque el suelo.
• No trate de forzar el trabajo, desplácese a una velocidad
constante para cortar todos los tallos de forma pareja.
CHT220L
El mango trasero del cortasetos puede regularse en cinco
posiciones tirando del fiador hacia afuera. (ver la figura).
Al regular la posición del mango, el cortasetos debe estar
en marcha lenta o sin funcionar.
• Durante el trabajo, el mango siempre debe mirar hacia
arriba, independientemente del sentido de dirección del
cortasetos.
Page 63

ES-15
CHT220/CHT220L
E
S
9. Mantenimiento
■ CARBURADOR
Reglaje del régimen de ralentí
Antes de hacer un ajuste, controle que el filtro de aire esté
limpio y que tenga colocada la tapa. Asegúrese de que la
posición de aceleración de arranque está desacoplada.
Regule el régimen de ralentí con el tornillo T, si es
necesario un reajuste. Gire primero el tornillo T en el
sentido de las agujas del reloj hasta que el equipo de corte
comience a moverse. Después gire el tornillo en el sentido
contrario, hasta que el equipo de corte se detenga. El
régimen de ralentí es correcto cuando el motor funciona de
forma pareja en todas las posiciones.
También debe existir un buen margen hasta el régimen de
ralentí en que empieza a moverse el equipo de corte.
Régimen recomendado en ralentí: Vea el capítulo Datos
técnicos.
¡ATENCION! Si no puede regular el régimen
en ralentí para que el equipo de corte deje de
girar, consulte a su
distribuidor/taller de servicio. No utilice la
máquina hasta que no esté correctamente
regulada o reparada.
■ SILENCIADOR
¡NOTA! Algunos silenciadores tienen catalizador. Consulte
el capítulo Datos técnicos para ver si su máquina tiene
catalizador.
El silenciador está diseñado para amortiguar el ruido y para
apartar del usuario los gases de escape. Los gases de
escape están calientes y pueden contener chispas que
pueden ocasionar incendios si se dirigen los gases a
materiales secos e inflamables.
Algunos silenciadores incorporan una red apagachispas.
Si su máquina cuenta con este tipo de silenciador, limpie la
red apagachispas. Esta limpieza se hace mejor con un
cepillo de acero.
En silenciadores sin catalizador, el apagachispas se debe
limpiar y cambiar una vez por semana, si es necesario. Si
el apagachispas presenta daños, se debe cambiar. Si el
apagachispas se bloquea frecuentemente, puede significar
que el carburador no está bien ajustado o que se ha
mezclado demasiado aceite con la gasolina.
En silenciadores con catalizador, se debe controlar el
apagachispas y limpiarlo, si es necesario, una vez por mes.
Si el apagachispas presenta daños, se debe cambiar.
Si el apagachispas se obstruye con frecuencia, esto puede
ser señal de que el catalizador no funciona correctamente.
Consulte a su distribuidor para un control.
Si el apagachispas se obstruye, la máquina se recalienta y
se dañan el cilindro y el pistón.
¡NOTA! No utilice nunca la máquina con un silenciador en
mal estado.
¡ATENCION! El silenciador con catalizador se
calienta mucho durante el uso y permanece
caliente aún luego de apagado el motor. Lo
mismo rige para la marcha en ralentí. Su
contacto puede quemar la piel. ¡Tenga en
cuenta el peligro de incendio!
■ SISTEMA REFRIGERANTE
Para lograr una temperatura de funcionamiento lo más baja
posible, la máquina incorpora un sistema refrigerante.
El sistema refrigerante está compuesto por:
1 Aletas de enfriamiento en el cilindro.
2 Cubierta del cilindro (dirige el aire refrigerante hacia el
cilindro).
3 Toma de aire por el cárter (dentro del depósito).
Limpie el sistema refrigerante con un cepillo una vez por
semana (en condiciones difíciles, con mayor frecuencia).
Un sistema refrigerante sucio u obturado produce
sobrecalentemiento de la máquina, con las consiguientes
averías del cilindro y el pistón.
Page 64

ES-16
CHT220/CHT220L
9. Mantenimiento
■ BUJÍA
Los factores siguientes afectan al estado de la bujía:
• Carburador mal regulado.
• Mezcla de aceite inadecuada en el combustible
(demasiado aceite o aceite inadecuado).
• Filtro de aire sucio.
Estos factores producen revestimientos en los electrodos
de la bujía que pueden ocasionar perturbaciones del
funcionamiento y dificultades de arranque.
Si la potencia de la máquina es demasiado baja, si es difícil
arrancar la máquina o si el ralentí es irregular:
revise primero la bujía antes de tomar otras medidas. Si la
bujía está muy sucia, límpiela y compruebe que la
separación de los electrodos sea de 0,5 mm. La bujía debe
cambiarse aproximadamente después de un mes de
funcionamiento o más a menudo si es necesario.
¡NOTA! ¡Utilice siempre el tipo de bujía recomendado!
Una bujía incorrecta puede arruinar el pistón y el cilindro.
Asegúrese de que la bujía tenga supresión de
perturbaciones radioeléctricas.
■ FILTRO DE AIRE
El filtro de aire debe limpiarse regularmente de polvo y
suciedad para evitar:
• Fallos del carburador
• Problemas de arranque
• Reducción de la potencia
• Desgaste innecesario de las piezas del motor
• Un consumo de combustible excesivo
Limpie el filtro cada 25 horas de funcionamiento o más
seguido si trabaja en un entorno muy polvoriento.
Limpieza del filtro de aire
Desmonte la cubierta del filtro de aire y retire el filtro.
Lávelo en agua jabonosa caliente. Deje que el filtro se
seque y luego aplíquele aceite tal y como se indica en las
instrucciones.
Un filtro utilizado durante mucho tiempo no puede limpiarse
del todo. Por tanto, hay que cambiarlo a intervalos
regulares. Un filtro de aire averiado debe cambiarse.
■ ENGRANAJE
En la caja de engranajes hay un tapón para introducir el
lubricante. Utilice el tubo para introducir la grasa y repita
este paso cada 25 horas. Use la grasa especial de
RedMax.
¡NOTA! No llene el engranaje totalmente con grasa. El
calor que se produce al hacer funcionar la máquina hace
que la grasa se dilate. Una cantidad excesiva de grasa en
el engranaje puede dañar las juntas y ocasionar fugas de
grasa.
Generalmente, el lubricante en el cuerpo del engranaje no
requiere cambiarse excepto cuando se realizan
reparaciones.
■ EQUIPO DE CORTE
Compruebe que los tornillos de las unidades de corte están
bien colocados. Apriételos con un par de apriete de 7–10
Nm.
Page 65

ES-17
CHT220/CHT220L
E
S
9. Mantenimiento
■ LIMPIEZA Y LUBRICACIÓN
Limpiar las cuchillas de resina y sabia con el detergente
531 00 75-13 (UL22) antes y después de cada empleo.
Compruebe que los bordes de la hoja no están dañados ni
deformados. Retire las rebabas que pueda encontrar.
Compruebe que las hojas se mueven sin atascarse.
Retire el botón del lubricante de la caja de engranajes,
introduzca la llave combinada y gírela hacia atrás y
adelante.
Lubricar las cuchillas con el lubricante especial referencia
531 00 75-12 (UL 21) antes del almacenaje prolongado.
¡IMPORTANTE! Utilice siempre repuestos originales de
RedMax. El uso de repuestos de otre marca puede
hacer daño al producto, al usario al tercer parte.
La garantía no cubre daños o responsabilidad causado
por uso de accesorios que no están recomendado por
RedMax.
Page 66

ES-18
CHT220/CHT220L
9. Mantenimiento
Limpie la parte exterior de la máquina.
Controle que los casquillos aislantes de las vibraciones no estén
dañados.
Para reducir el riesgo de incendio hay que limpiar el silenciador, el
tubo de escape y el motor de suciedad, hojas, lubricante sobrante,
etc.
Controle que el mando de detención funcione.
Controle que las cuchillas no giren en ralentí.
Compruebe que las cuchillas están intactas y que no tienen grietas ni
otros daños. Cambie las cuchillas si es necesario.
Controle la protección de las cuchillas para asegurarse de que no
presente daños ni deformaciones. Si la protección de la hoja está
doblada o dañada, sustituya la hoja.
Si la unidad de corte está doblada o dañada, debe cambiarse.
Controle que la protección para la mano no esté dañada.
Reemplace una protección dañada.
Compruebe que los tornillos y las tuercas estén apretados.
Controle que no haya fugas de combustible del motor, del depósito o
de los conductos de combustible.
Limpie el filtro de aire.
Limpiar más a menudo si trabaja en un entorno muy polvoriento.
Controle el mecanismo de arranque y la cuerda del mismo.
Compruebe que estén intactos los aisladores de vibraciones.
Limpie la bujía por fuera. Quítela y controle la distancia entre los
electrodos. Ajuste la distancia a 0,5 mm o cambie la bujía.
Controle que la bujía tenga supresión de perturbaciones
radioeléctricas.
Limpie el sistema de refrigeración de la máquina.
Limpie el exterior del carburador y la zona alrededor del mismo.
Rellene grasa en la caja de engranajes. Repita este procedimiento
cada 25 horas de trabajo aproximadamente.
Compruebe que los tornillos que mantienen juntas las cuchillas estén
correctamente apretados.
Controle y, si es necesario, limpie el apagachispas del silenciador
(sólo para silenciador con catalizador).
Limpie el interior del depósito de combustible.
Compruebe que no hay suciedad en el interior del filtro de
combustible y que la manguera de combustible no presenta fisuras ni
otros defectos. Cámbielo si es necesario.
Revise todos los cables y conexiones.
Compruebe si están desgastados el embrague, los muelles de
embrague y el tambor embrague. Cambie los componentes que sea
necesario en un taller de servicio oficial.
Cambie la bujía. Controle que la bujía tenga supresión de
perturbaciones radioeléctricas.
■ PROGRAMA DE MANTENIMIENTO
A continuación incluimos una lista con los puntos de mantenimiento a efectuar en la máquina. La mayoría de los puntos
se describen en el capítulo “Mantenimiento”. El usuario sólo puede efectuar los trabajos de mantenimiento y servicio
descritos en este manual. Los trabajos de mayor envergadura debe efectuarlos un taller de servicio oficial.
(25 tim).
Mantenimiento
Antes de
utilizar la
máquina:
Después de
40 horas en
uso
Después de
100 horas en
uso
Cada vez, después de usar la máquina
X
X
X
X
X
X
X
X
X
X
X
X
X
X
X
X
X
X
X
X
X
X
X
Page 67

ES-19
CHT220/CHT220L
E
S
1. Aceite la cuchilla para evitar la
oxidación.
2. Vacíe el tanque de combustible y
ponga de nuevo la tapa.
3. Quite la tapa de la bujía y eche una
pequeña cantidad de aceite en el
cilindro.
4. Gire el cigüeñal varias veces utilizando
la cuerda del arrancador para distribuir
el aceite. Reponga la bujía.
5. Envuelva el motor en plástico.
6. Guarde la cortasetos en un lugar seco,
preferiblemente sin contacto directo
con el suelo y lejos de fuentes de calor.
10. Almacenamiento
11. Eliminación
• Cuando decida deshacerse de la
máquina, el combustible o aceite para
la máquina, asegúrese de seguir el
reglamento de su localidad.
12. Guía de localización y solución de problemas
Caso 1. El motor no arranca
COMPROBAR POSIBLES CAUSAS ACCIÓN
Tanque de combustible ➞ Combustible incorrecto ➞ Vaciar y llenar con el combustible correcto
Filtro de combustible ➞
El filtro de combustible está obstruido.
➞ Limpiar
Tornillo de ajuste del carburador
➞ Fuera del margen normal ➞ Ajustar al margen normal
Explosión (no hay chispa) ➞ La bujía está sucia/mojada. ➞ Limpiar/secar
➞
La distancia interelectródica es incorrecta➞Corregir (DISTANCIA INTERELECTRÓDICA: 0,5 mm)
Bujía ➞ Desconectada ➞ Reajustarlo
Caso 2. El motor arranca pero no se mantiene en marcha./Dificultad para volver a arrancar el motor.
COMPROBAR POSIBLES CAUSAS ACCIÓN
Tanque de combustible ➞ Combustible incorrecto ➞
Vaciar y llenar con el combustible correcto.
Tornillo de ajuste del carburador ➞ Fuera del margen normal. ➞ Ajustar al margen normal.
Silenciador, cilindro (lumbrera de escape)
➞ Acumulación de carbón ➞ Quitar
Filtro de aire ➞ Obstruido con polvo ➞ Lavar
Aletas del cilindro, cubierta de ventilador
➞ Obstruidas con polvo ➞ Limpiar
Si le parece que la unidad necesita otros servicios, consulte nuestro centro de servicio en su área.
Page 68

ES-20
CHT220/CHT220L
La EPA (Agencia de Protección Ambiental de los EE.UU.), CARB (Comisión de Recursos del Aire de
California), Environment Canada y RedMax tienen el agrado de explicar la garantía del sistema de control de
emisiones para motores pequeños todo terreno modelos 2009 y posteriores. En EE.UU. y Canadá, el nuevo
equipo que utilice motores pequeños todo terreno deben estar diseñados, construidos y equipados de tal modo
que cumplan con las estrictas normas antiesmog de California o a nivel Federal. RedMax garantizan el sistema
de control de emisiones en el motor pequeño todo terreno para los periodos que se indican más abajo, siempre
que no haya habido abuso, negligencia o mantenimiento incorrecto del motor todo terreno. El sistema de
control de emisiones puede incluir piezas tales como el carburador, el sistema de ignición, el convertidor
catalítico, el depósito de combustible, filtros y otros componentes asociados. También podrían estar incluidos
las mangueras, bandas, conectores, sensores y otros ensambles relacionados con las emisiones. Cuando
exista una condición que esté cubierta por la garantía RedMax reparará el motor pequeño todo terreno
gratuitamente incluyendo los costos de diagnóstico, piezas y mano de obra.
COBERTURA DE LA GARANTÍA DADA POR EL FABRICANTE
Este sistema de control de emisiones está cubierto por la garantía durante un periodo de dos años o si el
producto califica para un periodo de garantía mayor resultante por el tipo de uso, ese periodo debe prevalecer.
Si cualquier pieza relacionada con el sistema de control de emisiones del motor presenta un desperfecto, dicha
pieza será reparada o reemplazada por RedMax.
RESPONSABILIDADES DEL PROPIETARIO
Como propietario del motor pequeño todo terreno, usted es responsable por la realización del mantenimiento
requerido que se indica en el Manual del propietario. RedMax le recomienda conservar todos los recibos de los
trabajos de mantenimiento realizados en el motor todo terreno, no obstante, RedMax no puede anular la
garantía solamente por la ausencia de recibos o por la no realización del mantenimiento programado. Sin
embargo, como propietario del motor todo terreno, debe tener presente que RedMax puede negar la cobertura
de la garantía si el motor pequeño todo terreno o una pieza del mismo falla debido al abuso, negligencia,
mantenimiento incorrecto o modificaciones no autorizadas.
Usted es responsable de llevar su motor pequeño todo terreno a un centro de distribución o de servicio
RedMax tan pronto como surja un problema. Los trabajos de reparación deberán completarse dentro de un
plazo razonable, que no exceda los 30 días. Si tiene cualquier duda relacionada con la cobertura de garantía
póngase en contacto con RedMax llamando a los teléfonos 1-800-291-8251 o por medio de correo electrónico
a la dirección service@redmax.com.
FECHA DE INICIO DE LA GARANTÍA
El periodo de garantía inicia a partir de la fecha de entrega del motor y del equipo al último comprador.
TIEMPO DE COBERTURA
RedMax garantiza al último comprador y a cada subsecuente propietario que el motor o el equipo está
diseñado, construido y equipado de tal modo que cumple con todas las regulaciones aplicables adoptadas por
le EPA y CARB y además se encuentra libre de defectos tanto en los materiales como en la fabricación
cubriendo las piezas garantizadas por un periodo de dos años.
COBERTURA
REPARACIÓN O REEMPLAZO DE PIEZAS. La reparación o el reemplazo de cualquier pieza cubierta por la
garantía se deben realizar sin costo alguno para el propietario y en una estación garantizada. Los servicios así
como las reparaciones cubiertos por la garantía serán realizados en todos los centros de distribución RedMax
que son franquicia para poder llevar a cabo el servicio a dichos motores. Durante todo el periodo de garantía
de emisiones que abarca dos años, RedMax debe mantener un suministro de piezas garantizadas suficiente
para satisfacer la demanda esperada para dichas piezas.
PERIODO DE GARANTÍA. Cualquier pieza garantizada que esté programada como reemplazo de acuerdo a lo
requerido en el programa de mantenimiento, está garantizada por el periodo de tiempo previo al primer punto
DECLARACIÓN DE GARANTÍA SOBRE EL CONTROL DE EMISIONES DE CALIFORNIA Y A NIVEL
FEDERAL, SUS DERECHOS Y LAS OBLIGACIONES RELACIONADAS CON ESTA GARANTÍA
Page 69

ES-21
CHT220/CHT220L
E
S
de reemplazo programado para dicha pieza. Si la pieza falla antes del primer reemplazo programado, la pieza
será reparada o reemplazada por RedMax sin costo alguno. Cualquier pieza reparada o reemplazada bajo
garantía está garantizada por el resto del periodo previo al primer punto de reemplazo programado para dicha
pieza. Cualquier pieza garantizada que no esté programada para reemplazo de acuerdo a lo requerido en el
programa de mantenimiento, está garantizada por dos años o si el producto califica para un periodo mayor
resultante del tipo de uso, ese periodo debe prevalecer. Si cualquier pieza falla durante el periodo de cobertura
de la garantía, será reparada y reemplazada por RedMax sin costo alguno. Cualquier pieza reparada o
reemplazada bajo el periodo de garantía está garantizada por el resto del periodo garantizado. Cualquier pieza
garantizada que esté programada solamente para inspección normal en el programa de mantenimiento deberá
estar garantizada por un periodo de dos años. Una declaración en dichas instrucciones por escrito bajo el
efecto de “reparación o reemplazo si es necesario” no reducirá el periodo de cobertura de garantía. Cualquier
pieza reparada o reemplazada bajo garantía estará garantizada por el resto del periodo garantizado.
DIAGNÓSTICO. El propietario no debe pagar costo alguno por el trabajo de diagnóstico que lleve a la
determinación de que una pieza garantizada se encuentre defectuosa, siempre que dicho diagnóstico se
realice en una estación garantizada.
DAÑOS CONSECUENTES. RedMax es responsable por los daños ocasionados en otros componentes del
motor debido al fallo de cualquier pieza garantizada cubierta por la garantía.
LISTA DE PIEZAS DE LA GARANTÍA DE EMISIONES
1. Sistema de inducción de aire*
2. Sistema de combustible*
3. Sistema de ignición*
4. Depósito de combustible, tapón y conductos si es aplicable*
*algunos componentes solamente están cubiertos hasta el punto especificado en el programa de
mantenimiento
LO QUE NO CUBRE LA GARANTÍA
Todos los fallos ocasionados por abuso, negligencia o mantenimiento incorrecto no están cubiertos por la
garantía.
ACCESORIOS O PIEZAS MODIFICADAS
Los accesorios o piezas modificadas que no estén excluidas por la CARB o EPA no se pueden utilizar. El uso
de cualquier accesorio no excluido o de piezas modificadas será la causa para negar el reclamo de la garantía.
RedMax no será responsable de garantizar los fallos de las piezas garantizadas ocasionados por el uso de
accesorios no excluidos o de piezas modificadas.
CÓMO RECLAMAR LA GARANTÍA
Si tiene dudas relacionadas con sus derechos y responsabilidades sobre la garantía, deberá ponerse en
contacto con el distribuidor autorizado más cercano o llame a RedMax al 1-800-291-8251 o por correo
electrónico a service@redmax.com.
CÓMO OBTENER EL SERVICIO DE GARANTÍA
El servicio de garantía o las reparaciones se pueden realizar en todos los distribuidores autorizados de
RedMax.
MANTENIMIENTO, REEMPLAZO Y REPARACIÓN DE LAS PIEZAS RELACIONADAS CON LAS
EMISIONES
Se puede utilizar cualquier pieza de reemplazo para llevar a cabo el servicio de mantenimiento o cualquier tipo
de reparación cubierto por la garantía y se debe realizar sin costo alguno para el propietario. Dicho uso no
reducirá las obligaciones de la garantía por parte del fabricante.
DECLARACIÓN DE MANTENIMIENTO
El propietario es responsable de realizar todo el servicio de mantenimiento requerido, de acuerdo a lo definido
en el manual del operador.
Page 70

ES-22
CHT220/CHT220L
RedMax
DECLARACIÓN DE GARANTÍA LIMITADA ESTÁNDAR
TODOS los productos vendidos en o después de 1/01/2010
Todos los productos de la marca RedMax
RedMax Garantía Limitada, le indica al comprador ORIGINAL
que este producto RedMax se encuentra libre de DEFECTOS tanto en
MATERIAL
como en la FABRICACIÓN bajo condiciones normales de uso y de mantenimiento a partir de la fecha de compra. RedMax está de
acuerdo en reparar o cambiar a nuestra discreción, cualquier producto defectuoso, sin costo alguno en cualquier distribuidor RedMax
autorizado utilizando piezas de repuesto originales RedMax, dentro del periodo de tiempo de aplicación, limitaciones y exclusiones listados
más abajo. ESTA GARANTÍA LIMITADA SE EXTIENDE SOLAMENTE AL PRIMER COMPRADOR ORIGINAL Y NO ES TRANSFERIBLE A
PROPIETARIOS SUBSECUENTES. Esta garantía viene por separado de la Declaración de Garantía de Control de Emisiones suministrada
con su nuevo producto. Consulte la Declaración de Garantía de Control de Emisiones para más detalles.
PERIODO DE GARANTÍA DEL PRODUCTO
PRODUCTOS ADQUIRIDOS PARA USO NO LUCRATIVO (Propietario Doméstico)
Las unidades por completo adquiridas para uso residencial o para uso no lucrativo, estarán cubiertas por esta garantía limitada durante un
periodo de dos (2) años a partir de la fecha de compra al por menor
. El módulo de ignición electrónica, los rebordeadores/desbrozadores,
están garantizados durante la vida útil* del producto solamente en las piezas.
PRODUCTOS ADQUIRIDOS PARA USO COMERCIAL, INSTITUCIONAL, INDUSTRIAL, PARA LA AGRICULTURA O PARA
USO LUCRATIVO
Las unidades por completo adquiridas para uso comercial, institucional, para la agricultura, industrial o de uso lucrativo estarán cubiertas por
esta garantía limitada durante un periodo de dos (2) años, a partir de la fecha de compra al por menor
. Las motosierras, BT280, BC280,
TR2301S/2350S, CHT2200/2250 y los atomizadores tienen cobertura durante un (1) año. Excepción de modelos: GZ400, BT250, BC250,
HB250/280 y HE250F, CHT220/220L. Estas EXCEPCIONES
están cubiertas por un periodo de noventa (90) días. El módulo de ignición
electrónica y los rebordeadores/desbrozadores, están garantizados durante la vida útil* del producto solamente en las piezas.
APLICACIÓN DE RENTA
Las unidades por completo para uso en alquiler estarán cubiertas contra defectos tanto en material como en fabricación por un periodo de 90
días a partir de la fecha de compra. Los siguientes modelos cuentan con garantía Sin Alquiler: GZ400, BT250, BC250,
TR2301S/2350S, HB250/280, CHT2200/2250 y HE250F, CHT220/220L. Estos productos cuentan con garantía SIN ALQUILER.
La responsabilidad de RedMax bajo la cobertura de "vida útil" está limitada al suministro de piezas solamente al expirar la cobertura de la
garantía estándar de acuerdo a lo especificado en la sección PERIODO DE GARANTÍA DE PRODUCTO de esta declaración de garantía. Las
piezas comprendidas como "vida útil" libre de costos solamente son por un periodo de siete (7) años después de la última fecha de la
producción final de la unidad por completo.
Esta garantía no cubre ningún daño que no sea aquel resultante de los defectos en el material o en la fabricación
. RedMax NO OFRECEN
NINGÚN PROGRAMA DE INTERCAMBIO SOBRE EL MOSTRADOR. Cualquier producto vendido, bajo servicio o reconstruido por otro
distribuidor que no sea el autorizado por RedMax, se vende tal cual sin
cobertura de garantía estándar RedMax. Las piezas de reparación y
los accesorios reemplazados bajo esta garantía están garantizados solamente para la ESTABILIDAD
de la unidad original o por el periodo de
garantía del accesorio. Todas las piezas o los productos reemplazados bajo garantía serán propiedad de RedMax.
PIEZAS DE REPARACIÓN ADQUIRIDAS, BLOQUES CORTOS Y ACCESORIOS
Estos artículos cuentan con una garantía de 90 días de uso residencial o de uso no lucrativo y 90 días de uso comercial, institucional, para
agricultura, industrial, uso lucrativo o de alquiler.
ACCESORIOS DE CORTE SUMINISTRADOS CON LOS PRODUCTOS
Todos los accesorios de corte originales del equipo utilizados para uso residencial, o no lucrativo, como por ejemplo, pero no limitado, barras,
cadenas, piñones, cuchillas, cabezales de corte de nylon, estarán cubiertos contra fallos ocasionados por defectos en el material o en la
fabricación durante un periodo de 60 días a partir de la fecha de compra original del producto. Cualquier mal uso derivado del contacto con
rocas o con cualquier otro material no aprobado y/o estructuras no está cubierto por esta garantía. Al utilizarse de forma comercial,
institucional, para agricultura, industrial, de forma lucrativa o en alquiler, la garantía del accesorio de corte es de 30 días.
Toda la serie Maxtreme, y los accesorios de eje separado cuentan con la misma duración de garantía que las unidades para las
cuales fueron diseñados.
DESCARGO DE RESPONSABILIDAD DE LAS GARANTÍAS IMPLICADAS
Cualquier garantía implicada está limitada al tiempo que dure la garantía limitada. De lo contrario, esta garantía limitada entrará en vigor en
lugar de todas las expresadas o implicadas, incluyendo cualquier garantía de CONVENIENCIA PARA UN PROPÓSITO O USO EN
PARTICULAR y cualquier garantía implicada de COMERCIABILIDAD aplicable para este producto. RedMax y sus compañías afiliadas no
serán responsables por cualquier incidente especial o daño consecuente, incluyendo la pérdida de ganancias. No existen garantías extendidas
diferentes a las proporcionadas aquí. Esta garantía puede ser modificada solamente por RedMax.
ATENCIÓN PARA LOS PROPIETARIOS DE PRODUCTOS CON MOTORES DE DOS TIEMPOS
Los motores de 2 tiempos de alto desempeño RedMax producen mayores emisiones de HP (Caballos de fuerza) en comparación con los
motores domésticos o comerciales ligeros ofrecidos por la mayoría de los fabricantes. Para obtener un rendimiento libre de problemas de la
unidad, se requiere
utilizar aceite que cumpla con los estándares ISO-L-EGD por ISO/CD 13738 y uno que esté registrado bajo los estándares
JASO M345/FD. El aceite RedMax MaxLife
™ Synthetic Blend Two-Stroke es un aceite de dos tiempos Premium específicamente formulado
para satisfacer los estándares ISO-L-EGD (ISO/CD 13738) y JASO M345/FD. El uso de aceites no registrados
diseñados para otras
aplicaciones, tales como para los motores fuera de borda o cortacésped o para los motores de bajas RPM, de HP bajo, puede resultar en
severos daños al motor e invalidará la garantía de su motor de dos tiempos. Este motor de 2 tiempos enfriado por aire de alto desempeño
requiere el uso de gasolina pura con un MÍNIMO DE 89 OCTANOS (Medio grado o Premium). Si la clasificación de octanos de la gasolina de
medio grado es menor a 89 octanos UTILICE gasolina sin plomo Premium. Advertencia: La gasolina con una clasificación de octanos menor a
89 incrementará la temperatura de operación del motor. La gasolina de bajo octanaje ocasionará detonación (truenos) dando como
E S
Page 71

ES-23
CHT220/CHT220L
E
S
consecuencia que el pistón se atore y daños internos en los componentes. Los fallos al motor ocasionados por operar los motores con
gasolina de octanaje menor
a 89 no están cubiertos por la garantía del motor de dos tiempos RedMax.
(Las piezas relacionadas con las emisiones solamente
están cubiertas por un periodo de dos años, independientemente del aceite de dos
tiempos que se utilice, por la declaración listada en la EPA o en la Explicación de la Garantía de Defectos de Emisión de California).
ESTA GARANTÍA NO INCLUYE O CUBRE LOS DAÑOS OCASIONADOS EN LA UNIDAD O EN EL MOTOR OCASIONADOS POR:
1. Falta de lubricación o fallos en el motor, debido al uso de aceites de dos tiempos que no cumplan con los estándares ISO-L-EGD (ISO/CD
13738) y que no estén registrados para satisfacer con los estándares JASO M345/FD. Los problemas con el motor debido a la lubricación
inadecuada ocasionados por no utilizar un aceite ISO-L-EGD y JASO M345/FD registrados
, INVALIDARÁ la garantía del motor de dos
tiempos RedMax. El aceite RedMax MaxLife
™ Synthetic blend Two-Stroke
cumple con los estándares ISO-L-EGD y están registrados
con el estándar JASO M345/FD.
2. Daños ocasionados por el uso de gasohol, que contenga metanol (alcohol de madera) o gasolina que contenga MENOS de 89
OCTANOS. Solamente utilice
gasolina que contenga 89 octanos o Mayor
. También está aprobado el uso de gasohol que contenga
un máximo del 10% de etanol (alcohol de grano) o 15% de MTBE (Metilterciariobutileter). La relación de mezcla prescrita de gasolinaaceite es de 50:1 y se encuentra en la etiqueta del aceite RedMax y en el manual del operador.
3. Daños del motor ocasionados por el uso de éter o de cualquier fluido de arranque. Los daños ocasionados por efecto de la
presión o de vapor al limpiar la unidad.
4. Sobrecalentamiento y los daños ocasionados por la detonación debido al uso de bujías diferentes a las especificadas para cumplir con los
requerimientos de desempeño de emisiones listados en el manual del operador.
5. Daños ocasionados por hacer cambios indebidamente en el gobernador de velocidad del motor o en los componentes de emisión, o por
correr el motor por arriba de la velocidad recomendada descrita en el manual del operador.
6. ESTA GARANTÍA NO CUBRE LOS DAÑOS DE LA UNIDAD O DEL MOTOR OCASIONADOS POR:
El funcionamiento de la unidad con escudos, protectores o dispositivos de seguridad instalados/desmontados incorrectamente.
7. Daños ocasionados por quitar/dañar el filtro de aire, suciedad, abrasivos, agua con sal, corrosión por humedad, oxidación, esmalte,
combustible añejado o cualquier reacción adversa debido a procedimientos de almacenamiento incorrectos.
8. Defectos, funcionamiento incorrecto o fallos resultantes por el abuso, desuso, negligencia, modificaciones, alteraciones, uso normal,
realización de servicio inadecuado, uso de accesorios no autorizados, incluyendo los fallos para proporcionar o realizar los servicios de
mantenimiento requeridos de acuerdo a lo descrito en el manual del operador.
El mantenimiento preventivo de acuerdo a lo establecido en el manual del operador es responsabilidad del propietario/cliente
.
9. Fallos debido a la incorrecta instalación, por el servicio de entrega previa o por el servicio de reparación realizado por distribuidores
diferentes a los autorizados por RedMax durante el periodo de garantía.
10. Ciertas piezas y otros elementos no están garantizados
, incluyendo pero no limitado los siguientes: bujías, filtros, lubricantes, cables de
arranque, piñones y bolsas de desecho. Los fallos por sobrecalentamiento o por las impurezas de carbono debido a la
restricción/obstrucción del puerto de escape, bloqueo de la malla supresora de chispas o por la cámara de combustión.
11. Instalación y servicio de entrega previa, afinación de motor, incluyendo la decoloración natural debido a la luz ultravioleta.
12. Ajustes después de los primeros (30) treinta días de compra y después, tal como el ajuste del carburador y del cable del acelerador.
13. Daños en los engranes o en la carcasa de los engranes ocasionados por grasa contaminada sucia, uso de grasa para carcasa incorrecta
y/o por no cumplir con los intervalos de engrase recomendados.
14. Daños ocasionados por atomizadores al bombear o atomizar materiales cáustico o inflamable, falta de coladores o por estar rotos.
15. Daños adicionales en las piezas o componentes debido al uso continúo después de haber ocurrido un problema o fallo funcional.
Si ocurriera un problema o fallo operacional, el producto no se debe
utilizar, por el contrario se debe enviar tal como está a un centro de
servicio RedMax autorizado.
RESPONSABILIDAD IMPORTANTE DEL PROPIETARIO
El propietario deberá demostrar cuidado y uso responsable
, y debe llevar a cabo un servicio de mantenimiento preventivo, almacenamiento,
combustible y uso de aceite de acuerdo a lo descrito en el manual del operador adjuntado. Si ocurriera alguna dificultad con el producto dentro
del periodo de garantía aplicable, debe, con cargo a su cuenta, enviar o entregar la unidad RedMax a un Centro de servicio RedMax
autorizado solamente para las reparaciones de la garantía y ponerse de acuerdo en recoger o regresar la unidad después de que hayan
finalizado las reparaciones. Si no sabe la ubicación del Centro de servicio RedMax, consulte la sección amarilla del directorio telefónico o
llame al RedMax, al teléfono 1-800-291-8251 de 8:00 am a 5:00 pm tiempo estándar del este, o visite www.RedMax.com
. Si requiere
asistencia o tiene dudas concernientes a esta declaración de garantía, póngase en contacto con nosotros al 1-800-291-8251 de 8:00 am a 5:00
pm tiempo estándar del este o póngase en contacto a través del sitio web www.RedMax.com
.
RESPONSABILIDAD IMPORTANTE DEL PROPIETARIO
ES RESPONSABILIDAD DEL CLIENTE Y/O DEL DISTRIBUIDOR LLENAR Y REGRESAR DENTRO DE UN PERIODO DE 10 DÍAS A
PARTIR DE LA FECHA DE COMPRA, LA TARJETA DE REGISTRO DE LA GARANTÍA SUMINISTRADA CON SU PRODUCTO REDMAX.
DEBE MANTENER EL RECIBO DE COMPRA INCLUYENDO LA FECHA, EL MODELO Y EL NÚMERO DE SERIE DEL MOTOR
Y
PRESENTARLO CON UN DISTRIBUIDOR RedMax AUTORIZADO PARA EL SERVICIO DE GARANTÍA. LA PRUEBA DE COMPRA ES
RESPONSABILIDAD SOLAMENTE DEL PROPIETARIO Y DEL CLIENTE. ALGUNOS ESTADOS NO PERMITEN LIMITACIONES DEL
TIEMPO QUE DURE UNA GARANTÍA IMPLICADA, DE TAL MODO QUE LAS LIMITACIONES MENCIONADAS ANTERIORMENTE
PODRÍAN NO APLICAR PARA USTED. ALGUNOS ESTADOS NO PERMITEN LA EXCLUSIÓN O LIMITACIÓN DE DAÑOS INCIDENTALES
O CONSECUENTES POR LO QUE LAS LIMITACIONES MENCIONADAS ANTERIORMENTE PODRÍAN NO APLICAR PARA USTED. ESTA
GARANTÍA SOLAMENTE
ES OTORGADA POR RedMax NUESTRA DIRECCIÓN ES, 7349 Stateville Rd. Charlotte, NC 28269
1/2010
E S
Page 72

www.redmax.com
PRODUCT REGISTRATION
FAST! EASY! SIMPLE!
Register your RedMax product online quickly and easily. All RedMax products can be registered online regardless of their
model year. Register products online at www.redmax.com, click the
Help & Support tab and then click on the Product
Registration link. Fill out the electronic form and submit. It’s that easy!
ENREGISTREMENT DU PRODUIT
RAPIDE ! FACILE ! SIMPLE !
Enregistrez votre produit de RedMax en ligne rapidement et facilement. Tous les produits de RedMax peuvent être enregistrés en ligne indépendamment de leur année modèle. Enregistrez les produits en ligne à l’adresse www.redmax.com,
cliquez Help & Support et puis cliquez sur le lien Product Registration. Complétez la forme électronique et soumettez.
Il est celui facile !
REGISTRO DEL PRODUCTO
¡RÁPIDO! ¡FÁCIL! ¡SIMPLE!
Registre su producto de RedMax en línea rápidamente y fácilmente. Todos los productos de RedMax se pueden colocar
en línea sin importar su año modelo. Registre los productos en línea en www.redmax.com, chasque la Help & Support
lengüeta y después chasque encendido el acoplamiento del Product Registration. Complete la forma electrónica y someta.
¡Es ése fácil!
 Loading...