

Page 1
Tel +1 (717) 767-6511
Fax +1 (717) 764-0839
www.redlion.net
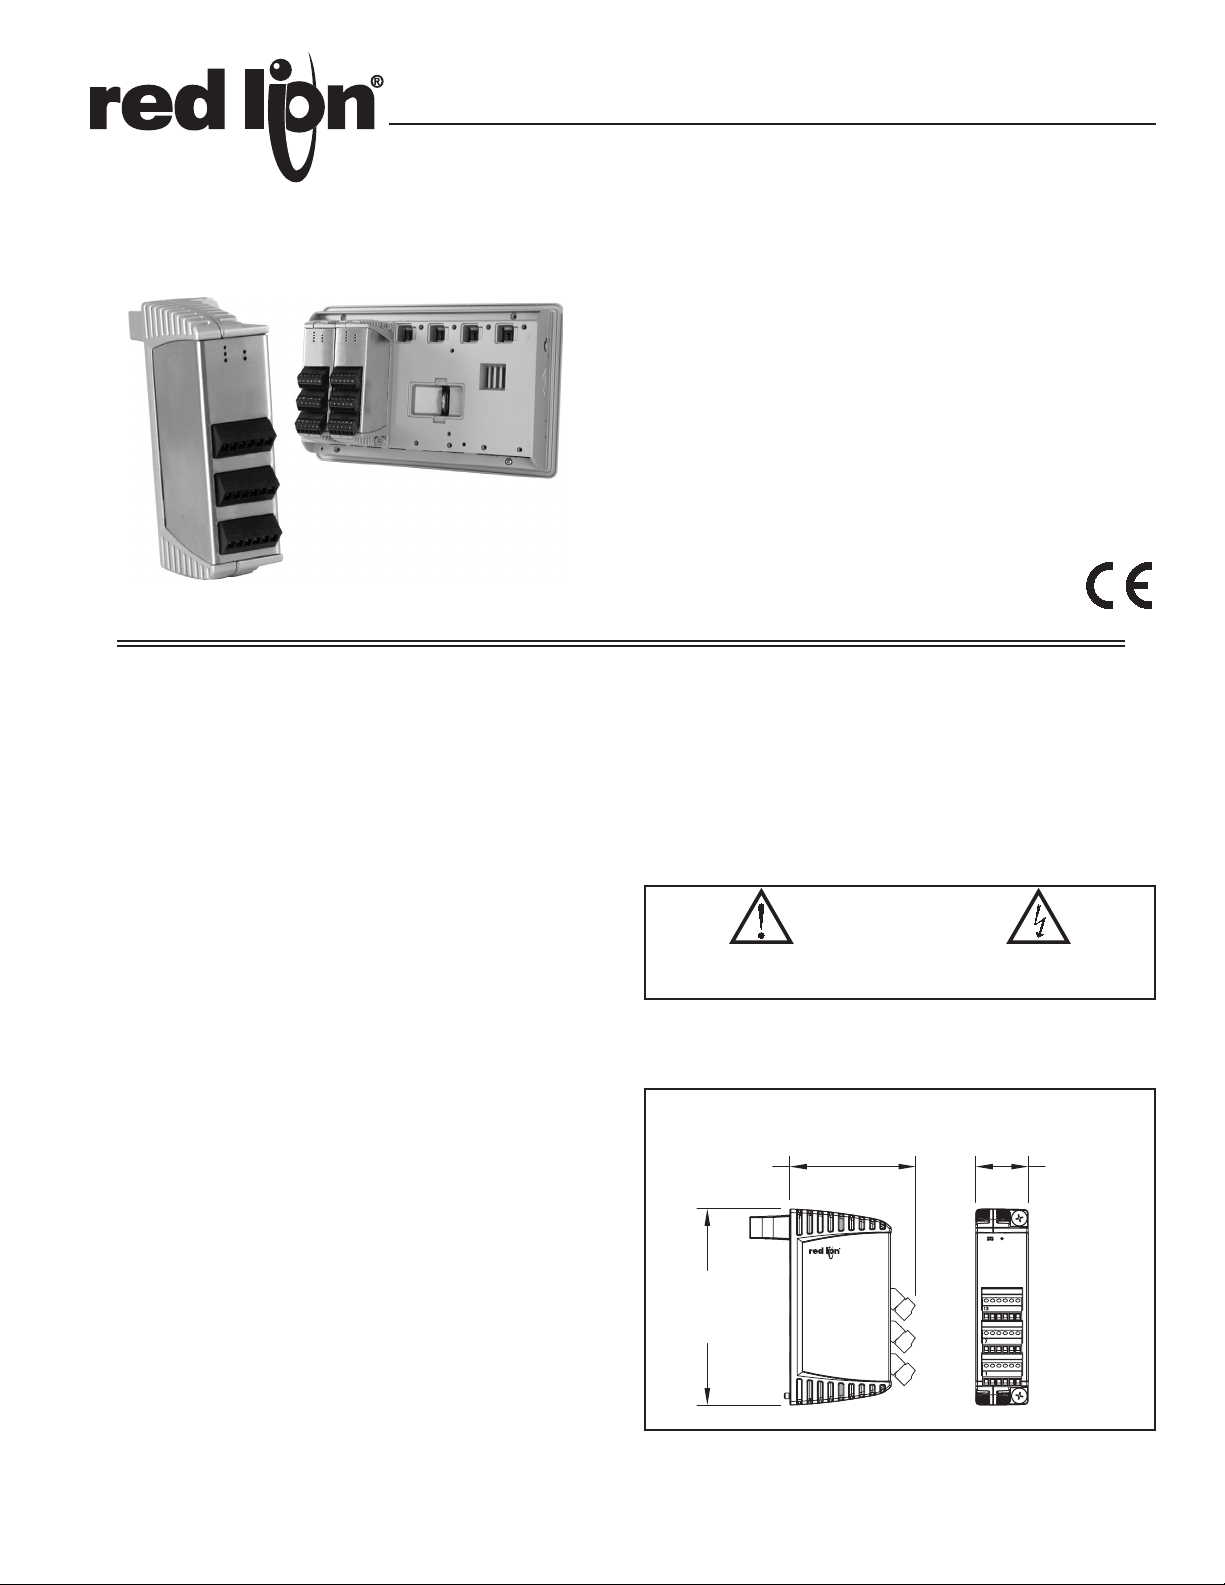
MODEL GMSG1 – GRAPHITE SERIES STRAIN GAGE MODULE
STRAIN GAGE MODULE FOR THE GRAPHITE SERIES
PID CONTROL WITH REDUCED OVERSHOOT
LOAD CELL, PRESSURE AND TORQUE BRIDGE INPUTS
SELECTABLE LOW LEVEL INPUTS (20 mV, 33 mV or 200 mV
FULL SCALE)
SOFTWARE SELECTABLE 5 VDC or 10 VDC BRIDGE
EXCITATION
DIGITAL TARE (re-zero), BATCH TOTALIZER, AND PEAK/VALLEY
(max/min) RECORDING
ON DEMAND AUTO-TUNING OF PID SETTINGS
DC ANALOG OUTPUT
WINDOWS® CONFIGURATION SOFTWARE
Bulletin No. GMSG1-A
Drawing No. LP0952
Effective 02/14
GENERAL DESCRIPTION
The Model GMSG is a full featured single loop PID controller designed for
use with the Graphite Series. The module accepts low level signals from a
variety of bridge-type transducers, such as load cells, pressure transducers,
torque transducers, etc. An optional second signal input is available, providing
math capabilities between the two input channels (average, differential, etc.).
Each input channel provides a software selectable 5 V or 10 V stable bridge
excitation voltage, capable of driving up to four 350 Ω bridges (combined total
per module). The inputs are selectable for ±20 mV, ±33 mV, or ±200 mV full
scale. With solid state or relay outputs, plus an analog output, the GMSG
module can perform virtually any combination of time-proportioning or linear
control. The discrete outputs may also be assigned to one of seven internal soft
alarms; and the linear output can be assigned to transmit virtually any internal
variable. In addition, digital tare (re-zero), batch totalizer, and peak/valley (max/
min) are provided.
The modules connect and communicate via proprietary USB connection to
the various Graphite host devices. Those devices, equipped with serial ports as
well as Ethernet port(s), allows the system to share data with PCs, PLCs, and
SCADA systems.
Caution should be used when adding modules to Graphite. Some modules,
depending on usage, may consume high levels of power. This may limit the total
number of modules that can be installed on a single Graphite host. Check the
Graphite module and Graphite host data sheets for specific usage and power
requirements.
The GMSG modules are available with relays, or open drain MOSFET
outputs. For applications requiring large loads to be controlled, several DIN rail
mount relays are available.
The modules can operate in On/Off, P, PI, or PID control mode, and use an
on-demand Auto-Tune that establishes the tuning constants. The PID constants
may be fine-tuned through the serial or Ethernet interface. The modules employ
a unique overshoot suppression feature, which allows the quickest response
without excessive overshoot. The modules can also be operated in manual mode,
providing the operator with direct control of the output.
CONFIGURATION
The Graphite Series is configured with Windows® compatible Crimson®
software. The software is an easy to use, graphical interface which provides a
means of configuration and commissioning of new systems, as well as routine
module re-calibration.
SAFETY SUMMARY
All safety related regulations, local codes and instructions that appear in the
manual or on equipment must be observed to ensure personal safety and to
prevent damage to either the instrument or equipment connected to it. If
equipment is used in a manner not specified by the manufacturer, the protection
provided by the equipment may be impaired.
Do not use the controller to directly command motors, valves, or other
actuators not equipped with safeguards. To do so can be potentially harmful to
persons or equipment in the event of a fault to the controller.
CAUTION: Risk of Danger.
Read complete instructions prior to
installationand operation of the unit.
CAUTION: Risk of electric shock.
DIMENSIONS In inches (mm)
2.97 (76)
1.25 (32)
4.65
(118)
1
Page 2
SPECIFICATIONS
1. POWER: Power will be supplied by the Graphite host device. Some
modules, depending on usage may consume high levels of power. This may
limit the total number of modules that can be installed on a single Graphite
host. Check the Graphite module and Graphite host data sheets for specific
usage and power requirements.
GMSG1 Max Power: 5.6 W
2. LEDs*:
STS - Status LED shows module condition.
OP1, OP2, OP3 - Indicate status of outputs 1, 2, and 3
ALM - Alarm LED is lit during any internal alarm condition.
* Default configuration.
3. MEMORY: Non-volatile memory retains all programmable parameters.
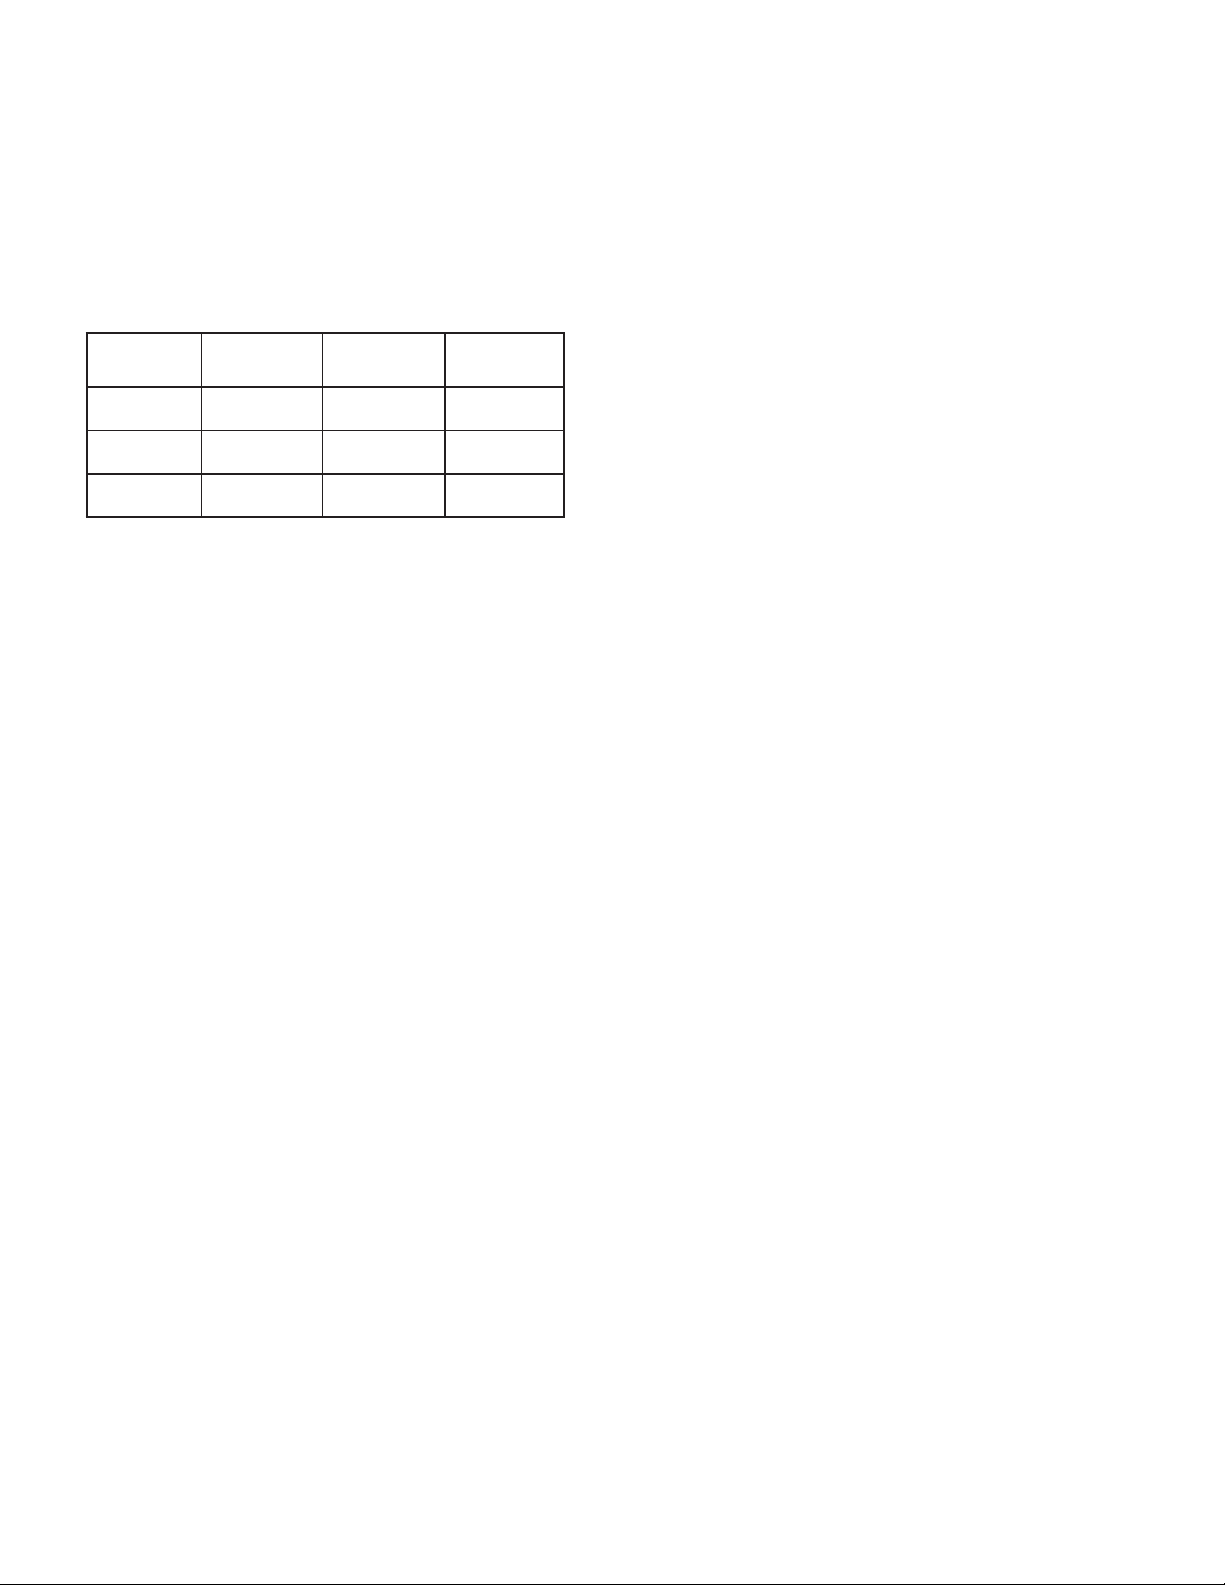
4. INPUTS:
SELECTABLE
INPUT RANGE
±20.000 mVDC
±33.000 mVDC
±200.00 mVDC
ACCURACY *
18 TO 28°C
10 TO 75% RH
0.02% of reading
+3 µV
0.02% of reading
+5 µV
0.02% of reading
+30 µV
* After 20 minute warm-up. Accuracy includes the temperature coefficient.
Connection Type:
4-wire bridge (differential)
2-wire (single-ended)
Sample Time: 50 msec (20 readings per second)
Common Mode Range (with respect to input common): 0 to +5 VDC
Common Mode Rejection: > 100 dB, DC to 120 Hz
Temperature Coefficient (ratio metric): 20 ppm/°C max.
Step Response Time: 200 msec max. to within 99% of final process value
Input Impedance: 100 MΩ
Max Continuous Overload: 30 V
PV Range: -30,000 to 30,000
Effective Resolution: 16-bit
5. BRIDGE EXCITATIONS:
Software selectable:
5 VDC, ±2%, 65 mA max.
10 VDC, ±2%, 125 mA max. combined (excitation 1 plus excitation 2).
Temperature coefficient (ratio metric): 20 ppm/°C max.
Max. four 350Ω bridges per module.
6. ISOLATION LEVEL: 500 Vrms @ 50/60 Hz for 1 minute between the
following:
OP1 * OP2 * OP3 *
Linear Output
Signal Inputs (the 2 input channels are not isolated from each other)
Power Supply Input
* Outputs OP1, OP2 and OP3 of SSR model are not isolated from each other
7. COMMUNICATIONS: Provided by the Graphite host device.
8. DISCRETE OUTPUTS:
Available as (3) Solid State NFET, or (3) Form A relay.
Solid State Output:
Type: Switched DC, N Channel open drain MOSFET
Current Rating: 1 A max
VDS ON: 0.3 V @ 1 A
VDS MAX: 30 VDC
Offstate Leakage Current: 0.5 mA max
Form A Relay Output:
Type: N.O.
Current Rating: 3 Amps @ 125 VAC
1/10 HP @ 125 VAC
Life Expectancy: 200,000 cycles at maximum load rating. (Decreasing
load, increasing cycle time, and use of surge suppression such as RC
snubbers increases life expectancy.)
9. CONTROL MODES:
Control: On/Off, P, PI, or PID
Output: Time proportioning or linear
Cycle Time: Programmable from 0.0 to 60.0 sec
Auto-Tune: When selected, sets proportional band, integral time, derivative
time values, and output dampening time
Input Fault Response: Upscale
ACCURACY *
0 TO 50°C
0 TO 85% RH
0.07% of reading
+4 µV
0.07% of reading
+7 µV
0.07% of reading
+40 µV
ACCURACY *
-40 TO 70°C
0 TO 85% RH
0.09% of reading
+5 µV
0.09% of reading
+9 µV
0.09% of reading
+50 µV
10. ALARMS:
Modes: Manual
Absolute High Acting Absolute Low Acting
Deviation High Acting Deviation Low Acting
Inside Band Acting Outside Band Acting
Reset Action: Programmable; automatic or latched
Standby Mode: Programmable; enable or disable
Hysteresis: Programmable
Input Fault Response: Upscale
11. ANALOG DC OUTPUT:
Software programmable for 0-10 VDC, 0-20 mA, or 4-20 mA
Resolution:
Voltage: 500 µV
Current: 1 µA
Accuracy:
0.1% of full scale (18 to 28°C)
0.2% of full scale (-40 to 70°C)
Update Time: 0.0 to 60.0 sec
Compliance (for current output only): 500 Ω max.
Minimum load (voltage output only): 10 KΩ min.
Output is software selectable for either 10 V or 20 mA. The output range may
be field calibrated to yield approximate 10% overrange and a small
underrange (negative) signal.
12. ENVIRONMENTAL CONDITIONS:
Operating Temperature Range: -40 to +70°C
Storage Temperature Range: -40 to +85°C
Operating and Storage Humidity: 85% max relative humidity, non-condensing,
from 0 to +50°C
Altitude: Up to 2000 meters
13. CERTIFICATIONS AND COMPLIANCES:
CE Approved
EN 61326-1 to Industrial Locations
IEC/EN 61010-1
RoHS Compliant
14. CONSTRUCTION: Case body is all metal construction. For indoor use
only. Installation Category II, Pollution Degree 2.
15. CONNECTIONS: Removable wire clamp screw terminal blocks.
Wire Gage: 28-16 AWG terminal gage wire
Torque: 6.0 lbf-inch (96 oz-inch)
16. MOUNTING: Screws to host.
17. WEIGHT: 8 oz (224 g)
2
Page 3

BLOCK DIAGRAM
VDC
RELAY
D
LINEAR
OUTPUT
ISOLATED
OP1-RELAY
OP2-RELAY
OP3-RELAY
ISOLATED
0-10V
0-20mA
F
PORT 1
PROGRAMMING
A
PORT 2
COMMUNICATIONS
A
+
-
POWER
SUPPLY
A
ISOLATED
PORT 3
ETHERNET
B
GRAPHITE HOST
+EXC
+SIG
-SIG
COM
+EXC
+SIG
-SIG
COM
SSR
OUTPUTS
ISOLATED
INPUT1
OUTPUTS
INPUT2
C
POWER
SUPPLY
ISOLATED
OP1-SSR1
OP2-SSR2
OP3-SSR3
E
GMSG1 - STRAIN GAGE MODULE
EMC INSTALLATION GUIDELINES
Although Red Lion Controls Products are designed with a high degree of
immunity to Electromagnetic Interference (EMI), proper installation and wiring
methods must be followed to ensure compatibility in each application. The type
of the electrical noise, source or coupling method into a unit may be different
for various installations. Cable length, routing, and shield termination are very
important and can mean the difference between a successful or troublesome
installation. Listed are some EMI guidelines for a successful installation in an
industrial environment.
1. A unit should be mounted in a metal enclosure, which is properly connected
to protective earth.
2. Use shielded cables for all Signal and Control inputs. The shield connection
should be made as short as possible. The connection point for the shield
depends somewhat upon the application. Listed below are the recommended
methods of connecting the shield, in order of their effectiveness.
a. Connect the shield to earth ground (protective earth) at one end where the
unit is mounted.
b. Connect the shield to earth ground at both ends of the cable, usually when
the noise source frequency is over 1 MHz.
3. Never run Signal or Control cables in the same conduit or raceway with AC
power lines, conductors, feeding motors, solenoids, SCR controls, and
heaters, etc. The cables should be run through metal conduit that is properly
grounded. This is especially useful in applications where cable runs are long
and portable two-way radios are used in close proximity or if the installation
is near a commercial radio transmitter. Also, Signal or Control cables within
an enclosure should be routed as far away as possible from contactors, control
relays, transformers, and other noisy components.
4. Long cable runs are more susceptible to EMI pickup than short cable runs.
5. In extremely high EMI environments, the use of external EMI suppression
devices such as Ferrite Suppression Cores for signal and control cables is
effective. The following EMI suppression devices (or equivalent) are
recommended:
Fair-Rite part number 0443167251 (RLC part number FCOR0000)
Line Filters for input power cables:
Schaffner # FN2010-1/07 (Red Lion Controls # LFIL0000)
6. To protect relay contacts that control inductive loads and to minimize radiated
and conducted noise (EMI), some type of contact protection network is
normally installed across the load, the contacts or both. The most effective
location is across the load.
a. Using a snubber, which is a resistor-capacitor (RC) network or metal oxide
varistor (MOV) across an AC inductive load is very effective at reducing
EMI and increasing relay contact life.
b. If a DC inductive load (such as a DC relay coil) is controlled by a transistor
switch, care must be taken not to exceed the breakdown voltage of the
transistor when the load is switched. One of the most effective ways is to
place a diode across the inductive load. Most RLC products with solid state
outputs have internal zener diode protection. However external diode
protection at the load is always a good design practice to limit EMI.
Although the use of a snubber or varistor could be used.
RLC part numbers: Snubber: SNUB0000
Varistor: ILS11500 or ILS23000
7. Care should be taken when connecting input and output devices to the
instrument. When a separate input and output common is provided, they
should not be mixed. Therefore a sensor common should NOT be connected
to an output common. This would cause EMI on the sensitive input common,
which could affect the instrument’s operation.
Visit RLC’s web site at http://www.redlion.net/Support/InstallationConsiderations.
html for more information on EMI guidelines, Safety and CE issues as they
relate to Red Lion Controls products.
3
Page 4

HARDWARE
INPUT RANGE SELECTION
Select either ±20 mV or the ±33 mV | ±200 mV range by placing the input jumper
in the appropriate location. The input jumpers are located on the side of the GMSG1
module.
± 20 mV
Range
± 33 mV
or
± 200 mV
Range
HARDWARE INSTALLATION
Modules must be installed beginning with slot 1 (left-most slot), with no
empty slots between the modules, and the order must match the modules order
in Crimson. Torque screws to 6.0 pound-force inch (96 ounce-force inch)
CAUTION: Some modules, depending on usage, may consume high
levels of power. This may limit the total number of modules that can
be installed on a single Graphite host. Check the Graphite module and
Graphite host data sheets for specific usage and power requirements.
WARNING: Disconnect all power
to the unit before installing or
removing modules.
REMOVE RUBBER
MODULE PLUG
WIRING
WIRING CONNECTIONS
All conductors should meet voltage and current ratings for each terminal. Also, cabling should conform
to appropriate standards of good installation, local codes and regulations. When wiring the module, use the
numbers on the label to identify the position number with the proper function. Strip the wire, leaving
approximately 1/4" (6 mm) of bare wire exposed. Insert the wire into the terminal, and tighten.
Terminals 13 to 18
Terminals 7 to 12
Terminals 1 to 6
4
OP3 COM.
OP3 +
13
OP1 COM.
OP1 +
879
COM.
-SIG.
N/C
N/C
1514
16 17 18
(OPT.)
OP2 +
OP2 COM.
10 11
(OPT.)
+SIG.
+EXC
4312 5
ANALOG-
ANALOG+
2
+SIG.
+EXC
12
21
-SIG.
COM.
6
Page 5

INPUT CONNECTIONS
Load
Load
VDC+
VDC-
+SIG
-SIG
COM
-SIG
+EXC
-EXC
4-Wire Bridge Input2-Wire Single Ended Input
+SIG
+EXC
+SIG
COM
-SIG
-SIG
+EXC
+SEN
+SIG
-SEN
-EXC
6-Wire Bridge Input
BRIDGE COMPLETION RESISTORS
For single strain gage applications, bridge completion resistors must be employed externally to the module. Only use metal film
resistors with a low temperature coefficient of resistance.
Load cells and pressure transducers are normally implemented as full resistance bridges and do not require bridge completion resistors.
OUTPUT CONNECTIONS (3 Form A relays or 3 SSR; Each model has analog output)
Power
Power
Load
OP1 COM
OP1 +
OP2 COM
10 11 12987
OP2 +
+SIG2 (OPT)
+EXC2 (OPT)
Power
Load
16 17 18151413
OP3 COM
OP3 +
N/C
N/C
ANALOG+
ANALOG-
+EXC
+SIG
COM
-SIG
Outputs 1 and 2 - Relay Version
Power
Power
+
+
-
+
-
+
OP1 COM
OP1 +
OP2 COM
10 1211789
OP2 +
+SIG2 (OPT)
+EXC2 (OPT)
Outputs 1 and 2 - Solid State Version
16 181713 14 15
Recorder,
Controller,
Valve, etc
+
-
Analog Output
OP3 COM
OP3 +
N/C
N/C
ANALOG+
ANALOG-
Power
Output 3 - Relay Version
+
-
+
OP3 COM
OP3 +
N/C
16 17 18151413
N/C
ANALOG+
ANALOG-
Outputs 3 - Solid State Version
5
Page 6

LEDS
STS – STATUS LED
The Status LED is a green LED that provides information regarding the state
of the module. This includes indication of the various stages of the start-up
routine (power-up), as well as any errors that may occur.
Startup Routine
Off
Flashing Green Module switching to configuration.
Green Module performing normally.
Error States
Flashing Green
OP1, OP2, OP3, – OUTPUT STATUS LED
The OP1, OP2, andOP3 LEDs are factory configured to indicate the status of
the outputs. The LEDs turn on when the output is active.
These LEDs may be remapped to various other module properties.
Module is currently running the boot loader and/or
being flash upgraded by Crimson.
Module is controlling properly, but has lost
communication with the Host.
ALM – ALARM LED
The Alarm LED is factory configured to indicate the presence of an alarm.
Whenever one of the seven alarms is active, the LED turns on.
This LED may be remapped to various other module properties.
FIRMWARE UPGRADE
The module’s firmware is stored in flash memory so that software/hardware
conflicts are avoided, and so features can be added in the future.
During a download, Crimson compares its own library of firmware files with
those stored in the module. If they do not match, Crimson will download the
necessary firmware.
CONFIGURATION
Programming is done via Crimson® software, a Windows® compatible
configuration interface. Please see the Crimson manual for more information.
ORDERING INFORMATION
TYPE DESCRIPTION PART NUMBER
Graphite 7" Color Touch Screen, Indoor, 24 VDC Powered G07C0000
Graphite 7" Color Touch Screen, Indoor/Outdoor, 24 VDC Powered G07S0000
Graphite 9" Color Touch Screen, Indoor, 24 VDC Powered G09C0000
Graphite 9" Color Touch Screen, Indoor, 24 VDC Powered, Additional Ethernet Port G09C1000
Graphite 10" Color Touch Screen, Indoor, 24 VDC Powered G10C0000
Graphite 10" Color Touch Screen, Indoor, 24 VDC Powered, Additional Ethernet Port G10C1000
Operator
Interface Panels
Input Modules
Graphite 10" High Resolution Display, Color Touch Screen, Indoor, 24 VDC Powered G10R0000
Graphite 10" High Resolution Display, Color Touch Screen, Indoor, 24 VDC Powered, Additional Ethernet Port G10R1000
Graphite 10" Color Touch Screen, Indoor/Outdoor, 24 VDC Powered G10S0000
Graphite 10" Color Touch Screen, Indoor/Outdoor, 24 VDC Powered, Additional Ethernet Port G10S1000
Graphite 12" Color Touch Screen, Indoor, 24 VDC Powered G12C0000
Graphite 12" Color Touch Screen, Indoor, 24 VDC Powered, Additional Ethernet and Serial Port G12C1100
Graphite 15" Color Touch Screen, Indoor, 24 VDC Powered G15C0000
Graphite 15" Color Touch Screen, Indoor, 24 VDC Powered, Additional Ethernet and Serial Port G15C1100
Graphite Module, Single Loop, One Strain Gage Input, Relay Outputs, and Analog Output GMSG10R0
Graphite Module, Single Loop, One Strain Gage Input, Solid State Outputs, and Analog Output GMSG10S0
Graphite Module, Single Loop, Two Strain Gage Inputs, Relay Outputs, and Analog Output GMSG11R0
Graphite Module, Single Loop, Two Strain Gage Inputs, Solid State Outputs, and Analog Output GMSG11S0
6
Page 7

This page intentionally left blank
7
Page 8

Red Lion Controls
Headquarters
20 Willow Springs Circle
York PA 17406
Tel +1 (717) 767-6511
Fax +1 (717) 764-0839
The Company warrants the products it manufactures against defects in materials and workmanship
LIMITED WARRANTY
for a period limited to two years from the date of shipment, provided the products have been stored,
handled, installed, and used under proper conditions. The Company’s liability under this limited
warranty shall extend only to the repair or replacement of a defective product, at The Company’s
option. The Company disclaims all liability for any affirmation, promise or representation with
respect to the products.
The customer agrees to hold Red Lion Controls harmless from, defend, and indemnify RLC against
damages, claims, and expenses arising out of subsequent sales of RLC products or products
containing components manufactured by RLC and based upon personal injuries, deaths, property
damage, lost profits, and other matters which Buyer, its employees, or sub-contractors are or may be
to any extent liable, including without limitation penalties imposed by the Consumer Product Safety
Act (P.L. 92-573) and liability imposed upon any person pursuant to the Magnuson-Moss Warranty
Act (P.L. 93-637), as now in effect or as amended hereafter.
No warranties expressed or implied are created with respect to The Company’s products except
those expressly contained herein. The Customer acknowledges the disclaimers and limitations
contained herein and relies on no other warranties or affirmations.
Red Lion Controls
Europe
Softwareweg 9
NL - 3821 BN Amersfoort
Tel +31 (0) 334 723 225
Fax +31 (0) 334 893 793
Red Lion Controls
India
201-B, 2nd Floor, Park Centra
Opp 32 Mile Stone, Sector-30
Gurgaon-122002 Haryana, India
Tel +91 984 487 0503
Red Lion Controls
China
Unit 302, XinAn Plaza
Building 13, No.99 Tianzhou Road
ShangHai, P.R. China 200223
Tel +86 21 6113 3688
Fax +86 21 6113 3683
 Loading...