

Page 1
OLPF FRAME
INSTALLATION INSTRUCTIONS
FOR RED DSMC CAMERAS
RED.COM
Page 2

OLPF FRAME INSTALLATION INSTRUCTIONS
Table of ConTenTs
feaTures 3
before You sTarT 3
Read First 3
OLPF Frame Components 3
Tools Required 3
InsTallIng The olPf frame 4
Remove the Lens Mount 4
Remove the Old OLPF Frame 5
Install the New Frame 6
Tighten the Screws 7
Install the Lens Mount 8
DIsClaImer 9
CoPYrIghT noTICe 9
TraDemark DIsClaImer 9
2 955-0011, Rev-A1 / COPYRIGHT © 2012 RED.COM, INC
Page 3
OLPF FRAME INSTALLATION INSTRUCTIONS
feaTures
• Each RED DSMC® Camera has an optical low-pass filter (OLPF) The OLPF frame secures the OPLF to the camera.
• RED has designed a new low-profile OPLF frame to accommodate the RED LEICA-M LENS MOUNT.
• This new OLPF frame is compatible with all RED DSMC PL, Canon, Nikon, and Leica lens mounts.
before You sTarT
reaD fIrsT
Note: The new OPLF frame must be installed on your camera before using the RED LEICA-M LENS MOUNT.
RED® is providing the following installation instructions to our customers for installing the OLPF Frame. The
procedure is the same on RED EPIC-M, EPIC-X and Scarlet-X camera brains.
If you properly install the OLPF frame by following these installation instructions, your warranty will not be void.
CAUTION: Use extreme care to ensure that no tools come into contact with OLPF.
If you want RED to perform the installation of the OLPF frame for you, RED will do so free of
charge. Please contact your Bomb Squad representative for complete details.
olPf frame ComPonenTs
The OLPF Port Frame comes with the following:
• OLPF Port Frame
• Four replacement screws
• T-4 Torx® Wrench
Tools requIreD
• T-20 Torx Driver
• T-4 Torx Wrench (Included)
• Tweezers
COPYRIGHT © 2012 RED.COM, INC / 955-0011, Rev-A1 3
Page 4

OLPF FRAME INSTALLATION INSTRUCTIONS
InsTallIng The olPf frame
• Place the camera in a clean indoor environment, free from dust or lint, on a suitable flat working surface,
with the front of the camera facing forward.
• Remove all accessories and lens as necessary.
remove The exIsTIng lens mounT
remove The lens mounT sCrews
Use Torx T-20 driver
remove The lens mounT
Pull straight out
4 955-0011, Rev-A1 / COPYRIGHT © 2012 RED.COM, INC
Page 5

OLPF FRAME INSTALLATION INSTRUCTIONS
remove The olD olPf frame
remove The TamPer seals
Use tweezers
remove The oPlf frame sCrews
Use included Torx T-4 driver
COPYRIGHT © 2012 RED.COM, INC / 955-0011, Rev-A1 5
Page 6

OLPF FRAME INSTALLATION INSTRUCTIONS
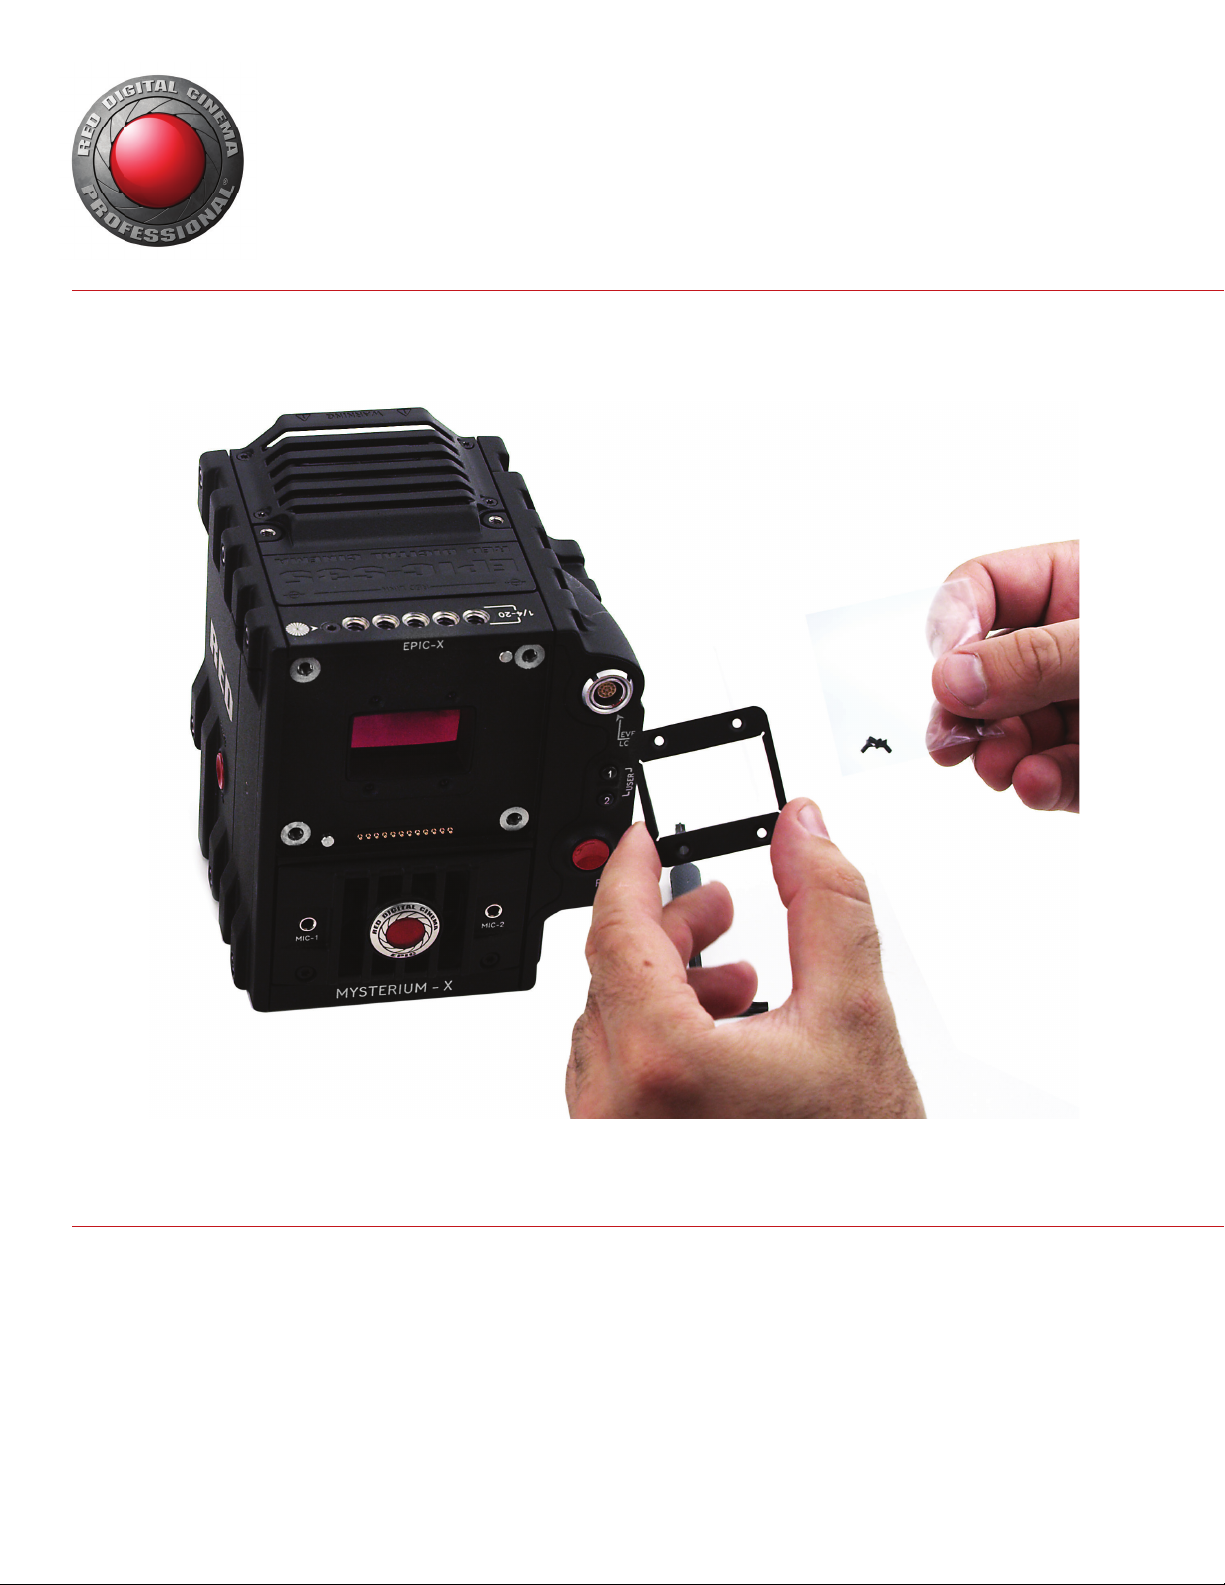
InsTall The new frame
remove The olD olPf frame
Place the tip of the Torx wrench under the bottom right edge of the OLPF frame to pry it off.
PosITIon The new olPf frame
Place the OLPF Frame into position with the
lip on the outer rubber frame and press lightly
downward to seat.
6 955-0011, Rev-A1 / COPYRIGHT © 2012 RED.COM, INC
Page 7

OLPF FRAME INSTALLATION INSTRUCTIONS
TIghTen The sCrews
InsTall The sCrews - Do noT Torque
Install 4 screws and progressively tighten them in an “X”
pattern until finger tight - DO NOT torque at this time.
Torque The sCrews
Use a torque wrench and tighten each screw to 30 in-oz.
If a torque wrench is not available an approximate
torque can be achieved by turning the wrench in a
clockwise direction approximately 30° beyond snug.
(30° is the distance between 12:00 and 1:00 on a
clock face.)
Repeat for each screw in an “X” pattern.
COPYRIGHT © 2012 RED.COM, INC / 955-0011, Rev-A1 7
Page 8

OLPF FRAME INSTALLATION INSTRUCTIONS
InsTall The lens mounT
InsTall The lens mounT
Make sure it is seated correctly
TIghTen The sCrews
Using a T-20 Torx Driver, seat the four Torx screws
very lightly until finger-tight.
After all four screws are seated; progressively tighten
them in an “X” pattern as shown until hand tight.
IMPORTANT: Tighten the screws snug but do not
over tighten. Torque the screws to 22 in-lbs if using a
torque driver.
8 955-0011, Rev-A1 / COPYRIGHT © 2012 RED.COM, INC
Page 9

OLPF FRAME INSTALLATION INSTRUCTIONS
DIsClaImer
RED has made every effort to provide clear and accurate information in these installation instructions, which
are provided solely for the user’s information. While thought to be accurate, the information in this document
is provided strictly “as is” and RED will not be held responsible for issues arising from typographical errors
or user’s interpretation of the language used herein that is different from that intended by RED. All safety and
general information is subject to change as a result of changes in local, federal or other applicable laws.
RED reserves the right to revise these installation instructions and make changes from time to time in the
content hereof without obligation to notify any person of such revisions or changes. In no event shall RED, its
employees or authorized agents be liable to you for any damages or losses, direct or indirect, arising from the
use of any technical or operational information contained in this document.
CoPYrIghT noTICe
COPYRIGHT© 2012 RED.COM, Inc
All trademarks, trade names, logos, icons, images, written material, code, and product names used in association with the accompanying product are the copyrights, trademarks or other intellectual property owned
and controlled exclusively by RED.COM, Inc.
TraDemark DIsClaImer
All other company, brand and product names are trademarks or registered trademarks of their respective
holders. RED has no affiliation to, is not associated or sponsored with, and has no express rights in thirdparty trademarks. Torx® is a registered trademark of Textron, Inc.
COPYRIGHT © 2012 RED.COM, INC / 955-0011, Rev-A1 9
 Loading...