


MODEL #RT-2500
RT-2500
Questions? CLICK for support!

A Letter From Ray and Ron |
3 |
Warnings |
4 |
Important Safety Information |
5 |
Carton Contents |
6 |
Assembling Your REC TEC |
7 |
Initial Setup Procedure |
19 |
Temperature Probes |
20 |
Operating your REC TEC |
21 |
Tips, Tricks, and Temps |
24 |
Maintenance and Cleaning |
27 |
Transport & Storage |
28 |
SPECS |
29 |
Troubleshooting |
30 |
Manual Start Up |
34 |
Controller Schematic |
35 |
Cooking Notes |
36 |
REC TEC BFG |
|
SIX (6) Year Non-transferable Limited Warranty |
37 |
Questions? CLICK for support! |
2 |
©2019, REC TEC Industries, LLC |
|
|

Back to Table of Contents
Congratulations on the purchase of your new REC TEC BFG Wood Pellet Grill!
With proper care and maintenance, your grill will provide you years of trouble free operation. Please review the following information carefully for useful tips and information that will help you utilize your grill’s extensive features and benefits.
Your REC TEC BFG is by far and away the most bang for your buck and comes fully loaded with a HotFlash Ceramic Ignition System, stainless steel body, and state-of-the-art Wi-Pellet WiFi
Technology.YourRECTEC’srevolutionarySmartGrillTechnology™ automatically adjusts the rate at which REC TEC Premium Hardwood
Pellets are introduced into the fire pot to maintain a consistent temperature like no other grill you have ever used. The result is the simplest and most convenient way for a backyard enthusiast to cook, bake, roast, grill, or slow smoke their favorite foods while adding flavor profiles that can only come from a real wood fire.
Just set your temperature and let your REC TEC take all the guess work out of your next cook.
We want you to join the vibrant and growing community of REC TEC owners. Whether you want to contribute your own tips and recipes, learn from others, or a bit of both, please jump right in!
You now have an incredible tool for cooking. Let’s see how you use it!
Join our online community at:
Website: rectecgrills.com
Facebook: facebook.com/rectecgrills Twitter: twitter.com/rectecgrills YouTube: youtube.com/rectecgrills Instagram: instagram.com/rectecgrills
Thank you for choosing REC TEC GRILLS!
Ray Carnes & Ron Cundy, Co-Founders, REC TEC Industries, LLC
Questions? CLICK for support! |
3 |
©2019, REC TEC Industries, LLC |
|
|

Back to Table of Contents
WARNING!
FOR OUTDOOR USE ONLY!
DO NOT STORE OR USE
COMBUSTIBLE MATERIALS IN OR
NEAR THIS APPLIANCE.
TO PREVENT INJURY, NEVER ATTEMPT TO MOVE GRILL WHILE HOT, OR WITHOUT ASSISTANCE.
NEVER STORE ANY GRILL IN A SMALL SPACE OR PLACE IN A VEHICLE UNLESS COMPLETELY COOL AND FIRE IS VERIFIED AS EXTINGUISHED.
LEAVE A MINIMUM OF 60” CIRCUMFERENCE BETWEEN GRILL, DECKS, HOUSES OR ANY COMBUSTIBLE MATERIALS.
USE ON LEVEL GROUND AWAY FROM OVERHANGING ROOFS OR EAVES.
Questions? CLICK for support! |
4 |
©2019, REC TEC Industries, LLC |
|
|

Back to Table of Contents
 Important Safety Information
Warning: Read all Safety Information Before Operating Grill
For outdoor use only. Do not use in any enclosed area. Use on level surface, away from overhanging eaves.
Keepgrill10feetormorefromanycombustiblesurfaceorflammable materials.
 Your grill does not require lighter fluid or flammable liquids.
 Topreventgreasefires,cleanyourgrillonaregularbasis(especially after cooking greasy foods at lower temperatures). In the event of a grease fire, unplug the grill and leave lid closed until the fire is out.
 Never plug-in your REC TEC grill without all service access panel(s) installed.
 Never move your grill during operation, or while grill is hot, without first ensuring that it is completely cool and no hot embers, pellets, or ashes remain in cooking chamber.
 Your REC TEC grill gets very hot; keep young children and animals away while in use.
 Use heat-resistant barbecue mitts or gloves when operating. Long handled, non-plastic utensils are recommended. When opening lid, keep hands, face, and/or body a safe distance from flames or flare ups.
 Before covering grill, make sure it has cooled completely.
 Never put your hand in the pellet hopper or attempt to service any part of your REC TEC grill while your grill is plugged in.
 It is advisable to have a fire extinguisher nearby when operating your grill. Refer to local authorities to determine proper size and type of fire extinguisher.
 If a fire ever gets out of your control, please contact your local authorities.
 Never use your grill while wheels are unlocked.
 Do not attempt to assemble grill by yourself.
 Use common sense practices at all times when operating or moving your REC TEC grill.
Questions? CLICK for support! |
5 |
©2019, REC TEC Industries, LLC |
|
|
Back to Table of Contents
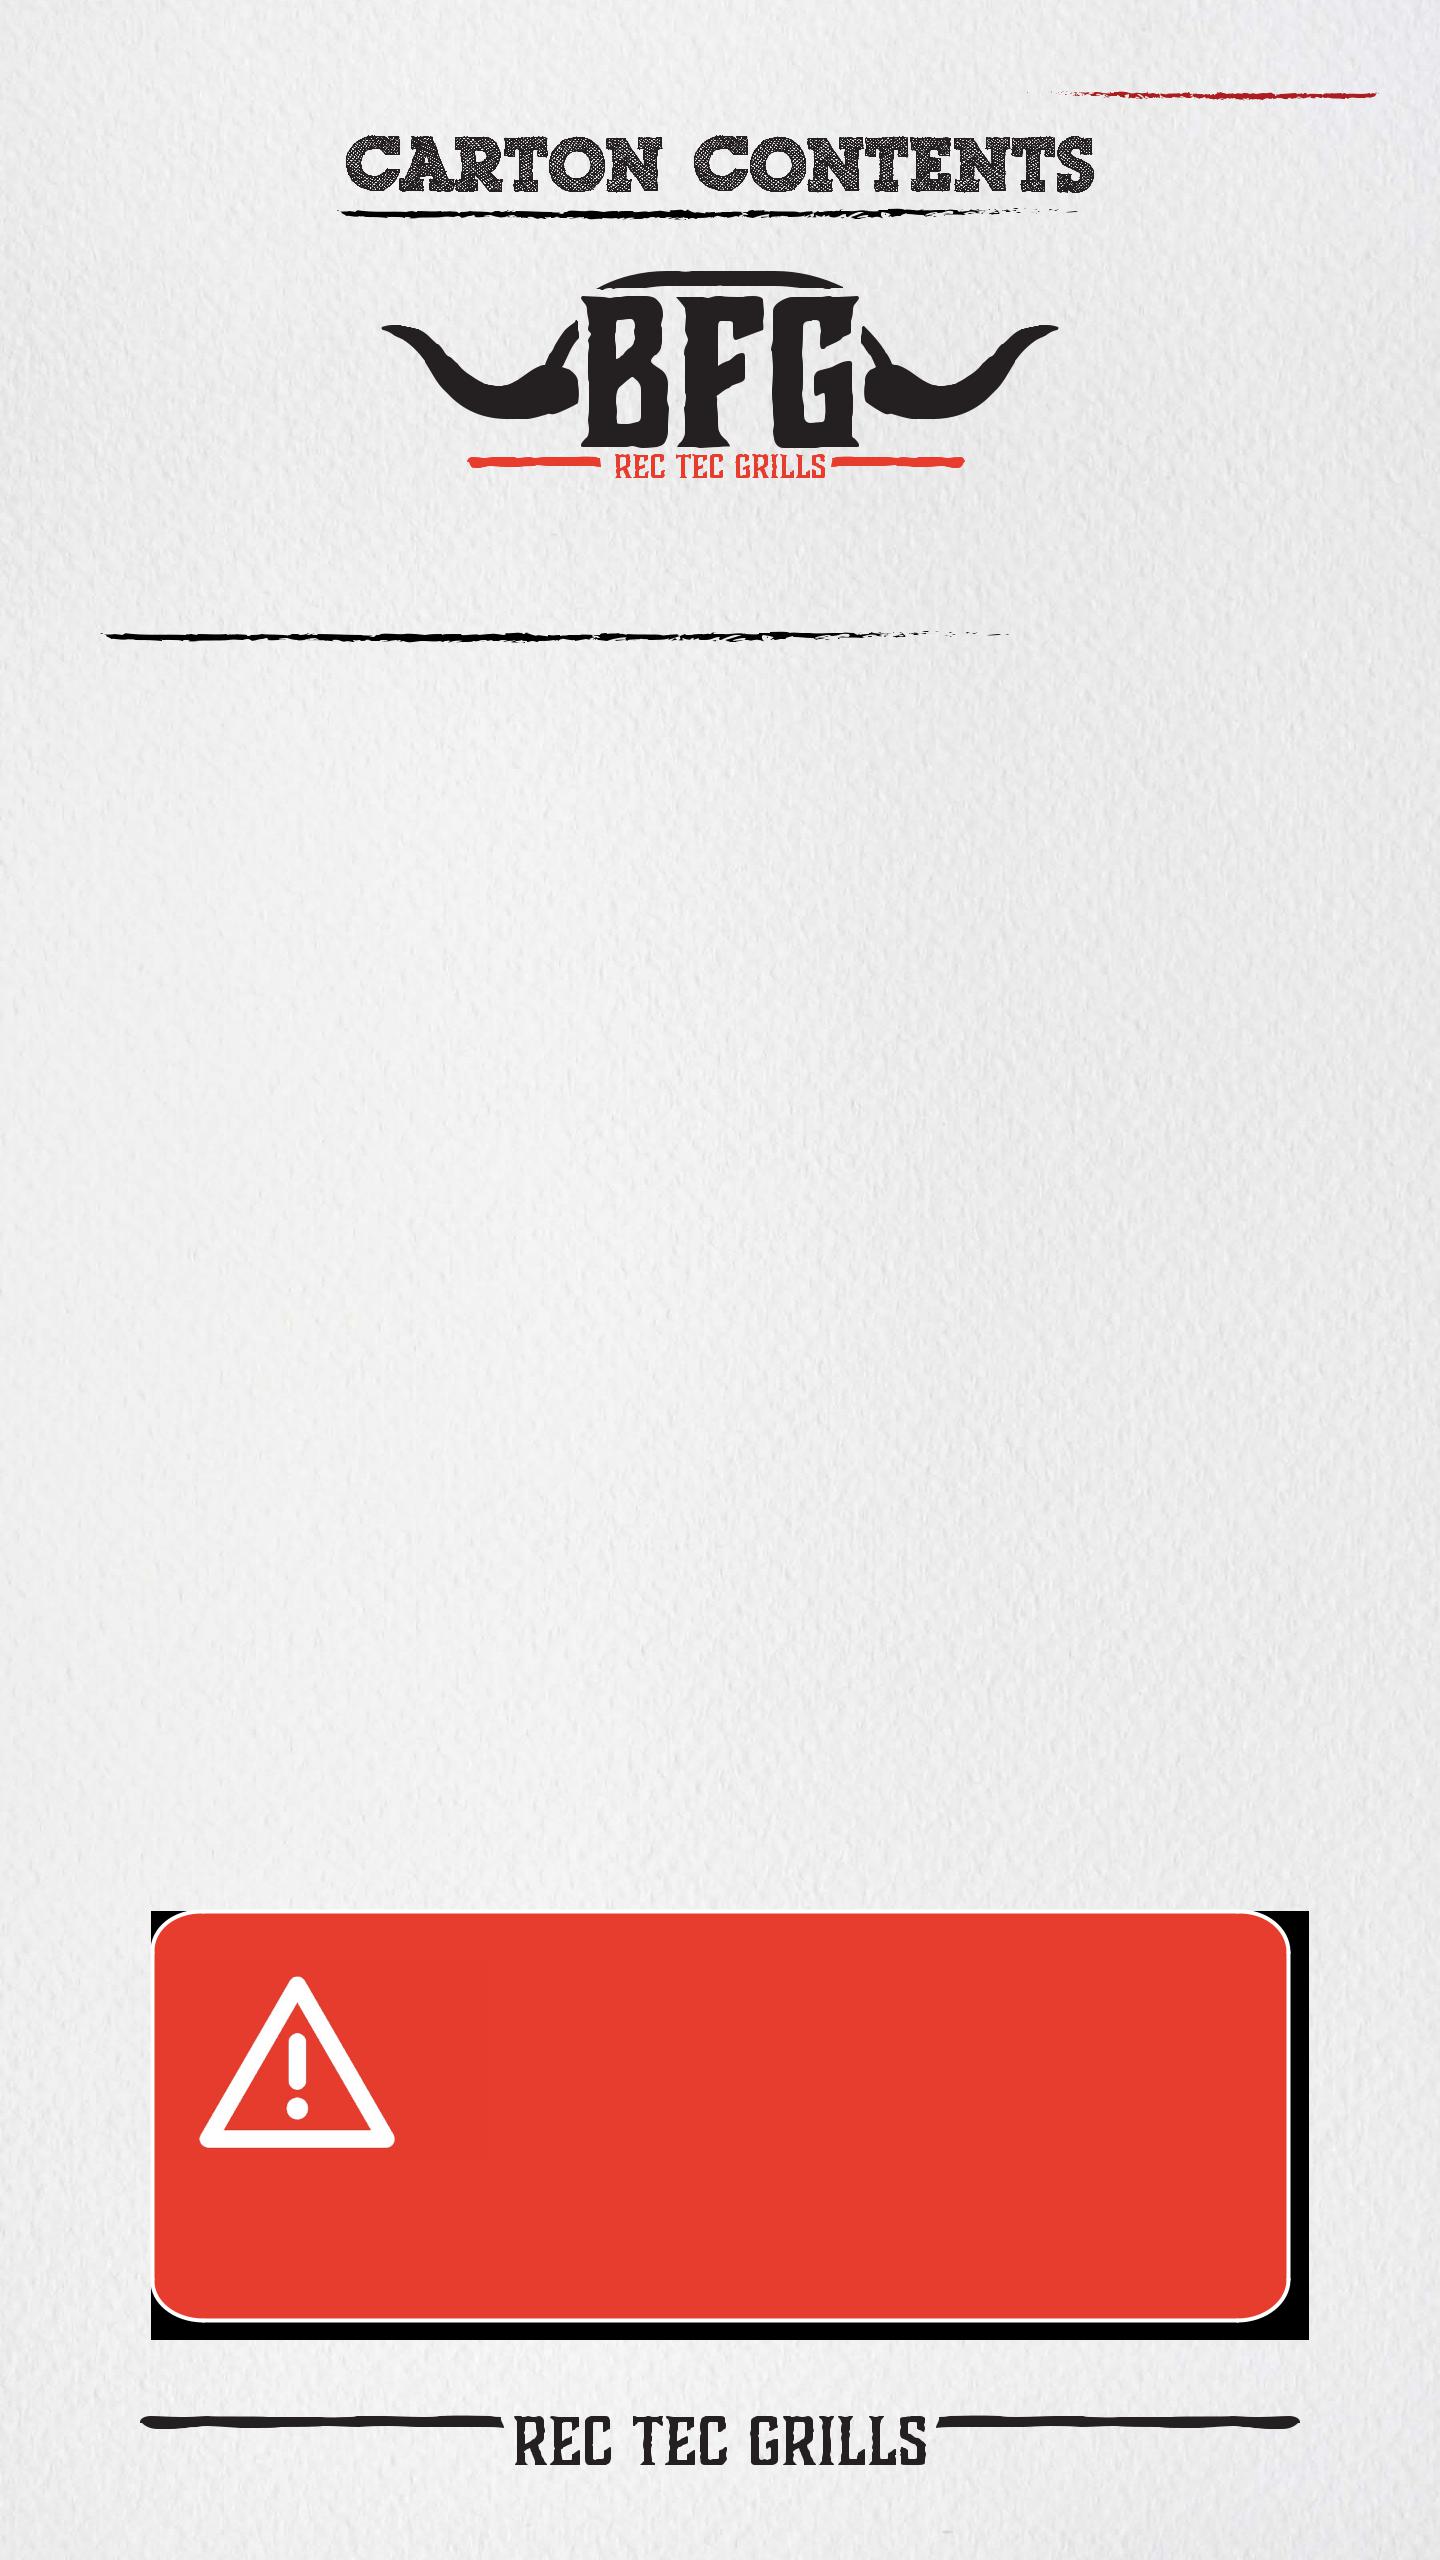
RT-2500
Your carton contains the following:
-1 preassembled grill body with attached skirt #1
-2 preinstalled interior lights #2
-2 drip buckets #3
-1 hardware set #4
-2 large grill racks #5
-1 front cart panel with logo #6
-1 back cart panel with access panel #7
-2 platinum tipped meat probes #8
-2 bottom cart shelves #9
-1 right side cart panel #10
-1 left side cart panel with notch #11
-1 internal cart frame #12
-4 bottom grill grates #13
-1 front folding shelf #14
-1 meat hanging rod #15
-2 drip pans #16
-4 locking caster wheels #17
-2 smoke stack assemblies #18
-1 side shelf with controller #19
-1 flame deflector with integrated smoke tray #20
-2 iconic micro polished bull horn handles with hardware #21
-1 back cart access panel #22
-2 pull bar handles with hardware #23
-4 pull bar handle brackets #24
-2 bull horn mounting pads #25
Please note that during shipping some movement may have taken place, so a complete visual inspection is required. Be sure to inspect entire grill after removing the protective shipping carton. Some surfaces may be sharp, so wear gloves when assembling.
Do not plug in the grill until it is fully assembled and you’re ready to cook.
Questions? CLICK for support! |
6 |
©2019, REC TEC Industries, LLC |
|
|
Back to Table of Contents
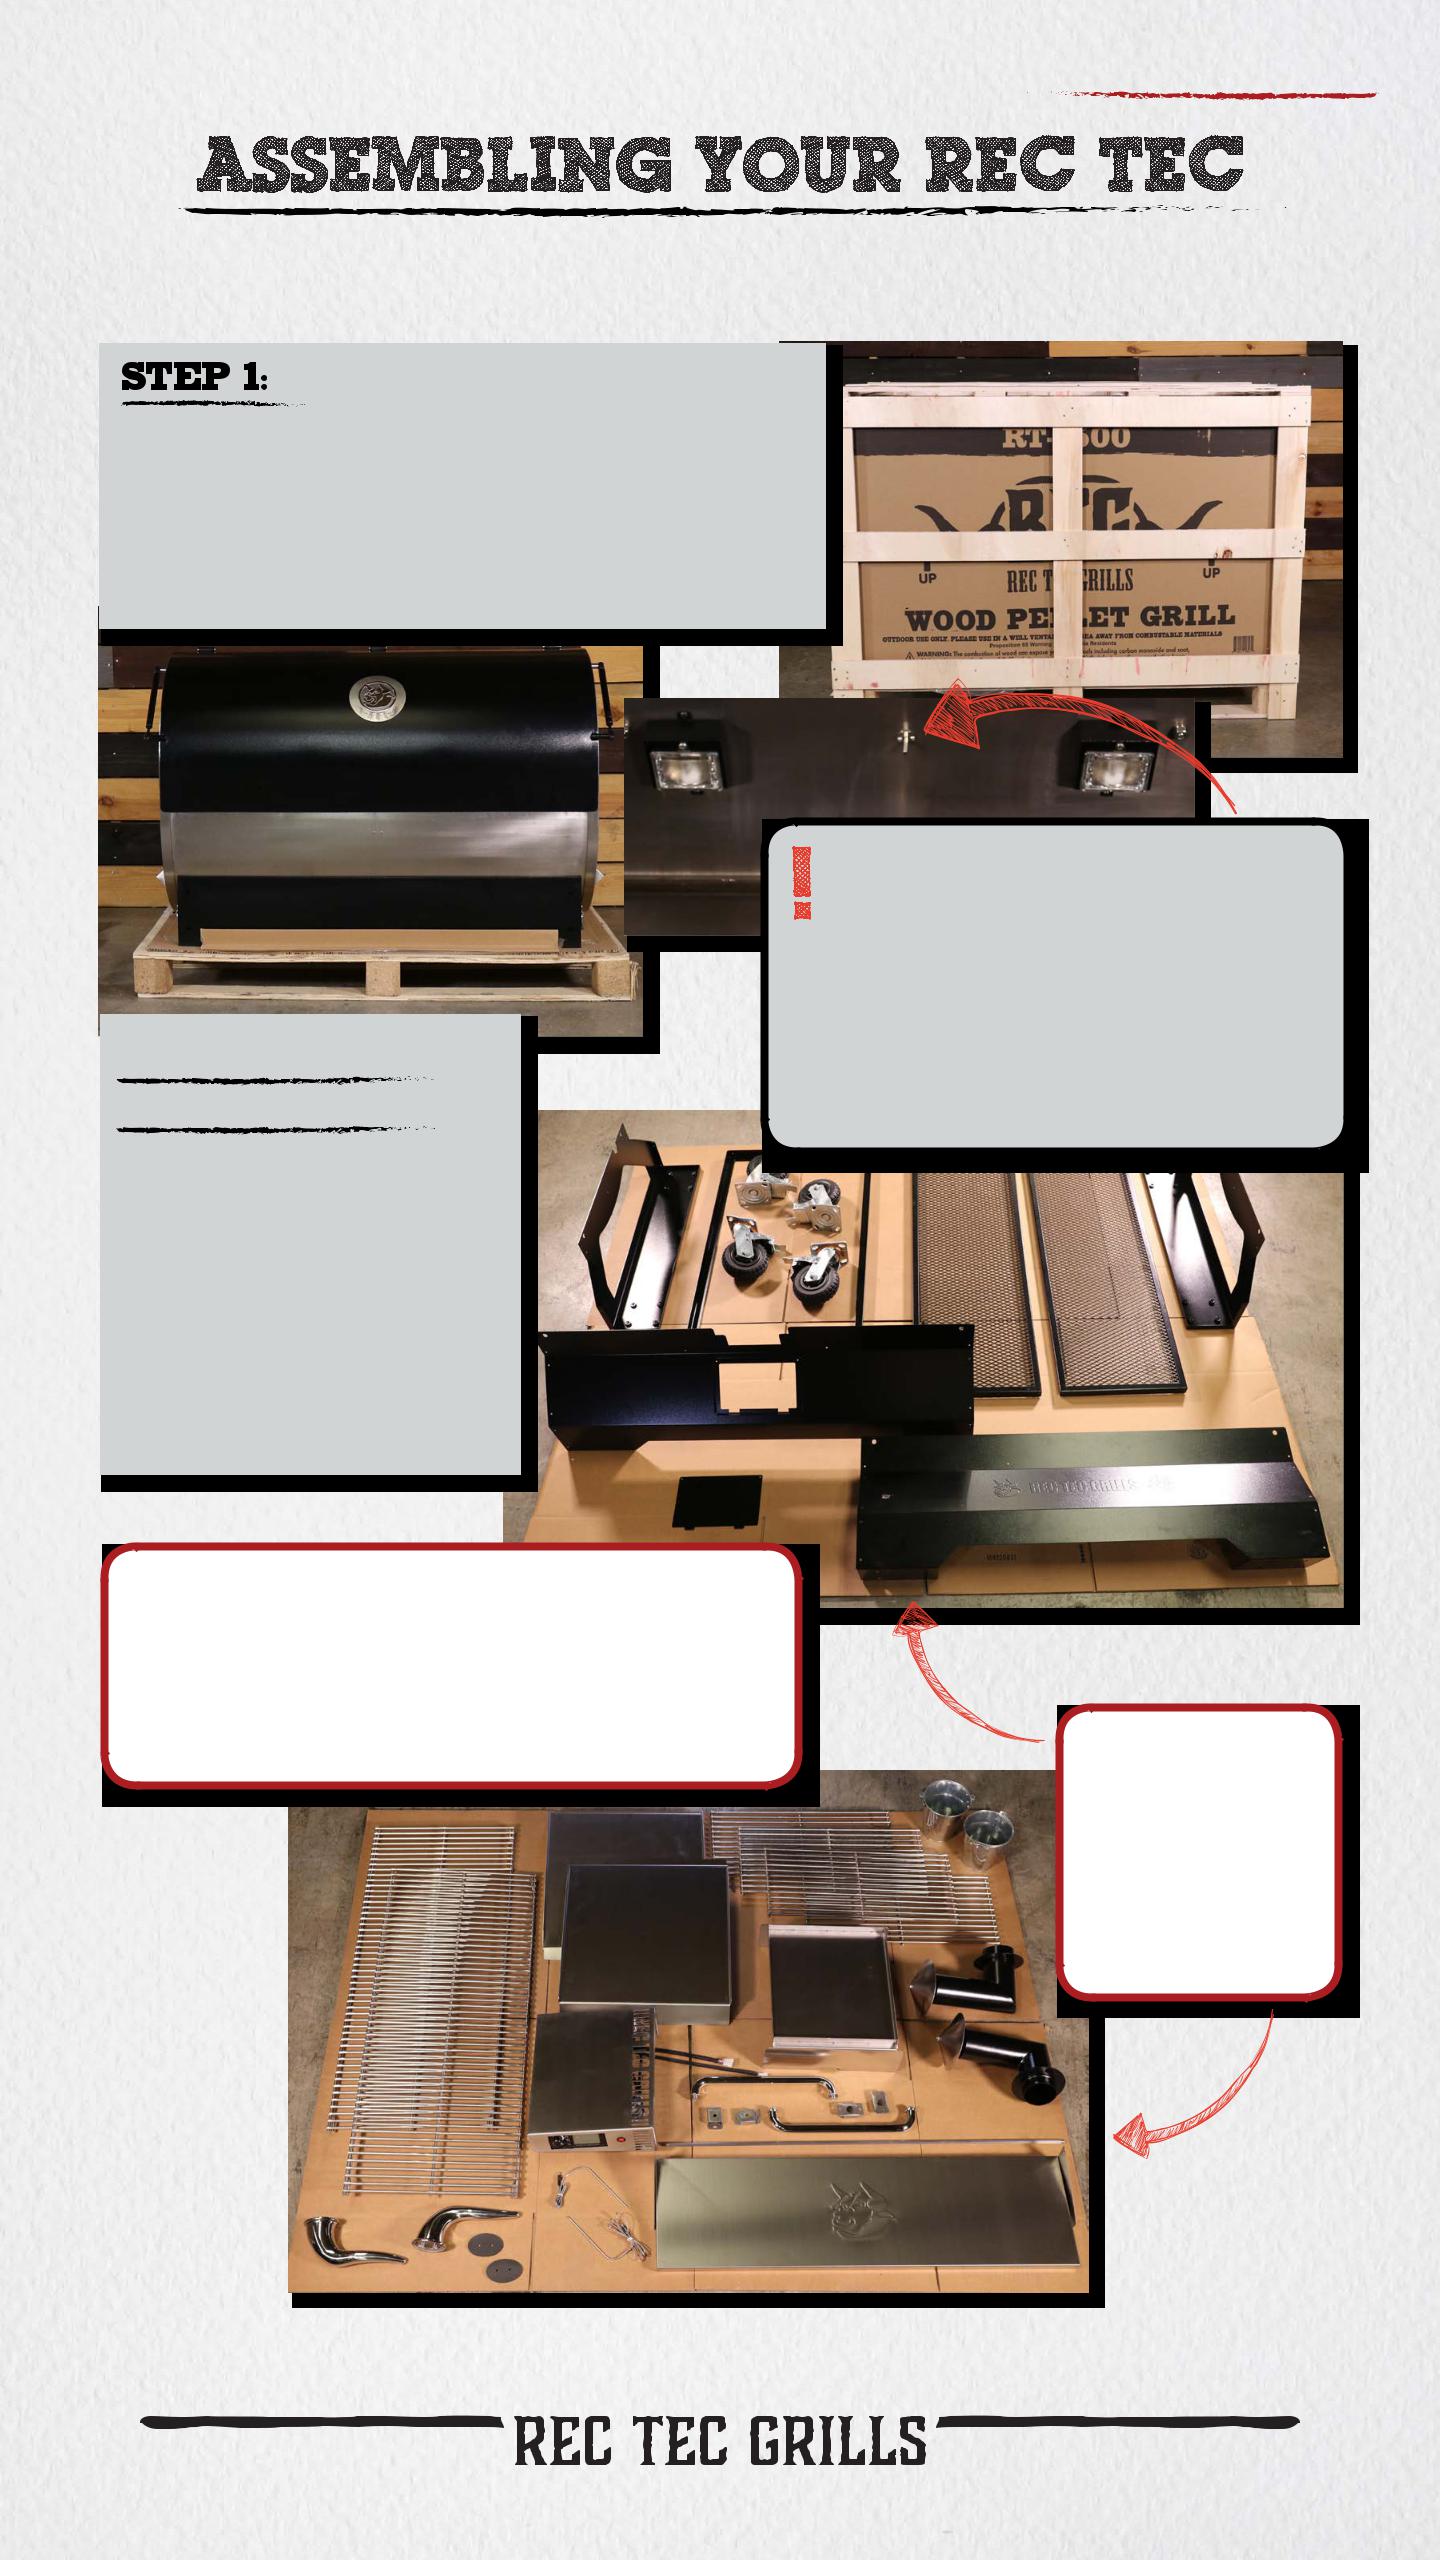
Unpack and Prepare for Assembly
Remove all items from inside box and grill body (#1) and unwrap. Do not attempt to assemble grill by yourself.
Recommended for Assembly:
-A good buddy
-Phillips head, or a flat head screw driver
-Socket wrench (17mm)
-Aluminum cooking foil
-Wood pellets
-Crowbar/claw hammer
Contents inside grills body (#1) are packed tightly to prevent damage during shipping. While unpacking, use caution to prevent damage to temperature sensor between the interior lights inside
the grill body.
Tip: Flatten the box and lay everything out on the cardboard. This serves as a good working area and it helps prevent the grill components from getting scratched or damaged during installation.
Tip: For faster assembly, lay parts for CART in one group and GRILL in another group.
Questions? CLICK for support! |
7 |
©2019, REC TEC Industries, LLC |
|
|
Back to Table of Contents
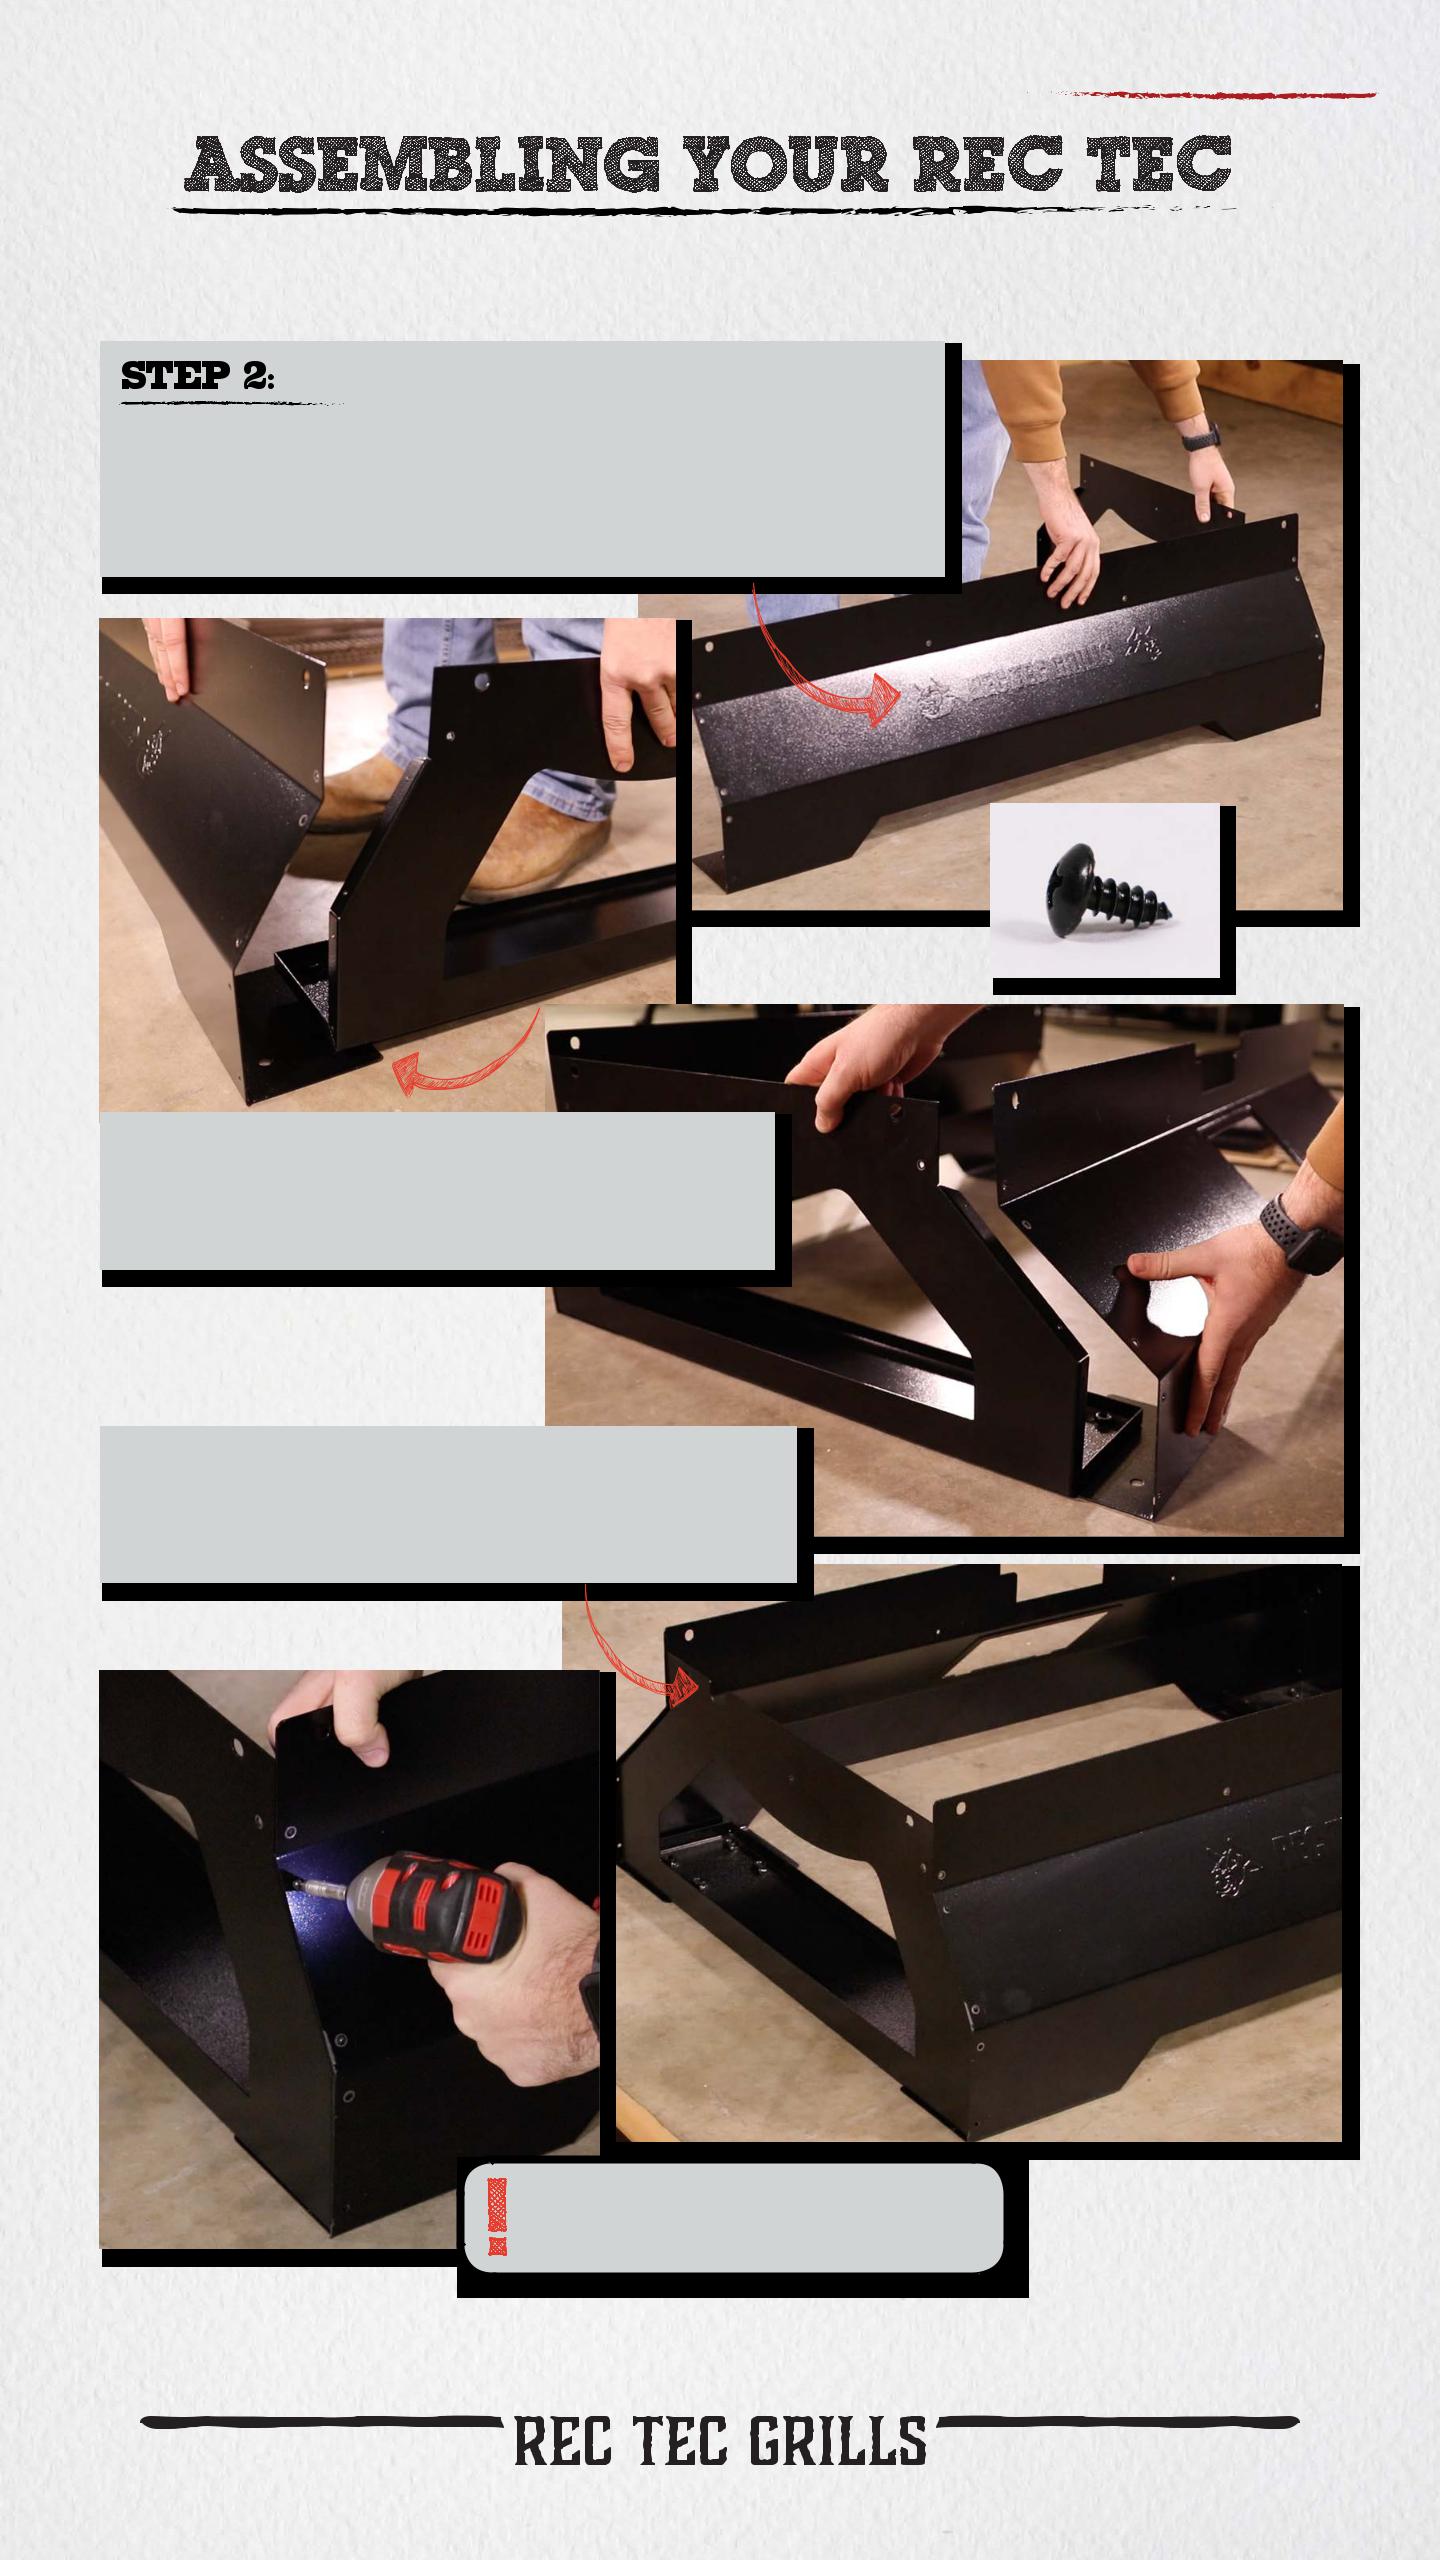
Assemble Cart
2a: Using 4 black screws (#4), attach right side cart panel (#10) to front cart panel with logo (#6).
2b: Using 4 black machine screws (#4), attach back cart panel with access panel
(#7) to right side cart panel (#10).
2c: Using 8 black machine screws (#4), attach left side cart panel with notch (#11) to front (#6) and back (#7) panels.
Back cart access panel (#22) is installed in Step 13.
Questions? CLICK for support! |
8 |
©2019, REC TEC Industries, LLC |
|
|
Back to Table of Contents
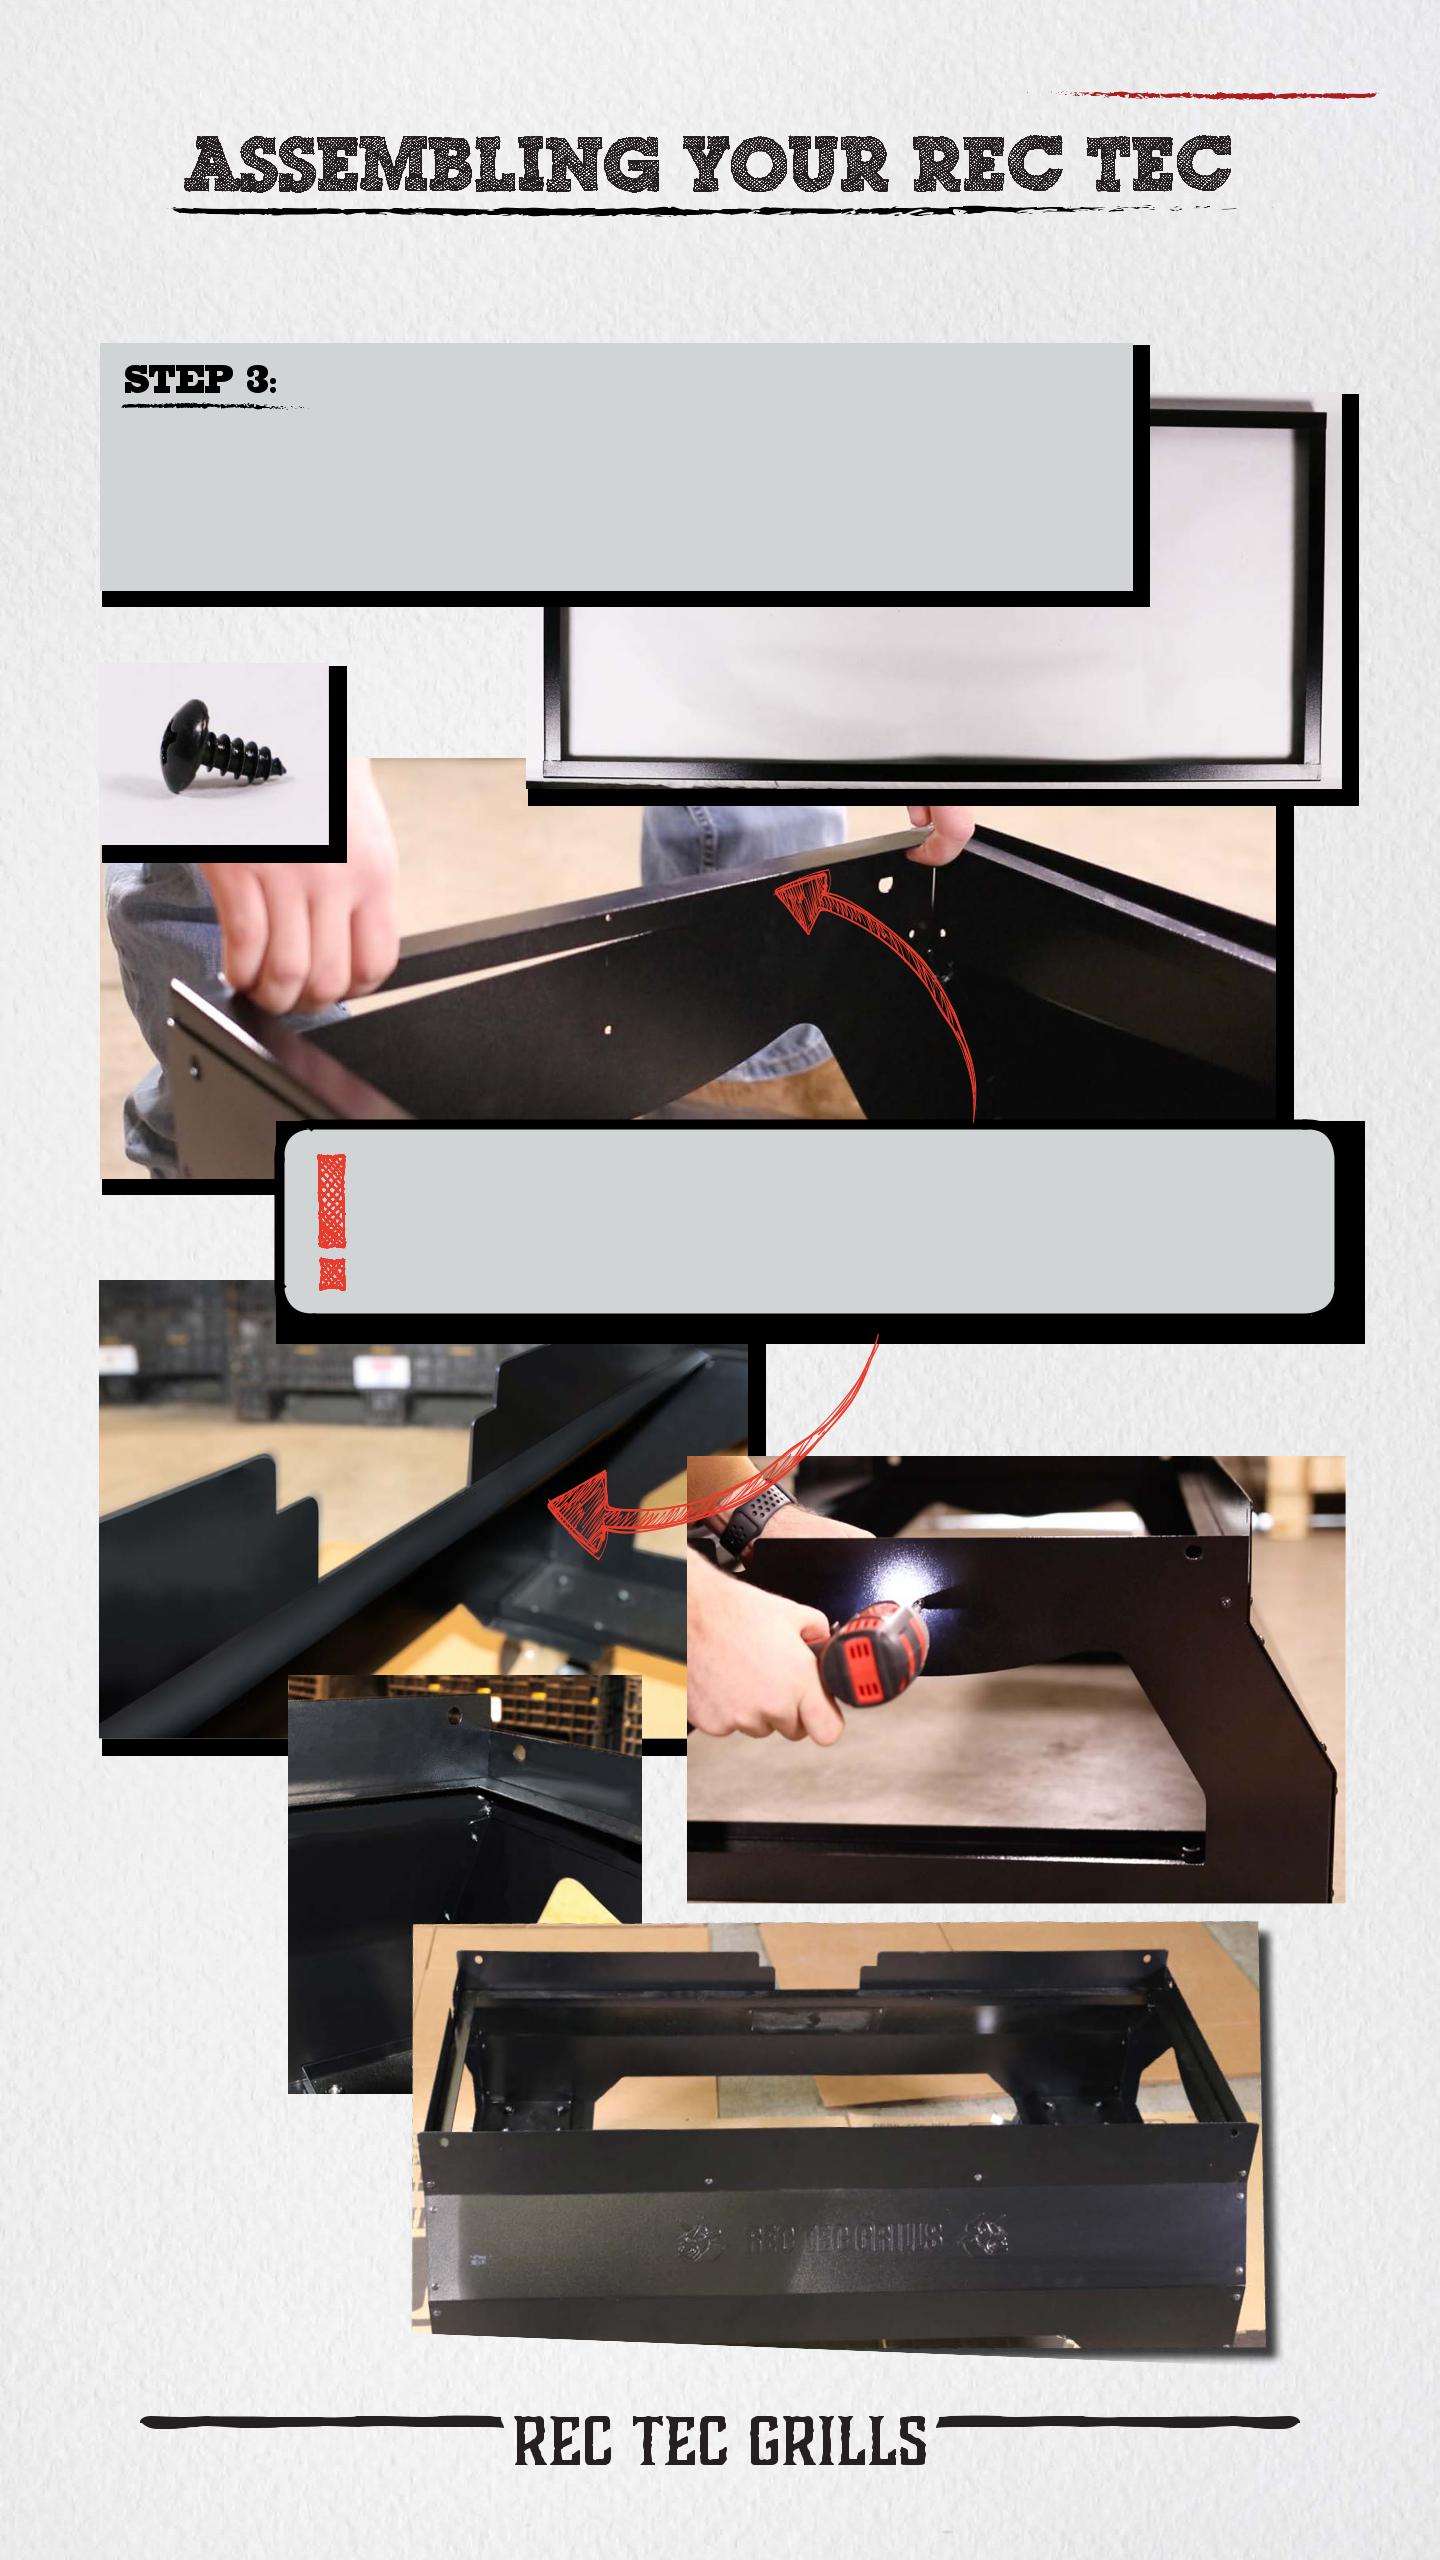
Internal Cart Frame
Mount internal cart frame (#12) into the top of the assembled cart using 14 black machine screws (#4) to stabilize the top.
The internal cart frame is in the proper position when lip is facing upward and inward. It will lay flush with the upper notch on the back cart panel.
|
|
|
|
|
|
|
|
|
|
|
|
|
|
|
|
|
|
|
|
|
|
|
|
|
|
|
|
|
|
|
|
|
|
|
|
|
|
|
|
Questions? CLICK for support! |
9 |
©2019, REC TEC Industries, LLC |
|||||
|
|
|
|
|
|
|
|

Back to Table of Contents
Flip Cart Upside Down
You will need two people to do this as the cart is heavy.
DO NOT ATTEMPT
TO COMPLETE
STEP 4 WITHOUT
ASSISTANCE!
Install Locking Caster Wheels
Attach all 4 locking caster wheels (#17) using 16 hex bolts, flat washers, and locking washers (#4).
|
|
|
|
|
|
|
|
|
|
|
|
|
|
|
|
|
|
|
|
|
Questions? CLICK for support! |
|
|
|
|
|
|
10 |
|
©2019, REC TEC Industries, LLC |
||||
|
|
|
|
|
|
|

Back to Table of Contents
Flip Cart Right-Side Up
You will need two people to do this as the cart is heavy.
LOCK CASTER WHEELS ONCE CART IS UPRIGHT!
DO NOT ATTEMPT
TO COMPLETE
STEP 6 WITHOUT
ASSISTANCE!
Finish Cart Assembly
Insert the two bottom cart shelves (#9) by laying them on bottom frame of cart.
Questions? CLICK for support! |
|
|
|
11 |
©2019, REC TEC Industries, LLC |
||
|
|
|
|

Back to Table of Contents
Pull Bar Installation
8a: Using preinstalled hardware, attach pull bar brackets (#24) to both pull bars (#23).
8b: Using a Phillips head screwdriver, attach pull bar handles (#23) to each side of grill body (#1) with 4 bolts, flat washers, and locking washers(#4).
Tip: When pull bar is horizontal, bracket holes are vertical.
Questions? CLICK for support! |
|
|
|
12 |
©2019, REC TEC Industries, LLC |
||
|
|
|
|
 Loading...