

Page 1
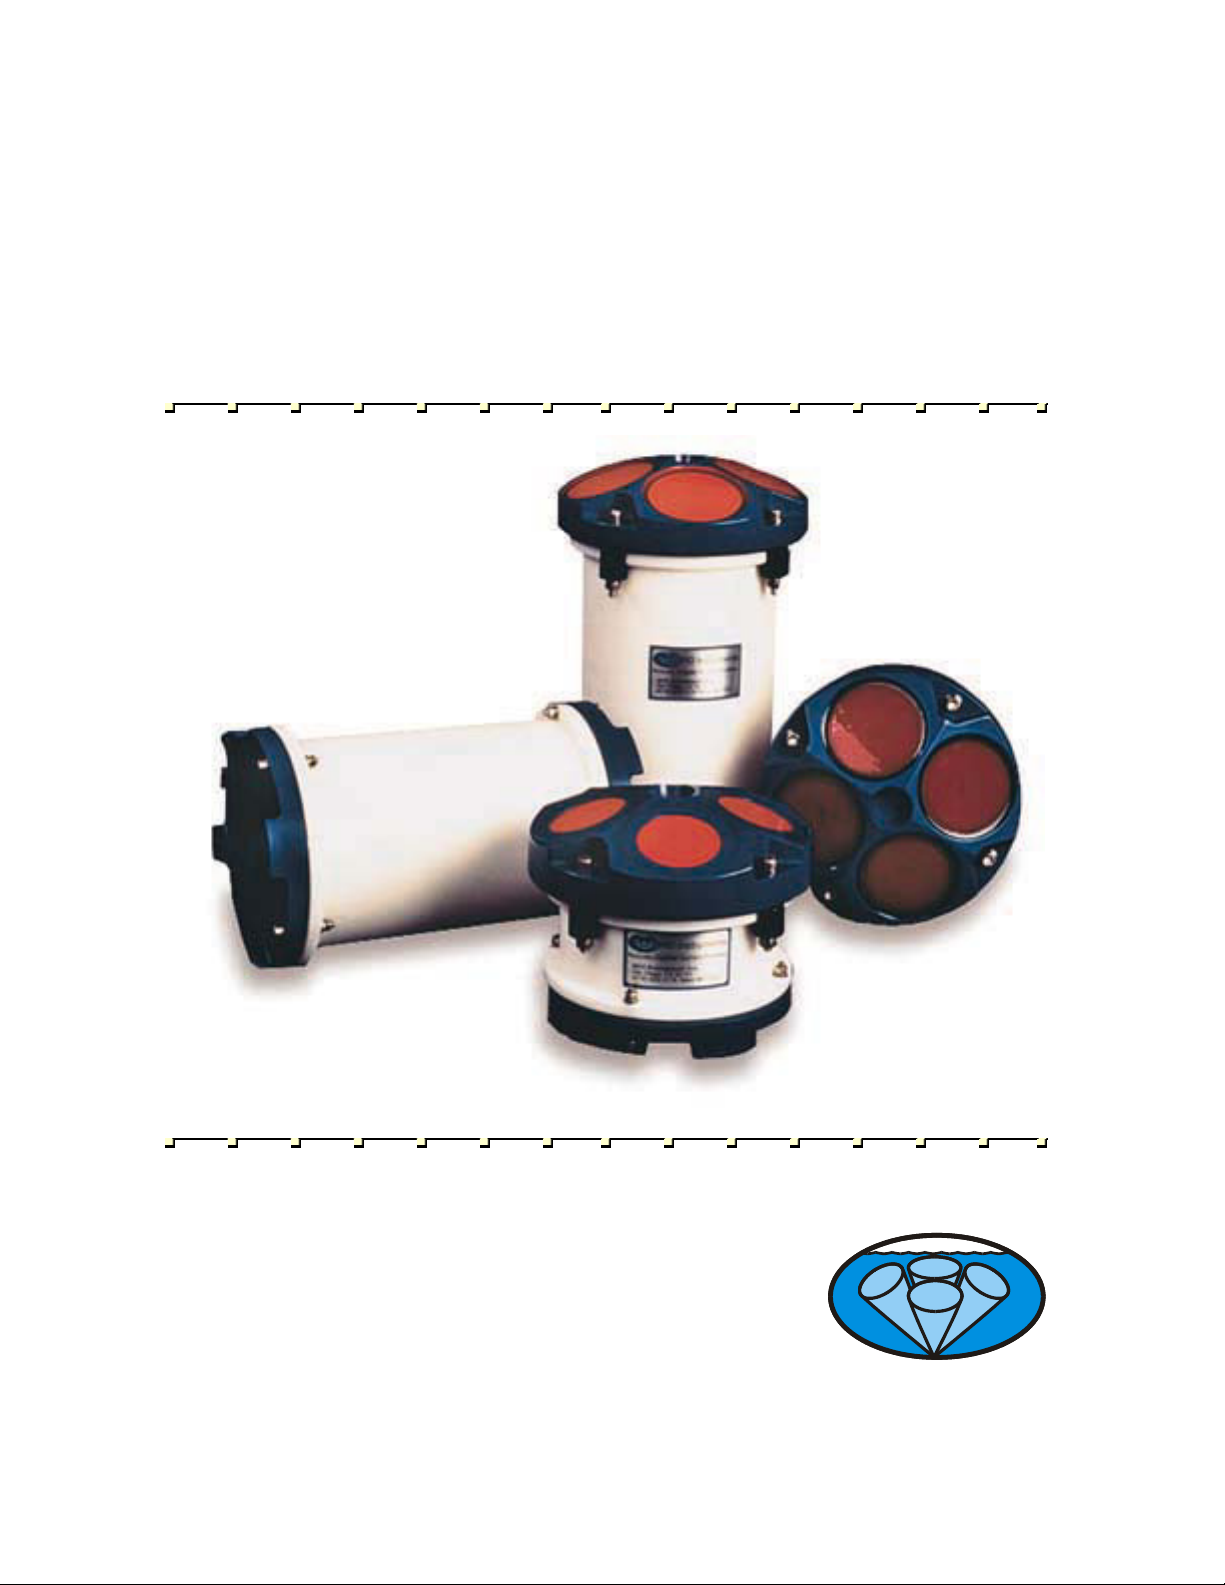
WorkHorse
Read This First
P/N 957-6151-00 (August 2002)
RD Instruments
Acoustic Doppler Solutions
Page 2

Page 3

Table of Contents
1 Introduction....................................................................................................................................... 1
2 Getting Started.................................................................................................................................. 1
3 What’s New........................................................................................................................................ 3
3.1 Firmware Updates...............................................................................................................................3
3.2 Feature Upgrades ............................................................................................................................... 3
3.3 Software..............................................................................................................................................4
3.4 I/O Cable and AC Power Supply......................................................................................................... 5
4 Conventions Used in Manuals ........................................................................................................ 5
5 WorkHorse Models and Options ..................................................................................................... 6
6 WorkHorse Care................................................................................................................................ 8
6.1 General Handling Guidelines ..............................................................................................................8
6.2 Assembly Guidelines ..........................................................................................................................9
6.3 Deployment Guidelines.......................................................................................................................9
7 Unpacking ....................................................................................................................................... 10
7.1 Inventory ........................................................................................................................................... 10
7.2 Visual Inspection of the WorkHorse .................................................................................................. 10
8 Using the Documentation CD........................................................................................................ 12
8.1 Opening PDF Documents .................................................................................................................13
8.2 Viewing Documents ..........................................................................................................................13
8.3 Paging Through a Document ............................................................................................................14
8.4 Using Find......................................................................................................................................... 15
8.5 Using Search ....................................................................................................................................16
8.6 Copying Text and Graphics...............................................................................................................17
9 How to Contact RD Instruments ...................................................................................................18
10 Warranty .......................................................................................................................................... 19
List of Figures
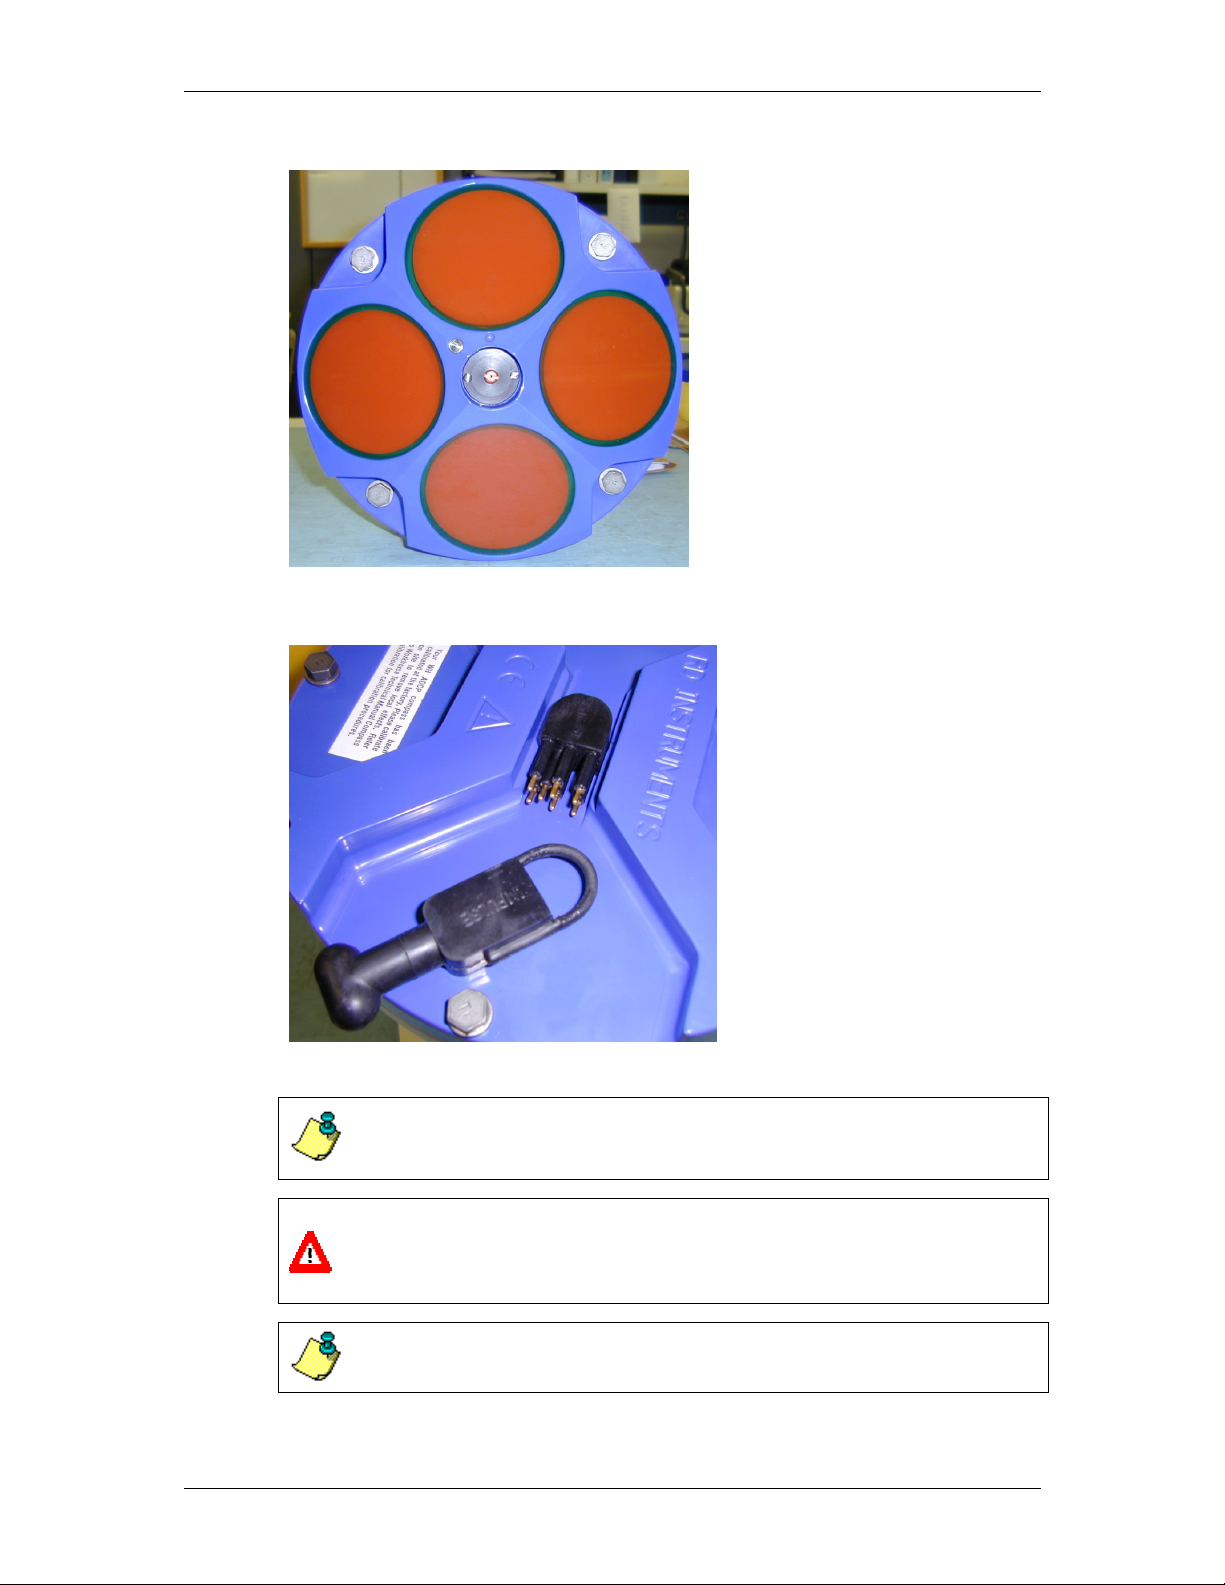
Figure 1. WorkHorse Transducer Face View ................................................................................ 11
Figure 2. WorkHorse End-Cap Connector View ........................................................................... 11
Figure 3. Adobe Acrobat Reader Screen...................................................................................... 13
Figure 4. Selecting the Index........................................................................................................ 16
List of Tables
Table 1: WorkHorse Software Main Modules ................................................................................ 4
Table 2: Visual Inspection Criteria............................................................................................... 10
Table 3: Acrobat Reader Toolbar ................................................................................................ 12
Page 4

NOTES
Page 5

WorkHorse Read This First
Acoustic Doppler Solutions
WorkHorse Read This First
1 Introduction
Thank you for purchasing a RD Instruments (RDI) WorkHorse Broadband
Acoustic Doppler Current Profiler (ADCP). This guide is designed to help
first time ADCP users to get familiar with their system.
2 Getting Started
You are probably eager to get started, but take a moment to read a few
words of guidance. We strongly recommend you read all of the provided
documentation to learn the full capabilities of your WorkHorse ADCP.
The Reference Guides includes:
• Read This First. This guide is an introduction to the WorkHorse
ADCP.
• Installation Guide. Use this guide to plan your installation re-
quirements. This guide includes specifications and dimensions
for the WorkHorse (including outline installation drawings).
• Maintenance Guide. This guide covers WorkHorse mainte-
nance. Use this guide to make sure the WorkHorse is ready for a
deployment.
• Test Guide. Use this guide to test the ADCP.
• Troubleshooting Guide. This guide includes a system overview
and how to troubleshoot the WorkHorse. If the WorkHorse fails
a built-in test or you cannot communicate with the system, use
this guide to help locate the problem.
The WorkHorse User's Guide includes:
• These guides (one for Mariner, Monitor, Rio Grande, and Sentinel models) contain an overview of the WorkHorse hardware and
software.
P/N 957-6151-00 (August 2002) page 1
Page 6
WorkHorse Read This First
The Commands and Output Data Format Guide includes:
• This guide contains a reference for all commands and output data
formats used by the WorkHorse. Use the Command Quick Refer-
ence Card to help remember the direct commands used by the
WorkHorse.
The Documentation CD includes:
• The Documentation CD has Adobe Acrobat® Portable Document
File (pdf) versions of all the user documentation. Use the electronic documentation to quickly search for information. See
“Using the Documentation CD,” page 12 for details on how to
use Adobe’s Acrobat Reader®.
The Reference Cards include:
• Setup Cards. The Setup Cards are designed for first time users
to connect the ADCP and establish communications.
• Command Quick Reference Card. The Command Quick Refer-
ence Card is designed for experienced users to help remember
the direct commands used by the WorkHorse.
• Software Quick Reference Card(s). The Software Quick Refer-
ence Cards are designed to help experienced users remember the
proper steps needed to deploy the WorkHorse for a deployment.
First time users should read the appropriate ADCP and Software
User’s Guides before deploying the WorkHorse.
NOTE. Each software program has it’s own user’s guide and help file.
NOTE. When an addition or correction to the manual is needed, an Interim
Change Notice (ICN) will be posted to our web site on the Customer
Service page (www.rdinstrument.com
). Please check our web site often.
page 2 RD Instruments
Page 7

WorkHorse Read This First
3 What’s New
Several new firmware versions, ADCP Feature Upgrades, and software programs have been released since the last update of the Workhorse Technical
Manual.
3.1 Firmware Updates
The 8.xx series firmware has been frozen. Thus, new features will only be
available to users with the 16.xx firmware. If you have a Workhorse ADCP
with version 8.xx firmware and wish to upgrade to version 16.xx firmware,
please check the following items.
Who should upgrade?
• Users planning to take advantage of new features (i.e. Waves).
What do you need to upgrade?
• The CPU board must have EEPROM Parts installed. The firmware upgrade program WH16FW.exe checks if the ADCP is ca-
pable of upgrading to version 16.xx firmware.
How do I upgrade?
a. Connect your ADCP to the computer.
b. Start the program WH16FW.exe. Click Setup. Click the View
README.TXT button to view the Readme.txt file for details on what
is new in version 16.xx firmware.
c. Click Next and follow the on-screen prompts.
d. If you are not able to install the version 16.xx firmware, contact Cus-
tomer Service and arrange for a CPU board replacement.
e. After successfully upgrading the firmware, use BBTalk to test the ADCP.
3.2 Feature Upgrades
Feature Upgrades can be installed to enhance the operation of the ADCP.
The feature upgrade installation program is used to install Bottom Tracking,
Shallow Water Bottom Mode, Lowered ADCP (LADCP), Water Profiling
(for Navigators), High-Resolution Water-Profiling mode, High Ping Rate,
and Waves capabilities in a Workhorse ADCP. For more instructions on
how to install the upgrades, see the Workhorse Commands and Output Data
Format Guide.
P/N 957-6151-00 (August 2002) page 3
Page 8
WorkHorse Read This First
3.3 Software
RDI has utility programs to help you set up, use, test, and trouble-shoot
your Workhorse ADCP. Each program has a help file and printed User’s
Guide. The User’s Guide is included in *.pdf format on the software CD.
Table 1: WorkHorse Software Main Modules
Program Name Description
WinSC
WinSC is the software package for Self-Contained ADCP
setup, data collection, and data review. For detailed information on how to use WinSC, see the WinSC and PlanADCP
User's Guide.
PlanADCP
PlanADCP lets you enter known or “best-guess” values for the
various ADCP profiling parameters and shows predictions of
expected results. For detailed information on how to use
PlanADCP, see the WinSC and PlanADCP User's Guide.
BBTalk
Windows ADCP communication program. Use this program to
"talk" to the ADCP and to run test script files. BBTalk is included on the RDI Tools CD. For detailed information on how
to use BBTalk, see the RDI Tools User's Guide.
WinADCP
Gives users a visual display of the entire set of data. You can
zoom in on a portion of the data for closer analysis and export
data to text or MatLab files. For detailed information on how
to use WinADCP, see the WinADCP User's Guide.
Documentation CD The Documentation CD has an Adobe Acrobat® (*.pdf) elec-
tronic version of the WorkHorse Technical Manual. Use the
Documentation CD to search for information. For detailed information on how to use Adobe Acrobat® and the Documentation CD, see “Using the Documentation CD,” page 12.
NOTE. See the appropriate ADCP User's Guide to see what software
package to use for collecting data.
NOTE. The RDI Tools CD also has other utility programs to supplement
data processing.
For detailed information, see the RDI Tools User's Guide.
NOTE. As of December 2001, BBTalk has replaced the DumbTerm
software program.
NOTE. As of August 2002, PlanADCP has replaced the Plan software
program.
page 4 RD Instruments
Page 9
WorkHorse Read This First
3.4 I/O Cable and AC Power Supply
Systems shipping after August 2002 include the new style I/O cable and the
48 VDC AC Power Adapter in place of the 24 VDC AC adapters. The AC
Power adapter converts AC power into 48 VDC output for the WorkHorse
input power. Increasing the input voltage to the ADCP from 24 VDC (standard AC adapter) to 48 VDC increases the transmitted power, and thus the
range of the ADCP.
NOTE. Transmitted power increases or decreases depending on the input
voltage. Higher voltage to the ADCP (within the voltage range of 20 to 60
VDC) will increase the transmitted power. The transmitted power is
increased 6 DB if you double the input voltage from 24 VDC to 48 VDC.
For a 300kHz WorkHorse ADCP, each additional DB will result in an
increase in range of one default depth cell.
The higher input voltage is sufficient to override the internal battery voltage
(i.e. the ADCP will draw all power from the AC adapter even if the battery
is installed and connected).
NOTE. This change is not applicable to Rio Grande and Mariner systems.
4 Conventions Used in Manuals
Conventions used in the WorkHorse manuals have been established to help
you learn how to use the WorkHorse quickly and easily.
Windows menu items are printed in bold: File menu, Collect Data. Items
that need to be typed by the user or keys to press will be shown as <F1>. If a
key combination were joined with a plus sign (<ALT+F>), you would press
and hold the first key while you press the second key. Words printed in italics include program names (BBTalk) and file names (default.txt).
Code or sample files are printed using a fixed font. Here is an example:
WorkHorse Broadband ADCP
RD INSTRUMENTS (c) 1997-2002
ALL RIGHTS RESERVED
Firmware Version 16.xx
>
You will find two other visual aids that help you: Notes and Cautions.
NOTE. This paragraph format indicates additional information that may
help you avoid problems or that should be considered in using the
described features.
CAUTION. This paragraph format warns the reader of hazardous
procedures (for example, activities that may cause loss of data or damage to
the ADCP).
P/N 957-6151-00 (August 2002) page 5
Page 10
WorkHorse Read This First
5 WorkHorse Models and Options
The following section explains the different models and options available
for WorkHorse ADCPs.
WorkHorse Monitor – The WorkHorse Monitor is designed to measure real-
time current profiles from temporary or permanent mounting in the ocean,
near-shore, harbors, and lakes. The Monitor ADCP system consists of an
ADCP, cables, RS-232-to-RS-422 converter, and software. The Monitor
system requires the addition of a Windows® compatible computer to collect
data.
WorkHorse Sentinel – The WorkHorse Sentinel is designed for several-
month autonomous current profile deployment from temporary or permanent mounting in the ocean, near-shore, harbors, and lakes. The Sentinel
ADCP system consists of an ADCP, cables, battery pack, flash memory
card, and software. Both battery capacity and memory can be increased
with upgrades for longer deployments. The Sentinel can also be used for
direct-reading current profile operation. The Sentinel system requires the
addition of a Windows® compatible computer to configure the ADCP and
replay collected data.
WorkHorse Rio Grande – The WorkHorse Rio Grande is designed to meas-
ure real-time current profiles from temporary or permanent mounting in a
vessel. The Rio Grande ADCP system consists of an ADCP with Bottom
Track mode, High Resolution Water Profiling modes, cables, and software.
The input power requirements for the Rio Grande are +12 VDC. The Rio
Grande system requires the addition of a Windows® compatible computer
to collect data.
CAUTION. Do not attempt to attach a Workhorse Monitor/Sentinel I/O
cable or power supply to the Workhorse Rio Grande ADCP. The
Workhorse Monitor and Sentinel ADCPs are 20 to 60 VDC systems. The
Workhorse Rio Grande uses 12 VDC only.
NOTE. The Rio Grande End-Cap is red to differentiate it from the Monitor
and Sentinel ADCPs. Do not swap end-caps between a Rio Grande and a
Monitor/Sentinel. The pin-outs are different on both the I/O cable
connector and the internal I/O cable.
WorkHorse Mariner – The WorkHorse Mariner is designed to measure real-
time current profiles from temporary or permanent mounting in a vessel.
The Mariner ADCP system consists of a Monitor ADCP with Bottom Track
mode, cables, Deck Box, Mounting Plate, and software. The Mariner system requires the addition of a Windows® compatible computer to collect
data.
page 6 RD Instruments
Page 11

WorkHorse Read This First
WorkHorse Options
• Bottom Track – You can use your WorkHorse ADCP from mov-
ing boats and ships with the Bottom Track Upgrade. Once the
Bottom Track Upgrade is added, a WorkHorse ADCP can measure both water depth and boat velocity over the ground.
• Shallow Water Bottom Track Mode 7 – You can use your
WorkHorse 1200kHz ZedHed™ ADCP in water as shallow as
30cm.
• High-Resolution Water Profiling Modes – This upgrade allows
you to collect water profiles using Water Modes 1, 5, 8, and 11.
• High Ping Rate Water Mode – This upgrade allows you to col-
lect water profiles using Water Mode 12.
• Waves – This upgrade allows you to use the ADCP as a wave
gauge.
• External Batteries – Adding external batteries can increase the
deployment length for Sentinel ADCPs. Use an External Battery
with a Monitor ADCP to provide backup power or for selfcontained deployments.
• High-Pressure Housing – The standard WorkHorse housing al-
lows deployment depths to 200 meters. High-pressure housings
are available in depth rating of 500, 1000, 3000, and 6000 meters. See the Installation Guide outline installation drawings for
dimensions and weights.
• Spare boards kit – Contains a complete set of spare printed cir-
cuit boards for a WorkHorse ADCP. T h e se t d o es not include
boards purchased as options such as the gyro/synchro board or
the receiver board (not field replaceable).
• VmDas Software – Controls the ADCP and displays profile data
through a personal computer.
• WinRiver Software – Controls the ADCP and displays discharge
data and profile data through a personal computer.
• Waves Software – Controls the ADCP and displays waves data
through a personal computer.
Mariner Options
• Deck Box – Converts AC power input or 12 VDC input into 48
VDC output for the Mariner input power. Converts computer
RS232 to RS422. Option: converts gyro analog input to a serial
NMEA output (requires an optional gyro interface; must be purchased at time of order).
• Gyrocompass (Gyro) Interface – Connects the ship’s gyro to
the Deck Box (must be purchased at time of order).
P/N 957-6151-00 (August 2002) page 7
Page 12

WorkHorse Read This First
• Mounting Plate – A bronze plate that helps mount the transducer
head to a vessel. See the Installation Guide outline installation
drawings for dimensions.
6 WorkHorse Care
This section contains a list of items you should be aware of every time you
handle, use, or deploy your WorkHorse. Please refer to this list often.
6.1 General Handling Guidelines
• Never set the transducer on a hard or rough surface. The ure-
thane faces may be damaged.
• Always remove the retaining strap on the end-cap underwaterconnect cable and dummy plug when disconnecting them. Fail-
ure to do so will break the retainer strap.
• Do not apply any upward force on the end-cap connector as the
I/O cable is being disconnected. Stressing the end-cap connec-
tor may cause the ADCP to flood. Read the Maintenance guide
for details on disconnecting the I/O cable.
• Do not expose the transducer faces to prolonged sunlight. The
urethane faces may develop cracks. Cover the transducer faces
on the Workhorse if it will be exposed to sunlight.
• Do not expose the I/O connector to prolonged sunlight. The
plastic may become brittle. Cover the connector on the Work-
horse if it will be exposed to sunlight.
• Do not store the ADCP in temperatures over 75 degrees C. The
urethane faces may be damaged. Check the temperature indi-
cator inside the shipping case. It changes color if the temperature
limit is exceeded.
• Store batteries in a cool dry location (0 to 21 degrees C).
• Do not store batteries inside the ADCP for extended periods.
The batteries may leak.
• Vent the system before opening by loosing the end-cap. If the
ADCP flooded with batteries installed, there may be gas under pressure inside the housing.
• Do not scratch or damage the O-ring surfaces or grooves. If
scratches or damage exists, they may provide a leakage path
and cause the ADCP to flood. Do not risk a deployment with
damaged O-ring surfaces.
• Do not lift or support a WorkHorse by the external I/O cable.
The connector or cable will break.
page 8 RD Instruments
Page 13

WorkHorse Read This First
6.2 Assembly Guidelines
• Read the Maintenance guide for details on WorkHorse re-
assembly. Make sure the housing assembly O-rings stay in their
groove when you re-assemble the WorkHorse. Tighten the hardware as specified. Loose, missing, stripped hardware, or dam-
aged O-rings can cause the WorkHorse transducer to flood.
• Place a light amount of DC-111 lubricant on the end-cap connector pins (rubber portion only). This will make it easier to con-
nect or remove the I/O cable and dummy plug.
• Do not connect or disconnect the I/O cable with power applied.
An exception to this is the external battery case. The external
battery case connector is always “hot” when batteries are installed. When you connect the cable with power applied, you
may see a small spark. The connector pins may become pitted
and worn.
• Do not attach a Workhorse Monitor or Sentinel I/O cable or
power supply to the Workhorse Rio Grande ADCP. The Workhorse Mariner, Monitor and Sentinel ADCPs are 24 VDC systems. The Workhorse Rio Grande uses 12VDC only.
• The WorkHorse I/O cable is wet mate-able, not under water
mate-able.
6.3 Deployment Guidelines
• Read the appropriate WorkHorse User’s Guide and the Software
User’s Guides. These guides have tutorials to help you learn
how to use the ADCP.
• WorkHorse Sentinel batteries are shipped inside the ADCP but
not connected. Connect the battery and seal the ADCP before
deployment.
• Align the compass whenever the battery pack or recorder module
is replaced, or when any ferrous metals are relocated inside or
around the WorkHorse housing. Ferro-magnetic materials af-
fect the compass.
• The AC power adapter is not designed to withstand water. Use
caution when using on decks in wet conditions.
• Avoid using ferro-magnetic materials in the mounting fixtures or
near the Workhorse. Ferro-magnetic materials affect the com-
pass.
P/N 957-6151-00 (August 2002) page 9
Page 14

WorkHorse Read This First
7 Unpacking
When unpacking, use care to prevent physical damage to the transducer
face and connector. Use a soft pad to protect the transducer. When handling any electronics modules, follow electrostatic discharge (ESD) prevention measures.
7.1 Inventory
You should have the following items.
• ADCP transducer
• I/O cable
• AC power adapter (Monitor and Sentinel only)
• Deck Box and mounting plate (Mariner only)
• Ship Kit (includes manuals, software (WinSC and PlanADCP
(Sentinel only), WinADCP, RDI Tools, and Documentation CD),
and power cords)
• Shipping crate (please save all foam for reshipping use)
7.2 Visual Inspection of the WorkHorse
Inspect the WorkHorse using the following table and Figure 1, page 11 and
Figure 2, page 11. If you find any discrepancies, call RDI for instructions.
Table 2: Visual Inspection Criteria
Item Inspection Criteria
Transducer Check the urethane face. There should be no gouges, dents,
scrapes, or peeling (see Figure 1, page 11).
I/O connector Check the I/O connector for cracks or bent pins (see
Figure 2, page 11).
I/O Cable Check the cable connectors for cracks or bent pins.
Deck Box (Mariner
only)
Check the connectors on the rear panel for cracks or bent
pins.
page 10 RD Instruments
Page 15
WorkHorse Read This First
Figure 1. WorkHorse Transducer Face View
Figure 2. WorkHorse End-Cap Connector View
NOTE. The Rio Grande End-Cap is Red to differentiate it from the Monitor
and Sentinel End-Cap. The I/O cable pin-out arrangement is different
between a Rio Grande and a Monitor/Sentinel.
CAUTION. Do not attach a Workhorse Monitor or Sentinel I/O cable or
power supply to the Workhorse Rio Grande ADCP. The Workhorse
Monitor and Sentinel ADCPs are 24 VDC systems. The Workhorse Rio
Grande uses 12 VDC only.
NOTE. Refer to the appropriate ADCP User’s Guide for instructions on
how to connect and use the ADCP.
P/N 957-6151-00 (August 2002) page 11
Page 16
WorkHorse Read This First
8 Using the Documentation CD
The documentation CD contains an electronic version of the WorkHorse
Technical Manual. All of the files are in Adobe® Portable Document Format (*.pdf). To use these files, you must install the Acrobat version 5.0
Reader. This program is included on the documentation CD.
NOTE. If you have an earlier version of Acrobat Reader installed on your
computer, please uninstall it prior to installing the version 5.0 Reader.
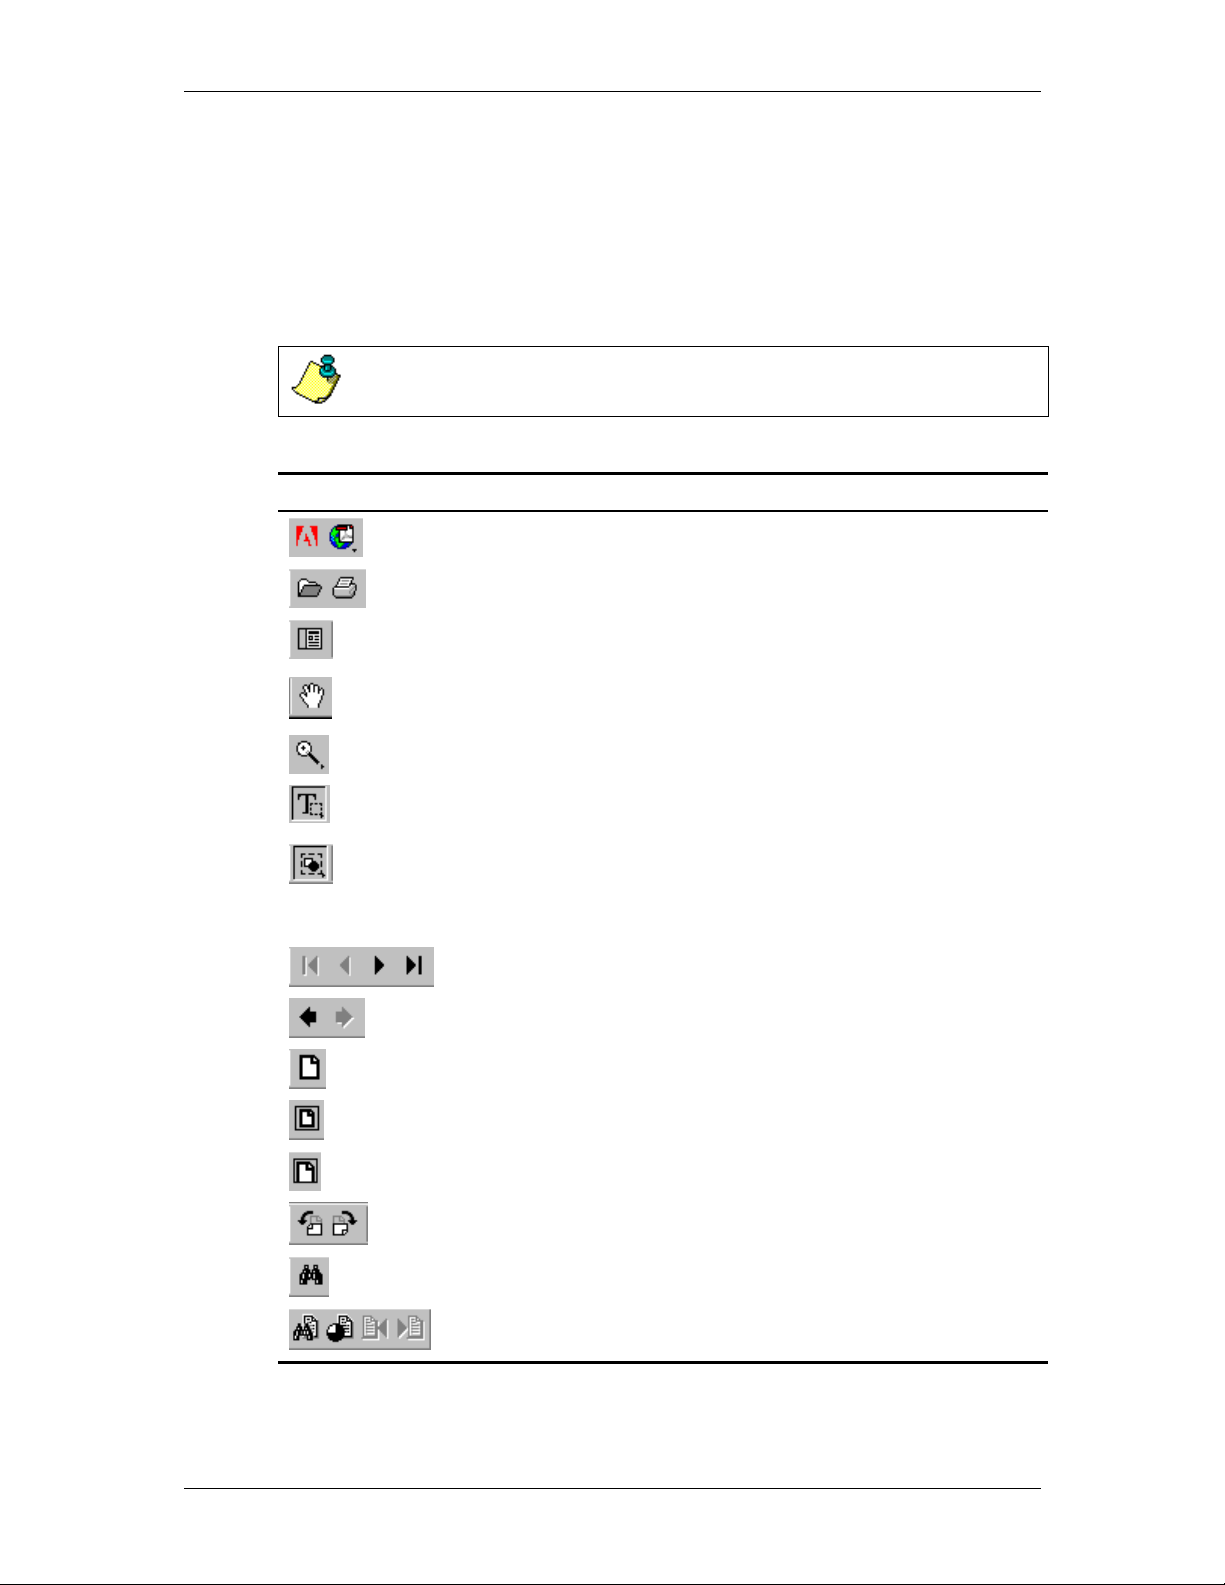
Table 3: Acrobat Reader Toolbar
Tool Description
Use these tools to visit Adobe’s website.
Use these tools to open or print a pdf file.
Use the navigation pane button to turn on or off the table of contents or thumbnail pane.
Use the hand tool to move the page around so that you can view
all the areas on it.
Zoom In/Out tool
Text select tool. Use this button to highlight text to be copied into
another document.
Select the Graphics Select tool by holding down the mouse button on the text select tool and dragging to the graphics select tool.
Use this button to select a graphic to be copied into another
document.
Use these buttons to page through a document.
Use these buttons to return to a previous or next view.
Actual size tool.
page 12 RD Instruments
Fit in window tool.
Fit width tool.
Rotates page 90 degrees.
Find tool. Find will search only the current open document.
Search tools. Use search to find information located in the
WorkHorse Technical Manual.
Page 17

WorkHorse Read This First
8.1 Opening PDF Documents
Do one of the following:
• Start Acrobat Reader. Choose File, Open. In the Open dialog
box, select the filename, and click Open. Acrobat Reader documents have the extension *.pdf.
• Double-click the file icon in your file system.
Figure 3. Adobe Acrobat Reader Screen
8.2 Viewing Documents
The minimum and maximum zoom levels available depend on the current
page size. If you magnify a page to a size larger than the window, use the
hand tool to move the page around so that you can view all the areas on it.
Moving a PDF page with the hand tool is like moving a piece of paper on a
desk with your hand.
To Resize a Page to Fit the Window:
Do one of the following:
• To resize the page to fit entirely in the window, click the Fit in
Window button, or choose View, Fit in Window.
• To resize the page to fit the width of the window, click the Fit
Width button, or choose View, Fit Width. Part of the page may
be out of view.
• To resize the page so that its text and graphics fit the width of the
window, choose View, Fit Visible. Part of the page may be out
of view.
To Increase Magnification:
Do one of the following:
• Select the Zoom-In tool, and click the page.
P/N 957-6151-00 (August 2002) page 13
Page 18
WorkHorse Read This First
• Select the Zoom-In tool, and drag to draw a rectangle, called a
marquee, around the area to magnify.
• Click the Magnification button in the status bar, and choose a
magnification level.
To Decrease Magnification:
Do one of the following:
• Select the Zoom-Out tool, and click the page.
• Select the Zoom-Out tool, and drag to draw a marquee the size
you want the reduced page to be.
• Click the Magnification button in the status bar, and choose a
magnification level.
NOTE. When the Zoom-In tool is selected, you can press Ctrl while
clicking or dragging to Zoom Out instead of in. When the Zoom-Out tool
is selected, press Ctrl to zoom in.
To Return a Page to Its Actual Size:
Click the Actual Size button, or choose View, Actual Size.
8.3 Paging Through a Document
Acrobat Reader provides buttons, keyboard shortcuts, and menu commands
for paging through PDF documents.
To Go to Another Page:
Do one of the following:
• To go to the next page, click the Next Page button in the com-
mand bar or status bar, press the Right Arrow key, press Ctrl +
Down Arrow key, or choose Document, Next Page.
• To go to the previous page, click the Previous Page button in the
command bar or status bar, press the Left Arrow key, press Ctrl
+ Up Arrow key, or choose Document, Previous Page.
• To move down one line, press the Down Arrow key.
• To move up one line, press the Up Arrow key.
NOTE. The Down and Up Arrow keys move you one line at a time when
you are not in Fit in Window view. In Single Page mode, these keys move
you one page at a time if the page fills the entire screen.
• To move down one screen, press Page Down or Return.
• To move up one screen, press Page Up or Shift + Return.
page 14 RD Instruments
Page 19

WorkHorse Read This First
• To go to the first page, click the First Page button in the com-
mand bar or status bar, press the Home key, or choose Docu-
ment, First Page.
• To go to the last page, click the Last Page button in the com-
mand bar or the status bar, press the End key, or choose Docu-
ment, Last Page.
To Retrace Your Viewing Path:
Do one or more of the following:
• To retrace your path within a PDF document, click the Go to
Previous View button in the command bar, or choose Document,
Go Back for each step back. Alternatively, click the Go to Next
View button, or choose Document, Go Forward for each step
forward.
• To retrace your viewing path through other PDF documents,
choose Document, Go Back Doc for each step back or Docu-
ment, Go Forward Doc for each step forward. Alternatively,
hold down Shift, and click the Go Back or Go Forward button.
This command opens the other PDF documents if the documents
are closed.
8.4 Using Find
You can use the Find command to find a complete word or part of a word in
the current PDF document. Acrobat Reader looks for the word by reading
every word on every page in the file, including text in graphics.
To Find a Word Using the Find Command:
a. Click the Find button, or choose Edit, Find.
b. Enter the text to find in the text box.
c. Select search options if necessary:
• Match Whole Word Only finds only occurrences of the com-
plete word you enter in the text box. For example, if you search
for the word stick, the words tick and sticky will not be highlighted.
• Match Case finds only words that contain exactly the same capi-
talization you enter in the text box.
• Find Backwards starts the search from the current page and goes
backwards through the document.
d. Click Find. Acrobat Reader finds the next occurrence of the word.
P/N 957-6151-00 (August 2002) page 15
Page 20
WorkHorse Read This First
To Find the Next Occurrence of the Word:
Do one of the following:
• Choose Edit, Find Again.
• Reopen the Find dialog box, and click Find Again (the word
must already be in the Find text box).
8.5 Using Search
The Acrobat Search command allows you to perform full-text searches of
PDF document collections (i.e. the WorkHorse Technical Manual), whereas
the Acrobat Find command allows you to search only a single document.
The Search command also provides powerful tools for limiting and expand-
ing a search. Opening a PDF document associated with an index automatically makes the index searchable.
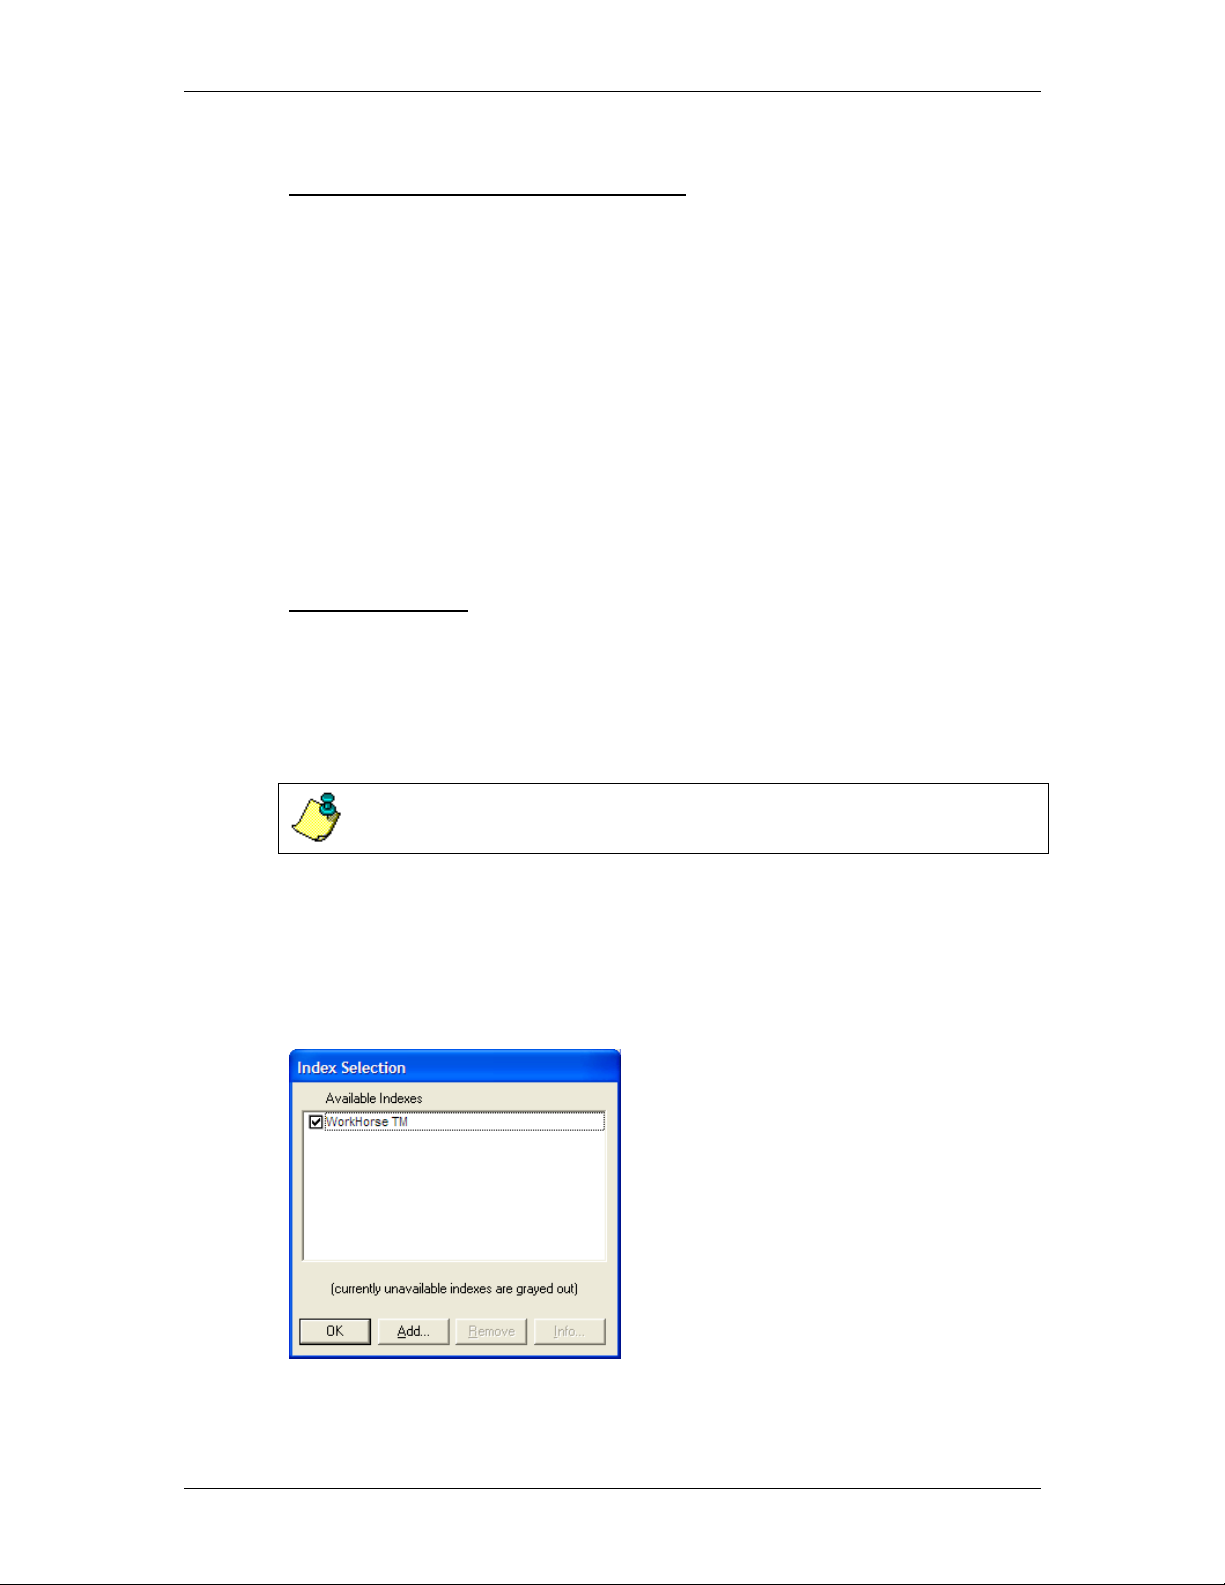
To Select an Index:
Choose Edit, Search, Select Indexes to list the currently available indexes
and to add or delete indexes, and then do one of the following in the Index
Selection dialog box:
• To add an index to the available indexes list, click Add, navigate
to the file named index.pdx, and double-click on the index file.
NOTE. The index file (index.pdx) is in the same folder as the pdf files.
• To remove an index, select the index name, click Remove, and
then click OK.
• To select or deselect an index, select the box for the index, and
then click OK. Indexes that are grayed out are currently unavailable for searching.
Figure 4. Selecting the Index
page 16 RD Instruments
Page 21
WorkHorse Read This First
Using the Search Command
The Search command allows you to perform a search on PDF documents.
You can search for a simple word or phrase, or you can expand your search
query by using wild-card characters and operators. You can use the search
options to further refine your search.
To Perform a Full-Text Search:
a. Choose Edit, Search, Query.
b. Type the text you want to search for in the Find Results Containing
Text box: The text that you type in can be a single word, a number, a
term, or a phrase.
c. To clear the search dialog box and redefine the search, click Clear.
To View a Document Returned From a Search:
a. Double-click the document name to open the document.
b. Use the Search buttons on the tool bar to view all the matches for your
query.
c. Review the search results that automatically appear in the text box: To
highlight the next occurrence of a match in the document, click Next
Highlight. To highlight the previous occurrence of a match in a document, click Previous Highlight.
d. To highlight the first occurrence of a match in the next document listed
or previous document listed, Shift-click Next Highlight or Previous
Highlight.
e. To view any other document listed, select Search Results to redisplay
the list, and then double-click the document name.
8.6 Copying Text and Graphics
You can select text or a graphic in a PDF document, copy it to the Clipboard, and paste it into a document in another application such as a word
processor.
NOTE. If a font copied from a PDF document is not available on the
system displaying the copied text, the font cannot be preserved. A default
font is substituted.
To Select Text and Copy It to the Clipboard:
Select the Tex t Se l ec t tool, and do one of the following:
• To select a line of text, select the first letter of the sentence or
phrase and drag to the last letter.
P/N 957-6151-00 (August 2002) page 17
Page 22

WorkHorse Read This First
• To select all the text on the page, choose Edit, Select All. To de-
select the text and start over, click anywhere outside the selected
text.
Choose Edit, Copy to copy the selected text to the Clipboard.
To Copy Graphics to the Clipboard:
Select the Graphics Select tool by holding down the mouse button on the
text select tool and dragging to the graphics select tool, or press Shift-V as
necessary to cycle through the group of tools. The cursor changes to the
cross-hair icon.
Drag a rectangle around the graphic you want to copy. To deselect the
graphic and start over, click anywhere outside the selected graphic.
Choose Edit, Copy to copy the graphic to the Clipboard.
NOTE. The graphic is copied using the *.wmf file format.
9 How to Contact RD Instruments
If you have technical problems with your instrument, contact our field service group in any of the following ways:
RD Instruments RD Instruments Europe
9855 Businesspark Ave. 5 Avenue Hector Pintus
San Diego, California 92131 06610 La Gaude, France
(858) 693-1178 +33(0) 492-110-930
FAX (858) 695-1459 +33(0) 492-110-931
Sales - [email protected]
Field Service - [email protected] [email protected]
Web: www.rdinstruments.com
page 18 RD Instruments
Page 23

WorkHorse Read This First
10 Warranty
Solely for the benefit of the original buyer, RD Instruments (RDI) warrants
all new products of its manufacture to be free from defects in material and
workmanship. RDI will replace or repair free of charge, F.O.B. at its factory in San Diego, California or other location designated by RDI, any part
or parts returned to it within one year of original delivery, which RDI’s examination shall show to have failed under normal use and service.
For those parts or components of a product which RDI does not manufacture itself but which are acquired from other vendors, the duration on times
of this warranty given above shall not exceed those of the vendor’s warranties for such parts or components.
This warranty applies to all goods manufactured by RDI and is included in
the Terms and Conditions contained in sales documents of RDI which
Terms and Conditions set forth the provisions that govern all sales made by
RDI. This warranty also applies to all other activities performed by research, design, design and development, joint development, field engineering, field testing and operation training and is the ONLY WARRANTY
GIVEN FOR THE SALE OF PRODUCTS OR SERVICES. NO
WARRANTIES IMPLIED IN LAW, INCLUDING BUT NOT LIMITED
TO THE IMPLIED WARRANTIES OF MERCHANTABILITY AND
FITNESS FOR PARTICULAR PURPOSE SHALL APPLY. IN NO
EVENT WILL RDI BE LIABLE FOR CONSEQUENTIAL DAMAGES
RESULTING FROM THE PURCHASE OR USE OF RDI PRODUCTS,
OR RESULTING FROM ANY DELAYS OR FAILURE OF
PERFORMANCE OR RDI UNDER ANY AGREEMENT, OR
RESULTING FROM ANY SERVICES FURNISHED BY RDI.
This warranty may not be modified, amended, or otherwise changed except
in writing and properly executed by an officer of RDI.
P/N 957-6151-00 (August 2002) page 19
Page 24

WorkHorse Read This First
NOTES
page 20 RD Instruments
 Loading...