

Vantage FPV Headset
Model No.: 89153RC
INSTRUCTION MANUAL
Read the entire instruction manual to become familiar with the featu res of the product before
operating. Failure to operate the product correctly can re sult in damage of the product,
personal property and cause serious inj ury.
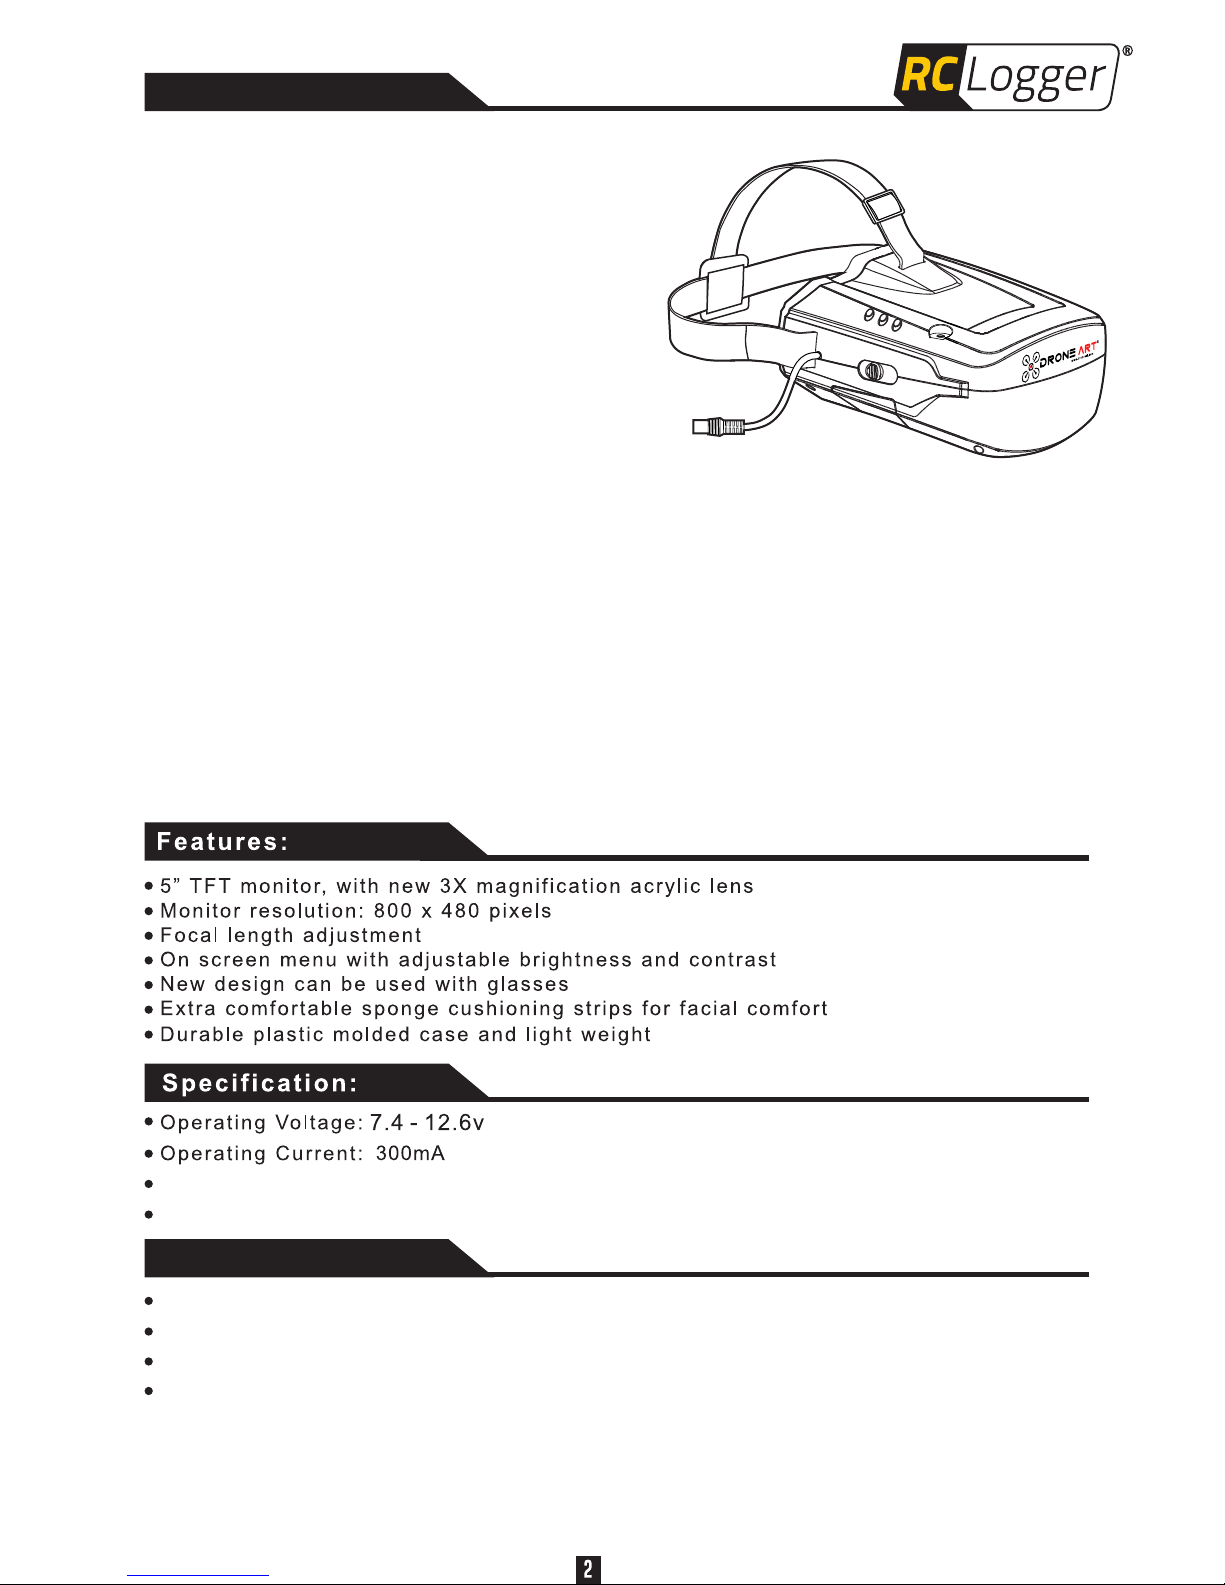
Thank you for purchasing the RC Logger
Vantage FPV Headset. We hope that you
will fully enjoy the immersive experience
of the first person view world.
The Vantage headset is light weight and
super comfortable. Offering a 5" monitor,
floating rear mounted battery pouch for
optimum weight distribution, soft sponge
rubber facial foam liner and a one piece
plastic molded shell with space for those
with prescription glasses, the headset
With the A/V 3.5mm input the Vantage Headset can also be used as a stand alone
unit. The monitor can receive signal from any device you'd like that supports video
out. So if you already have your own equipment, such as a 5.8GHz video receiver,
you can simply plug into the headset for the same immersive experience. If you
are looking for a complete 5.8GHz package please check our website for our RC
Logger Vantage FPV Headset 5.8GHz combo package, that features our RC
Logger 5.8GHz Video RX Module.
Get ready, you are about to experience pure #DRONEsomeness!
Introduction
Maximum Operating Hour: 3 hrs
Working hand in hand with our Xtreme V2
radio's output port, it's an immediate plug and play experience.
packs in a lot of well thought out details.
Product dimensions: 187(L) x 179(W) x 107(H)mm
Lipo Battery
Capacity: 1500mAH
Voltage: 2 x 3.7V
Maximum Charging Voltage: 4.2V
Energy: 2 x 5.55Wh
+
MENU
VIDEO IN
Adjustable head s tr ap
(velcro)
Batt ery
hold er
Powe r connector
Posi tion adjust ment
for ma gnifying le ns
Adjustable
head strap
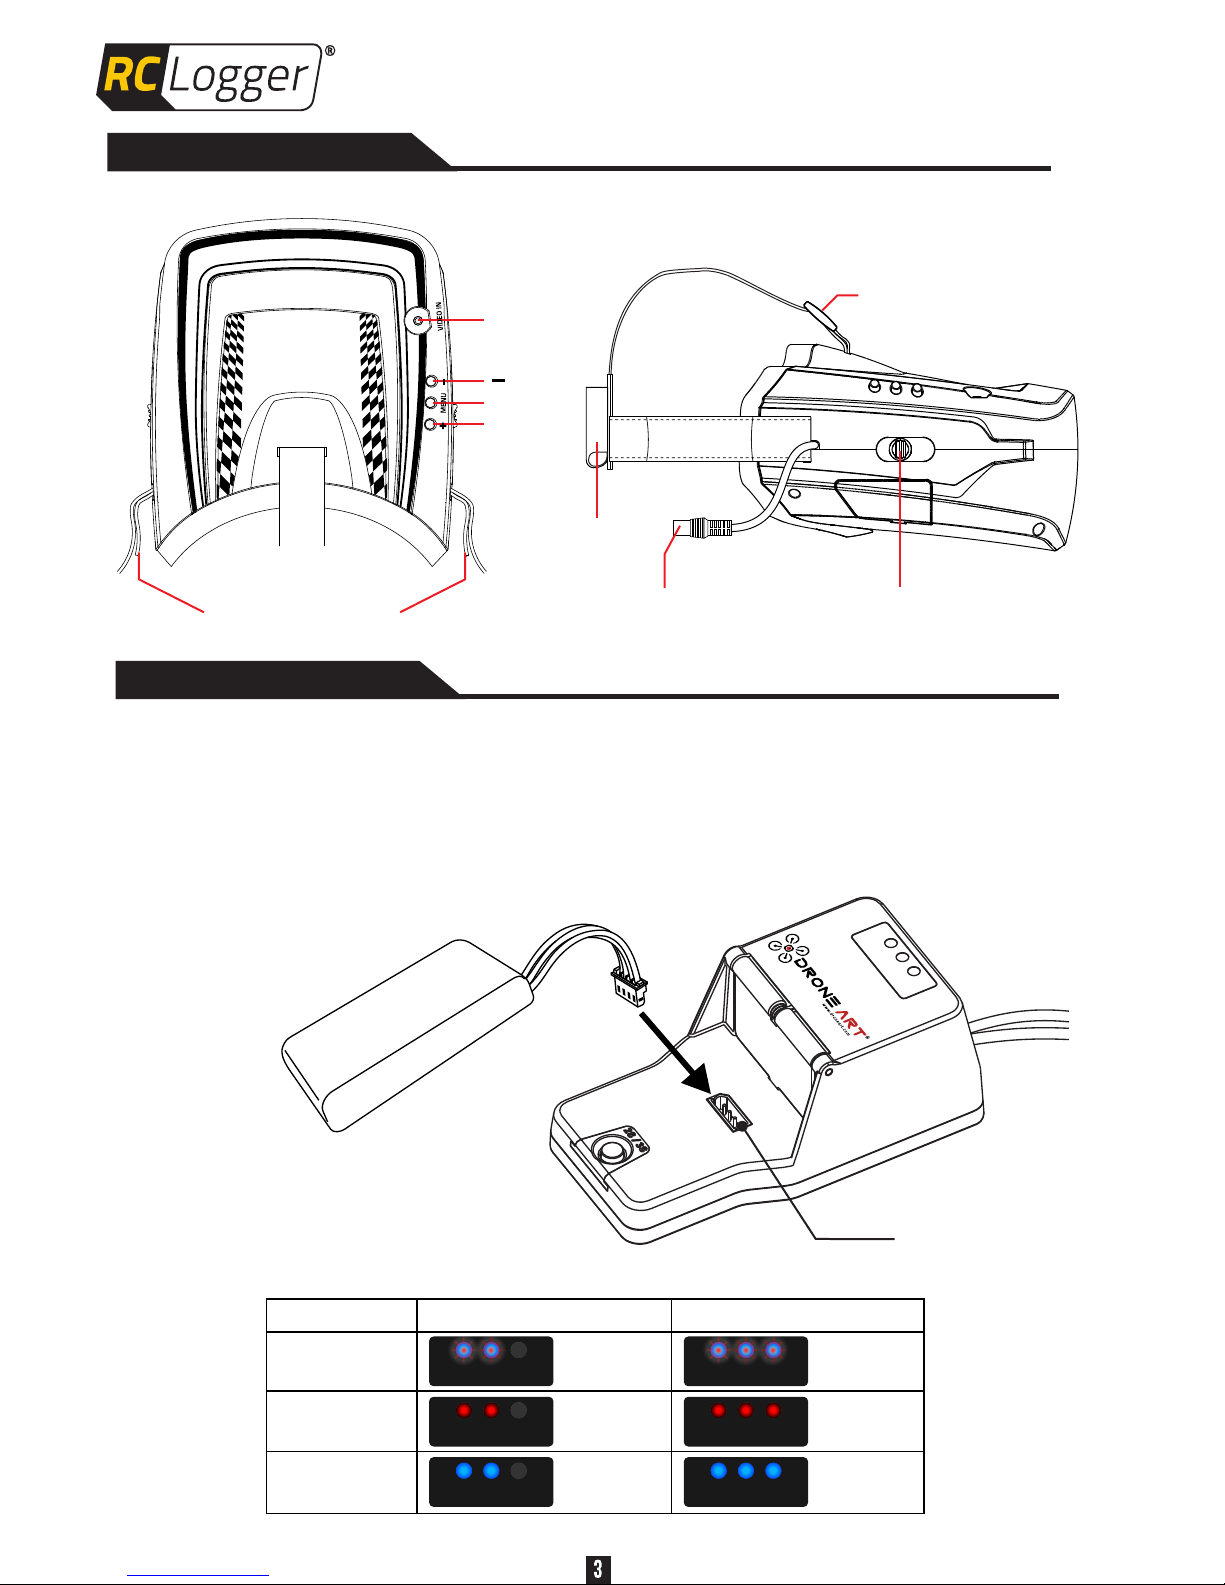
Parts Identification
Charging the battery
Connect the provided battery pack to the charger’s 5624 connector as shown
below. When the battery is fully charged, steady Blue LED will be displayed
(Please refer to the LED indication chart for charging status).
Please use Charger 89155RC (sold separately) to charge up the provided
battery pack. The charger’s default setting is 2S.
Provided battery pack
(2 cell)
5624 connector
2S mode (default)
3S mode
Withou t ba tt ery
Fully ch ar ge d
Steady blue
+
Flashing red
Steady red
Steady blue
Steady blue
+
Flashing red
Steady red
Steady blue
Chargi ng

Power On the Goggle
Before using the goggle, make sure the battery pack is fully charged.
Slip the goggle's power cable through the head strap’s pocket.
Using provided AV cable, connect the goggle to your video source.
Battery pack
(89152RC)
5624 Power cable
Connect the provided battery pack (89152RC) with the 5624 power cable (you can
also use your own 2S / 3S battery with the provided XT60 power cable).
OR
AV cable
Video
source
You can choose to slip the battery’s
connector wire through the slot at
the bottom of the battery pouch

To adjust your focus, you can move the slider on 2 sides to adjust the
magnifying lens position.
Once the power cable is connected to the battery, the goggle will be
turned on.
Focus adjustment
OSD
The goggle’s OSD Menu displays the following adjustments. P
MENU consecutively will cycle through these settings and back:
ressing the
Brightness
Contrast
Color
Reset
Adjustable from 0~100
Adjustable from 0~100
Adjustable from 0~100
Reset to factory default screen setting
Zoom
Selectable between 16:9 and 4:3
OSD’s Vertical Position
Adjustable from 1(bottom of screen)~12(top of screen)

1) Brightness
When “BRIGHT” is shown on OSD, press the “+” or “-” button to adjust the
brightness. After adjusting the brightness level, it will be saved automatically.
2) Contrast
When “CONTRAST” is shown on OSD, press the “+” or “-” button to adjust the
contrast. After adjusting the contrast level, it will be saved automatically.
3) Color
When “COLOR” is shown on OSD, press the “+” or “-” button to adjust the
color. After adjusting the color level, it will be saved automatically.
4) Zoom
When “ZOOM” is shown on OSD, press the “+” or “-” button to select between
16:9 and 4:3. After adjusting the aspect ratio, it will be saved automatically.
Factory default setting is 50
Factory default setting is 50
Factory default setting is 50
Factory default setting is 16:9

5) OSD’s Vertical Position
When “MENU VP” is shown on OSD, press the “+” or “-” button to adjust the
vertical position of OSD. After adjusting the OSD position, it will be saved
automatically.
There are 12 adjustable vertical levels. “1" is at the bottom. “12" is at the top.
Below are some examples:
6) Reset
When “RESET” is shown on OSD, press the “+” or “-” button to restore factory
default screen setting. After pressing “+” or “-” the screen will show “RESET OK”
in red color, meaning default screen setting is restored.
Factory default setting is “1" (at the bottom)
Remark: After pressing the MENU button, if no buttons are pressed
within 3 seconds, the display will auto-exit OSD settings.

Slip t he lens into th e frame corners. Avo id
touc hing the Tex tured side of t he lens
Smoo th side
of the l ens
Firm ly lock the
lens i n place
Put ba ck the lens mod ule
Next , gently put ba ck the bottom cas e, then put
the sc rews back
Replacing Fresnel lens
* Textured side of t he lens always faci ng the monitor
1 piece of spare Fresnel lens is included in this package. In case you need to
replace the lens, please follow below steps:

Trouble Shooting
Cannot turn on the
goggle
The battery pack is not
connected properly
The battery pack is
discharged
Install a charged battery
pack
The battery pack is dead
Install a new and charged
battery pack
Nothing is displayed
on the monitor when
the power is on
Install the battery pack
correctly
Install the AV connection
correctly
The AV cable is dead
The battery pack is
discharged
Install a charged battery
pack
The power turns off
suddenly
The battery pack is
discharged
Install a charged battery
pack
The lens get fogged
Moisture condensation
has occurred
Turn off the goggle and
leave it for an hour before
using it again
Product Support
For product support, visit our Online Ticket System at http://support.rclogger.com
for any RC Logger inquiry.
Check battery and wire
connections
Get a replacement AV
cable
The battery pack is not
connected properly
The AV cable is not
connected properly
Possible causeSymptom Solution

Spare Fresnel lens x 1pc
Battery pack x 1pc
5624 power cable x 1pc
AV cable x 1pc
XT60 power cable x 1pc

 Loading...