


Operating instructions |
Manual de uso |
Instructions d’utilisation |
Istruzioni d’uso |
Bedienungsanleitung |
Gebruiksaanwijzing |
|
89050RC |
RC EYE OneCam 5.8 GHz RX

These Operating Instructions accompany this product. They contain important information on setting up and using the device. You should refer to these instructions, even if you are buying this product for someone else. Please retain these Operating Instructions for future use! A list of the contents can be found in the Table of contents, with the corresponding page number, on page 3.
Estas instrucciones de operación acompañan este producto. Contienen información importante sobre cómo configurar y utilizar el dispositivo. Debe consultar estas instrucciones, incluso si está comprando este producto a otra persona. ¡Por favor, conserve este manual para uso futuro! Se puede encontrar una lista de los contenidos en índice, con el número de página correspondiente, en la página 29.
Ces Instructions d’utilisation accompagnent ce produit. Elles contiennent des informations importantes sur la configuration et l’utilisation de l’appareil. Vous devez vous référer à ces instructions, même si vous avez acheté ce produit pour une tierce personne. Veuillez conserver ces Instructions d’utilisation pour une utilisation future ! Une liste des éléments contenus se trouve dans la Table des matières, avec le numéro de page correspondant, à la page 55.
Queste istruzioni operative fanno parte del prodotto. Contengono importanti informazioni sull’impostazione e sull’utilizzo del dispositivo. Far riferimento a queste istruzioni anche se acquistate questo prodotto per altri. Conservare le istruzioni per una futura consultazione! Nell’Indice è presente un elenco dei contenuti con il numero di pagina corrispondente, a pagina 81.
Diese Bedienungsanleitung bezieht sich nur auf dieses Produkt. Sie enthält wichtige Informationen zur Sicherheit und Verwendung des Gerätes. Sie sollten diese Anweisungen beachten, auch wenn Sie dieses Produkt für jemanden anderen kaufen. Bitte heben Sie diese Anleitung zum späteren Nachschlagen auf! Eine Liste mit dem Verpackungsinhalt finden Sie im Inhaltsverzeichnis mit der entsprechenden Seitenzahl, auf Seite 107
Deze gebruiksaanwijzing hoort bij dit product. Het bevat belangrijke informatie over het instellen en gebruiken van het apparaat. U moet deze instructies opvolgen, zelfs als u dit artikel voor iemand anders koopt. Bewaar deze gebruiksaanwijzing voor toekomstig gebruik! Een overzicht van de inhoud is te vinden in de inhoudsopgave, met het corresponderende paginanummer, op pagina 133.
下さい。今後のために、この取扱説明書を保管しておくようにして下さい。記載内容については159
2

Table of Contents
1. |
Introduction................................................................ |
4 |
21. |
Use monitor as display device................................. |
24 |
2. |
Intended use ............................................................. |
4 |
22. |
Cleaning and care................................................... |
25 |
3. |
Product features........................................................ |
5 |
23. |
Reset....................................................................... |
25 |
4. |
Product compatibility................................................. |
5 |
24. |
Product support....................................................... |
25 |
5. |
Delivery content......................................................... |
5 |
25. |
Disposal................................................................... |
25 |
6. |
Safety instructions..................................................... |
6 |
26. |
FCC Compliance Statement.................................... |
26 |
7. |
Operating elements................................................... |
8 |
27. |
Technical specifications........................................... |
27 |
8. |
Display..................................................................... |
10 |
|
|
|
9. |
Placing the product.................................................. |
11 |
|
|
|
10. |
Charging the battery................................................ |
11 |
|
|
|
11. |
Core functions......................................................... |
12 |
|
|
|
12. |
Menu........................................................................ |
14 |
|
|
|
13. |
Function settings..................................................... |
16 |
|
|
|
14. |
System settings....................................................... |
18 |
|
|
|
15. |
Pair camera with monitor......................................... |
19 |
|
|
|
16. |
Record video and photo.......................................... |
20 |
|
|
|
17. |
Motion detect........................................................... |
21 |
|
|
|
18. |
Play back video/photo............................................. |
22 |
|
|
|
19. |
Format..................................................................... |
23 |
|
|
|
20. |
Connecting to a TV or headphone set..................... |
24 |
|
|
|
3

1. Introduction
Dear customer,
Thank you for making the excellent decision to purchase this RC Logger® product. You now have a high-quality product with a name that represents outstanding products.
This product complies with the applicable National and European standards and regulations. We kindly request the user to follow the operating instructions, to preserve this condition and to ensure safe operation! These operating instructions relate to this product. They contain important notices on commissioning and handling. Please take this into consideration when you pass the product on to third parties.
Please keep these instructions for further reference!
All company names and product designations contained herein are trademarks of the respective owners. All rights reserved.
We wish you a great deal of enjoyment with your new RC Logger® product!
Please download the latest version of the operating instructions from our website at www.rclogger.com. Navigate to the product page and open the “Downloads” tab. Click on “Operating instructions” to start the download.
2. Intended use
The “RC EYE OneCam 5.8 GHz RX” is designed to be used in combination with the “RC EYE OneCam TX” (89049RC). The monitor is excellent for fun FPV applications to receive wirelessly transmitted videos. It supports photo-taking, video recording and playback and auto power-off. It comes with a foldable stand and can be mounted on a standard camera tripod with the included clip-on back holder.
For safety and approval purposes (CE), you must not rebuild and/or modify this product. If you use the product for purposes other than those described above, the product may be damaged. In addition, improper use can cause hazards such as short circuiting, fire, electric shock etc. Read the instructions
4

carefully and keep them. Make this product available to third parties only together with its operating instructions.
From here on, the “RC EYE OneCam 5.8 GHz RX” is referred to as “monitor”.
3. Product features
>> 5” LCD monitor with integrated speaker and 5.8 GHz RX module
>> 8 RF channels with auto/manual channel switch
>> Motion detection and loop video recording
>> AV IN/OUT compatible with NTSC/PAL
4. Product compatibility
The monitor can be used in conjunction with the following RC Logger products:
>> 5.8 GHz Video Transmission Set (20015RC)
>> 5.8 GHz Video TX RX Module (20011RC)
>> 5.8 GHz Video TX Module (20007RC) >> RC EYE OneCam TX (89049RC)
5. Delivery content
>> RC EYE OneCam 5.8 GHz RX >> USB Cable
>> AV Cable (for AV IN)
>> AV Cable (for AV OUT)
>> Back holder with standard DIN tripod attachment >> Antenna switch cable (to SMA female)
>> Operating instructions
5

6. Safety instructions
Read the operating instructions carefully and especially observe the safety information. If you do not follow the safety instructions and information on proper handling in this manual, we assume no liability for any resulting personal injury or damage to property. Such cases will invalidate the warranty/guarantee.
>> The device is not a toy. Keep it out of the reach of children and pets.
>> Do not leave packaging material lying around carelessly.
These may become dangerous playing material for children.
>> Do not place the product under any mechanical stress.
>> Do not attempt to dismantle the device. Any attempt to alter or repair the unit, except by the original manufacturer or an Authorized Service Facility, will void the limited warranty.
>> Regularly check the functional reliability of your product. Watch out for any visible damage such as cracks.
>> Handle the product carefully. Jolts, impacts or a fall even from a low height can damage the product.
>> If it is no longer possible to operate the product safely, take it out of operation and protect it from any accidental use.
Safe operation can no longer be guaranteed if the product:
-- is visibly damaged,
-- is no longer working properly,
-- has been stored for extended periods in poor ambient conditions, or has been subjected to any serious transport-related stresses.
>> Also observe the safety and operating instructions of any other devices which are connected to the product.
>> Keep the product away from moisture, damp areas, dripping
and splashing water. |
|
>> The product is not water-proof. |
|
>> Keep the product away from direct sunlight. |
|
>> Delicate control electronics are used in |
the product |
which are also sensitive to temperature |
fluctuations |
and are optimised for a particular temperature range.
See chapter “Technical specifications” on page 27.
6

(Rechargeable) batteries
>> The rechargeable battery is permanently built into the
product and cannot be replaced. |
||
>> Never damage |
the |
rechargeable battery. Damaging |
the casing of |
the |
rechargeable battery might cause |
an explosion or a fire! Unlike conventional batteries/ rechargeable batteries (e.g. AA or AAA type), the casing of the LiPo rechargeable battery does not consist of a thin sheet but rather a sensitive plastic film only.
>> Never short-circuit the contacts of the rechargeable battery. Do not throw the battery or the product into fire. There is a danger of fire and explosion!
>> Charge the rechargeable battery regularly, even if you do are not using the product. Due to the rechargeable battery technology being used, you do not need to discharge the rechargeable battery first.
>> Never charge the rechargeable battery of the product unattended.
>> When charging, place the product on a surface that is not heat-sensitive. It is normal that a certain amount of heat is generated during charging.
>> Before disposing of the product have the battery removed by a professional.
Miscellaneous
>> Consult an expert when in doubt about operation, safety or connection of the device.
>> Maintenance, modifications and repairs are to be performed exclusively by an expert or at a qualified shop.
>> If you have questions which remain unanswered by these operating instructions, contact our technical support service or other technical personnel.
7

7. Operating elements
17
16
15
14
13
12
1 |
2 |
3 |
4 |
5 |
6 |
7 |
8
10
<![if ! IE]><![endif]>AV-IN AV-OUT/
11
9
RESET
8

18
SMA SMB 
19 |
20 |
21
1Button 
2Button M
3Button 
4Button  5 Button
6 Speaker
7Display
8Antenna
9Stand
10Holder
11Tripod attachment
12Button RESET
13Video switch 
14microSD card slot
15Jack AV-IN
16Jack AV-OUT
17Mini USB socket
18Antenna switch cable (to SMA female)
19AV IN cable
20AV OUT cable
21USB cable
9

8. |
|
Display |
|
|
|
|
|
|
|
|
||
A |
B C |
D |
E |
F |
G |
|||||||
|
|
|
|
|
|
|
|
|
|
|||
|
|
|
REC 5.8 GHz CH1 |
2013/08/13 00:00:00 |
||||||||
MUTE |
|
|
|
|
|
|
00:00:00 |
|||||
D1 |
|
|
0000MB |
|
|
|
|
||
|
|
|
|
|
|||||
|
|
|
|
|
|||||
|
|
|
|
|
|
|
|
||
L |
K |
J I H |
|||||||
A Audio muted
BMode
C Recording status
DFrequency
E Channel
FDate
GTime
HBattery status
I Recording time
J Available storage memory K microSD card inserted
LVideo resolution
10
9. Placing the product
>> The monitor shall be used in a dry environment. Any form of liquid must be strictly avoided.
>> Make sure you hold the monitor firmly in your hand at all times.
>> You may place the monitor on a stable surface by flipping out the stand (9) at the back to the monitor. Once you place the monitor, it will rest at an angle for comfortable viewing.
The monitor gets warm during operation. Be careful not to place the monitor on any surface sensitive to heat.
Tripod
The standard DIN tripod attachment (11) on the holder (10) allows you to mount the monitor onto a standard tripod attachment, commonly found on cameras and similar devices.
Clip the holder onto the monitor’s back. Observe the slots (two at the bottom, one at the top). Start attaching the holder from the bottom slots.
10. Charging the battery
The battery is built-in and can be charged via the supplied USB cable (21) (Type A to type Mini B).
A full charging cycle takes approximately 4 – 6 hours.
A brand new battery should be charged between 6 and
10 hours during first charging cycle. A new battery will reach its full potential after a few charging cycles.
If you do not use the monitor for a longer period of time, then charge it every 2 – 3 months.
Charging indicators
Pay attention to the battery charging states:
Full |
Half |
Little |
Depleted |
When the battery is depleted the battery indicator flashes.
11

Charge battery
For proper charging, a power adapter with USB connection is required. The required voltage and current are as follows:
5 V/DC, min. 2 A
1.Make sure the monitor is turned off. See chapter “Core functions” on page 12 to learn more.
2.Connect the mini-B connector of the USB cable to the mini USB socket (17) on the monitor.
3.Connect the A-plug to your power adapter.
4.Establish the power connection.
5.After a charging duration of 4 – 6 hours the battery is fully charged.
6.Disconnet the USB cable from the monitor.
11. Core functions
Turn on and off
>> Press and hold button M (2) for approx. 3 seconds to turn the monitor on.
>> Press and hold button M (2) for approx. 3 seconds to turn the monitor off.
MicroSD card
>> A microSD card is used to store pictures and video recordings.
>> Insert a microSD card (1 to 32 GB) into the microSD card slot (14). Make sure it looks in place.
>> To remove the microSD card, push it in until it unlocks.
Carefully pull it out.
Select receiving mode (wired/wireless)
The monitor can operate with cameras connected wirelessly or by wire. When a camera is connected by wire then the monitor switches automatically to wired mode. To connect a wired camera follow the information provided in chapter “Use monitor as display device” on page 24.
12
Video mode
Locate the video switch |
(13). Slide the switch to the |
|
desired position. The following modes are at your disposal. |
||
-- |
Motion detection mode |
|
-- |
Playback mode |
|
-- |
Recording mode (receiving/recording/photo taking) |
|
Antenna
The preinstalled antenna (8) can be hidden for protection purpose. For better reception during use turn the antenna fully up. After use turn in down again.
The antenna can be replaced by the antenna switch cable (18):
1.Carefully pull the antenna out of the antenna socket. Hold the antenna as close as possible to the socket.
2.Insert the SMB connector of the switch cable. Make sure it locks in place.
3.You may now connect an external antenna featuring a male SMA connector to the female SMA connector.
4.Always put the protective cap on the SMA connector on the switch cable when no external antenna is connected.
Access storage on computer
1.Turn the monitor off.
2.Connect the monitor to a free USB port on your computer via the provided USB cable. Connect the Mini B plug of the cable to the Mini USB socket (17) and the A plug to the USB port on your computer.
3.Turn the monitor on. Your computer will install the necessary drivers automatically.
4.On completion of driver installation open the removable disk image. Open the “DCIM” directory. Videos are located in the “RECORD” directory and photos in the “PHOTO” directory.
For videos, subdirectories are allocated according to recording date. Open them to gain access to videos.
Photo file names contain recording date and time.
13
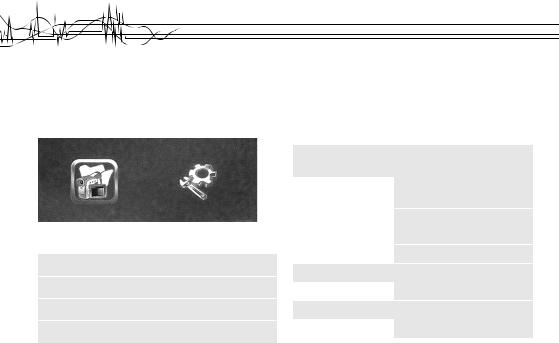
12. Menu
Menu navigation
To open the settings menu, press the button  (3). There are two different settings menus, “Function” and “System”.
Menu – Function
In the “Function” menu you choose settings for video/photo recording.
Use below keys to navigate the menu.
 (1) Enter submenu / Confirm selection / Level down
 (3) Back / Leave submenu / Level up
 (4) Left / Up / Decrease value
 (5) Right / Down / Increase value
Channel Setting |
Channel Switch |
CH1, CH2, |
|
Select |
CH3, CH4 |
|
|
CH5, CH6, |
|
|
CH7, CH8 |
|
Auto Switch |
Off |
|
|
On |
|
Dwell Time |
xx seconds |
Recorder Resolution |
720 x 576 |
|
|
720 x 480 |
|
Frame Rate |
30 FPS |
|
|
25 FPS |
|
14

Video Segment Sizes |
10 MIN |
|
|
30 MIN |
|
|
60 MIN |
|
Overwrite |
Off |
|
|
On |
|
Time Stamp |
Off |
|
|
On |
|
Information Display |
Off |
|
|
On |
|
Video Setting |
Brightness |
–xx / +xx |
|
Contrast |
–xx / +xx |
Menu – System
In the “System” menu you choose settings for the monitor.
Date Time |
Y / M / D H : M |
|
Language |
English, ..., ... |
|
AV Out |
LCD |
|
|
NTSC |
|
|
PAL |
|
Format |
Yes |
|
|
No |
|
Power Save |
Auto LCD Off |
1 MIN |
|
|
5 MIN |
|
|
OFF |
|
Auto Power Off |
5 MIN |
|
|
10 MIN |
|
|
OFF |
15
Firmware Update |
Yes |
|
No |
Default Setup |
Yes |
|
No |
Memory Info |
All: 0.0 MB |
|
Free: 0.0 MB |
Version |
Software Version: |
Display Mode |
16:9 |
|
4:3 |
13. Function settings
This chapter describes the “Function” settings in more detail. Note the following header prefixes for easier navigation:
-- |
Sub-1 |
: |
Parent menu |
|
-- |
Sub-2 |
: |
Child of parent menu |
|
>> Slide the video switch |
into position or . |
|||
>> Observe the section “Menu navigation” on page 14.
Sub-1 Channel Setting
Sub-2 Channel Switch Select:
>> Here you choose which channels shall be activated and be scanned by the monitor during auto channel search.
>> Uncheck/check channels which you want to include in the search.
>> If you decide to set the channels manually, check the ones you would like to use.
Sub-2 Auto Switch:
>> If you like the monitor to search for channels automatically, then activate the function with “On”. For manual channel selection turn the function off with “Off”.
16

Sub-2 Dwell Time:
>> Set the time (in seconds) for which each channel is scanned for during auto channel selection. If there is no valid signal after elapse of the set time, the monitor skips to the next channel. The lower the set dwell time the less the impact on battery life.
Sub-1 Recorder Resolution
>> Choose the desired recording resolution.
Sub-1 Frame Rate
>> Choose the desired frame rate.
Sub-1 Video Segment Size
>> With video segment size you can restrict the length of recorded videos. After the set time has elapsed a new file is allocated.
Sub-1 Overwrite
>> The overwrite function allows you to always save the latest recorded video clip. To activate overwriting confirm with “On”. To cancel overwriting confirm with “Off”. When storage is full, then previously saved clips are overwritten.
Sub-1 Time Stamp
>> If you like a time stamp to be added to your recordings activate the function with “On”. Deactivate the function with “Off”.
Sub-1 Information display:
>> If you like to display Time, Date, Mode, Channel, Recording size on the display (7), then activate the function with “On”. Deactivate the function with “Off”.
Sub-1 Video Setting:
>> Select “Brightness” and adjust brightness value for video with buttons  and
and  and save with button
  .
.
>> Select “Contrast” and adjust contrast value for video with buttons  and
and  and save with button
  .
.
17

14. System settings
This chapter describes the “System” settings in more detail. Note the following header prefixes for easier navigation:
-- Sub-1 : Parent menu
-- Sub-2 : Child of parent menu
>> Slide the video switch  into position
  or
or  .
.
>> Observe the chapter “Menu navigation” on page 14.
Sub-1 Date Time
>> Set the date and time
Sub-1 Language
>> Choose your desired language
Sub-1 AV Out
>> Choose the video output source: -- LCD (this monitor)
-- NTSC (display device supporting NTSC signal) -- PAL (display device supporting PAL signal)
>> Read chapter “Connecting to a TV or headphone set” on page 24 for more information on connecting to an external display device.
Sub-1 Format
>> Format the microSD card. All stored data is lost!
Sub-1 Power Save
Power save settings extend the battery life.
Sub-2 Auto LCD Off
This setting turns the display off after the specified time.
>> Select a given time to activate the function.
>> Select “Off” to deactivate the function.
>> During display sleep, wake the monitor by pressing any button.
Sub-2 Auto Power Off
This setting turns the monitor (the device) off after the specified time.
>> Select a given time to activate the function.
>> Select “Off” to deactivate the function.
18

Sub-1 Firmware Update
This setting enables you to update the firmware of the monitor. Follow below steps for successful updating:
1.Prepare a microSD card and format it. Place the firmware update (file extension: “.elf”) in the root directory of the microSD card.
2.Turn the monitor off and slide the card into the microSD card slot (14).
3.Turn the monitor on.
4.The monitor will detect the firmware file and start the update process. Confirm the confirmation dialogue with “Yes”. The monitor’s firmware will be updated automatically.
Sub-1 Default Setup
This setting allows you to reset your device to the factory settings. Select “Yes”and confirm.
Sub-1 Memory Info
Displays the current capacities of the microSD card.
Sub-1 Version
Displays the installed firmware version.
Sub-1 Display Mode
Select your preferred display mode: -- 16:9 ratio
-- 4:3 ratio
15. Pair camera with monitor
“Pairing” means connecting your wireless RF (Radio Frequency) camera to the monitor. After pairing camera and monitor they are able to safely communicate with each other.
For successful pairing, you are required to correctly set the channels on camera and monitor.
1.The section “Sub-1 Channel Setting” on page 16 provides you with the available settings for setting the channel.
2.Carefully read the operating instructions that came with your compatible RF camera. Look for descriptions on how to set the channels.
19

3.Set the monitor to search for available channels automatically or manually (auto search is off). If you activate auto channel search then the monitor briefly displays “AUTO” and starts flipping through the set channels. You may manually flip through the channels with buttons  and
and  .
.
4.Once pairing is complete the image is displayed on the monitor’s display.
16.Record video and photo
To record video or photos follow these steps:
1.Turn the monitor on and connect a camera.
2.Switch the video switch (13) into position .
.
Taking photos
To take a photo press the button  . The symbol
  will be displayed briefly to confirm successful taking of photo.
Recording video
>> To record video, press and hold the button  for approx. 3 seconds to start recording. “REC” (C) and the recording
time (I) are displayed. |
|
>> To pause recording press the button |
and the display |
shows “ ”. |
|
>> To toggle muting of audio, press button M. This function only applies to the built-in speaker (6). Output to connected headphones cannot be muted.
>> Press button to save recording and exit recording mode. >> Video size can be controlled via video segment sizes. See section “Sub-1 Video Segment Size” on page 17 for more
information.
Overwrite mode
See section “Sub-1 Overwrite” on page 17 for more information. Whenever a video is saved, previously saved clips are overwritten by the latest recording, once storage space is full.
20
17. Motion detect
Motion detection reacts to changes in the camera image.
Follow these steps to activate motion detection:
1.Turn the monitor on and connect a camera.
2.Switch the video switch (13) into position . “Press Rec to Start Motion Detect” is displayed.
3.Press and hold the button  for approx. 3 seconds to activate the motion detection. “Motion Detecting..” is displayed.
4.As soon as motion is detected video will be recorded.
“REC” (C) and the recording time (I) will be displayed.
When no motion is present recording is stopped after a short period (approx. 10 seconds) and the video is saved.
>> To toggle muting of audio, press button M. This does not affect headphone output.
>> Press button to save recording and exit motion detection. >> Video size can be controlled via video segment sizes. See section “Sub-1 Video Segment Size” on page 17 for more
information.
Make sure the wireless signal is sufficiently strong, stable and no interferences are present. Otherwise motion detection may be triggered unintentionally.
Overwrite mode
See section “Sub-1 Overwrite” on page 17 for more information. Whenever a video is saved, previously saved clips are overwritten by the latest recording, once storage space is full.
21
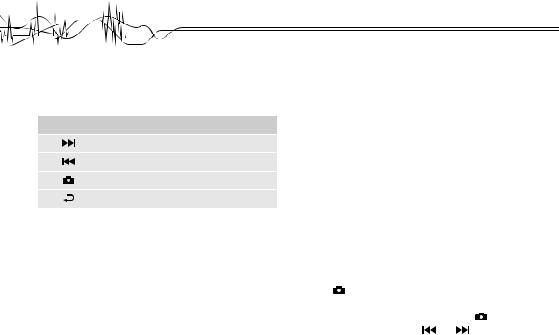
18. Play back video/photo
Please note below button functions when navigating recorded photos and videos:
Button Function
Forward / Right / Down
Backward / Left / Up
Enter / Confirm input / Confirm selection
Exit / Level up
Photos
1.Turn the monitor on.
2.Switch the video switch (13) into position  . Select the photo icon and confirm your selection.
3.Taken photos are listed with their corresponding sizes. Select a photo you would like to view and confirm your selection. While viewing photos you may flip through photos with buttons  and
and  .
.
Videos
1.Turn the monitor on.
2.Switch the video switch (13) into position  . Select the video icon and confirm your selection.
3.Recorded videos are stored in directories named with recording date. Select a directory and confirm your selection.
4.All videos of the selected directory are listed with their corresponding sizes. Select a video to be played back and confirm your selection.
5.The selected video is played back. Total length and remaining time are displayed.
6.After playback time for the choosen video has elasped the next recorded video is automatically played back.
>> The |
navigation bar will |
hide automatically. Press |
||
button |
to display the navigation bar again. Playback |
|||
must be started again. |
|
|
|
|
>> To toggle play/pause of videos press button |
. |
|||
>> During playback press button |
and |
to increase and |
||
decrease the volume. |
|
|
|
|
22

>> Press and hold button  or
or  to fast forward and fast rewind videos respectively. Different speeds are available (2x, 4x, 8x). To stop forwarding/rewinding, press button
 once to resume playback.
>> Videos that cannot be played are displayed as “Unsupported
File”.
Delete photos/videos
1.Select a photo or video and press button M.
2.A window dialogue opens. Choose what you want to do: -- All: Delete all recordings
-- Current: Delete selected item
-- Cancel: Cancel deletion process
3.Confirm your selection with button  . A confirmation dialogue will pop up. Confirm or cancel deletion process with button
  .
.
19. Format
Formatting will erase all data available on the memory card. You may externally back up the
recordings first or copy them to your computer via the USB cable.
Follow the following steps for properly formatting the monitor’s memory:
1.See section “Sub-1 Format” on page 18 for more information.
2.Turn the monitor on.
3.Switch the video switch (13) into position or
or  .
.
4.Navigate to the menu entry “Format”, select “Yes” and confirm your selection. All saved video recordings and photos are permanently erased.
5.Upon successful formatting the message “Format Success” is displayed.
23

20. Connecting to a TV or headphone set
Headphones
You may connect a headphone set equipped with a 3.5 mm stereo jack plug. Connect the jack plug to the jack AV OUT (16). The volume must be adjusted on the headphone side.
Connecting to a TV
You may connect the monitor to a TV or other display device, supporting the PAL or NTSC standard.
1.Carefully read the operating instructions of the display device you are about to connect the monitor to.
2.Set the output standard on the monitor. See chapter
“Sub-1 AV Out” on page 18.
3.Turn the monitor and TV/display device off.
4.Connect the 3.5 mm stereo jack of the AV OUT cable (20) to the jack AV-OUT (16).
5.Connect the RCA plugs of the AV OUT cable to your TV or display device (yellow = video signal, red = right audio channel, white = left audio channel).
6.Turn monitor and TV/display device on.
7.Video can now be played and displayed on TV or display device.
21. Use monitor as display device
You may use the monitor as a display device by connecting an external video playback device via the AV IN cable (19) to the monitor.
1.Carefully read the operating instructions of the display device you are about to connect the monitor to.
2.Turn the monitor and the external playback device off.
3.Connect the external playback device via the AV IN cable to the monitor. The 2.5 mm stereo jack plug connects to the jack AV-IN (15).
4.Turn the monitor and the external playback device on.
5.Start playback on the external playback device and the video will be displayed on the monitor.
Optional use: Some devices (e.g. CCTV camera) need an external power source to function. The power plug on the supplied AV IN cable allows for that. However, observe the playback device’s operating instructions for the requirements and the chapter “Technical specifications” on page 27.
24

22. Cleaning and care
>> Turn the monitor off and disconnect any devices connected to the monitor before you start cleaning.
>> Clean the monitor with a soft cloth only.
>> Do not immerse the monitor in water or any other liquid. >> Clean the speaker openings with a vacuum cleaner. Make
sure to adjust the suction power to the lowest setting to avoid damage.
>> Do not use alcohol, acid liquids, or abrassive cleaning agents to clean the monitor.
>> Store the monitor in a dry environment out of reach of children.
23. Reset
In case the monitor does not work properly or behaves in unusual manner, a hard reset may solve the problem.
1.Use a thin, blunt object and press the button RESET (12).
The device is reset to the factory presets.
2.If the device reset did not solve your problem, contact a professional.
24. Product support
Visit “http://www.rclogger.com/index.php/contact-us” or call +852 2559 2662 for product support.
Additionally visit our support forum at “http://rclogger.com/ forum”.
25. Disposal
General
In order to preserve, protect and improve the quality of environment, protect human health and utilise natural resources prudently and rationally, the user should return unserviceable product to relevant facilities in accordance with statutory regulations.
The crossed-out wheeled bin indicates the product needs to be disposed separately and not as municipal waste.
25

Batteries / rechargeable batteries
The user is legally obliged (battery regulation) to return used batteries and rechargeable batteries.
Disposing used batteries in the household waste is prohibited! Batteries/ rechargeable batteries containing hazardous substances are marked with the crossed-out wheeled bin.
The symbol indicates that the product is forbidden to be disposed via the domestic refuse.
The chemical symbols for the respective hazardous substances are Cd = Cadmium, Hg = Mercury, Pb = Lead.
You can return used batteries/ rechargeable batteries free of charge to any collecting point of your local authority, our stores or where batteries/ rechargeable batteries are sold.
Consequently you comply with your legal obligations and contribute to environmental protection!
26. FCC Compliance Statement
This device complies with Part 15 of the FCC Rules. Operation is subject to the following two conditions:
>> (1) this device may not cause harmful interference, and >> (2) this device must accept any interference received,
including interference that may cause undesired operation.
26

27. Technical specifications
Power supply........................................................ |
5 V/DC, max. 2 A, via USB |
Battery.................................................................. |
3.7 V/DC, 3200 mAh, LiPo |
Current consumption............................................ |
max. 680 mA |
Standby times...................................................... |
Wireless recording: ≥9.5 hours (display off), ≥5 hours (display on) |
Standby times...................................................... |
Wired recording: ≥12 hours (display off), ≥6 hours (display on) |
Storage................................................................. |
microSD card (miniSD, miniSDHC), max. 32 GB, min. Speed Class: 6 |
Transmitting frequency......................................... |
5.8 GHz |
Range................................................................... |
max. 60 m (open field) |
RF channels......................................................... |
CH1: 5.733 GHz, CH2: 5.752 GHz, CH3: 5.771 GHz, CH4: 5.790 GHz, |
|
CH5: 5.809 GHz, CH6: 5.828 GHz, CH7: 5.874 GHz, CH8: 5.866 GHz |
Sensitivity............................................................. |
-88 dB |
Display resolution................................................. |
800 x 480 px |
Luminance............................................................ |
200 cd/m2 |
Operating system support.................................... |
Windows®, Mac OS X |
Operating conditions............................................ |
0 to +50 °C, max. 85 % RH |
Storage conditions............................................... |
-10 to +50 °C, max. 85 % RH |
Dimensions (B x H x D)........................................ |
131 x 86 x 18 mm |
Weight.................................................................. |
approx. 205 g |
27

AV IN
TV system............................................................ |
NTSC, PAL |
Output voltage...................................................... |
3.6 – 4.2 V |
AV OUT |
|
TV system............................................................ |
NTSC, PAL |
Photo |
|
Format.................................................................. |
JPG/JPEG |
Video |
|
Resolution............................................................ |
720 x 576 / 720 x 480 |
Compression........................................................ |
MPEG-AVI, 30 fps |
Playback format................................................... |
MPEG-AVI |
Audio |
|
Frequency............................................................ |
20 Hz – 20 kHz (stereo) |
Earphone output................................................... |
Left: 20 mW + right 20 mW |
Speaker................................................................ |
1 W |
28

TABLA DE CONTENIDOS
1. |
Introducción............................................................. |
30 |
21. |
Utilizar el monitor como |
|
2. |
Uso previsto ............................................................ |
30 |
|
dispositivo de visualización..................................... |
50 |
3. |
Funciones del producto........................................... |
31 |
22. |
Limpieza y cuidado.................................................. |
50 |
4. |
Compatibilidad del producto.................................... |
31 |
23. |
Restablecer............................................................. |
51 |
5. |
Contenido del envío................................................. |
31 |
24. |
Soporte de producto................................................ |
51 |
6. |
Instrucciones de seguridad...................................... |
32 |
25. |
Eliminación.............................................................. |
51 |
7. |
Elementos de funcionamiento................................. |
34 |
26. |
FCC Compliance Statement.................................... |
52 |
8. |
Mostrar.................................................................... |
36 |
27. |
Especificaciones técnicas........................................ |
53 |
9. |
Ubicación del producto............................................ |
37 |
|
|
|
10. |
Carga de la batería.................................................. |
37 |
|
|
|
11. |
Funciones básicas................................................... |
38 |
|
|
|
12. |
Menú........................................................................ |
40 |
|
|
|
13. |
Ajustes de función................................................... |
42 |
|
|
|
14. |
Configuración del sistema....................................... |
44 |
|
|
|
15. |
Cámara de vinculación con el monitor.................... |
45 |
|
|
|
16. |
Grabación de vídeo y fotos...................................... |
46 |
|
|
|
17. |
Detección de movimiento........................................ |
46 |
|
|
|
18. |
Reproducir vídeo / foto............................................ |
47 |
|
|
|
19. |
Formato................................................................... |
49 |
|
|
|
20. |
Conexión a un Televisor o auricular fijado............... |
49 |
|
|
|
29

1. Introducción
Estimado cliente,
Gracias por la excelente decisión de comprar este producto RC Logger®. Ahora tiene un producto de alta calidad con un nombre que representa productos destacados.
Este producto cumple con las normas y reglamentos nacionales y europeos aplicables. ¡Se solicita que el usuario siga las instrucciones de uso, para preservar este estado
y garantizar un funcionamiento seguro! Este manual de instrucciones se refiere a este producto. Contiene notas importantes sobre la puesta en marcha y el manejo. Por favor, tenga esto en cuenta cuando traspase el producto a terceros.
¡Guarde estas instrucciones para futuras consultas!
Todos los nombres de empresas y denominaciones de productos mencionados en el presente documento son marcas registradas de sus respectivos propietarios. Todos los derechos reservados.
¡Le deseamos mucha diversión con su nuevo producto RC Logger®!
Descargue la versión más reciente de las instrucciones de funcionamiento de nuestro sitio Web en www.rclogger.com. Vaya a la página del producto y abra la pestaña “Descargas”. Haga clic en “Manual de instrucciones” para comenzar la descarga.
2. Uso previsto
El “RC EYE OneCam 5.8 GHz RX” está diseñado para ser utilizado en combinación con el “RC EYE OneCam TX” (89049RC).
El monitor es excelente para utilizar divertidas aplicaciones FPV de recepción de vídeos de transmisión inalámbrica. Es compatible con la toma de fotos, grabación y reproducción de vídeo y apagado automático. Viene con un soporte plegable y se puede montar sobre un trípode estándar con una sujeción de clip trasero incluido.
30
 Loading...