

Page 1
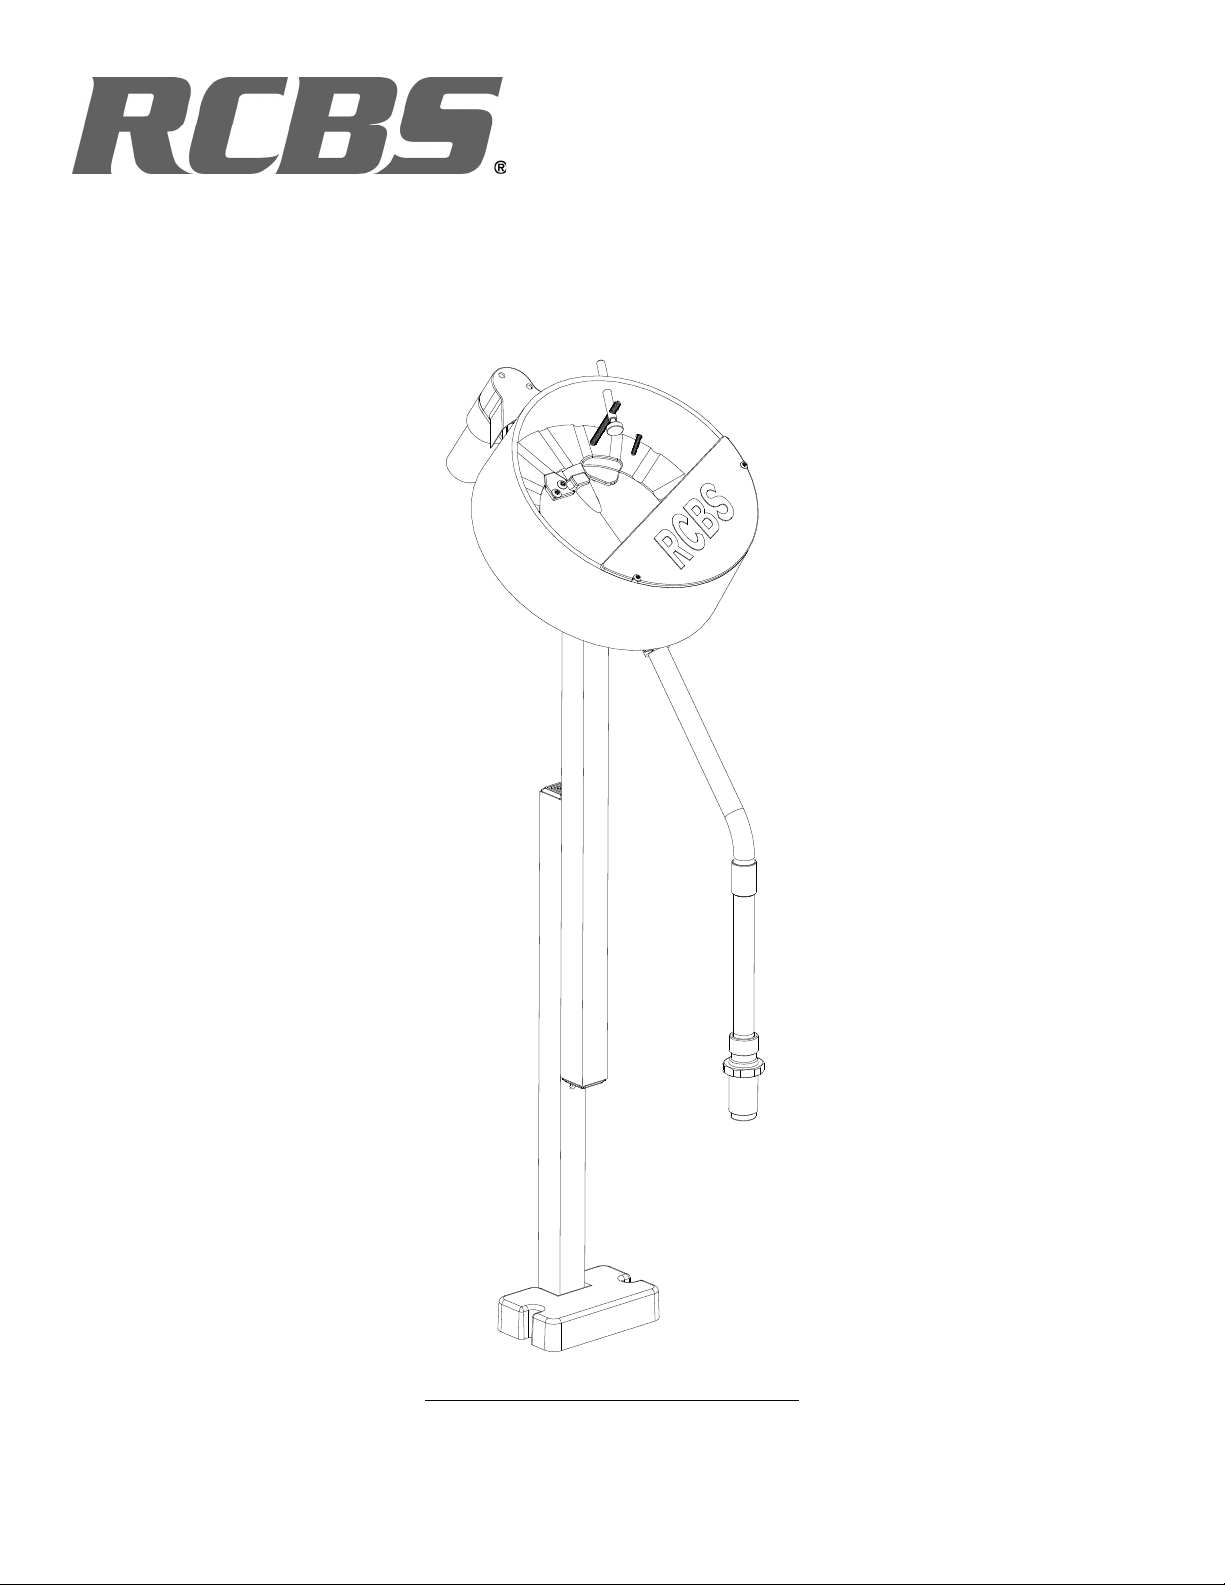
Bullet Feeder – Pistol Kit
PRODUCT INSTRUCTIONS
Page 2

WARNING
Before using the RCBS Bullet Feeder – Pistol Kit, read these instructions carefully to fully learn how to safely operate the
related reloading equipment. Failure to properly operate the related reloading equipment can result in severe personal
injury and/or equipment damage.
If you have any questions while assembling or operating this tool,
Call us at 1-800-533-5000 or 1-530-533-5191
Monday – Thursday 6:30 am – 4:00 pm Pacific Time
(hours may vary)
Or email us at rcbs.tech@atk.com
This instruction manual contains specific safety and operating information. It should be considered a permanent part of
your reloading equipment and remain with the equipment at all times for easy reference.
TWO YEAR LIMITED WARRANTY
Your Bullet Feeder – Pistol Kit is warranted to be free
from defects in material or workmanship for two years
from the date of purchase. This warranty is extended
only to the original consumer purchaser. All RCBS
products are intended for non-commercial use by
hobbyists. Any other use of these products will void the
warranty. Should you believe that your Bullet Feeder –
Pistol Kit is defective in material or workmanship, you
must return it to Ammunition Accessories Inc. through its
Oroville operation (hereinafter “Oroville Operations”)
postage paid for evaluation. If defective, the product will
be repaired or replaced at Oroville Operations’ option, at
no charge.
Send a dated proof of purchase to Oroville Operations
for return shipping and handling, along with the Bullet
Feeder – Pistol Kit to:
Ammunition Accessories Inc.,
Oroville Operations
605 Oro Dam Blvd East
Oroville, California 95965
Warranty services cannot be provided without meeting
the above requirements.
THIS TWO YEAR LIMITED WARRANTY DOES NOT
COVER DEFECTS OR DAMAGE RESULTING FROM:
CARELESSNESS, MISUSE, COMMERCIAL USE,
ABUSE, IMPROPER INSTALLATION, MODIFICATION,
OR NORMAL WEAR AND TEAR. THE IMPLIED
WARRANTIES OF MERCHANTABILITY AND FITNESS
FOR A PARTICULAR PURPOSE ARE LIMITED TO
THE DURATION OF THIS TWO YEAR LIMITED
WARRANTY. OROVILLE OPERATIONS IS NOT
LIABLE FOR DAMAGES IN EXCESS OF THE
PURCHASE PRICE OF THE PRODUCT AND UNDER
NO CIRCUMSTANCES SHALL OROVILLE OPERATIONS BE LIABLE FOR CONSEQUENTIAL OR
INCIDENTAL DAMAGES. HOWEVER, SOME STATES
DO NOT ALLOW LIMITATIONS ON INCIDENTAL, OR
CONSEQUENTIAL DAMAGES, SO THE ABOVE
LIMITATION OR EXCLUSION MAY NOT APPLY TO
YOU.
The above warranty provides the sole and exclusive
warranty available to the customer in the event of a
defect in material or workmanship in the reloading press.
This warranty gives you specific legal rights, and you
may also have other rights which vary from State to
State.
SAFETY
Reloading is an enjoyable and rewarding hobby that can
be conducted safely. But, as with any hobby,
carelessness or negligence can make reloading
hazardous. This product has been designed from the
beginning with the user's safety in mind. When
reloading, safety rules must be followed. By observing
these rules, the chance of a hazardous occurrence
causing personal injury or property damage is
minimized.
GENERAL
• Use all equipment as the manufacturer recommends.
Study the instructions carefully and become
thoroughly familiar with the operation of the product. If
you do not have written instructions, request a copy
from the equipment manufacturer.
• Do not take short cuts. Attempting to bypass
established procedures is an invitation to an accident.
• Observe "good housekeeping" in the reloading area.
Keep tools and components neat, clean and orderly.
Promptly and completely clean up primer and powder
spills.
• Reload only when you can give your undivided
attention. Do not reload when fatigued or ill, or under
the influence of medications or alcohol.
• Develop a reloading routine to avoid mistakes which
may prove hazardous. Do not rush - load at a leisurely
pace.
• Always wear adequate eye protection to protect your
eyes from flying particles. You assume unnecessary
risk when reloading without wearing safety glasses.
LOADING DATA
• Use only laboratory tested reloading data. We highly
recommend the current SPEER Reloading Manual.
• OBSERVE ALL WARNINGS ABOUT THE USE OF
MAXIMUM LISTED LOADS
- 2 -
Page 3

WARNING/CAUTION
PRIMERS AND POWDER
• Store primers and powder beyond the reach of
children and away from heat, dampness, open flames
and electrical equipment. Avoid areas where static
electricity is evident.
• DO NOT use primers of unknown identity.
• Dispose of unknown primers in accordance with
applicable regulations.
• Keep primers in the original factory container until
ready to use. Return unused primers to the same
factory packaging for safety and to preserve their
identity. Primer packaging is designed to provide safe
storage.
• DO NOT store primers in bulk. The blast of just a few
hundred primers is sufficient to cause serious injury to
anyone nearby.
• DO NOT force primers. Use care in handling primers.
• DO NOT have more than one can of powder on the
bench at one time. Powder cans should be stored
away from the bench to avoid picking up the wrong
one.
• DO NOT use any powder unless its identity is
positively known. The only positive identification is the
manufacturer's label on the original canister. Discard
all mixed powders and those of uncertain identity.
• If you use a powder measure, replace the lids on both
the powder hopper and powder can after the powder
hopper has been filled.
• When using a powder measure, settle the powder in
the powder hopper before charging any cases. Throw
and check the weight of at least ten charges. This will
assure you that the correct powder charge is being
thrown.
• When you finish a reloading session, pour any
remaining powder back into its original factory
container. This will preserve the identity and shelf life
of the powder.
• DO NOT smoke while reloading.
RECORD KEEPING
• Keep complete records of reloads. Apply a descriptive
label to each box showing the date produced, and the
primer, powder and bullet used. Labels for this
purpose are packed with SPEER bullets.
• Never attempt to guess at the identity of your
ammunition.
Because RCBS has no control over the choice of components, the manner in which they are assembled, the use of this
product, or the firearms in which the resulting ammunition may be used, we assume no responsibility, expressed or
implied, for the use of ammunition reloaded with this product.
USE
The RCBS Bullet Feeder – Pistol Kit has been designed to increase your progressive pistol load rate by ~50% by
reducing the manual operation of placing a bullet onto the case mouth. All parts and adapters are included for you to be
able to feed 9mm, .38 Spl, .357 Mag, .40 S&W and .45 ACP pistol bullets.
The Bullet Feeder is designed to work with FMJ/TMJ, JACKETED or SEMI JACKETED Hollow Point, Soft Point, Round
Nose, Truncated/Flat Nose and Semi Wadcutter designed bullets ONLY. Cast or swaged LEAD and Wadcutter(HB, BB,
DE) bullets are NOT to be used. The lube from lead bullets deposits on the moving parts and collects dust and dirt,
slowing down the function of the Bullet Feeder and eventually causing the motor to burn out and will void the Warranty.
The deposited lube also does not allow the bullets to be positioned properly for feeding from the sorting Wheel to the
Feed Tube. The Wadcutter design will not sort properly through the Bullet Feeder.
The Bullet Feeder is designed to be used on RCBS 5-station progressive presses such as the Pro2000, Pro2000 Auto
and PiggyBack. The Bullet Feeder has also been designed to function on progressive presses manufactured by other
companies. RCBS has successfully tested the Bullet Feeder on the following presses: Dillon® RL550B, XL650 and
Hornady® Projector™, L-N-L™AP™. For presses that require you to Seat and Crimp bullets in separate operations, you
may need to combine bullet Seating and Crimping to accommodate the Bullet Feeder. This may require the purchase of a
combination bullet Seat and Crimp die(not included).
The Collator will hold ~200 bullets depending on caliber. Less for .45, more for 9mm.
Page 4
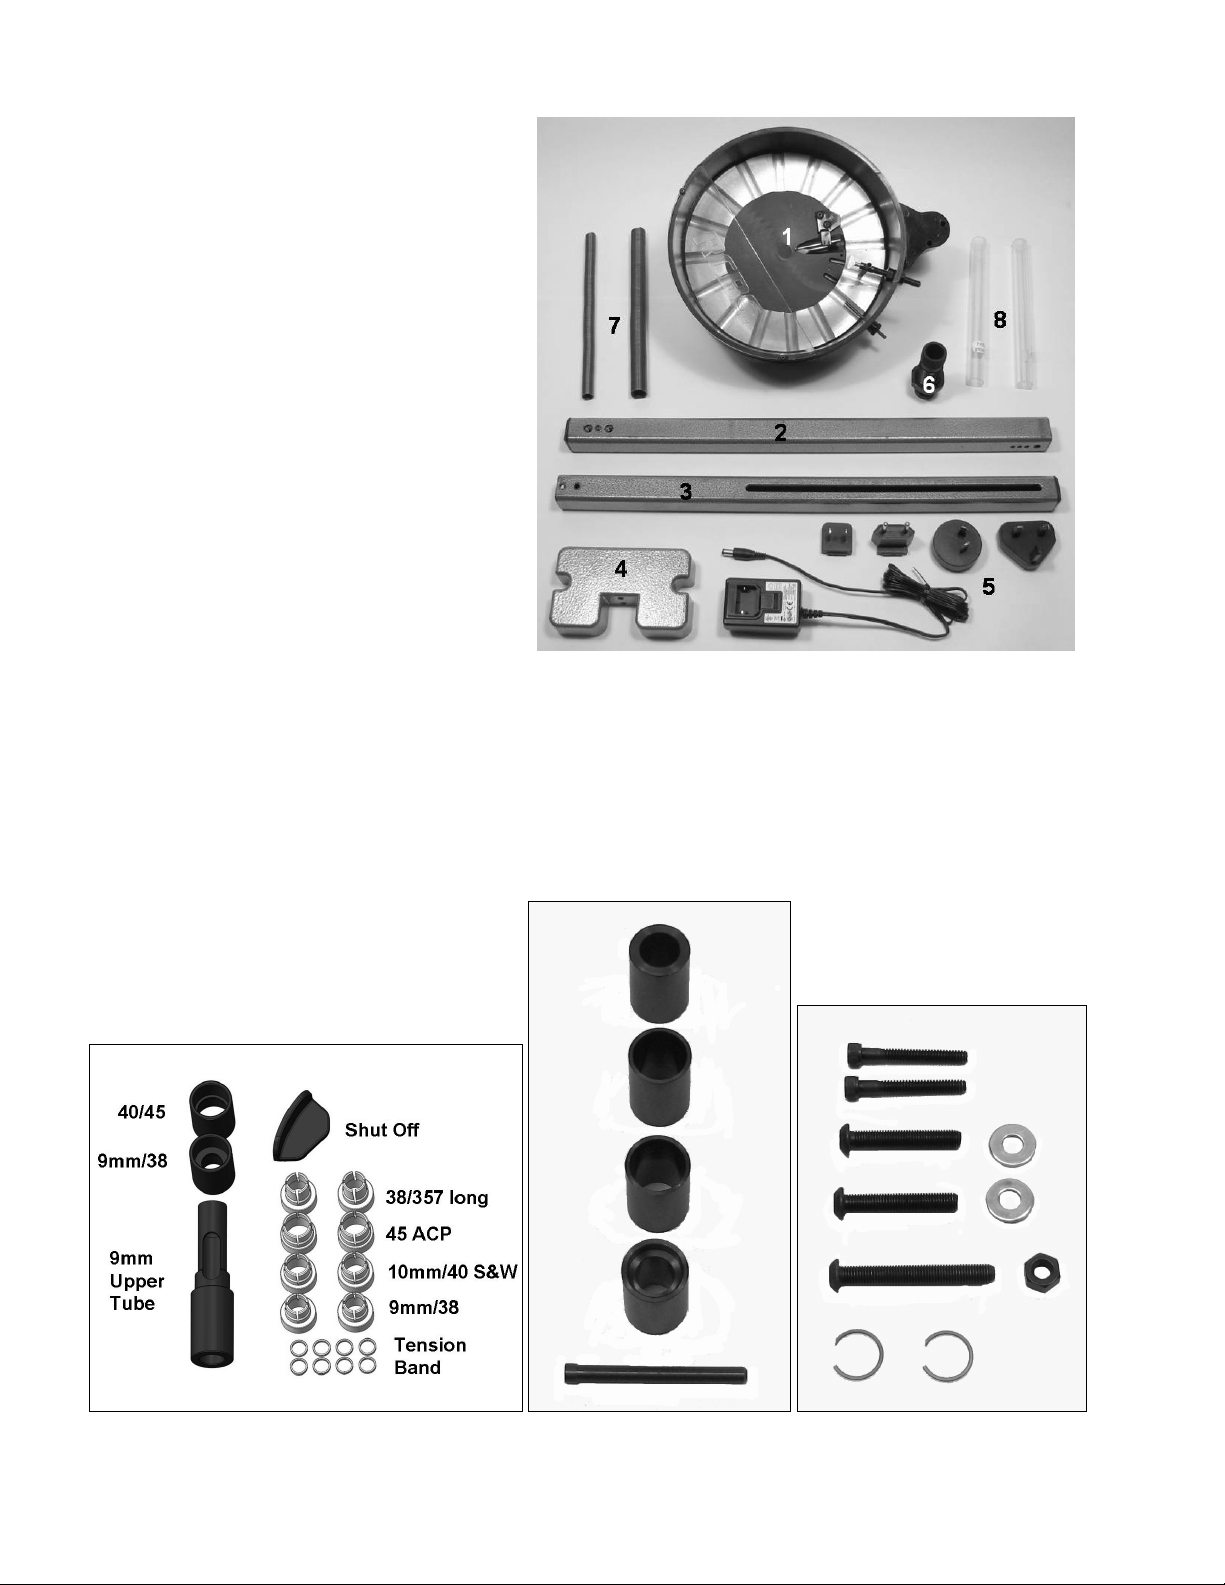
UNPACKING
Refer to the list below to Identify parts as you unpack your new Bullet Feeder – Pistol Kit.
1. Bowl assembly
2. Upper Support Tube
3. Lower Support Tube
4. Support Foot
5. Power Supply and Plug adapters
6. Bullet Die body
7. Continuous Spring Tubes
8. Plastic Lower Clear Tubes
BF – Pistol Kit Parts Bag #1 BF – Pistol Kit Parts Bag #2 BF – Pistol Kit Parts Bag #3
Upper Tube 9mm Bullet Guide 9mm/38 10-24x 1 ½ SHCS(2)
Tube Adapter 38/357 Bullet Guide 40 ¼-28x 1 ½ BHCS(2)
Tube Adapter 40/45 Bullet Guide 45 ¼-28x2 BHCS
Shutoff Bullet Guide 38/357 Long ¼” Flat Washer(2)
Bullet Fingers(2) 9mm/38 Bracket Pin VH-62 Retaining Ring(2)
Bullet Fingers(2) 40
Bullet Fingers(2) 45
Bullet Fingers(2) 38/357 Long
Tension Bands (8)
Bag 1 Bag 2 Bag 3
- 4 -
Page 5

ASSEMBLY
Attach the Lower Support Tube to the Support Foot
using two 10-24x1 ½ SHCS (A)(see photo 1).
Attach the Upper Support Tube to the Lower Support
Tube using two ¼-28x 1 ½ BHCS and ¼ Flat
Washers(B)(see photo 1). The Support height is
adjustable depending on the type of press that you will
be using the Bullet Feeder with.
INSTALLATION
Bolt the Bullet Feeder – Pistol Kit to the reloading bench
or table using the slots provided in the Support Foot
casting. Temporarily install the Continuous Spring tube
and plastic Lower Clear Tube to help position the
assembly in relation to your press. Insure that the
placement of the Bullet Feeder does not interfere with
the operation of your press.
Install the Tension Band down to the first “step” on the
desired caliber plastic Bullet Fingers and insert into the
bottom of the Bullet Die. Secure with the Retaining Ring.
Photo 1
Attach the collator Bowl assembly to the top of the
Support assembly with the ¼-28x2” BHCS and a ¼-28
Hex Nut (A)(see photo 2). Tighten this just enough so
that the Bowl assembly will still pivot. Install the lower
“angle” Bracket Pin into the middle 35° adjustment
position (B)(see photo 2). This position works for most
types of bullets, however, you may need to change the
angle of the Bowl assembly to reliably sort the bullets
that you are using.
Photo 2
Four changeable plugs are provided: US, UK, AUS and
EU. The power transformer is an automatic switching
120-240 VAC design. Select the proper plug adapter and
install onto the power transformer. Plug in the Power
Supply and connect to the power jack on the underside
of the Bowl assembly (A)(see photo 3).
Photo 4
Bullet Fingers are coded on the bottom with a series of
marks(lines):
One = 45 ACP
Two = 10mm/40 S&W
Three = 9mm/38
Four = 38/357 Long, 170 gr and heavier
Install the Bullet Die assembly into your press (See
ADJUSTMENT section for proper setup). Where you
choose to install the Bullet Die depends on the press
that you are using. For RCBS five station presses,
station four (4) is the most common position.
Photo 5
Photo 3
- 5 -
Page 6

Install the Bullet Guide into the die body, the tapered
inner portion is the “top” of the guide. Bullet guides are
stamped on the side for identification.
Photo 6
Place the proper plastic Lower Clear Tube(A) into the
top of the Bullet Die and place the Tube Adapter(B) on
the top.
Install the Continuous Spring tube into the top of the
Tube Adapter and into the Bowl assembly(C).
Photo 7
For short 9mm and .38 bullets, the Upper Tube 9mm
needs to be installed.
switch out of the way to install the 9mm Upper Tube
adapter. Failure to do so will cause the switch to break,
the motor will then not shut off and continually feed
bullets potentially burning out the motor or breaking
parts in the Bowl.
CAUTION Move the micro
When you are ready to load, fill the Bowl with ~100
bullets and connect the Power Supply. The Bowl will run
until the feed Tubes fill up with bullets. Add another ~100
bullets to bowl.
You are now ready to begin your loading session.
OPERATION
With the Bowl filled with bullets and power applied, the
Bullet Wheel will orient the bullets and fill the feed
Tubes.
The Bullet Guide in the top of the Bullet Die aligns the
bullet for feeding through the Bullet Fingers.
The case will expand the Bullet Fingers and allow one
bullet to be placed on the case mouth. As the case is
retracted, the Bullet Fingers close, preventing the next
bullet from passing through the Bullet Die.
As the press handle is operated and a case is brought
up into the Bullet Die, a bullet will be placed on the case
mouth. The weight of the bullet stack puts enough
pressure on the placed bullet to prevent it from falling off
the case as it moves to the next station to be seated and
crimped.
Add more bullets to the Bowl as needed. NOTE: The
sorting plate may not feed the last 10-20 bullets
ADJUSTMENT
Bullet Die
The position of the Bullet Die must be adjusted to
properly place the bullet on the case mouth at the top of
the press stroke. This is a trial and error adjustment.
Case mouths should be belled/flared .030” over the
bullet diameter. For example:
9mm .385”
.38/.357 .387”
.40 S&W .430”
.45 ACP .481”
With the Bullet Die partially threaded into the press and
the plastic Lower Clear Tube filled with bullets, run a
properly flared case up into the Bullet Die. Thread the
Bullet Die into the press until you hear a bullet drop or
see the bullet stack move down. Thread the Bullet Die
down a further ½ turn and temporarily lock the Bullet Die
lock ring. Run another properly expanded and flared
case up into the Bullet Die to check the setting. If a bullet
is placed on the case and no other bullets fall through
the die, the setting is correct. Lock the Bullet Die lock
ring. If a bullet is not fed, loosen the Bullet Die lock ring
and thread the die down in ½ turn increments until the
proper setting is achieved.
Depending on how level your reloading bench is or the
type of bullet that you are using, you may need to
change the angle position from the middle 35° to 40° or
45°. A steeper or shallower angle is achieved by moving
the Bracket Pin to one of the other positions.
- 6 -
Page 7

Bowl Assembly
There are two “wipes” in the bowl assembly. These are
designed to prevent a double stack of bullets.
With the power disconnected, rotate the Sorting Plate
until one of the grooves is in line with the first “wipe”.
Place a bullet into the groove, loosen the lock nut and
adjust the “wipe” in or out until it clears the bullet by 1/8”1/4”, tighten the locknut.
Move the bullet up one groove and adjust the “spring
wipe” by loosening the two locknuts and positioning the
spring to clear the bullet nose by ~1/8”.
Photo 10
CALIBER CHANGE
When changing calibers, the Bullet Fingers and Bullet
Guide must be changed. The Continuous Spring tube
and plastic Lower Clear Tube may also need to be
changed.
There are two diameters of Continuous Spring Tubes
and Lower Clear Tubes.
The smaller diameter tubes are for 9mm and 38/357.
The 9mm Upper Tube may need to be added to the “out”
feed of the Bullet Feeder to load “short” light (90 gr)
9mm bullets. The micro-switch will align in the cutout in
the side of the 9mm Upper Tube (A).
Photo 8
Photo 9
Shut Off
RCBS has found that certain round nose bullet designs
for 9mm and 38/357 require the Shut Off to be installed.
Photo 11
The larger diameter tubes are for .40 cal and .45 ACP.
Unplug the Power Supply from the Bullet Feeder.
Disconnect the Lower Clear Tube from the Bullet Die
and remove any bullets still in the tubes.
Remove the Bullet Die from the press. It is easiest to
change the Bullet Fingers in the Bullet Die when the
Bullet Die is removed from the press.
Remove the Retaining Ring from the bottom of the Bullet
Die and set aside, remove the Bullet Fingers, replace
with the desired Bullet Fingers, reinstall the Retaining
Ring.
Reinstall Bullet Die into press, insert proper Bullet Guide
and adjust per the ADJUSTMENT section.
Remove and replace the tubes with the appropriate ones
if required.
NOTE: If you are loading 170 grain or heavier .38/.357
bullets, the Bullet Finger with four marks and the .38
Bullet Guide marked “38L” with the stepped inner base
must be used together.
- 7 -
Page 8

TROUBLESHOOTING
If correctly oriented bullets fall off of the sorting plate too
early, change to a shallower Bowl angle adjustment.
Move the Bracket Pin from the 45 or 40 degree position
to the 40 or 35 degree position.
35°position-middle
If changing the angle does not correct the problem,
install the Shut Off into the bowl.
MAINTENANCE
45°position-top
Periodically wipe down the inner part of the Bowl and
Bullet Wheel to remove dust and debris.
Also, disassemble the Bullet Die body and clean the
Bullet Guide and Bullet Fingers to ensure smooth
function.
The drive belt may need adjustment as the belt wears.
Loosen the two FHCS and apply more tension on the
belt. Re-tighten the two FHCS.
40°position-bottom
- 8 -
Page 9

17
22
16
23
19
11
10
21
3
39
27
24
40
41
37
25
14
46
20
42
54
15
43
13
44
45
38
26
32
12
34
35
47
5
2
1
48
53
49
9
7
8
6
4
- 9 -
Page 10

82350 Bullet Feeder - Pistol Kit
Part Number Description Item No Qty
781205 Support Foot 1 1
781208 Support Tube Lower 2 1
181219 Tube Cap 3 2
181233 10-24 x 1-1/2 BHCS 4 2
781207 Support Tube Upper 5 1
181218 Support Block 6 1
186214 6-32 x 1/2 SHCS 7 1
180072 1/4" Flat Washer 8 2
181234 1/4-28 x 1-1/2 BHCS 9 2
781200 Bowl 10 1
781204 Pistol Hub 11 1
187211 10-32 x 1 BHCS 12 4
181231 10-32 x 1/2 BHCS 13 3
781201 Pistol Bullet Wheel 14 1
181222 Drive Belt 15 1
181217 Motor Mount 16 1
181215 Motor 17 1
181221 Drive Pulley 18 1
181203 Pulley Cover 19 1
181237 5-40 x 3/8 BHCS 20 4
781221 Bowl Drop Tube 21 1
181206 Tube Retainer 22 1
187217 8-32 x 3/8 BHCS 23 2
781203 Switch Block Left 24 1
181204 Switch Block Right 25 1
181230 6-32 x 3/8 BHCS 26 2
181223 Case Switch 27 1
181239 .110 Female Disconnect 28 2
181238 3/16 Female Disconnect 29 2
181228 4-40 x 5/8 SHCS 30 1
181227 4-40 Hex Nut 31 1
781206 Bowl Bracket 32 1
781225 Jumper Wire 33 1
109603 10-32 Hex Nut 34 5
181220 Power Jack 35 1
181229 6-32 Nyloc Nut 36 2
181224 Continuous Spring 37 1
109604 1/4-28 Hex Nut 38 3
781210 Deflector Rod 39 1
181240 Deflector Spring 40 1
181236 8-32 x 3/8 Thumbscrew 41 1
181207 Bowl Cover 42 1
781226 Split Wire Loom 43 1
181235 1/4-28 x 2 BHCS 44 1
781224 Bracket Pin 45 1
181242 Continuous Spring 46 1
781215 Tube Adapter 47 1
781223 Bullet Drop Tube 48 1
781219 Bullet Die 49 1
187546 Retaining Ring 50 1
181211 Bullet Fingers 51 1
781217 Bullet Guide 52 1
787500 7/8-14 Lock Ring 53 1
781227 Wiper Bushing 54 1
- 10 -
Page 11

- 11 -
Page 12

PRECISIONEERED RELOADING EQUIPMENT
We think that we make the very best reloading equipment in the world. If you agree, please tell your friends. If you
disagree, tell us we want to do something about it!
Customer Service
1-800-533-5000 (US or Canada) or 530-533-5191
Hours: Monday - Thursday, 6:30am - 4:00pm Pacific Time
(hours may vary)
e-mail: rcbs.tech@atk.com or visit our website at www.rcbs.com
RCBS 605 Oro Dam Blvd. East Oroville, CA 95965
ALLIANT POWDER - CCI - CHAMPION TRAPS & TARGETS
ESTATE CARTRIDGE - FEDERAL AMMUNITION - FUSION AMMUNITION
GUNSLICK - INTENSITY - NITREX - ORBEX - OUTERS - RCBS - RAMLINE
SHOOTERS RIDGE - SPEER – WEAVER
7200549/0310
- 12 -
 Loading...