

Page 1
FCC Information
EN
This device generates and uses radio frequency (RF) energy, and if not installed and used properly, this
equipment may cause interference to radio and television reception.
This equipment has been type tested and found to comply with the specifications in Subpart J of Part 15 of FCC Rules.
These rules are designed to provide reasonable protection against radio and television
interference in a residential installation. However, there is no guarantee that interference will not occur in particular
installations.
If this equipment does cause interference to radio or television reception (which you can determine by
turning the equipment off and on), try to correct the interference by one or more of the following measures:
• Reorient the receiving antenna (that is, the antenna for the radio or television
that is "receiving" the interference).
• Move the unit away from the equipment that is receiving interference.
• Plug the unit into a different wall outlet so that the unit and the equipment
receiving interference are on different branch circuits.
If these measures do not eliminate the interference, please consult your dealer or an experienced
radio/television technician for additional suggestions.
Also, the Federal Communications Commission has prepared a helpful booklet, "How To Identify and Resolve Radio TV
Interference Problems." This booklet is available from the U.S. Government Printing Office, Washington, DC 20402. Please
specify stock number 004-000-00345-4 when ordering copies.
For Your Safety
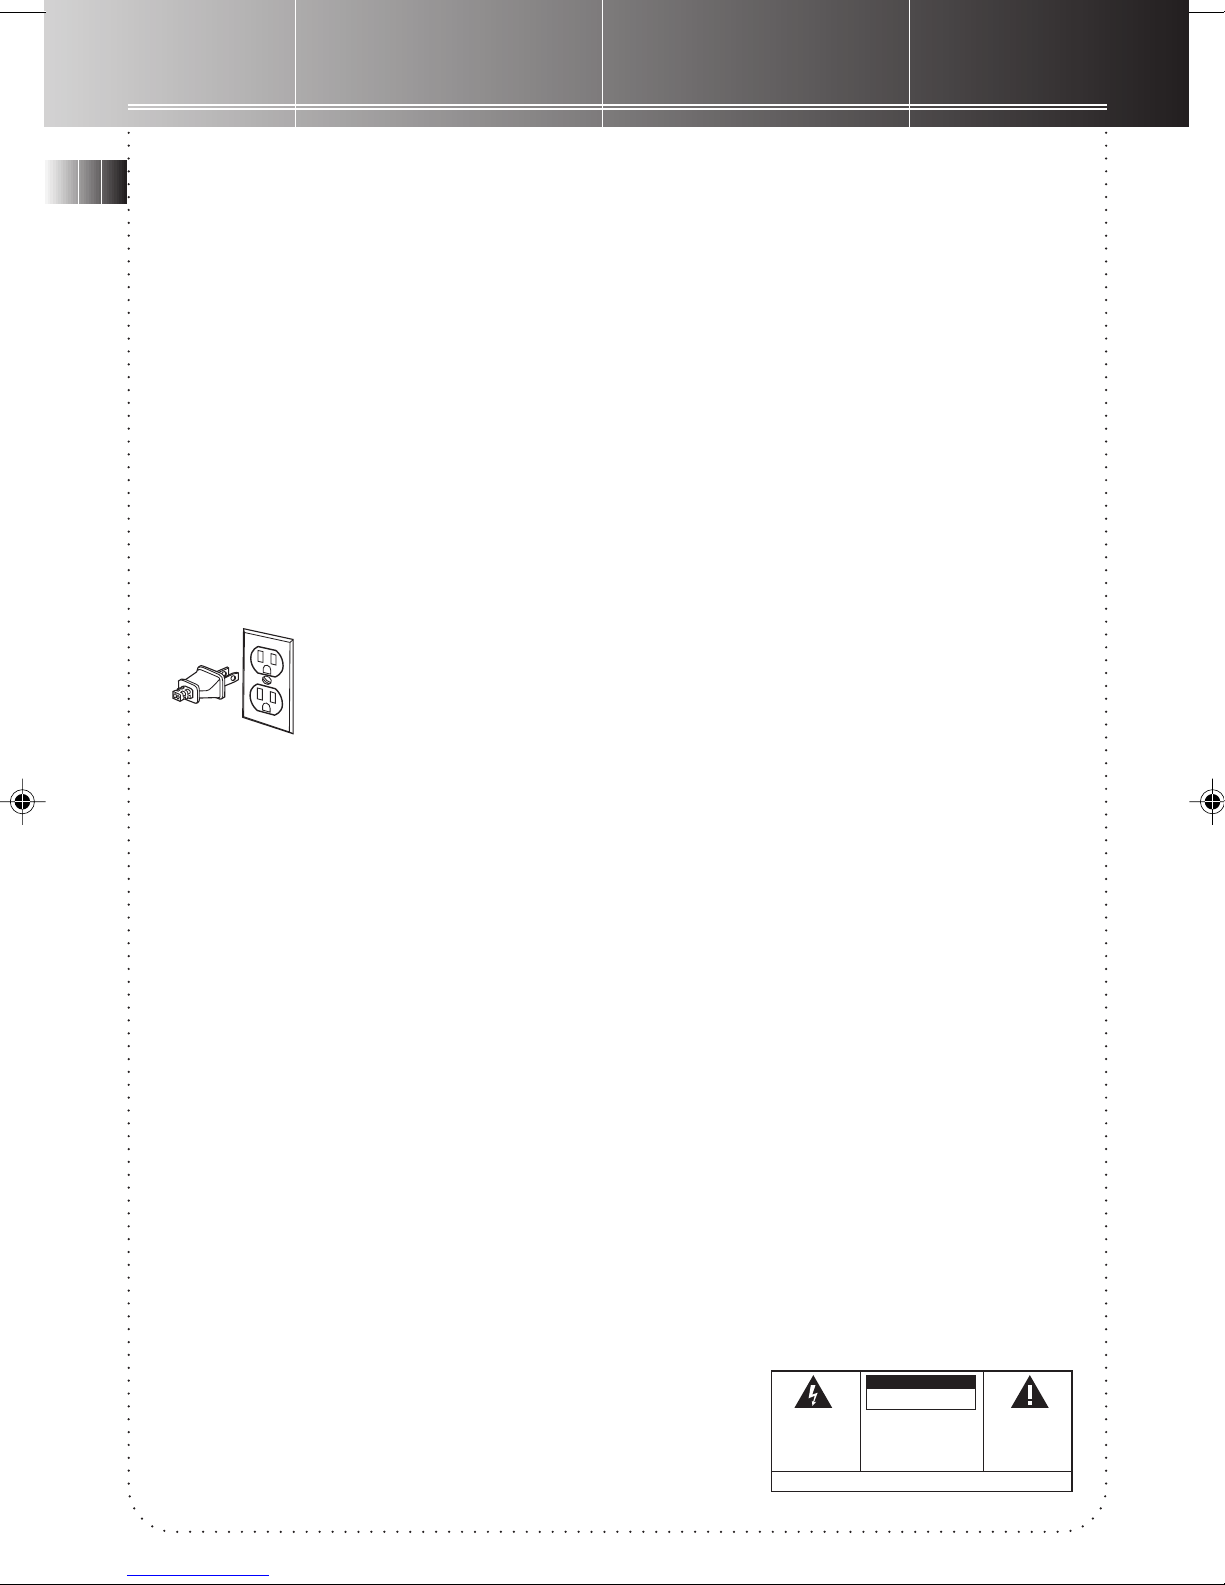
The AC power plug is polarized (one blade is wider than the other) and only fits into AC power
outlets one way . If the plug won’t go into the outlet completely, turn the plug over and try to insert
it the other way. If it still won’t fit, contact a qualified electrician to change the outlet, or use a
different one. Do not attempt to bypass this safety feature.
CAUTION: TO PREVENT ELECTRIC SHOCK, MA TCH WIDE BLADE OF PLUG TO WIDE SLOT, FULLY
INSERT.
For Your Records
In the event that service should be required, you may need both the model number and the serial number. In the space
below, record the date and place of purchase, and the serial number:
Model No. RP8085
Remote Control No.
Date of Purchase
Place of Purchase
Serial No.
Service Information
This product should be serviced only by those specially trained in appropriate servicing techniques. For instructions on
how to obtain service, refer to the warranty included in this Guide
WARNING : TO PREVENT
FIRE OR ELECTRICAL
SHOCK HAZARD, DO NOT
EXPOSE THIS PRODUCT TO
RAIN OR MOISTURE.
CAUTION
RISK OFELECTRIC SHOCK
DO NOTOPEN
THE LIGHTNING FLASH
AND ARROW HEADWITHIN
THE TRIANGLE IS A
WARNING SIGN ALERTING
YOU OF "DANGEROUS
VOLTAGE" INSIDE THE
PRODUCT.
CAUTION: TO REDUCE THE RISK OF
ELECTRIC SHOCK, DO NOT REMOVE
COVER (OR BACK). NO USER
SERVICEABLE PARTS INSIDE. REFER
SERVICING TO QUALIFIED SERVICE
PERSONNEL.
SEE MARKING ON BOTTOM/BACK OF PRODUCT
THE EXCLAMATION POINT
WITHIN THE TRIANGLE IS A
WARNING SIGN ALERTING
YOU OF IMPORTANT
INSTRUCTIONS
ACCOMPANYING THE
PRODUCT.
Page 2

Contents
FCC/ Safety Information
First Things First .................2
Unpack the System .......................... 2
Check for Moisture.......................... 2
Choose a Location ........................... 2
Connections ........................ 3
Connecting the CD player
to an amplifier................................. 3
General Controls ................ 4
Main Unit ......................................... 4
VFD (Vacuum fluorescent display)
Messages .......................................... 5
Remote Control ............................... 6
Using the CD Player ........... 7
Loading Discs ................................... 7
Playing Discs..................................... 7
Shuffling Play Order........................ 8
Tracks Introduction.......................... 8
Repeating Play Order ...................... 8
Playing and Loading Discs
Simultaneously ................................. 8
Programming Play Order ................ 8
Using ATS (Auto Track Skip) ........... 9
Creating an ATS Program ............... 9
Assigning CD Titles and Play Order 9
Erasing CD Titles .............................. 10
Time Edit .......................................... 10
Direct Track Access .......................... 10
CD Display Messages ....................... 11
Using the Remote
Control ................................. 12
Troubleshooting Tips ......... 13
Care and Maintenance ....... 13
Index.................................... 14
US Warranty........................ 15
Canadian Warranty ............ 16
EN
1
Page 3
First Things First
EN
STANDBY
POWER/
PHONE LEVEL
PROG.DEMO/INTRO REPEAT ATS
MAXMIN
PHONES
DIRECT DISC ACCESS
D
I
S
C
1
D
I
S
C
-
2
D
I
S
C
3
5 CD CHANGER
P
I
K
S
C
S
I
D
5
C
S
I
D
4
C
S
I
D
SIMULTANEOUS
PLAY AND LOAD SYSTEM
CONGRATULATIONS ON
STOP
REW/PREV F.FWD/NEXT
CD TITLE OKCLEAR PEAK SEARCH
PLAY/PAUSE
OPEN/CLOSE
REVERSE
PREV
TIME/TEXT
MUTE
SHIFT
1
DISC 1
45
DISC 4
7
PROGRAM
POWER
PLAY
FORWARD
NEXT
PAUSE
STOP
CD-TITLE
DISC SKIP
TIME EDIT
K
O
OPEN/CLOSE
CLEAR
2
3
DISC 3
DISC 2
6
DISC 5
REPEAT
8
9
ATS
SHUFFLE
0
YOUR PURCHASE...
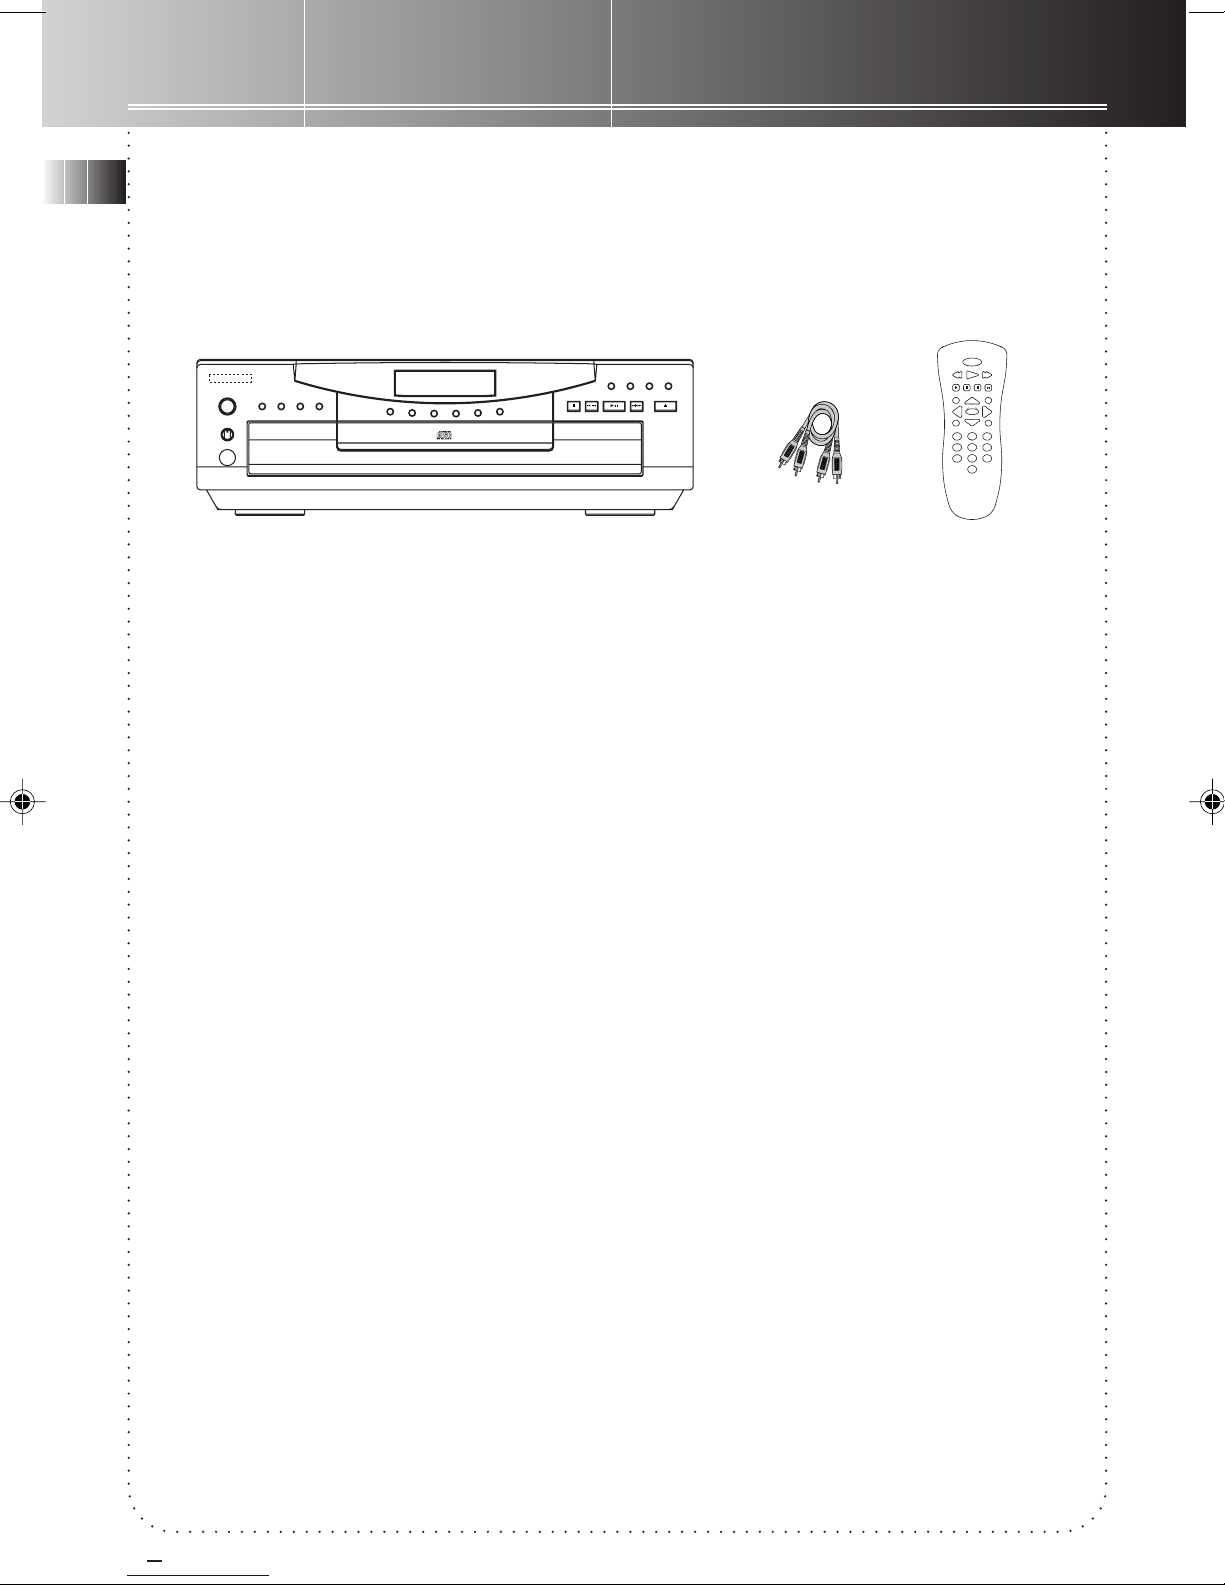
Congratulations on the purchase of your new 5
DISC CHANGER CD PLAYER !
Unpack
Remove all items including packing materials
and wrappings from the pack. We recommend
that you save the shipping carton and packing
materials in case you want to store, transport, or
ship the unit in future.
• Your new purchase/gift includes these items:
• one 5 DISC CHANGER CD PLAYER;
• one remote control;
• one audio cable;
• one user’s guide.
Choose a Location
Follow the guidelines below when selecting a
place to put your player:
• Choose a level and solid surface. Don’t place
it on a soft surface, such as carpeting or
foam rubber.
• Make sure the location is away from direct
sunlight, radiators, air ducts, and other
sources of heat.
• Avoid locations that are subject to moisture,
mechanical vibration, shock, or excessive
dust.
• As good ventilation is essential to protect the
CD player from internal heat build up, the
selected location should have adequate air
circulation.
Check for moisture
Moisture is your CD player’s worst enemy. Do
take note of some of the following situations in
which condensation might form :
• Immediately after a heater has been turned
on;
• In a steamy or very humid room;
• When the system is suddenly moved from a
cold environment to a warm, moist one; for
example, in moving the unit from a cool air
conditioned room to an outside porch on a
humid, summer day.
If moisture forms inside this player, it may not
operate properly. To correct the problem, turn
off the power and wait about 30 minutes for
moisture to evaporate.
2
3
Page 4

Connections
EN
Digital Out
(Optical)
Connecting the CD Player
to an amplifier
Prior to or during connections, the CD player
should NOT be plugged to an AC power outlet.
1. Connect the cable’s red plug to the CD
player’s red (R) output jack. Connect the
white plug at the same end of the cable to
the white (L) output jack of the CD player.
2. Repeat step 1 above for connecting the other
end of the cable to an amplifier’s (R) and (L)
output jack.
Note: If the amplifier does not have input
jacks labeled “CD”, you can use input jacks
labeled “AUX” (Auxilliary).
3. Plug the power cord of the CD player into an
AC power outlet that accepts the polarized
plug (one blade wider than the other) or use
the AC outlet, if provided, at the back of
your amplifier.
.
White
L
L
R
R
4. If your amplifier is equipped with optical
input, connect it with an optical cable (not
supplied, available at general audio shops) to
your CD player to enjoy digital playback. By
connecting a CD recorder or MD deck to your
player with an optical cable (not supplied),
you can make a digital recording from your
CD player. Analog cable is no longer needed
once you have furnished the player with
optical cable settings.
IMPORTANT: The polarized plug is an improtant
safety feature. It will fit into the power outlet
only one way. If the plug won’t go into the
outlet completely, reverse it and try inserting it
the other way. If it still won’t fit, contact a
qualified electrician to change the outlet, or use
a different one. Do not attempt to bypass this
safety feature.
Red
3
Page 5
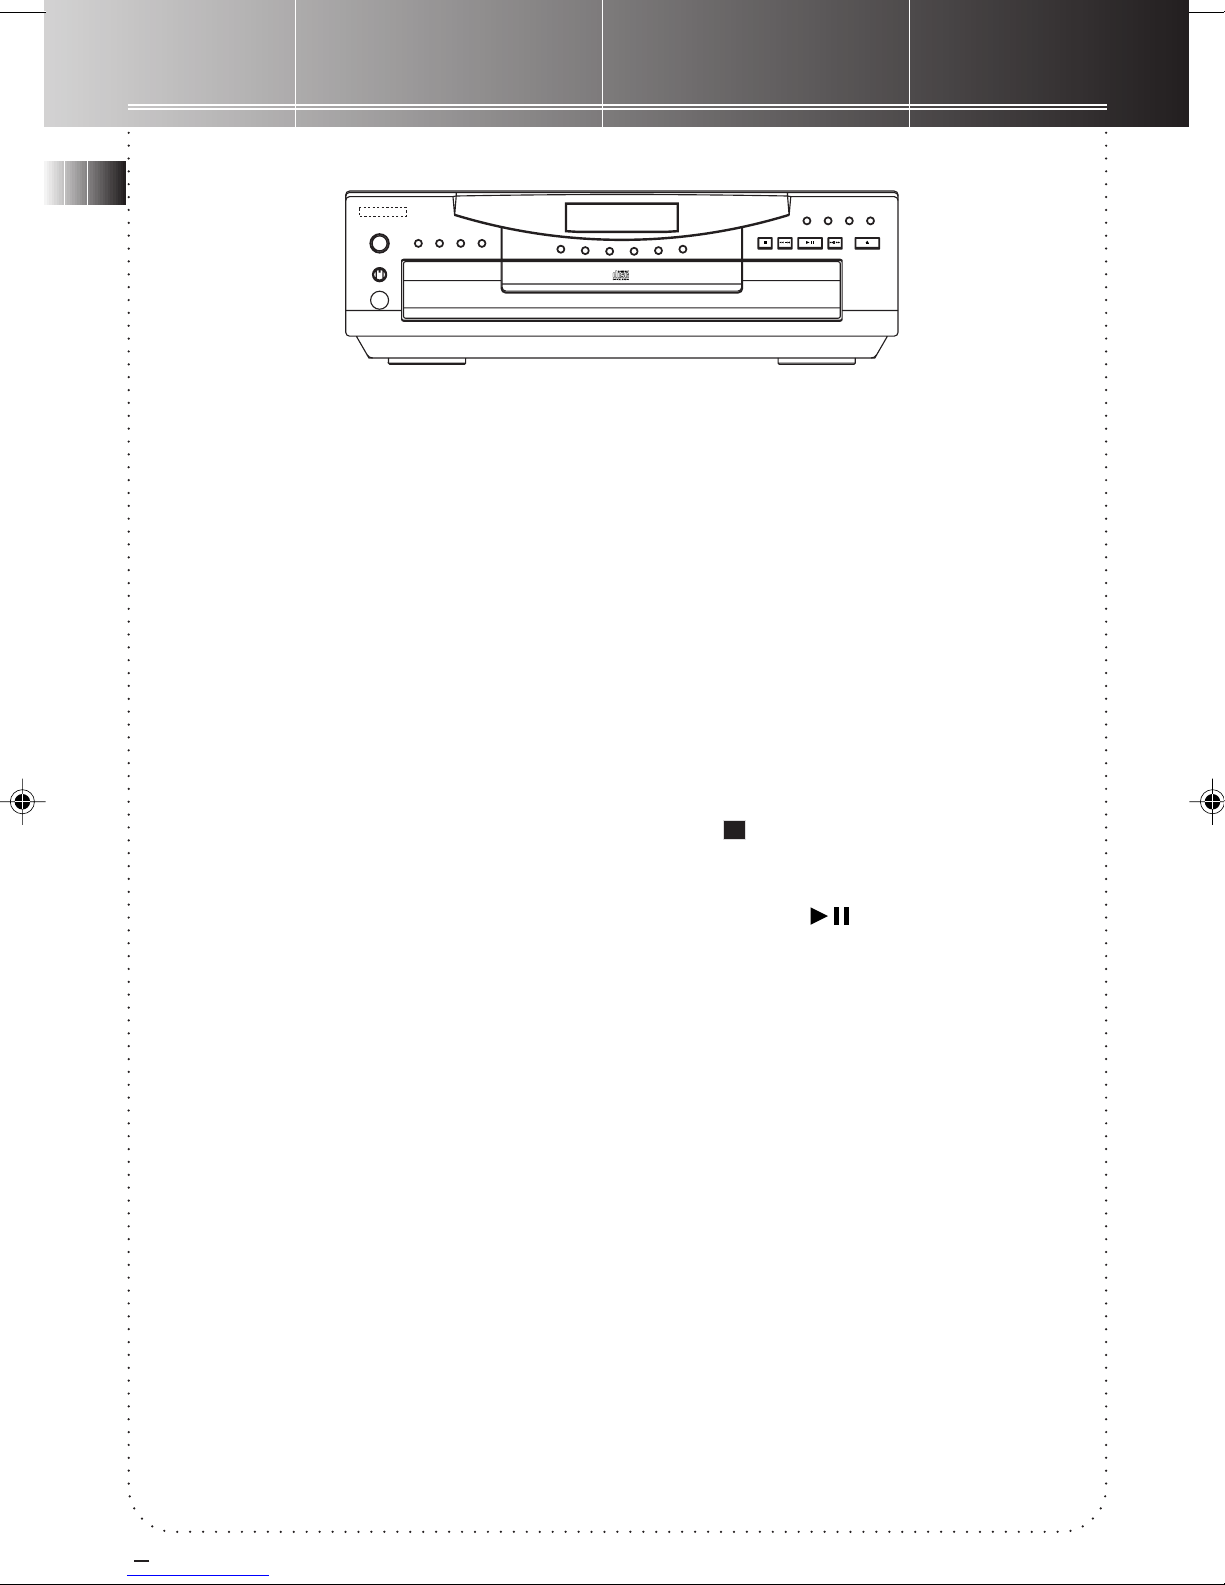
General Controls
EN
STANDBY
POWER/
PHONE LEVEL
PHONES
Main Unit
POWER/ STANDBY
Press this button to turn the player on and off.
(Note: The unit will automatically switch to
standby mode without any key acitvation for 30
minutes after unit is turned on.)
PROG.DEMO/INTRO REPEAT ATS
MAXMIN
DIRECT DISC ACCESS
D
I
S
C
1
D
CD TITLE OKCLEAR PEAK SEARCH
STOP
PLAY/PAUSE
I
S
C
-
2
D
I
S
C
3
S
I
D
5 CD CHANGER
P
I
K
S
C
S
I
D
5
C
S
I
D
4
C
SIMULTANEOUS
PLAY AND LOAD SYSTEM
REW/PREV F.FWD/NEXT
OPEN/CLOSE
REPEAT
You can set the CD player to play repeatedly a
track, a disc or all discs. Press REPEAT to toggle
between these modes: REPEAT, REPEAT 1,
REPEAT ALL, ALL.
DISC 1, DISC 2, DISC 3, DISC 4,
DISC 5 Direct Disc Access
You can press these buttons to select one of the
loaded discs on the CD compartment tray. With
Direct Disc Access buttons, the selected disc is
accessed and the unit plays the CD from track 1.
You can also press them to turn on the unit
directly.
DISC SKIP
Press DISC SKIP to skip to the next disc on the
tray without opening the CD compartment tray.
If the button is pressed while the tray is out and
a CD is playing, the tray rotates clockwise or
anti-clockwise for loading and un-loading CDs.
OPEN/CLOSE
Press this button to slide out or close the CD
compartment tray automatically. Press it to turn
on the unit directly and open/ close the tray.
DEMO/INTRO
In standby mode, press to show/ de-select demo
messages. When unit is on, use this feature to
listen to the first 10 seconds of each track on a
disc.
Program (PROG.)
The CD player can store up to 32 tracks in
memory and play back the programmed tracks
in the same sequence as you stored them.
Auto Track Skip (ATS)
ATS is the opposite of programmed play. Instead
of programming the tracks you want to hear,
you specify and store into memory those ones
that you don’t like hearing.
You can block up to 32 tracks from playing.
STOP
Press this button to end CD play mode.
PLAY/PAUSE
This button controls the CD play mode. In stop
mode, press once to begin CD play, press again
to pause and a third time to resume play.
F.FWD/ NEXT
Press once to skip to the beginning of the next
track or repeatedly to skip forward to the
beginning of other tracks. Press and hold during
play to search forward at high speed within the
current track. Play resumes to normal when
button is released.
REW/ PREV
Press once to skip to the beginning of the
current track or repeatedly to skip to previous
tracks. Press and hold during play to search
backward at high speed within the current track.
Play resumes when button is released.
4
Page 6

General Controls
Selected Mode
CD TEXT
3
2
1
4
ATS TIME
Playing Disc
RANDOM
REPEAT
5
CD Message Display/ Track Time /Track Number
1 ALL PROGRAM
SHUFFLE DISCS MIX TRACK PEAK
Fig. 1 Vacuum Fluorescent Display
CD TITLE
For inputting CD titles.
CLEAR
To clear the stored program in memory (either
program play or ATS program), press and hold
the button until the display shows CLEAR which
indicates the memory is cleared and empty.
Music Calendar
234
MIN
STEP SEC
1
567
9
101112
14
13
8
15
Vacuum Fluorescent
Display (VFD) messages
As you select various modes, the VFD shows the
settings and current status of the unit. Fig.1
shows the majority of messages that may appear
on display. Also refer to page 11 for more
display messages.
EN
OK
To confirm selection during program, entering
CD titles etc.
PEAK SEARCH
To scan through the disc and search the peak
tone (with peak tone time flashes on display)
for your corresponding sound adjustment when
you want better recording effects.
(Note: the unit may detect more than one peak
tone points in different searches as the peak
tone difference may fall within the minimum
detectable range.)
Phones Jack
Insert the plug of a headphone set (not
included) into this jack for private listening.
Phones Level (for headphones)
When listening to music with headphones (not
included), adjust this knob to your desired
volume level.
Have a Blast - Just Not in Your
Ears!
Make sure you turn the volume
down (towards MIN) on the unit
before you put on headphones.
Increase the volume to the
desired level only after headphones are in place.
Music Calendar
You can see at a glance how many tracks there
are on the playing disc. A “>” appears if there
are more than 15 tracks. In play mode, one of
the numbers flashes to indicate the playing
track; the “>” flashes for the track numbers
greater than 15.
5
Page 7

General Controls
POWER
TIME/TEXT
1
2
3
6
9
8
7
45
0
CD-TITLE
DISC SKIP
MUTE
TIME EDIT
SHIFT
CLEAR
OPEN/CLOSE
PROGRAM
ATS
SHUFFLE
DISC 1
DISC 3
DISC 4
DISC 5
REPEAT
REVERSE
PLAY
FORWARD
PREV
STOP
PAUSE
NEXT
O
K
DISC 2
EN
Remote Control
You can control or adjust most of the function
keys as those are present on the main unit
through the remote control.
However, the following keys are present on the
remote control only:
REVERSE/ FORWARD
In play mode, press and hold to start reverse or
forward search operations.
TIME/ TEXT
Press to read disc details (such as elapsed
playback time, total disc remaining time) and CD
text (e.g. song titles) (if available).
(Note: CD text is inscribed in music album CD
manufactured by some record companies.)
MUTE
Press once to silence sound output, press again
to resume.
SHIFT
Press it before you want to activate the
functions as indicated below the numerical keys.
Numerical Keys
For direct track selection, disc titling and
programming.
TIME EDIT
Press in stop mode to program automatically in
the order best for cassette tape recording.
SHUFFLE (MIX for Thomson model)
To activate random play.
All functions indicated under the numerical
buttons ( e.g. PROGRAM, ATS )
Press SHIFT before you select these keys.
6
Page 8

Using the CD Player
POWER/
PHONE LEVEL
PHONES
STANDBY
PROG.DEMO/INTRO REPEAT ATS
DIRECT DISC ACCESS
MAXMIN
D
I
S
C
1
D
I
S
C
-
2
D
I
S
4
C
C
3
S
I
D
5 CD CHANGER
P
I
K
S
C
S
I
D
5
C
S
I
D
SIMULTANEOUS
PLAY AND LOAD SYSTEM
STOP
CD TITLE OKCLEAR PEAK SEARCH
PLAY/PAUSE
REW/PREV F.FWD/NEXT
EN
OPEN/CLOSE
Disc Number (flashes)
CD TEXT
3
2
1
5
4
ATS TIME
RANDOM
REPEAT
Track Number
1 ALL PROGRAM
SHUFFLE DISCS MIX TRACK PEAK
This section contains a set of step-by-step
procedures on how to use your new 5 DISC CD
CHANGER PLAYER. Press POWER to turn on the
unit, the display will show the “NO DISC”
message. Select your favourite CDs and start
loading!
Loading Discs
1. Press OPEN/CLOSE to slide out the CD
compartment tray automatically.
2. Load one to five discs onto the tray with
label side up.
3. Press DISC SKIP to rotate the tray for
loading more CDs onto the other parts of the
tray.
4. When you’ve finished loading, press OPEN/
CLOSE to close the tray.
Elapsed Time
STEP SEC
MIN
Track Number (flashes)
234
1
6
5
7
8
9
101112
14
13
15
Fig. 2
Playing Discs
Press PLAY, now you can select a disc by
pressing one of the DISC DIRECT ACCESS buttons
or press DISC SKIP. After you have made your
selection, the unit starts playing from track 1.
The display shows a flashing disc number, track
number, elapsed time of track play, and a
flashing track number. (Also r efer to Fig. 2)
Press STOP to end CD play mode.
Note: This unit is compatible with Audio CD-R and Audio CD-RW discs only for playback.
7
Page 9

Using the CD Player
EN
Shuffling Play Order
Select the SHUFFLE feature to randomize the
order of track play.
1. Press SHIFT and then SHUFFLE (numerical
key 9) to start random track play. The display
shows SHUFFLE to indicate activation of
shuffle mode.
2. Press SHIFT and then SHUFFLE a second time
to de-activate the function.
Note: MIX for Thomson model.
Note: Shuffling tracks among discs depends on
the selected REPEAT mode. (see Repeating Play
Order)
Tracks Introduction
This feature is most useful for newly purchased
CDs. You can listen to the first ten seconds of
each track as brief introduction. Press INTRO
once, INTRO lights up at the selected mode
section on the display. To de-activate, press
INTRO again and the unit begins playing track 1
of the disc.
Repeating Play Order
You can repeat one track, one disc or all discs
and toggle between various modes. Providing
that the display shows ALL:
1. Press REPEAT once to play a specific track on
a particular disc over and over. The display
shows REPEAT.
2. Press REPEAT a second time and the display
shows REPEAT 1. With this mode selected,
the CD player plays the selected disc
repeatedly from start to finish.
3. Press REPEAT a third time, the display shows
REPEAT ALL. Selecting this mode sets the
unit playing all loaded discs repeatedly.
Repeating a Program
When you program tracks into memory, you can
repeat playing the program by pressing REPEAT
after the program begins playing.
Playing and Loading Discs
Simultaneously
You can open the CD compartment tray without
interrupting the playing music. Simply press
OPEN/CLOSE once to slide out the tray. While
the disc is playing, you can change the rest of
the four discs by pressing DISC SKIP to rotate
the tray clockwise and anti-clockwise to load
and unload CDs. Press OPEN/ CLOSE again to
close the tray. To play or select disc, refer to the
section on Playing Discs.
Programming Play Order
You must be in Stop mode to program/store
your desired track sequence.
1. Press PROGRAM.
2. Press DISC SKIP or one of the Disc Direct
Access buttons to choose a disc.
3. Press Numerical Keys or NEXT/ PREV to
choose a track.
4. Press OK to save the selected track number
into memory.
5. Repeat the above steps 2 to 4 for
programming up to 32 tracks.
6. Press PLAY/PAUSE to begin programmed
play.
Recalling and Editing the
Program
You must be in Stop mode in order to recall and
edit the program.
1. Press PROGRAM to enter Program mode.
2. Press OK to the next program number until
you get to the programmed track you want
to change.
3. Press DISC SKIP or Direct Disc Access keys to
choose the disc and then press NEXT / PREV
or Numerical Keys to choose a replacement
track.
4. Press OK to change the current programmed
track to the one you just selected.
Playing the Program
To play your programmed tracks, press
PROGRAM then PLAY/PAUSE.
Clearing the Program
You cannot select tracks within a program to
clear. Upon completion of the following steps,
the entire program will be cleared.
1. Press PROGRAM to enter Program mode.
2. Press and hold the CLEAR button until
CLEAR shows in the display.
8
Page 10

Using the CD Player
CD TEXT
1
3
2
4
ATS TIME
RANDOM
REPEAT
5
1 ALL PROGRAM
SHUFFLE DISCS MIX TRACK PEAK
Fig. 3
MIN
STEP SEC
234
1
6
5
9
101112
14
13
EN
7
8
15
Using Auto Track Skip
(ATS)
ATS is the opposite of programmed play. Rather
than programming into memory the tracks that
you want to hear, with ATS you set the unit to
skip those tracks that you don’t like.
Creating an ATS Program
1. Press ATS to activate the feature. The VFD
display will be similar Fig. 3 with a flashing
disc number and “_ _”.
2. Press DISC SKIP or Direct Disc Access keys to
choose a disc.
3. Press NEXT/ PREV or Numerical Keys to
choose the first track to be skipped.
4. Press OK to add the seleced track to the ATS
program.
5. Repeat the preceding steps to add more
tracks to the ATS program.
6. Press PLAY/PAUSE to begin playing the ATS
program.
Clearing the ATS Program
Clearing the ATS program is also a lot like
clearing a regular program.
1. Press ATS.
2. Press and hold CLEAR until CLEAR shows on
the display.
Assigning CD Titles and
Play Order
STEP 1- Assigning CD Titles
1. Press CD TITLE to activate the feature. CD
TITLE will flash on display.
2. Press OK to confirm the activation.
3. Press NEXT or PREV to select alphabets.
4. Press OK to confirm the selections.
5. Repeat step 3 and 4 for further input.
6. Press CD TITLE twice for finalising the CD
title.
Tip: you can press
cursor during titling.
REVERSE/ FORWARDREVERSE/ FORWARD
REVERSE/ FORWARD to shift the
REVERSE/ FORWARDREVERSE/ FORWARD
Recalling and Editing the ATS
Program
Editing the ATS program is a lot like editing a
regular program.
1. Press ATS to go to Auto Track Skip mode.
2. Press OK to move to the next program
number unitl you get to the programmed
track you want to change.
3. Press DISC SKIP or Direct Disc Access keys to
choose the disc, and then press NEXT / PREV
or Numerical Keys to choose a replacement
track.
4. Press OK to change the current skipped track
to the one you just selected.
STEP 2 - Programming Play Order
After assigning the CD titles, you may program
the play order as well.
1. Press CD TITLE once right after assigning CD
title, INPUT PROG will flash on display.
2. Press OK to confirm the activation.
3. Press CLEAR to choose the playback status
(ON - to be played or OFF - to be skipped),
and then press OK to confirm status and
change to the next track.
4. Press CD TITLE for the confirmation of the
play order.
Note: CD title program is only valid for normal or
repeat mode but not in shuffle, ATS, program, intro or
peak search mode. However, you can still edit the CD
title in any playback mode.
9
Page 11

Using the CD Player
EN
Erasing CD Titles
For single disc:
1. Press CD TITLE to activate the feature. “CD
TITLE” will flash on display.
2. Press OK to confirm the activation.
3. The CD title is shown on display. Press
CLEAR to erase the title.
4. Press CD TITLE to confirm the erasure of
title.
For all discs:
All disc titles erasure is possible in unit Standby
mode only.
1. Press and hold CLEAR. While you are still
pressing CLEAR, press and hold PROG on
the panel for a while and then release both
keys at the same time.
2. The display will show “DEL MEM?”, then
press OK to confirm deletion.
3. “DELETE…” is shown on display. The
deletion will be completed in a few
seconds.
Tip: This unit can store up to 128 disc titles. When
the memory is full, “
MEM FULLMEM FULL
MEM FULL” will show on display.
MEM FULLMEM FULL
Time Edit
After inputting the length of your cassette
tape, this feature can program automatically
the disc tracks in the order best for your
recording.
programming by yourself to be recorded on
side B of the cassette tape. (Note: when
playback ends for recording on side A of
cassette tape, the unit will pause playback
automatically. You can then change side of
the cassette tape and start playback again
for recording).
5. Press OK to confirm program.
Tips: you can also activate time edit function in
program mode under the following conditions:
1. The total programmed track time is known.
2. Program inputting mode is still active.
3. The selected cassette length should be longer than
the total time of the current program.
Direct Track Access
Access the track by directly inputting the track
numbers. For examples, for track 3, press 3,
for track 13, press 1, and within 3 seconds,
press 3 to access track 13. Otherwise, track 1
will be selected for failing to input the second
digit within 3 seconds.
Remarks:
1. The player will go to normal playback mode or
repeat mode after activating direct track access.
2. If you directly access a track which is not selected
in CD title program, this track will be stored in the
program automatically.
1. Press TIME EDIT on the remote control.
2. Press again repeatedly to select among the
following cassette length:
a. C46 23:00 (lenght on a side in minutes)
b. C54 27:00
c. C60 30:00
d. C74 37:00
e. C90 45:00
f. C100 50:00
g. C120 60:00
3. Press OK to confirm the length. The unit
will enter program mode and program the
tracks automatically to best fit the time
length on a cassette tape side. When
programming completes, playback program
will be shown on display.
4. While display is still showing the playback
program, press PAUSE to enable free
10
Page 12

Using the CD Player
CD Display Messages
When using the CD function, you may encounter the following messages:
CD compartment tray is in.
CD compartment tray is out.
Program is full (applies to both Program and ATS mode).
Reading disc’s table of contents (how many tracks there are
and the total time for the disc). This information is
displayed when the unit is in Stop mode.
EN
Unit is in Standby mode
Obstruction to the opening and/ or closing of CD
compartment tray. ( Prevent obstruction and press OPEN/
CLOSE to close tray.)
11
Page 13

Using the Remote Control
POWER
TIME/TEXT
1
2
3
6
9
8
7
45
0
CD-TITLE
DISC SKIP
MUTE
TIME EDIT
SHIFT
CLEAR
OPEN/CLOSE
PROGRAM
ATS
SHUFFLE
DISC 1
DISC 3
DISC 4
DISC 5
REPEAT
REVERSE
PLAY
FORWARD
PREV
STOP
PAUSE
NEXT
O
K
DISC 2
EN
Open the battery compartment lid. Insert 2 AAA-size batteries with the correct polarities by following
the engraved diagram in the compartment. Replace and close the lid. Refer to the description of the
remote control on page 6.
Now you can operate the unit from a distant!
“...don’t point, it’s rude!” But... with a remote control, you MUST!
The remote control works by line-of-sight, which means you should aim and point the remote directly
at the front of the unit so that the sensor on the unit senses the transmittion from your remote.
POWER/
STANDBY
PROG.DEMO/INTRO REPEAT ATS
PHONE LEVEL
MAXMIN
PHONES
DIRECT DISC ACCESS
D
I
S
C
1
D
I
S
C
-
2
D
I
S
C
3
5 CD CHANGER
P
I
K
S
C
S
I
D
5
C
S
I
D
4
C
S
I
D
SIMULTANEOUS
PLAY AND LOAD SYSTEM
STOP
REW/PREV F.FWD/NEXT
CD TITLE OKCLEAR PEAK SEARCH
PLAY/PAUSE
OPEN/CLOSE
12
Page 14

Troubleshooting Tips
Problem Solution
CD Player doesn’t turn on
No sound
CD Player doesn’t play
CD sound skips
Remote control doesn’t work
EN
• Make sure power cord is securely plugged into the AC power
outlet.
• Unplug the unit for a moment, then plug it back in.
• Check the outlet by plugging in another device.
• Ensure that a disc is loaded on the CD compartment tray.
• Adjust volume setting.
• Check for proper connection of cables between speakers and
amplifer and CD player.
• Make sure volume is not muted. To de-activate, press MUTE on
the remote control.
• Make sure the tray contains at least one disc.
• Make sure that discs’ labels are facing up.
• Make sure that Pause mode is not activated.
• Use a CD lens cleaner to clean the lens.
• Clean the disc (refer to Care and Maintenance).
• Check disc for warping, scratches, or other damage.
• Ensure that the CD player is placed on a solid and level surface.
• Check for vibartions or shock that may affect the CD player.
Move the CD player to another location if necessay.
• Make sure the CD player is plugged into a working AC outlet.
• Make sure that the batteries are correctly installed in the
remote control.
• Replace weak batteries (DO NOT mix old batteries with fresh
ones, it can cause damage to the remote control).
• Point the remote directly at the front of the unit when pressing
the buttons.
• Move closer to the CD player with the remote control.
• Make sure that there are no obstacles between the remote and
the unit.
Care & Maintenance
Cleaning the Exterior
Disconnect the system from AC power before
cleaning the exterior of the system with a soft
clean cloth.
Handling Compact Discs
• Do not touch their signal surfaces. Hold by
the edges, or by one edge and the hole.
• Do not affix labels or adhesive tape to the
label surfaces. Also, do not scratch or
damage the label.
• Discs rotate at high speeds inside the player.
Do not use damaged (cracked or warped)
discs.
Cleaning Compact Discs
• Dirty discs can cause poor sound quality.
Always keep discs clean by wiping them
gently with a soft cloth from the inner edge
toward the outer perimeter.
• If a disc becomes very dirty, wet a soft cloth
in water, wring it out well, wipe the dirt
away gently, and then remove any water
drops with a dry cloth.
• Do not use record cleaning sprays or
antistatic agents on discs. Also, never clean
the discs with benzene, thinner, or other
volatile solvents which may cause damage to
the disc surface.
13
Page 15

Index
EN
A
AC power outlet 3
Amplifier 3
Assigning CD titles and play order 9
ATS (Auto Track Skip) 4
Auxiliary 3
C
Cables 2,3
Care and maintenance 13
CD display messages 10
Cleaning compact discs 13
Clearing 4
Clearing the program 8
Clearing the ATS program 9
Connections 3
Creating an ATS program 9
D
Digital Opitcal Output 3
Direct disc access 4
Direct track access 10
Disc Skip 4, 6
O
Open/close 4
P
PHONES (jack) 5
Phones level 5
PLAY/PAUSE 4, 6
Playing discs 7
Polarized Plug 3
POWER 4, 6
Program 4
Programming play order 8
R
Recallingand editing program 8
Recalling and editing ATS program 9
Remote control 6, 12
Repeat 4, 6, 8
S
Shuffle 4, 6, 8
Stop 4, 6, 8
E
Erasing CD Titles 10
H
Handling compact discs 13
I
Input jack 3
L
Limited Warranty 15, 16
Loading Discs 7
Locations 2
M
Main Unit 4
Moisture 2
Music Calendar 5
Mute 6
T
Time edit 10
Track Search 6
Troubleshooting Tips 13
U
Unpack 2
V
Vaccum Fluorescent Display 5
14
Page 16

US Warranty
What your warranty cover:
Any defect in material or workmanship.
For how long after our purchase:
• One year.
(The warranty period for rental units begins with the first rental or 45 days from date of
shipment to the rental firm, whichever comes first.)
What we will do:
• Provide you with a new or, at our options, a refurbished unit.
• The exchange unit is under warranty for the remainder of the original product’s warranty
period.
How to make a warranty claim:
• Properly pack your unit. Included any cables, etc., which were originally provided with the
product. We recommend using the original carton and packing materials.
• Included in the package evidence of purchase date such as the bill of sale. Also print your
name and address and a description of the defect. Send standard UPS or its equivalent to:
Thomson Consumer Electronic, Inc.
Product Exchange Center
11721 B Alameda Av.,
Socorro, TX 79927
• Pay any charges billed to you by the Exchange Center for service not covered by the
warranty.
• Insure your shipment in case of loss or damage. Thomson accepts no liability in case of
damage or loss.
• A new or refurbished unit will be shipped to you prepaid freight.
What your warranty does not cover:
• Customer instruction. (Your Owner’s Manual provides information regarding operating
instructions and user controls. For additional information, ask your dealer.)
• Installation and set-up service adjustments.
• Batteries.
• Damage from misuse or neglect.
• Products which have been modified or incorporated into other products.
• Products purchased or serviced outside USA.
• Acts of God, such as but not limited to lightning damage.
Product Registration:
• Please complete and mail the Product Registration Card packed with your unit. It will make
it easier to contact you should it ever be necessary. The return of the card is not required
for warranty coverage.
How state law relates to this warranty:
• This warranty gives you specific legal rights, and you may have other rights which vary from
state to state. If you purchased your product outside the USA:
• This warranty does not apply. Contact your dealer for warranty information.
EN
15
Page 17

Canadian Warranty
EN
Thomson Consumer Electronics Canada, Inc. warrants to the purchaser or gift recipient that if
any manufacturing defect becomes apparent in this product within 1 year from the original
date of purchase, it will be replaced free of charge, including return transportation.
This warranty does not include damage to the product resulting from accidents misuse or
leaking batteries.
Should your product not perform properly during the warranty period, either:
1. Return it to the selling dealer with proof of purchase for replacement,
OR
2. Remove the batteries (where applicable), and pack product complete with accessories in the
original carton (or equivalent).
Mail prepaid (with proof of purchase) and insured to:
Thomson Consumer Electronics Canada, Inc.
Distribution Centre
6200 Edwards Blvd
Mississauga, Ontario L5T 2V7
The provisions of this written warranty are in addition to and not a modification of or
subtraction from the statutory warranties and other rights and remedies contained in any
applicable legislation, and to the extent that any such provisions purport to disclaim, exclude
or limit any such statutory warranties and other rights and remedies, such provisions shall be
deemed to be amended to the extent necessary to comply therewith.
If you are unable to find a qualified servicer for out of warranty service, you may write to:
Thomson Consumer electronics Canada, Inc.
P.O. Box 0944
Indianapolis, Indiana, U.S.A., 46206-0944
Attach your sales receipt to this booklet for future reference. This information is required if
service is needed during the warranty period.
PURCHAE DATE ________________________________________________________
NAME OF STORE________________________________________________________
16
 Loading...