

Page 1
FOR YOUR RECORDS
In the event that service should be required, you may need both the model number and the serial number.
In the space below, record the date and place of purchase.
Date of Purchase:
Place of Purchase:
SERVICE INFORMATION
This product should be serviced only by those specially trained in appropriate servicing techniques. For
instructions on how to obtain service, refer to the warranty included in this Guide.
Main plug is used as the disconnect device, it shall remain operable and should not be obstructed during
intended used. To be completely disconnected the apparatus from supply mains, the main plug of the
apparatus shall be disconnected from the mains socket outlet completely.
The descriptions and characteristics given in this document are given as a general indication and not as a guarantee. In order to
provide the highest quality product possible, we reserve the right to make any improvement or modification without prior
notice. The English version serves as the final reference on all products and operational details should any discrepancies arise in
other languages.
HEADPHONES USE
When you attach headphones (not included), the speaker is automatically silenced for private listening.
Make sure you turn down the volume on the unit before you put on headphones. Increase the volume to
the desired level only after headphones are in place.
CUE/REVIEW
This feature is helpful in finding the beginning or the end of the recorded segment on the tape.
When in the Play mode, press and hold the F.FWD or REW button and listen for a change from noise to
silence (signaling the end of the recording) or from silence to noise (beginning of recording).
When you reach the segment of tape you want to listen to, release the F.FWD or REW button. Use the
same procedure if you want to skip a prerecorded portion or if you want to listen to the same segment
again.
AUTOMATIC STOP
When the unit is operating in the Play or Record mode and the tape reaches its end, the unit will
automatically turn off and return all buttons to their off position.
ERASING CASSETTES
To erase a tape or a segment of the tape, simply rewind and record over the unwanted material.
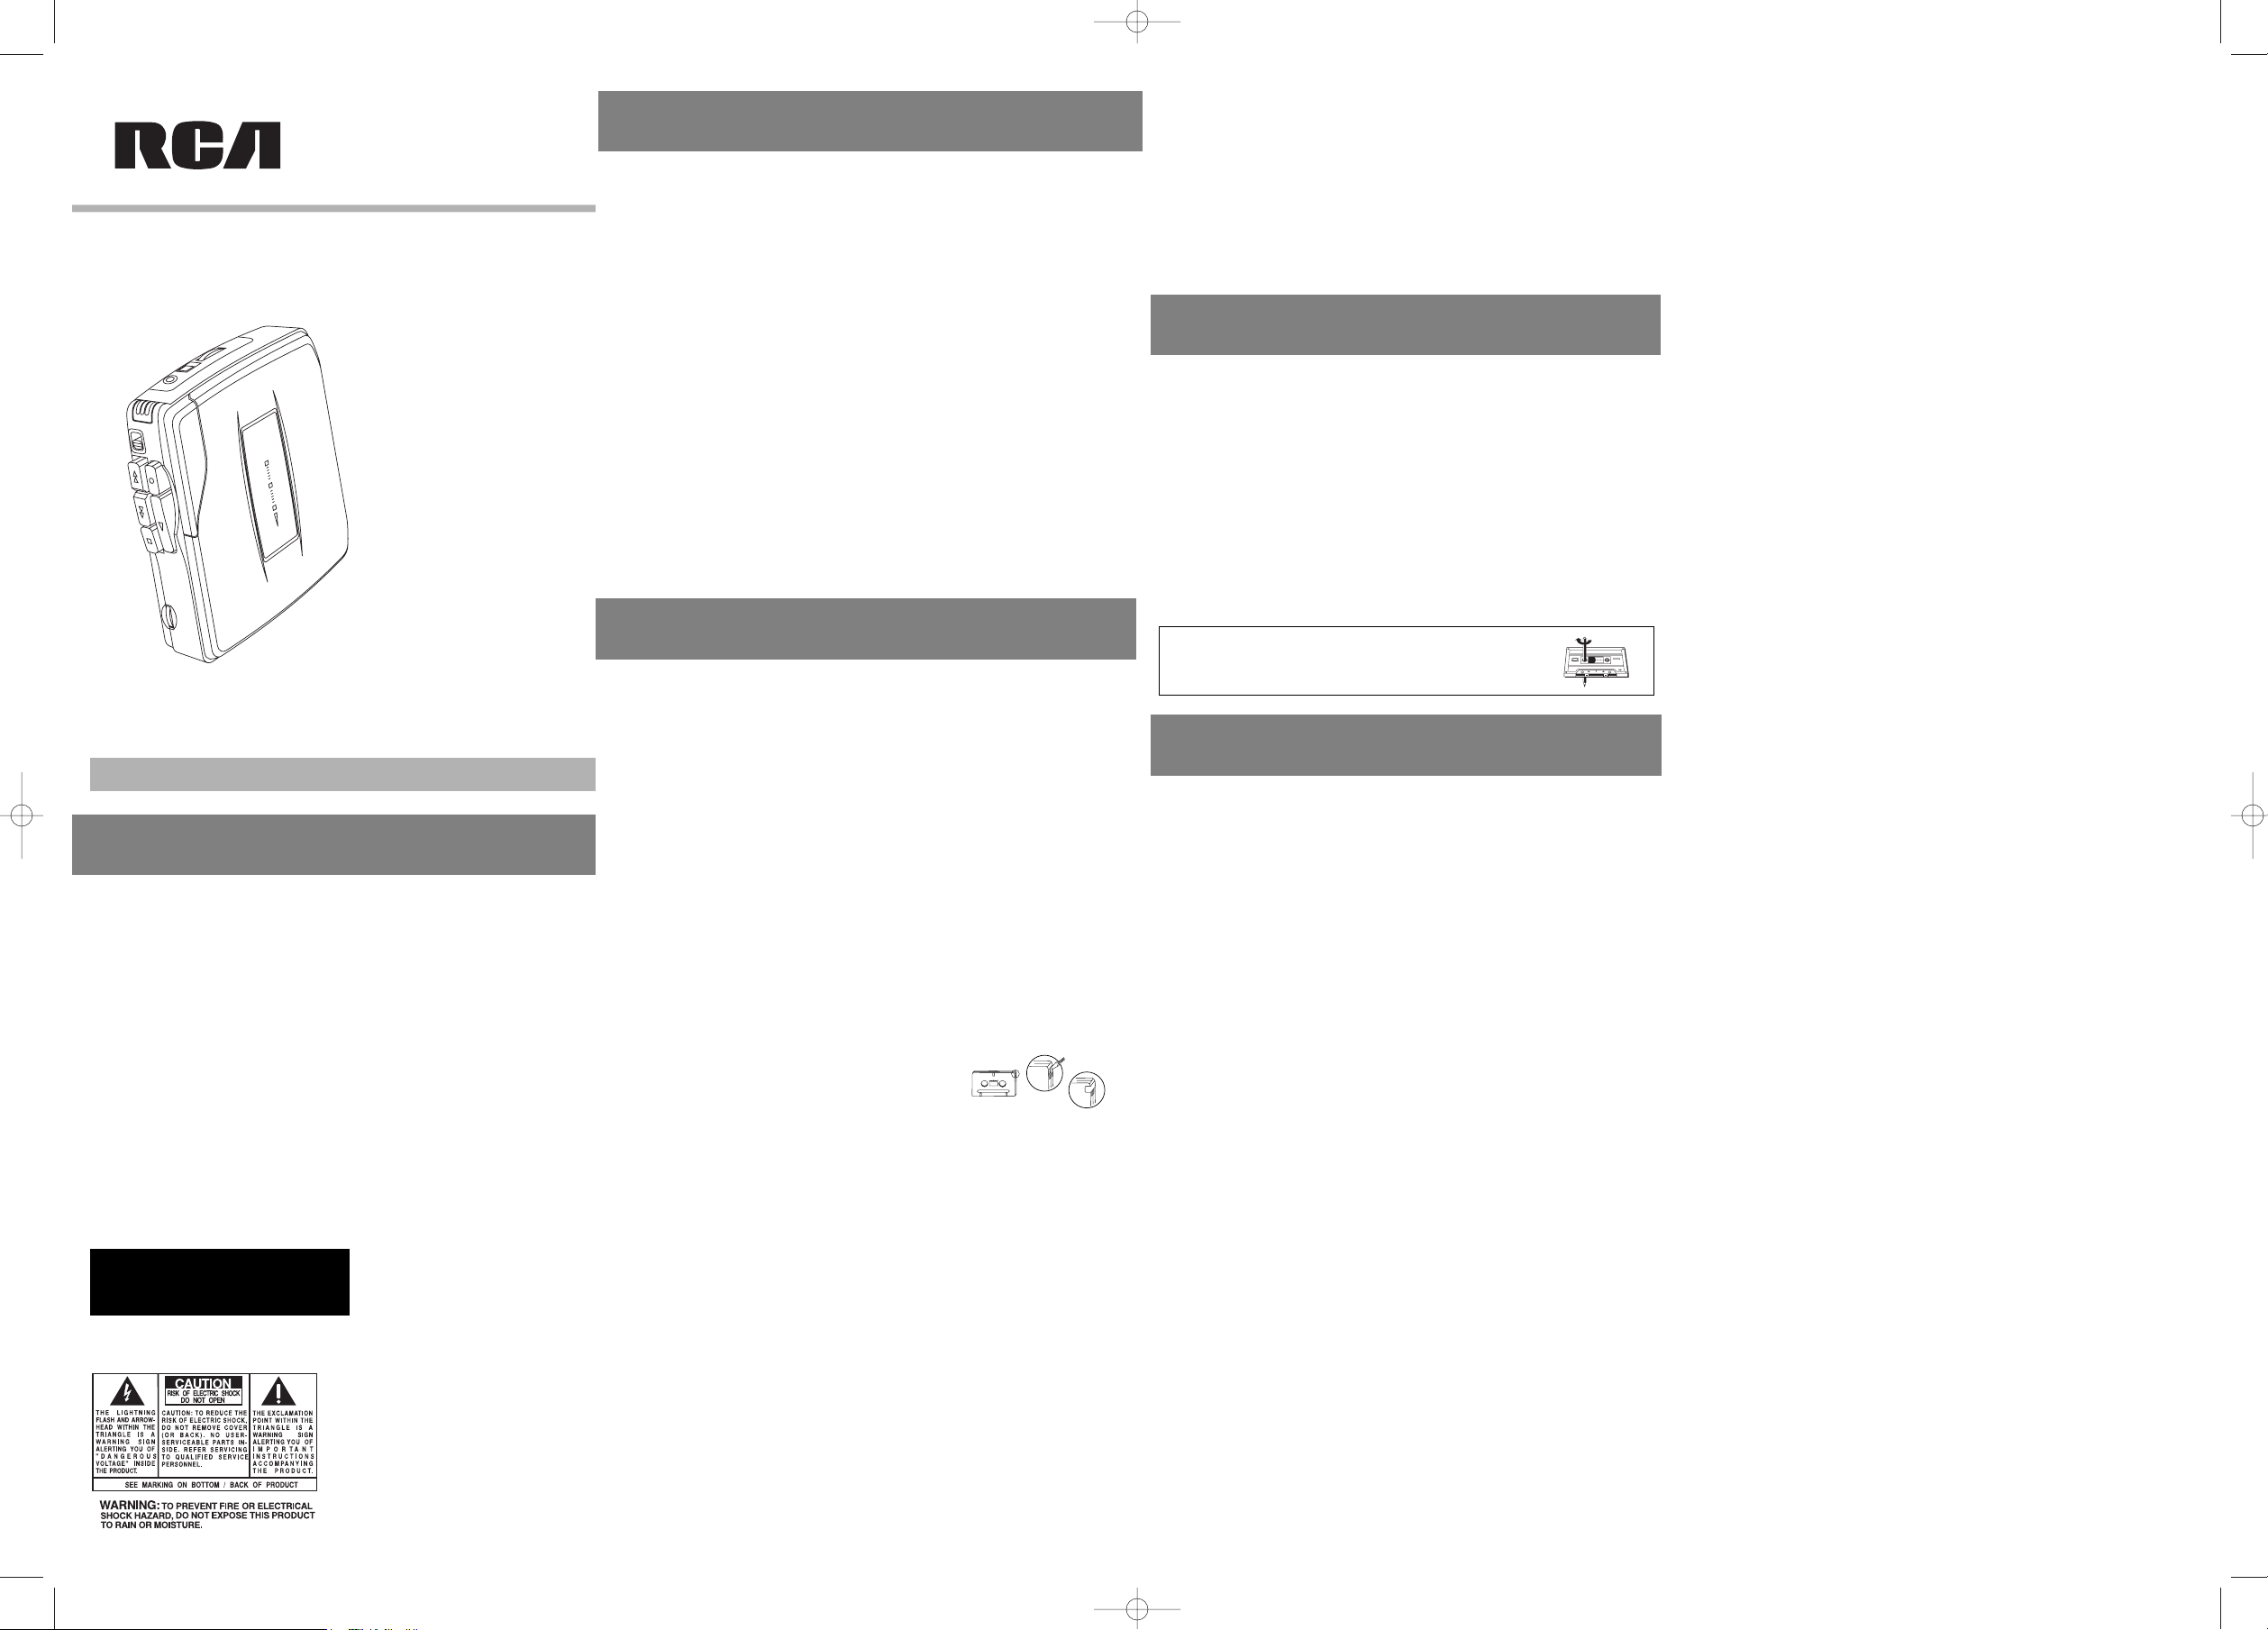
PREVENTING ACCIDENTAL ERASURE
Whenever you make a recording, all material on the tape will be automatically erased.
When you have a recording you want to keep permanently, break out the rear left tab of the side you
want to save.
When a cassette with the tab broken is inserted in the cassette compartment, accidental erasure is
prevented by a lever in the mechanism that keeps the RECORD button from pressing down.
Cellophane tape can be placed over the broken tab if you decide later that you want to record over the
material on that side.
NOTE: This unit is equipped with a cassette sensing mechanism. This mechanism prevents the RECORD
button from being pressed down when a cassette is not present.
CAUTION/CARE
Do not expose the unit to extreme temperatures, such as near a hot stove or inside a car parked under
the sun. Such conditions can damage the unit. Always clean the unit with a soft cloth, dampened with
water only.
Cleaning the Heads: Iron oxide particles will gradually build up on parts that touch the tape. This can
cause a muffled sound. Use liquid head cleaner or a head cleaning tape to clean the heads.
LIMITED WARRANY (US)
What your warranty covers:
• Defects in materials or workmanship.
For how long after your purchase:
• One year from date of purchase.
The warranty period for rental units begins with the first rental or 45 days from date of
shipment to the rental firm, whichever comes first.
What we will do:
• Provide you with a new, or at our option, a refurbished unit. The exchange unit is under
warranty for the remainder of the original product’s warranty period.
• Proof of purchase in the form of a bill of sale or receipted invoice which is evidence that
the product is within the warranty period must be presented to obtain warranty service.
For rental firms, proof of first rental is also required.
How to make a warranty claim:
• Properly pack your unit. Include any cables, etc., which were originally provided with the
product. We recommend using the original carton and packing materials.
• Include evidence of purchase date such as the bill of sale. Also print your name and
address and a description of the defect. Send via standard UPS or its equivalent to:
Thomson Inc.
Product Exchange Center
11721 B Alameda Avenue
Socorro, Texas 79927
• Insure your shipment for of loss or damage. Thomson accepts no liability in case of
damage or loss en route to Thomson.
• Pay any charges billed to you by the Exchange Center for service not covered by the
warranty.
• A new or refurbished unit will be shipped to you freight prepaid.
What your warranty does not cover:
• Customer instruction. (Your Owner’s Manual provides information regarding operating
Instructions and user controls. For additional information, ask your dealer.)
• Installation and setup service adjustments.
• Batteries.
• Damage from misuse or neglect.
• Products which have been modified or incorporated into other products.
• Products purchased or serviced outside the USA.
• Acts of nature, such as but not limited to lightning damage.
Product Registration:
• Please complete and mail the Product registration Card packed with your unit. It will
make it easier to contact you should it ever be necessary. The return of the card is not
required for warranty coverage.
IT IS IMPORTANT TO READ THIS INSTRUCTION BOOK PRIOR TO USING YOUR NEW PRODUCT FOR THE FIRST TIME.
NOUS VOUS RECOMMANDONS DE LIRE CE MANUEL D’INSTRUCTIONS AVANT D’UTILISER VOTRE NOUVEAU PRODUIT POUR LA PREMIÈRE FOIS.
User manual
Guide de l’utilisateur
RP3536
Thomson Inc.
P. O . Box 1976
Indianapolis, IN 46206-1976
© 2007 Thomson Inc.
Trademark(s) ® Registered
Marca(s) ® Registrada(s)
Marque(s) ® Deposée(s)
www.rcaaudiovideo.com
Printed In China / Imprimé à Chine
5633753B (EN/F)
POWER
There are two ways to supply power to your recorder:
BATTERY INSTALLATION
1. Press down on the battery door and slide in the direction of the arrow.
2. Insert two "AA" batteries (not included) as shown in the diagram on the back
of the unit.
3. Replace the battery door.
IMPORTANT BATTERY INFORMATION
• Alkaline batteries are recommended for best results. Using nickel-cadmium
rechargeable batteries may result in shorter playing time.
• If you do not intend to use the unit for a month or more, remove the batteries
to avoid leakage or subsequent damage.
• Dispose of batteries in the proper manner, according to federal, state and local
regulations.
• Any battery may leak electrolyte if mixed with a different battery type; if
inserted incorrectly; if all batteries are not replaced at the same time; if
disposed of in fire; or if an attempt is made to charge a battery not intended to
be recharged.
• Discard leaky batteries immediately to avoid possible skin burns or other
personal injury.
AC/DC POWER CONVERTER (NOT INCLUDED)
You can use an AC/DC power converter to operate your recorder. Plug the barrel end of the converter into the
recorder's 3V DC jack - automatically disconnecting the batteries - and then plug into an AC household outlet.
TO INSERT OR REMOVE A CASSETTE
Make sure all buttons are in their "off" (up) position before attempting to open the cassette compartment
door.
1. Grasp both sides of the cassette compartment door and lift up.
2. Gently slide in a cassette with the exposed tape facing out and the side you
want to hear/record showing through the cassette door window.
3. Close cassette compartment door.
MIC SENSITIVITY SWITCH
Select HI sensitivity for recording at conferences or for general use.
Select LO sensitivity for close dictation.
RECORDING
1. Insert a blank cassette.
2. Select MIC sensitivity (HIGH or LOW).
3. Press the RECORD button. (The PLAY button will automatically be pressed at the
same time).
NOTE: If the RECORD button does not depress, see "Preventing Accidental
Erasure."
4. Speak normally into the microphone. To obtain the best recording quality, place
the recorder with the microphone freely exposed to sound source and as close
as possible.
5. When you finish recording, press the STOP button.
NOTE: The ALC (Automatic Level Control) will set
the record level for optimum recordings, regardless
of the volume setting. Avoid recording near
unwanted noise sources, such as air conditioners,
fans, etc.
PAUSE
The PAUSE feature allows you to momentarily stop tape activity in any mode without resetting the control
buttons.
To use, simply slide the PAUSE switch to the ON position. Slide the switch back to the OFF position to resume
activity.
PLAYBACK
To listen to a prerecorded cassette:
1. Insert a cassette as explained above.
2. Press the REW button to rewind the tape to its starting point if necessary.
3. Press the PLAY button.
4. Adjust VOLUME to your desired level.
VARIABLE SPEED PLAYBACK
During the playback, you can adjust the speed of the prerecorded tapes by rotating the Variable Speed
Playback knob towards the MAX (maximum) position. Tape playback will be approximately 30-50 percent
faster than normal at the MAX position.
F.FWD AND REW
When in the Stop mode, you can use these buttons to adjust the tape position. Press F.FWD to move th tape
quickly forward. Press REW to move the tape quickly backward.
Powering the Recorder
Warranty
Care & Maintenance
Using the Recorder
Limitation of Warranty:
• THE WARRANTY STATED ABOVE IS THE ONLY WARRANTY APPLICABLE TO THIS
PRODUCT. ALL OTHER WARRANTIES, EXPRESS OR IMPLIED (INCLUDING ALL IMPLIED
WARRANTIES OF MERCHANTABILITY OR FITNESS FOR A PARTICULAR PURPOSE) ARE
HEREBY DISCLAIMED. NO VERBAL OR WRITTEN INFORMATION GIVEN BY THOMSON
INC., ITS AGENTS OR EMPLOYEES SHALL CREATE A GUARANTY OR IN ANY WAY
INCREASE THE SCOPE OF THIS WARRANTY.
• REPAIR OR REPLACEMENT AS PROVIDED UNDER THIS WARRANTY IS THE EXCLUSIVE
REMEDY OF THE CONSUMER. THOMSON INC. SHALL NOT BE LIABLE FOR INCIDENTAL
OR CONSEQUENTIAL DAMAGES RESULTING FROM THE USE OF THIS PRODUCT OR
ARISING OUT OF ANY BREACH OF ANY EXPRESS OR IMPLIED WARRANTY ON THIS
PRODUCT. THIS DISCLAIMER OF WARRANTIES AND LIMITED WARRANTY ARE
GOVERNED BY THE LAWS OF THE STATE OF INDIANA. EXCEPT TO THE EXTENT
PROHIBITED BY APPLICABLE LAW, ANY IMPLIED WARRANTY OF MERCHANTABILITY OR
FITNESS FOR A PARTICULAR PURPOSE ON THIS PRODUCT IS LIMITED TO THE
APPLICABLE WARRANTY PERIOD SET FORTH ABOVE.
How state law relates to this warranty:
• Some states do not allow the exclusion nor limitation of incidental or consequential
damages, or limitations on how long an implied warranty lasts, so the above limitations or
exclusions may not apply to you.
• This warranty gives you specific legal rights, and you also may have other rights that vary
from state to state.
If you purchased your product outside the USA:
• This warranty does not apply. Contact your dealer for warranty information.
LIMITED WARRANY (CANADA)
Thomson multimedia Ltd. warrants to the purchaser or gift recipient that if any
manufacturing defect becomes apparent in this product within 1 year from the original date
of purchase, it will be replaced free of charge, including return transportation.
This warranty does not include damage to the product resulting from accidents, misuse or
leaking batteries.
Should your product not perform properly during the warranty period, either:
1. Return it to the selling dealer with proof of purchase for replacement,
OR
2. Remove the batteries (where applicable), and pack product complete with accessories in the
original carton (or equivalent).
— Mail prepaid (with proof of purchase) and insured to:
Thomson Ltd.
Product Distribution Center
6200 Edwards Blvd.,
Mississauga, Ontario, L5T 2V7
Canada
The provisions of this written warranty are in addition to and not a modification of or
subtraction from the statutory warranties and other rights and remedies contained in any
applicable legislation, and to the extent that any such provisions purport to disclaim, exclude
or limit any such statutory warranties and other rights and remedies, such provisions shall be
deemed to be amended to the extent necessary to comply therewith.
If you are unable to find a qualified servicer for out of warranty service, you may write to:
Thomson Inc.
P.O. Bo x 0944
Indianapolis, Indiana, U.S.A., 46206-0944
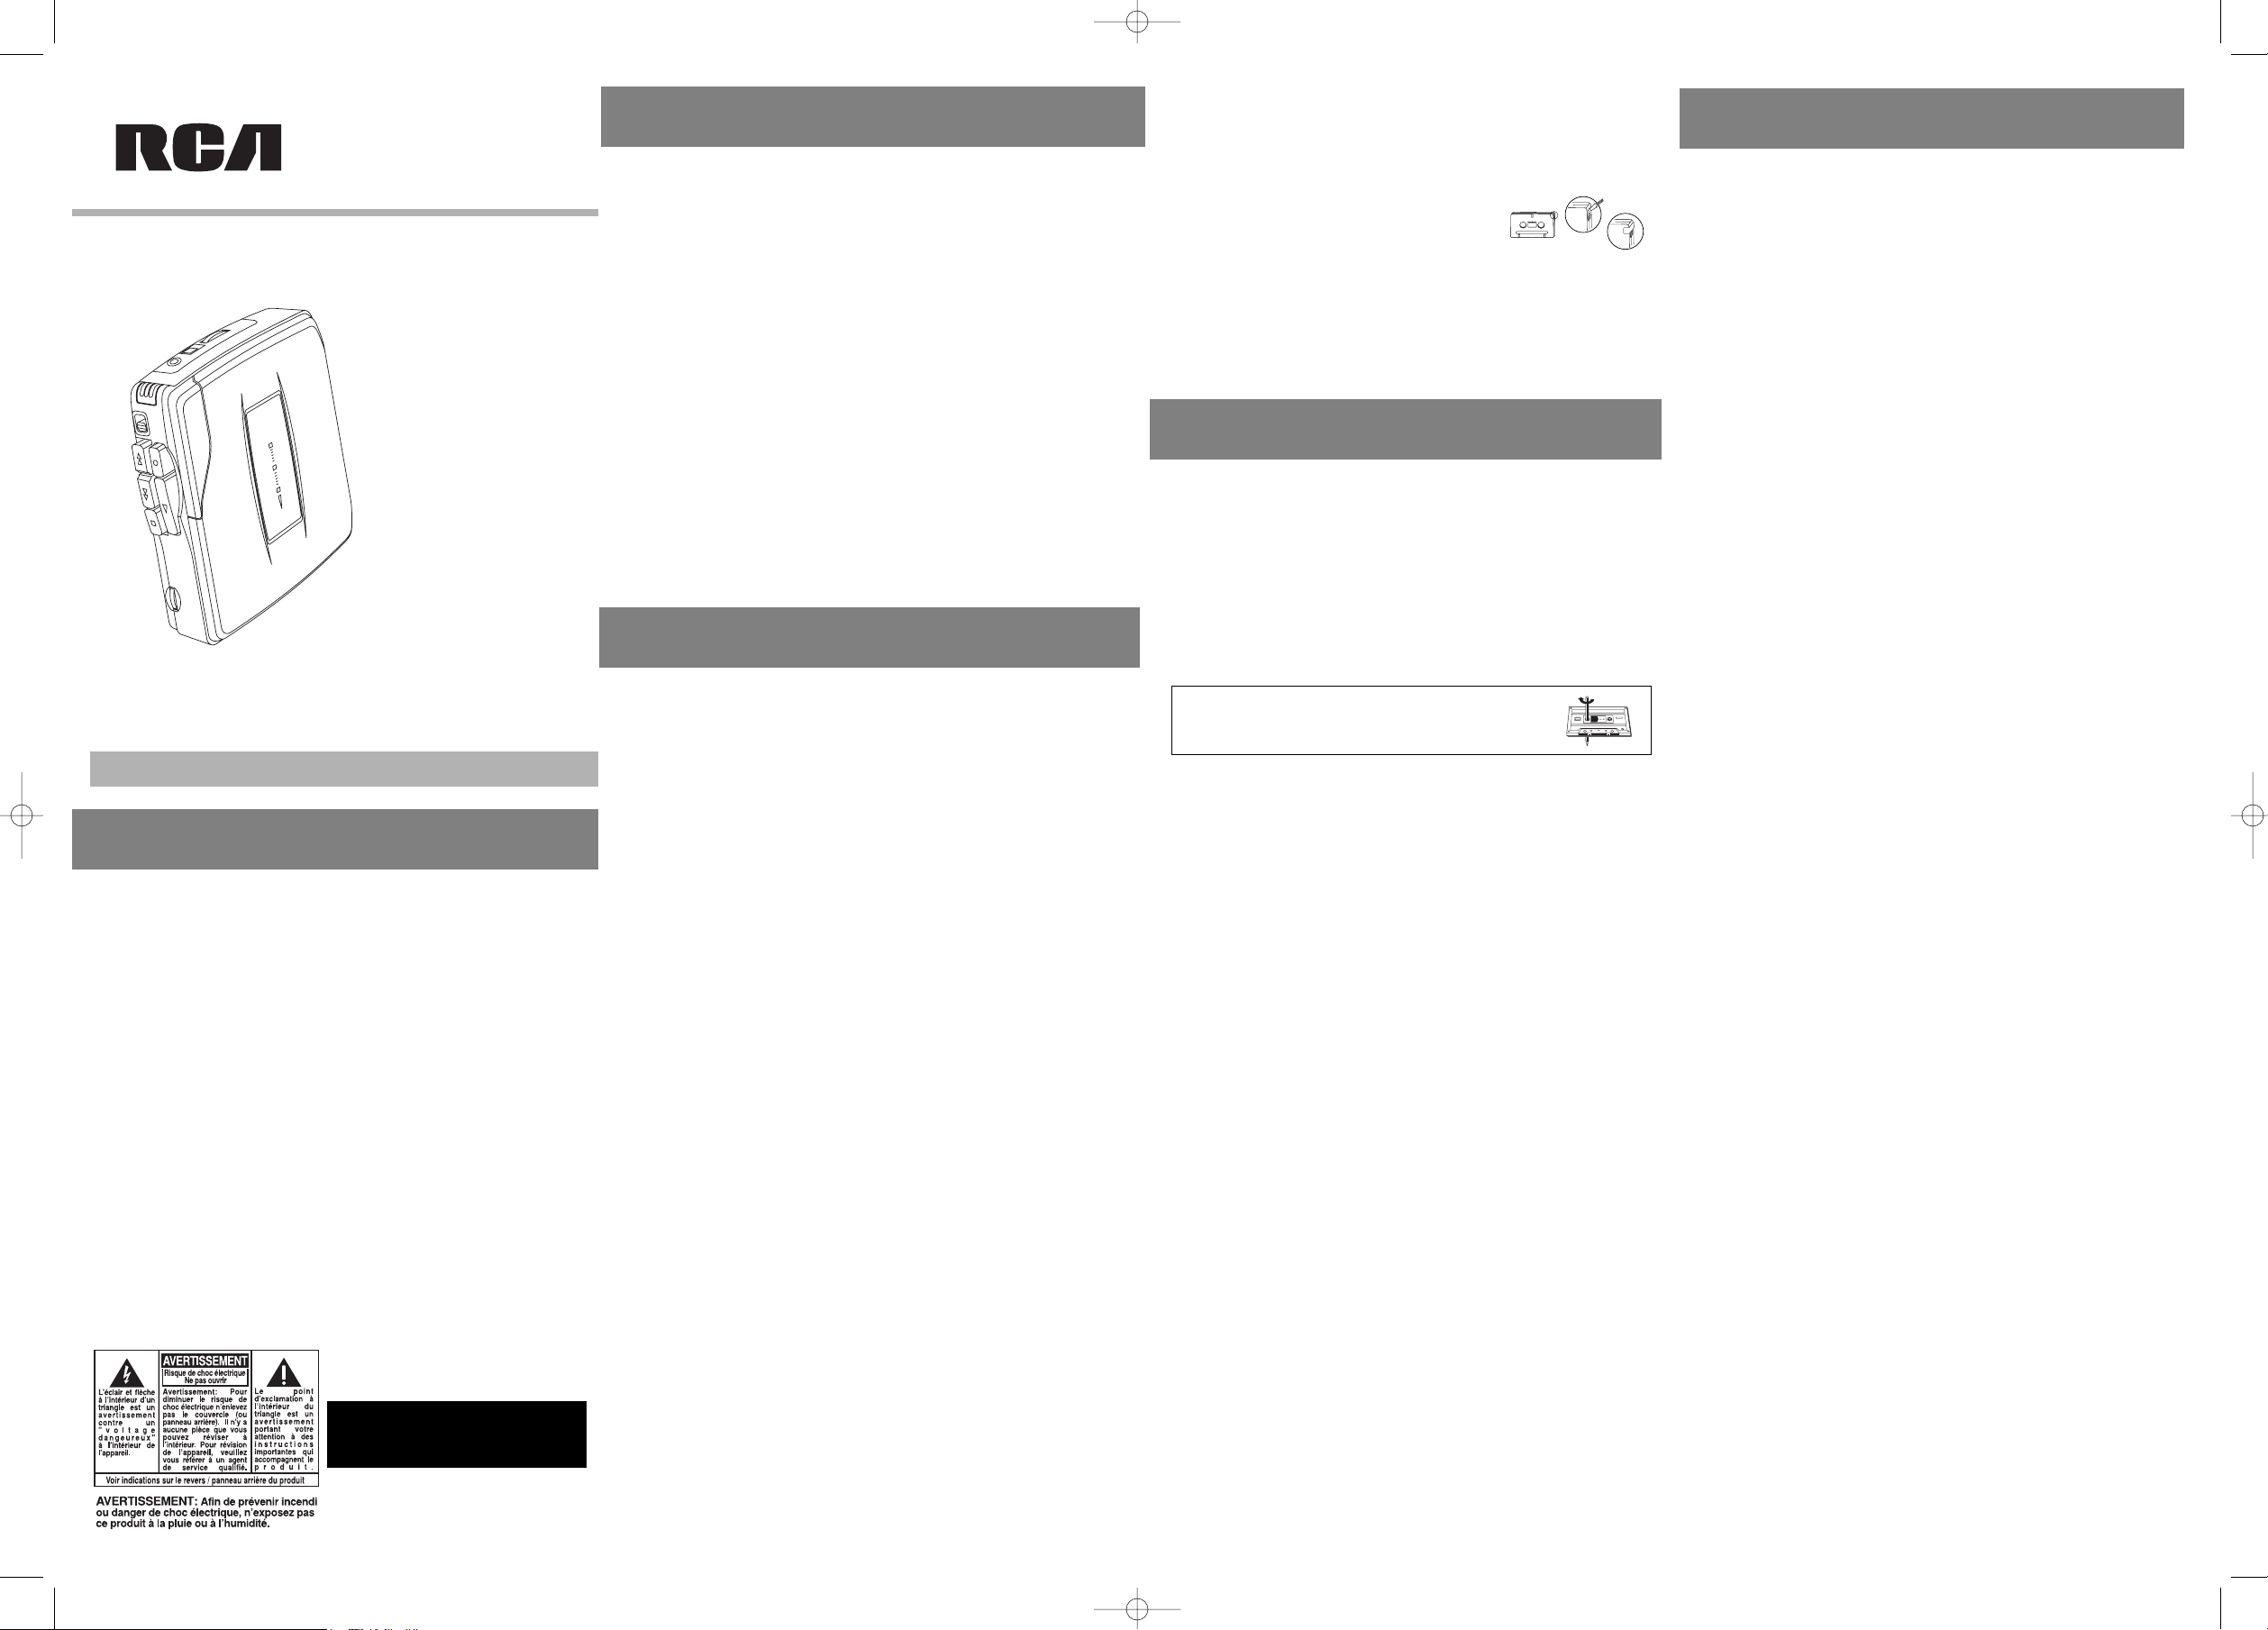
QUIT SLACKING
A little bit of slack in your tapes can cause scratches on the tape, or in
the worse case, the tape could break. If you notice some slack in the
tape, use a pencil to tighten it up before you insert it.
Safety Information
This Class B digital apparatus complies with Canadian
ICES-003.
Cet appareil numérique de la class B est conforme à la
norme du NMB-003 du Canada
RP3536 EN_F 16/7/07 9:43 AM Page 1
A
A
Page 2
POUR VOS DOSSIERS
Vous pourriez avoir besoin des numéros de modèle et de série en cas de réparation.
Inscrivez ci-dessous la date d'achat et l'endroit où vous l'avez acheté :
Date de l’achat :
Endroit de l’achat :
INFORMATION SUR LE SERVICE
Ce produit doit être réparé uniquement par des personnes formées sur les techniques de
réparation appropriées. Pour des instructions sur la manière d’obtenir une réparation,
consultez la garantie incluse avec ce guide.
La fiche pour prise murale est utilisée en tant que moyen de déconnexion; elle doit rester
en état de fonctionnement et ne pas être gênée pendant l’utilisation. Pour déconnecter
complètement l’appareil de l’alimentation électrique, la fiche pour prise murale doit être
déconnectée de la prise murale.
Les descriptions et caractéristiques contenues dans ce manuel sont fournies à titre de
référence générale et non comme garantie. Dans le but de toujours fabriquer le meilleur
produit, nous pouvons apporter des modifications sans préavis. La version anglaise doit être
utilisée comme référence ultime relativement au produit et aux modes de fonctionnement
s’il y avait des différences dans les autres versions.
UTILISATION D'UN CASQUE D'ÉCOUTE
Le branchement du casque d’écoute (non fourni) désactive automatiquement le hautparleur pour une écoute confidentielle.
Assurez-vous de baisser le volume de l’appareil avant d’utiliser un casque d’écoute. Montez
le volume au niveau voulu après avoir mis le casque d’écoute.
IT IS IMPORTANT TO READ THIS INSTRUCTION BOOK PRIOR TO USING YOUR NEW PRODUCT FOR THE FIRST TIME.
NOUS VOUS RECOMMANDONS DE LIRE CE MANUEL D’INSTRUCTIONS AVANT D’UTILISER VOTRE NOUVEAU PRODUIT POUR LA PREMIÈRE FOIS.
User manual
Guide de l’utilisateur
RP3536
ALIMENTATION
Deux manières d’alimenter votre enregistreur sont offertes :
INSTALLATION DES PILES
1. Appuyez sur le couvercle du compartiment des piles puis faites-le glisser en suivant le sens
de la flèche.
2. Insérez deux piles AA (non incluses) comme indiqué sur le diagramme à l’arrière de
l’appareil.
3. Replacez le couvercle du compartiment.
RENSEIGNEMENTS IMPORTANTS SUR LES PILES
• Les piles alcalines sont recommandées afin d’obtenir une meilleure performance.
L’utilisation de piles rechargeables au nickel-cadmium peut réduire le temps d'écoute.
• Retirez les piles pour éviter une fuite ou d’autres dommages si vous n’utilisez pas votre
appareil pendant plus d’un mois.
• Débarrassez-vous des piles d’une manière appropriée, en respectant les réglementations
fédérales, provinciales et locales.
• Une pile peut laisser fuir de l’électrolyte si elle est mélangée avec une pile d'un type
différent, si elle est mal installée, si toutes les piles ne sont pas remplacées en même temps,
si elle est incinérée ou si on tente de recharger une pile qui n'est pas conçue pour être
rechargée.
• Débarrassez-vous immédiatement des piles qui fuient parce qu’elles peuvent causer des
brûlures ou d’autres blessures.
ADAPTATEUR CA/CC (NON INCLUS)
Vous pouvez utilisez un adaptateur CA/CC pour alimenter votre enregistreur. Branchez la fiche
de l’adaptateur dans la prise 3V CC de l’enregistreur puis branchez l’autre fiche dans une prise
murale; les piles seront déconnectées automatiquement.
INSERTION ET RETRAIT D’UNE CASSETTE
Assurez-vous que toutes les touches sont en position « off » (non enfoncées) avant de tenter
d’ouvrir le couvercle du compartiment de la cassette.
1. Saisissez les deux côtés du couvercle du compartiment et soulevez-le vers le haut.
2. Glissez doucement une cassette; le ruban de la cassette devrait faire face à l’extérieur et le
côté que vous désirez écouter ou utiliser pour l’enregistrement devrait être visible à travers
la fenêtre du couvercle.
3. Fermez le couvercle du compartiment de la cassette.
COMMUTATEUR DE SENSIBILITÉ DU MICROPHONE
Sélectionnez la position HI pour enregistrer lors d'une conférence ou en situation normale.
Sélectionnez la position LO pour enregistrer une dictée.
ENREGISTREMENT
1. Insérez une cassette vierge.
2. Sélectionnez la sensibilité du microphone (HIGH ou LOW).
3. Appuyez sur le bouton RECORD. (le bouton PLAY s’enfoncera automatiquement)
REMARQUE : si le bouton RECORD ne s’enfonce pas, voyez la section PRÉVENTION D’UN
EFFACEMENT ACCIDENTEL.
4. Parlez normalement dans le microphone. Pour une meilleure qualité d’enregistrement,
placez le magnétophone le plus près possible de la source à enregistrer et n’obstruez pas le
microphone.
5. Lorsque vous avez terminé l’enregistrement, appuyez sur le bouton STOP.
REMARQUE : le contrôle automatique de niveau (ALC) réglera le niveau d’enregistrement
pour la meilleure qualité possible, sans égard au réglage du volume. Évitez d’enregistrer
près des sources de bruits indésirables, tels que les climatiseurs, les ventilateurs, etc.
PAUSE
La fonction PAUSE vous permet de suspendre temporairement la lecture ou l’enregistrement
sans modifier les boutons de contrôle.
Pour l’utiliser, glissez le commutateur PAUSE à la position « ON ». Replacez l’interrupteur à la
position « OFF » pour reprendre.
LECTURE
Pour écouter une cassette préenregistrée :
1. Insérez la cassette tel qu’expliqué plus haut.
2. Si nécessaire, appuyez sur le bouton REW pour rembobiner la cassette jusqu’au début de
l’enregistrement.
3. Appuyez sur le bouton PLAY.
4. Ajustez le bouton VOLUME au niveau désiré.
LECTURE À VITESSE VARIABLE
Pendant la lecture, vous pouvez ajuster la vitesse de lecture des cassettes préenregistrées en
faisant tourner le bouton de lecture à vitesse variable jusqu’à la position maximale (MAX). La
vitesse de lecture sera environ de 30 à 50 % plus rapide que la normale lorsque le bouton est à
la position MAX.
BALAYAGE VERS L’AVANT ET L’ARRIÈRE
Lorsque vous êtes en mode d’arrêt, vous pouvez utiliser les boutons F.FWD et REW pour régler
la position sur le ruban. Appuyez sur F.FWD pour faire avancer le ruban plus rapidement.
Appuyez sur REW pour faire reculer le ruban plus rapidement.
Alimentation de l’appareil
Utilisation de l’enregistreur
Information relative à la sécurité
Thomson multimédia Ltée. garantie à l’acheteur ou bénificiaire de cadeau que si aucun
défaut de fabrique devient évident dans ce produit à l’intérieur d’un an de la date
originale d’achat, il sera remplacé sans frais, incluant le transport de retour.
Cette garantie n’inclue pas les dommages du produit qui résultent d’accidents, d’usage
non-approprié ou de piles qui fuient.
Si votre appareil ne performe pas adéquatement lors de la période de garantie:
1. Retounez-le avec preuve d’achat au marchand qui l’a vendu pour remplacement,
OU
2. Enlevez les piles (s’il y en a), et emballez le produit avec les accessoires complets dans
la boîte originale (ou équivalent),
Postez à vos frais (avec preuve d’achat) et assuré à:
Thomson Ltd.
Product Distribution Center
6200 Edwards Blvd.,
Mississauga, Ontario, L5T 2V7
Canada
Les provisions de cette garantie écrite sont une addition et non une modification ou
soustraction des garanties statutaires et autres droits et remèdes contenus dans
n’importe quelle législation en vigueur, et dans la mesure où de telles provisions
prétendent désavouer, exclure ou limiter n’importe quelle garantie statutaire et autres
droits et remèdes, telles provisions seront jugées corrigées dans la mesure où elles
doivent se conformer avec ceux-ci.
Si vous êtes incapable de trouver un technicien de révision qualifié pour un service hors
de la garantie, vous pouvez contacter:
Thomson Inc.
P.O. Box 0944
Indianapolis, Indiana, U.S.A., 46206-0944
Garantie Pour Le Canada
REPÉRAGE/REVUE
Cette fonction vous aide à trouver le début ou la fin d’un segment enregistré sur la
cassette.
Lorsque vous êtes en mode de lecture, appuyez et gardez enfoncé le bouton F.FWD ou
REW et écoutez jusqu’à ce que vous entendiez un changement; le passage d’un bruit au
silence indique la fin de l'enregistrement et le passage du silence au son indique le début
de l'enregistrement.
Lorsque vous avez trouvé le segment que vous désirez
écouter, relâchez le bouton F.FWD ou REW. Reprenez les
mêmes étapes lorsque vous désirez sauter un segment
préenregistré ou si vous désirez l’écouter à nouveau.
ARRÊT AUTOMATIQUE
Lorsque le magnétophone est en mode de lecture ou d'enregistrement, il se fermera
automatiquement et désactivera les boutons en arrivant à la fin du ruban.
EFFACEMENT DE CASSETTES
Pour effacer une cassette ou un segment sur le ruban, il suffit de la rembobiner et
d’enregistrer sur la partie à supprimer.
PRÉVENTION D’UN EFFACEMENT ACCIDENTEL
Dès que vous commencez un enregistrement, l’enregistrement existant sur la cassette est
automatiquement effacé.
Si vous voulez conserver un enregistrement, enlevez la languette à l’arrière gauche du
côté de la cassette que vous voulez conserver.
Lorsqu’une cassette dont la languette a été enlevée est insérée dans le compartiment,
l’effacement accidentel sera bloqué par un levier qui empêchera le bouton RECORD d’être
enfoncé.
Si vous décidez ultérieurement d’enregistrer sur ce côté, il suffit de placer un ruban de
cellophane par-dessus la languette brisée.
REMARQUE : cet appareil est doté d’un dispositif de détection de cassette. Il empêche
le bouton RECORD de s’enfoncer s’il n’y a pas de cassette dans l’appareil.
MISE EN GARDE/ENTRETIEN :
N’exposez pas l’appareil à des températures extrêmes, par exemple la chaleur émise par
un four ou l'intérieur d'un véhicule stationné sous le soleil. De telles températures peuvent
endommager l’appareil. Nettoyez toujours l’appareil avec un chiffon doux et n'utilisez que
de l'eau.
Nettoyage des têtes : des particules d’oxyde de fer provenant du ruban magnétique
peuvent s’accumuler sur les pièces qui sont en contact avec le ruban. Celles-ci peuvent
causer un son étouffé. Utilisez un nettoyant liquide pour les têtes ou une cassette de
nettoyage des têtes pour les nettoyer.
Soin et entretien
JEU DU RUBAN
Le jeu du ruban de la cassette peut égratigner le ruban ou, pire,
provoquer sa rupture. Si vous remarquez que le ruban a du jeu,
utilisez un crayon pour rembobiner avant d’utiliser la cassette.
This Class B digital apparatus complies with Canadian
ICES-003.
Cet appareil numérique de la class B est conforme à la
norme du NMB-003 du Canada
RP3536 EN_F 16/7/07 9:43 AM Page 2
A
A
 Loading...