

Page 1
For Your Records
In the event that service should be required, you may need both the model number and
the serial number. In the space below, record the date and place of purchase.
Date of Purchase:
Place of Purchase:
Service Information
This product should be serviced only by those
specially trained in appropriate servicing
techniques. For instructions on how to obtain
service, refer to the warranty included in this
Guide.
Main plug is used as the disconnect device, it
shall remain operable and should not be
obstructed during intended used. To be completely disconnected the apparatus from
supply mains, the main plug of the apparatus shall be disconnected from the mains socket
outlet completely.
The descriptions and characteristics given in this document are given as a general
indication and not as a guarantee. In order to provide the highest quality product possible,
we reserve the right to make any improvement or modification without prior notice. The
English version serves as the final reference on all products and operational details should
any discrepancies arise in other languages.
Precautions
• Never open the cabinet under any circumstances. Never operate
this product with the cabinet removed. Any repairs or internal
adjustments should be made only by a trained service technician.
• Do not touch the player with wet hands. If any liquid enters the
player cabinet, take the player to a trained service technician for
inspection.
NOTE: Only use the adapter that came with this unit. Using other adapters could seriously
damage the unit.
Do not attempt to bypass this safety feature.
Automatic Stop
When your recorder is operating in PLAY or RECORD mode and the end of the tape is
reached, your unit will automatically shut itself off and return the buttons to the OFF
position.
Stand-up Microphone Recording
To record with stand-up microphone, plug the microphone into the MICROPHONE jack and
follow the built-in microphone recording instructions. When the stand-up microphone is
used, the built-in microphone is automatically disconnected.
Tape Erase
To erase a tape simply record over the unwanted recording.
Rewind
To run the tape back to the beginning of your recording, press REWIND. Then press STOP
after you have rewound to the desired point on the tape.
Fast Forward (F-fwd)
Press F-FWD to skip over portions of the tape quickly. Press STOP after you have advanced
to the desired point on the tape.
Pause Control
Your recorder is equipped with a PAUSE control which will stop PLAY & RECORD operation.
Press PAUSE to stop PLAY or RECORD operation. Press again to release PAUSE for
continued operation.
Tape Counter and Reset Button
The reset counter is used to quickly determine the approximate location of different
recording selections.
1. Rewind to the beginning of the tape.
2. Press the Reset Counter once to read "000". After each selection is played or recorded,
make a note of the numbers in the readout window. This will serve as a reference for
the start of the next selection or recording.
3. To locate a selection previously noted, press either F-FWD or REWIND. When the
counter indicates the selection number you desire, press STOP/EJECT.
NOTE: The Reset Counter will not indicate actual distance in units of measure; it
determines only the relative location of each selection.
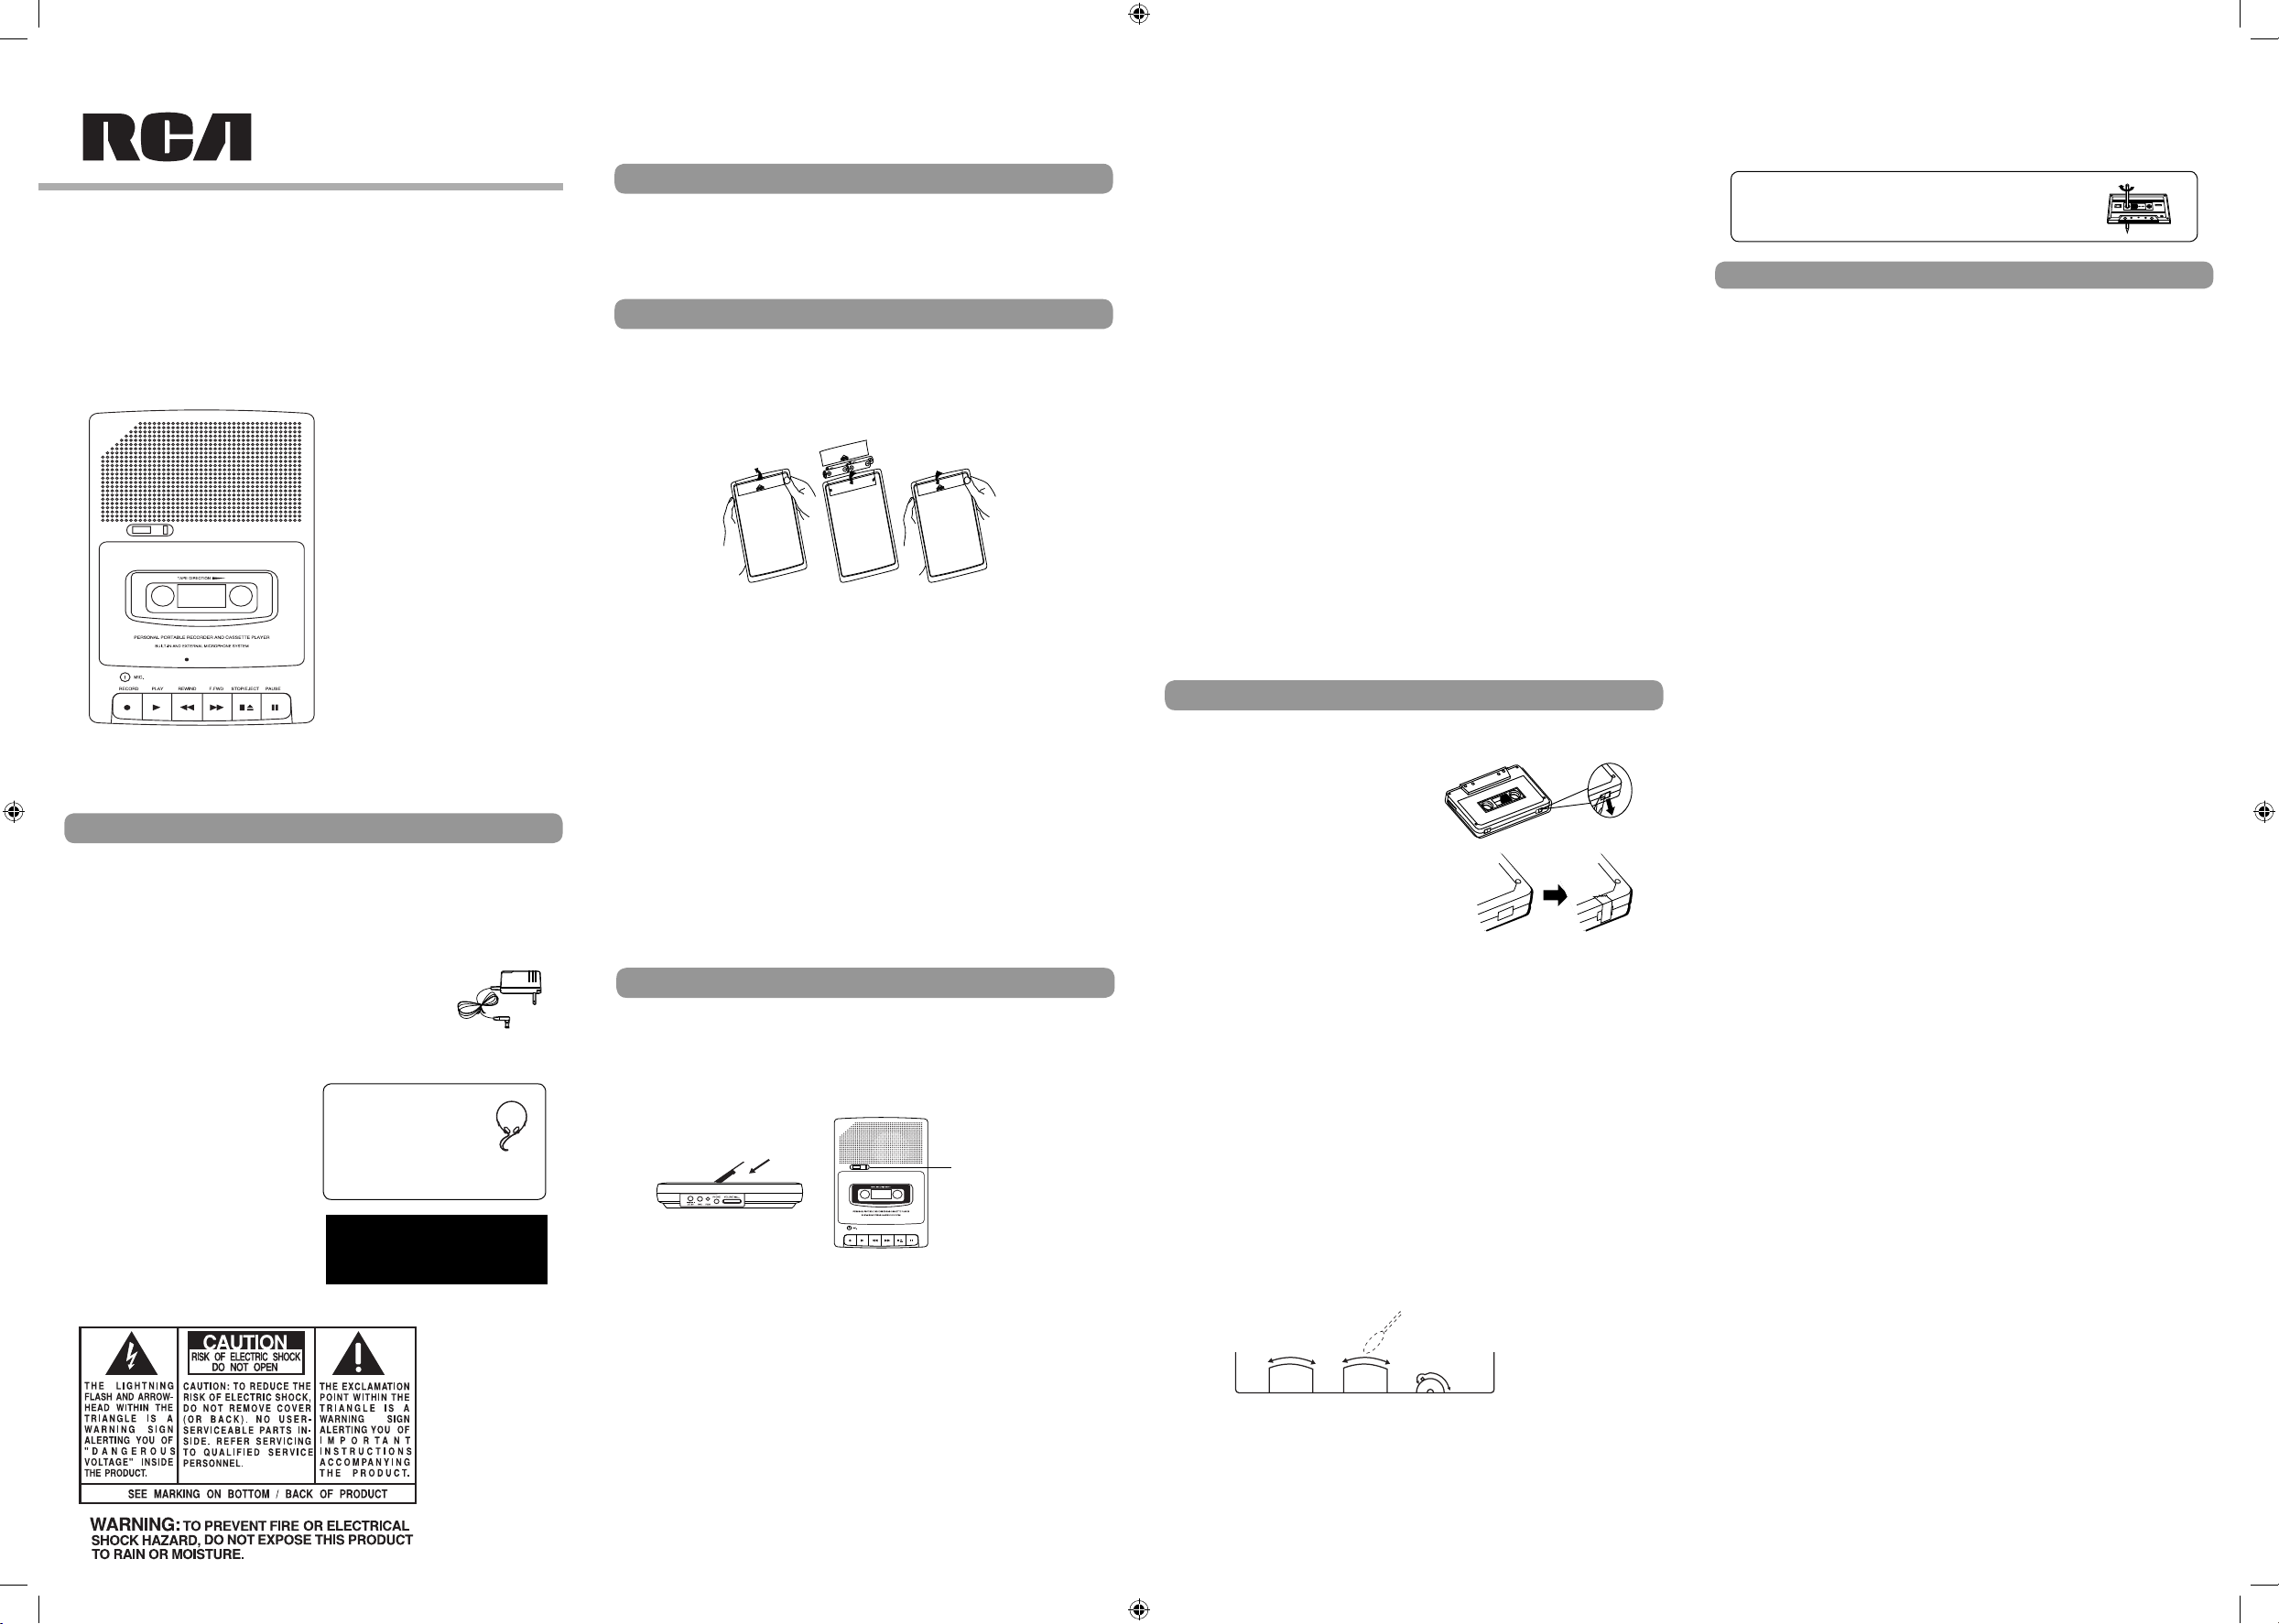
Prevent Accidental Erasure
Whenever you make a recording, any previous recording on the tape is automatically
erased.
When you have a recording you want to keep permanently, snap out the rear left tab of
the side you want to save as shown in the illustration below.
When a cassette with the tab snapped out is inserted into the tape unit, accidental erasure
is prevented by a lever in the mechanism that keeps the RECORD button from depressing.
Cellophane tape can be place over the opening if you decide later to record over the
original recording. Similarly, you can record over purchased pre-recorded cassettes.
PLEASE NOTE: Your unit is equipped with a cassette sensing mechanism. This mechanism
prevents the RECORD button from being depressed when a cassette is not in the unit.
Headphone (Optional)
You can plug a set of headphones to your set. With the headphone plugged in, the
speaker is automatically silenced for private listening. Your set is also equipped with
EARPHONE MONITOR capability when recording direct from other sound sources such as
other tape recorders, radios or phonographs. You can listen to what's being recorded by
plugging in a set of headphones and an adapter.
Remote On/Off Jack (2.5mm)
The use of a remote on/off unit enables you to temporarily stop recording, when using a
remote microphone, without resetting the buttons. Such remote control units are usually
available from local audio supply houses. When selecting a remote control on/off unit, be
sure it is equipped with a 2.5mm plug.
Cleaning the Heads
Iron oxide particles from the magnetic tape can build up on the parts that come in contact
with the tape. These deposits can cause incomplete erasure, muffled playback sound, and
might prevent automatic stop. To clean a cassette tape, open the compartment door, push
the PLAY button and
gently clean the heads, capstan, and pinch wheel with a head cleaner.
Always unplug the power cord before cleaning, and allow 30 minutes drying
time when using a liquid cleaner.
Clean heads after every 25 hours of use.
• Demagnetize the head occasionally with a head demagnetizing cassette (available from
many audio equipment stores).
• Never use any metal objects on or near the tape heads.
Do not allow any cleaning material to fall into the tape assembly.
Tape Care
• Don’t expose tapes to sunlight or store in hot places. High temperatures may warp the
shell or damage the tape itself.
• Keep cassettes in their boxes when not in use.
• Cassette tapes can be erased by magnetic fields produced by magnets, electric motors,
electrical transformers, and other devices. Keep tapes away from magnets and magnetic
fields.
It is important to read this instruction book prior to using your new product for the first time.
Nous vous recommandons de lire ce manuel d’instructions avant d’utiliser votre nouveau produit pour la première fois.
user
manual
RP3503
Thomson Inc.
P. O. Box 1976
Indianapolis, IN 46206-1976
© 2006 Thomson Inc.
Trademark(s) ® Registered
Marca(s) ® Registrada(s)
Marque(s) ® Deposée(s)
www.rca.com
Printed In China / Impreso en China
56418020 (EN/F)
Important Battery Information
• Batteries may leak electrolyte if inserted incorrectly, if disposed of in fire, or if an
attempt is made to charge a battery not intended to be recharged.
• Discard leaky batteries immediately. Leaking batteries can cause skin burns or other
personal injury.
• Dispose of batteries, according to federal, state, and local regulations.
Unpacking Your Unit
You should have the following:
•one main unit
• one AC power converter
• one stand-up microphone
• one user’s guide
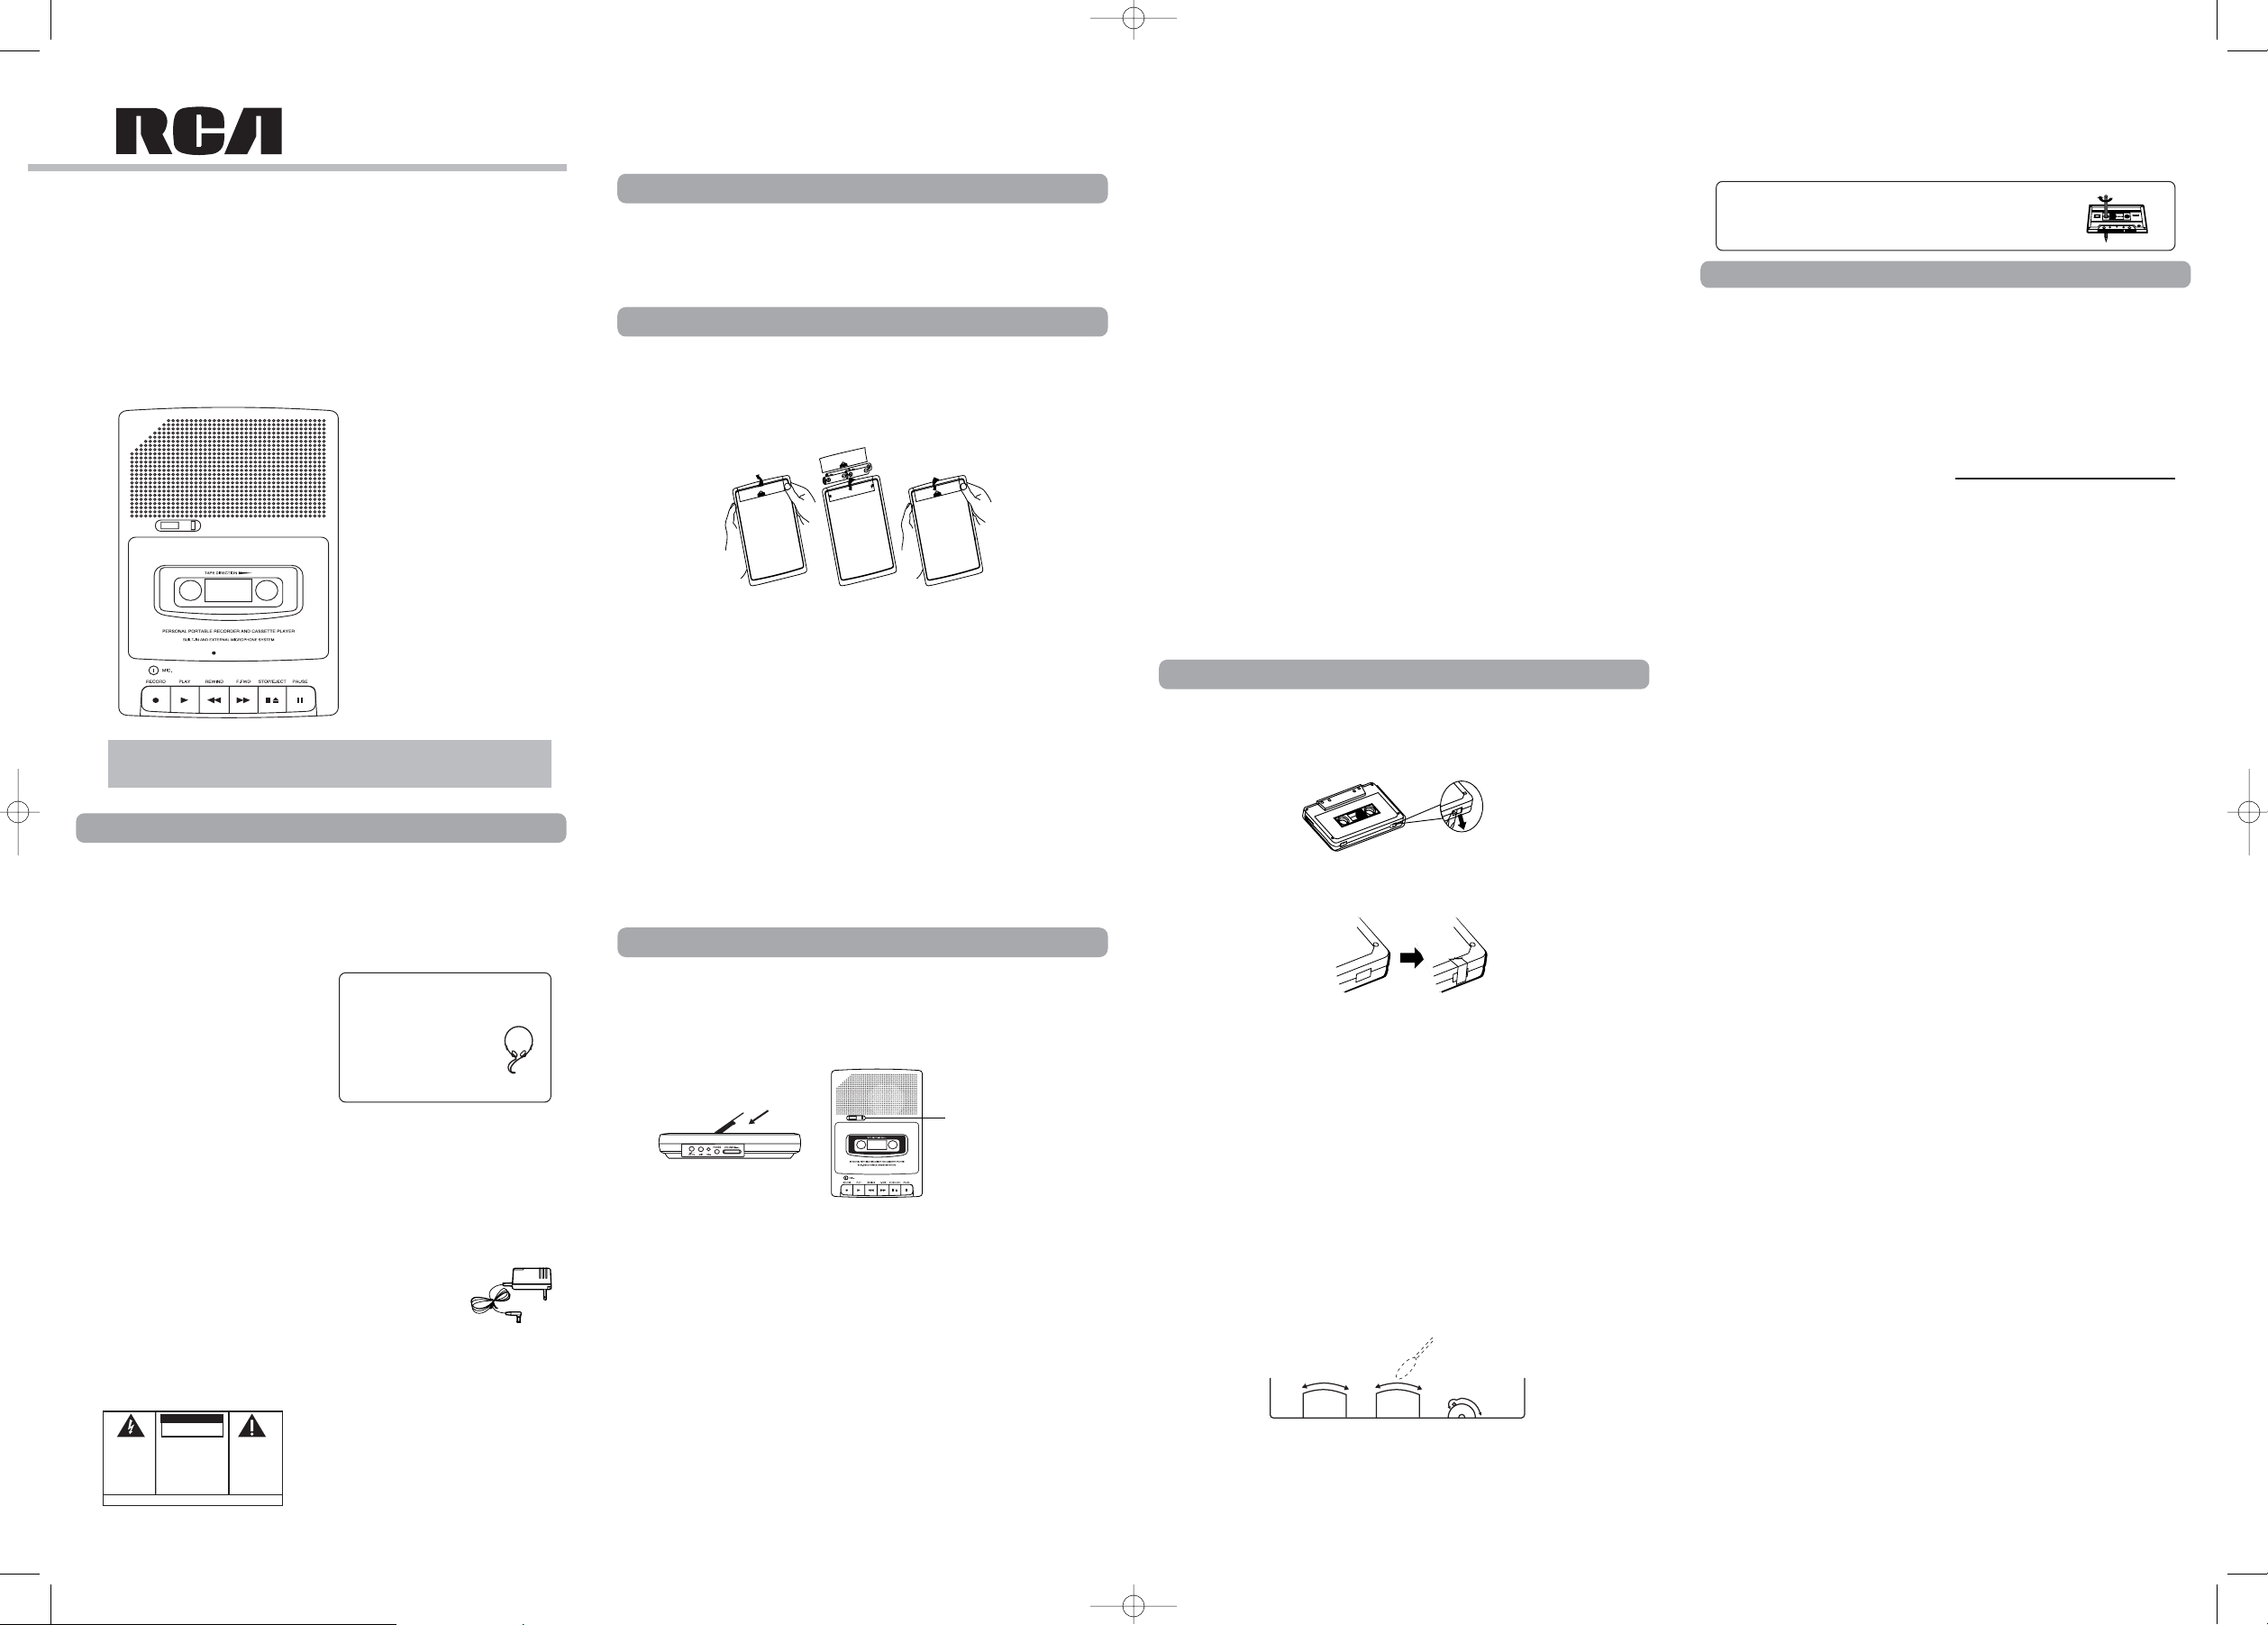
Battery Installation
1To remove the battery compartment door (located on the cabinet bottom) press the
snap tab and lift the door off the cabinet back.
2 Insert 4 "AA" - size batteries (not included) into the battery compartment. Be sure the
(+) or cap end of each battery is installed as shown on the battery diagram.
3. Replace the battery door.
NOTE: If the recorder begins to sound distorted, or if the tape reels turn very slowly or not
at all, be sure to check with a new set of batteries or another cassette before seeking
service.
IMPORTANT: Be sure to remove the batteries when storing the set for more than a few
weeks at a time. Leaky batteries can badly damage the recorder. When discarding
batteries, be sure to dispose of them in the proper manner, according to provincial and
local regulations.
Always push STOP before storing. This will relieve pressure on certain parts in the recorder
that might deform after long periods of time.
AC Power Converter
The AC Power Converter plugs into the 6-V DC PWR JACK on the recorder (which
automatically disconnects the batteries), and plugs into 120 -volt AC household power.
IMPORTANT: The AC Power Converter coming with this unit is intended to be correctly
orientated in a vertical or floor mount position.
Car Adapter (Optional)
Your recorder may be operated from the cigarette lighter socket in a car. The optional Car
Adapter plugs into the 6-V DC PWR JACK on the recorder, which automatically disconnects
the batteries.
To Insert or Remove Cassette
1. Press STOP/EJECT if any of the buttons are depressed.
2. Press STOP/EJECT to open CASSETTE DOOR.
3 Insert a cassette tape with a full reel at its left and open edge facing towards you, then
push on the deck door to close. Unload a cassette tape by following the above steps 1
and 2, take out the tape, push on the deck door to close.
NOTE: Some special formula tapes (chromium dioxide and metal particle tapes) cannot be
properly recorded on this product. These tapes can, however be used for playback.
Tape Play
To listen to your recorded tape cassettes:
1. Insert cassette as explained above.
2. Rewind tape to the starting point if necessary. ( See REWIND operation.)
3. Press PLAY.
4. Adjust VOLUME control.
Built-in Microphone Recording
1. Insert cassette as previously described. Press RECORD (the PLAY button is depressed
with it). You are now recording. If the RECORD button does not depress, see "PREVENT
ACCIDENTAL ERASURE".
2. Talk normally into the BUILT-IN CONDENSER MICROPHONE. To obtain optimum
recording quality, place the recorder with the microphone freely exposed and as close
as convenient to the sound source.
NOTE: The automatic level control (ALC) will set the record level for optimum recordings,
regardless of volume setting.
QUIT SLACKING
A little bit of slack in your tapes can cause scratches on the tape, or
worse yet, the tape could break. If you notice some slack in the
tape, use a pencil to tighten it up before you insert it.
A
LIMITED WARRANY (US)
What your warranty covers:
• Defects in materials or workmanship.
For how long after your purchase:
• One year from date of purchase.
The warranty period for rental units begins
with the first rental or 45 days from date of
shipment to the rental firm, whichever
comes first.
What we will do:
• Provide you with a new, or at our
option, a refurbished unit. The
exchange unit is under warranty for the
remainder of the original product’s
warranty period.
• Proof of purchase in the form of a bill of
sale or receipted invoice which is
evidence that the product is within the
warranty period must be presented to
obtain warranty service. For rental
firms, proof of first rental is also
required.
How to make a warranty claim:
• Properly pack your unit. Include any
cables, etc., which were originally
provided with the product. We
recommend using the original carton
and packing materials.
• Include evidence of purchase date such
as the bill of sale. Also print your name
and address and a description of the
defect. Send via standard UPS or its
equivalent to:
Thomson Inc.
Product Exchange Center
11721 B Alameda Avenue
Socorro, Texas 79927
• Insure your shipment for of loss or
damage. Thomson accepts no liability in
case of damage or loss en route to
Thomson.
• Pay any charges billed to you by the
Exchange Center for service not covered
by the warranty.
• A new or refurbished unit will be
shipped to you freight prepaid.
What your warranty does not cover:
• Customer instruction. (Your Owner’s
Manual provides information regarding
operating Instructions and user controls.
For additional information, ask your
dealer.)
• Installation and setup service
adjustments.
• Batteries.
• Damage from misuse or neglect.
• Products which have been modified or
incorporated into other products.
• Products purchased or serviced outside
the USA.
• Acts of nature, such as but not limited to
lightning damage.
Product Registration:
• Please complete and mail the Product
registration Card packed with your unit.
It will make it easier to contact you
should it ever be necessary. The return
of the card is not required for warranty
coverage.
Limitation of Warranty:
• THE WARRANTY STATED ABOVE IS
THE ONLY WARRANTY APPLICABLE
TO THIS PRODUCT. ALL OTHER
WARRANTIES, EXPRESS OR IMPLIED
(INCLUDING ALL IMPLIED
WARRANTIES OF MERCHANTABILITY
OR FITNESS FOR A PARTICULAR
PURPOSE) ARE HEREBY DISCLAIMED.
NO VERBAL OR WRITTEN
INFORMATION GIVEN BY THOMSON
INC., ITS AGENTS OR EMPLOYEES
SHALL CREATE A GUARANTY OR IN
ANY WAY INCREASE THE SCOPE OF
THIS WARRANTY.
• REPAIR OR REPLACEMENT AS
PROVIDED UNDER THIS WARRANTY IS
THE EXCLUSIVE REMEDY OF THE
CONSUMER. THOMSON INC. SHALL
NOT BE LIABLE FOR INCIDENTAL OR
CONSEQUENTIAL DAMAGES
RESULTING FROM THE USE OF THIS
PRODUCT OR ARISING OUT OF ANY
BREACH OF ANY EXPRESS OR
IMPLIED WARRANTY ON THIS
PRODUCT. THIS DISCLAIMER OF
WARRANTIES AND LIMITED
WARRANTY ARE GOVERNED BY THE
LAWS OF THE STATE OF INDIANA.
EXCEPT TO THE EXTENT PROHIBITED
BY APPLICABLE LAW, ANY IMPLIED
WARRANTY OF MERCHANTABILITY OR
FITNESS FOR A PARTICULAR PURPOSE
ON THIS PRODUCT IS LIMITED TO THE
APPLICABLE WARRANTY PERIOD SET
FORTH ABOVE.
How state law relates to this warranty:
• Some states do not allow the exclusion
nor limitation of incidental or
consequential damages, or limitations on
how long an implied warranty lasts, so
the above limitations or exclusions may
not apply to you.
• This warranty gives you specific legal
rights, and you also may have other
rights that vary from state to state.
If you purchased your product outside
the USA:
• This warranty does not apply. Contact
your dealer for warranty information.
LIMITED WARRANY (CANADA)
Thomson multimedia Ltd. warrants to the
purchaser or gift recipient that if any
manufacturing defect becomes apparent in
this product within 1 year from the original
date of purchase, it will be replaced free of
charge, including return transportation.
This warranty does not include damage to
the product resulting from accidents, misuse
or leaking batteries.
Should your product not perform properly
during the warranty period, either:
1. Return it to the selling dealer with proof
of purchase for replacement,
OR
2. Remove the batteries (where applicable),
and pack product complete with
accessories in the
original carton (or
equivalent). — Mail prepaid (with proof of
purchase) and insured to:
Thomson multimedia Ltd.
6200 Edwards Blvd.,
Mississauga, Ontario, L5T 2V7
Canada
The provisions of this written warranty are
in addition to and not a modification of or
subtraction from the statutory warranties
and other rights and remedies contained in
any applicable legislation, and to the extent
that any such provisions purport to disclaim,
exclude or limit any such statutory
warranties and other rights and remedies,
such provisions shall be deemed to be
amended to the extent necessary to comply
therewith.
If you are unable to find a qualified servicer
for out of warranty service, you may write
to:
Thomson Inc.
P. O. Box 0944
Indianapolis, Indiana, U.S.A., 46206-0944
Attach your sales receipt to this booklet for
future reference. This information is
required if service is needed during the
warranty period.
PURCHASE DATE
NAME OF STORE
Have a Blast - Just Not in Your
Eardrums
Make sure you turn down
the volume on the unit
before you put on
headphones. Increase
the volume to the desired
level only after headphones
are in place.
Reset Counter
Guide de l’utilisateur
Safety Information
Before you begin
Powering the Recorder
Using the Recorder
Care & Maintenance
Warranty
RP3503 EN (23_10_06) 23/10/06 10:08 AM Page 1
THE LIGHTNING
FLASH AND ARROWHEAD WITHIN THE
TRIANGLE IS A
WARNING SIGN
ALERTING YOU OF
"DANGEROUS
VOLTAGE" INSIDE
THE PRODUCT.
WARNING:
SHOCK HAZARD,
TO RAIN OR MOISTURE.
CAUTION
RISK OF ELECTRIC SHOCK
DO NOT OPEN
CAUTION: TO REDUCE THE
RISK OF ELECTRIC SHOCK,
DO NOT REMOVE COVER
(OR BACK). NO USERSERVICEABLE PARTS INSIDE. REFER SERVICING
TO QUALIFIED SERVICE
PERSONNEL.
SEE MARKING ON BOTTOM / BACK OF PRODUCT
TO PREVENT FIRE
DO NOT EXPOSE THIS PRODUCT
THE EXCLAMATION
POINT WITHIN THE
TRIANGLE IS A
WARNING SIGN
ALERTING YOU OF
IMPORTANT
INSTRUCTIONS
ACCOMPANYING
THE PRODUCT.
OR ELECTRICAL
60
A
A
A
A
Page 2
For Your Records
In the event that service should be
required, you may need both the model
number and the serial number. In the
space below, record the date and place of
purchase.
Date of Purchase:
Place of Purchase:
Service Information
This product should be serviced only by
those specially trained in appropriate
servicing techniques. For instructions on
how to obtain service, refer to the
warranty included in this Guide.
Main plug is used as the disconnect device,
it shall remain operable and should not be
obstructed during intended used. To be
completely disconnected the apparatus
from supply mains, the main plug of the
apparatus shall be disconnected from the
mains socket outlet completely.
Precautions
• Never open the cabinet under any
circumstances. Never operate this
product with the cabinet removed. Any
repairs or internal adjustments should
be made only by a trained service
technician.
• Do not touch the player with wet
hands. If any liquid enters the player
cabinet, take the player to a trained
service technician for inspection.
NOTE: Only use the
adapter that came with
this unit. Using other
adapters could seriously
damage the unit.
Do not attempt to
bypass this safety feature.
Automatic Stop
When your recorder is operating in PLAY or RECORD mode and the end of the tape is
reached, your unit will automatically shut itself off and return the buttons to the OFF
position.
Stand-up Microphone Recording
To record with stand-up microphone, plug the microphone into the MICROPHONE jack and
follow the built-in microphone recording instructions. When the stand-up microphone is
used, the built-in microphone is automatically disconnected.
Tape Erase
To erase a tape simply record over the unwanted recording.
Rewind
To run the tape back to the beginning of your recording, press REWIND. Then press STOP
after you have rewound to the desired point on the tape.
Fast Forward (F-fwd)
Press F-FWD to skip over portions of the tape quickly. Press STOP after you have advanced
to the desired point on the tape.
Pause Control
Your recorder is equipped with a PAUSE control which will stop PLAY & RECORD operation.
Press PAUSE to stop PLAY or RECORD operation. Press again to release PAUSE for
continued operation.
Tape Counter and Reset Button
The reset counter is used to quickly determine the approximate location of different
recording selections.
1. Rewind to the beginning of the tape.
2. Press the Reset Counter once to read "000". After each selection is played or recorded,
make a note of the numbers in the readout window. This will serve as a reference for
the start of the next selection or recording.
3. To locate a selection previously noted, press either F-FWD or REWIND. When the
counter indicates the selection number you desire, press STOP/EJECT.
NOTE: The Reset Counter will not indicate actual distance in units of measure; it
determines only the relative location of each selection.
Prevent Accidental Erasure
Whenever you make a recording, any previous
recording on the tape is automatically erased.
When you have a recording you want to keep
permanently, snap out the rear left tab of the
side you want to save as shown in the
illustration below.
When a cassette with the tab snapped out is
inserted into the tape unit, accidental erasure is
prevented by a lever in the mechanism that keeps
the RECORD button from depressing. Cellophane
tape can be place over the opening if you decide
later to record over the original recording. Similarly,
you can record over purchased pre-recorded
cassettes.
PLEASE NOTE: Your unit is equipped with a cassette sensing mechanism. This mechanism
prevents the RECORD button from being depressed when a cassette is not in the unit.
Headphone (Optional)
You can plug a set of headphones to your set. With the headphone plugged in, the
speaker is automatically silenced for private listening. Your set is also equipped with
EARPHONE MONITOR capability when recording direct from other sound sources such as
other tape recorders, radios or phonographs. You can listen to what's being recorded by
plugging in a set of headphones and an adapter.
Remote On/Off Jack (2.5mm)
The use of a remote on/off unit enables you to temporarily stop recording, when using a
remote microphone, without resetting the buttons. Such remote control units are usually
available from local audio supply houses. When selecting a remote control on/off unit, be
sure it is equipped with a 2.5mm plug.
Cleaning the Heads
Iron oxide particles from the magnetic tape can build up on the parts that come in contact
with the tape. These deposits can cause incomplete erasure, muffled playback sound, and
might prevent automatic stop. To clean a cassette tape, open the compartment door, push
the PLAY button and gently clean the heads, capstan, and pinch wheel with a head
cleaner.
Always unplug the power cord before cleaning, and allow 30 minutes drying
time when using a liquid cleaner.
Clean heads after every 25 hours of use.
• Demagnetize the head occasionally with a head demagnetizing cassette (available from
many audio equipment stores).
• Never use any metal objects on or near the tape heads.
Do not allow any cleaning material to fall into the tape assembly.
Tape Care
• Don’t expose tapes to sunlight or store in hot places. High temperatures may warp the
shell or damage the tape itself.
• Keep cassettes in their boxes when not in use.
• Cassette tapes can be erased by magnetic fields produced by magnets, electric motors,
electrical transformers, and other devices. Keep tapes away from magnets and magnetic
fields.
It is important to read this user manual prior to using your new product for the first time.
Es importante leer este manual antes de usar por vez primera su equipo.
user manual
manual de usuario
RP3503
Important Battery Information
• Batteries may leak electrolyte if inserted incorrectly, if disposed of in fire, or if an
attempt is made to charge a battery not intended to be recharged.
• Discard leaky batteries immediately. Leaking batteries can cause skin burns or other
personal injury.
• Dispose of batteries, according to federal, state, and local regulations.
Unpacking Your Unit
You should have the following:
• one main unit
• one AC power converter
• one stand-up microphone
• one user’s guide
Battery Installation
1 To remove the battery compartment door (located on the cabinet bottom) press the
snap tab and lift the door off the cabinet back.
2 Insert 4 "AA" - size batteries (not included) into the battery compartment. Be sure the
(+) or cap end of each battery is installed as shown on the battery diagram.
3. Replace the battery door.
NOTE: If the recorder begins to sound distorted, or if the tape reels turn very slowly or not
at all, be sure to check with a new set of batteries or another cassette before seeking
service.
IMPORTANT: Be sure to remove the batteries when storing the set for more than a few
weeks at a time. Leaky batteries can badly damage the recorder. When discarding
batteries, be sure to dispose of them in the proper manner, according to provincial and
local regulations.
Always push STOP before storing. This will relieve pressure on certain parts in the recorder
that might deform after long periods of time.
AC Power Converter
The AC Power Converter plugs into the 6-V DC PWR JACK on the recorder (which
automatically disconnects the batteries), and plugs into 120 -volt AC household power.
IMPORTANT: The AC Power Converter coming with this uint is intended to be correctly
orientated in a vertical or floor mount position.
Car Adapter (Optional)
Your recorder may be operated from the cigarette lighter socket in a car. The optional Car
Adapter plugs into the 6-V DC PWR JACK on the recorder, which automatically disconnects
the batteries.
To Insert or Remove Cassette
1. Press STOP/EJECT if any of the buttons are depressed.
2. Press STOP/EJECT to open CASSETTE DOOR.
3 Insert a cassette tape with a full reel at its left and open edge facing towards you, then
push on the deck door to close. Unload a cassette tape by following the above steps 1
and 2, take out the tape, push on the deck door to close.
NOTE: Some special formula tapes (chromium dioxide and metal particle tapes) cannot be
properly recorded on this product. These tapes can, however be used for playback.
Tape Play
To listen to your recorded tape cassettes:
1. Insert cassette as explained above.
2. Rewind tape to the starting point if necessary. ( See REWIND operation.)
3. Press PLAY.
4. Adjust VOLUME control.
Built-in Microphone Recording
1. Insert cassette as previously described. Press RECORD (the PLAY button is depressed
with it). You are now recording. If the RECORD button does not depress, see "PREVENT
ACCIDENTAL ERASURE".
2. Talk normally into the BUILT-IN CONDENSER MICROPHONE. To obtain optimum
recording quality, place the recorder with the microphone freely exposed and as close
as convenient to the sound source.
NOTE: The automatic level control (ALC) will set the record level for optimum recordings,
regardless of volume setting.
A
60
A
A
A
QUIT SLACKING
A little bit of slack in your tapes can cause scratches on the tape, or
worse yet, the tape could break. If you notice some slack in the
tape, use a pencil to tighten it up before you insert it.
A
Have a Blast - Just Not in
Your Eardrums
Make sure you turn down
the volume on the unit
before you put on
headphones. Increase
the volume to the desired level only
after headphones are in place.
Reset Counter
Safety Information
Before you begin
Powering the Recorder
Using the Recorder
Care & Maintenance
Warranty
This Class B digital apparatus complies with
Canadian ICES-003.
Cet appareil numérique de la classe B est
conforme à la norme NMB-003 du Canada
Audiovox Electronics Corp.,
150 Marcus Blvd., Hauppauge,
NY 11788
© 2009 Trademark(s) ® Registered
www.rcaaudiovideo.com
Printed In China
v3.0 (EN/E)
The descriptions and characteristics given in
this document are given as a general
indication and not as a guarantee. In order to
provide the highest quality product possible,
we reserve the right to make any improvement
or modification without prior notice.
12 Month Limited Warranty
Applies to RCA Audio/Video Products
• AUDIOVOX ELECTRONICS CORP. (the
Company) warrants to the original retail
purchaser of this product that should
this product or any part thereof, under
normal use and conditions, be proven
defective in material or workmanship
within 12 months from the date of
original purchase, such defect(s) will be
repaired or replaced with reconditioned
product (at the Company’s option)
without charge for parts and repair
labor.
• To obtain repair or replacement within
the terms of this Warranty, the product
is to be delivered with proof of
warranty coverage (e.g. dated bill of
sale), specification of defect(s),
transportation prepaid, to the Company
at the address shown below.
• This Warranty does not extend to the
elimination of externally generated
static or noise, to correction of antenna
problems, loss/interruptions of
broadcast or internet service, to costs
incurred for installation, removal or
reinstallation of product, to corruptions
caused by computer viruses, spyware or
other malware, to loss of media, files,
data or content, or to damage to tapes,
discs, removable memory devices or
cards, speakers, accessories, computers,
computer peripherals, other media
players, home networks or vehicle
electrical systems.
• This Warranty does not apply to any
product or part thereof which, in the
opinion of the Company, has suffered or
been damaged through alteration,
improper installation, mishandling,
misuse, neglect, accident, or by removal
or defacement of the factory serial
number/bar code label(s). THE EXTENT
OF THE COMPANY’S LIABILITY UNDER
THIS WARRANTY IS LIMITED TO THE
REPAIR OR REPLACEMENT PROVIDED
ABOVE AND, IN NO EVENT, SHALL THE
COMPANY’S LIABILITY EXCEED THE
PURCHASE PRICE PAID BY PURCHASER
FOR THE PRODUCT.
• This Warranty is in lieu of all other
express warranties or liabilities. ANY
IMPLIED WARRANTIES, INCLUDING ANY
IMPLIED WARRANTY OF
MERCHANTABILITY, SHALL BE LIMITED
TO THE DURATION OF THIS WRITTEN
WARRANTY. ANY ACTION FOR BREACH
OF ANY WARRANTY HEREUNDER
INCLUDING ANY IMPLIED WARRANTY
OF MERCHANTABILITY MUST BE
BROUGHT WITHIN A PERIOD OF 24
MONTHS FROM DATE OF ORIGINAL
PURCHASE. IN NO CASE SHALL THE
COMPANY BE LIABLE FOR ANY
CONSEQUENTIAL OR INCIDENTAL
DAMAGES FOR BREACH OF THIS OR
ANY OTHER WARRANTY. No person or
representative is authorized to assume
for the Company any liability other than
expressed herein in connection with the
sale of this product.
• Some states do not allow limitations on
how long an implied warranty lasts or
the exclusion or limitation of incidental
or consequential damage so the above
limitations or exclusions may not apply
to you. This Warranty gives you specific
legal rights and you may also have other
rights which vary from state to state.
How to make a warranty claim:
• If your product is capable of storing
content (such as an mp3 player, digital
voice recorder, etc), it is recommended
to make periodic backup copies of
content stored on the product. If
applicable, before shipping a product,
make a back up copy of content or data
stored on the device. Also, it is advisable
to remove any personal content which
you would not want exposed to others.
IT IS LIKELY THAT CONTENTS AND DATA
ON THE DEVICE WILL BE LOST DURING
SERVICE AND REFORMATTING.
AUDIOVOX ACCEPTS NO LIABILITY FOR
LOST CONTENT OR DATA, OR FOR THE
SECURITY OF ANY PERSONAL CONTENT
OR DATA ON THE RETURNED DEVICE.
Product will be returned with factory
default settings, and without any preloaded content which may have been
installed in the originally purchased
products. Consumer will be responsible
for reloading data and content.
Consumer will be responsible to restore
any personal preference settings.
• Properly pack your unit. Include any
remotes, memory cards, cables, etc.
which were originally provided with the
product. However DO NOT return any
removable batteries, even if batteries
were included with the original
purchase. We recommend using the
original carton and packing materials.
• Include evidence of purchase date such
as the bill of sale. Also print your name
and address and a description of the
defect. Send via standard UPS or its
equivalent to:
Audiovox Electronics Corp.
Attn: Service Department.
150 Marcus Blvd.
Hauppauge N.Y. 11788
1-877-833-3491
• Insure your shipment for loss or
damage. Audiovox accepts no liability in
case of damage or loss en route to
Audiovox.
• Pay any charges billed to you by the
Exchange Center for service not covered
by the warranty.
• A new or refurbished unit will be
shipped to you freight prepaid.
What we will do:
Provide you with a new, or at our option, a
refurbished unit. The exchange unit is
under warranty for the remainder of the
original product’s warranty period.
For Canada Customers, please ship to:
Audiovox Return Centre
c/o Genco
6685 Kennedy Road,
Unit#3, Door 16,
Mississuaga, Ontario
L5T 3A5
Maufacturer/
Responsible Party
Audiovox Electronics
Corp.
150 Marcus Blvd.,
Hauppauge, NY 11788
Page 3

Por Favor, Tome Nota
En caso de que necesitase asistencia
técnica, deberá consignar tanto el número
de modelo como el número de serie.
Rellene en los espacios que hay más abajo
los datos del lugar de compra y número de
serie:
Fecha de compra
Lugar de compra
Información Técnica
Este producto sólo debería ser atendido
por personal especializado y entrenado con
las técnicas de mantenimiento apropiadas.
En la garantía, incluida en esta guía,
encontrará instrucciones sobre la forma de
obtener servicio técnico.
La clavija principal es usada como el
dispositivo de desconexión. Permanecerá
en condiciones operativas y no deberá ser
obstruida durante el uso para el cual está
destinada. Para ser desconectado
completamente el aparato desde la fuente
de poder, la clavija principal del aparato
deberá estar desconectada por completo
de la toma principal en la pared.
PRECAUCIONES
• Nunca abra la caja bajo ninguna
circunstancias. No use este producto
sin la caja. Reparaciones o ajustes
técnicos solo puede efectuarse por
técnicos entrenados para ofrecer este
servicio.
• No toque la unidad con la manos
mojadas. Si cualquier líquido entra al
compartimiento de la caja, llévelo a un
técnico especializado para inspección.
NOTA: Solo utilice el
adaptador que acompaña
a esta unidad. El uso de
otros adaptadores
pueden ocasionar severos
daños a la unidad. No
trate de pasar por alto estas medidas
de seguridad.
INTERRUPCION AUTOMÁTICA
Cuando su grabadora este funcionando en el modo PLAY o RECORD y se llegue al final de
la cinta, su unidad efectuará una interrupción automática y regresará los botones a la
posición de OFF.
GRABACION CON MICROFONO DE PEDESTAL
Para grabar con micrófono de pedestal, conecte el micrófono en el receptáculo
MICROPHONE y siga las instrucciones de grabación con micrófono interno. Cuando se use
el micrófono de pedestal, el micrófono interno se desconectará automáticamente.
BORRAR CINTA
Para borrar una cinta simplemente grabe encima de la grabación no deseada.
REBOBINADO
Para hacer retroceder una cinta hasta el inicio de la grabación, presione REWIND.
Posteriormente presione STOP al llegar al punto de rebobinado deseado.
ADELANTO RAPIDO (F-FWD)
Presione F-FWD para saltar sobre las porciones de la cinta de manera rápida. Presione
STOP después de avanzar hasta la posición deseada en la cinta.
CONTROL DE PAUSA
Su grabadora esta equipada de con un control de pausa la cual permite detener la función
de PLAY & RECORD. Presione PAUSE para detener las funciones de PLAY o RECORD.
Nuevamente presione PAUSE para soltarlo y así continuar con las funciones.
CONTADOR DE CINTA Y BOTON DE REAJUSTE
El contador de reajuste es para determinar de manera rápida la ubicación aproximada de
las diferentes selecciones de grabación.
1. Rebobine hasta el principio de la cinta.
2. Presione el contador de reajuste hasta leer “000”. Después de la ejecución o grabación
de cada selección, anote los números mostrados en la ventanilla. Esto servirá como
referencia para el comienzo de la próxima selección o grabación.
3. Para ubicar una selección previamente anotada, puede presionar tanto F-FWD o
REWIND. Cuando el contador indique el número de la selección deseada, presione
STOP/EJECT.
NOTA: El contador de reajuste no indicará la distancia existente en unidades de
medidas; solo determina la ubicación relativa de cada selección.
EVITE CINTAS BORRADAS ACCIDENTAMENTE
Cuando quiera hacer una grabación, las
grabaciones previas en la cinta son
automáticamente borradas.
Cuando quiera conservar permanentemente una
grabación, quite la lengüeta que esta localizado
en el lado izquierdo de la parte que se quiera
conservar como se demuestra en la ilustración.
Cuando una cinta sin lengüeta es insertado en la
unidad, y se desea evitar cintas borradas
accidentalmente, existe una palanca en el mecanismo
que mantiene el botón de RECORD levantado. Si decide
grabar sobre la cinta original
puede pegar cinta adhesiva en dicha abertura.
Igualmente, puede hacer lo mismo sobre cassettes
comprados previamente grabados.
TOME NOTA: Si su unidad esta equipada con un mecanismo sensitivo de cassettes. Este
mecanismo puede evitar la presión del botón RECORD en caso que ningún cassettes se
encuentre en la unidad.
AUDIFONOS (OPCIONAL)
Puede enchufar un juego de audífonos a su unidad. Al momento de enchufarlos, los
parlantes se apagan automáticamente para su deleite personal. Su juego está equipado
con un monitor auricular capaz de grabar directamente de otras fuentes de sonidos como
otras grabaciones de cintas, radios o fonógrafos. Puede escuchar a lo que se ha grabado,
enchufando un juego de audífonos y un adaptador.
ENCHUFE (2.5 mm) DE CONTROL REMOTO ENCENDIDO/ APAGADO
El uso de la unidad de control remoto encendido/apagado le permite detener
temporalmente la grabación, el uso del micrófono, permite reajustar sin necesidad de
presionar botones. Dichas unidades de control remoto se pueden
adquirir en tiendas de distribución de equipos de sonidos. Asegúrese al momento de
seleccionar su unidad de control remoto encendido/apagado, que este equipada de un
enchufe de 2.5 mm.
LIMPIEZA DE CABEZAS
Partículas de Oxido de Hierro de las cintas magnéticas pueden formarse en las partes que
estén en contacto con la cinta. Estos depósitos pueden causar cintas borradas incompletas,
reproducción de sonido apagado, y puede prevenir de
interrupción automática. Para limpiar una cinta cassette, abra la tapa del compartimiento,
presione el botón PLAY y suavemente limpie las cabezas, cabrestante y pinche la rueda de
la cabeza limpiadora.
Siempre desenchufe el cable de potencia antes de limpiar, y deje 30 minutos para el secado
cuando este usando el líquido limpiador.
Limpie las cabezas después de 25 horas de uso.
• Debe desimantar las cabezas ocasionalmente con una cinta para desimantisar cabezas
(disponible en muchas tiendas de equipos de sonido).
• Nunca use ningún objeto de metal en o cerca de las cabezas de las cintas. No permita
que caiga ningún material de limpieza dentro del ensamblaje de la cinta.
CUIDADOS DE CINTAS
• No exponga cintas a la luz solar o dejarlos en lugares calientes. Altas temperaturas pueden
causar deformación a la cubierta o dañar la misma cinta.
• Guarde los cassettes en sus respectivas cajas cuando no se estén usando.
• Cintas de cassettes pueden borrarse por los campos magnéticos de los imanes, motores
eléctricos, transformaciones eléctricas, y otros aparatos. Mantenga las cintas lejos de
imanes y campos magnéticos.
It is important to read this user manual prior to using your new product for the first time.
Es importante leer este manual antes de usar por vez primera su equipo.
user manual
manual de usuario
RP3503
Información Importante sobre la Batería
• Cualquier pila puede explotar o gotear electrólito si se echa en un fuego o si trata de
cargar una pila no recargable.
• Deseche inmediatemente pilas con fuga. Estas pueden causar quemaduras a la piel otra
herida personal.
• Cuando deseche las baterías asegúrese de deshacerse de ellas en una manera
apropiada, de acuerdo con las regulaciones locales o del estado.
PARA DESEMPACAR SU UNIDAD
Usted debería tener lo siguiente:
• una unidad principal
• un convertidor de corriente CA
• un micrófono
• una guía del usuario
INSTALACON DE BATERIA
1. Para remover la tapa del compartimiento de batería (localizado en el parte posterior de
la caja) presione la tapa y levante ésta de la parte posterior del caja.
2. Inserte 4 baterías tamaño “AA” (no incluídas) en el compartimiento de la batería.
Asegúrese de que (+) o la chapa final de cada batería sea instalada como se muestra en
el diagrama de la batería.
3. Cierre la tapa del compartimiento de batería.
NOTA: Si la grabadora empieza a sonar distorsionado, o si la cinta rebobina demasiado
lento o no rebobina del todo, asegúrese de revisar con un nuevo par de baterías o otra
cinta antes de buscar servicio técnico.
IMPORTANTE: Asegúrese al mismo tiempo de remover las baterías cuando guarde la
unidad por más de unas semanas. Baterías con fuga puede causar daños a la grabadora. Al
deshacerse de las baterías, asegúrese de que este de acuerdo con las regulaciones locales o
del estado.
Siempre presione STOP antes de guardar. Esto ayudará a evitar deformaciones en ciertas
partes de la grabadora después de largos períodos de tiempo.
CONVERTIDOR DE POTENCIA CA
El convertidor de potencia CA se enchufará a una toma de potencia 6-V DC en la grabadora
(esto desconectará automáticamente las baterías), y se enchufará a uno domestico de
120-V AC .
El adaptador CA/CD suministrado con este producto está diseñado para estar orientado
correctamente en una posición vertical o montado en el piso.
ADAPTADOR DE CARRO (OPCIONAL)
Su grabadora puede operar desde el encendedor de cigarrillos del carro. El enchufe
adicional de adaptador de carro, se enchufará a una toma de potencia de 6-V DC en la
grabadora, esto ocasionará la desconexión automáticamente las baterías.
PARA INSERTAR O REMOVER CASSETTE
1. Presione STOP/EJECT si cualquier botón este pulsado.
2. Presione STOP/EJECT para abrir la tapa de la grabadora.
3. Inserte una cinta de cassette con toda la cinta rebobinada hacia la izquierda y abra la
tapa hacia su lado, posteriormente empuje la tapa para cerrarlo. Saque la cinta cassette
siguiendo los pasos mencionados 1 y 2, saque la cinta, y empuje la tapa para cerrarlo.
NOTA: Algunas cintas de fórmula especial ( Dióxido de Cromo y cintas con partículas
metálicas) no pueden ser grabados apropiadamente en este producto. Sin embargo, estas
cintas se puede usarse para reproducción.
REPRODUCCION DE CINTA
Para escuchar las cintas grabadas:
1. Inserte el cassette como se ha explicado anteriormente.
2. Rebobine la cinta hasta el punto de inicio si es necesario. ( Ver las operaciones de
REWIND).
3. Presione PLAY.
4. Ajuste el control del VOLUMEN.
GRABACION CON MICROFONO
1. Inserte el cassette como se ha descrito anteriormente. Presione RECORD (el botón de
PLAY que se encuentra pulsado conjuntamente). Ya esta grabando. Si no puede pulsar
el botón de RECORD , ver “EVITE CINTAS BORRADAS ACCIDENTALMENTE”.
2. Hable normalmente por el MICROFONO INTERNO. Para obtener una óptima calidad de
grabación, ponga la grabadora con el micrófono libremente expuesto y tan cerca como
sea conveniente de la fuente de sonido.
NOTA: El control del nivel automático (ALC) se ajustará al nivel de grabación para optimas
grabaciones, a pesar del ajuste de volumen.
A
60
A
A
A
EVITE SUELTO CINTAS
Una pequeña flojera en sus cintas pueden causar raspaduras en las
cinta, o aún más severo, la cinta se puede romper. Si nota pequeñas
flojeras en la cinta, use un lápiz para estirar antes de insertarlo.
A
Evite un trompetazo en sus
oídos.
Asegúrese de bajar el volumen
antes de colocarse los
audífonos. Aumente el
volumen después de colocarse los
audífonos.
CONTADOR DE
REAJUSTE
Información sobre Seguridad
Antes de empezar
Fuente de Alimentación
Utilización del Grabador
Cuidados y Mantenimiento
Garantía
This Class B digital apparatus complies with
Canadian ICES-003.
Cet appareil numérique de la classe B est
conforme à la norme NMB-003 du Canada
Las descripciones y características dadas en este
documento son provistas como una indicación
general y no como una garantía. Con objeto de
proveer el producto de la más alta calidad posible,
nos reservamos el derecho de hacer cualquier
mejora o modificación sin notificación previa.
Audiovox Electronics Corp,
150 Marcus Blvd, Hauppauge,
NY 11788
© 2009 Marca(s) ® Registrada(s)
www.rcaaudiovideo.com
Impreso en China
v3.0 (EN/E)
12 meses de garantía limitada
Aplica a productos de audio/video RCA
• AUDIOVOX ELECTRONICS CORP. (la
Compañía) garantiza al comprador
original a través de minorista de este
producto, que en el caso de que este
producto o alguna parte del mismo,
sometido a uso y condiciones normales, y
probando que tenga defectos en material
o mano de obra, en un plazo de 12 meses
desde la fecha de la compra original,
tal(es) defecto(s) será(n) reparado(s) o
reemplazado(s) con producto
reacondicionado (a opción de la
Compañía) sin cargo por las partes y
labor en la reparación.
• Para obtener reparación o reemplazo
dentro de los términos de esta Garantía,
el producto debe ser entregado con
prueba de cobertura de la garantía (por
ejemplo, nota de venta con fecha),
especificación de defecto(s), transporte
prepagado, a la Compañía a la dirección
que se indica a continuación
• Esta garantía no se extiende a la
eliminación de ruido o estática generados
externamente, a la corrección de
problemas de antena, a la pérdida/
interrupciones de transmisión o servicio
de Internet, a costos incurridos por
instalación, remoción o reinstalación del
producto, a corrupciones causadas por
virus de computadora, software espía u
otro tipo de software malicioso, a la
pérdida de medios, archivos, datos o
contenido, o al daño a cintas, discos,
dispositivos o tarjetas de memoria
removible, bocinas, accesorios,
computadoras, periféricos de
computadoras, otros reproductores de
medios, redes caseras o sistemas eléctricos
de vehículo.
• Esta Garantía no aplica a algún producto
o parte del mismo que, en la opinión de
la Compañía, haya sufrido o haya sido
dañado mediante la alteración,
instalación inapropiada, mal manejo,
mal uso, negligencia, accidente o
mediante la remoción o borrado del
número de serie de fábrica/etiqueta(s) de
código de barras. EL GRADO DE LA
RESPONSABILIDAD DE LA COMPAÑÍA
BAJO ESTA GARANTÍA ESTÁ LIMITADO A
LA REPARACIÓN O REEMPLAZO QUE SE
INDICA ANTERIORMENTE, Y, EN NINGÚN
CASO, LA RESPONSABILIDAD DE LA
COMPAÑÍA EXCEDERÁ EL PRECIO DE
COMPRA PAGADO POR EL COMPRADOR
POR EL PRODUCTO.
• Esta Garantía reemplaza todas las otras
garantías o responsabilidades expresas.
CUALQUIER GARANTÍA IMPLÍCITA,
INCLUYENDO CUALQUIER GARANTÍA
IMPLÍCITA DE COMERCIABILIDAD,
ESTARÁ LIMITADA A LA DURACIÓN DE
ESTA GARANTÍA ESCRITA. CUALQUIER
ACCIÓN POR VIOLACIÓN DE ALGUNA
GARANTÍA BAJO LA PRESENTE
INCLUYENDO ALGUNA GARANTÍA
IMPLÍCITA DE COMERCIABILIDAD DEBE
SER PRESENTADA EN UN PERIODO DE 24
MESES DESDE LA FECHA DE LA COMPRA
ORIGINAL. EN NINGÚN CASO LA
COMPAÑÍA SERÁ RESPONSABLE POR
DAÑO ALGUNO INCIDENTAL O
CONSECUENCIAL POR LA VIOLACIÓN DE
ESTA O DE CUALQUIER OTRA GARANTÍA.
Ninguna persona o representante está
autorizado a asumir por la Compañía
responsabilidad alguna distinta que la
expresada en el presente documento en
relación con la venta de este producto.
• Algunos estados no permiten limitaciones
en cuanto a la duración de una garantía
implícita o la exclusión o limitación de
daño incidental o consecuencial, por lo
tanto las limitaciones o exclusiones
anteriores pueden no aplicar a usted.
Esta Garantía le da derechos legales
específicos y puede ser que usted tenga
también otros derechos que pueden
variar de estado a estado.
Cómo efectuar una reclamación en
garantía:
• Si su producto tiene la capacidad de
almacenar contenido (tal como un
reproductor MP3, una grabadora de voz
digital, etc.), se recomienda que efectúe
respaldos periódicos de copias del
contenido almacenado en el producto. Si
es aplicable, antes de enviar un producto,
haga una copia de respaldo del contenido
o de los datos almacenados en el
dispositivo. También, es aconsejable
remover cualquier contenido personal
que usted no querría exponer a otros. ES
PROBABLE QUE LOS CONTENIDOS Y
DATOS EN EL DISPOSITIVO SE PIERDAN
DURANTE EL SERVICIO Y REFORMATEO.
AUDIOBOX NO ACEPTA
RESPONSABILIDAD POR LA PÉRDIDA DE
CONTENIDO O DATOS, O POR LA
SEGURIDAD DE ALGÚN CONTENIDO O
DATO PERSONAL EN EL DISPOSITIVO QUE
SEA RETORNADO. El producto será
devuelto con las configuraciones
predeterminadas de fábrica, y sin
contenido alguno precargado que
pudiera haber sido instalado en los
productos comprados originalmente. El
consumidor será responsable por
recargar los datos y el contenido. El
consumidor será responsable de restaurar
cualquier configuración de su preferencia
personal.
• Empaque apropiadamente su unidad.
Incluya cualquier control remoto, tarjetas
de memoria, cables, etc. que fueron
suministrados originalmente con el
producto. Sin embargo, NO regrese
batería removible alguna, aún si las
baterías estaban incluidas con la compra
original. Recomendamos usar el empaque
y materiales de empaque originales.
• Incluya a evidencia de la fecha de compra
tal como la nota de venta. También
escriba su nombre y dirección, y la
descripción del defecto. Envíe mediante
UPS estándar o su equivalente a:
Audiovox Electronics Corp.
At’n: Departamento de Servicio.
150 Marcus Blvd.
Hauppauge N.Y. 11788
1-877-833-3491
• Asegure su embarque por pérdida o
daño. Audiovox no acepta responsabilidad
en caso de daño o pérdida en ruta a
Audiovox.
• Pague todos los cargos que le sean
facturados por el Centro de Intercambio
por servicio que no esté cubierto por la
garantía.
• Una unidad nueva o reconstruida le será
enviada con flete prepagado.
Lo que nosotros haremos:
Suministrarle una unidad nueva, o a opción
nuestra, una reconstruida. La unidad de
intercambio está bajo garantía por el
remanente del período de garantía del
producto original.
Para clientes en Canadá, favor de enviar
a:
Audiovox Return Centre, c/o Genco
6685 Kennedy Road,
Unit#3, Door 16,
Mississuaga, Ontario L5T 3A5
Fabricante / Parte
responsable
Audiovox Electronics Corp.,
150 Marcus Blvd.,
Hauppauge, NY 11788
Page 4

For Your Records
In the event that service should be
required, you may need both the model
number and the serial number. In the
space below, record the date and place of
purchase.
Date of Purchase:
Place of Purchase:
Service Information
This product should be serviced only by
those specially trained in appropriate
servicing techniques. For instructions on
how to obtain service, refer to the
warranty included in this Guide.
Main plug is used as the disconnect device,
it shall remain operable and should not be
obstructed during intended used. To be
completely disconnected the apparatus
from supply mains, the main plug of the
apparatus shall be disconnected from the
mains socket outlet completely.
Precautions
• Never open the cabinet under any
circumstances. Never operate this
product with the cabinet removed. Any
repairs or internal adjustments should
be made only by a trained service
technician.
• Do not touch the player with wet
hands. If any liquid enters the player
cabinet, take the player to a trained
service technician for inspection.
NOTE: Only use the
adapter that came with
this unit. Using other
adapters could seriously
damage the unit.
Do not attempt to
bypass this safety feature.
Automatic Stop
When your recorder is operating in PLAY or RECORD mode and the end of the tape is
reached, your unit will automatically shut itself off and return the buttons to the OFF
position.
Stand-up Microphone Recording
To record with stand-up microphone, plug the microphone into the MICROPHONE jack and
follow the built-in microphone recording instructions. When the stand-up microphone is
used, the built-in microphone is automatically disconnected.
Tape Erase
To erase a tape simply record over the unwanted recording.
Rewind
To run the tape back to the beginning of your recording, press REWIND. Then press STOP
after you have rewound to the desired point on the tape.
Fast Forward (F-fwd)
Press F-FWD to skip over portions of the tape quickly. Press STOP after you have advanced
to the desired point on the tape.
Pause Control
Your recorder is equipped with a PAUSE control which will stop PLAY & RECORD operation.
Press PAUSE to stop PLAY or RECORD operation. Press again to release PAUSE for
continued operation.
Tape Counter and Reset Button
The reset counter is used to quickly determine the approximate location of different
recording selections.
1. Rewind to the beginning of the tape.
2. Press the Reset Counter once to read "000". After each selection is played or recorded,
make a note of the numbers in the readout window. This will serve as a reference for
the start of the next selection or recording.
3. To locate a selection previously noted, press either F-FWD or REWIND. When the
counter indicates the selection number you desire, press STOP/EJECT.
NOTE: The Reset Counter will not indicate actual distance in units of measure; it
determines only the relative location of each selection.
Prevent Accidental Erasure
Whenever you make a recording, any previous
recording on the tape is automatically erased.
When you have a recording you want to keep
permanently, snap out the rear left tab of the
side you want to save as shown in the
illustration below.
When a cassette with the tab snapped out is
inserted into the tape unit, accidental erasure is
prevented by a lever in the mechanism that keeps
the RECORD button from depressing. Cellophane
tape can be place over the opening if you decide
later to record over the original recording. Similarly,
you can record over purchased pre-recorded
cassettes.
PLEASE NOTE: Your unit is equipped with a cassette sensing mechanism. This mechanism
prevents the RECORD button from being depressed when a cassette is not in the unit.
Headphone (Optional)
You can plug a set of headphones to your set. With the headphone plugged in, the
speaker is automatically silenced for private listening. Your set is also equipped with
EARPHONE MONITOR capability when recording direct from other sound sources such as
other tape recorders, radios or phonographs. You can listen to what's being recorded by
plugging in a set of headphones and an adapter.
Remote On/Off Jack (2.5mm)
The use of a remote on/off unit enables you to temporarily stop recording, when using a
remote microphone, without resetting the buttons. Such remote control units are usually
available from local audio supply houses. When selecting a remote control on/off unit, be
sure it is equipped with a 2.5mm plug.
Cleaning the Heads
Iron oxide particles from the magnetic tape can build up on the parts that come in contact
with the tape. These deposits can cause incomplete erasure, muffled playback sound, and
might prevent automatic stop. To clean a cassette tape, open the compartment door, push
the PLAY button and gently clean the heads, capstan, and pinch wheel with a head
cleaner.
Always unplug the power cord before cleaning, and allow 30 minutes drying
time when using a liquid cleaner.
Clean heads after every 25 hours of use.
• Demagnetize the head occasionally with a head demagnetizing cassette (available from
many audio equipment stores).
• Never use any metal objects on or near the tape heads.
Do not allow any cleaning material to fall into the tape assembly.
Tape Care
• Don’t expose tapes to sunlight or store in hot places. High temperatures may warp the
shell or damage the tape itself.
• Keep cassettes in their boxes when not in use.
• Cassette tapes can be erased by magnetic fields produced by magnets, electric motors,
electrical transformers, and other devices. Keep tapes away from magnets and magnetic
fields.
It is important to read this user manual prior to using your new product for the first time.
Nous vous recommandons de lire ce manuel d’instructions avant d’utiliser votre nouveau produit pour la première fois.
user manual
guide de l’utilisateur
RP3503
Important Battery Information
• Batteries may leak electrolyte if inserted incorrectly, if disposed of in fire, or if an
attempt is made to charge a battery not intended to be recharged.
• Discard leaky batteries immediately. Leaking batteries can cause skin burns or other
personal injury.
• Dispose of batteries, according to federal, state, and local regulations.
Unpacking Your Unit
You should have the following:
• one main unit
• one AC power converter
• one stand-up microphone
• one user’s guide
Battery Installation
1 To remove the battery compartment door (located on the cabinet bottom) press the
snap tab and lift the door off the cabinet back.
2 Insert 4 "AA" - size batteries (not included) into the battery compartment. Be sure the
(+) or cap end of each battery is installed as shown on the battery diagram.
3. Replace the battery door.
NOTE: If the recorder begins to sound distorted, or if the tape reels turn very slowly or not
at all, be sure to check with a new set of batteries or another cassette before seeking
service.
IMPORTANT: Be sure to remove the batteries when storing the set for more than a few
weeks at a time. Leaky batteries can badly damage the recorder. When discarding
batteries, be sure to dispose of them in the proper manner, according to provincial and
local regulations.
Always push STOP before storing. This will relieve pressure on certain parts in the recorder
that might deform after long periods of time.
AC Power Converter
The AC Power Converter plugs into the 6-V DC PWR JACK on the recorder (which
automatically disconnects the batteries), and plugs into 120 -volt AC household power.
IMPORTANT: The AC Power Converter coming with this uint is intended to be correctly
orientated in a vertical or floor mount position.
Car Adapter (Optional)
Your recorder may be operated from the cigarette lighter socket in a car. The optional Car
Adapter plugs into the 6-V DC PWR JACK on the recorder, which automatically disconnects
the batteries.
To Insert or Remove Cassette
1. Press STOP/EJECT if any of the buttons are depressed.
2. Press STOP/EJECT to open CASSETTE DOOR.
3 Insert a cassette tape with a full reel at its left and open edge facing towards you, then
push on the deck door to close. Unload a cassette tape by following the above steps 1
and 2, take out the tape, push on the deck door to close.
NOTE: Some special formula tapes (chromium dioxide and metal particle tapes) cannot be
properly recorded on this product. These tapes can, however be used for playback.
Tape Play
To listen to your recorded tape cassettes:
1. Insert cassette as explained above.
2. Rewind tape to the starting point if necessary. ( See REWIND operation.)
3. Press PLAY.
4. Adjust VOLUME control.
Built-in Microphone Recording
1. Insert cassette as previously described. Press RECORD (the PLAY button is depressed
with it). You are now recording. If the RECORD button does not depress, see "PREVENT
ACCIDENTAL ERASURE".
2. Talk normally into the BUILT-IN CONDENSER MICROPHONE. To obtain optimum
recording quality, place the recorder with the microphone freely exposed and as close
as convenient to the sound source.
NOTE: The automatic level control (ALC) will set the record level for optimum recordings,
regardless of volume setting.
A
60
A
A
A
QUIT SLACKING
A little bit of slack in your tapes can cause scratches on the tape, or
worse yet, the tape could break. If you notice some slack in the
tape, use a pencil to tighten it up before you insert it.
A
Have a Blast - Just Not in
Your Eardrums
Make sure you turn down
the volume on the unit
before you put on
headphones. Increase
the volume to the desired level only
after headphones are in place.
Reset Counter
Safety Information
Before you begin
Powering the Recorder
Using the Recorder
Care & Maintenance
Warranty
This Class B digital apparatus complies with
Canadian ICES-003.
Cet appareil numérique de la classe B est
conforme à la norme NMB-003 du Canada
Audiovox Electronics Corp,
150 Marcus Blvd, Hauppauge,
NY 11788
© 2009 Trademark(s) ® Registered
Marca(s) ® Registrada(s)
Marque(s) ® Deposée(s)
www.rcaaudiovideo.com
Printed In China / Imprimé en Chine
v3.0 (EN/F)
The descriptions and characteristics given in this
document are given as a general indication and
not as a guarantee. In order to provide the
highest quality product possible, we reserve the
right to make any improvement or modification
without prior notice.
Maufacturer/
Responsible Party
Audiovox Electronics
Corp.
150 Marcus Blvd.,
Hauppauge, NY 11788
12 Month Limited Warranty
Applies to RCA Audio/Video Products
• AUDIOVOX ELECTRONICS CORP. (the
Company) warrants to the original retail
purchaser of this product that should
this product or any part thereof, under
normal use and conditions, be proven
defective in material or workmanship
within 12 months from the date of
original purchase, such defect(s) will be
repaired or replaced with reconditioned
product (at the Company’s option)
without charge for parts and repair
labor.
• To obtain repair or replacement within
the terms of this Warranty, the product
is to be delivered with proof of
warranty coverage (e.g. dated bill of
sale), specification of defect(s),
transportation prepaid, to the Company
at the address shown below.
• This Warranty does not extend to the
elimination of externally generated
static or noise, to correction of antenna
problems, loss/interruptions of
broadcast or internet service, to costs
incurred for installation, removal or
reinstallation of product, to corruptions
caused by computer viruses, spyware or
other malware, to loss of media, files,
data or content, or to damage to tapes,
discs, removable memory devices or
cards, speakers, accessories, computers,
computer peripherals, other media
players, home networks or vehicle
electrical systems.
• This Warranty does not apply to any
product or part thereof which, in the
opinion of the Company, has suffered or
been damaged through alteration,
improper installation, mishandling,
misuse, neglect, accident, or by removal
or defacement of the factory serial
number/bar code label(s). THE EXTENT
OF THE COMPANY’S LIABILITY UNDER
THIS WARRANTY IS LIMITED TO THE
REPAIR OR REPLACEMENT PROVIDED
ABOVE AND, IN NO EVENT, SHALL THE
COMPANY’S LIABILITY EXCEED THE
PURCHASE PRICE PAID BY PURCHASER
FOR THE PRODUCT.
• This Warranty is in lieu of all other
express warranties or liabilities. ANY
IMPLIED WARRANTIES, INCLUDING ANY
IMPLIED WARRANTY OF
MERCHANTABILITY, SHALL BE LIMITED
TO THE DURATION OF THIS WRITTEN
WARRANTY. ANY ACTION FOR BREACH
OF ANY WARRANTY HEREUNDER
INCLUDING ANY IMPLIED WARRANTY
OF MERCHANTABILITY MUST BE
BROUGHT WITHIN A PERIOD OF 24
MONTHS FROM DATE OF ORIGINAL
PURCHASE. IN NO CASE SHALL THE
COMPANY BE LIABLE FOR ANY
CONSEQUENTIAL OR INCIDENTAL
DAMAGES FOR BREACH OF THIS OR
ANY OTHER WARRANTY. No person or
representative is authorized to assume
for the Company any liability other than
expressed herein in connection with the
sale of this product.
• Some states do not allow limitations on
how long an implied warranty lasts or
the exclusion or limitation of incidental
or consequential damage so the above
limitations or exclusions may not apply
to you. This Warranty gives you specific
legal rights and you may also have other
rights which vary from state to state.
How to make a warranty claim:
• If your product is capable of storing
content (such as an mp3 player, digital
voice recorder, etc), it is recommended
to make periodic backup copies of
content stored on the product. If
applicable, before shipping a product,
make a back up copy of content or data
stored on the device. Also, it is advisable
to remove any personal content which
you would not want exposed to others.
IT IS LIKELY THAT CONTENTS AND DATA
ON THE DEVICE WILL BE LOST DURING
SERVICE AND REFORMATTING.
AUDIOVOX ACCEPTS NO LIABILITY FOR
LOST CONTENT OR DATA, OR FOR THE
SECURITY OF ANY PERSONAL CONTENT
OR DATA ON THE RETURNED DEVICE.
Product will be returned with factory
default settings, and without any preloaded content which may have been
installed in the originally purchased
products. Consumer will be responsible
for reloading data and content.
Consumer will be responsible to restore
any personal preference settings.
• Properly pack your unit. Include any
remotes, memory cards, cables, etc.
which were originally provided with the
product. However DO NOT return any
removable batteries, even if batteries
were included with the original
purchase. We recommend using the
original carton and packing materials.
• Include evidence of purchase date such
as the bill of sale. Also print your name
and address and a description of the
defect. Send via standard UPS or its
equivalent to:
Audiovox Electronics Corp.
Attn: Service Department.
150 Marcus Blvd.
Hauppauge N.Y. 11788
1-877-833-3491
• Insure your shipment for loss or
damage. Audiovox accepts no liability in
case of damage or loss en route to
Audiovox.
• Pay any charges billed to you by the
Exchange Center for service not covered
by the warranty.
• A new or refurbished unit will be
shipped to you freight prepaid.
What we will do:
Provide you with a new, or at our option, a
refurbished unit. The exchange unit is
under warranty for the remainder of the
original product’s warranty period.
For Canada Customers, please ship to:
Audiovox Return Centre
c/o Genco
6685 Kennedy Road,
Unit#3, Door 16,
Mississuaga, Ontario
L5T 3A5
Page 5

Pour vos dossiers
Vous aurez besoin du numéro de modèle
en cas de réparation. Inscrivez ci-dessous la
date d’achat et l’endroit où vous l’avez
acheté :
date de l’achat :
endroit de l’achat :
Information sur le service
Ce produit doit être réparé uniquement
par des personnes formées pour ce travail.
Pour des instructions sur la manière
d’obtenir une réparation, consultez la
garantie incluse avec ce guide.
La fiche pour prise murale est utilisée en
tant que moyen de déconnexion; elle doit
rester en état de fonctionnement et ne pas
être gênée pendant l’utilisation. Pour
déconnecter complètement l’appareil de
l’alimentation électrique, la fiche pour
prise murale doit être déconnectée de la
prise murale.
Précations
• Ne jamais ouvrir cet appareil
quelles que soient les circonstances.
Ne faites pas fonctionner cet appareil si
le boîtier a été enlevé. Toute réparation
ou ajustement interne devrait être fait
seulement par un technicien compétent.
• Ne touchez pas l’appareil avec les
mains mouillées. Si un liquide pénètre
dans l’appareil, faites-le inspecter par
un technicien qualifié.
REMARQUE : Utilisez
seulement
l’adaptateur fourni
avec cet appareil.
L’utilisation d’autres
adaptateurs pourrait
endommager sérieusement l’appareil.
N’essayez pas de contourner cette
mesure de sécurité.
ARRÊT AUTOMATIQUE
Lorsque le magnétophone est en mode de lecture ou d’enregistrement, il se fermera
automatiquement et désactivera les boutons en arrivant à la fin du ruban.
ENREGISTREMENT AVEC LE MICROPHONE SUR PIED
Pour enregistrer avec le microphone sur pied, branchez-le dans la prise MICROPHONE et
suivez la même procédure que pour l’enregistrement avec le microphone intégré.
Le microphone intégré est mis hors circuit lorsque le microphone sur pied est branché.
EFFACEMENT D’UNE CASSETTE
Pour effacer, il suffit d’enregistrer sur la partie à supprimer.
REMBOBINAGE
Pour ramener la cassette au début de l’enregistrement, appuyez sur REWIND. Appuyez sur
STOP lorsque vous avez atteint l’emplacement désiré.
AVANCE RAPIDE
Appuyez sur F-FWD pour sauter des passages rapidement. Appuyez sur STOP lorsque vous
avez atteint l’emplacement désiré.
COMMANDE PAUSE
Ce magnétophone est doté d’une fonction PAUSE qui suspend la lecture et
l’enregistrement. Appuyez sur PAUSE pour arrêter temporairement la lecture ou
l’enregistrement. Appuyez à nouveau sur PAUSE pour reprendre la lecture ou
l’enregistrement.
COMPTEUR ET BOUTON DE REMISE À ZÉRO
Le compteur sert à déterminer rapidement l’emplacement approximatif de divers
enregistrements.
1. Rembobinez la cassette jusqu’au début.
2. Appuyez une fois sur le bouton de remise à zéro pour afficher « 000 ». Notez l’affichage
du compteur après la lecture ou l’enregistrement de chaque sélection. Cela vous
indiquera le début de l’enregistrement suivant.
3. Pour aller à une sélection notée au préalable, appuyez sur F-FWD ou REWIND. Lorsque
le compteur affiche le numéro de la sélection, appuyez sur STOP/EJECT.
REMARQUE : Le compteur n’indique pas une longueur réelle mesurée; il donne une
indication relative de l’emplacement de chacune des sélections.
PRÉVENTION D’UN EFFACEMENT ACCIDENTEL
Dès que vous commencez un enregistrement,
l’enregistrement existant sur la cassette est
automatiquement effacé.
Si vous voulez conserver un enregistrement.
Enlever la languette, à gauche et à l’arrière, du
côté de la cassette que vous voulez conserver.
Lorsqu’une cassette dont la languette a été
enlevée est insérée, le magnétophone empêchera
l’effacement accidentel en bloquant le bouton
RECORD. Si vous décidez de ne plus conserver cet
enregistrement, placez un ruban gommé sur l’ouverture
de la languette. Vous pouvez enregistrer sur des
cassettes préenregistrées de la même manière.
VEUILLEZ NOTER : Cet appareil est doté d’un dispositif
de détection de la cassette. Il empêche le bouton
RECORD de s’enfoncer s’il n’y a pas de cassette dans l’appareil.
CASQUE D’ÉCOUTE (EN OPTION)
Vous pouvez brancher un casque d’écoute à cet appareil. Le branchement du casque
d’écoute désactive automatiquement le haut-parleur pour une écoute confidentielle. Cet
appareil est aussi doté d’une fonctionnalité de surveillance par casque d’écoute lorsque
vous enregistrez directement d’un autre appareil comme un magnétophone, la radio ou
une platine. Vous pouvez écouter ce qui est enregistré en branchant un casque d’écoute et
un adaptateur.
PRISE DE MARCHE/ARRÊT À DISTANCE (2,5 mm)
Un dispositif de mise en marche et d’arrêt à distance permet d’arrêter momentanément
l’enregistrement, lorsque vous utilisez un microphone externe, sans réinitialiser les
boutons. Ces contrôles à distance sont généralement disponibles chez les revendeurs
d’appareils audio. Assurez-vous que le dispositif que vous sélectionnez est doté d’une fiche
2,5 mm.
NETTOYAGE DES TÊTES
Des particules d’oxyde de fer provenant du ruban magnétique peuvent s’accumuler sur les
pièces qui sont en contact avec le ruban. Ces accumulations peuvent empêcher
l’effacement total, donner un son étouffé et même désactiver l’arrêt automatique.
Pour nettoyer les têtes, ouvrez le compartiment, appuyez sur p et nettoyez les têtes, le
cabestan et le presseur avec un produit nettoyant pour têtes.
Débranchez le cordon d’alimentation avant le nettoyage et si vous utilisez un produit
nettoyant humide, attendez 30 minutes pour laisser sécher.
Nettoyez les têtes après chaque période de 25 heures d’utilisation.
• Démagnétisez les têtes de temps à autre avec une cassette de démagnétisation
(disponible chez les revendeurs audio).
• N’utilisez pas d’objet métallique sur ou près des têtes du magnétophone. Ne laissez pas
de produit de nettoyage tomber dans le mécanisme de transport du ruban.
PRÉCAUTIONS ENVERS LES CASSETTES
• N’exposez pas les cassettes au soleil et ne les entreposez pas en des endroits chauds. Les
températures élevées peuvent tordre le boîtier ou endommager le ruban.
• Entreposez les cassettes dans leur boîte si vous ne les utilisez pas.
• Les cassettes peuvent être effacées par des champs magnétiques produits par des aimants,
moteurs électriques, transformateurs électriques et d’autres appareils. Gardez les cassettes
éloignées des aimants et des champs magnétiques.
It is important to read this user manual prior to using your new product for the first time.
Nous vous recommandons de lire ce manuel d’instructions avant d’utiliser votre nouveau produit pour la première fois.
user manual
guide de l’utilisateur
RP3503
RENSEIGNEMENTS IMPORTANTS SUR LES PILES
• Les piles peuvent échapper de l’électrolyte si elles sont mal installées, si elle sont
incinérées ou si on tente de recharger une pile qui n’est pas conçue pour être rechargée.
• Jetez immédiatement les piles qui coulent. Les piles qui coulent peuvent causer des
brûlures et d’autres blessures.
• Disposez des piles selon les lois fédérales, provinciales et locales.
DÉBALLAGE DE L’APPAREIL
Vous devriez avoir ceci :
• un appareil principal
• un adaptateur CA
• un microphone sur pied
• un guide de l’utilisateur
INSTALLATION DES PILES
1. Appuyez sur la patte de verrouillage et soulevez le couvercle du compartiment des piles
situé sous l’appareil pour ouvrir le compartiment.
2. Insérez quatre piles AA (non fournies) dans le compartiment. Assurez-vous que la
polarité + de chaque pile est conforme au schéma des piles.
3. Replacez le couvercle du compartiment.
REMARQUE : Si le magnétophone commence à exhiber un son déformé ou si les bobines
tournent très lentement, vérifiez l’appareil avec des piles neuves ou avec une autre
cassette avant de le faire réparer.
IMPORTANT : Assurez-vous de retirer les piles si vous rangez l’appareil pour quelques
semaines. Les piles qui fuient peuvent endommager grandement le magnétophone.
Disposez des piles correctement et conformément aux lois provinciales et locales.
Appuyez toujours sur STOP avant de ranger. Cela enlèvera des contraintes subies par
certaines pièces qui pourraient se déformer après une longue période.
ADAPTATEUR CA
L’adaptateur CA se branche dans la prise d’alimentation 6 V DC (ce qui débranche
automatiquement les piles) et dans une prise murale de 120 V CA.
IMPORTANT : le convertisseur de courant alternatif fourni avec cet appareil doit être placé
correctement en position verticale ou monté sur le sol.
ADAPTATEUR POUR VÉHICULE (EN OPTION)
Ce magnétophone peut se brancher à l’allume-cigare d’un véhicule. L’adaptateur pour
véhicule se branche dans la prise d’alimentation 6 V DC, ce qui débranche
automatiquement les piles.
PARA INSERTAR O REMOVER CASSETTE
1. Appuyez sur STOP/EJECT si un des boutons est enfoncé.
2 Appuyez sur STOP/EJECT pour ouvrir la PORTE du COMPARTIMENT DE LA CASSETTE.
3. Insérez une cassette, la bobine pleine vers la gauche, et soulevez le rebord devant vous,
puis appuyez sur la porte du compartiment pour le fermer. Retirez une cassette en
suivant les étapes 1 et 2 ci-dessus, retirez la cassette, puis appuyez sur la porte du
compartiment pour le fermer.
REMARQUE : Certains rubans spécifiques (au bioxyde de chrome et à particules
métalliques) n’enregistrent pas correctement avec cet appareil. Cependant, ces rubans
peuvent être lus.
LECTURE D’UNE CASSETTE
Pour écouter une cassette enregistrée :
1. Insérez la cassette tel qu’expliqué plus haut.
2. Rembobinez le ruban au point de départ s’il y a lieu. (Voir la fonction REWIND)
3. Appuyez sur PLAY.
4. Réglez le VOLUME.
ENREGISTREMENT AVEC LE MICROPHONE INTÉGRÉ
1. Insérez une cassette tel qu’expliqué plus haut. Appuyez sur RECORD (le bouton PLAY
s’enfonce simultanément). Vous êtes en mode d’enregistrement. Si le bouton RECORD
ne s’enfonce pas, voyez la section PRÉVENTION D’UN EFFACEMENT ACCIDENTEL.
2. Parlez normalement dans le MICROPHONE ÉLECTROSTATIQUE INTÉGRÉ. Pour une
meilleure qualité d’enregistrement, placez le magnétophone le plus près possible de la
source à enregistrer et n’obstruez pas le microphone.
REMARQUE : Le contrôle automatique de niveau (ALC) réglera le niveau d’enregistrement
pour la meilleure qualité possible, sans égard au réglage du volume.
A
60
A
A
A
JEU DU RUBAN
Le jeu du ruban de la cassette peut égratigner le ruban ou, pire,
provoquer sa rupture. Si vous remarquez que le ruban a du jeu,
utilisez un crayon pour rembobiner avant d’utiliser la cassette.
A
Allez-y fort ... mais pas dans vos
oreilles
Assurez-vous de baisser le
volume de l’appareil avant
d’utiliser un casque
d’écoute. Montez le volume
au niveau voulu après avoir
mis le casque d’écoute.
Remise à zéro du
compteur
Information relative à la sécurité
Avant de commencer
Alimentation de L'enregistreur
Utilisation de L'enregistreur
Entretien
Garantie
This Class B digital apparatus complies with
Canadian ICES-003.
Cet appareil numérique de la classe B est
conforme à la norme NMB-003 du Canada
Les descriptions et caractéristiques contenues
dans ce manuel sont fournies à titre de
référence générale et non comme garantie.
Dans le but de toujours fabriquer le meilleur
produit, nous pouvons apporter des
modifications sans autre avis.
Audiovox Electronics Corp,
150 Marcus Blvd, Hauppauge,
NY 11788
© 2009 Trademark(s) ® Registered
Marca(s) ® Registrada(s)
Marque(s) ® Deposée(s)
www.rcaaudiovideo.com
Printed In China / Imprimé en Chine
v3.0 (EN/F)
Fabricant/Partie
responsable
Audiovox Electronics Corp.,
150 Marcus Blvd.,
Hauppauge, NY 11788
Garantie limitée de 12 mois
S’applique aux appareils RCA
audiovideo
AUDIOVOX ELECTRONICS CORP. (la
Compagnie) garantit au premier acheteur au
détail de cet appareil que cet appareil ou
toute partie de ce dernier, dans des conditions
d’utilisation normales, ne possède aucune
défectuosité matérielle ou de main d’œuvre
pendant les douze (12) mois suivant la date
du premier achat; une telle défectuosité sera
réparée ou remplacée par un appareil remis
en état (à la discrétion de la Compagnie) sans
frais pour les pièces et la main d’œuvre.
Pour obtenir une réparation ou un
remplacement selon les conditions de cette
Garantie, l’appareil doit être envoyé avec une
preuve de garantie (p. ex., une facture datée
de l’achat), une description de la(des)
défectuosité(s) et le port payé à la Compagnie
à l’adresse indiquée ci-dessous.
Cette Garantie ne couvre pas l’élimination
des bruits ou parasites externes, la solution de
problèmes d’antenne, la perte/l’interruption
de transmissions ou de l’accès à Internet, les
coûts de l’installation, de la désinstallation ou
de la réinstallation de l’appareil, les altérations
causées par un virus informatique, un logiciel
espion ou tout autre programme malveillant,
la perte de média, de fichiers, de données ou
de contenus, les dommages causés à des
cassettes, des disques, des dispositifs ou des
cartes de mémoire amovibles, des hautparleurs, des accessoires, des ordinateurs, des
périphériques d’ordinateurs, d’autres lecteurs
multimédia, des réseaux résidentiels ou des
systèmes électriques de véhicule.
Cette Garantie ne s’applique pas à l’appareil
ou à toute partie de ce dernier qui, selon la
Compagnie, a été endommagée par ou a
souffert d’une modification, d’une mauvaise
installation, d’une manutention incorrecte,
d’abus, de négligence, d’un accident ou dont
l’étiquette portant le numéro de série/le code
à barres usiné a été retirée ou dégradée.
L’ÉTENDUE DE L’OBLIGATION DE LA
COMPAGNIE SOUS CETTE GARANTIE SE
LIMITE À LA RÉPARATION OU AU
REMPLACEMENT INDIQUÉ CI-DESSOUS;
L’OBLIGATION DE LA COMPAGNIE NE DOIT EN
AUCUN CAS DÉPASSER LE PRIX D’ACHAT
PAYÉ PAR L’ACHETEUR POUR CET APPAREIL.
Cette Garantie remplace toutes les autres
garanties ou obligations explicites. TOUTE
GARANTIE IMPLICITE, INCLUANT LA
GARANTIE IMPLICITE DE QUALITÉ
MARCHANDE, DOIT ÊTRE LIMITÉE À LA
DURÉE DE LA PRÉSENTE GARANTIE ÉCRITE.
TOUT ACTE CONTREVENANT AUX TERMES DE
LA PRÉSENTE GARANTIE, INCLUANT LA
GARANTIE IMPLICITE DE QUALITÉ
MARCHANDE, DOIT ÊTRE RAPPORTÉ DANS
UNE PÉRIODE DE VINGT-QUATRE (24) MOIS À
PARTIR DE LA DATE ORIGINALE DE L’ACHAT.
LA COMPAGNIE NE DEVRA EN AUCUN CAS
ÊTRE TENUE RESPONSABLE DES DOMMAGES
INDIRECTS OU ACCESSOIRES SUITE À LA
VIOLATION DE CETTE OU DE TOUTE AUTRE
GARANTIE. Aucune personne et aucun
représentant n’est autorisé à assumer au nom
de la Compagnie toute obligation autre que
celles indiquées dans cette Garantie en lien
avec la vente de cet appareil.
Certaines provinces ne permettent pas les
limites à la durée des garanties implicites ou
l’exclusion des dommages indirects ou
accessoires, alors certaines limites ou
exclusions pourraient ne pas s’appliquer à
vous. Cette Garantie vous donne certains
droits spécifiques et vous pourriez avoir
d’autres droits, qui varient selon la province.
Comment faire une réclamation de
garantie :
• Si votre appareil est en mesure
d’enregistrer des contenus (comme un
lecteur mp3, un enregistreur numérique
de la voix, etc.), nous vous recommandons
de faire des copies de sauvegarde des
contenus enregistrés sur l’appareil
régulièrement. Si possible, avant d’envoyer
l’appareil, faites une copie de sauvegarde
des contenus ou des données enregistrés
sur l’appareil. De plus, il est recommandé
de supprimer tout contenu personnel que
vous ne voudriez pas rendre accessibles à
d’autres. IL EST PROBABLE QUE LES
CONTENUS ET DONNÉES ENREGISTRÉS
SUR L’APPAREIL SERONT PERDUS LORS DE
LA RÉPARATION ET DU REFORMATAGE.
AUDIOVOX REFUSE TOUTE
RESPONSABILITÉ POUR LES CONTENUS OU
DONNÉES PERDUS OU POUR LA SÉCURITÉ
DES CONTENUS OU DONNÉES PERSONNELS
ENREGISTRÉS SUR L’APPAREIL RETOURNÉ.
L’appareil sera retourné avec les réglages
par défaut et sans contenus préenregistrés
qui auraient pu être déjà installés lors de
l’achat original. Le consommateur sera
responsable de télécharger à nouveau les
données et les contenus. Le consommateur
sera responsable du rétablissement des
réglages personnalisés.
• Emballez correctement votre appareil.
Incluez toute télécommande, carte de
mémoire, câble, etc. qui étaient fournis
avec l’appareil. Par contre, NE retournez
PAS les piles, même si les piles étaient
fournies lors de l’achat original. Nous vous
recommandons d’utiliser la boîte et le
matériel d’emballage originaux.
• Incluez une preuve de la date de l’achat
telle qu’une facture. Inscrivez aussi vos
nom et adresse et une description de la
défectuosité. Envoyez l’appareil par UPS
standard ou un équivalent à :
Audiovox Electronics Corp.
Attn : Service Department.
150 Marcus Blvd.
Hauppauge N.Y. 11788
1-877-833-3491
• Assurez-vous votre envoi contre la perte
ou les dommages. Audiovox refuse toute
responsabilité en cas de dommages ou de
perte lors du transport vers Audiovox.
• Payez les frais qui vous sont facturés par le
Centre d’échange pour les réparations qui
ne sont pas couvertes par la garantie.
• Un nouvel appareil ou un appareil remis à
neuf vous sera envoyé avec le port
prépayé.
Ce que nous ferons :
Nous vous fournirons un nouvel appareil ou,
à notre discrétion, un appareil remis à neuf.
L’appareil échangé est sous garantie pour la
durée restante de la période de garantie de
l’appareil original.
Pour les consommateurs canadiens,
veuillez envoyer votre appareil à :
Audiovox Return Centre
c/o Genco
6685 Kennedy Road,
Unit#3, Door 16,
Mississauga, Ontario
L5T 3A5
 Loading...