

RCA RLEDV2238A Instruction Manual
LED TV
RLEDV2238A
INSTRUCTION MANUAL
Table of Contents
1
Caution
Important Safety Precautions
Top/Side panel diagram
Remote Controller
Battery Installation
Using the Remote Control
Install TV
Set your TV
Connect Antenna and power
Turn On TV
Help
2
3
4
6-7
8
9
10-11
12
12-25
24-25
28
29
TV Bracket assembly
5
Specifications
Select Input Source
Picture Menu
Sound Menu
Time Menu
Setup Menu
Close Caption
Lock Menu
Channel Menu
PC Menu
DVD Setup
13-14
15-16
17
18-19
19
20-21
22-23
26-27
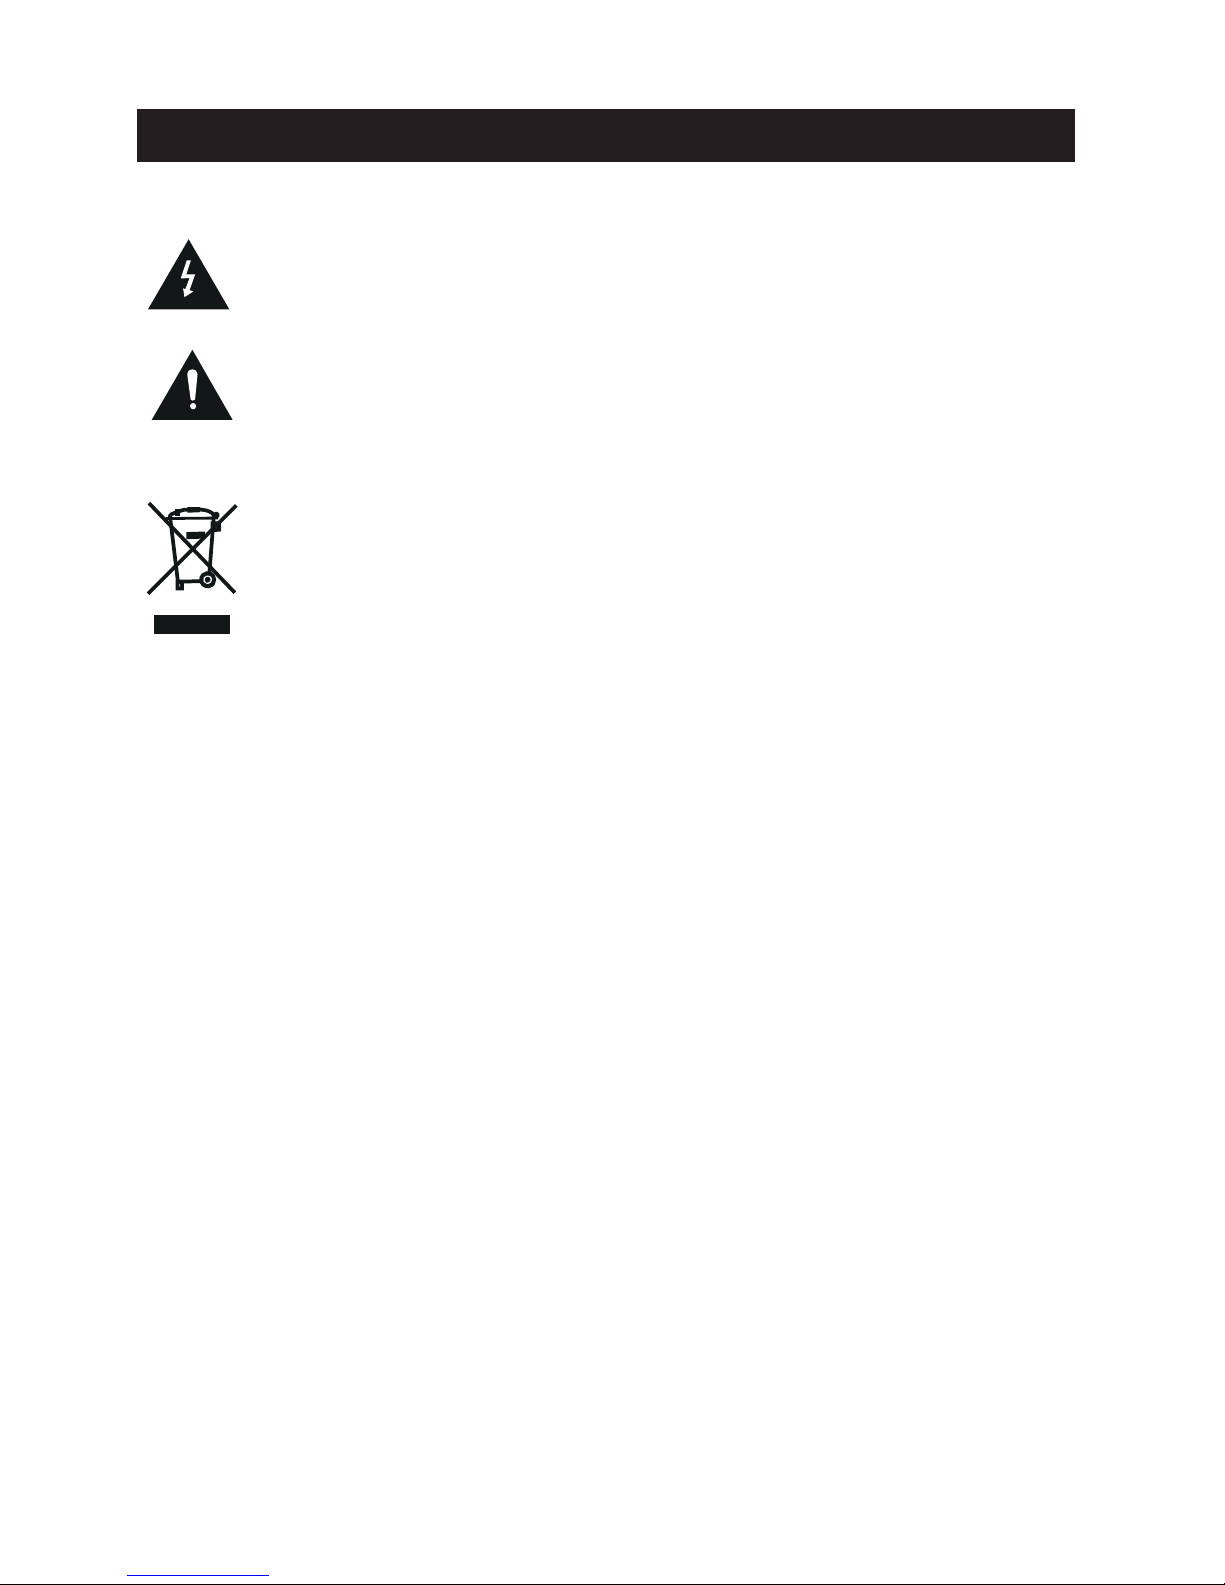
The lighte nin g fla sh wi th ar rowhead symb ol, w ith in an e qui lateral triangl e is
intended t o ale rt th e use r to th e presence of un-in sul ate d "da nge rous voltage "
within the p rod uct s enc los ure that may be of suff ici ent m agnitude to const itu te a
risk of elec tri c sho ck to t he pe rso ns.
The exclam ati on po int w ith in an equilateral t ria ngl e is in tend to alert the use r to
the presen ce of i mpo rta nt op erating and maint ena nce ( ser vicing) instruc tio ns in
the litera tur e acc omp any ing the applia nce .
Co r r ect dis p osal of t his Pr o duct
W aste E lec tri cal & E lec tro nic Equipmen t (WE EE)
Your product i s des ign ed an d manufactured wi th hi gh qu ali ty ma terials and
componen ts wh ich c an be r ecy cled and reuse d.
This symbol mea ns th at el ect ric al and electro nic e qui pme nt, a t their end-of -li fe,
should be di spo sed o f sep ara tely from your hous eho ld wa ste .
Please dis pos e of th is eq uip ment at your local co mmu nit y was te
collection/ rec ycl ing c ent re.
In the Europ ean U nio n the re ar e separate col lec tio n sys tem s for u sed electrical
and electr oni c pro duc ts. P lease help us to c ons erv e the e nvi ronment we liv e in!
Caution
2

To reduce t he risk of fi re or elect ric shock , do not expo se thi s app arat us to r ain or m oisture .2
Caution:
These s ervicin g instruc tions are f or use b y qua lifi ed servic e personn el only. To reduce t he risk of
elect ric shock d o not perfo rm any serv icin g oth er tha n tha t cont ain ed in th e operati ng instru ctions.
unless you are q uali fied t o do so.
19) Do no t place any s ources of d anger on th e apparat us (e.g. li quid fill ed obj ect s, lig hte d cand les).
20) Wall or C eiling Mo unting - The applia nce sh oul d be mou nte d to a wal l or ceilin g only as
recom mended by t he manufa cturer.
3

4
8
3.95”
3.95”
4
3.95 ” x 3.95”
100 100
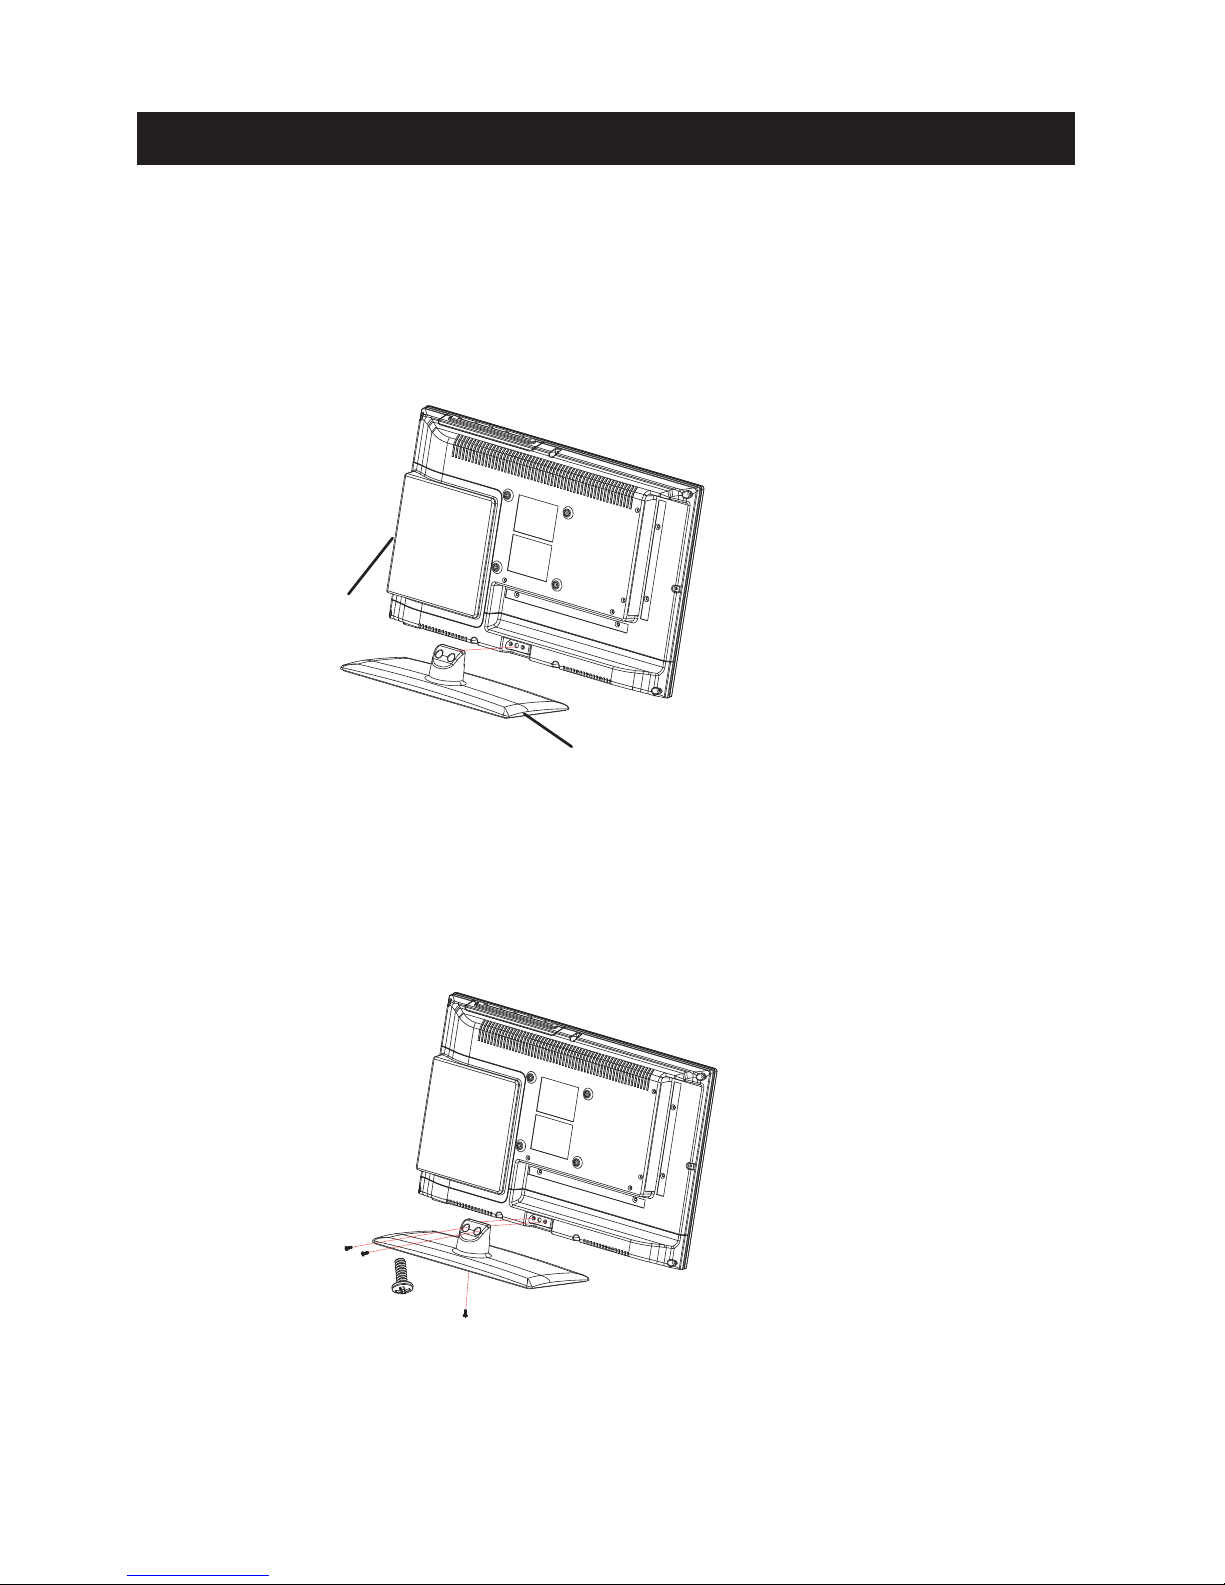
1.Match the position hole in the middle of the stand poles
to the position holes undter the bottom to the TV unit and
connect the stand base with the TV unit, the position holes
locates between the 2 screws of the stand poles.
TV
stand base
2. Fix the stand and the stand poles with 3 pieces of
BM4*10 screws
scre ws
BM4 *1 0( 3P CS)
TV Bracket assembly
5
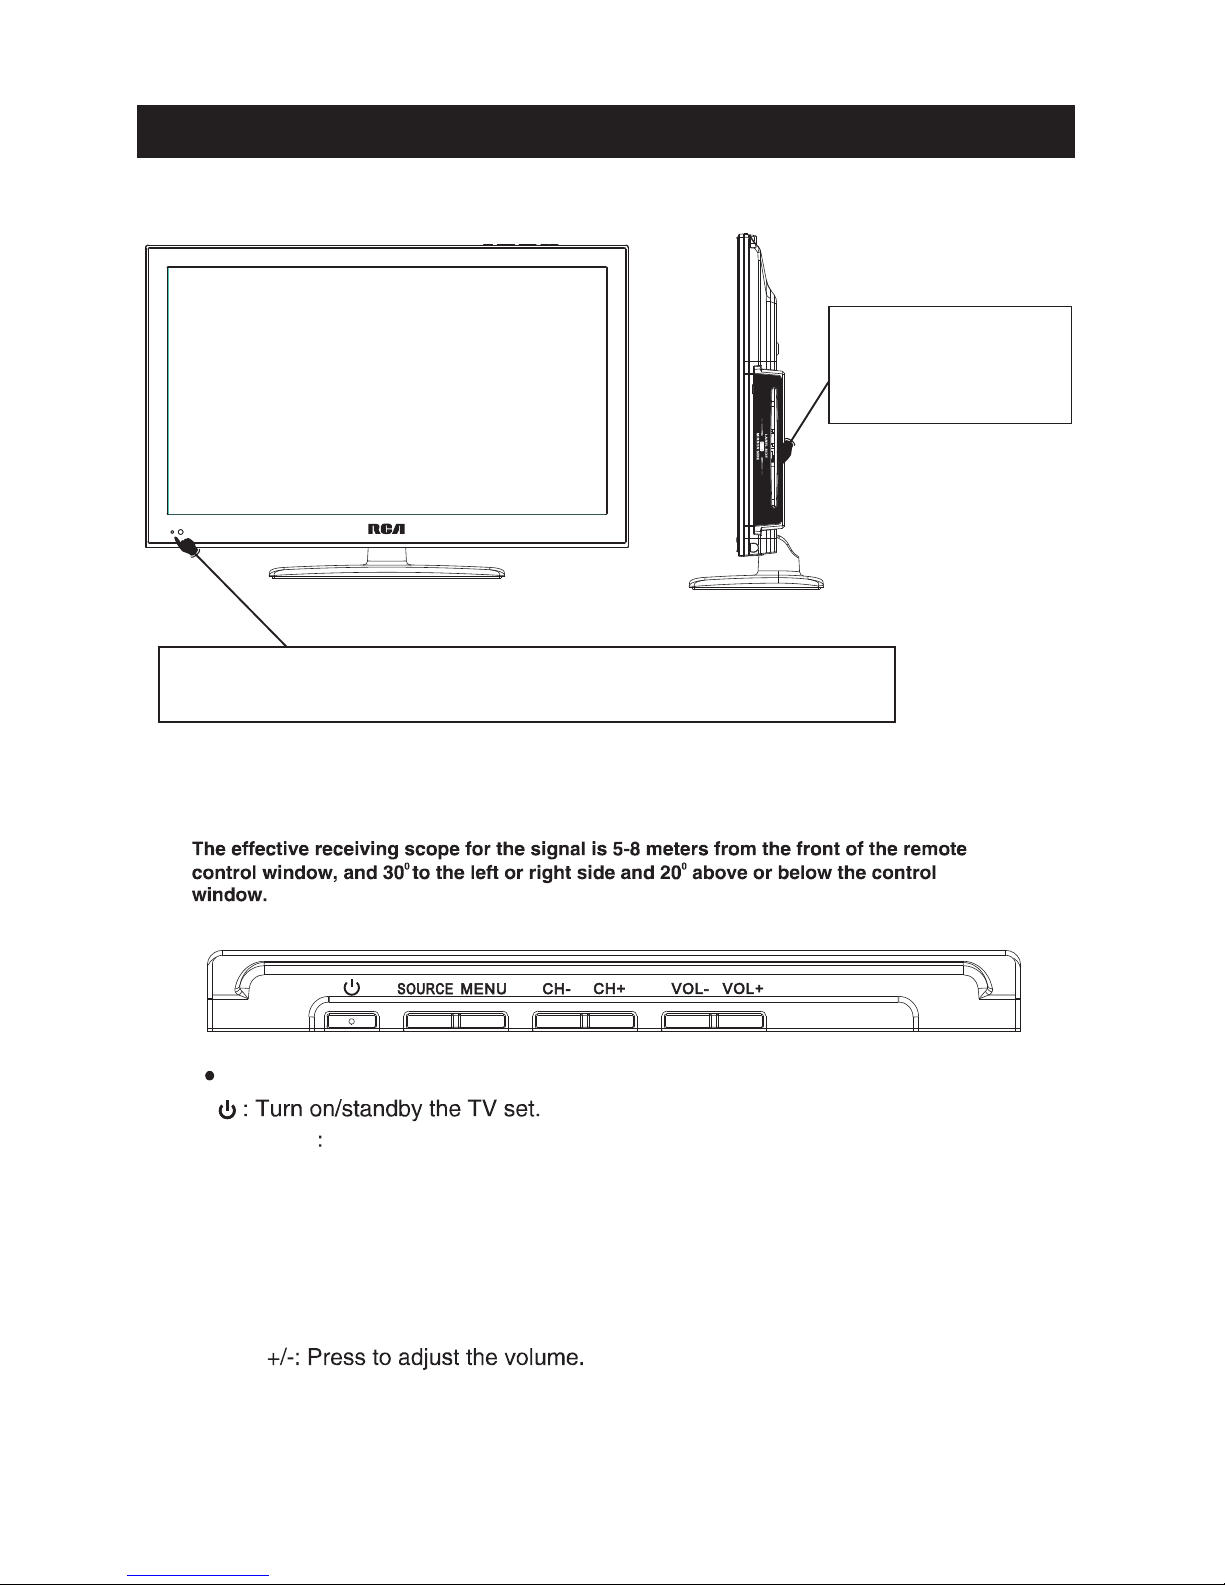
Indicator on(Red) Standby mode
Indicator on(Green) Power on mode
(IR) Infrared Receiver: Receives IR signals from the remote control.
(Power on/Standby) LED Indicator: Press
to turn on and off
VOL
SOURCE External signal input selection
item selected.
and confirm the
The functions of the buttons on the are as follows:TV
CH+/-:When watching TV: select channels.
MENU:
1.Press Menu.
2.Press SOURCE t o enter .
3.Use CH+/- to shi ft UP/D OWN.
4.Press SOURCE to confi rm, then press VOL+/-to ad just.
5.Press SOURCE t o confi rm
DVD
Insert disc with shiny
side facing the front
of TV.
Top panel diagram
6
(Left Side)
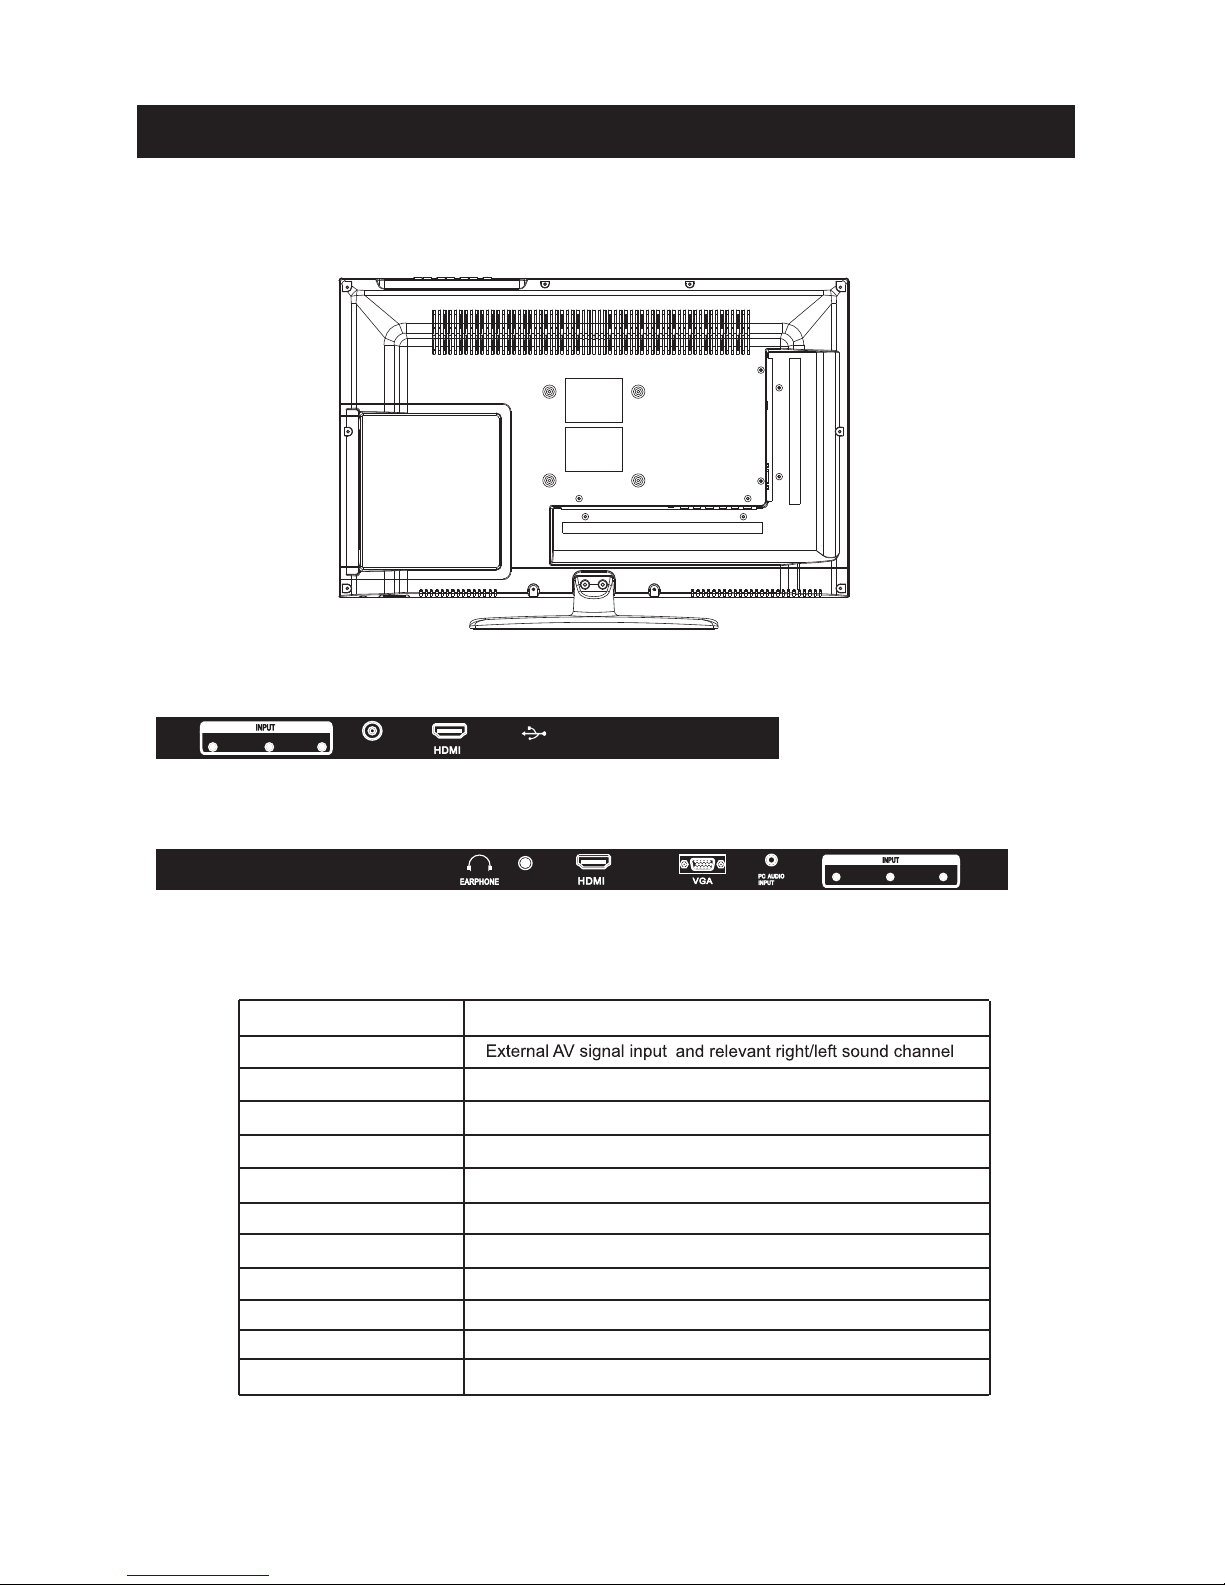
(Back Side)
Side panel diagram
7
R
L
VIDE O
Ser vice Po rt
RF
2
AC 10 0-240 V~
50/ 60Hz
COAX IAL
1
Pb
Y
Pr
Connect to ANT or cable sour ce
Power Socket
HDMI2 IN
Connect to HDMI of DVD or other equipment
PC AUDIO IN
PC audio input
VGA IN
VGA signal from computer output
Y Pb Pr
Connect to the composite terminal of your DVD/VCR
ANT 75 Ω
EARPHONE
For Upgrad e Use .
AV INPUT
Earphone o utp ut
AC 100-240V~ 5 0/60 Hz
COAXIAL
Digital Aud io Ou tpu t
Service Port
Name
Function Description
HDMI1 IN
Connect to HDMI of DVD or other equipment
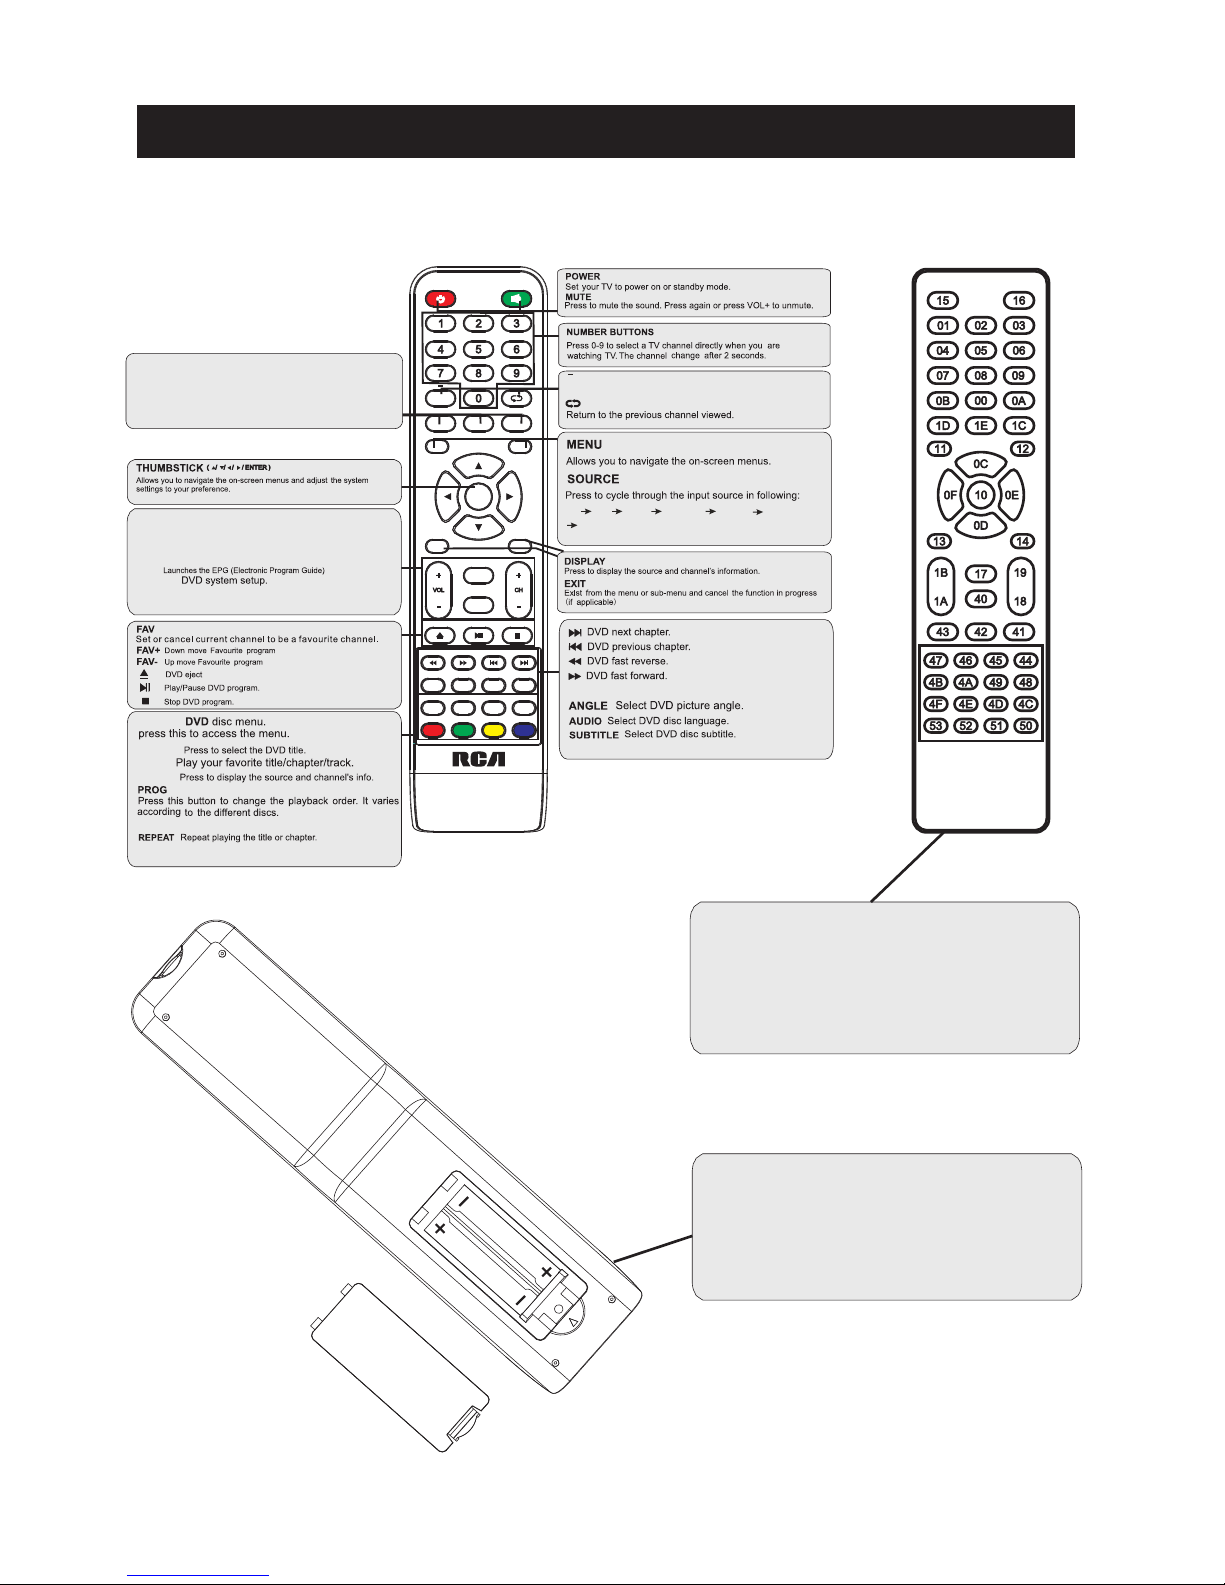
Remote Controller
8
Unive rsal remo te co de
This is t he co de for r emo te contro l of
RLEDV 2238A,i f you w ant to chan ge to a
unive rsal remo te co ntro l,y ou can edit
this co de into you r uni versal re mote cont rol.
(1)Open th e bat ter y com par tment cover
on the back si de
(2)Inser t two 1 .5V b att eri es of AAA type
with corre ct po lar ity
(3)Close t he ba tte ry co mpa rtment cover
on the back si de
Universal Remote Control code:007F
(Universal Remote control is not included)
MENU
SOURCE
ENTER
EXIT
SLEEP P.MODE S.MODE
DISPLAY
MTS / MP3PROG
ZOOM
D.MENU D.TITLE
ANGLE
EPG
D.DISP
REV FWD PREV
FAV-
GOTO
AUDIO
SUBTITLE
FAV FAV+
PROG STEP REPEAT A-B
NEXT
D.setup
D.Menu D.Title
Goto
D.Disp
PROG STEP REPEAT A-B
Zoom
Angle
Subtitle
Audio
D.TITLE:
A-B
Dur ing the p layba ck,pr ess thi s butto n to repe at
pla yback o f a speci fic sec tion on a d isc.
SLEEP: Select amount of time before TV turn
off
automatically.
S.MODE: Press to cycle through the different sound settings
P.MODE: Press to cycle through the different picture settings
D.DISP:
D.MENU:
Pre ss "-" to e nter a pr ogram n umber f or mult iple pr ogram
cha nnel, s uch as 2- 1 etc.
GOTO:
STE P:Play fo r singl e frame i mage
ZOOM In DVD source adjust DVD picture size
MTS / MP3PROG:
Pre ss to sel ect the a udio mo de,yo u can sel ect ste reo,M ono,
or SA P(sec ond aud io prog ram). /When p layin g mp3 dis c,
pre ss MP3 PR OG and ad d the fav orite m usic to p layli st,
pre ss PROG t wo time s to see th e progr ammed p layli st.
CH +/ - : Press t o scan th rough o r to sele ct a chan nel.
V +/- : Press t o incre ase / dec rease t he soun d level .
EPG:
D.Setup:
AVTV
HDM I1
HDM I2
PC
YPB PR
DVD
 Loading...