

Page 1

No film output on this page
Page 2

Thomson multimedia Inc.
10330 N. Meridian St.
Indianapolis, IN 46290
©2001 Thomson multimedia Inc.
Trademark(s) © Registered
Marca(s) © Registrada(s)
Marque(s) © Deposée(s)
55118880 (EN)
www.rca.com
Page 3
S
T
O
P
L
A
S
T
N
E
X
T
P
L
A
Y
usermanual
RD1000
Page 4

Important Information
Warning
• Do not play your headset at a high volume. Hearing experts warn against extended
high-volume play.
• If you experience a ringing in your ears, reduce volume or discontinue use.
• Y ou should use extreme caution or temporarily discontinue use in potentially hazardous situations.
Even if your headset is an open-air type designed to let you hear outside sounds, don’t
turn up the volume so high that you are unable to hear what is around you.
Precautions for the Unit
• Do not use the unit immediately after transportation from a cold place to a warm
place; condensation problem may result.
• Avoid shock to the unit especially during recording. Recorded data may be damaged.
• Do not store the unit near fire, places with high temperature or in direct sunlight.
• Do not operate or store unit in places with frequent static electricity or electrical
noise (e.g. speaker, TV set).
• Clean the unit with a soft cloth or a damp chamois leather. Never use solvents.
• The unit must only be opened by qualified personnel.
Warning: Use of this product is for your personal use only. Copying CDs
or downloading music files for sale or other business purposes is a violation of copyright law. It is also a violation of copyright law to download
files without permission of the copyright owner.
Caution While Driving: Use of headphones while operating an automobile or moving vehicle is not recommended and is unlawful in some states
and areas. Be careful and attentive on the road. Stop operation of the
unit if you find it disruptive or distracting while driving.
Page 5

Important Information
Care of MultiMediaCards
• Do not touch the golden electrodes. Use a soft dry cloth to clean any dirt.
• Do not bend MultiMediaCards.
• Do not operate or store MultiMediaCards in places with frequent static electricity or
electrical noise (e.g. speaker, TV set). Recorded data may be damaged.
• It is normal for MultiMediaCards to get warm after being used for a long time.
• Always put it in storage case after removing from the unit.
• Do not store MultiMediaCards near fire, places with high temperature/ humidity or
in direct sunlight.
• We recommend that you make a copy of your recorded contents into another media
(e.g. floppy disc, tape) as back-up.
Power supply
• Battery power: AAA (LR03) x 2.
Battery Precautions
• When storing the unit , be sure to remove the batteries because they may leak and
damage the unit.
• Batteries may leak electrolyte if inserted incorrectly, if disposed of in fire, or if an
attempt is made to charge a battery not intended to be recharged.
• Never mix new batteries with old ones. Do not mix battery types.
• Discard leaky batteries immediately. Leaking batteries may cause skin burns or other
personal injury.
• Do not charge batteries which are not intended to be recharged.
• Dispose of batteries, according to federal, state and local regulations.
The descriptions and characteristics given in this document are given as a general indication and not as a guarantee. In
order to provide the highest quality product possible, we reserve the right to make any improvement or modification
without prior notice. The English version serves as the final reference on all product and operational details should any
discrepancies arise in other languages.
EN
Page 6
FCC Information
FCC Information
This device generates and uses radio frequency (RF) energy, and if not installed and
used properly, this equipment may cause
interference to radio and television reception.
This equipment has been type tested and
found to comply with the specifications in
Subpart J of Part 15 of FCC Rules. These rules
are designed to provide reasonable protection against radio and television interference
in a residential installation. However, there is
no guarantee that interference will not occur
in particular installations.
If this equipment does cause interference to
radio or television reception (which you can
determine by turning the equipment off and
on), try to correct the interference by one or
more of the following measures:
• Reorient the receiving antenna (that is, the
antenna for the radio or television that is
receiving the interference).
• Move the unit away from the equipment
that is receiving interference.
• Plug the unit into a different wall outlet so
that the unit and the equipment receiving
interference are on different branch circuits.
If these measures do not eliminate the interference, please consult your dealer or an
experienced radio/television technician for
additional suggestions.
Also, the Federal Communications
Commission has prepared a helpful booklet,
"How To Identify and Resolve Radio TV
Interference Problems." This booklet is available from the U.S. Government Printing
Office, Washington, DC 20402. Please specify
stock number 004-000-00345-4 when ordering copies.
For Y our Recor ds
In the event that service should be required,
you may need both the model number and
the serial number. In the space below, record
the date and place of purchase, and the serial number:
Date of Purchase
Place of Purchase
Serial No.
Service Information
This product should be serviced only by those
specially trained in appropriate servicing
techniques. For instructions on how to
obtain service, refer to the warranty included
in this Guide.
WARNING: TO PREVENT FIRE
OR ELECTRICAL SHOCK HAZARD,
DO NOT EXPOSE THIS PRODUCT
TO RAIN OR MOISTURE.
CAUTION
RISK OF ELECTRIC SHOCK
THE LIGHTNING
FLASH AND ARROWHEAD WITHIN THE
TRIANGLE IS A
WARNING SIGN
ALERTING YOU OF
"DANGEROUS
VOLTAGE" INSIDE
THE PRODUCT.
DO NOT OPEN
CAUTION: TO REDUCE THE
RISK OF ELECTRIC SHOCK,
DO NOT REMOVE COVER
(OR BACK). NO USERSERVICEABLE PARTS INSIDE. REFER SERVICING
TO QUALIFIED SERVICE
PERSONNEL.
SEE MARKING ON BOTTOM / BACK OF PRODUCT
THE EXCLAMATION
POINT WITHIN THE
TRIANGLE IS A
WARNING SIGN
ALERTING YOU OF
IMPORTANT
INSTRUCTIONS
ACCOMPANYING
THE PRODUCT.
Page 7

Table of Content
EN
Important Information
FCC Information
Before You Begin . . . . . . . . . . . .1
What’s So Special About This MP3
Player? . . . . . . . . . . . . . . . . . . . . . . . . .1
Computer System Requirements . . . .1
Getting Started . . . . . . . . . . . . .2
1. Insert The Included Software CD
Into your CD-ROM Drive . . . . . . . . . .2
2. Install The USB Drivers . . . . . . . . . .3
3. Connect The k@zoo Player To
Computer . . . . . . . . . . . . . . . . . . . . . . .3
4. Install The Music Management
Software . . . . . . . . . . . . . . . . . . . . . . . .4
5. Install The MusicMatch Jukebox
TM
Software . . . . . . . . . . . . . . . . . . . . . . . .5
6. Set MusicMatch Jukebox Basic
Preferences . . . . . . . . . . . . . . . . . . . . .7
7. Learn The MusicMatch Jukebox
Basic Controls . . . . . . . . . . . . . . . . . .11
8. Save CD Tracks To Play On Y our
PC Or In Your k@zoo Player . . . . . . .12
9. Download Music From The
Internet . . . . . . . . . . . . . . . . . . . . . . .14
10. Use MusicMatch Jukebox To
Play Radio On Your PC . . . . . . . . . . .14
11. Organize The Music Library . . . .16
12. Create a Playlist For Playing Or
Downloading . . . . . . . . . . . . . . . . . . .17
13. Edit Tags For Your Songs . . . . . .19
14. Transfer The Audio Files To
k@zoo Player . . . . . . . . . . . . . . . . . . .20
15. Install The RealJukebox
TM
Software . . . . . . . . . . . . . . . . . . . . . . .23
16. Set Basic Preferences . . . . . . . . .24
17. Learn the RealJukebox Basic
Controls . . . . . . . . . . . . . . . . . . . . . . .27
18. Save CD Tracks To Play On Y our
PC Or In Your k@zoo Player . . . . . . .28
19. Download Music From The
Internet . . . . . . . . . . . . . . . . . . . . . . .29
20. Organize The Playlist . . . . . . . . .30
21. Create A Playlist For Playing Or
Downloading . . . . . . . . . . . . . . . . . . .31
MusicMatch Jukebox is a trademark of MusicMatch, Inc.
RealJukebox is a trademark of Real Networks, Inc.
Page 8

Table of Content
22. Create An Auto-Playlist . . . . . . .32
23. Searching For Tracks . . . . . . . . . .32
24. Radio . . . . . . . . . . . . . . . . . . . . . .33
25. Transfer The Audio Files To The
k@zoo Player . . . . . . . . . . . . . . . . . . .34
26. Install The k@zoo User’s Guide
And Documentation . . . . . . . . . . . . .36
Before You Begin . . . . . . . . . . .37
1. Insert Batteries Into The Player . .37
2. Inserting A MultiMedia Card
(Optional) . . . . . . . . . . . . . . . . . . . . . .38
3. Using Headphones . . . . . . . . . . . .38
General Controls . . . . . . . . . . . .39
Display . . . . . . . . . . . . . . . . . . .40
Operation . . . . . . . . . . . . . . . . .41
General Operation . . . . . . . . . . . . . .41
DSP . . . . . . . . . . . . . . . . . . . . . . . . . . .42
Play Modes . . . . . . . . . . . . . . . . . . . . .42
Programming Tracks . . . . . . . . . . . . .42
Editing Program . . . . . . . . . . . . . . . .43
Key Lock . . . . . . . . . . . . . . . . . . . . . . .43
File Download . . . . . . . . . . . . . . . . . .43
Troubleshooting Tips . . . . . . . .44
Limited Warranty (For US) . . . .45
Limited Warranty (For Canada) 46
Page 9

Before You Begin
1
EN
What’ s so special about this MP3 player?
This player is meant to play MP3 files encoded on a memory card or recorded in the
built-in flash memory.
To do so, you need the use of a Windows computer with USB connection, USB cable
(included) and a music management software (MusicMatch Jukebox recommended).
Compressed music internet sites
www.thomson-lyra.com, www.lyrazone.com
www.thomson-music.com, www.musicmatch.com,
www.emusic.com
CDs
Compression and transfer
USB cable
MP3 music in
MultiMediaCard
or built-in flash
memory
Playback
and/or
Computer System Requirements
Minimum
• Pentium 166 MHz or faster
• 32MB RAM
• Windows* 98, Windows Me or
Windows 2000
• 45 MB free hard disk space plus 1 MB
for every minute of CD quality music you
store on your hard drive
• CD-ROM Drive
• USB Port
• Full Duplex Sound Card
Optimum
• Pentium II 300 MHz or higher
• 64 MB RAM
• Windows 98SE, Windows Me or
Windows 2000
• 50 MB free hard disk space plus 1 MB
for every minute of CD quality music you
store on your hard drive
• CD-ROM Drive
• USB Port
• Full Duplex Sound Card
• Internet Explorer 4.0 or more with
latest access
* Windows and Microsoft are registered trademarks of Microsoft Corporation in the United States and/or
other countries.
MusicMatch
Jukebox
S
T
Y
O
A
P
L
P
L
A
T
S
X
T
E
N
Page 10
Getting Started
2
Use the software setup program on the included CD to install the USB
drivers, Music Management software, and User’s guide and
documentation.
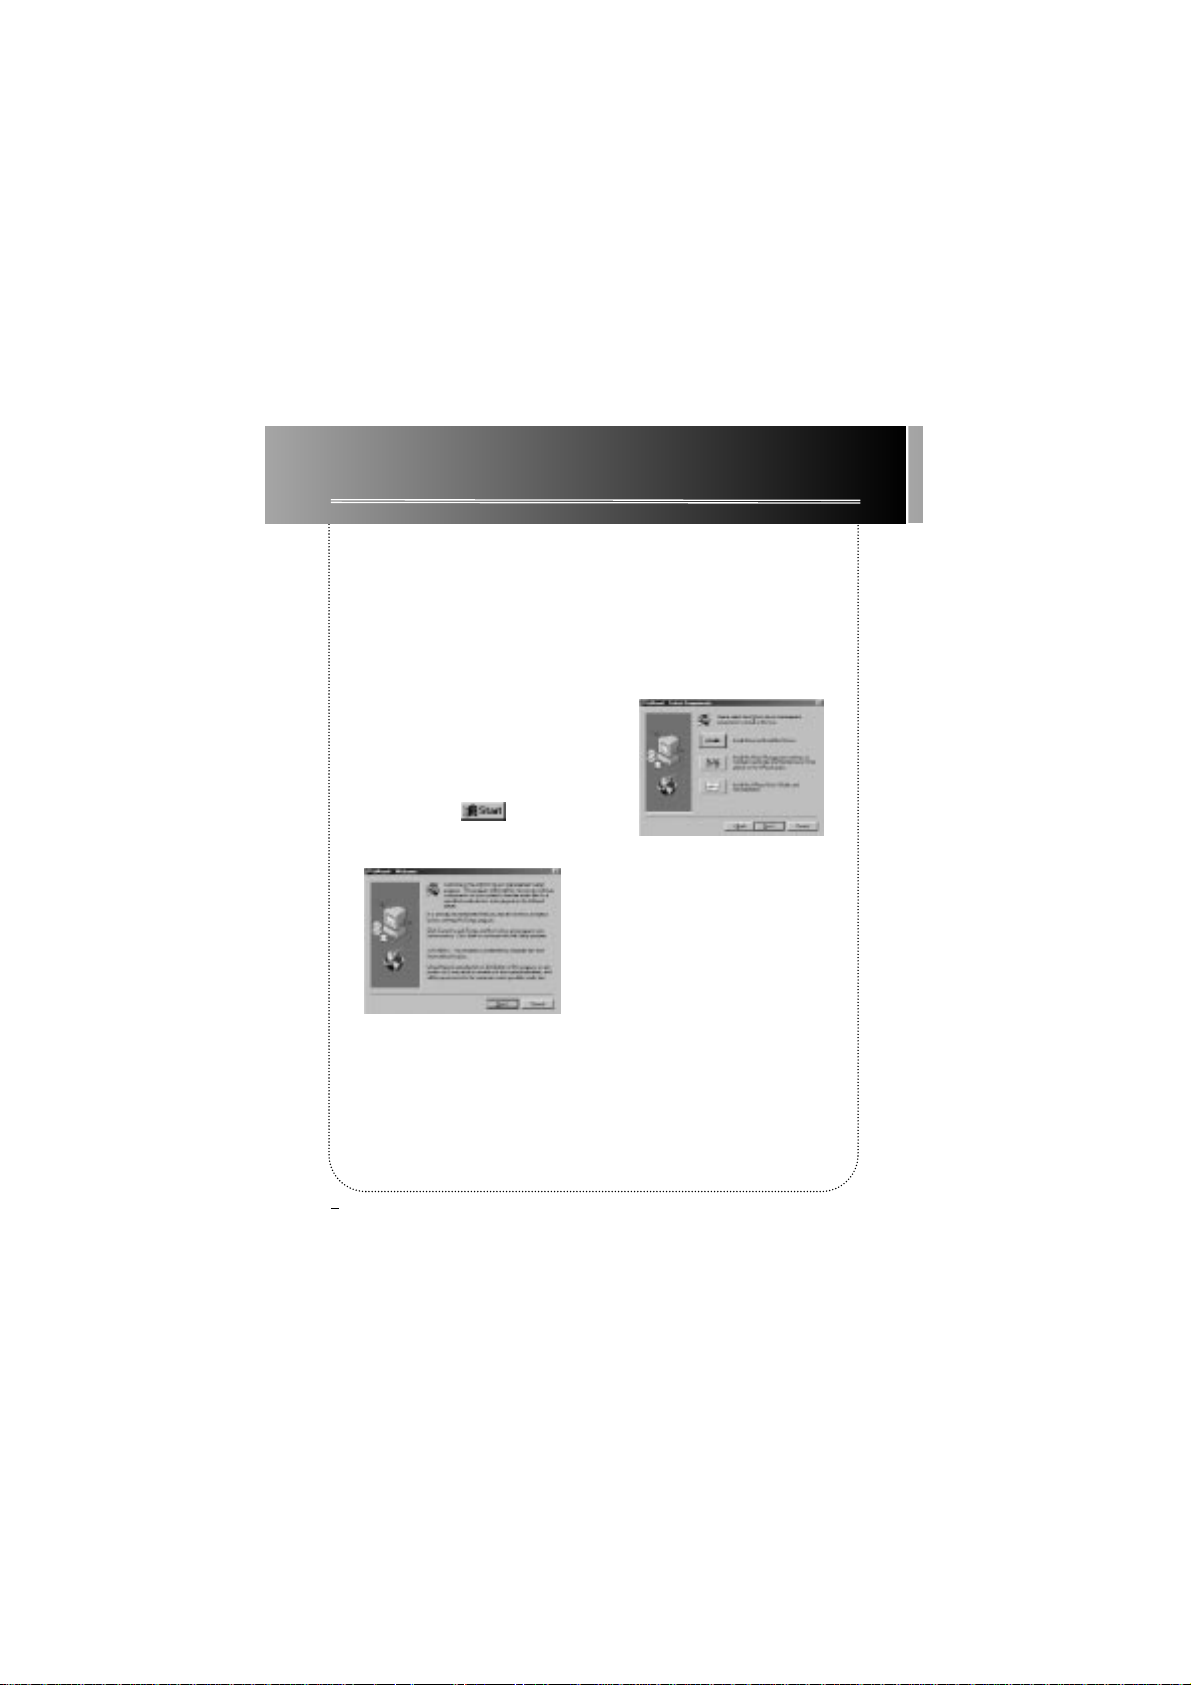
1. Insert the included software CD into your CD-ROM drive.
A. Turn on your computer and
insert the software CD. The K@zoo
Software Setup program will
automatically run.
Note: If the setup screen does not
appear, double click My Computer,
double click your CD-ROM drive
icon, and double click setup.exe.
You can also click , Run, then
type D:\setup.exe (where D is the
letter of your CD-ROM drive).
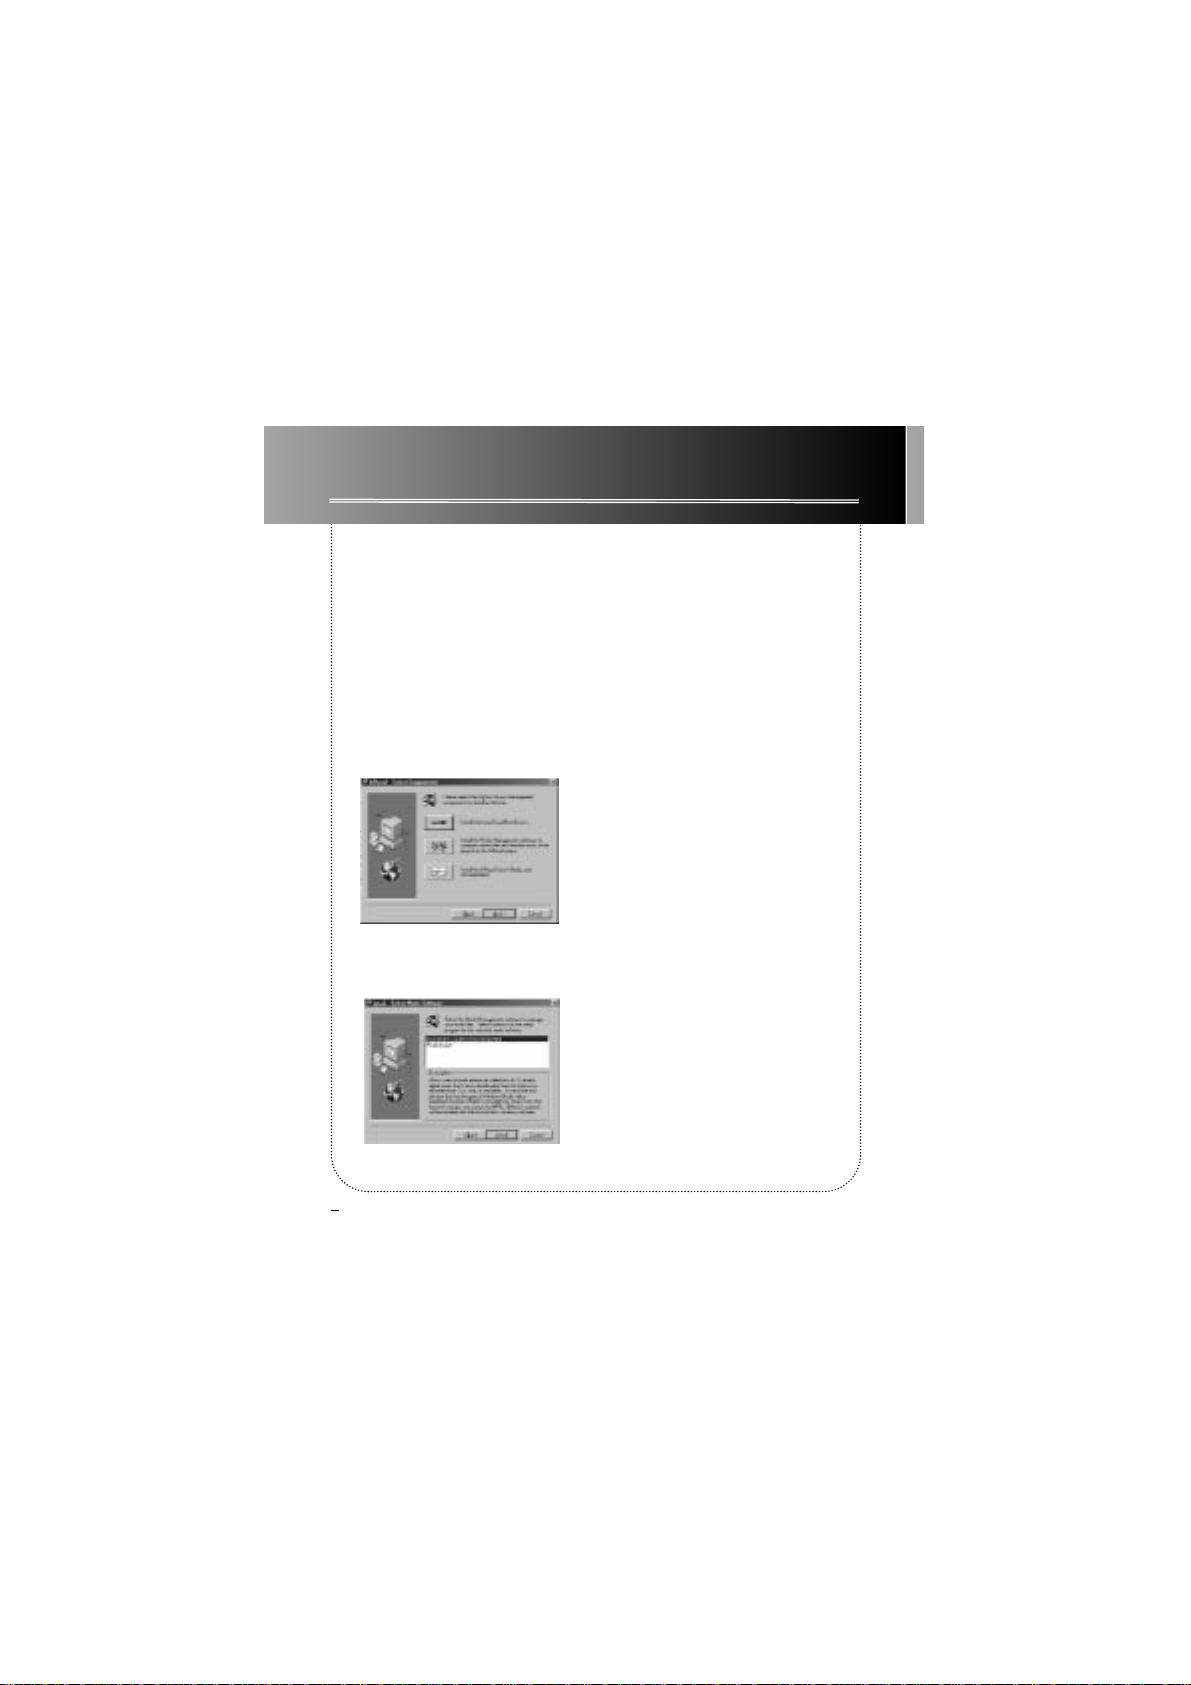
B. Click Next to display the Select
Components screen.
Page 11
Getting Started
2. Install the USB drivers.
A. Click the Install Universal Serial
Bus Drivers button and follow the
on-screen instructions to install the
drivers.
B. Restart your computer (if
prompted).
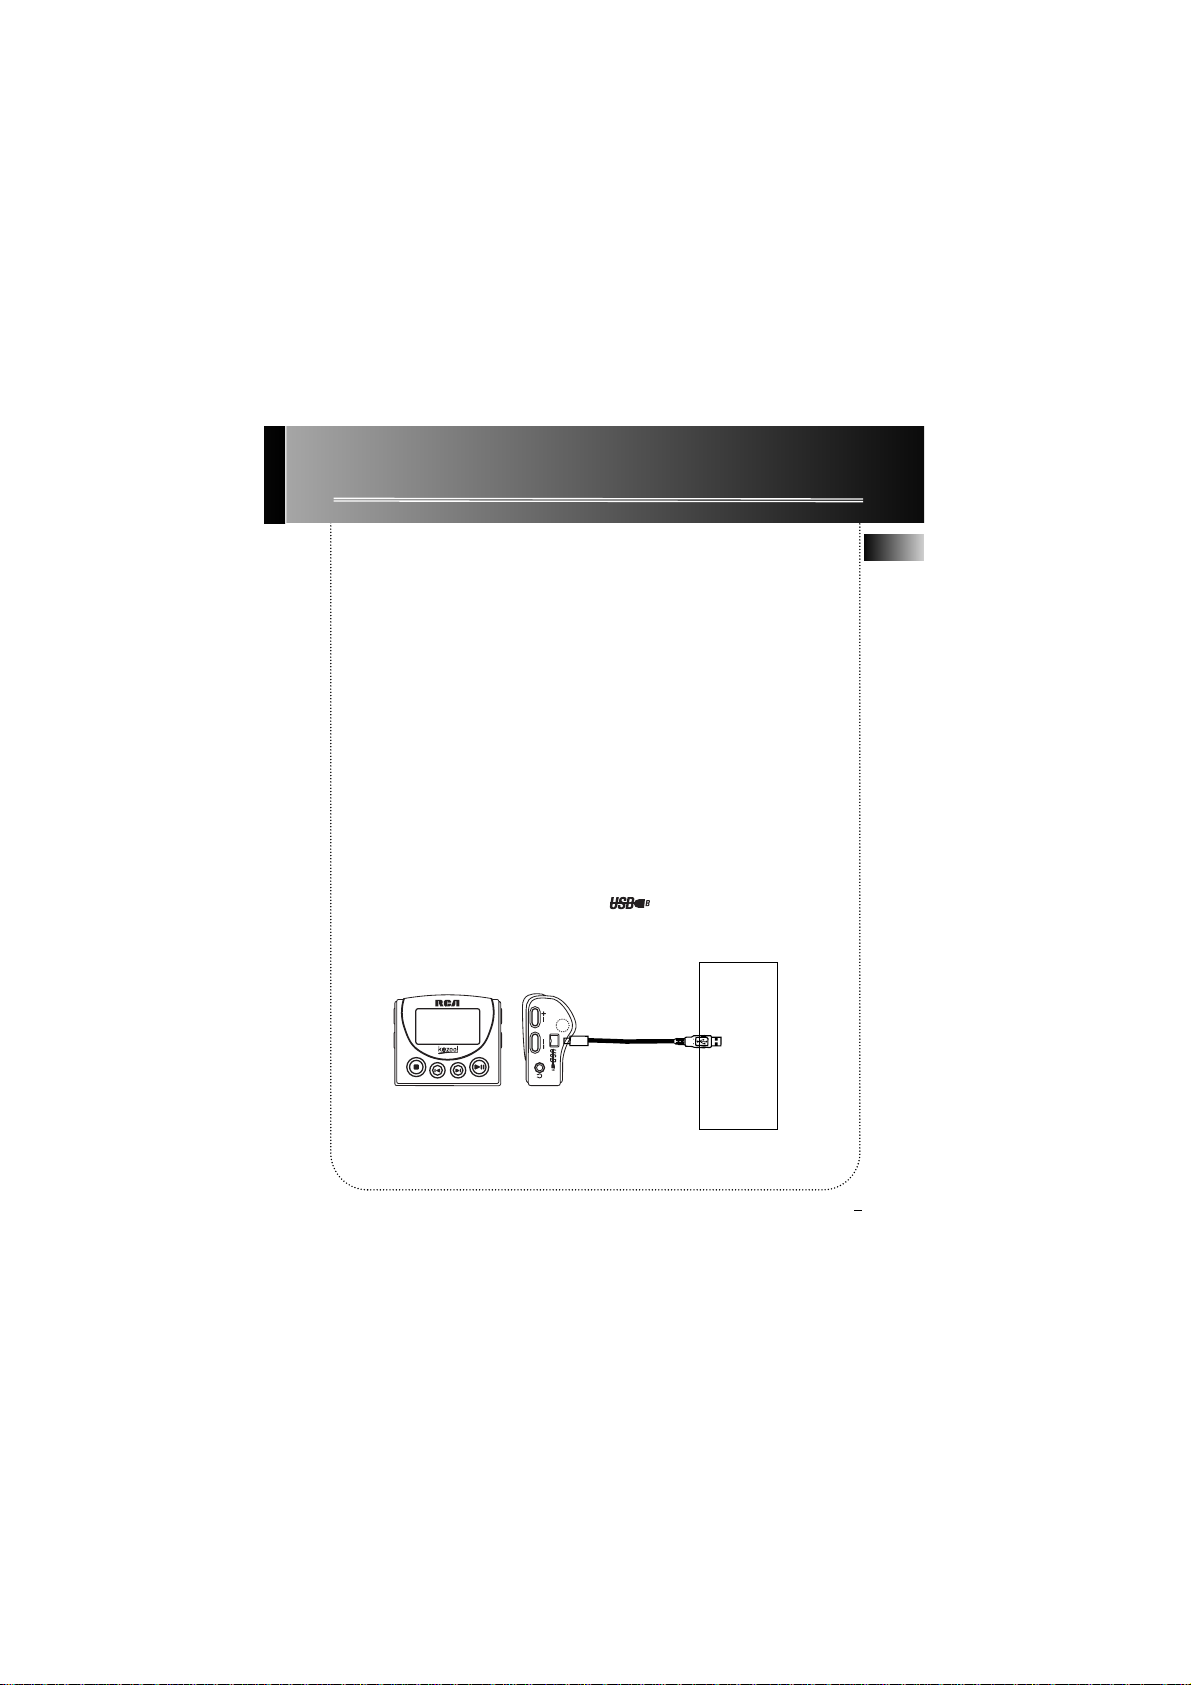
3. Connect the k@zoo player to computer
A. Make sure you have installed the
USB drivers and that your computer
has been restarted (if necessary).
B. Once the computer has been
restarted, connect the mini-USB
(small) connector to the k@zoo
player, connect the Type-A (large)
connector to an available USB port
of your computer as shown below.
C. Windows will automatically
install the drivers for the external
drive after you connect it.
Note: Consult your computer or
device’s owner manual for USB port
specifications and troubleshooting.
The k@zoo player will display the
icon when USB cable is prop-
erly connected.
3
EN
S
T
O
Y
A
P
L
P
L
A
T
S
X
T
E
N
VOLUME
PHONES
PC
Page 12
Getting Started
4. Install the music management software.
MusicMatch Jukebox and RealJukebox software are included on the k@zoo
software CD. We recommend MusicMatch Jukebox for ease of use and functionality. Both software programs operate as players on your PC, compress
CDs to MP3 format, download files from the Internet, and transfer the files to
your k@zoo player. Download MP3 files to the player with the MusicMatch
Jukebox software and RealJukebox software. Install one or both of these programs.
A. Insert the k@zoo software disc into
your CD-ROM drive. Follow the
directions under Step 1 to display the
Select Components screen.
B. Click the Install the Music
Management Software icon to display
the Select Music Software screen.
C. Select the software you want to
install and click Install.
• Select MusicMatch Jukebox
(Recommended) to install the
MusicMatch Jukebox software.
MusicMatch Jukebox is capable of
MP3, WAV, and Windows Media
TM
audio format compression. Musical
content is provided by EMusic.com*.
EMusic’s content will be installed
with the MusicMatch Jukebox software.
Go to Step 5.
• Select RealJukebox to install the
RealJukebox software. RealJukebox
is capable of MP3, wave, and
RealAudio8 with ATRAC3 compression.
Go to Step 15.
*EMusic.com, the EMusic.com Logo and other proprietary names of EMusic.com are
trademarks of Emusic.com Inc.
4
Page 13

Getting Started
5. Install the MusicMatch Jukebox™ software.
A. Display the Select Music Software
screen as described in Step 4.
B. Make sure MusicMatch Jukebox is
highlighted and click Install.
C. QUICKSTART screen will appear
after installation has started. Click
on Install MusicMatch Jukebox 5.1.
5
EN
Helpful Hint
It is recommended to uninstall
any previous installations of
the MusicMatch Jukebox software before preceding with
the Getting Started process.
After the uninstall process has
been completed, it is also recommended to delete the
C:\Program Files\MusicMatch
folder from Windows as well
where C:\Program Files is the
path where the software was
installed.
Page 14
Getting Started
5. Install the MusicMatch Jukebox™ software. (continued)
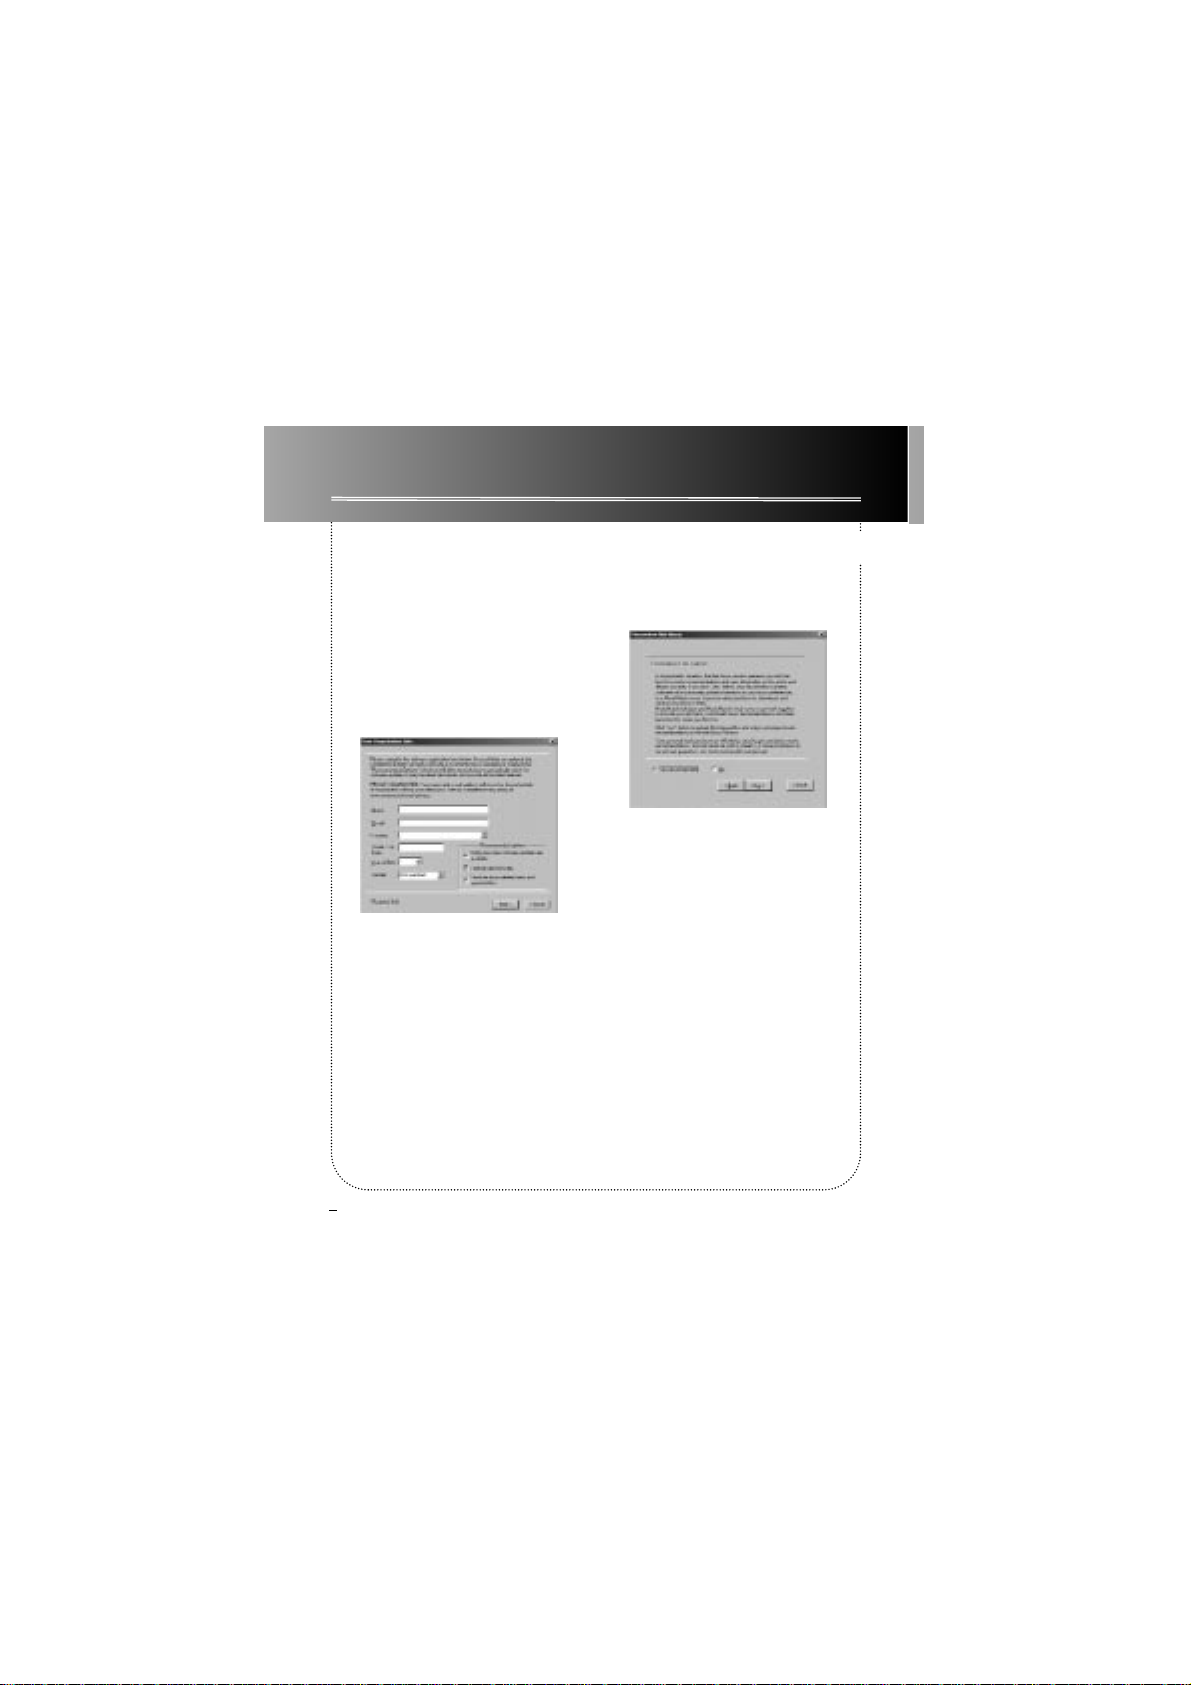
D. Click Yes to accept or No to
decline after you have read the
license agreement. You must click
Yes to continue.
E. When the next screen appears,
enter your Name, E-mail address,
Postal code, Country, Year of Birth,
and sex (Male or Female).
Notes: Enter an E-mail address or
yourname@home.com if you don’t
have E-mail. You must enter an Email address to proceed.
If you do not want to be informed
of program updates or receive news
and offers via E-mail, uncheck the
boxes.
F. Click Next to display Personalize
Net Music screen.
G. Read the screen and decide if you
would like to enable the PERSONAL-
IZE NET MUSIC feature. Select Yes or
No. This setting can be changed
later.
6
Page 15

Getting Started
H. Click Next to display Installation
Options dialog. Select the installa-
tion option you wish to use.
Express Setup is recommended.
Click Next to continue.
I. After the installation is complete,
click Finish to complete setup.
5. Install the MusicMatch Jukebox™ software. (continued)
If necessary, close the main setup
screen.
You may need to restart your
web browser. Reboot your computer if any other software was
installed specifically USB drivers.
6. Set MusicMatch Jukebox basic preferences.
Detailed information, Welcome Tips, and troubleshooting are available
through the Help menu and the MusicMatch Internet site (accessed from the
Help and Sites menus). We recommend you familiarize yourself with the
MusicMatch Welcome Tips and view the Online FAQ’s before using and
recording files. Logging onto the Internet while using MusicMatch Jukebox
takes advantage of all its features.
We feel a few of the Recording Settings options need to be discussed before
you start using the MusicMatch Jukebox software.
7
EN
Page 16
Getting Started
6. Set MusicMatch Jukebox basic preferences. (continued)
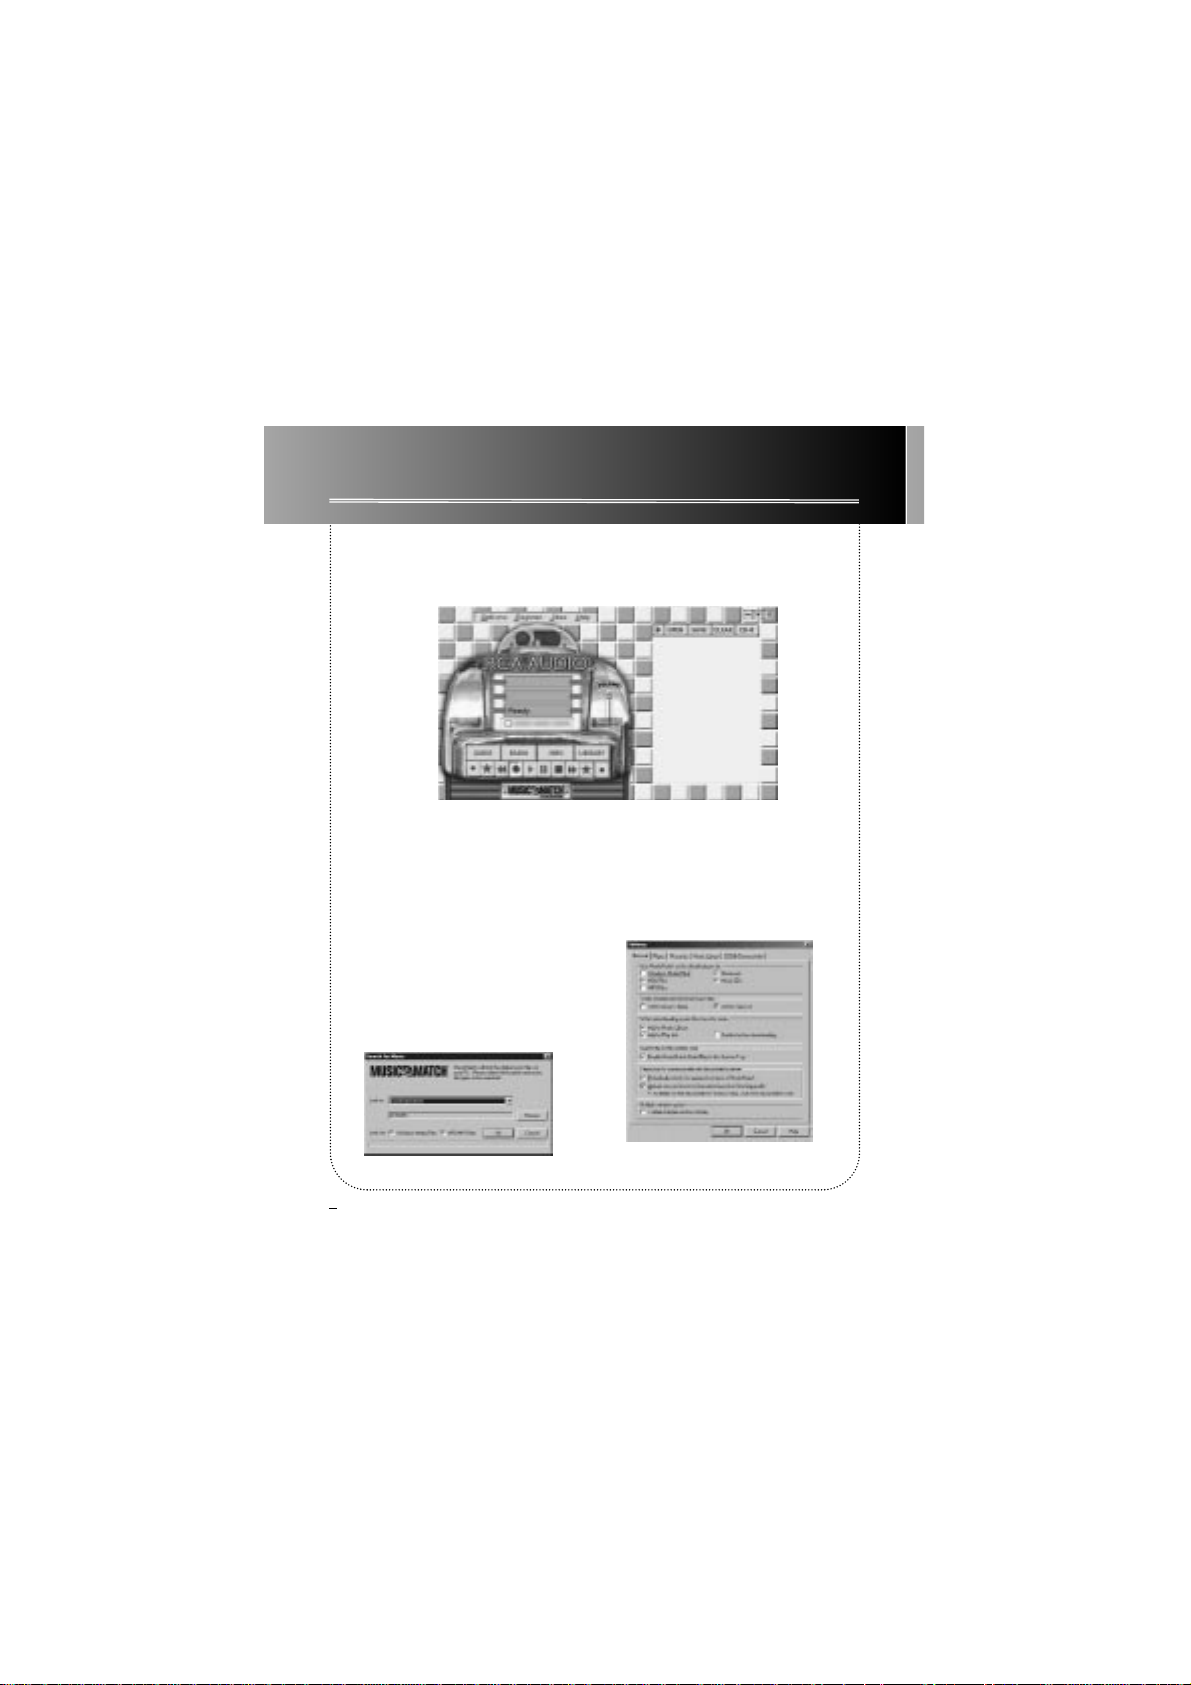
A. Start the MusicMatch Jukebox software.
Note: If the RCA Jukebox theme
does not appear, select the Change
Theme menu item from the View
item listed under the Options menu.
Select the RCA Jukebox item from
the list and click OK to change to
the proper theme.
B. The Search for Music screen
appears asking if you want the program to search for existing compatible music files.
Click OK, to have the files found
appear in the Music Library.
C. Display the Settings menu by
choosing Settings under the Options
menu.
Note: You can access the Options
menu at almost any time by pressing the right mouse button.
8
Page 17
Getting Started
6. Set MusicMatch Jukebox basic preferences. (continued)
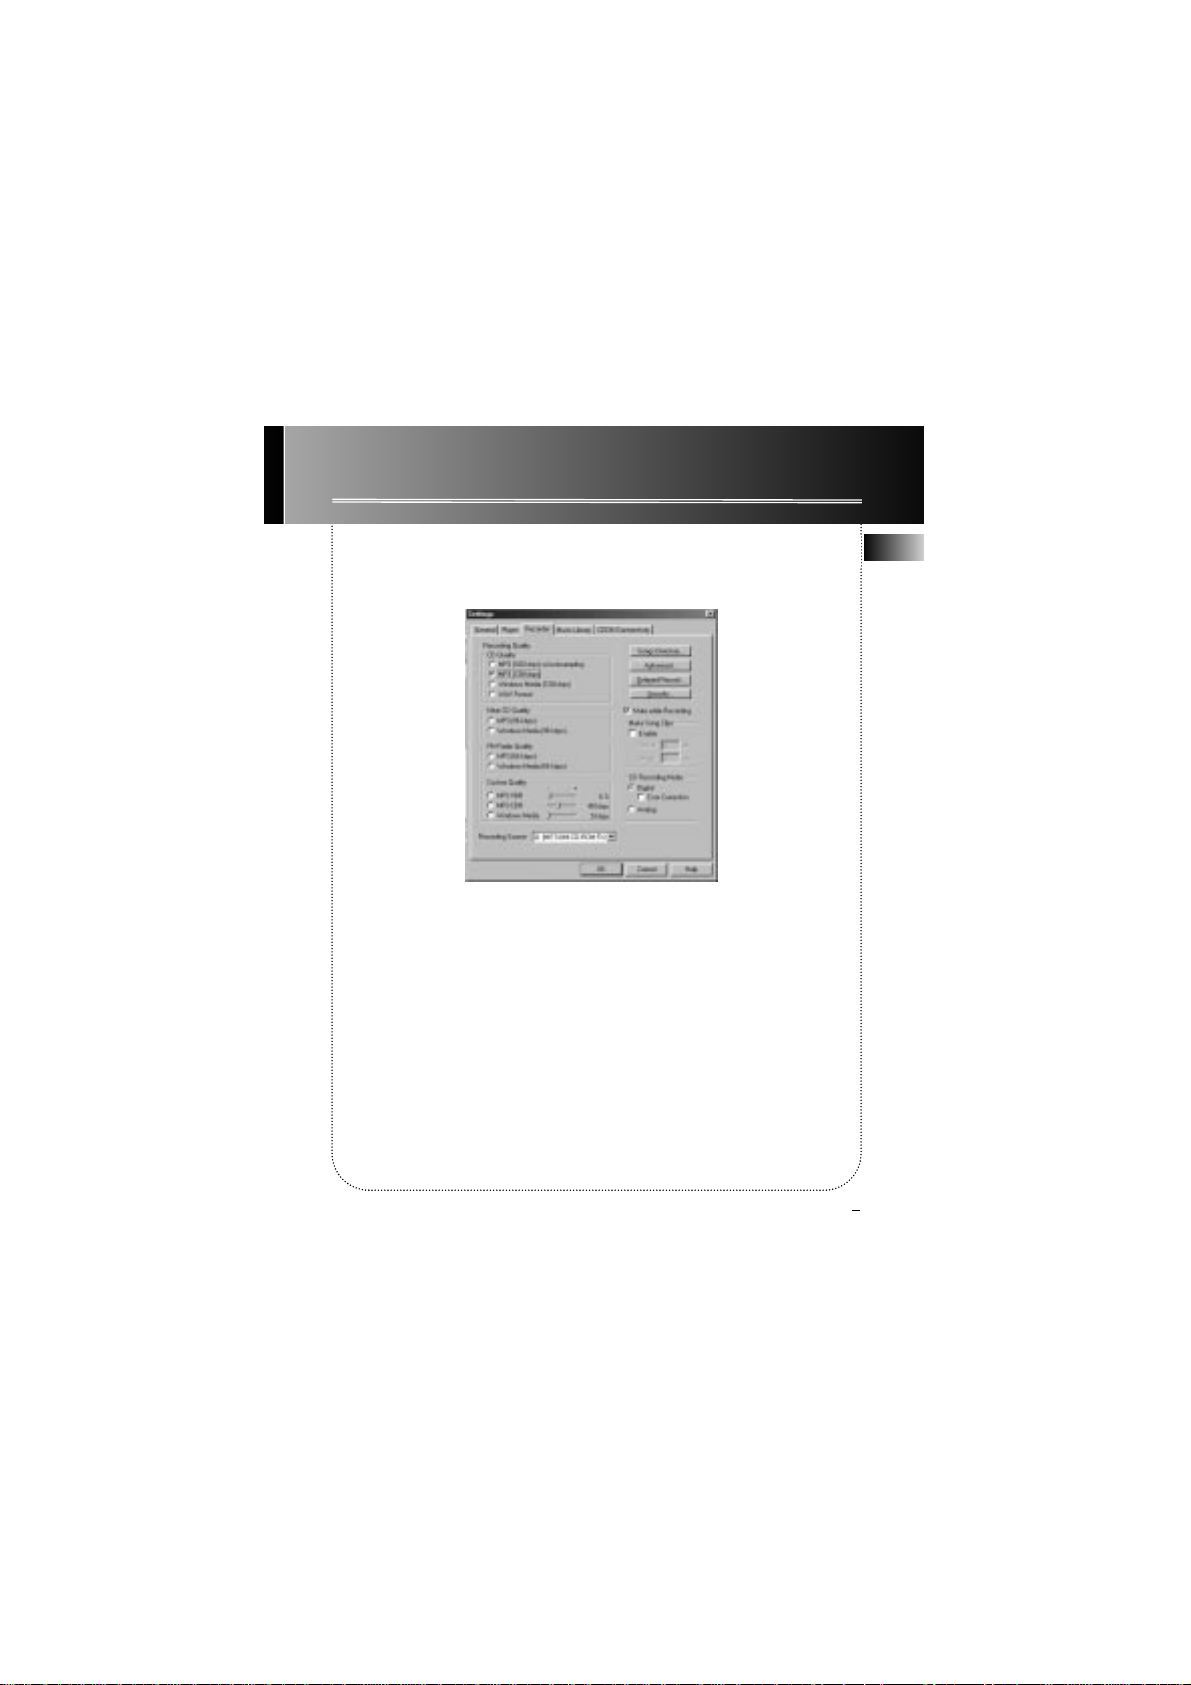
D. Click the Recorder tab to display the Recorder settings.
E. Select the recording Quality
level. CD Quality MP3 (128Kbps) is
the recommended quality level.
The MP3 format is supported by
MusicMatch Jukebox for the K@zoo
player.
• MP3 audio is MPEG
Layer-3 Audio available at various
encoding bit rates. The highest bit
rate has the best quality sound, but
uses the most disk space.
9
EN
Page 18

Getting Started
6. Set MusicMatch Jukebox basic preferences. (continued)
• WAV audio is unencoded
music that is not compressed.
This format has the best quality
sound but requires the largest
file size, as much as 650MB per
CD. WAV audio files are much
larger than MP3 audio files.
Note: Custom Quality settings
are for advanced users only.
F. Select a CD Recording Mode.
1. Check Digital and Error
Correction for the best results.
Error checking and correction
will be performed while you
are recording.
Note: Choosing Error
Correction will slow down your
recording speed.
2. Check Analog if your CDROM drive does not support
digital audio extraction.
G. Select a default Recording
Source. If you have more than one
recording source, select the source
you record from the most.
H. Mute while Recording. This feature allows you to mute the audio
while it is being recorded. Uncheck
this box to hear the audio as it is
recorded.
Note: This is not recommended as it
will decrease the recording speed.
10
Page 19

Getting Started
7. Learn the MusicMatch Jukebox basic controls.
Current Selection
Display Area
PLAYButton (Press to
start playback.)
PREV and NEXT
Buttons (Use to select
the next or previous
song in the playlist.)
STOP Button
VOLUME
Control
Displays the Recorder
Window
Playlist Controls
Docks and Undocks
Playlist Window
OPEN, SAVE, CLEAR,
and CD-R
Menus
Options, Register,
Sites and Help
Listed below are the basic functions of the main controls for the program.
Playlist Window
PAUSE Button (Press
to pause playback.)
Displays the Music Library Window
Displays the Track Info Window
Displays the Music Guide Window
Displays the Radio Window
Note: These secondary display windows
normally attach to the lowest open window. You may need to close, move, or
open windows to view them.
11
EN
Page 20

Getting Started
8. Save CD tracks to play on your PC or in your k@zoo player.
A. Insert a CD into your CD-ROM
drive. If you are connected to the
Internet, MusicMatch Jukebox will
retrieve information about the CD
in the CD-ROM drive.
If you are on a LAN system and the
titling feature does not work, contact your administrator.
Make sure the Enable CDDB CD
lookup service is selected on the
CDDB Preferences page if you are
able to make a connection to the
Internet. Choose CDDB Preferences
from Settings in the Options menu.
B. The information from the Internet appears.
If the information cannot be
retrieved from the Internet, enter it
manually. You can enter
information or edit existing
information by clicking in the
desired box and typing.
Important Note: If the information
is not entered before recording,
default song names and information will be used.
12
Page 21

Getting Started
8. Save CD tracks to play on your PC or in your k@zoo player . (continued)
C. Press the REC button if the Recorder window is not open. Press REFRESH
if the songs are not listed.
D. Select the tracks you want to
record.
• To start recording, click Record.
• To stop recording the current
track, click Stop.
• To cancel the entire recording
session for all selected tracks, click
Cancel.
• To eject the CD, click Eject CD.
• To select all songs, click All.
• To deselect all songs, click None.
• To refresh the track title information or to attempt detection again,
click Refresh.
E. After recording is completed, the
songs will be stored in the Music
Library.
CD Info Display
Area
ALL
Button
NONE
Button
REFRESH
Button
RECORD
Button
Cancel
Button
Stop
Button
Eject
CD
Song Selection Area
13
EN
Page 22

Getting Started
9. Download music from the Internet.
A. Click the MUSIC GUIDE button to connect to the MUSICMATCH MUSIC
GUIDE download site.
Note: You can also select Show
Music Match Guide from View in
the Options menu to display this
window.
If you have not established an
Internet connection, MusicMatch
Jukebox will attempt but fail to
connect.
Music you download from the
MUSIC GUIDE window will automatically be placed in the Music Library.
You can download files using your
regular browser. Be sure to import
(and/or move) them into
MusicMatch Jukebox.
10. Use MusicMatch Jukebox to play Radio on your PC.
A. Click the Radio button to open the Radio window.
Note: You can also select Show MusicMatch Radio from View in the
Options menu to display this window.
14
Page 23

Getting Started
10. Use MusicMatch Jukebox to play Radio on your PC. (continued)
B. Click on STATION SELECTOR to
open the following window.
Click the button in the upper left
corner to toggle between FORMAT,
CITY, or COUNTRY to select the station you want to listen to.
• Select FORMAT to choose a station by the type of music you like to
listen to.
• Select CITY to choose a station in
a certain city.
• Select COUNTRY to choose a station in a certain country
• If you want to search for a certain
station, use the SEARCH feature on
the bottom of the window.
C. Click once on a station to display
it. Click twice on the station (or click
PLAY) to play music from the station.
The station you select appears in
the Playlist.
D. To connect to the station’s website, click the GO TO STATION’S
WEBSITE button on the bottom of
the Net Radio Window.
Note: If the station you select is not
available, this is usually a temporary
situation. Try again later.
15
EN
Page 24

Getting Started
11. Organize the Music Library.
You can choose how to view your music library. You can select as many as
seven categories to display at one time.
A. Click the Music Library button from the Main window to display the
Music Library window.
Note: you can also select Show Music Library from View in the Options
menu.
ADD
Button
DELETE
Button
TAG
Button
FIND
Button
AUTO DJ
Button
Sort/View
Button
Music Library Window
B. Setup the Music Library for your
preferences. Select Music Library
from Settings in the Options menu
to display the Music Library Settings
screen.
Select the number of columns and
type of information you want displayed in each, and then click OK.
16
Page 25

Getting Started
11. Organize the Music Library. (continued)
C. The Music Library now displays
your selections. To sort by categories
click on the folder icon (sort/view
button) in the Music Library window.
to Select how you want to view your
songs.
D. To add a track from your Music
Library to your playlist, either double click it or drag and drop it.
12. Create a playlist for playing or downloading.
To create a playlist, you can drag and drop files from your Music Library or
you can open an existing playlist.
Playing Info
CD-R
Button
CLEAR
Button
SAVE
Button
OPEN
Button
Undocks and Docks
Playlist Window
PLAY Button
Displays Music
Library
Playlist
Window
PAUSE
Button
17
EN
Page 26

Getting Started
12. Create a playlist for playing or downloading. (continued)
A. To manually add tracks to the playlist,
double click the track or drag and drop
the track from the Music Library into the
playlist display.
To play a track before adding it to the
playlist, click next to the desired track
in the Music Library window.
Note: Click to select a song, Shift
and click to select groups of songs,
or Ctrl and click to select multiple
songs.
B. Click OPEN to open an existing
playlist, browse for tracks from a specific
group, or play an audio CD.
C. To clear an entire playlist from the
playlist window, click CLEAR.
D. To save your current playlist, click
SAVE. When the window appears, enter
a playlist name and click Save.
E. To remove a single track from the
playlist, click on the track to highlight it, and then press Delete on
the keyboard.
F. Click Play to play the songs from
the playlist. You can also double
click the song in the playlist to
begin playing.
ADD
Button
DELETE
Button
TAG
Button
FIND
Button
AUTO DJ
Button
Sort/View
Button
Music Library Window
18
Page 27

Getting Started
13. Edit Tags for Y our Songs
You can edit or delete the tags for the tracks in your Music Library. If you
delete the track’s tag, all of the information about the track will be deleted.
A. Highlight the track in the Music Library and click the Tag button to display the Tag Song File window.
Note: Right click on the highlighted track to display a menu. Select Edit
Track Tag to display the Tag Song File window.
B. You can edit the tag with your personal preferences for each of the
tracks in your Music Library.
19
EN
Page 28

Getting Started
14. T ransfer the audio files to k@zoo player.
Use MusicMatch Jukebox to transfer music files to the MultiMediaCard or
built in (internal) flash memory on the k@zoo player.
Important Note
Removing the
MultiMediaCard and
unplugging the USB
connection before the
data is completely written may cause loss of
data or damage to the
contents of the
MultiMediaCard and
internal flash memory.
A. Choose Options, Send to Device,
Download Playlist to k@zoo to display
the Download To k@zoowindow.
If a MultiMediaCard is present in the
k@zoo player and it needs to be formatted, a screen will be displayed prompting you to format the card.
Click OK to properly format the card for
use with the k@zoo player.
Click Cancel to format the card at a later
time. The External memory device will
not be available until the card is properly formatted or a different
MultiMediaCard is inserted.
Note: Formatting the MultiMediaCard
will erase the contents of the card.
B. Make sure the k@zoo device(s) are
listed in the Portable Device Memory
area.
Note: If the Internal device is not
listed, check all connections, click
the Refresh button to refresh the
portable device memory list.
If the External device is not listed
make sure the MultiMediaCard (if
present) is properly inserted in the
player, click the Refresh button to
refresh the portable device memory
list.
Restart your computer, and consult
online troubleshooting for possible
causes if problem persists.
20
MultiMediaCard
EJECT
Page 29

Getting Started
C. Double click Internal device icon
to view contents of the built-in flash
memory
or
Double click the External device icon
to view contents of the
MultiMediaCard (if present)
D. Select either the Internal or
External device icon to transfer files
to the player.
E. Select and highlight the tracks
you want to download to the selected device in the Files To Download
area.
Notes: Click to select a song, Shift
and click to select groups of songs,
or Ctrl and click to select multiple
songs.
F. After you have selected all of the
music you want to record on the selected
device (Internal or External), click the
Download button on the bottom of the
screen.
During transfer, the icon will flash.
When the transfer is complete, the icon
will remain lit and the total number of
tracks and total playing time will be displayed.
File size and availability are listed in the
status and window displays.
14. T ransfer the audio files to the k@zoo player. (continued)
Caution
Make sure all data are transferred to the k@zoo player
before unplugging the USB connection.
Removing the card before
the data is completely written may cause loss of the
entire contents of the card
and damage the card.
21
EN
Page 30

Getting Started
G. Click Done when you are finished.
H. Click Exit under File in the Options
menu to close MusicMatch Jukebox.
I. Disconnect the USB cable from the
k@zoo player.
Note: If using Windows 2000, must stop
the k@zoo device first before disconnecting the USB cable to avoid loss of
data or damage to file device.
Click the Unplug or Eject Hardware icon
from the system tray and select the
k@zoo Audio Player item and click Stop.
See the Windows 2000 help for further
details on the Unplug or Eject Hardware
topic.
J. Skip to page 36, Step 26 if you do not
want to install the Real Jukebox software.
Information for installing the
RealJukebox software starts on the next
page.
Helpful Hints
For detailed information on file
management, creating playlists,
and grouping management,
please consult the online documentation or Help section.
14. T ransfer the audio files to the k@zoo player . (continued)
22
Page 31

15. Install the RealJukebox software.
After you have installed the k@zoo USB drivers and placed the K@zoo software CD in
the CD-ROM drive as described previously, follow these directions to install the
RealJukebox software.
A. Display the Select Music Software
screen as described in Step 4.
Make sure RealJukebox is highlighted
and click Install.
B. Click Accept or Cancel after you read
the license agreement.
Note: Y ou must Accept to continue.
C. When the Setup of RealJukebox
screen appears, verify the correct
destination path for the program files.
Click Next.
D. Select how to configure shortcuts for
RealJukebox and click Finish to start
installation of the software.
23
Getting Started
E. Once the RealJukebox software has
started, complete the Electronic
Registration Card. Enter your Country
and Zip Code. Click Next to proceed.
Note: If you don’t have e-mail,
enter yourname@home.com. Y ou
must enter an E-mail address to proceed.
EN
Page 32

Getting Started
F. Read Information about RealJukebox
window appears. Click Tell Me More
for more information or click Next to
continue.
G. Setup Options screen. Select the
setup option you wish to use. Express
Setup is recommended. Click Next to
continue.
H. Confirm Express Setup screen. These
screens will give a summary of the most
common and default configuration
settings. Y ou can change the settings or
click Finish.
We suggest you click Finish and not
change any of the settings at this
time.
I. If necessary, close the main setup
screen.
Y ou may need to restart your web
browser. Reboot your computer if any
other software was installed, specifically
USB drivers.
Note: You can access the Configuration
Wizard from the Tools menu at any time
later when you are more familiar with
the program
16. Set basic preferences.
Detailed information, tutorials, and troubleshooting are available through the Help
menu and the RealJukebox Internet site (accessed from the Help and Sites menus).
Note: We recommend you familiarize yourself with the RealJukebox New User’s
Guide and complete the Online Tutorial before using and recording files.
• We also recommend that you log onto the Internet while using RealJukebox to take
advantage of all the features.
• We feel the Recording Method and a few of the Audio Quality Preferences need to
be discussed before you start using the RealJukebox software.
24
Page 33

Getting Started
A. Start the RealJukebox software.
B. Display the Preferences menu by
choosing Preferences under the Tools
menu.
C. Click Recording to display the
Recording menu.
D. Select a recording method.
1. Check Digital and Use Error
Correction for the best results. Error
checking and correction will be
performed while you are recording.
Note: Choosing Use Error Correction
will slow down your recording speed.
2. Check Analog if your CD-ROM drive
does not support digital audio
extraction.
25
16. Set basic preferences. (continued)
EN
Page 34

Getting Started
E. With the Preferences menu displayed,
click Audio Quality to display the Audio
Quality menu.
F. Select a recording Format and
Quality Level.
1. RealAudio 8 with ATRAC 3 is
RealNetworks’ audio format. This format
saves your music as RealAudio (.rmx)
secure or RealAudio unsecured (.rmj)
files. Compression levels available are 32
kbps stereo to 352kbps stereo. 352 kbps
has the best quality sound but uses the
most disk space. We recommend using
132kbps
2. MP3 Audio is MPEG layer 3 Audio
available at multiple compression levels
from 32 kbps mono to 320 kbps stereo.
320 kbps has the best quality sound, but
uses the most disk space. We
recommend using 128 kbps.
3. Wave Audio is unencoded music that
is not compressed. This format has the
best quality sound but requires the
largest file size, as much as 650MB per
CD. Wave Audio files are much larger
than RealAudio and MP3 Audio files.
G. Select a Secure Files setting
1. Secure Files On
Files recorded with security on can only
be played on the PC on which they were
recorded.
Note: If you record with the security
feature on, make sure you perform a
security key back up (Backup Security
Key feature located under Options
menu).
2. Secure Files Off
Most people choose to turn the Secure
Files feature off.
Notes: In the future, some music may
require the security feature turned on to
record to your computer.
Turn this feature off if you own two
computers and exchange files between
them.
3. Click OK.
26
Page 35

Getting Started
Menus
Record
Button
Play
Button
Pause
Button
Stop
Button
Previous
Button
Next
Button
Progress Bar
Continuous
Play Button
Shuffle Play
Button
Volume Control
17. Learn the RealJukebox basic controls.
Listed below are the basic functions of the main controls for the program.
Program
Information
Display Area
Mode
Selection
27
EN
Page 36

Getting Started
18. Save CD tracks to play on your PC or in your k@zoo player.
A. Insert a CD into your CD ROM drive. If
you have auto play/record enabled, the
CD will automatically begin playing and
recording.
Note: If you do not want the CD to
automatically start playing or recording,
you can change the settings.
Choose Preferences in the Toolsmenu,
and set the options for your personal
preference.
RealJukebox is an internet enabled
application and connects to the Internet
to retrieve information about the CD in
the CD ROM.
Make sure the Automatically detect my
online status item is selected in the
Internet Preferences. Choose Internet
from Preferences in the Tools menu.
If you are on a LAN system and the titling
feature does not work, contact your
administrator.
28
Page 37

Getting Started
The information from the Internet appears on your screen.
If the information cannot be retrieved from
the Internet, enter it manually.
Important Note: If the information is not
entered, titling and sorting information will
not be available in the library.
Press View Track Infofor information on the
artist of the track.
B. Select the tracks you want to play or
record.
• To start or stop playback, click play.
• To start or stop recording, click record.
• To pause playback, press pause.
• To stop playback and recording,
press stop.
C. After recording is complete, the songs
will be stored in the Playlist.
19. Download music from the Internet.
A. Click the Music Guide icon to have
RealJukebox connect you to the Internet.
B. Download the music you select to your
PC, and add it to your playlists.
Note: You can also download files using
your regular browser. Just be sure to
import (and/or move) them into
RealJukebox.
29
EN
Page 38

Getting Started
Y ou can also search the internet to
download the music you want through
the search mode.
A. Click the Search icon on the mode
selection row.
B. Key in information on how you want
the search to be done.
20. Organize the Playlist.
A. All tracks can be grouped by Genre,
Artist / Album, or all three. Choose Music
Files from Preferences in the Toolsmenu.
B. Click Change Sub-Folders... to select
the groupings, that you would like to use
for your music (any combination of Artist,
Album, or Genre). Click OK.
C. Click the Genre or Artist/Album icon
on the mode selection row to view the
groups of songs.
To play a song, double click it or highlight
it, and press play.
30
Page 39

Getting Started
21. Create a Playlist for playing or downloading.
A. Click the Playlist icon in the mode
selection row. ClickNew Playlist
button on the right of the screen.
B. Fill out the Create Playlist form to
give specifications as to the name of the
new playlist, which tracks to put into the
playlist and the location where you want
to put it.
C. Press Add Trackson the right hand
side in Playlist mode. Click on the song(s)
you want to add to the playlist so it is
highligted. Press Add Tracks >> to store.
Repeat this step to enter additional
tracks.
Note: Click to select a song, Shift and
click to select groups of songs, or Ctrl and
click to select multiple songs.
31
EN
Page 40

Getting Started
22. Create an Auto-Playlist.
A. Click the Auto-Playlist icon in the
mode selection mode. Click New
Auto-Playlist button on the right of the
screen.
B. Fill out the Create a New Auto Playlist
form to give specifications as to how
songs will be organized in the the new
Auto playlist.
Click and highlight the the playlist you
want to edit. Click Edit Autoplaylist on
the right side column to change
preferences at any time.
All tracks saved on your PC will
automatically be placed in this folder if
track information follows specifications.
23. Searching for T racks
A. Click on the Search button on the mode
selection bar.
B. Click on the Search All Trackspage.
C. Key in the music you wan to search for
and Click Search Now to begin search.
32
Page 41

Getting Started
24. Radio
A. Click on the Radio icon on the Mode
Selection bar.
B. Click on the Features page to search
for stations according to Featured Genre
or view Featured Stations.
Click the Find Station page to search the
internet for the type of station you like to
find.
A. Click My Stations to view stations that
you have bookmarked in the past.
B. To add a station to your My Station list,
click on the button beside the station
you want to store.
C. Y our RealPlayer will automatically
open when you click on a station to listen
to the internet radio
Note: First time users of RealPlayer
will need to fill out the registration
form to personalize RealPlayer.
33
EN
Page 42

Getting Started
25. T ransfer the audio files to the k@zoo player.
Use RealJukebox to transfer music files to the MultiMediaCard or built in
(internal) flash memory for the k@zoo player.
Important Note
Removing the MultiMedia
card or unplugging the USB
cable before the data is completely written may cause loss
of data or damage to the contents of the MultiMedia Card
and internal flash memory.
A. Make sure the k@zoo device(s)
are listed in the Organizer under
Devices/Storage.
If a MultiMediaCard is present in the
k@zoo player and it needs to be formatted, a screen will be displayed prompting
you to format the card.
Click OK to properly format the card for
use with the k@zoo player.
Click Cancel to format the card at a later
time. The External memory device will
not be available until the card is properly
formatted or a different
MultiMediaCard is inserted.
Note: Formatting the MultiMediaCard
will erase the contents of the card.
Note: If the Internal device it is not
listed, check all connections, click the
Refresh button to refresh the portable
device memory list. If the External device
is not listed make sure the MultiMedia
Card (if present) is properly inserted in
the player, click the Refreshbutton to
refresh the portable device memory list.
Restart your computer, and consult
online troubleshooting for possible
causes if problem persists.
B. Double click the k@zoo! icon to display the memory devices or click on the
button beside the k@zoo! icon
on the Organizer directory.
34
MultiMediaCard
EJECT
Page 43

Getting Started
25. T ransfer the audio files to the k@zoo player
(continued)
C. Double click the Internal device icon
to view contents of the built-in flash
memory
or
Double click the External device icon to
view contents of the MultiMediaCard (if
present).
D. Click the Add Tracksicon on the
right side column. Select the music
and click Add Track>> button on the
bottom.
Note: Click to select a song, Shift and
click to select groups of songs, or Ctrl and
click to select multiple songs. Click Close
when all music tracks have been selected.
E. After you have selected all of the
music you want to record to the selected
device, double click the appropriate icon.
File size and availability are listed in the
status and window displays.
F. Click the Begin Transferbutton on the
right of the screen to download your
songs to the selected device (k@zoo
Internal or k@zoo External)
After transfer is complete, repeat process
as needed until all desired music tracks
have been downloaded to either the
k@zoo Internal or External devices
G. Click Exit under the File menu to close
RealJukebox.
H. Disconnect the USB cable from k@zoo
player.
Note: If using Windows 2000, must stop
the k@zoo device first before disconnecting USB cable to avoid loss of data ar
damage to the device.
Click the Unplug or Eject Hardware icon
from the system tray and select the
k@zoo Audio Player item and click Stop.
See the Windows 2000 Help for further
details on the Unplug or Eject Hardware
topic.
Caution
Disconnect the k@zoo USB cable
only after data is transferred.
Disconnecting the USB cable
before the data is completely
written may cause loss of
data or damage to the k@zoo
player.
35
EN
Page 44

Getting Started
26. Install the k@zoo user’ s guide and documentation.
After you have installed the music Software and placed the k@zoo software
CD in the CD ROM drive as described on section 1, follow these directions to
install the k@zoo User’s Guide and documentation.
36
A. Display the Select Components
screen.
B. Click the Install the k@zoo User’s
Guide and documentation button.
C. Select the Destination folder
where you want the k@zoo User’s
Guide installed and click Next.
D Select the location for the program icons and click Next.
E Click Finish to complete the installation.
Page 45

Before You Begin
A. To insert batteries, lift open the battery compartment door.
B. Insert 2 “AAA”(LR03) batteries with
polarities corresponding to indications
on the compartment. (Refer to “More
information” on page 45 for battery precautions.)
C. Close the door to the battery
compartment
Note: Refer to the power level indicator
on display for battery level.
Replace with new batteries when the
indicator is empty.
37
Battery
compartment
door
1. Insert batteries into the player
EN
EJECT
Page 46

Before You Begin
2. Inserting a MultiMediaCard
(Optional)
The player has built-in flash memory. To
extend the playtime, you can use the
optional MultiMediaCard slot.
A. Insert a MultiMediaCard into the card
slot when the player is off as the diagram
shows:
B. To remove card, slide EJECTin the direction of the arrow.
3. Using Headphones
Insert phone jack into
PHONES on the side of player
for listening.
38
Caution: Do not remove
MultiMedia Card during playback or
when power is on. It may result in
damages to the unit and the card.
Note: Have a Blast- Just Not in Your
Eardrums. Make sure you turn down
the volume on the unit before you
put on headphones. Increase the volume to the
desired level only
after headphones
are in place.
PHONES
VOLUME
PHONES
EJECT
Page 47

General Controls
1
2
3
5
9
10
12
14
13
11
8
6
7
4
1. Display
2. STOP - Stop playback and turn unit
off .
3. LAST - Skip back to last track. Press
and hold to search backward within
the same track.
4. NEXT - Skip to next track. Press and
hold to search forward within saved
tracks.
5. PLA Y - Turn unit on, start playback
and pause.
6. DSP - Select among DSP modes.
(Flat, Bass,Pop, Rock,Jazz)
7. MODE - Select between repeat,
program and random playback modes.
8. LOCK - To lock keys to avoid
accidental key activation.
9. MEMORY CARD - Slot for inserting
MutliMediaCard.
10. VOLUME - Adjust sound volume.
11. PHONES - Insert headphones.
12. USB - Connect USB cable.
13. Battery compartment door
14. EJECT - Slide to eject MutliMedia
Card.
EN
39
DSP
CARD
MEMOR Y
MODE
OFF- LOCK
EJECT
S
T
O
P
Y
A
L
P
L
A
T
S
X
T
E
N
VOLUME
PHONES
Page 48

Display
DSP modes
Total number of
track / Current track
number during
playback
Volume level bar
Encoded bit rate
Repeat mode Random mode
Total playing time on card / Elapsed time during playback
Key locked
Battery level indicator
Multimedia card
inserted
Program
mode
USB cable connected
40
FLAT
TRACK
ROCK
k
JAZZ
P
ALL
POPBASS
Page 49

Operation
EN
General operation
• Press PLA Yto turn the unit on. Total number of
tracks and playing time show on display. Playback
then starts automatically from the first track.
• In stop mode, press PLAYto start playback of selected track. Current track number, elapsed playback time
and encoded bit rate show on display.
• Press PLA Y during playback to pause playing and
press PLA Yagain to resume playback.
• During playback, press STOP to stop playback (Stop
mode) with total number of tracks and playing time
shown on display.
• Press STOP again to turn unit off. (The unit will also
turn itself off automatically after about 1 minute if
there is no key activation. )
• In stop mode, press or to select desired
tracks.
• Press once to skip to next track starting. Press
and hold for quick forward scan of playing track.
• Press once to return to previous track start. Press
and hold for quick backward scan of playing track.
• Press + or - to adjust sound volume. Refer to the volume bar on display for sound level.
41
POPBASS ROCK
POPBASS ROCK
JAZZ
JAZZ
k
FLAT
TRACK
FLAT
TRACK
VOLUME
Page 50

Operation
DSP
• Press repeatedly to select among the DSP modes:
FLAT > BASS > POP > ROCK > JAZZ
Play modes
• Press MODE repeatedly during playback for the following playback modes:
Off (Normal playback) > Repeat All > Shuffle >
Shuffle and Repeat All > Program > Program and
Repeat All.
Programming T racks
1. Press and hold MODE for 2 seconds in stop mode to
enter program mode. Y ou will see ‘P’ icon lit representing program mode, flashing ‘ - -’ for track selection and ‘P01’ for program list position.
2. Press or to select a track. Selected track
number will flash.
3. Press MODE to confirm selection.
4. Press MODE again to skip to the next programming
position.
5. Repeat steps 2-4 for further selections. Maximum 10
selections can be made.
6. Press STOP to exit programming mode or unit
returns to stop mode automatically after 30 seconds if
no keys are activated.
See section on “Play Modes” to playback programmed
tracks.
DSP
42
FLAT
BASS
TRACK
JAZZ
POP
ROCK
MODE
ALL
MODE
MODE
ALL
P P
ALL
JAZZ
ROCK
P
ALL
k
JAZZ
POPBASS ROCK
FLAT
TRACK
FLAT
TRACK
FLAT
TRACK
POPBASS ROCK
POPBASS ROCK
P
JAZZ
P
JAZZ
P
Page 51

Operation
EN
Editing program
1. In stop mode, press and hold MODE to enter programming mode.
2. Press MODE to select the programmed track to be
deleted.
3. Press and hold DSP for about 3 seconds to delete
unwanted track from your program list. ‘ - - ‘ shows to
indicate track deleted from the program.
4. Repeat steps 2 and 3 to delete additional tracks
from the program.
5. To cancel editing program, press STOPonce to
return to stop mode OR the unit will automatically
exit the editing mode after 30 seconds if no keys are
activated.
Key Lock
To avoid accidental key activation, slide the HOLDkey
to LOCK position to lock keys. Lock icon can be
seen on display. Slide to OFF position to unlock keys.
File Download
When the unit is connected to the computer,
will be displayed on the screen.
During transfer, the icon will flash. When the transfer
is complete, the icon will remain lit, the total number
of tracks and total playing time will be displayed.
NOTE:
See Getting Started (sections 2-5 and 15) for instruction to install USB driver and music management software.
See sections Getting Started (sections 14 or 34) for
procedures to transfer tracks to player and/or memory
card.
MODE
43
FLAT
TRACK
POPBASS ROCK
JAZZ
P
DSP
OFF LOCK
TRACK
FLAT
TRACK
FLAT
TRACK
POPBASS ROCK
POPBASS
P
JAZZ
k
JAZZ
ROCK
JAZZ
POPBASS ROCK
FLAT
Page 52

Troubleshooting Tips
k@zoo player does not turn on when PLAY button pressed.
• Batteries may be inserted incorrectly. (Refer to page 37 for details)
• Batteries may be empty. (Refer to page 37 for details)
• LOCK button may be activated. (Refer to page 43 for details)
Skipping tracks or bad sound quality?
• Repeat, random or program function may be activated. (Refer to page 42 for details)
• There may be strong magnetic fields (e.g. too close to TV) near the unit.
• Low Battery level. Replace with new ones.
Cannot perform playback?
• Check if MultiMediaCard is properly inserted. MultiMediaCard icon should be displayed.
• LOCK button may be activated. (Refer to page 43 for details)
• There may be no MP3 tracks in the card or internal memory.
• MultiMediaCard may be damaged.
Cannot play MP3 track on the k@zoo players?
• Track encoded bit rate may not be between 32 to 320kbps
Note: For better result, we recommend a constant encoded bit rate from 32 to
320kbps. Nevertheless, your unit may play tracks encoded in variable bit rate (VBR).
USB icon or display does not appear when connected to computer.
• Check connection between your unit and the computer. (Refer to page 3)
• Check if USB drivers are properly installed (Refer to page 3)
44
Page 53

EN
What your warranty covers:
• Any defect in materials or workmanship.
For how long after your purchase:
• One year (The warranty period for rental units begins with the first rental or
45 days from date of shipment to the rental firm, whichever comes first.)
What we will do:
• Provide you with a new, or at our option, a refurbished unit.
• The exchange unit is under warranty for the remainder of the original
product's warranty period.
How to make a warranty claim:
• Properly pack your unit. Include any cables, etc., which were originally provided
with the product. We recommend using the original carton and packing materials.
• Include in the package evidence of purchase date such as the bill of sale. Also
print your name and address and a description of the defect. Send standard UPS or
its equivalent to:
Thomson multimedia Inc.
Product Exchange Centre,
11721 B Alameda Ave,
Socorro, TX 79927
• Pay any charges billed to you by the Exchange Center for service not covered by
the warranty.
• Insure your shipment in case of loss of damage. Thomson accepts no liability in case
of damage or loss.
• A new or refurbished unit will be shipped to you prepaid freight.
What your warranty does not cover:
• Customer instruction. (Your Owner's Manual provides information regarding
operating instructions and user controls. For additional information, ask your dealer.)
• Installation and set-up service adjustments.
• Batteries.
• Damage from misuse or neglect.
• Products which have been modified or incorporated into other products.
• Products purchased or serviced outside the USA.
• Acts of God, such as but not limited to lightning damage.
Product Registration:
• Please complete and mail the Product Registration Card packed with your unit.
It will make it easier to contact you should it ever be necessary. The return of the card is
not required for warranty coverage.
How state law relates to this warranty:
• This warranty gives you specific legal rights, and you may have other rights which vary from
state to state.
If you purchased your product outside the USA:
• This warranty does not apply. Contact your dealer for warranty information.
45
Limited Warranty (For US)
Page 54

Page 55

Limited Warranty (For Canada)
Thomson multimedia Ltd. warrants to the purchaser or gift recipient that if any manufacturing defect
becomes apparent in this product within 1 year from the original date of purchase, it will be replaced
free of charge, including return transportation.
This warranty does not include damage to the product resulting from accidents, misuse or leaking batteries.
Should your product not perform properly during the warranty period, either:
1. Return it to the selling dealer with proof of purchase for replacement,
OR
2. Remove the batteries (where applicable), and pack product complete with accessories in the
original carton (or equivalent).
— Mail prepaid (with proof of purchase) and insured to:
Thomson multimedia Ltd.
6200 Edwards Blvd.,
Mississauga, Ontario,
L5T 2V7
Canada
The provisions of this written warranty are in addition to and not a modification of or subtraction
from the statutory warranties and other rights and remedies contained in any applicable legislation,
and to the extent that any such provisions purport to disclaim, exclude or limit any such statutory warranties and other rights and remedies, such provisions shall be deemed to be amended to the extent
necessary to comply therewith.
If you are unable to find a qualified servicer for out of warranty service, you may write to:
Thomson multimedia Ltd.
P .O. Box 0944
Indianapolis, Indiana, U.S.A., 46206-0944
Attach your sales receipt to this booklet for future reference. This information is required if service is
needed during the warranty period.
PURCHASE DATE
NAME OF STORE
46
 Loading...