

PRO-LS100 Mini Home Theater Satellite Speaker
Your RCA PRO-LS100 Mini Home Theater
Satellite Speaker is designed around a
shielded 50 × 90 mm woofer and a
polycarbonate ferrofluid cooled tweeter.
The two-way speaker’s small size makes it
ideal for placement on a bookshelf. Or,
you can mount it on a wall using an
optional
bracket. Follow the instructions provided
with the bracket.
The PRO-LS100 is designed for use as
either a front or rear speaker in a complete
home theater speaker system. It can
handle up to 100 watts RMS, and is
timbre-matched with the PRO-LS200 Mini
Home Theater Center Speaker for a
seamless transition when sound moves
from speaker to speaker.
When PRO-LS100 speakers are used with
a subwoofer, the result is a dynamic sound
experience, ranging from 42 Hz to 20 kHz.
1
/4-inch wall-mount speaker
1
/2-inch
SSSSppppeeeeak
akeeeer
r PPPPllllaaaacccceeeemmmmeeeennnntttt
akak
r r
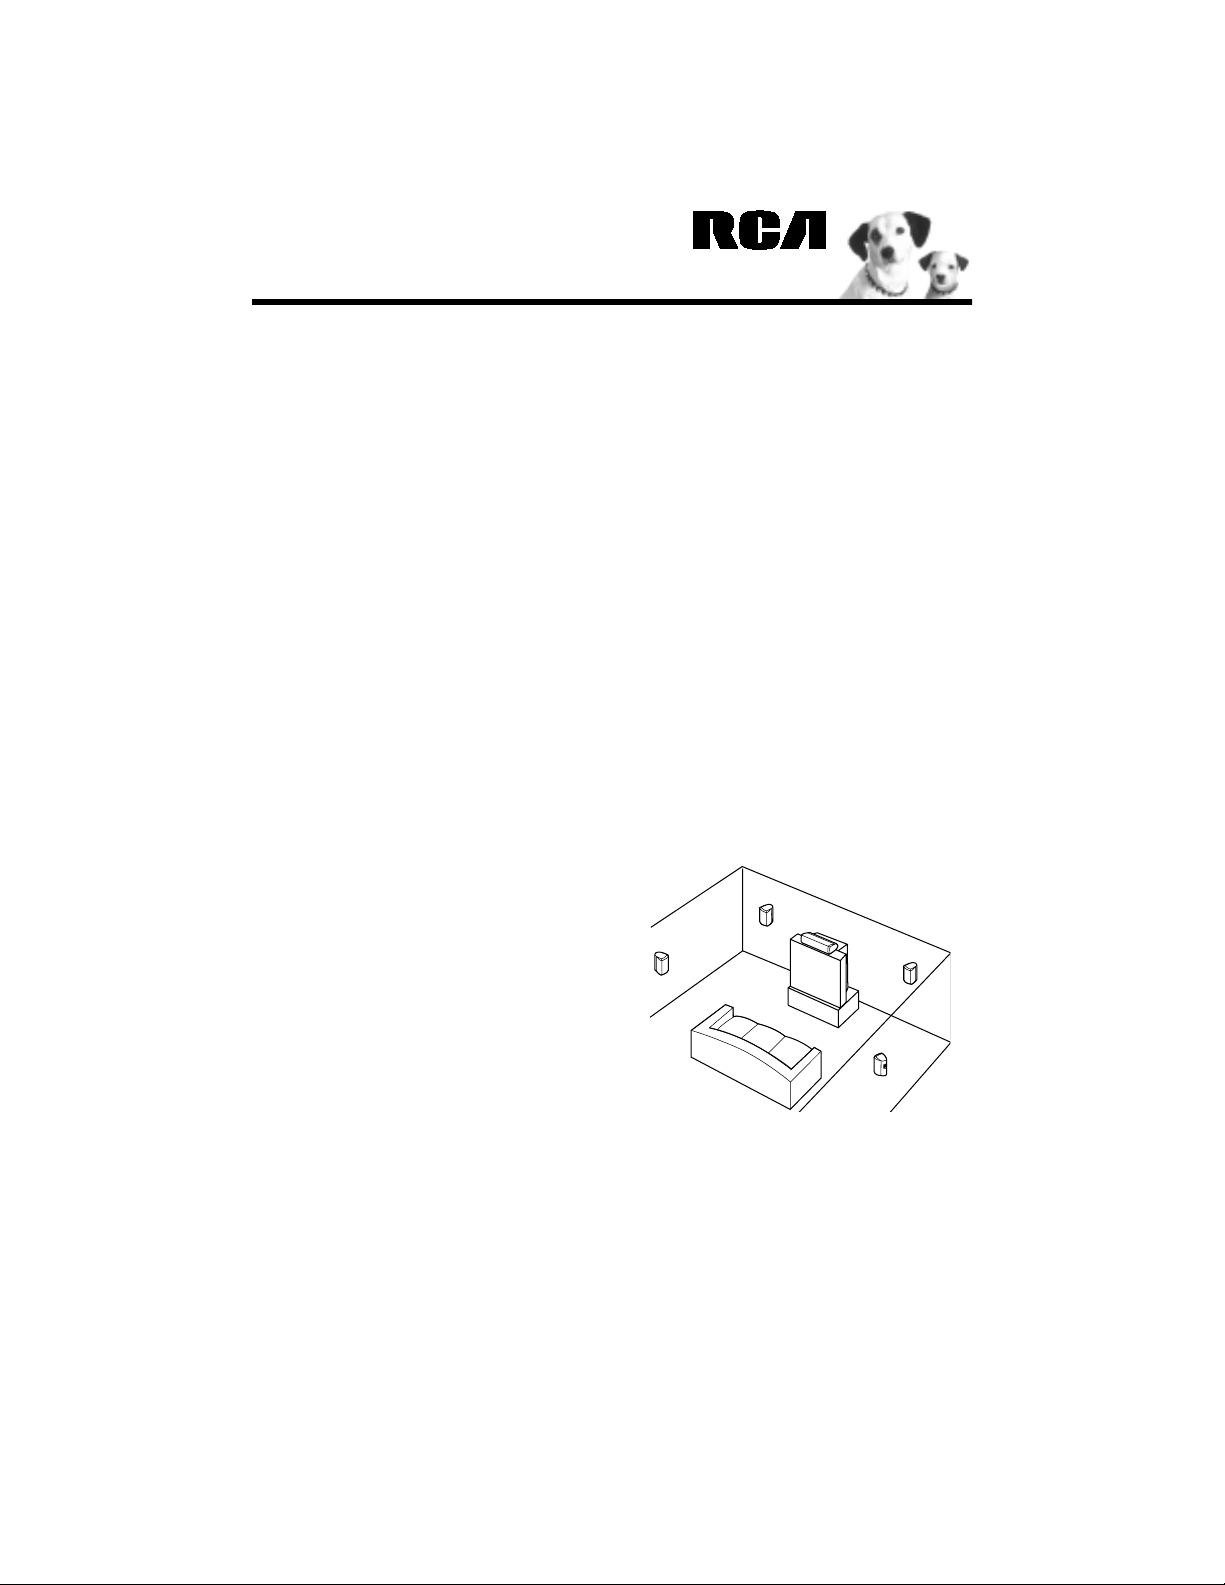
Where and how you position speakers has
a great effect on the overall sound of your
surround sound system.
Cautions:
• Place speakers away from heat sources
such as radiators, stoves, or other
appliances.
• To prevent the cabinets from warping
or discoloring, do not place speakers
where they are exposed to direct
sunlight or excessive humidity.
• Do not place speakers where they
might be knocked over or exposed to
falling objects.
Note: You need speaker wire (not
supplied) to connect your speaker (see
“Connecting the Speaker to an Amplifier/
Receiver” on page 2).
2001 RadioShack Corporation.
©
All Rights Reserved.

MMMMai
ain
n FFFFrrrroooonnnnt
aiai
n n
Main front speakers are critical for home
theater sound. They provide sound for the
action that takes place off screen, as well as
sounds that move from left to right or right
to left. Place them at least 2 feet away from
the TV, with the centers of their grilles as
close as possible to the listener’s ear level.
Rea
Rear
r CCCChhhhaaaannnnnnnneeeel
ReaRea
r r
SSSSppppeeeeaaaake
Rear channel surround speakers produce
subtle sounds that help create special
effects, convey a sense of movement, and
give viewers the sensation that they are
“inside” a movie.
The ideal position for rear channel
surround speakers is behind the listening
area and at ear level.
AAAAtt
ttaaaacccchhhhiiiinnnng
tttt
AAAAnnnnttttiiii----SSSSli
Push out each precut circle from the
rubber square and remove the adhesive
backing. Then attach one pad at each
corner on the bottom of the speaker.
kerrrrssss
keke
lip
lili
t SSSSppppea
eakkkkeeeerrrrssss
t t
eaea
l SSSSuuuurrrrrrrroooouuuunnnnd
l l
g tttthhhhe
e
g g
e e
p PPPPaaaaddddssss
p p
d
d d
• To avoid damage to the speaker
system or amplifier/receiver, turn off
the amplifier/receiver before making
the connections.
Use 18-gauge speaker wire or lamp cord
for distances up to 50 feet. For greater
distances, use 16-gauge wire. Your local
RadioShack store has a wide selection of
speaker wire.
We recommend you use color-coded or
marked wire to help you correctly connect
the wire. Color-coded wires have a stripe
running down one side of the conductors.
Marked wires have ridges along one side of
the conductors.
1. With the speaker in its approximate
location, measure the distance to the
amplifier and route the wire from the
speaker to the amplifier.
2. Separate the wire conductors for a
length of about 2 inches, then remove
1
about
/2 inch of insulation from the
wire’s ends using a wire stripper.
s
e
h
c
n
I
2
h
c
n
I
2
/
1
CCCCoooonn
nneeeeccccttttiiiinnnng
nnnn
tttto
o aaaan
n AAAAmmmmppppli
o o
n n
Cautions:
• Do not exceed the speaker system’s
maximum power rating (see
“Specifications” on page 4).
g tttthhhhe S
e Sppppea
e Se S
eakkkkeeeer
eaea
g g
liffffiiiieeeerrrr////RRRReeeecccceeeeiiiive
lili
r
r r
verrrr
veve
2
 Loading...