

Page 1
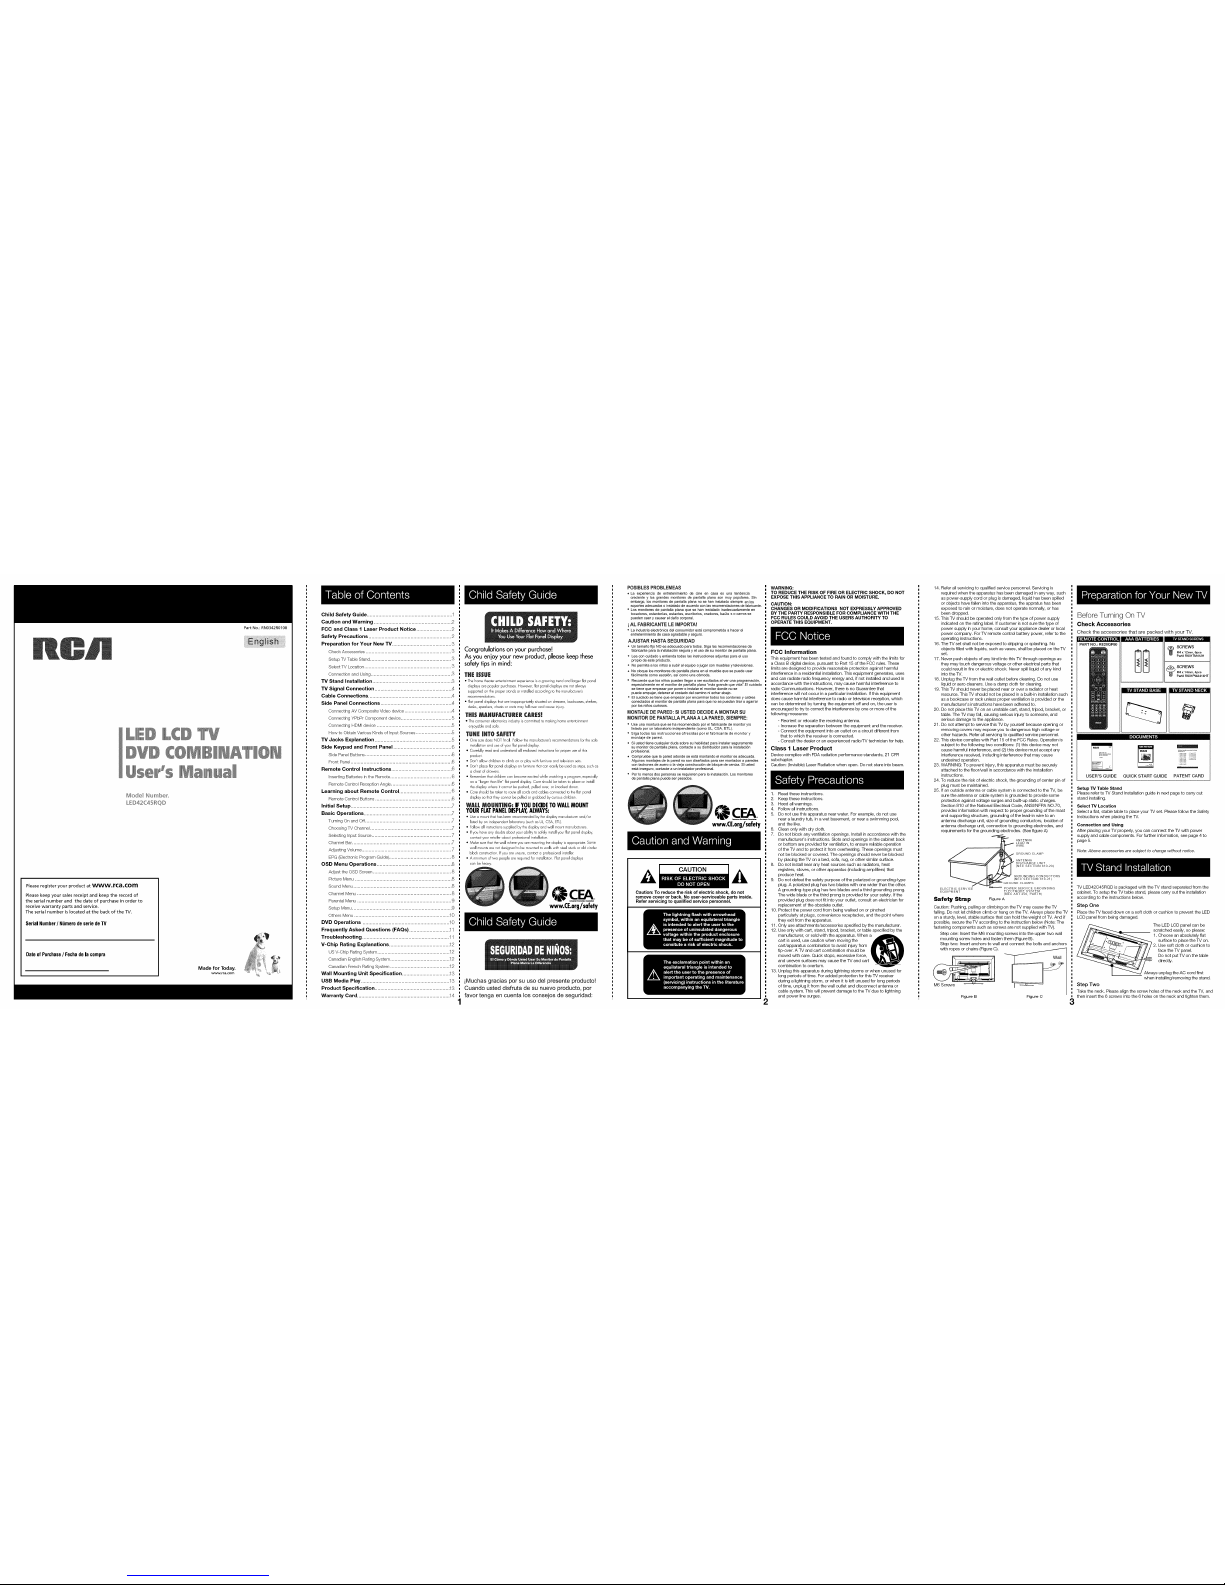
Mod÷l Numb_r_
LED42C45RQD
Please register your product at www,rca,com
Please keep your sales receipt and keep the record of
the serial number and the date of purchase in order to
receive warranty parts and service.
The serial number is located at the back of the TV.
Serial Number/ Ni]merode serie deTV
Dateof Purchase/ Fechade la compra
Made for Today.
www.rca.com
Part No.: RNO342R0108
Child Safety Guide ...........................................................
Caution and Warning ......................................................
FOG and Class 1 Laser Product Notice ........................
Safety Precautions .........................................................
Preparation for Your New "IV .........................................
Check Accessories ...........................................................
Setup TV Table Stand ........................................................
Select TV Location ............................................................
Connection and Using ........................................................
TV Stand Installation .......................................................
TM Signal Connection .....................................................
Cable Connections ..........................................................
Side Panel Connections .................................................
Conrlect[ng AV Composite Video device .................................
Connecting YPbPr Component device ...................................
Connecting HDM[ device ....................................................
How to Obtain Various Kinds of input Sourees .........................
TM Jacks Explanation .....................................................
Side Keypad and Front Panel ........................................
Side Panel Butterls ............................................................ 6
Frent Panel ......................................................................
Remote Control Instructions .......................................... 6
[nsertirlg Batteries in the Remote .......................................... 6
Remote Control Reception Angle .......................................... 6
Learning about Remote Control .................................... 6
Remote Control Buttons ..................................................... 6
Initial Setup ...................................................................... 7
Basic Operations ............................................................. 7
Turning On and Off............................................................ 7
Choosing TV Channel ........................................................ Z
Selecting input Source ....................................................... 7
Channel Bar ..................................................................... 7
Adjusting Volume .............................................................. 7
EPG (Electronic Program Guide) ........................................... 8
OSD Menu Operations .................................................... 8
Adjust the OSD Screen ...................................................... 8
Picture Menu ................................................................... 8
Sound Menu .................................................................... 8
Channel Menu ................................................................. 8
Parental Menu ................................................................. 9
Setup Menu ..................................................................... 9
Others Menu .................................................................. 10
DVD Operations ............................................................ 10
Frequently Asked Questions (FAQs) ........................... .11
Troubleshooting ............................................................ 11
V-Chip Rating Explanations ......................................... .12
us V-Chip Rating System .................................................. 12
Canadian English Rating System ......................................... 12
Canadian French Rating System ......................................... 12
Wall Mounting Unit Specification ................................ .13
USB Media Play ............................................................. 13
Product Specification ................................................... .13
Warranty Card ................................................................ 14
Congratulationson your purchase[
Asyou enjoy yournew product, please keepthese
safelytips in mind:
THEiSSUE
• ThehomeJheaterentertainmentexpenenceisa growingtrendand larger flatpanel
displaysare popularpurchases However,flatpaneldisplays arenotalways
supportedonthe properstandsor installedaccordinglo thernanufacturer's
_ecommendations
• Flatpanel displaysthatareinappropriately situatedondressers,bookcases,shelves,
desks,speakers,chestsorcartsmay fallover andcauseinlury
THISMA_UFACTU_E_CARES!
• Theconsumerelectronicsinduslryiscommifledto makinghome emertainment
enjoyableand safe
TU_Ei_TO $AJ:ETY
• One sizedoesNOT fit all Followthemanufacturer'srecommendationsforthesafe
installationand useofyourflat paneldisplay
• Carefullyread andunderstandall enclosedinslructionsfororoperuse ofthis
product
• Don't allowchildrento climbon orplay withfurnitureand televisionsets
• Don't placeflatpanel displayson furniturethatcaneasily beusedas steps,suchas
achestd drawers
• Rememberthatchildrencan becomeexcitedwhile watchinga Dogram, especially
ona "largerthanIre" flat paneldisplay Careshould betakento placeor nslall
thedisplaywhere itcannotbe pushed,pulled ave_;orknockeddawn
• Ca_eshould betakento _outeallcordsand cablesconnectedto theflat panel
displayso lha_lheycannotbe pulledor grabbedby curiouschildren
_ALL MOU_T|_G: IFYOUDE(]DETOWALLMOUNT
YOURFLATPANELDISPLAY,ALWAYS:
• Usea moun__ha_hasbeenrecommendedby thedisplay manufacturerand/or
hsledbyan independentlaboratory(suchas UL,CSA,ETL}
• Follow allinstructionssuppliedbythe displayand wallmountmanufacturers
• Ifyou haveany doubtsabout yourabilityto safelyinstallyour_latpanel dsplay,
contactyourretailer aboulprofessionalinstallation
• Make surethatthewall whereyou aremounting1hedisplay isappropriate Some
wall mountsarenotdesignedto be mountedtowalls withsteelstudsor oldcinder
blockconstruction Ifyou areunsure,contacta professionalinstaller
• A minimumoftwo peopleare requiredforinstallation Flatpaneldisplays
can beheavy
www.CE.org/safety
iMuchas gracias pot su uso del presente producto!
Cuando usted dJsfruta de su nuevo producto, por
favor tenga en cuenta los consejos de segufidad:
POSiBLES PROBLEMEAS
. La experiencia de entretenimientode Line en casa es una tendencia
crecientey los grandesmonitores de pantaila pianoson muypopulates. Sin
embargo,los monitoresde pantaliaplaneno sehen instaladosiempre entos
soportesadecuadosoinstalado deacuerdocon lasrecomendacionesde fabricante.
Los monitoresde pantallaplana que sehen instalado inadecuadamenteen
tocadores,estanterias, estantes,escritorios, oradores,baste s ocarros se
puedencaer ycausar eldaffo corporal
i AL FABRICANTE LE I_PORTA!
Laindustriaelectr5nica delconsumMorest& comprornetidaa hacerel
entretenimientode casaagradable yseguro,
AJUSTAR HASTA SEGUR[DAD
untarnaffo fijo NOes adecuadoparatodos. Siga lasrecomendaciones de
fabficante para[a instalaci6nsegurayel usode sumonitor depantaIla plana,
Leacon cuidadoy erdiendatodas tasinstrucciones adjuntaspara eluso
propiode esteproducto.
o No permitaa losniffosa subiral equipoo jugarconmuebles ytelevisiones.
o Noclaque losmanitores de pantaliaplanaen elmueble que sepuede usar
f_citmentecomo escal6n,asi como unac6moda.
Recuerdeque tosniffospueden Ilegara serexcitados aiver unaprogramaci6n,
especiatmenteen etmonitor depantafla plana"m&sgrande que vida".EIcuidado
setiene queempezar porponer oinstalar elmonitor donde nose
puedeempujar,detener aIcostado del caminoni echarabajo.
EIcuidadose tiene q_eempezar potencaminar todoslos cordones ycables
conectadosal monitorde pantaltaplana paraque nose puedantiraro agarrar
portos niSoscuriosos.
MONTAJE DE PARED: SI USTED DECIDE A MONTAR SU
MONITOR DE PANTALLA PLANA A LA PARED, SIEMPRE:
Useuna monturaque seha recomendadopor elfabricante demonitor y/o
fistadopor untaboratorio independiente(como UL,CSA, ETL).
Siga todas lasinstrucciones ofrecidas por etfabricante de monitor y
montaje de pared.
Siusted tienecualquier dudasobresu habiiidadpara instalarseguramente
sumonitor depantaiia piana,contacte asu distribuidorpara lainstalaci6n
profesionaL
Compruebeque [apared adandese est_montando etmonitor esadecuada.
Algunosmontajes dela pared nosondiseSados paraser montadosa paredes
cantachones deacero o[a viejaconstrucci6n de bloquedeceniza. Siusted
est_inseguro, contactea uninstaiadorprofesionaL
Por_omenos dospersonasserequieren para Iainstalaci6n. Losmonitores
depantalla plana puedeserpasados.
www.CE.org/safety
CAUTION
Caution: To reduce the risk of electric shock, do not
remove cover or back. No user-serviceable parts inside.
Refer servicing to qualified service personnel.
WARNING:
TO REDUCE THE RISK OF FIRE OR ELECTRIC SHOCK, DO NOT
EXPOSE THIS APPLIANCE TO RAIN OR MOISTURE.
CAUTION:
CHANGES OR MODIFICATIONS NOT EXPRESSLY APPROVED
BY THE PARTY RESPONSIBLE FOR COMPLIANCE WITH THE
FCC RULES COULD AVOID THE USERS AUTHORITY TO
OPERATE THIS EQUIPMENT.
FCC Information
This equipment has been tested and found to comply with the limits for
a Class B digital device, pursuant to Part 15 of the FCC rules. These
limits are designed to provide reasonable protection against harmful
interference in aresidential installation. This equipment generates, uses
and can radiate radio frequency energy and, if not installed and used in
accordance with the instructions, may cause harmful interference to
radio Communications. However, there is no Guarantee that
interference will not occur in a particular installation. If this equipment
does cause harmful interference to radio or television reception, which
can be determined by turning the equipment off and on, the user is
encouraged to try to correct the interference byone or more of the
following measures:
- Reorient or relocate the receiving antenna.
- Increase the separation between the equipment and the receiver.
- Connect the equipment into an outlet on a circuit different from
that to which the receiver is connected.
- Consult the dealer or an experienced radio/TV technician for help.
Class 1 Laser Product
Device complies with FDA radiation performance standards, 21 CFR
subchapter.
Caution: (Invisible) Laser Radiation when open. Do not stare into beam.
1. Read these instructions.
2. Keep these instructions.
3. Heed all warnings.
4. Follow all instructions.
5. Do not use this apparatus near water. For example, do not use
near a laundry tub, in a wet basement, or near aswimming pool,
and the like.
6. Clean onlywith drycloth.
7. Do not block any ventilation openings. Install in accordance with the
manufacturer's instructions. Slots and openings in the cabinet back
or bottom are provided for ventilation, to ensure reliable operation
of the TV and to protect it from overheating. These openings must
not be blocked or covered. The openings should never be blocked
by placing the TV on a bed, sofa, rug, or other similar surface.
8. Do not install near any heat sources such as radiators, heat
registers, stoves, or other apparatus (including amplifiers) that
produce heat.
9. Do not defeat the safety purpose of the polarized or grounding-type
plug. A polarized plug has two blades with one wider than the other.
A grounding-type plug has two blades and a third grounding prong.
The wide blade or the third prong is provided for your safety. Ifthe
provided plug does not fit into your outlet, consult an electrician for
replacement of the obsolete outlet.
10. Protect the power cord from being walked on or pinched
particularly at plugs, convenience receptacles, and the point where
they exit from the apparatus.
11. Only use attachments/accessories specified bythe manufacturer.
12. Use only with cart, stand, tripod, bracket, or table specified by the
manufacturer, or sold with the apparatus. When _ _
cart is used, use caution when moving the
cart/apparatus combination to avoid injury from
tip-over. A TV and cart combination should be
moved with care. Quick stops, excessive force,
and uneven surfaces may cause the TV and cart
combination to overturn.
13. Unplug this apparatus during lightning storms or when unused for
long periods of time. For added protection for this TV receiver
during a lightning storm, orwhen it is left unused for long periods
of time, unplug itfrom the wall outlet and disconnect antenna or
cable system. This will prevent damage to the TV due to lightning
and power line surges.
14. Refer all servicing to qualified service personnel. Servicing is
required when the apparatus has been damaged in any way, such
as power-supply cord or plug is damaged, liquid has been spilled
or objects have fallen into the apparatus, the appratus has been
exposed to rain or moisture, does not operate normally, or has
been dropped.
15. This TV should be operated only from the type of power supply
indicated on the rating label. Ifcustomer is not sure the type of
power supply in your home, consult your appliance dealer or local
power company. For TV remote control battery power, refer to the
operating instructions.
16. The TV set shall not be exposed to dripping or splashing. No
objects filled with liquids, such as vases, shall be placed on theTV
set.
17. Never push objects of any kind into this TV through openings as
they may touch dangerous voltage or other electrical parts that
could result in fire or electric shock. Never spill liquid of any kind
into the TV.
18. Unplug the TVfrom the wall outlet before cleaning. Do not use
liquid or aero cleaners. Use a damp cloth for cleaning.
19. This TV should never be placed near or over aradiator or heat
resource. This TV should not be placed in a built-in installation such
asa bookcase or rack unless proper ventilation is provided or the
manufacturer's instructions have been adhered to.
20. Do not place this TV on an unstable cart, stand, tripod, bracket, or
table. The TV may fall, causing serious injury to someone, and
serious damage tothe appliance.
21. Do not attempt to service this TV by yourself because opening or
removing covers may expose you to dangerous high voltage or
other hazards. Refer all servicing to qualified service personnel.
22. This device complies with Part 15 of the FCC Rules. Operation is
subject to the following two conditions: (1)this device may not
cause harmful interference, and (2) thisdevice must accept any
interference received, including interference that may cause
undesired operation.
23. WARNING: To prevent injury, this apparatus must be securely
attached to the floor/wall in accordance with the installation
instructions.
24. To reduce the risk of electric shock, the grounding of center pin of
plug must be maintained.
25. Ifan outside antenna or cable system is connected to the TV, be
sure the antenna or cable system is grounded to provide some
protection against voltage surges and built-up static charges.
Section 810 of the National Electrical Code, ANSI/NFPA NO.70,
provides information with respect to proper grounding of the mast
and supporting structure, grounding of the lead-in wire to an
antenna discharge unit, size of grounding conductors, location of
antenna discharge unit, connection to grounding electrodes, and
requirements for the grounding electrodes. (See figure A)
LEAD _N
WIRE
GROUND CLAMP
ANTENNA
DISCHARGE UNIT
(NEC SECTION 810 2O)
GROUNDING CONDUCTORS
(NEC SECTION 810 21)
EQUIPMENT ELECTRODE SYSTEM
(NEC ART 250, PARTH)
Safety Strap FigureA
Caution: Pushing, pulling or climbing on the TV may cause the TV
falling. Do not let children climb or hang on the W. Always place the TV
on a sturdy, level, stable surface that can hold the weight of TV. And if
possible, secure the TV according to the instruction below (Note: The
fastening components such as screws are not supplied with TV).
Step one: Insert the M6 mounting screws into the upper two wall
mounting screw holes and fasten them (Figure B).
Step two: Insert anchors to wall and connect the bolts and anchors
with ropes or chains (Figure C). _
M6 Screws
Figure B Figure O
Before Turning On TV
Check Accessories
Check the accessories that are packed with your TV.
It1_111]11:lllil] _ii l[O] I
PARTNO.: RE20QPS0
SCREWS
_l M4x12mm, 6pcsPa_# RS0tTM4t2H
SCREWS
_ M4x14mm, 4pcs
_Pa_# RS01PWA414HT
_ilvJ_'111[]Dll].* :.'[_'!:BB II|VJ_,11f.*l_ll]_l:[e,]_l
:21::[ I?Z:_i
USER'S GUIDE QUICK START GUIDE PATENT CARD
Setup TV Table Stand
Please refer to TV Stand Installation guide in next page to carry out
stand installing.
Select rv Location
Select a flat, stable table to place your TV set. Please follow the Safety
Instructions when placing the TV.
Connection and Using
After placing your TV properly, you can connect the TV with power
supply and cable components. For further information, see page 4 to
page 5.
Note."Above accessories are subject to change without notice.
3
TV LED42C45RQD is packaged with the TV stand separated from the
cabinet. To setup the TV table stand, please carry out the installation
according to the instructions below.
Step One
Place the TV faced down on a soft cloth or cushion to prevent the LED
LCD panel from being damaged.
The LED LCD panel can be
scratched easily, so please:
1. Choose an absolutely flat
surface to place the TV on.
2. Use soft cloth or cushion to
face the TV panel.
Do not put TV on the table
directly.
ys unplug the AC cord first
when installing/removing the stand.
Step Two
Take the neck. Please align the screw holes of the neck and the TV, and
then insert the 6 screws into the 6 holes on the neck and tighten them.
Page 2
1
u
u
u
u
u
u
Take the base. Please align four holes of the base and four screwholes
and tighten them.
sPcede_tsal IQuantityI Part#
4x 14mnlI 4pcs IRSO1PWA414H
Please take note of the base direction: __
The bottom view ofthe TV _ J _J
(Frontcabinet faces down) Longer side
The first step in connecting your TV is obtaining the signal. Your TV
LED42045RQD has a back panel, which allows you to receive analog
and/or digital television channels via ANT/CABLE jack.
Before connecting your TV, determine using an antenna or acable
service to obtain the signal.
A. Antenna
Connect the antenna to TV via coaxial cable on ANT/CABLE jack
of the back panel. You are ready to receive air local digital and
analog channels.
B. Cable TV service
Connect the cable TV wall jack to TV via coaxial cable on
ANT/CABLE jack of the back panel. You are ready to receive
off-air local digital and analog channels.
C. Set-Top Box
Ifyou use a set-top box, you may need to call your cable company
or satellite service provider, which use a special connection, please
refer to the user's guide of set-top box.
Note: Do not plug the AC cord until you have accomplished
all the connections.
Cable TV Antenna
COMPOSITE
L-AUDIO-R
COMPONENT Y,Pb, Pr
L-AUDIO-R
HDMI IN1/DVI, 2
Video/Audio cable
Audio Cable
COMPONENT video cable
HDMI-DVI cable
HDMI cable
See the below
Go topage 5
Go to page 5
Note:
HDMI, the HDMI logo, and High-Definition Multimedia Interface
are trademarks or registered trademarks ofHDMI Licensing LLC
Caution:
Unplug the AC cord when you connect other devices to TV.
Connecting AV Composite device
(Good Video Quality)
Composite connector will be shared with Component Y connector,
To connect a composite AV device, such as a DVD player, follow these
steps:
1.Connect the COMPOSITE jack on the side of TV to the video output
jacks of device via video cable (yellow).
2.Connect the L-AUDIO-R jacks on the side of TV to the audio
output jacks of device via audio cable.
Notice the left channel jack and plugs are white and the right
channel jack and plugs are red.
No/_: AV si_}nal befi_ngs to compos//_; vidco. Thi_ kffld of videe dqnal
has regular goed did€play quality.
Composite Video Connection
The picture below is anexample of a connection using the
composite videojack.
AC Power Cord
(Connect after all the other connections are done.)
Choose "four Connections
TV LED42C45RQD supports various connections to other
devices (such as DVD, VCR, Set-top box, etc.). Please follow the
table to choose the cables which adapt to your device.
4
The back of TV
The output panel of other device
Connecting YPbPr Component device
(Better Video Quality)
To connect a component device, such as aDVD player, follow these
steps:
1.Connect the COMPONENT IN Y/Pb/Pr jack on the side of TV to the
video output jacks of device via video cable (green, blue and red).
2.Connect the L-AUDIO-R jacks on the side of TV to the audio
output jacks of device via audio cable.
Notice the left channel jack and plugs are white and the right channel
jack and plugs are red.
Note: Y/Pb/P_ jacka ate component video. This kind of video sirjnal has
beller display qual,'ly.
Component Video Connection
The picture below is an example of a connection using the component
video jack.
The back of TV
The output panel of other device
Connecting HDMI device
(Best Video Quality)
To connect a HDMI device, such as a DVD player, please Connect the
HDMI1/DVl, 2 jack on the side of TV to the output jacks of device via
HDMI cable.
To connect a DVldevice, via DVI port of PC or Device and HDMI
jack of TV:
1. Connect the HDMI1/DVl jack on the side of TVto the DVl port of
PC via HDMI-DVl cable.
2. Connect the L-AUDIO-R jack on the side of TV to the audio
output jack of computer with audio cable (dual-channel RCA jacks
to 3.5mm stereo jack or the L-AUDIO-R jack).
Nete: 7. HiDM/ (Hi_}hDefieihae M /Ihrrled/a /nlertacp.) is acoml'gact
a ybo/vkfe.o ffltel4cee for traes'rniP,/ng uncompressed d_jil_:!ldc!i_'_.It
carries file au(Jle and vk:k%)sig'na/ vk:!file same s'abl_s.and has file best
c@pk:!y q/alily.
2. HDMI.DV/ rx'_blett ansf_.'rsonly video signal from DVIport of
DV/ (;M.viceto HDMl jc!ck of IV. /::braudio si9_}aL please connect aude
ealput to L-AUDIO.Rjac'k on T_{back pand.
HDMI Connection
The picture below is an example of a connection using the HDMI video
jack.
The back of TV
The output panel
of HDMI device
PC
The output panel of
other AV device
How to Obtain Various Kinds of Input
Sources
After connection is done, press INPUT button on remote control or TV
top panel to choose the input source you need. See page 7, Basic
Operation of TV.
5
HEAD PHONE: Connect a 3.5mm headphone for
personal audio.
USB: Connect your USB storage device to enjoy music!
photo files on your TV. (Also used for service purpose).
HDMII/DVI, 2: (High-Definition Multimedia Interface)
It provides an uncompressed digital connection that
carries both video and audio data by way of anintegrated
mini-plug cable.
COMPONENT Y/Pb/Pr: Connect a device that has
component video jacks, such as aDVD player. To access
device connected to the Y/Pb/Pr jack, press the INPUT
button on your remote; then press the up/down arrow to
select Component. Press the ENTER button at last to
confirm.
• Y/Pb/Pr (Component Video}: They provide good
picture quality because the video signal is separated into
three components. Use three video-grade or component
video cables for the connection. When using Y/Pb/Pr,
make sure you connect left and right audio cables to the
AUDIO IN R/L jacks.
L-AUDIO-R, COMPOSITE: Connect an AVdevice that has composite
video jacks, such as a VCR or aDVD player. To access device connected
to these jacks, press the INPUT button on your remote; then press the
up/down arrow to select AV. Press the ENTER button at last to confirm.
• AUDIO IN L: Left audio channel connection. The left audio
connector is usually white. For mono audio sources, be sure to use the
left AUDIO INPUT.
• AUDIO IN R: Right audio channel connection. The right audio
connector is usually red.
ANT/CABLE: Connect to receive the signal from your antenna or cable
viacoaxial cable.
Digital Audio out: Connect a coaxial cable for digital audio output.
Keypad Buttons
If you cannot locate your remote, you can use the keypad buttons on
your TV to operate many TV features.
INPUT: Displays the Source Select List.
MENU: Displays the TV Main Menu.
CHA: Scans up through the channel list. In the TVmenu system, it acts
like the up arrow on the remote control and can be used to select
menu options.
CRy: Scans down through the channel list. In the TVmenu system,
it acts like the down arrow on the remote control and can be used to
select menu options.
VOL+: Increases the volume. In the TV menu system, itacts like the
right arrow on the remote control and can be used to select menu
options.
VOL-: Decreases the volume. In the TVmenu system, it acts like the
left arrow on the remote control and can be used to select menu
options.
POWER (_): Turns the TV on and oft.
Front Panel
About remote control working distance and angle, see the right side.
Power/Standby Indicator: Light up in red when the TV is in standby
mode. Light out when the TV ison.
Remote Control Sensor: Remote control IR sensor, which receives
infrared ray sent by remote control.
[_emote Control S..... 1
Power/Standby Indicator
I
Inserting Batteries in the Remote
• Remove the cover of battery cabin on the back ofthe remote control
by lifting the cover.
• Insert two AAA batteries, making sure the polarities (+ and -) are
aligned correctly.
• Place the cover back.
If the remote control does not work, check these points:
• Are the polarities (% -) correct?
• Are the batteries wom out?
• Isthere an AC power failure?
• Isthe power cord plugged in?
• Isthere any interference or block near the remote control sensor?
6
CAUTION:
• Used batteries should be recycled.
• Keep out of children's reach.
• DO NOT use new and old batteries together.
• Change both the batteries at the same time.
• When not using the remote control for a long time, remove the
batteries from the unit.
Remote Control Reception Angle
Use your remote control within the distance and angle range shown
below.
Universal Remote Control Code List
For Universal Remote Control brands listed below, please use ac
companying codes and refer to your Universal Remote Control User
Manual for basic Instruction for changing TV code to operate the TV
model.
• Codes for DIRECTV: 0178, 10178
• Codes for Time Warner Cable: 0178, 10178
• Codes for Cox Communications: 0178
• Codes for Comcast: 10178
• Codes for Dish Network: 627
• Codes for Fios Verizon: 0205, 0057, 0493, 0775
Remote Control Buttons
MUTE (1_ }: Reduces the TV volume to its
minimum level.
Press again to restore the volume.
POWER (O}: Turns the TV on or off.
CH,LIST: Displays the channel list.
FAV,: Adds the current channel to your
favorite list, or erases the current channel from
your favorite list (ifthis channel is a favorite
channel already).
FAY.+ or FAV.- : Scans up or down through
the current favorite channel list.
Numeric Buttons: Use these buttons to enter
numbers.
"--": To enter a digital channel with a sub-
channel, enter the main channel; then, press
this button to enter the sub-channel and press
ENTER.
Recall (_--_3}: Returns to the previous channel.
EPG: Shows Electronic Program Guide (see
page 8).
INPUT: Accesses the available input channels
(TV,AV, Component, HDMI 1/2, Media). Use
the arrows to highlight options, and press
ENTER to select.
Arrows (,ill/I_/A/V): Uses the four arrows
to highlight different items inthe TV menu or
change the value. The up/down arrow
work as CH,',/CHv button, and the left!right
arrow can also work as VOL-/VOL+ button.
ENTER: Enter and confirm button.
MENU: Accesses the Main Menu, or return to
the upper level of a sub-menu.
FREEZE: Freeze the current screen frame,
press again to return to normal.
DISPLAY: Displays the Channel Bar (see
page 7).
EXIT: Exits the current menu orfunction.
VOL+ or VOL-: Increases or decreases the TV
Remote control part number
RE20QPS0
volume.
OH^or CHv: Scans up or down through the current channel list.
Press once to change the channel up or down; press and hold to
continue changing channels.
PICTURE: Switches between the preset picture mode (see page 8).
SOUND: Switches between the preset sound mode (see page 8).
SLEEP: Selects the sleep timer, after which the TV will shut off
automatically.
ASPECT: Switches between the preset screen size mode (see page 8).
CC: Selects the closed caption.
MTS: Selects the multi-channel television sound.
EJECT (A}: Ejects or loads the disk from DVD module.
PLAY ( I_}: Plays the DVD disk.
PAUSE (11}: Pauses the DVD playing.
STOP ill): Stops the DVD playing.
PREY (1_): Goes back to the previous chapter of DVD.
NEXT (_1): Skips to the next chapter ofDVD.
FR (<4) or FF (1_,}: Fast review or fast forward.
DVD-M: Returns to DVD root menu.
ZOOM: Zooms the size of screen.
A-B: Sets the A-point to B-point repeating.
TITLE: Returns to DVD title menu.
SETUP: Displays the DVD-setup menu.
REPEAT: Selects the repeating mode.
SUB-T: Selects the DVD subtitle.
AUDIO: Selects the DVD audio language.
Note: t:br DVD conl_e/ and epeslhon c/elc!/;% seepadre 10.
If itis the first time you turn on your TV, or you have done Clear
Channel List option (see page 9),the initial setup menu appears
automatically.
Step One
Please select Menu Language, press the
up/down arrow select the language you
need. Available languages: English, Spanish
and French.
Step Two
Please select the TV installation mode, press
the up/down arrow select the mode you
need: Home, Retail. If you select Home
mode, the next option isstep three. Ifyou
select Retail mode, please refer the step four
Step Three
Please choose between Energy Saving and
Dynamic mode. You can save more energy
with Energy Saving.
Step Four
To choose your TV tuner signal type, press the up/down arrow select
the signal type: Air, Cable.
Note: please select TV signal type according to the antenna or cable
closed circuit TV you use.
Step Five
Ifyou accomplish the initial setup, the TV will search channels
automatically.
What to notice:
1. Thechannel search access starts from the Analog TV channel
searching and ends at Digital TV channel searching.
2. The channels that have been found will be stored automatically.
3. You can press MENU button to skip analog/digital channel
searching.
4. You can press ENTER/EXIT button to end the channel searching.
Turning On and Off
Connect the AC cord to power the LED LOb TV. At this time the TV
will enter standby mode and power indicator will turn red. Use Power
button (_) on the top panel of TV or on the remote control to tum on
the TV. After switching off the TV for 5 seconds, you can turn on TV
again.
Choosing TV Channel
Tuning To Analog Channels
An analog channel has a channel number beginning with "A". Input the
digital number with numeric buttons directly and press ENTER button
to confirm.
For example, to watch analog channel "A51 ",press "5", "1 ", "ENTER"
on remote control in sequence.
Nete: Al/boagh them. is:no analog iV si_nal available in Arr_emta, we
reserve A P/ functions R:)rsome expansible use.
Tuning To Digital Channels
A digital channel has a channel number beginning with "D". Input the
main digital number with numeric buttons directly, then press "_"
button on remote control, and input the sub number at last.
For example, to watch analog channel "D31-1 ", press "3", "1", "_ ",
"1", "ENTER" on remote control in sequence.
Changing Channels Directly
You can use OH-". button to increase channel number and CHv to
decrease channel number. When no OSD (On Screen Display) is used,
the up/down arrows can also work as OH/'-/OH v buttons.
Selecting Input Source
Press INPUT button on remote control to
display Source Select list.
Use up/down arrows to highlight the source
you need and press ENTER to confirm.
Channel Bar
Press the DISPLAY button on the remote control, the channel bar will
appear on the top right comer of the screen. It displays the current
channel's information. The following list describes the items on the
channel bar.
7
A'IV D'IV
A2/D50-1 If the channel isanalog, A is displayed. Ifit's a
digital channel, D isdisplayed. For example, in the
pictures above, A2 is an analog channel, and
D50-1 is a digital channel ( -1 isa sub-channel
number).
MTV/KOOE-HD Displays the channel label.
Mono/English Displays whether the current channel is being
broadcasted in stereo or mono. If the current
channel is digital, this space will be SAP (Second
Audio Program) language.
480i/1080i Displays the signal resolution.
16:9/CC/TV-PG Displays the screen aspect ratio, closed caption
and TV rating level of the current program or
channel. These are only available for digital
channels.
Oct-31 23:14 Mon Displays current date and time.
Adjusting Volume
Press the VOL+/VOL- button on the remote control to adjust the
volume. If you want to switch sound off, press MUTE (1_). When OSD
(On Screen Display) is not used, the arrows left/right can also work as
VOL-/VOL+ buttons.
Page 3

EPG (Electronic Program Guide)
Press EPG button on the remote control, the electronic program guide
will appear in the center of screen. The electronic program guide gives
the TV program playing project. You can use left/right arrows to switch
pages.
Adjust the OSD Screen
The OSD (On Screen Display) menu enables you to approach to the TV
functions.
To use OSD menu system, press MENU button on remote control,
then use left/right arrow to highlight an option from PICTURE, SOUND,
CHANNEL, PARENTAL, SETUP or OTHERS and press ENTER/down
button.
Press the up and down arrow to move to a different option within each
menu. If necessary, press ENTER or right arrow to display the choices
of the option you've highlighted. If available, use the text at the bottom
of each screen for help. To return to the previous menu, press the
MENU button.
To exit the OSD menu:
• Press the EXIT button. The menu will clear from the screen.
• Press the MENU button repeatedly until the menus disappear.
Picture Menu
The Picture Menu contains menus and controls to configure the way
the picture appears. The Picture Menu options apply to the video for
the main TV and VIDEO INPUT selections. All picture options can be
applied to each input.
Press MENU on the remote. Select Picture from the Main menu. Press
the ENTER/down button to proceed to PICTURE menu.
Use up/down to choose the function you need, press ENTER or right
arrow to adjust or enter a sub-menu. The sub-menu image and
explanation are shown below.
If available, use the text at the bottom ofeach screen for help.
Picture Settings
Picture Mode: Choose the preset visual mode of your TV:
Standard, Movie, User, Dynamic, Power Saving. (Only in User
mode you can adjust Brightness, Contrast, Color, Tint and
Sharpness. Changes to Power Saving mode can decrease the
power consumption.)
• Brightness: Adjust the brightness of picture.
• Contrast: Adjust the contrast of color.
• Color: Adjust the richness of color.
• Tint: Adjust the balance between red and green level (only
available in NTSC signal).
• Sharpness: Adjust the sharpness level of picture.
Screen Size
Screen Size: Select a screen aspect ratio. (Available ratio: Wide,
Cinema, Zoom, and Normal.) Please choose the ratio that applies
to your video signal format best.
8
Color Temperature
This option allows you to select one of three automatic color
adjustments: Cool for a bluer palette of picture colors; Normal or
Warm for aredder palette of color.
Advanced Picture Settings
• Dynamic Contrast: Set dynamic contrast Oft/low/Medium/High.
• Film Mode: Set film mode on/oft.
• Noise Reduction: Set noise reduction as Oft/low/Medium/High.
• MPEG Noise Reduction: Set MPEG noise reduction as Off/low/
Mediumor High.
Note: Noise reduction helps to reduce the picture "static" or
any type of interference. This feature is especially useful for
providing a clearer picture in weak analog signal conditions.
The MPEG Noise Reduction specifically works on video signal
with MPEG coding.
Sound Menu
The Sound Menu lets you adjust audio output. To access the Sound
Menu, press MENU on the remote, and then select SOUND from the
Main Menu. Press ENTER/down button to proceed to SOUND menu.
Use up/down to choose the function you need, press ENTER or right
arrow to adjust or enter asub-menu. Thesub-menu image and
explanation are shown below.
Sound Settings
• Sound Mode: Choose the preset sound mode ofyour TV:
Standard, Soft, User, Dynamic. Only in User mode you can
adjust Bass, Treble, Balance.
• Bass: Adjust the bass component of TV sound.
• Treble: Adjust the treble component ofTV sound.
• Balance: Adjust the balance between the left and right channel.
Surround Mode
Creates a 3D sound surround from standard stereo material, with
deep and rich enhancement.
Auto Volume
Set auto volume control on/oft.
Analog Sound
Select analog TV audio sound type: Stereo, Mono or SAP (only
available in TV mode).
Digital Sound
Select digital TV audio language type: English, French or Spanish
(only available for DTV channel).
Digital Audio Output
Set the audio output type as Off, PCM or Raw. Please set this
option according to your power amplifier.
Equalizer Settings
The seven-band graphic equalizer allows you to adjust the audio
frequency settings. You can select one of the equalizer presets
(Off, Pop, Rock, Jazz) or create your own personal preset (User).
Press the left or right arrow to select the frequency (100Hz, 250Hz,
500Hz, 1KHz, 2KHz, 4KHz, 10KHz) you want to adjust. Use the
up or down arrow to adjust.
Channel Menu
The Channel Menu enables you to search, view and edit channels. It is
available in TV mode only. Press MENU and choose CHANNEL from
the Main menu. Press the ENTER/down button to proceed to
CHANNEL menu.
Use up/down to choose the function you need, press ENTER or right
arrow to adjust or enter asub-menu. Thesub-menu image and
explanation are shown below.
Channel List
Displays a channel list. Itshows the current channels.
Favorite List
Displays afavorite channel list. Itshows the current
favorite channels.
Channel Settings
Go to channel setting sub-menu.
Channel: Press up/down arrow to switch the channel you want to
edit.
Skip: Set if thecurrent channel is skipped.
Favorite: Set if the current channel is the favorite channel.
Label: Enter a channel label to rename the current channel.
Signal Type
Select your TV signal type: Air or Cable.
Auto Channel Search
Execute an auto channel search (see page 7).
ParentaU Menu
The Setup Menu enables you to lock program with special content,
panel key board and input source. Press MENU and choose
PARENTAL from the Main menu. Press the ENTER/down button to
proceed to PARENTAL menu.
Lock Parental Control
• When the Parental Control Menu is accessed from the Main
Menu, you need to enter password to unlock the menu function.
Please enter your four-digit password with numeric keys 0~9.
Note: The ori_;flr_alpassword is "0000".
• After unlocking, the items in parental control menu can be used.
Use arrow up/down to highlight the function you need and press
ENTER or right arrow to use V-chip, Change Password, Keypad
Lock and Source Lock, Clear Channel List sub-menu.
V-Chip
Press ENTER or right arrow to enter V-Chip sub-menu, the detail
asfollow:
US V-Chip
Press ENTER or right arrow to enter US V-Chip ratings menu,
which contains two sub-menus: Movie Rating and TV rating. See
next page for more details.
Movie Rating
use arrow keys to select the rating level you want to block, press
ENTER to IocWunlock the rating level. If you have blocked a lower
level rating, the higher ratings will be blocked too.
For example, when PG-13 is blocked, R, N0-17 and X will be
blocked at the same time.
TV Rating
Similar with Movie Rating. After adjusting, press MENU to return or
press EXIT to exit the menu.
TV Rating Overview
TV-MA MatureAudienceOnly D Sexually Explicit Dialogue
TV-14 Parents Strongly Cautioned L Adult Language
TV-PG Parents Guidance Suggested S Sexual Situations
TV-G General Audience V Violence
Directed to Children 7
TV-Y7 Years and Older FV Fantasy Violence
TV-Y All Children
For more rating explanation, see page 12.
Canada V-Chip
Press ENTER or right arrow to enter US V-Chip ratings menu,
which contains two sub-menus: English Rating and French Rating.
English Rating
Press ENTER or right arrow to enter English rating menu.
Use arrow keys to select the rating level you want to block, press
ENTER to leoWunlock the rating level. If you have blocked a lower
level rating, the higher ratings will be blocked too.
Forexample, when PG is blocked, 14+ and 18+ will be blocked at
the same time.
French Rating
Press ENTER or right arrow to enter French rating menu.
Similar with English Rating.
9
Note: _*leea raflngs are available only if 1he broadcaster is eatlding
rating informaflot_.
Block Unrated Show
Block allthe unrated program.
Downloadable Rating, Clear Downloadable Data
Activate or downloadable rating data. if available.
Change Password
Change the password ofparental menu.
Old PIN: Input the old password.
New PIN: Input the new password.
Confirm: Input the new password again to confirm.
Remote
Select your Remote: Off, Remote1 or Remote2. This is for special
purpose.
Keypad Lock
Select this option to block or unblock the TV's side panel buttons
so that they can't be used.
Source Lock
This option allows you to lock or unlock the input source. The
source blocked can not be chosen from input list unless you input
the correct parental password.
Use up/down arrow to select the source, press ENTER to lock or
unlock it.
Clear Channel List
This option allows you to execute Clear Channel List function. This
function will reset the whole TV system to factory default (not only
reset OSD menu).
Setup Menu
The Setup Menu lets you config the TV with your preferences. Select
SETUP from the Main Menu. Press ENTER/down button to proceed to
SETUP menu.
Use up/down to choose the function you need, press ENTER or right
arrow to adjust or enter a sub-menu. The sub-menu image and
explanation are shown below.
Closed Caption
Press ENTER or right arrow to enter closed caption sub-menu, the
detail as follow:
Caption Display
Press left/right arrow to select caption display on or off.
Analog Caption Type
Press left/right arrow to select analog closed caption type: OO1,
002, 003, 004, TEXT1, TEXT2, TEXT3, TEXT4.
Digital Caption Type
Press left/right arrow to select digital closed caption type: Service1,
Service2, Service3, Service4, Service5, Service6.
Digital CC Preset
Press left/right arrow to select digital closed caption preset: Default,
Custom. Only in custom mode you can adjust the digital closed
caption style.
Digital CC Style
Press left/right arrow to go to digital closed caption style sub-menu,
to select the closed caption style.
Select the item you want to adjust in Digital CO Style menu with
up/down arrows.
After changing, you can preview the caption style in the bottom.
Menu Language
To choose your menu language, press the left/right arrow until the
language you need appears.
Available languages: English, French and Spanish.
Menu Transparency
To choose your menu transparency mode, press the left/right
arrow until the transparency you need appears: Off, Low, Medium,
High.
Video Style
Ifyou connect the HDMI/DVI port of PC to HDMI jack of the TV
and the video signal is 1080p, please choose the compatible video
style: Video, Graphic.
Clock
Press ENTER or right arrow to enter Clock sub-menu, the detail as
follow:
Time Zone
Select your time zone: Eastern, Central, Mountain, Pacific, Alaska,
Hawaii, Samoa, Newfoundland, Atlantic.
Auto Clock
Select auto clock on/off. Auto clock helps you synchronize your TV
time to standard time (from DTV signal).
Setup Time
Set your TV time manually (needs to turn off auto clock).
Day of Week
Displays what day it is(can't be adjusted, displays only).
Daylight Saving Time
Set your daylight saving time on or off (needs to turn on auto clock).
Initial Setup Wizard
To set the initial settings. (see page 7)
Others Menu
The Others Menu lets you conflg the TV with your preferences in other
features. Choose OTHERS from the Main Menu. Press ENTER/down
button to proceed to SETUP menu.
Use up/down to choose the function you need, press ENTER or right
arrow to adjust or enter a sub-menu. The sub-menu image and
explanation are shown below.
Blue Back
Press ENTER button to select Blue Back on or off. If the Blue Back
isturned on, the TV will display a blue background when there is
no signal input.
No Signal Power Off
Press ENTER button to select "No Signal Power Off" on or off. If it
is turned on, the TV will shut off after 10-minute no signal time. We
suggest you turn on this function when Blue Back is turned on. It
may hurt the LED LCD panel if blue screen is on for too long.
Note: In PC mode, the monitor standby and power off settings
depend on the No Signal Off time.
No Operation Power Off
Press ENTER button to select "No Operation Power Off" on or off.
Ifit is turned on, the TV will shut off after a 3-hour no operation
time.
All Reset
Press ENTER button to execute reset to TV system. All the settings
will be reset to factory default.
Audio Only
Press ENTER button to activate audio only mode. The TV will
output only sound and the LED LCD panel will be turned off. To
restore normal playing, hold POWER button for three seconds.
Note: The OSD's appearance and color are referred to the actual
appliance.
DVD mode of TV LED42C45RQD
TV LED42C45RQD has a built-in DVD player module, which
you can use to watch DVD disk. The following operation guide gives
the DVD module instruction.
1. How to enter DVD mode for rv LED42045RQD
Press INPUT button on remote control, select "DVD" in the Source
Select menu (see page 7), then press ENTER or right arrow to enter
DVD mode. The DVD will start playing automatically if there is adisk in
DVD module. Ifnot, the TV will display a standy screen as shown. And
a "No Disc" message will appear on screen.
Note: The TV wilt turn to DVD mode automatically when you insert a
disk, no matter which mode it isnow.
2. Insert a disk to DVD player
Insert the DVD disk with reflector surface facing the front of TV.
Disk reflector surface facing the front of TV.
Note: Do not insert with much strength.
Insert disk gently and the DVD
module will toad in the disk
automatically.
3. DVD control
You can control the DVD playing with keypad on DVD module or with
remote control. For operating information, see the follow.
Keypad on DVD module
EJECT ( A,): Ejects or loads the disk from DVD module.
PLAY/PAUSE ( I_ll): Plays or pauses the DVD disk.
STOP (•): Stops the DVD playing.
PREV (1_): Goes back to the previous chapter ofDVD.
NEXT (IN): Skips to the next chapter ofDVD.
ZOOM: Zooms the size of screen,
About DVDcontrolbuttons onremotecontrol, seepage 6,remotecontrol buttons.
4. DVD basic operations
Play/pause the disk: After inserting the disk to DVD module, the TV
will play DVD disk automatically. You can use PAUSE button to
suspend the playing. Press PLAY button, the TV will restore playing.
Stop playing: During playing, you can use STOP button to stop
playing. If you press STOP once, the DVD will be stopped briefly. Press
STOP again, it will stop completely and the disk in DVD module no
longer wheals.
Eject the disk: You can press EJECT button to eject the disk from
DVD module. And press EJECT again, the DVD will load the disk
renewedly.
Going backward or forward: You can press FR for fast review and FF
for fast forward. You can also press PREV to return to the previous
chapter, and press NEXT to skip to next chapter.
Function menu: Press DVD-M, you will return to the selection menu of
current DVD function. For example, you are using "Audio Selection",
and you choose "Continue playing", then after selecting, you can press
DVD-M to go back to "Audio Selection" menu while playing.
Title menu: Press TITLE, you can reset the disk to the title menu. It
equals to ejecting and loading the disk again.
Zoom in: Press ZOOM, you can zoom in the screen for 2 times, 3
times or 4 times from centre. This function provide a better view of the
content locate near screen centre.
Subtitle selection: Press SUB-T, you can switch the available subtitles
in DVD disk.
Audio language selection: Press AUDIO, you can switch the available
audio language in DVD disk.
Repeat: There are two kinds of repeat, one is regular repeat and the
other is Atop repeat. For regular repeat, press REPEAT button to
switch between chapter repeat, title repeat and all repeat. For A-to-B
repeat, press A-B once to set the repeating origin and press it twice to
set the repeating end.
DVD-setup menu: Press SETUP button, a specific setup menu for
DVD will display on screen. This menu isespecially prepared for DVD
control. For menu instructions, see the follow.
5. DVD setup menu
A. General setup page
There exist three sub-menus in DVD setup menu, the first one is
General Setup. Press SETUP button on remote control to display
General Setup Page. Press up/down arrow to select the item you
want to adjust and press right arrow or ENTER button to activate it.
After activating, use up/down arrow to set item value. When you are
satisfied with the adjustment, press left arrow to return to the upper
10
level of general setup menu. Press left arrow repeatedly, you can exit
the DVD setup menu. To exit setup menu directly, press SETUP.
rv Display
Set the TV display shape.
OSD Lang
Set the DVD OSD language as English, French or Spanish.
Last Memory
Set it on to memorize the last stop point. During playing the DVD,
ifyou change to another mode and then come back to DVD mode,
it can play automatically from the last stop point.
Note: We suggest you turn off the last memory function unless you
really need it. To turn on this function may influence the lifetime d
flash memory of DVD module.
B. Speaker setup page
Press SETUP button on remote control to display General Setup Page.
Press left/right arrow to choose Speaker Setup Page. The operating
method is similar with the General Setup Page.
Downmix
This option is preset as Stereo. That means the DVD player will
output atwo-channel audio signal (L/R) to TV front speakers
(left/right).
C. Preference page
Press SETUP button on remote control to display General Setup Page.
Press left/right arrow to choose Preference Page. The operating
method is similar with the General Setup Page.
TV Type
Set the TV type as PAL, Auto or NTSC.
Note."American DVD standard is NTSD system, so we suggest you
set the TV Type as NTSC. In addition you can also set it as PALto
watch some disks w th PAL system, or seect Auto for conven ence.
Audio
Set the DVD audio language.
Subtitle
Set the DVD subtitle language.
Disc Menu
Set the DVD disk menu language.
Parental
Set the parental control rating as KID SAF, G, PG, PG13, PGR, R,
NC17 or ADULT. To change this option, you need password, and
the original one is "0000".
Default
Reset the DVD setup menu options as factory default.
What's the most convenient way to view High
Definition (HD) video?
Connect an antenna to the TV Input jack to view free local digital
channels. You may need to purchase an antenna. (See page 4 for
more information about antenna setup).
Visit www.antennaweb.org for assistance in deciding what type of
antenna to use to receive the local digital channels available to you.
After entering your location, this mapping program tells you which local
analog and digital stations are available using a certain antenna.
Are there other ways to view High Definition
(HD) video?
Besides using an antenna as mentioned above, you can also use a
eat-top box to receive digital video. Contact your cable service provider
or satellite provider to purchase digital programming and have them
connect the box to ensure you are viewing channels in the best way.
How do I tell ananalog channel from a digital
channel?
Press the DISPLAY button to display the Channel Bar. Look at the top
right corner of the screen. An "A" is displayed for an analog channel.
A "D" isdisplayed for a digital channel.
Note: Since the analog TV in America has been cut off, we reserve
analog TV function only for some unexpected use.
11
Why are there bars on my screen, and can I get
rid of them?
Most digital video is sent ina 16/9 format which fills your screen, but is
sometimes sent in 4/3 which does not fill your screen. Itdepends on
how the station or device connected to your TV is formatting the video.
Ifthere are bars on the screen,
press the ASPECT button to try a different format that may eliminate
the bars. Some bars can't be removed because of the way the format
is sent by the broadcaster. The format changes as you press the
ASPECT button and the format type is displayed at the bottom of the
screen. For more information on screen size, go to page 8.
Why does channel search find a lot of channels,
but when I try to tune to them, there's nothing
there?
Some channels don't carry programming, such as video On Demand.
When channels are unavailable, your TV screen is blank or appears like
snow. You probably want to remove these channels from your channel
list. Remove these inthe Channel List Menu. Go to page 8 for more
information.
Why does it take a long time when I search the
channels at first time?
Ifyou have both analog and digital channels, the TV is looking for all
available channels in thechannel list. Ifyou do have digital channels,
the TV isalso searching for scrambled channels, non-scrambled
channels, and each sub-channel of that digital channel.
Identifying Problems
Ifthere are any problems when using the product, please consult the
list below. Ifthe list does not solve the problem, call our Customer
Service Center immediately.
TV Problems
The TV can't be turned on.
• Make sure the AC cord is plugged in.
• Check the wall outlet, make sure the AC output works normally and
stably.
• The side panel may be locked (disabled). Use the remote control to
turn on the TV.
• Select the Keypad Lock function in the PARENTAL Menu and press
ENTER to uncheck the locking status.
There is nopicture or sound but the TV is on andthere
is a "No Signal" sign on screen.
• Are you trying to use an input source with no device connected to
it? For using other video/audio device, make sure the external
device works normally first, then press INPUT and choose the right
input source.
• The Signal Type option may be set incorrectly. Go to page 9 for
detailed instructions.
• The channel may be blank. Try to search the channel again or
change another channel.
The sound is fine, but the picture is poor.
• If you can only get black and white pictures from extemal device
that you've connected to your TV, maybe it is due to the video
cables is not connected well, or they are connected wrongly.
Check the connection stability first, then check the correctness. For
AV input, the yellow video cable connects to the yellow Video In
jack on the side of your TV. For Component input, the three Y, Pb,
Pr video cables (red, blue, and green) should be connect to the
corresponding input jacks on the side of your TV.
• Check the antenna connections. Make sure all of the cables are
firmly connected to the TV jack on side of your TV.
• Try adjusting the color features to improve.
There is no sound, but the picture is fine.
• The sound might be muted. Try pressing the MUTE button to
restore sound.
• For using AV or Component, remember to connect the device's left
Page 4

andrightaudiooutputcorrectly.Theleftchannelcableiswhiteand
therightchannelcableisred.Pleasematchthecablesandjacks
accordingtotheircolors.
• The sound settings may not be set correctly. Go to page 8 for
more information.
• If your audio source has only one jack or is a (mono) audio source,
make sure you have plugged the connection into the Audio In L
jack (white) on the TV.
The buttons on the side panel don't work.
• The side panel may be locked (disabled). Use the remote control to
turn on the TV.
• Select the Keypad Lock function in the PARENTAL Menu and press
ENTER to uncheck the locking status.
• Unplug the TV from the AC power for 10 minutes and then plug it
back. Tum the TV on and try again.
The TV turns off unexpectedly.
• The electronic protection circuit may have been activated because
of apower surge. Wait 30 seconds and then turn the TV on again.
Ifthis happens frequently, the voltage inyour house may be
abnormal. If the other electronic equipment in your home can't work
normally, consult a qualified service personnel.
Can't select a certain channel.
• The channel may be blocked or not approved in the PARENTAL
Menu.
• The channel may be skipped in channel list in CHANNEL Menu.
Check the blocking and skipping status of channel.
The stereo sound performance is bad.
• Itmay be aweak station. Use the SOUND Menu and set Analog
Sound as Mono.
A black box appears on the screen.
• Closed captioning might be on. Check Closed Caption in the
SETUP menu. Go to page 9 for more instructions.
Problems with the HDMI Connection.
• Make sure the HDMI device (DVD, video garner, etc.) isturned on
and the cables are firmly connected. If problems still occur, turn off
your device and reconnect it. Reset the power by unplugging the
power cord and plugging it again.
• Ifa "No Signal" message appears on screen, the HDMI device isn't
responding. Contact the manufacturer of the HDMI device for
further assistance.
• Ifyou have black bars on each side of your picture (which means
the TV can not display a full-screen image), the device you
connected might have a switch or a menu option allowing you to
change the picture quality output that will fix this. Choose either
720p or 1080i.
The Remote control doesn't work.
• Something might be blocking between the remote control and the
remote sensor on the front panel of the TV. Make sure there isa
clear path.
• The remote may not be aimed directly at the TV.
• The batteries inthe remote may be weak, dead, or installed
incorrectly. Put new batteries in the remote.
You are experiencing problems with V-Chip/Parental
Controls.
• If the rating limits don't work, you must lock the settings. Go to the
Main Menu (press MENU on your remote), select PARENTAL to
check the settings.
What else can Ido?
If you've been through the Troubleshooting section and nothing has
fixed your problem, try rebooting your TV. Note that after a reboot, you
may need to run your TV through the setup process again. To reboot,
unplug the power cord from the wall outlet or power strip. Keep your
TV unplugged for about 5 minutes. Then plug in the TV and turn it on.
See if the problem is fixed. If the problem remains, then please visit the
Customer Support Menu at www.rca.com or updated FAQs or contact
RCA Customer Support at the support number provided inyour
US V-Chip Rating System
TV-MA (Mature Audience Only): Specifically designed to be viewed
byadults and may be unsuitable for children under 17. It contains one
ormore of the following content themes: crude indecent language (L),
explicit sexual activity (S), or graphic violence (V).
TV-14 (Parents Strongly Cautioned): Contains some material that
many parents would find unsuitable for children under 14. Parents are
strongly urged to exercise greater care in monitoring this program and
arecautioned against letting children under the age of 14 watch
unattended. This program contains one or more of the following
content themes: intensely suggestive dialogue (D), strong coarse
language (L), intense sexual situations (S), or intense violence (V).
TV-PG (Parental Guidance Suggested) : Contains material that
parents may find unsuitable for younger children. Many parents may
want to watch it with their younger children. The program contains one
ormore of the following content themes: some suggestive dialogue (D),
infrequent coarse language (L), some sexual situations (S), or moderate
violence (V).
TV-G (Parental Audience): Most parents would find this program
suitable for all ages. Itcontains little or no sexual dialogue (D)or
situations (S), no strong language (L), and little or no violence (V).
Canadian English V-Chip Rating System
18+ (Adult): Programming intended for adults 18 and older. Itmay
contain elements of violence, language, and sexual content which
could make it unsuitable for viewers under 18. Violence Guidelines:
May contain violence integral to the development of the plot, character
ortheme, intended for adult audiences. Other Content Guidelines: May
contain graphic language and explicit portrayals of nudity and/or sex.
14+ (Viewer 14 and over): Programming contains themes or contents
which may not be suitable for viewers under the age of 14. Parents are
strongly cautioned to exercise discretion in permitting viewing by
pre-teens and early teens. Violence Guidelines: May contain intense
scenes of violence. Could deal with mature themes and societal issues
in arealistic fashion. Other Content Guidelines: May contain scenes of
nudity and/or sexual activity. There could be frequent use of profanity.
PG (Parental Guidance): Programming intended for a general
audience but which may not be suitable for younger children (under the
age of8). Parents may consider some content inappropriate for
unsupervised viewing by children aged 8-13. Violence Guidelines:
Depictions of conflict and/or aggression will be limited and moderate;
may include physical, fantasy, or supernatural violence. Other Content
Guidelines: May contain infrequent mild profanity, or mildly suggestive
language. Could also contain brief scenes of nudity.
G (General Audience): Programming considered acceptable for all
ages groups. While not designed specifically for children, it is
understood younger viewers may be part of the audience. Violence
Guidelines: Will contain very little violence, either physical or verbal or
emotional. Will be sensitive to themes which could frighten a younger
child, will not depict realistic scenes of violence which minimize or gloss
over the effects of violent acts. Other Content Guidelines: There may be
some inoffensive slang, no rofanity and no nudity.
08+ (Children 8 and older): Programming generally considered
acceptable for children 8 years and over to watch on their own.
Violence Guidelines: Violence will not be portrayed as the preferred,
acceptable, or only way to resolve conflict or encourage children to
imitate dangerous acts which they may see on television. Any realistic
depictions of violence will be infrequent, discreet, of low intensity and
will show the consequences ofthe acts. Other Content Guidelines:
There will be no profanity, nudity or sexual content.
C (Children): Programming intended for children under age of 8.
Violence Guidelines: Careful attention is paid to themes which could
threaten children's sense of security and well being. There will be no
realistic scenes of violence. Depictions of aggressive behavior will be
infrequent and limited to portrayals that are clearly imaginary, comedic
orunrealistic in nature. Other Content Guidelines: There will be no
offensive language, nudity or sexual content.
Canadian French V-Chip Rating System
18+ (Adult): Programming is for adults only. This program contains
sustained violence or extremely violent scenes.Warranty card.
12
16+ (Viewer 16 and over): Programming is not suitable for those
under age 16. This program contains frequent scenes of violence or
intensely violent scenes.
13+ (Viewer 13 and over): Programming may not be suitable for
children under the age of 13. This program either contains several
violent scenes or one or more scenes that are violent enough to affect
them. Viewing in the company of an adult is therefore strongly
recommended for children under the age of 13.
8+ (Viewer 8 and over): Not recommended for young children. This
program is suitable for most audiences, but it contains mild or
occasional violence that could upset young children. Viewing in the
company of an adult is therefore recommended for young children
(under the age of 8) who do not distinguish between reality and
imagination.
G (General Audience): This program issuitable for audiences of all
ages. It contains no violence, or any violence that it does contain is
either minimal or is presented in a humorous manner, as a caricature,
or in anunrealistic way.
M6 screws, length 16ram
200 mm
Note:
A. The wall mount is not contained in the accessories sold with
television. We only provide the installing specifications but not the wall
mount itself. Ifyou need the mount, please consult with the local dealer
for aVESA wall mount.
B. We strongly suggest to set the wall mount with equipments of
specification we ordered. Ifnot, inappropriate installing may cause
damage to device or people.
C. We suggest that you keep your TV at least 2.36 inches(60mm) from
the wall to prevent cable interference.
Warnings:
1. Do not set up thewall mount by yourself. Please contact qualified
professionals for installation.
2. The TV should not be mounted on walls or surfaces which have an
angle more than 10 degrees with vertical direction. Otherwise the
TVset may fall.
3. The walls for mounting must have enough strength to hold the
whole weight of TV set. For example, concrete wall and brickwork
are eligible. Do not place the mount on soft walls such as earth
walls and plasterboard.
4. If spare parts of different specifications (such as screws) are used
during mounting, consult with qualified professionals to make sure
these parts are safe and effective.
5. Before attaching the base to wall, ensure the holes for anchors are
in keeping with the installing rules. Otherwise there may exist some
potential problems.
6. Do not place any heating source under your television. Or else, it
can cause fire.
7. Do not place the TV near anything dripping. Transducers and high
voltage wires should be kept far away from the apparatus too. Or
else, it may cause creepage, electric shock or bad resonance.
8. Do not place TV in a location where collision or vibration is liable to
happen.
9. In order to avoid unexpected falling ofthe TV set, do not put any
strong force on TV orwall mount after installing.
10. Be sure to unplug theTV before installing. Keep anything hard or
sharp away from the screen panel to prevent the scuffing.
11. After installing, if there is any need to move the cabinet, please
contact the qualified professionals.
13
With USB Media Play, you can enjoy music and photo files stored in a
USB storage device on your RCA TV.
Connecting a USB storage device
• Connect a USB storage device to the USB port in the back of the TV.
• Press "INPUT" and select "Media".
• "USB Media Play" menu will appear.
Playing back Music files
• Press arrow (4/11_-) toselect "Music" and press "ENTER".
• The file orfolder list will show up. Press arrow (A/V) to select a file
orfolder. Press "ENTER" to playback the music file you selected.
Playing back Photo files
• Press arrow (4/1_) to select "Photo" and press "ENTER".
• The file orfolder list will show up. Press arrow (A/V) to select
a file or folder. Press "ENTER", and you will be given several
options to view photo files.
• You can directly open and playback the file. view thumbnails for
photo preview, or play slideshow.
Media setting for Slideshow and Music playback
• Press arrow (4 /I1_-)toselect "Media Setting" and press "ENTER".
• In "Media Setting", you can set various options for Slideshow and
Music Playback.
Media Support Specification
• Photo JPG/JPEG files
• Music MP3 (8~320kbps) files
• USB Storage USB flash drive
• File System format FAT32
Caution:
Do not tum off the TV or disconnect USB storage device while the TV
isplaying back picture or music. This may result in loss of data or
damage to the USB storage device, and RCA is not responsible for any
damage to, or loss of, data on the USB storage device.
Diagonal Display Size
Television System
Channel Coverage
Temperature
42 inches
American TV standard
ATSC/NTSC system
VHF: 2-13 UHF: 14-69
CATV: 1-135
Storage Temperature is
-20_C-+60°C (-4°F-+140°V)
Operating Temperature is
0"C-+50_C (+32°F-+122°V)
Humidity
Power Supply
RF input
Connection Video input
Interlace
Audio input
Audio output
Resolution
Component/HDMI mode
With stand
Dimensions Without
stand
With stand
Weight Without
stand
Power Consumption
Storage Humidity: Less than 85% RH
(No condensation)
Operating Humidity: Less than 80% RH
(No condensation)
AC 100-120V, 60Hz
Cable/Antenna x 1
AVx 1
Component x 1
HDMI x 2
AVx 1
Headphone x 1, Digital Audio Out x 1
1920 x 1080
480i, 480p, 720p, 1080i, 1080p
38.6"W X 25.4"H X 9.4"D
38.6"W X 23.1 "H X 3.6"D
31.5LBS (14.3KGS)
26.7LBS (12.1KGS)
less than 79W
Notice: Specifications are subject to change without notice.
Coverage - Labor
For a period of 12 months from date of purchase of your RCA
product, we will pay an authorized RCA service center the
labor charge to repair any defects in materials or workmanship
in your television.If your television is unrepairable we will
provide you with a refurbished unit of the same or better model.
Coverage - Parts
For a period of 12 months from date of purchase of your RCA
product, we will pay an authorized RCA service center for the
new,or at our option, refurbished replacement parts needed to
repair any defects in material or workmanship inyour television.
ifyour television is unrepairable we will provide you with a
refurbished unit of the same or better model.
Coverage - LED LCD Panel
For a period of 12 months from date of purchase of your RCA
product, we will pay an authorized RCA service center for the
new, or at our option, refurbished LED LCD panel needed to
repair any defects in material or workmanship inyour television.
Ifyour television is unrepairable we will provide you with a
refurbished unit of the same or better model.
How to Obtain Service
• For assistance (U.S.A) - ifyou purchased RCA product in
U.S.A, please call 1-888-977-6722.
Or visit www.rca.com
• For assistance (Mexico) - if you purchased RCA product in
Mexico, please call 01-800-8233858.
Or visit www.rca.com
[Mexico service center address]
Servicios Computacionales de Mexico, S.A. de C.V.
Francisco Diaz Covarrubias # 33, Ciudad Satelite
C.P. 53100, Naucalpan, Mexico
The service representative will review your options for service.
As a convenience we offer three ways to obtain warranty
service. You may mail your product to the address provided by
the service representative, you may take your product to an
authorized service center, or you may request in home service
(servicer will determine if product is serviceable in home or must
be taken back to local service center for repair). Service
representative will supply instructions for preferred service. At
the time of service proof of purchase such as original receipt,
will be required. Only 37" LCD size and above are appficablefor
in-home-service.
• Un-instafiation, installation and adjustment ofcustomer
controls and operating instruction.
• Batteries and customer replacement fuses.
• Damage due to misuse, abuse, negligence or neglect
including but, not limited to, damage resulting from
exposure to moisture, humidity or salt.
• Inability to receive a signal due to problems not caused
bythe product.
• Damage to the product due to images burnt into the screen.
• Product purchased or serviced outside of Country of
Original Purchase. -i.e. Purchased USA can not be
serviced in Mexico/Purchased in Mexico can not be
serviced in USA.
• Product modified or incorporated into other products.
• Damage due toacts of nature, including but not limited to,
lightning damage or flooding.
• Service calls which do not involve any defect in materials
orworkmanship.
Commercial Use Excluded
This limited warranty only applies to products used for personal
use and does not cover any product used for institutional,
commercial or rental purposes.
THIS LIMITED WARRANTY IS THE SOLE AND EXCLUSIVE
WARRANTY APPLICABLE TO THIS PRODUCT. ON CORP
US, INC., THE MANUFACTURER OF THIS PRODUCT,
DISCLAIMS ALL OTHER WARRANTIES, EXPRESSED OR
IMPLIED (INCLUDING ALL IMPLIED WARRANTIES OF
MERCHANTABILITY OR FITNESS FOR A PARTICULAR
PURPOSE). NO VERBAL OR WRITTEN INFORMATION
GIVEN BY ON CORP US, INC., ITS AGENTS, INDEPENDENT
CONTRACTORS, SALES REPRESENTATIVES, EMPLOYEES,
RETAIL DEALERS, WHOLE SALE DISTRIBUTORS OR ANY
OTHER THIRD PARTY SHALL CREATE AGUARANTY OR
INCREASE. EXPAND OR MODIFY THE SCOPE OF THIS
LIMITED WARRANTY.
THIS LIMITED WARRANTY PROVIDES THE SOLE AND
EXCLUSIVE REMEDY FOR THE CONSUMER OF REPAIR OR
REPLACEMENT OF THE PRODUCT. ON CORP US, INC.
SHALL NOT BE LIABLE FOR SPECIAL, INCIDENTAL OR
CONSEQUENTIAL DAMAGES ARISING OUT OF THE USE
OF THEP RODUCT OR ARISING OUT OF A BREACH
EXPRESSED OR IMPLIED WARRANTY ON THIS PRODUCT.
THIS LIMITED WARRANTY AND THE DISCLAIMERS
CONTAINED HEREIN ARE GOVERNED BY THE LAWS OF
THE STATE OF INDIANA. EXCEPT TO THE EXTENT
PROHIBITED BY APPLICABLE LAW, ANY IMPLIED
WARRANTY OF MERCHANTABILITY ORFITNESS FOR A
PARTICULAR PURPOSE IS LIMITED TO APPLICABLE
LIMITED WARRANTY PERIOD(S) SET FORTH ABOVE.
THIS WARRANTY GIVES YOU SPECIFIC LEGAL RIGHTS
AND YOU ALSO MAY HAVE OTHER RIGHTS THAT VARY
FROM STATE TO STATE.
RCA is a trademark of RCA Trademark Management
SAS and used under license by ON Corporation
HechoPaoraHoy.
Cobertura-Trabajo
Durante un periodo de 12 meses desde la fecha de compra
de su producto RCA, pagaremos a un centre autorizado de
servicio de RCA el cargo de mane de obra para reparar
cualquier defecto en materiales o mane de obra en el
televisor. Si su televisor es irreparable que le proporcionar&
una unidad reacondicionada del mismo modelo o superior.
Cobertura / Recambios
Durante un periodo de 12 meses desde la fecha de compra
de su producto RCA, pagaremos a un centro autorizado de
servicio de RCA pars un reemplazar ya sea con partes
nuevas o reacondicionadas, oa nuestra opcien, para reparar
cualquier defecto del material o mane de obra en el televisor.
Si su televisor es irreparable que le proporcionar& una unidad
reacondicionada del mismo modelo o superior.
Panel de Cobertura-LED LCD
Durante un periodo de 12 meses desde la fecha de compra
de su producto RCA, pagaremos un centro autorizado de
servicio de RCA pars un reemplazar la pantafia LED LCD, ya
sea con pantalla nueva o reacondicionada, oa nuestra opcien,
para reparar cualquier defecto del material o mane de obra
en ]a pantafia de su televisor. Si su televisor es irreparable
que le proporcionar_ una unidad reacondicionada del mismo
modelo o superior.
Cerno Obtener Servicio
Para asistencia en Estados Unidos (E.U.A) si compr6 un
aparato RCA en E.U.A. favor defiamar afi
1-888-977-6722 o visite: www.rca.com
Pars asistencia en Mexico: si compr6 un aparato RCA en
M_xico, favor de llamar al:
01-800-823-3858, ovisite: www.rca.com
(Centre de Servicio en Mexico)
Servicios Computacionales de Mexico, S.A. de C.V.
Francisco D(az Covarrubias # 33, Ciudad Satelite
C.P. 53100, Naucalpan, M_xico
El representante de Servicio revisar_ sus opciones para el
servicio. Para su comodidad le ofrecemos tres formas de
obtener servicio de garantia. Usted puede enviar su producto a
la direcci6n proporcionada perel representante de servicio,
usted puede fievar su producto a un centre de servicio
autorizado, o puede solicitar en el servicio a domicifio
(administrador determinar_ si el producto se encuentre en
funcionamiento en casa o debe ser llevado de vuelta a servicio
local t_cnico para su reparaci6n). Elrepresentante del Servicio
le proporcionar& las instrucciones pars el servicio preferido. Se
requiere del comprobante de compra original. S61o se les dar&
servicio a Domicifio a Televisores de 37 " pulgadas de tama6o
ym_s grandes.
• Un-instalacien, montaje y ajuste de controles del cliente
e instruociones defunoionamiento.
e Las pflas y los fasibles de repuesto al cfiente.
Da_os per use indebido, abase, negligencia o descaido
incluyendo pero no fimitado a, los dafos derivados
15
de la exposicien a la humedad, la humedad o la sal.
Incapacidad para recibir la sepal debido a los problemas
que no son causadas per el producto.
• Da_os en el producto debido alas imAgenes de grabadas
en la pantalla.
Productos comprados o prestar servicios fuera del pals
de compra original.
Ej: Comprado en Estados Unidos no puede prestar
servicios en Mexico/Comprado en Mexico no paede
prestar servicios en Estados Unidos.
Productos modificados oincorporados a otros productos.
Da_os debidos a fenOmenos de la naturaleza, incluyendo
pero no limitado a, da_os per rayos o inundaciones.
• Las llamadas de servicio que no impfiquen caalquier
defecto en materiales omane de obra.
Uso Cornercial Exclusi6n
Esta garant[a limitada s61o se aplica a los productos utilizados
para use personal o, y no cabre todos los productos utilizados
con fines institucionales, comerciales o de alquiler.
ESTA GARANTiA LIMITADA ES EL UNICO Y EXCLUSlVO
DE GARANTiA APLICABLE A ESTE PRODUCTO. EN
CORP EE.UU., Inc., el fabricante de este producto, rechaza
cualquier otra garant_'a, expresada o implicada (INCLUYENDO
TODAS LAS GARANT/AS IMPLiCITAS DE COMERCIAL
IZAClON O IDONEIDAD PARA UN PROPOSlTO
PARTICULAR). NO informacien verbal o escrita per parte
CORP DE EE.UU., Inc., sus agentes, contratistas
independientes, representantes de ventas, empleados,
comerciantes minoristas, mayoristas ocaalqaier otto tercero
DEBER._,N crear una garant[a ni aamentar. Ampfiar o
modificar el alcance de esta (jarant[a limitada. Esta
GARANTiA LIMITADA DEL UNICO Y EXCLUSlVO REMEDIO
PARA EL CONSUMIDOR DE REPARAClON O REEMPLAZO
DEL PRODUCTO. EN CORP EE.UU., Inc. no serA
responsable perda_os especiales, incidentales o
consecuentes resuttantes DEL USO DEL PRODUOTO O
DERIVADOS DE UNA VlOLACION garant_'a expresa o
impl(cita de este producto. ESTA GARANT/A LIMITADA Y
RESPONSABILIDADES contenida en 61 se rige per las Leyes
del Estado de Indiana. SALVOPROHIBIDO POR LA LEY
APLICABLE, CUALQUIER GARANTiA IMPLiClTA DE
COMEROIALIZAOION O IDONEIDAD PARA UN
PROPOSlTO PARTICULAR ESTAR._, LIMITADA A LIMITADA
pedodo de garant_'a (S) mencionado anteriormente. Esta
garant(a le otorga derechos legales espec[ticos yUSTED
TAMBIEN PUEDE TENER OTROS DERECHOS,
QUE PUEDEN VARIAR DE ESTADO.
RCA es una marca registrada de SASbajo licencia
de ON Corporation
ON Corp US, Inc.
10920 Via Frontera, Ste 540
San Diego, CA 92127, U.S.A.
© 2013 ON Corporation
RCA is atrademark of RCA Trademark Management
SAS used under license to ON Corporation.
RCA es una marcade RCA Trademark Management
SAS usada bajo licencia de ON Corporation.
 Loading...