

Page 1
Models
Aluminum Foil
4,14,16
Broiling/Broiling Guide 16,17
Control Settings 13
L3BI15GL
L3B130GL
Anti-Tip Device
3,22
AmAiance Registration 2
Door Removal
20
Preheating 5,13,15
Cannimz Tim 9
Roastin~/Roastin~ Guide 18
Care and Cleanirw 19-21
Shelves’
13,20,21
Clock/Timer 12
Thermostat Adjustment 13
Consumer Services
27
26
Problem Solver
Energy-Saving Tips 5
3,4
Features 6,7
Safety Instructions
8-11
Surface Cookinz
Installation Instructions 22-25
L381
Leveling 23
Control Settings 8
Cooking Guide
Model and Serial Numbers 2
13
Cookware Tips
Oven
Back Cover
Warranty
Bakin~/Bakin~ Guide 14,15
——.. .
Page 2
. . s -..-e-~ ——.
——. .—
.s
.-
.
It is intendedto helpyou operi~te
and maintain your new
range
properly.
Keep it handy for answers to your
questions.
If you don’t understand
something
or need more help, write (int$utje
your phone number):
ConsumerRelations
AppliancePark
Louisville, KY 40225
writedow’nthemodelm’ld
serial numbers.
..
You’Hfind them on a label on the
front of the range behind the ‘
storage drawer.
These numbers are also on the
Consumer Product Ownership
Registration Card that ~ame with
your range. Before sending in
this card, please write these
numbers here:
ModelNumber
SerialNumber
Use thesenumbers in any
correspondence or service calls
concerning your range.
hmndiatdy contactthedealer(or
builder)thatsoldym therange.
Checkthe
Pr&lem Solver inthe
backof thisbook.Itlistswum?sof
q’inor,operatingproblemsthatyou
canCxXrectyoul”sdf.
.,
H’you need!!wvicem
To obtain service,see the
ConsumerServicespage in the
back of this book.
We’reproudof our service and
want you to be pleased. If for some
reason you are not happy with the
serviceyou receive, here are three
stepsto follow for furtherhelp.
FIRST’,contact the people who
serviced your appliance.Explain
why you are not pleased. In most
cases, this will solve the probkm
NEXT, if you are still not pleased,
write all the details—including
your phone number—to: -
ConsumerRelations
AppliancePark
Louisville,KY 40225
FINALLY,if your problem is still
notresolved, write:
Major Appliance Consumer
Action Panel
20 North WackerDrive
Chicago, IL 60606
.’. .
,:
,.
Page 3
..
.
-.
.f
moRTANT SAFEW msTRucTloNs
AJ?wBdallinstructionsbeforeusingthisappliance.
hen using electrical
pliances~basic
safety
-ecautions shouM be followed,
including the following:
o usethis‘apphmmiyfor
itsintendeduseasdescribedin
thismanuaL
@Besure yourapplianceis
properly
installedandgrowled
byaqualifiedtechnicianin
accordancewiththeprovided
installationinstructions.
oDon1atkmpt to repair
‘orreplace any
partofyour
rangeunkssitisspecifically
recommendedhithisbookAll
otherservicingshouldbereferred
toaqualifiedtechnician.
~Beforeperformingany
serviee9DISCONNECTTHE
RANGEPOWERSUPPLY
T‘mmHOUSEHOLD
ISTRIBUTIONPANEL
BYREMOVINGTHEFUSE
RSWITCHINGOFFTHE
IRCXJITBREAKER.
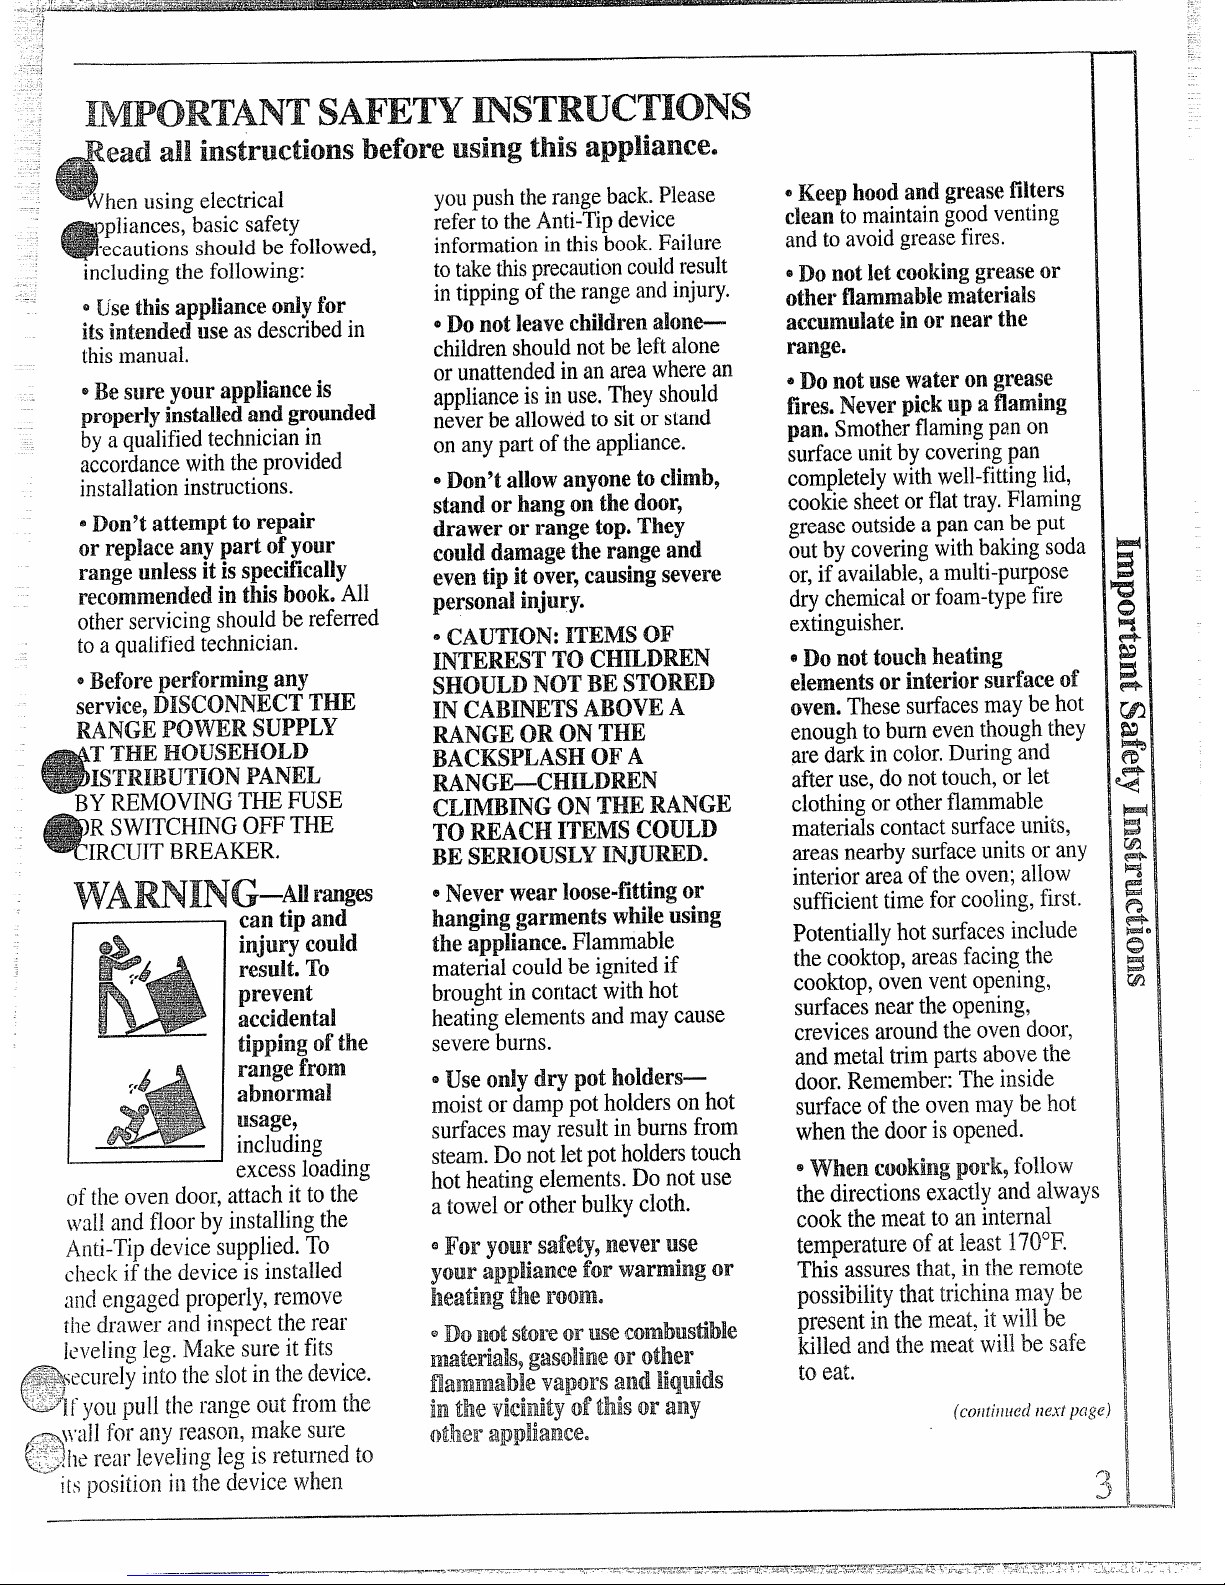
WARNING–AU!ra.nges
—
can @ and
injurycould
!iW?dt.To
prevent
accidental
tippingof‘h
rangefrom
abnormal
usafy+
including
excess
loading
oftheovendoor,attachittothe
wallandfloorbyinstallingthe
Anti-Tipdevicesupplied.To
checkifthedeviceisinstalled
andengagedproper~y,remove
thedrawerandii]specttherear
levelingleg.Makesureit
fits
a~wcurely intotheslotinthedevice.
.
youpushtherangeback.Please
refertotheAnti-Tipdevice
informationinthisbook.Failure
totakethisprecautioncouklrwlt
intippingoftherangeandinjury.
~Donotleavechildrenakme--
childrenshouldnotbeleftalone
orunattendedinanareawhereafl
applianceis inuse,Theyshould
neverbeallowedtositorstand
onanypartoftheappliance.
~Don9tallowanyonetocbb~
standorhangonthedoor9
drawerorrangetop.They
cdl damagetherangeand
eventipit
OWX’9cawingsevere
personalinjury.
~CAUTION:ITEMSOl?
INTEWST TOCHILDREN’
SHOULDINCH’BESTORED
INCABDJETSABOVE
A
RANGEORON
THE
BACKSPLASHOF
A
MNGE—CHILDREN
CLIMBINGONTHE
RANGE
TO
REACHITEMSCOULD
BE
SENOUSLY~~~w~.
e~~~~~~~a~~o~~e-flttillg
Or
hanging
garmentswhileusing
theapp~iance.Flammable
materialcouldbeignitedif
broughtincontactwithhot
heatingelementsandmaycause
severeburns.
suse onlydry pot!hokk333—
moistordamppothoidersonhot
surfacesmayresultinburnsfrom
steam.Donotletpotholderstouch
hotheatingelements.Donotuse
atowelorotherbulkycloth.
5I?oryour saf4?ty9BM?veruse
ymf’ appliance for warming or
heating the room.
oml not stfwe or -$Mecombustible
Imaterials9gasoline or other
flamlnable ‘vapors and liquids
M the vicinity d this or my
ft-kbwapplianc~~
~~~~p ~00~ a~dgrease flhl%
deantomaintaingoodventing
andtoavoidgreasefires.
sDonotM cookinggreaseor
otherflammablematerials
accumulateinornearthe
range.
~~~ ~~~~s~~a~~rongrWW?
fires.Neverpickupafk-ning
pan.Smotherflamingpanon
surfaceunitbycoveringpan
completelywithwell-fittinglid,
cookiesheetorflattray.Flaming
greaseoutsideapancanbeput
outbycoveringwithbakingsoda
or,if available,amulti-purpose
drychemicalorfoam-typefire
extinguisher.
~Donot touchheating
ekmentsorinteriorsurfaceof
oven.Thesesurfacesmaybehot
enoughtoburneventhoughthey
aredarkincolor.Duringand
afteruse,donottouch,orlet
clothingorotherflammable
matefialscontactsurfaceunits,
areasnearbysurfaceunitsorany
interiorareaoftheoven;allow
sufficienttimeforcooling,first.
Potentiallyhotsurfacesinclude
thecooktop,areasfacingthe
cooktop,ovenventopening,
surfacesneartheopening,
crevicesaroundtheovendoor,
andmetaltrimpartsabovethe
door.Remember:Theinside
surfaceoftheovenmaybehot
whenthedoorisopened.
ewhen cookingpo3%Lfollow
thedirectionsexactlyandalways
cookthemeattoaninternal
temperatureofatleastUO’F.
Thisassuresthat,intheremote
possibilitythattrichinamaybe
presentinthemeat,itwillbe
killed.andthemeatwillbe safe
to
eat.
i:
—
r...
—.-
Page 4
oven
,
e
standawayfnm-$range
when
openingovendoor.~~~
airorsteamW% ewapescm
Cawx! inn-wtohands,face
andkweyes.
eDon%heatunopenedfood
fcontainersintheoven.
Pressurecouldbuildq) WBd
the
COIlt&M!~ wdd burst,
causinganinjury.
@Keepovenventdud
unobstructed.
~Keepovenfreefromgrease
btii~dup.
op~a~e~ve~~~e~f~~~e~~~e~
~OSitiOE4 Whik 0V4Nl k cd. If
shelvesmustbehandledwhen
hot,donotletpotholdercontact
heatingunitsintheoven.
ePulIingoutshelfto theSMf
stopisa conveniencein lifting
heavyfoods.Itisalsoa
precautionagainstburnsfrom
ltouchinghotSudacesofthe
‘doororovenwalk
*when using(xxkhg or
roasting
bagsinoven9follow
themanufacturer’sdirections.
oDonotuseyourovento dry
newspapers.Ifoverheated,they
cancatchfire.
QDonotleavepaper products9
cooking‘$MMMNSYor foodinthe
ovenwhen.not in use.Donot
storeflammablematerialsinan
ovenornearthesurfaceunits.
surfacecookingunits
@
Use properpan size-Thki
appliailceisequippedwithoneor
moresurfaceunitsofdifferent
size.Selectcookwarehavingflat
bottomslargeenoughtocover
thesurfaceunitheatingelement.
Theuseofundersizedcookware
willexposeaportionofthe
heatingelementtodirectcontact
andmayresultinignitionof
clothing,Properrelationshipof
cookwaretoburnerwillalso
improveefficiency.
@p@v~~]~~v~s~fla~~~~~@
unattendedathighheat
settings.Boilovercauses
smokingandgreasyspillovers
thatmaycatchonfire.
~ Besure drip pansandvent
dudsareW coveredandare
inplace.Theirabsenceduring
cookingcoulddamagerange
pallsandwiring.
@~~~?~~$~~~~~~~~~f~~]to
linedrip pansoranywherein
theovenexceptasdescribedin
thisbook.Misusecouldresultin
ashock,firehazardordamageto
therange.
Q(My certaintypesofglass9
gkisskermic, earthenware or
other gku?x!dcontainers are
suitable for range=top service;
othersmaybreakbecauseofthe
suddenchangeintemperature.
SeethesectiononSurface
Cookingforsuggestions.
eTomilRimixethe possibilityof
bum+ ignitionofflammable
materials,andspillage,the
handleofa containershouldbe
turnedtowardthecenterofthe
rangewithoutextendingover
nearbysurfaceunits.
eAlwaysawn Swhx?Unitto
(IUFB’?oefm’eremovingcookware,
*
Impm eyeonfindsMng
fried
atHIorMEDIUN4HI(2
heatsettings.
@
TOavoidthepossibilityd’a
h.morelectricshock.,Iidways
be’certainthat thecontrolsfor
allsurfaceunitsareattheOFF _
positionandallcoilsaredxd
beforeattemptingtoliftor
removetheunit.
~Don’timmerseorsoak
removablesurfacelnnits.Don9t
putthemina dishwasher,
* Whenflamingfoodsare
underthehood9turnthefan
Off’eThefan,ifopeE’ating9may
spreadthefkmle.
~Alwaysheat
fat slowly? and
watchasitheats.
o
usedeepfatthermometer
wheneverpossibletoprevent
overheatingfatbeyondthe
smokingpoint.
@~~(J&’forfrying Shotlldbeas
dry aspossible.Frostonfrozen
foodsormoistureonfreshfoods
cancausehotfattobubbleup
andoversidesofpan.
~Ifacombinationofoilsor fats
willbeusedin fryingystir
togetherbeforeheating,orasfats
meltslowly.
—
—
——....——
Page 5
Ener*sa*mp
rfacecoo~ng
se cookware of medium-weight
minum,with tight-fitting -
ers, and flat bottomsthat
completelycover the heated
portionof the surface unit.
~Cook fresh vegetables with a
minimumamountof water in a
coveredpan.
~Watchfoods when bringing them
quicklyto cooking temperaturesat
high heat. When food reaches
cookingtemperature, reduce heat
immediatelyto lowest settingthat
willkeep itcooking.
~“Useresidual heat with surface
cooking whenever possible. For
example, when cooking eggs in
their shells,bring water and eggs
to a boil, then turn control knob to
OFF position and cover cookware
with lid to complete the cooking.
~When boiling water for tea or
coffee, heat only amount needed. It
“snot economical to boil a
ntainer full of water for one or
o cups.
*Preheat oven oniy when
necessary..IV@tfoodswillcook
satisfactorilywithoutpreheating.
If you find preheating is necessary,
watch theindicatorlight,and put
food in the ove~ promptlyafter the
oven is preheated.
~Always
turnovenoffbefore
removing
food.
oDuringbaking,avoidfrequent
dooropenings.Keepdooropen
asshorta timeaspossibleif it
isopened.,
. .
~Cookcompleteovenmeals
insteadofjustonefooditem.
Potatoes,othervegetables,and
somedessertswillcooktogether
witha main-dishcasserole,meat
loaf,chickenor roast.Choose.
foodsthatcookat thesame
temperamreandin approximately
thpsameamountoftime.
euse residualheatintheoven
wheneverpossibletofinish
cookingcassero~es,ovenmeals,
etc.,N;o add rollsorprecooked
dessertstoa warmoven,using
residualheatto warmthe~.
L--
Page 6
.
—
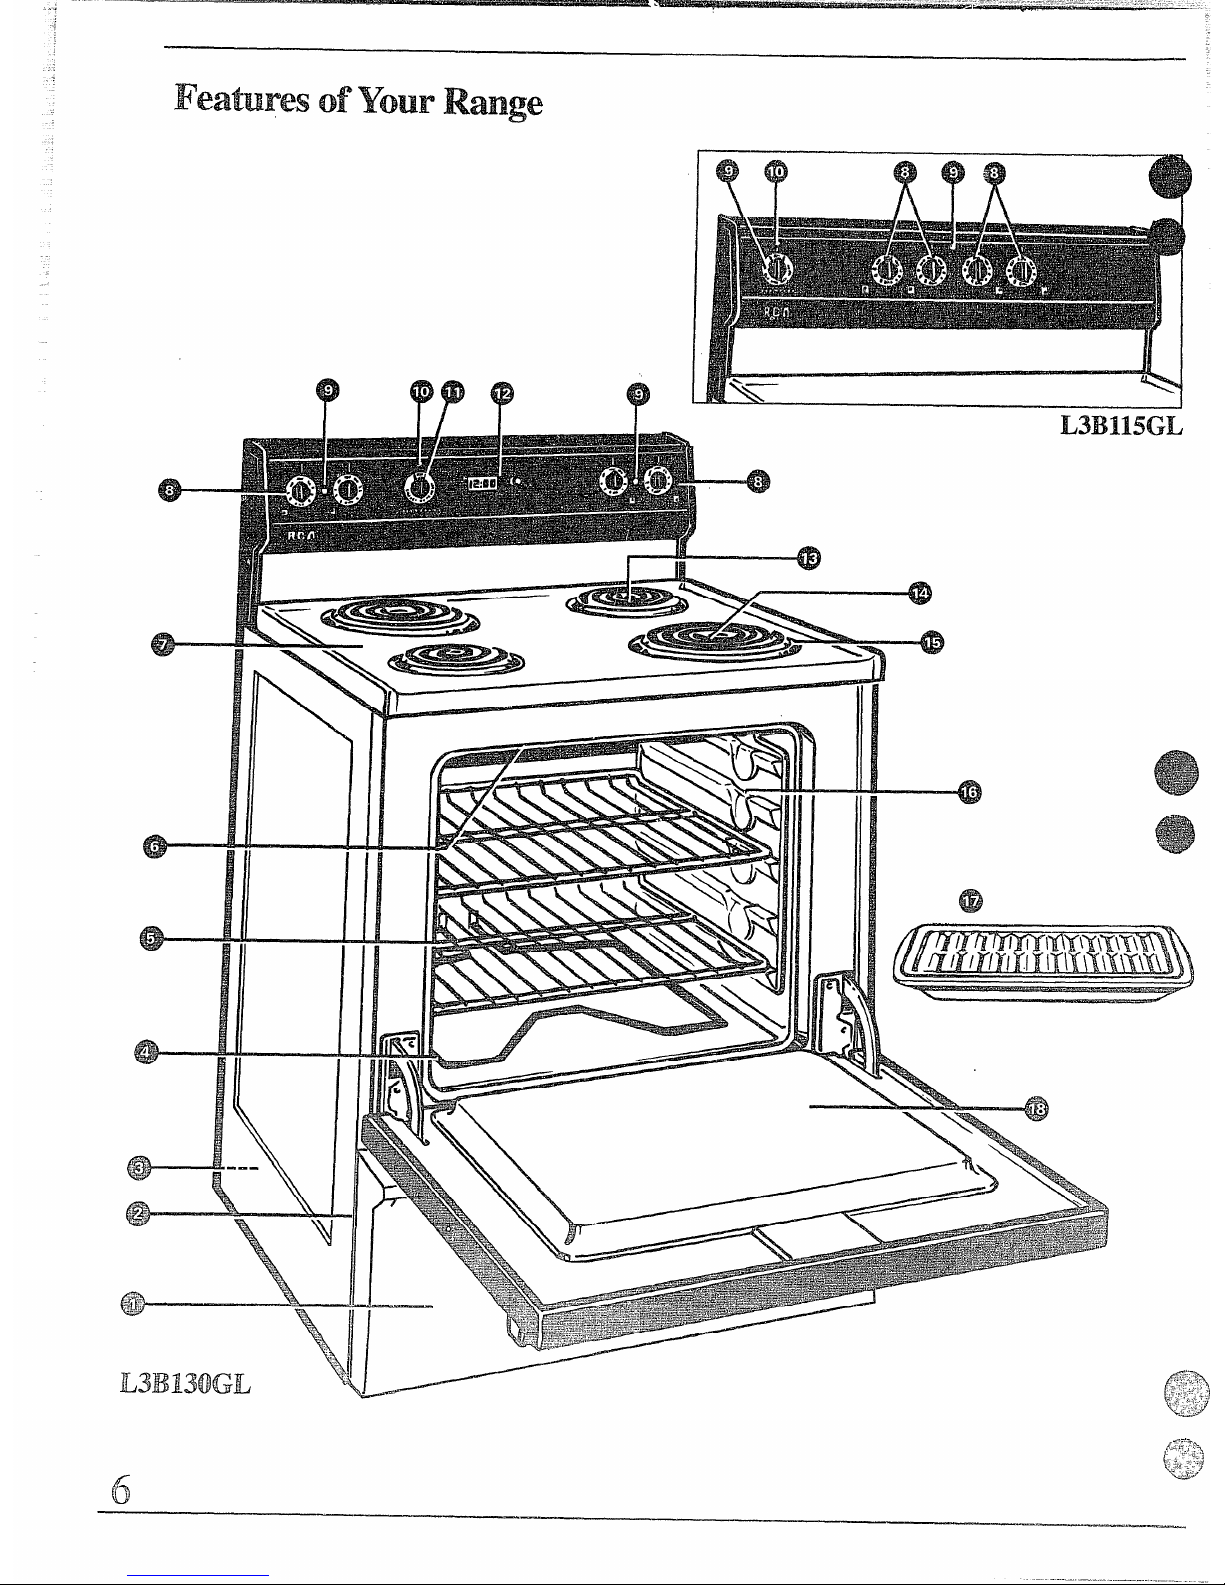
Featuresof’YourRange
?? ?
I
@
Page 7
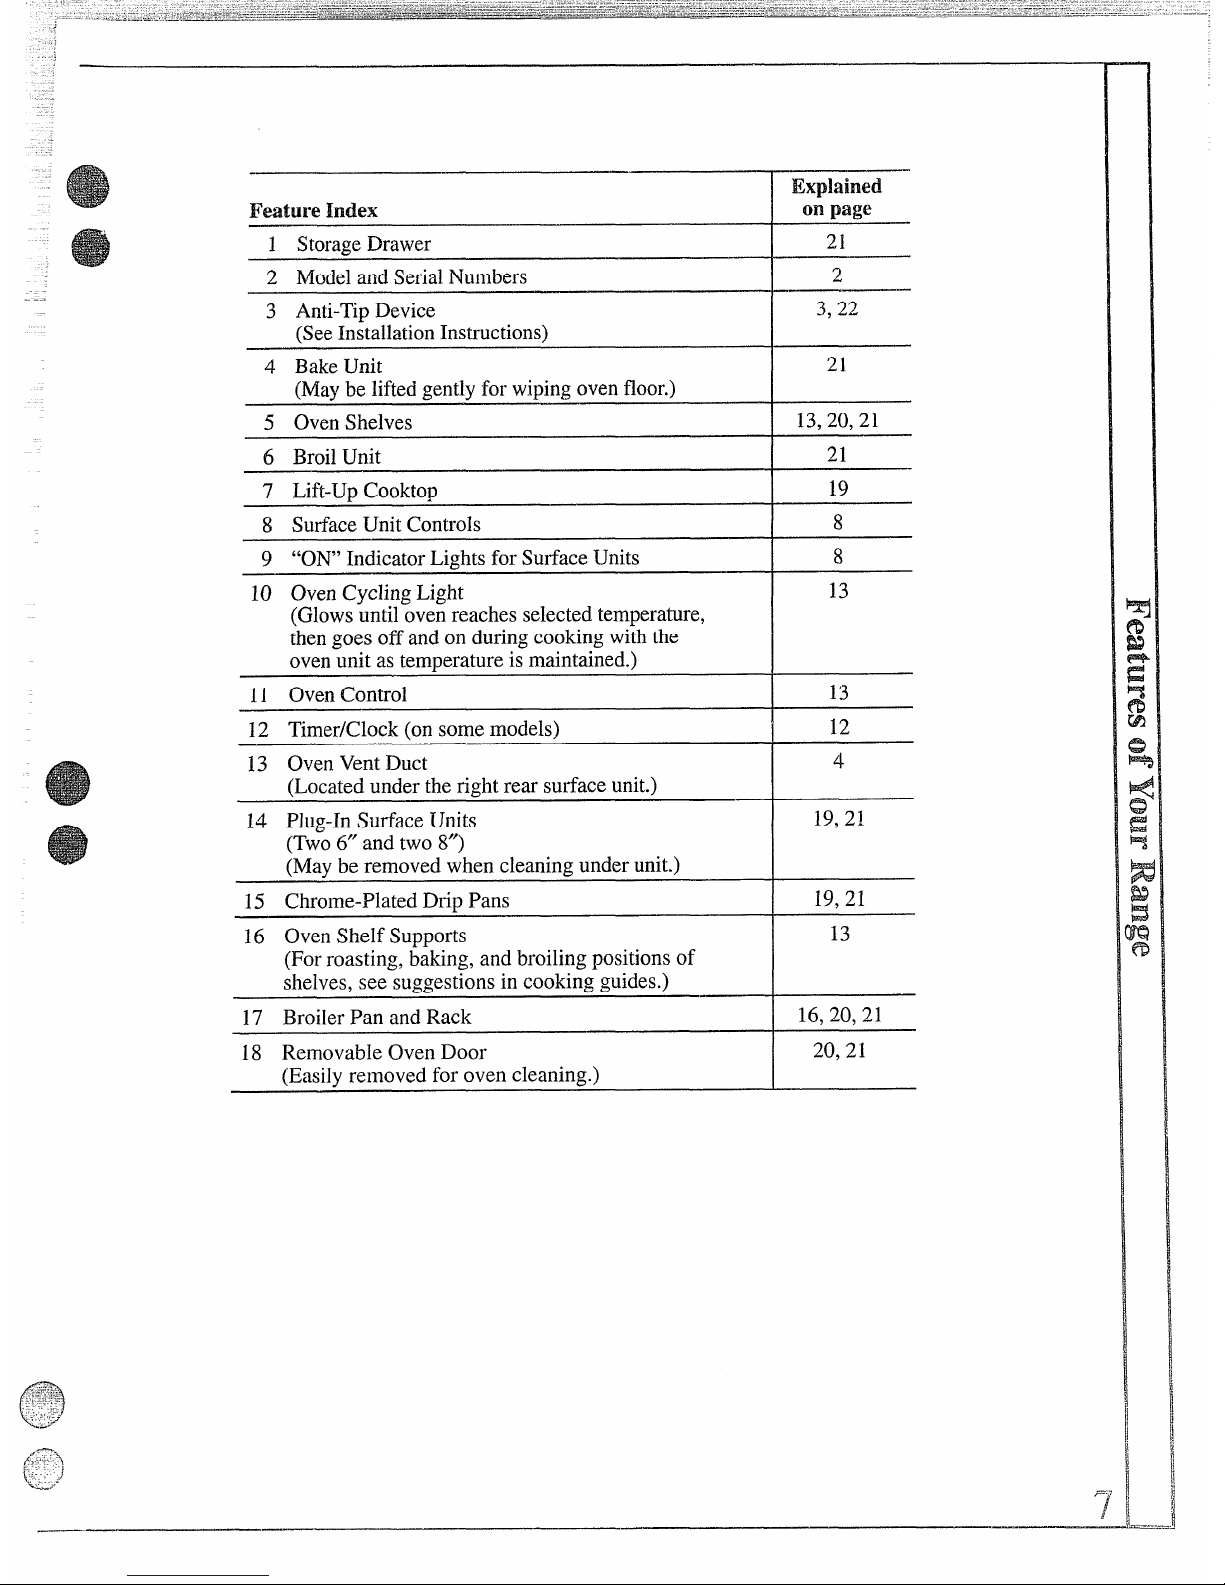
Explained
Feature index
onpage
1 StorageDrawer
21
1
2 Model and Serial Numbers
3 Anti-Tip Device
3,22
(SeeInstallation Instructions)
4 BakeUnit
21
(Maybe liftedgently for wiping oven floor.)
5 Oven Shelves
13,20,21
6 Broil Unit
7 Lift-Up Cooktop
19
8 Surface Unit Controls
8
9 “ON” Indicator Lights for Surface Units
8
10 Oven Cycling Light
(Glowsuntil oven reaches selected temperature,
then goes off and on during cooking with the
oven unit as temperature is maintained.)
11 Oven Control
13
12 Timer/Clock (on some models)
12
13 Oven Vent Duct
(Located under the right rear surface unit.)
JJ-
14 P1ug-InSurface Units
(Two 6“ and two 8“)
(May be removed when cleaning under unit.)
19,21
15 Chrome-Plated Drip Pans
I 19,21
16 Oven Shelf Supports
13
(For roasting, baking, and broiling positions of
shelves, see suggestions in cooking guides.)
17 Broiler Pan and Rack
16,20,21
18 Removable Oven Door
20,21
(Easily removed for oven cleaning.)
Page 8
SutiaeeCoohg
SeeSurface Cooking Guide.
surfacecookingwith
Infinite
matcontrols
At bothOFF and HI positions,
thereis a slight niche so control
“clicks”at those positions;“click”
on the word HI marks the highest
setting;the lowest settingis the
wordLO. In a quietkitchen,you
may hear slight“clicking” sounds
duringcooking,indicatingheat
settingsselectedare being
maintained.
Switchingheats to highersettings
alwaysshows a quicker change
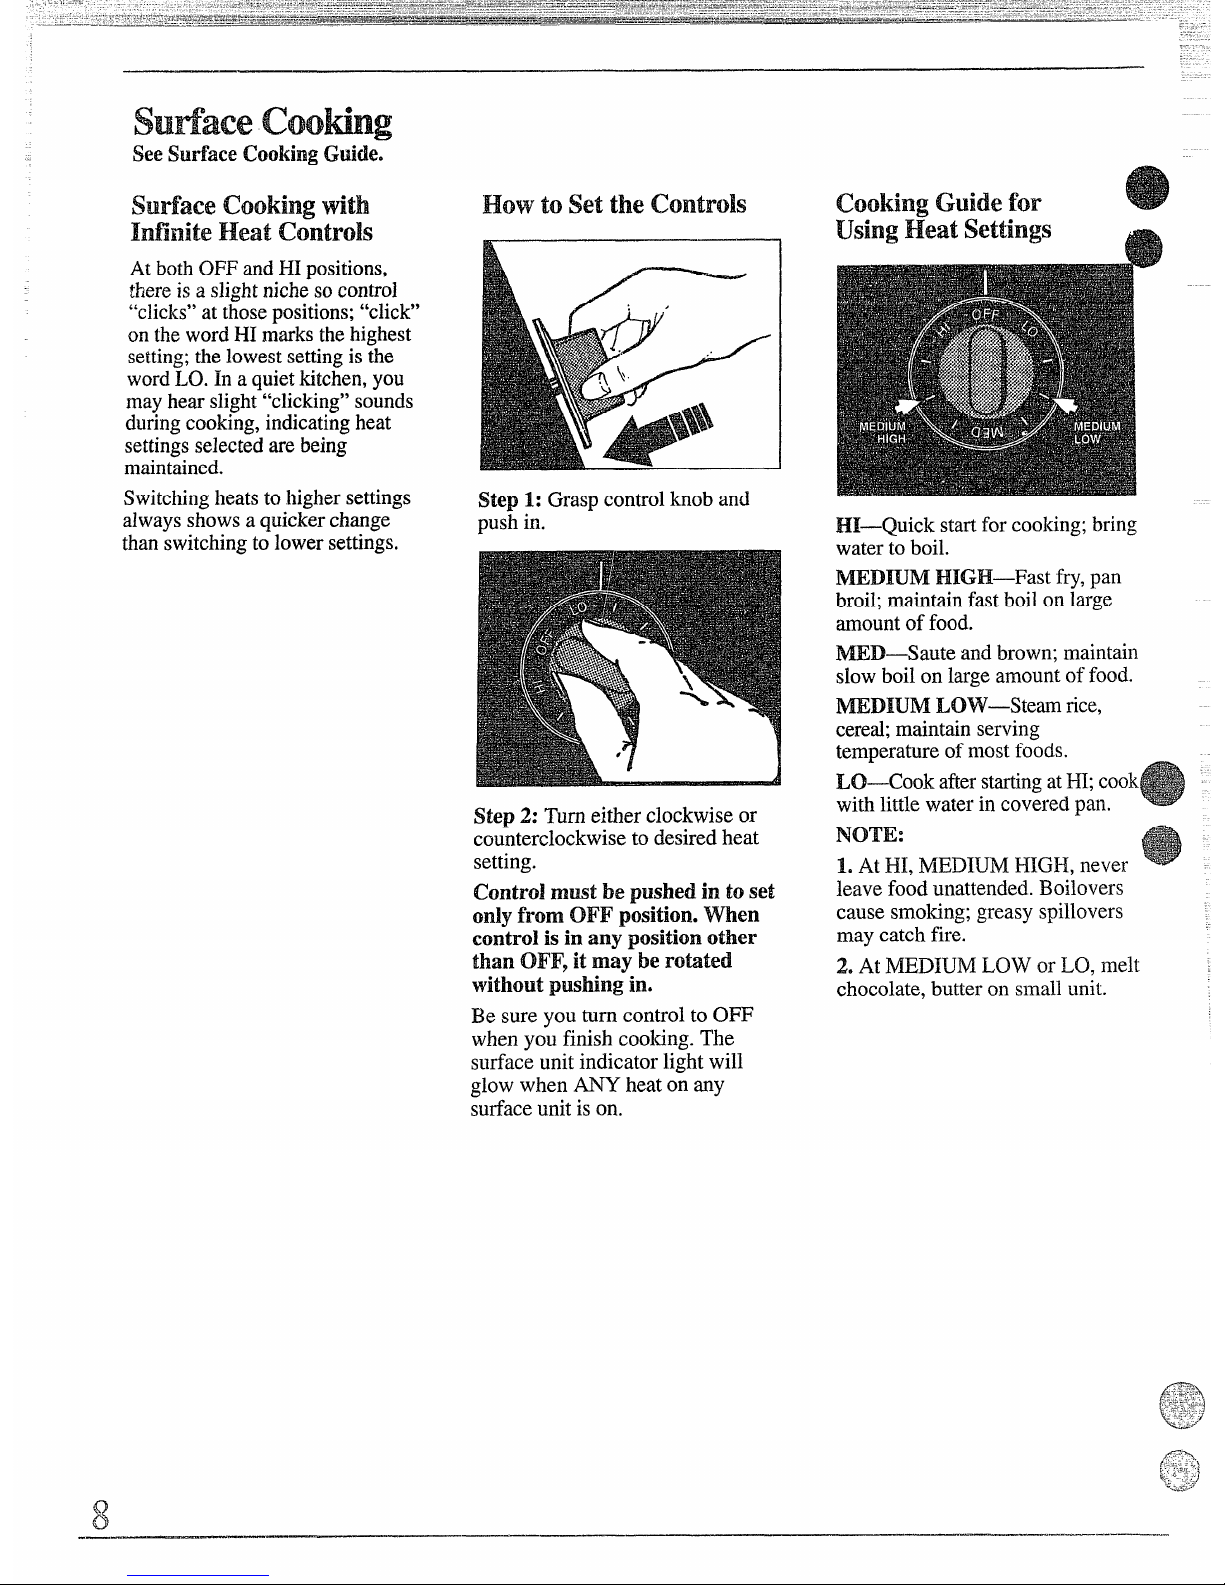
Howtosetthecontrols
Step 1: Grasp control knob and
push in.
than switching to lower settings.
Step 2: Turn either clockwise or
counterclockwise to desired heat
setting.
Control must be pushed in to set
only from OFF
position. men
control is in my positionother
than CM%’,it maybe rotated.
without pushing in.
Be
sure you turn control to OFF
when you finish cooking. The
surface unit indicator light will
glow when ANY heat on any
surfaceunit is on.
cookingCh.xiikfor
thingHeatsettings
Hi—Quick startfor cooking; bring
water to boil.
MEDIUM HIGH—Fast fry, pan
broil;maintain fast boil on large
amountof food.
MED-Saute and brown; maintain
slow boil on large amount of food.
MEDIUM LOW—Steam rice,
cereal;maintain serving
temperature of most foods.
LO—Cook afterstartingat HI;cook
with little water in covered pan.
NfoT_lE:
1. At EH,MEDIUM HIGH, never
leave food unattended. 130ilovers
cause smoking; greasy spillovers
may catch fire.
2. At MEDIUM LOW or LO, melt
chocolate, butter on small unit.
Page 9
Questions& Answers
. May I $3?i?lfoodsland
eswveson my
surfaceunits?
.
Yes,but only use cookware
signedfor canningpurposes.
heck the manufacturer’s
instructionsand recipesfor
preservingfoods.Be sure canner is
flat-bottomedand fits overthe
centerof the surface unit. Since
canninggenerateslarge amountsof
steam,be careful to avoidburns
from steam or heat. Canningshould
onlybe done on surface units.
Q.
Can I covermy drip pans
withfoil?
A.No.
Clean as recommendedin
CleaningGuide.
Q. Cm I me specialcooking
equipment,likean orientalwok,
onany surfaceunit?
A. Cookwarewithoutflat surfaces
is notrecommended.The life of
the surfaceunitscan be shortened
and therange top can be damaged
fromthe highheat needed for this
type of cooking.
Q. Why am I notgettingthe heat
I needfrom mysurfaceUnits
eventhoughI havethe knobson
the right setting?
A.
After turning surfaceunitsoff
and making sure they are cool,
check to make sure that your plugin units are securely fastened into
the surface connection.
Q.m-ydoesmy cookwaretilt
when1placeitm thesurfacemit?’
A. Because the surfaceunit or the
cookwareis not flat. M“akesure
that the “feet” on your surface
units are siltingtightly in ~herange
top indentationand the drip pan is,
flat on the range surface.
Q. Why
isthe porcelainfinish on
my UMkVVare‘comingW’?
A.
If you setyour surface unit
higher than required for the
cookwarematerial, and let the
cookware sittoo long,the
cookware’sfinish may smoke,
crack, pop Orburn, depending on
the pot or pan. Also,cooking small
amounts of dry food may damage
omeCating Tips
armingshould.be done on
surface Unitsonly.
In surface cooking, the use of pots
extending more than one inch
beyond the edge of the surface
unit’sdrip panis not recommended.
However, when canning with a
wate~.bathor pressure canner,
large-diameter pots may be used.
This is because boiling water
temperatures (even under pressure)
w-enot harmful to cooktop surfaces
surrounding the surface units.
HOWEVER, DO NOT USE
LARGE-DIAMETER CANNERS
the cookware;s finish.
OR OTI-HX LARGE-DIAMETER
POT’S FOR FRYING OR
BOILING FOODS OTHER
THAN WATER.Most syrL~por
sauce nlixtures-
and all types of
frying-cook at temperatures
much higher than boiling water.
,K:~%Silch temperatures could
k
?
:.:-::,cllej~~~j~~~jyh:lrn]cc)oi(topswfaces
“=”
sllrrouncling surface units.
fl.%
r.-
>
-:]
-;
z-.
‘>’
%----
observe theRmnving
Points
inGM-ming
1.Be sure the canner fits ove~the
center of the surfaceunit. If your
rangeor itslocation does not allow
the canner to be centered on the
surface unit, use smaller-diameter
pots for good canning results.
2. For best results use canners with
flat bottoms. Canners with flanged
or rippled bottoms (often found in
enamelware) don
‘tmakegood
contact with the surface unit and
take a long time to boil water.
3. When canning, use recipes and
procedures from reputable sou~ces.
Reliablerecipes and procedures are
available from the manufacturer of
your canner; manufacturers of
glassjars for canning, such as Ball
and Kerr; and the United States
Department of Agriculture
Extension Service.
4. Remember that canning is a
process that generates large
amounts of steam. To avoid burns
from steam or heat, be careful
when canning.
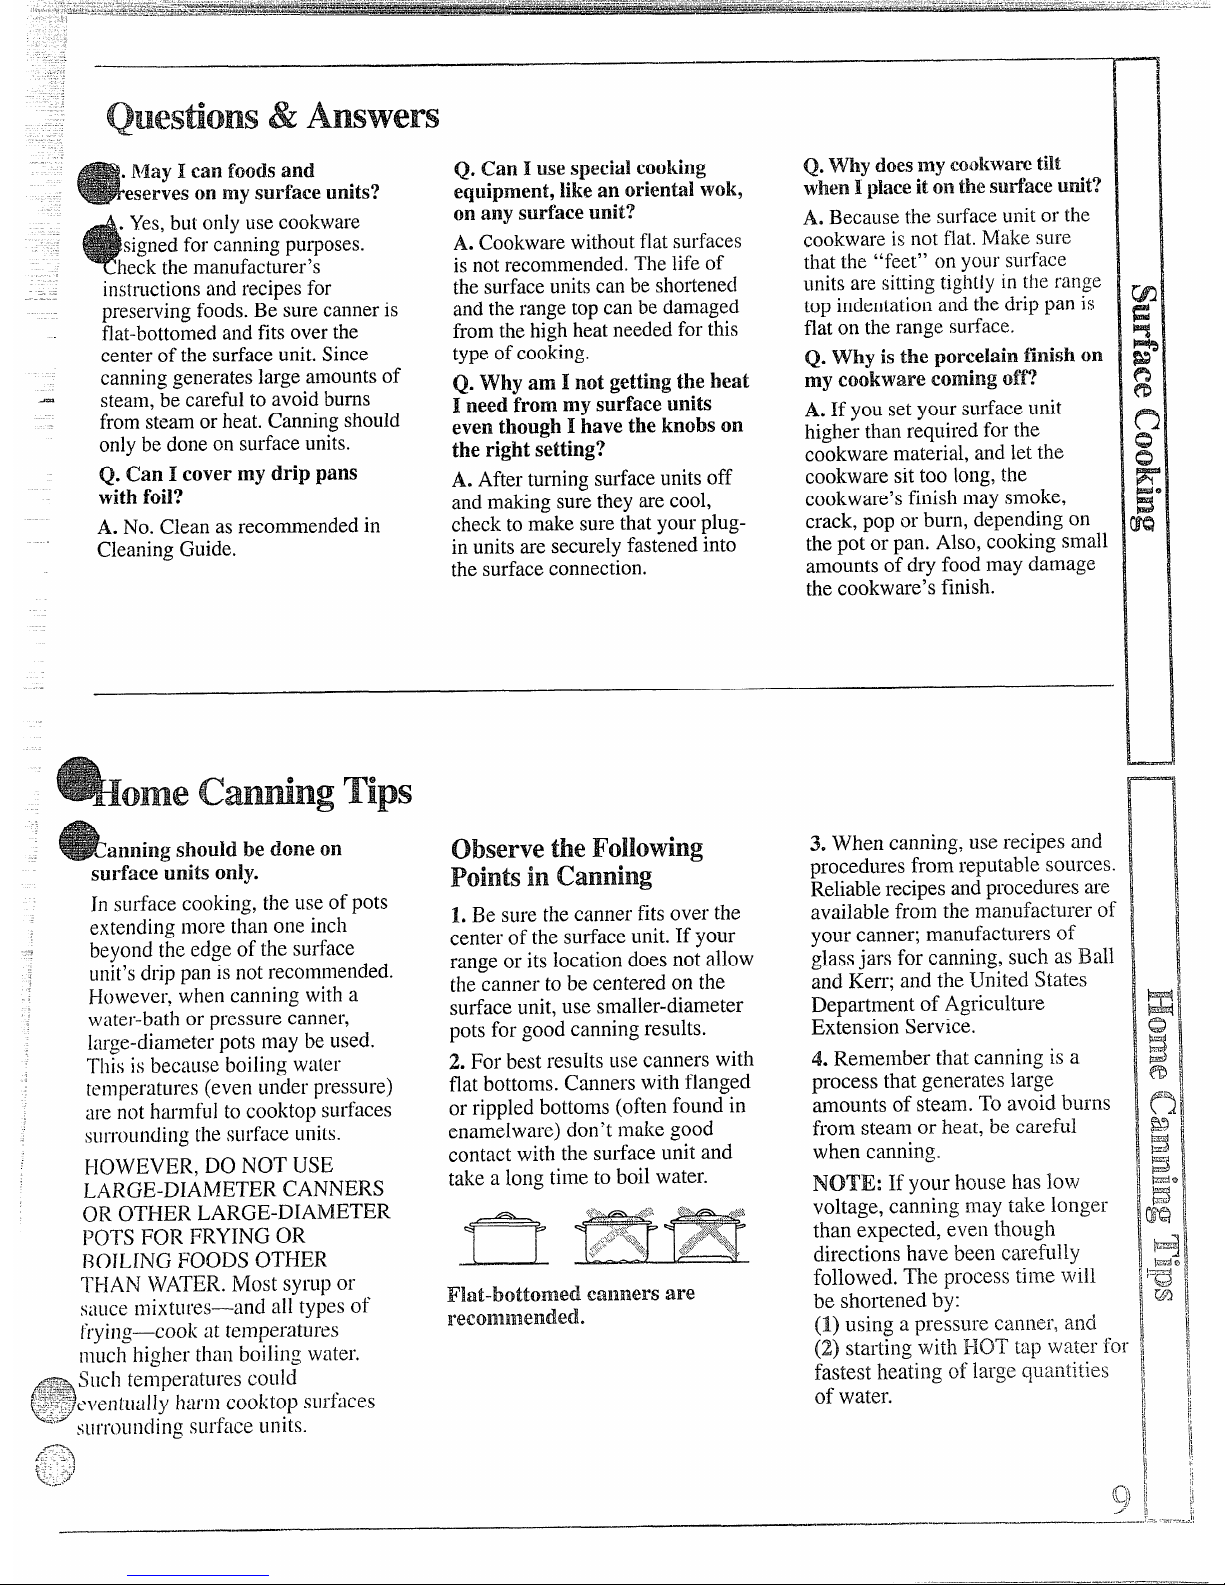
Flat-bottomed winnersare
voltage, cafining may take longer
than expected, even though
directions have been careft.dly
followed. The process time will
be shortened by:
(~) using a
pressure cannfx,EUld
(2)
starting with HOT tt~pv~~terfo~
fastest heating of IaIge quantifies
of water.
---
Ij
\
~
Ii
(
1
I
i
- -.,-----....
—..
f-l
\A<j
,>.
———-———--
——.
Page 10

Gn’m-dsettings
Cakwmi?Tips
L Use medium-or heavy-weightEW—@best setting.
~EDIUM EUGJi&---Setting
halfwaybetween I-UandMED.
NIED—Medkmlsetting.
MEDIUMLOW—Setting
halfway between MEDand LO.
cookware.Aluminumcookware
conductsheatfasterthan other
*
metals.Cast-ironand coated castiron cookwareare slow to absorb
heat, but generallycookevenly at
low to mediumheat settings.Steel
pansmay cookunevenlyif not
combinedwithothermetals.
L@—-Lowestsetting.
DirectionsandSettings
to CompleteCooking
Directions andSettings
to Start Cooking
comments
Food ICookware
Cereal
Cornn2eal.grits,
oatmeal
MEIXUMLOWorLO,then
addcereal.Finish
timing
aceordin~toPaskagedirections.
Cerealsbubbleand expandas
theycook;uselargeenough
saucepantopreventboilover.
Covered
Saucepan
HI.Incoveredpanbring
watertoboilbeforeadding
cereal.
Milkboilsoverrapidly.
Watchasboilingpoint
Cocoa
Coffee
Uncovered
Saucepan
HI,Stirtogetherwateror
milkandcocoaingredients.
Bringjust toaboil.
MED.Cook1or2 minutesto
completelyblendingredients.
approaches.
Percolate8to 10minutesfor
Percolator
HI.Atfirstperk,switch
heatto MEDIUMLOW.
MEDIUMLOWtomaintain
gentlebutsteadyuerk.
8cups,lessforfewercups.
Eggs
Cookedinshell
Friedsunny-side-up
Friedovereasy
Covered
Saucepan
HI.Covereggswithcool
water.Coverpan,cook
untilsteaming.
MEDIUMHIGH.Meltbutter,
addeggsandcoverskillet.
HI.Meltbutter.
MEDIUMLOW.Cookonly3
to4 minutesforsoilcooked;
15minutesforhardcooked.
ContinuecookingatMEDHJM
HIGHuntilwhitesarejustset,
about3to 5 moreminutes.
MEDIUMLOW,thenaddeggs
Whenbottomsofeggshave
just set,carefullyturnover
tocookotherside.
MEDIUMLOW.Carefullyadd
eggs.Cookuncoveredabout
Covered
Skillet
IfYoudonotcoverskillet,
ba~teeggswithfattocook
topsevenly.
Uncovered
Skillet
Poached
Scrambledoromelet
Covered
Skillet
HI.Incoveredpanbring
watertoaboil.
Removecookedeggswith
slottedspoonorpancake
turner.
I 5-finutesat MEDIUMHIGH.
HI.Heatbutteruntillight
goldenincoior.
MED.Addeggmixture.
Cook,stirringtodesired
doneness.
Eggscontinueto setslightly
aftercooking.For omeletdo
notstirlastfewminutes.
Whenset,foldinhalf.
Uncovered
Skillet
Fruits
~overed
~aucepan
HI.In coveredpanbring
‘ruitandwaterto boil.
MEDIUMLOW.Stiroccasionally
and checkforsticking.
Freshfruit:Use 1/4to 1/f?
cupwaterperpoundoffruit.
Dr~edfruit:Usewateras
packagedirects.Time
dependsonwhetherfruithas
beenpresoaked.Ifnot,allow
morecookingtime.
Meats
Braised:Potroastsof
beef,lamborveal;
pork chopsandsteak!
;overed
killet
31.Meltfat,thenaddmeat.
lwitchtoMEDIUMHIGHto
)rownmeat.Add wateror
Itherliquid.
MEDIUMLOW.Simmeruntil
forktender,
Meatcanbe seasonedand
flouredbeforeit is browned,
ifdesired.Liquidvariations
forflavorcouldbe wine,fruit
ortomatojuice or meatbroti2.
Timing:Steaks1 to 2 inches:
1 to
2 hours,BeefStew:2 to
3hours.PotRoast:2!Ato
4hours.
Pa~2-t’ried:Tender
c120ps;t12i]2steaksup
to 3/4-inch;n2inute
steaks;hamburgers;
franksandsausage;
thinfishfillets
ncovered
cillet
I-H,Preheatskillet,then
greaselightly.
MEDIUMHIGHor MED.Brown
andcook to desireddoneness,
turningoveras needed.
Panfryii2gisbestforthii2
steaksa~2dchops.If rareis
,~,:~1
desired,preheatskillet
[
&s-.’:
-.-,,h,: y
beforeaddingmeat.
?:ka~
—
Y——.—...
Page 11

—
wrong
~F==%—=—
drip pans ranging from blueto
!$m2zA!4bs_4!~
Concave Botlom
Rounded Bonom
2. Toconserve the mostcooking
ergy,pans should be flat cmthe
ttom,have stmightsidesand
tight-fitting lids. Nlatchthe size
‘the saucepanto the size of the
‘aceunit.A pan thatextends
morethan one inch beyondthe
edgeof the drip pan will trap heat,
dark gray.
Right
~.
Deep Fat Frying. Do notoverfill
cookwarewith fat that may spill
over when addingfood. Frosty
foods bubblevigorously.Watch
Wrong
foods frying at high temperatures.
\
Keep range and hood clean from
accumulatedgrease.
Right
{
a
A’NOT OVER 1“
ca&ing discolorationon chl’ome
Food
Meats
FriedChicken
Directions and Settings
to Start Cooking
DirectionsandSettings
to CompIeteCooking
Cookware
Comments
Covered
Skillet
I-H.Meltfat.SwitchtoMEDIUM
HIGHtobrownchicken.
MEDIUMLOW.Coverskillet
andcookuntiltender,
Uncoverlastfewminutes.
Forcrisp,drychicken,coveronly
afterswitchingtoMEDIUM
LOWfor10minutes.
Uncoverandcook,turning
occasionallyfor 10to20min.
Pan-friedbacon Uncovered
Skillet
HI.Incoldskillet,arrange
baconslices.Cookjust until
startingtosizzle.
HI.Meltfat. SwitchtoMED
tobrownslowly.
MEDIUMHIGH.Cook,turning
overasneeded.
Amoreattention-freemethod
istostartandcookatMED.
MEDIUMLOW.Coverandcook
untiltender.
Meatmaybebreadedor
marinatedinsaucebefore
flying.
Sauteed:Lesstender
thinsteaks(chuck,
round,etc.);liver;
thickorwholefish
Simmeredorstewed
meat;chicken;
cornedbeefismoked
pork;stewingbeet
tongue;etc.
Melting Chocolate,
Covered
Skillet
MEDIUMLOW.Cookuntilforktender.(Watershouldboilslowly.)
For verylargeamounts,medium
heatmaybe needed.
Addsaltorotherseasoning
beforecookingifmeathas
notbeensmokedor
otherwisecured.
Covered
DutchOven,
Kettleor
Large
Saucepan
Small
Uncovered
Saucepan.
Usesmall
surfaceunit.
HI.Covermeatwithwater
andcoverpanorkettle.
Cookuntilsteaming.
LO.Allow10to 15minutes
tomeltthrough.Stirto smooth.
Whenmeltingmarshmallows,
add milkorwater.
utter,Marshmallows
MEDIUMHIGH.Heatskillet
8to 10minutes.Greaselightly.
Cook
2 to 3 minutesperside.
Thickbattertakesslightly
longertime.Turnover
pancakeswhenbubbles
risetosurface.
Skilletor
Griddle
Pasta
Noodlesorspaghetti
Uselargeenoughkettleto
preventboilover.Pasta
doublesinsizewhencooked.
Large
Covered
KettleorPot
HI.Incoveredkettle,bring
~altedwaterto a boil,uncover
mdaddpastaslowlysoboiling
~oesnotstop.
MEDIUMHIGH.Cook
uncovereduntiltender.For
largeamounts,HI maybe needed
tokeepwateratrollingboil
throughoutentirecookingtime.
Cookershouldjiggle2to3
timesperminute.
Pressure Cooking
+1.Heatuntilfirstjiggleis heard.
MEDIUMHIGHforfoods
cooking10minutesorless.
MEDforfoodsover 10minutes.
Pressure
Cookeror
Canner
MEDIUMLOW.Tofinish
Puddings, Sauces,
Candies, Frostings
Uncovered
Saucepan
+1.Bringjust toboil.
Stirfrequentlyto prevent
sticking.
cooking.
Vegetables
Fsesh
Covered
Saucepan
11,Measure1/2to 1inch
vaterinsaucepan.Addsalt
nd preparedvegetable.
ncoveredsaucepan,bring
Jboil.
MED.Cook1pound
10to 30ormoreminutes,
dependingon tenderness
ofvegetable.
Uncoveredpanrequiresmore
waterandlongertime.
Covered
Stiucepan
11.Measurewaterandsalt
s above.Addfrozenblock
f vegetable.In covered
mcepan,bringtoboil.
[1.Inskillet,meltfat.
MEDIUMLOW.Cookaccording
totimeonpackage.
Breakuporstiras needed
whilecooking.
Frozen
MED.Addvegetable.
Cookuntildesired
tendernessisreached.
‘,
Turnoveror stirvegetableas
necessaryforevenbrowning,
Smtced:Onions;
wccnpeppers;
~-
mmhrooms;celerv;etc.
Uncovered
Skillet
!1.Bringsaltedwaterto a boil.
Riceandg-itstripleinvolumt
i
~overed
Saucepan
LO.Coverandcook
aftercool&g.TihleatLO.
~lce: 1 cupriceand~ cLlps
waterfor25minutes.
Glits:1 cLlpgritsand4cups
wa[erfor40minutes.
~“
accordingtotime.
Page 12

To set the ciock.,turn the knob to
the left until the words“SET
TIME” appearin thedisplay.Then
turn the knob in eitherdirection
untilthe correct timeis displayed.
After a slightpause, timeis set.
To set the timer, turn the lcnobto
the rightuntilthe words “SET
TIMER” appear in the display.
Then turn the knob in either
directionuntilthe desired time
(minutesand seconds)is
displayed.The timer will start
countingdown.
‘lb
cancel the timer,turn the
knob in eitherdirectionuntil
“0:00”appearsin the display.
At the end
ofthe timeroperation,
after the3 beeps?the display
returnsto time of day automatically.
During the timer function, the
display flashes back to the time of
day every 10seconds.
QuestionsmulAnswers
Q. How can I usemy Minute
.
Timer tomake my surface
u90kingeasier?
A. YourMinuteTimerwill help
time total cookingwhich includes
time to boil food and change
temperatures.Do notjudge
cooking timeby visible s~eam
only.Food willcook in covered
containerseven though you can’t
see any steam.
Q.
Can I usetheMinuteTimer
during ovencooking?
A. The Minute Timer can be used
during any cookingfunction.
Page 13

usingYouroven
eforeusing M3uroval
. Look at the control.Be sureyou
derstandhow to set it properly.
. Check oveninterior.Look
at the shelves.Take a practice
run at removing and replacing
themproperly,to give sure,
sturdysupport.
3. Read over information and tips
thatfollow.
4. Keep thisbookhandy soyou
can refe~to it,especially during
the first weeksof using your
new range.
ovenTemperamrecontrol
The OVEN CONTROL knobis
located on the control panel on the
front of the range.
Simply turn theknob to the desired
cooking temperature, or-to BROIL.
The Oven
CyclingLight glows
untiltheoven reaches your selected
temperature, then goes off and on
\J/iththeovenunit
duringcooking.
PREHEATING the oven takes
about 10-15 minutes. Preheat the
oven only when necessary.
ovenshelves
The shelvesare designedwith
stop-locksso whenplacedcorrectly
on the shelf supports,they will
stopbefore coming completelyout
of ~heoven and will not tilt when
you are removing food from them
or placing food on them.
When placing cookware on a shelf,
pull the shelf out to the “stop”
position. Place the cookware on
the shelf, then slidethe shelf back
into the oven. This will eliminate
reaching into the hot oven.
To remove
the shelf’from the
oven, pull it toward you, tilt front
end upward and pull it out.
To replace, place shelf on shelf
support with stop-locks (curved
extension of shelf)facing up and
toward rear of oven. Tiltup front
and push shelf toward back of
oven until it goes past “stop” on
oven wall. Then lower front of
shelf and push it all the way back.
shelf Positions
The
ovenhasfour shelf
supports-A (bottom), B, C and D
(top). Shelf positions for cooking
are suggested on Baking and
Roasting pages.
_—-—
Adjustingown
mmi-mosta%
Use thetime givenon a recipe
when cookingthe firsttime. Oven
thermostats,in time, may “drift”
from the factory
setting and
differencesin timingbetween
an old and a new oven of 5 to 10
minutesare not unusual.If you
find that your foodsconsistently
brown too littleor too much, you
may make a simple adjustment
in the thermostat(OVEN
CONTROL)
hOb.
Pull the knob off the shaft, look at
the back of the knob and note the
current settingbefore making any
adjustment.The knob is factory set
with the top screw directly under
the pointer.
ter
To adjust the thermostat:
L Pull off the knob.
2. Loosen both screws on back of
the knob.
3. Hold both parts of the knob and
turn so the top screw moves in the
desired di~ection—HOTTERto
increase temperature, COOLER to
decrease temperature. You will
hear and feel the notches as you
turn the knob. Each notch changes
temperature about 10°Fahrenheit.
4. Tighten the screws.
5. Return the knob to the range.
Recheck oven performance before
making an additional adjustment.
&-.P_-
. “...-.”.
.—..
Page 14

Howtoset YOm’ $
Rangefor’Baking
L Positionthe shelf or shelvesin
the oven.
.2.Closeovendoor.TurnOVEN
CONTROLknob to desired
temperature.Oven is preheated
when ovencycling lightfirst
goes out.
3. Place food in ovenon center of
shelf.Allow at least 2 inches
between edge of bakeware and
oven wallor adjacent cookware.
If cookingon two shelves at the
same time,place shelveson
alternateshelf supportsand stagger
food on them.
4. Checkfoodfordonenessat
minimumtimeonrecipe.Cook
longerifnecessary.TurnOVEN
CONTROL knob to OFF and
remove food.
shelfPositions
Most baking is done on the second
shelf position(B) from the bottom.
When baktingthree or four items,
use two shelvespositionedon the
second and fourth sets of supports
(B &D) from bottom of oven.
Bake angel food cakes on first
shelf position (A) from bottom of
oven.
BakingTips
*Follow a tested recipe and
measure the ingredients carefully.
If you are using a package mix,
follow label directions.
~Do not opentheovendoorduring
a bakingoperation—heatwill be
lostandthebakingtimemight
needto beextended.Thiscould
causepoorbakingresults.If you
mustopenthedoor,openit
partially—only3 or 4 inches—and
closeit as quickly as possible.
~Do notdisturbtheheatcirculation
in the oven with the use of
aluminumfoil.If foil is used, place
a small sheetof it, about 10 by 12
inches at the most, on alower shelf
severalinchesbelow the food. Do
not place foil on the oven bottom.
Conlmon Baking Problems
and Possible
solutions
PIES
Burningaw.mdedges
ID
Edges of crust too thin.
@Incorrect baking temperature.
Bottom crust soggy and unbaked
~Allow crust and/or filling to cool
sufficientlybefore filling pie shell.
~Filling may be too thin or juicy.
~Filling allowed to standin pie
shell before baking. (Fillpie shells
and bake immediately.)
@Ingredients and propermeasuring
affect the quality ofthe crust. Use
a tested recipe and good technique.
Make surethere are no tiny holes
ortearsin a bottomcrust.“Patctig”
a pie crustcould cause soaking.
Pie
fillingruns over
e
Top and bottom crust not sealed
together well.
eEdges ofpie crust not builtup
high enough.
~Too much filling.
~Check size of pie plate.
Pastryistough;crustnotflaky
e
Too much handling.
~Fat too soft or cut in too fine.
Roll dough lightly and handle as
little as possible.
CAKES
cake rises higher on one side
~Batter spread unevenly in pan.
oOven shelves not level.
gWarped pans used.
‘cakesWackingon top
0Oven temperaturetoo high.
0Batter too thick,follow recipe or
exact package directions.
@Check for proper shelfposition.
~Check pan sizecalled for in
recipe.
~Improper mixing of cake.
Cakefalls
eToomuch shortening,sugar or
liquid.
0Check leaveningagent,baking
powder or baking soda to assure
freshness.Make a habit of noting
expiration datesof packaged
ingredients.
0Cake baked atincorrect
temperature or not baked long
enough.
~If adding oil to a cake mix, make
certain the oil is the type and
amount specified.
Crust
ishard
~Check temperature.
eCheck shelfposition.
Cake
hassoggy!k3yerorstreaks
-.
.-
.
atbottom
0Undermining ingredients.
oShortening too soft for proper
creaming.
~Toomuchliquid.
Doughy
tmltm-; heavy H’uston
surface
~Check temperature.
0Check shelf position.
~Carefully follow baking
instructions as given in reliable
recipe or on convenience food
package.
.
eFlat cookie sheets will give more ‘
even baking results. Don’t
overcrowd~oods on a baking
sheet.
oConveniencefoodsused beyond I
their expiration date. -
1
EhwvlningHnolrwE’mtkeabkon
one side
T
~Oven doornotclosedproperly. $<j~$,
QCheckshelfposition.
y;;>:+
--.+
..-.——,.——
Page 15

BaMngGuide
1.Aluminumpartsconductheat
2. Dark or non-shinyfinishesand
3, Preheatingthe oven is not always
quickly.For most conventional
glasscookwaregenerallyabsorb necessary,especiallyforfoodsthat
baking,light, shiny finishes
heat, which may resultin dry,crisp cooklongerthan 30 to 40 minutes.
generallygive best resultsbecause
crusts.Reduceovenheat25°F.if Forfoodswithshortcookingtimes,
they help prevent overbrowning.
lightercrustsaredesired.Rapid
preheatinggivesbest appearance
For best browning results, we
browningof somefoodscan be andcrispness.Althoughpreheating
recommenddullbottom surfaces
achievedby preheatingcast-iron is notnecessarywith meats,it is
for cake pans and pie plates.
cookware.- “
preferredfor bked goods.
4. Topreventunevenheatingand to
saveenergy,open the oven door as
littleas possiblein checkingfood.
shelf
Position
B,C
B
B
B
B
B
B
B
B
B
Oven
Temperature
Time,
Minutes Comments
Food
Cookware
Mead
Biscuits(l/2-in.thick
Coffeecake
Cornbreadormuffin!
Gingerbread
ShinyCookieSheet
ShinyMetalPanwith
satin-finishbottom
Cast-ironorG1assPan
ShinyMetalPanwith
satin-finishbottom
400°-4750
350°-4000
400°-4500
350°
400°-4250
375°
350°-3750
375°-4250
375°-4250
350°-3750
15-20
20-30
20-40
45-55
20-30
45-60
45-60
45-60
10-25
20-30
Canned,refrigeratedbiscuitstake2to
4minuteslesstime.
Preheatcast-ironpan forcrispcrust.
Muffins
Popovers
ShinyMetalMuffinPans
DeepGlassor Cast-ironCups
MetalorGlassLoafPans
I
MetalorGlassLoafPans
ShinyOblongorMufllnPans
ShinyOblongorMuffinPans
Decreaseabout5minutesfor muffin
mix,orbakeat450°F.for 25minutes,
thenat 350”F.for 10to 15 minutes.
Darkmetalorglassgivedeepest
browning.
Quickloafbread
Yeastbread(2loaves)
Plainrolls
Sweetrolls
Cakes
(withoutshortening)
Angelfood
Jellyroll
Sponge
Cakes
AluminumTubePan
MetalJellyRollPan
Metalor CeramicPan
325°-3750
375°-400”
325°-3500
30-55
10-15
45-60
‘llvo-piecepanis convenient.
Linepanwithwaxedpaper.
hletalorCeramicPan
ShinyMetalMuffinPans
Pletai orGlassLoaforTubePar
A,B
ABB
B
B
B
325°-3500
350°-3750
275°-3000
350°-3750
350°-3750
350°
45-65
20-25
2-4
k%
20-35
25-30
40-60
Bundtcakes
Cupcakes
Fruitcakes
Paperlinersproducemoistercrusts.
Use300”F.andShelfBforsmallor
individualcakes.
Layer ;hinyMetalPanwith
iatin-finishbottom
;hinyMetalPanwith
atin-finishbottom
detalor GlassLoafPans
Layer,chocolate
Loaf
(lmkies
Brownies
Drop
Refrigerator
Rolledorsliced
325°-3500
350°-4000
400°-4250
375°-4000
25-35
10-20
6-12
7-12
Barcookiesfrommixuse sametime.
UseShelfC andincreasetemp.25”F.
to50°F.for morebrowning.
LetalorGlassPans
;ookieSheet
;ookieSheet
~ookieSheet
Other Desserts
Baked:lpples
Custard
B,C
B
B
350°-4000
300°-3500
325°
30-60
30-60
50-90
ilassorMetalPans
ilassCustardCUDSor Casserole Re$mc~temp.to 300”F.forlarge
Cookb~eadorricepuddingwith
custardbase80to90 minutes.
(setinpanofhothater)
GlassCustardCupsorCasserolePuddings,rice
and custard
Pies
Frozen
Meringue
FoilPanonCookieSheet
Spreadtocrustedges
GlassorSatin-finishMetalPan
GlassorSatin-finishMetalPari
Glassor Satin-finishMetalPan
SetonOvenShelf
GlassorMetalPan
GlassPan
400°-4250
325°-3500
400°-4250
400°-4250
450°
45-70
15-25
45-60
40-60
12-15
For largepiesuse400”F.andmoretime.
To quickly brownmeringue,
use
400”F.for9 to 11minutes.
Custardfillingsrequirelower
temperature,longertime.
(he crust
‘r\voCrllst
Pastryshell
B, C
B,C
B
325°-4000
325°-3750
300°-3500
60-90
30-60
30-75
Increasetimefor largeramountor
size.
—
Page 16

..
.
Browg
Broilingis cooking food by intense
radiantheat from theupper unit in
the oven.Most fish and tender cuts
of meat can be broiled.Follow
these stepsto keep spatteringand
smokingto a rnini.mum.
Step 1: If meathas fat or gristle
near edge, cut vertical slashes
throughboth about 2“apart. If
desired,fat may be trimmed,
leaving layer about 118”thick.
Step 2: Placemeaton broilerrack
inbroilerpanwhichcomeswith
range.
Always use racksofat drips
intobroilerpan;otherwisejuices
maybecomehotenoughto
catchfire.
Step 3: Position shelfon
recommended shelfposition as
suggested in BroilingGuide. Most
broiling is done on C position.
Step 4: Leavedooropento
thebroilstopposition.Thedoor
staysopenbyitself,yetproper
temperatureis maintainedin
theoven.
Step 5: TurnOVENCONTROL
knobtoBROIL.Be sureto setthe
knoball theway to thestopin the
BROILsectionof the knob.
Step6:Turn food only once
duringcooking.Timefoods for
first sideper BroilingGuide.Turn
food, then use times given for
second side as a guide to preferred
doneness. (Where two thicknesses
and times are given together,use
first times given for thinnestfood.)
Step 7: When finishedbroiling,
turn OVEN CONTROL knob to
OFF.Serve food immediately,and
leave pan outsideoven to cool
during meal for easiest cleaning.
use of A&Ull&lum Foil
Youcan use aluminum foil to line
vour broiler Danand broiler rack.
Questions& Amvvers
Q. When broiling,isit newwn-y
toalwaysuse a rackin the pan?
A,Yes.
Usingthe rack suspends
the meat over the pan, As the meat
cooks,thejuices fallinto thepan,
thuskeepingmeatdrier.Juicesare
~rotectedby therack
andstay
.
.
cooler,thuspreventingexcessive
spatterand smoking.
Q. Should
Isaltthemeat
beforebroiling?
A. No. Salt draws outthejuices
and allows them to evaporate.
Always salt after cooking.Turn
meat with tongs;piercing meat
with a fork alsoallowsjuices to
escape. When broilingpoultry or
fish, brush each side often
with butter.
Q.
Whyare my meatsnot turning
out as brown as they should?
A. In some areas, the power
(Troltage)to the range rna~ be 10W,
In these cases, preheat the broil
unit for 10minutesbefore placing
broiler pan withfood in oven.
Check to seeif you are using the
recommended shelfposition. Broil
for
longestperiodoftirne indicated
intheBroiling(hlide.Turnfood
only once duringbroiling.
Q.
DoI need togrease my broik
racktopreventmeatfromsticking?
fiowever,yo~
must mold thefoil
A. No.
Thebroilerrackis designed
tightlyto therackandcutslits in
to reflectbroilerheat,thuskeeping
itjust liketherack.
thesurfacecoolenoughtoprevent
Withouttheslits,thefoilwill
meatfromstickingtothe surface.
preventfat and meatjuicesfrom
However,sprayingthebroilerrack
drainingto thebroilerpan.The
lightlywitha vegetablecooking
juicescouldbecomehotenoughto
spraybeforecookingwillmake
catchon fire.If youdonotcutthe
cleanupeasier.
slits,youarefrying,notbroiling.
.—— ,—
. . . .. -xv
—-.—------------------ !--..........
Page 17

—
1.Always use broiler pan andrack
4. If desired, marinatemeats or
70Frozensteakscan be
thatcomes with your oven. It is
chicken beforebroiling,or brush
conventionallybroiled by
designedto minimize smokingand
with barbecuesaucelast 5 to 10
positioning the oven shelf at
spatteringby trappingjuices in the
minutes only. nextlowest shelfpositionand
shieldedlower part of the pan.
5. When arrangingfood on pan, do
increasingcooking time givenin
2. Oven door shouldbe open to the
not let fattyedgeshang over sides,
thisguide 1%.times per side.
.-
broil stop position. - which could SO;loven‘with
3. For steaksand chops, slash fat
fat dripping.
evenly around outside edgesof 6. Broiler does not need to be
meat. To slash, cut crosswise
preheated. I-Iowever,for very thin
throughouter fat surfacejust to the foods, or to increase browning,
edge of the meat. Use tongsto turn preheat if desired.
meat over to prevent piercing
meat
and losingjuices.
First Side
SecondSide
Time, Minutes
Time,Minutes
4%
4!A
10 7
6
5
8
6
12 11
10 7-8
15
14-16
25
20-25
35
10-15
1)4-2
1/2
3-4
13-16
Donot
turnover.
Quantityand/or Shelf
Thickness Position
1/2lb.(about8 c
thinslices)
1lb,(4patties)
112to3/4inchthick
c
Food
Bacon
C!onlmmts
Arrangeinsinglelayer.
GroundBeef
Well Done
Spaceevenly.
Upto8pattiestakeaboutsametime.
Beef Steaks
Rare
Medium
WellDone
1inchthick
(1to1Xlbs.)
c
c
c
Steakslessthan1inchthickcook
throughbeforebrowning.Panfrying
isrecommended.
Slashfat.
Rare
1!4inchthick
(2to2XIbs.)
c
c
c
Medium
Well
Done
(hicken
Reducetimeabout5to 10minutesper
sideforcut-upcKlcken.Brusheachside
withmeltedbutter.Broilskin-side-down
first,
1whole
(2to 2!4lbs.),
splitlengthwise
A
Bakery Products
Bread(Toast)or
ToasterPaskies
EnglishMuffins
LobsterTails
Spaceevenly.PlaceEnglishmufilns
cut-side-upandbrushwithbutter,if
desired.
Cutthroughbackofshell.Spreadopen.
turnover.Brushwithmelted butter
beforebroilirwandafterhalfof time
2to
4slices
1pkg.(2)
2(s~lit)
c
c
2-4
(6to 8 oz.each)
B
Fish
Handleandturnverycarefully.Bru~
withlernonbutterbeforeandduring
cookingifdesired.Preheatbroilerto
increasebrowning.
5 5
8
8
10
10
13 13
10
9
12 10
14
12
17
]2-14
6
1-2
1-lb.fillets1/4to
1/2inchthick
c
Increasetime5to 10minutesperside
for 1)4inchthickorhomecured.
1 inchthick
IB
Ham
Slices
(I]rccookcd)
Pork Chops
WellDorm
Z(1/2 inchthick)
c
2 (
1 inchthick)
B
tbout1 lb.
!(1 inchthick)
c
Slashfat.
I,amb Chops
Mcdiam
Slashfat,
If desired,splitsausagesinhalf
lengthwise;cutinto5-to6-inchpieces
WCIIDone
I
about10to 12oz.
I
c
WellDone
about1lb,
B
J1’ienersandsimilar
l-lb. pkg. (10)
c
prccoolwdSilLIS~~CS,
br:l[wurst
Page 18

.———__=__
YA. ..=.-._ -_ L- . ._-_.
—
.-
.
Roasting
Roastingiscookingby dry heat.
Tendermeat or poultrycan be
roasteduncoveredin your oven.
Roastingtemperatures,which
shouldbelow and steady, keep
spatteringtoa minimum.When
roasting,it is not necessaryto sear,
baste,cover or add waterto your
meat. Roastingis easy,just follow
these steps:
Step 1:Position oven shelfat
secondfrom bottom position(B)
for smallroasts (3 to 5 pounds)
and at bottomposition(A) for
largerroasts+
Step 2: Check weightof roast.
Place meat fat-side-upor poultry
breast-side-upon roasting rack in a
shallowpan. Do notcover.Do not
stuffpoultryuntiljust before
roasting.Use a meat thermometer
for more accuratedoneness(do not
place thermometerin stuffing)or
refer to the RoastingGuide for
approximatecookingtimes.?%e
melting fat will baste the meat.
Select a pan asclose to the size of
the meat as possible. (Broilerpan
with rack is a good pan for this.)
Step 3: TurnOVEN CONTROL
knob to desired temperature.
Check the Roasting Guide for
temperaturesand approximate
cookingtimes.
Step 4: Most meats continueto
cook slightly while standing after
being removed from the oven.
Standing time recommended for
roasts is 10to 20minutes. This
allows roasts to firm up andmakes
themeasier to carve. Internal
temperaturewill rise about
5° to 1O*F.;to compensatefor
temperatureincrease,if desired,
removethe roast from the oven
when its internaltemperature is
5°to 10”F.lessthanthetemperature
shown on the RoastingGuide.
FrozenRoasts’
Frozen roasts of beef, pork, lamb,
etc., can be startedwithout
thawing,but allow 15to 25
minutesadditionaltimeper pound
(15 minutesadditionaltime per
pound for roastsunder 5 pounds,
more time for largerroasts).
Thaw most frozen poultrybefore
roasting to ensure even doneness.
Some commercialfrozen poultry
can be cooked successfullywithout
thawing. Follow directionsgiven
on package label.
RoastigGtide
Internal
Temperature“1?
Approximate Roasting Time
in Minutes per Pound
Oven
Temperature
Type
Doneness
Meat
Tendercuts;rib,highquaiity
sirlointip,mmportopround*
3
to 5 HIS. 6 to 8 h.
24-33
18-22
35-39 22-29
40-45
30-35
21-25 20-23
25-30 24-28
30-35
28-33
35-45
30-40
35-45 30-40
17-20minutes
perlb.(anyweight)
Under 10lbs. 10to 15Ibs.
20-30
17-20
140°-1500
150°-1600
170°-1850
140°-1500
150°-1600
170°-185°
170°-1800
170°-1800
115°-1250
325°
325°
325°
325°
325°
325°
Rare:
Medium:
WellDone:
Rare:
Medium:
WellDone:
WeilDone:
WellDone:
To Warm:
Lamblegorbone-inshoulder’h
Vealshoulder,legor loin’c
Porkloin,riborshoulder:~
Ham,pre-cooked
Ham,raw
‘}’Forbonelessrolledroastsover6 inches
thick,add5 to 10minutesperlb. totimes
give[labove.
WellDone:
170°
Poultry
3
to5 h%
(her 5hi.
35-40
30-35
35-40
10to
15lbs.
Over 15h.
18-25
15-20
ChickenorDuck
Chickenpieces
325°
350°
325°
WellDone:
WellDone:
185°-190°
185°-j900
Turkey
h thigh:
185°-1900
WellDone:
Page 19

Proper care and cleaning are
important so your range will give
you efficient and satisfactory
service. l?ollow these directions
carefully in caring for it to help
assure safe and proper maintenance.
~~
SUREELECTRIC POWER
1SOl?l?BEFORECLEANING
ANY PART OF TIMERANGE.
fcooktop
The porcelain enamel cooktopis
sturdybut breakableif misused.
T-hisfinishis acid-resistant.
However, any acidicfoodsspilled
(such as fruitjuices, tomato or
vinegar) should not be permittedto
remain on thefinish.
Lift-up Cooktop
C1eanthe area under thecooktop
often. Built-up soil,especially
grease, may catch on fire.
To make cleaning easier, the entire
cooktop may be lifted tlpand
supported in the up position.
Be sure ail surface units are
turned off B3efumraising the
mddqh
Raisethecooktop all the
way up until the support rods snap
into place at the bottom. They will
hold the cooktop Llpwhile you
clean
underneathit.
To lower thecooktop,pushthe
bottomof eachrod forward
SIightlyso thatit willslidedown
i~~tothesideof the range.
Aftercleaningunderthecooktop
~,>,>=.:*1
;
iii; hot,mildsoapywaterand a
.<~<l~:ln~~oth,lowerthecooktop.Be
,:~..dill’eflllnot to pin~~ yOur fingers.
,,>:.
f:; ~~~}
~.z~
controlPanel
It’sa goodidea to wipe the control
panelclean after each use of the
oven.Clean with mild soap and
water,rinse with clean water and
polishdry with a softcloth.
Do notuse abrasivecleansers,
strongliquidcleanersor oven
cleanerson the controlpanel—
they will damagethe finish.
~lu@~
SurfaceUnits
Clean the area under the drip pans
often.Built-up soil,especially
grease,may catch fire.
To make cleaning easier,the plugin surfaceunits are removable.
Liftaplug-inunit about1“above
thedrippan-just enoughtograsp
it—andyoucanpull it out.
DOnotlift a ph.lg”inunitmore
than 1!Mym do, it may mt k
flat Onthe drip pan when you
plug it back in.
Repeated lifting of the plug-in
unit mdxe than 1“above the drip
pan
can permanently damage
the receptadee
caution: Be WuIred
Controlsare
ihnrnedto Om?and surface units
are eod before attempting to
R%?movemm.
After removing a plug-inunit,
removethe drip pan underthe unit
and clean it accordingto directions
in the CleaningGuide. Wipe
around the edges of the surface
unit opening.Clean the areabelow
the unit. Rinse all washed areas
with a damp cloth or sponge.
Receptacle
+
Q
g
s
s
O’Q
I Terminals
H
TOreplaceaplug=inunit:
1
~Firstplacethedrip pan into the
surface unit cavity found on top of
the cooktop so the unitreceptacle
can be seen through the opening in
the pan.
~
Inserttheterminals of the plug-in
unit through the opening in the
L
drip pan and into the receptacle. 7
@Guide the surfaceunitintoplace
soit fitsevenly intothedrippan.
CAUTION
eDo not attempt to clean plug-in
surface units in an automatic
dishwasher.
~Do net immerseplug-insurface
unitsin liquidsof anykind.
~Do notbend the plug-in surface
unit plug terminals.
@Donot attempttoclean,adjustor
inanywayrepairtheplug-in
receptacle.
(continuednextpage)
Page 20

PorcelainovenInterior
Withproper care, the porcelain
enamelfinishon the insideof the
oven—top,bottom, sides,back and
insideof the door—willstaynew-
Iookingfor years.
Let range cool before cleaning.We
recommendthat you wear rubber
gloveswhen cleaningtherange.
Soap and water willnormal~ydo
thejob. Heavy spatteringor
spiIloversmay require cleaning
with a mild abrasivecleanser.
Soapy,wet metal pads may also be
used. Do notallow food spillswith
a high sugaror acidcontent(such
as milk, tomatoes, sauerkraut,fruit
juices orpie filling) to remain on
the surface. They may cause a dull
spoteven aftercleaning.
Householdammonia may make the
cleaningjob easier. Place 1/2cup
ammonia in a shallow glass or
pottery container and leave in a
cold oven overnight. The ammonia
fumes will help loosen the bumed-
Ongrease and food.
If necessary,you may use an oven
cleaner.Follow package directions.
Cautionsabout using spray-on
oven ckaners:
~Donot sprayovencleaneron
theelectricalcontrolsandswitches
becauseitcouldcausea short
circuitandresultin sparking
orfire.
~Donot allowa filmfromthe
cleanerto buildup on the
temperaturesensor—itcouldcause
theovento heatimproperly.(The
sensoris locatedat thetopof the
oven.)Carefullywipethesensor
cleanaftereachovencleaning,
beingcarefulnot to movethe
sensoras a changein itsposition
couldaffecthow the ovenbakes.
~Do not sprayany ovencleaneron
theovendoor,handlesor any
exteriorsmtaceof theoven,wood
orpaintedsurfaces.Thecleaner
candamage thesesurfaces.
2%)
.-4
w/
7’
To remove the door, open it afew
inches to the special stopposition
that will hold the dooropen. Grasp
firmly on each sideand lift the
door straightup andoff the hinges.
NOTE: Be careful not to place
hands between the spring hinge
and the oven door frame asthe
hinge could snap back andpinch
your fingers.
‘lb replace the door,
makesure
thehingesare in the“out”
position.Positiontheslotsin the
bottomofthedoor squarelyover
thehinges.Thenlowerthedoor
slowlyandevenlyoverboth
hingesatthesametime.If hinges
snapbackagainsttheovenframe,
pullthembackout.
Broiler Pall & Rack
Afterbroiling,removethebroiler
panandrackfromtheoven.
Removetherack fromthepan.
Carefullypouroutthegreasein the
pan intoa proper container.Wash
andrinsethepan andrackin hot,
soapywater.If foodhasburnedon,
sprinkletherack while hot with
detergentandcoverwith wet paper
towelsor a dishcloth.Thatway,
burned-onfoodswillsoakloose
whilethemealis beingserved.
Do notstorea soiledbroile~pan
andrack in the oven.
cleaningU’KkrtheRange
The areaunder the range can easily
be reached for cleaningby
removingthe bottomdrawer.To
remove,pull drawerout all the
way,tiltLlpthefront and remove it.
To replace, insell glides at back of
drawerbeyond stop on range
glides.Lift drawer if necessaryto
inserteasily.Letfront of drawer
down, then push into close.
control
Knobs
The control knobs may be
removed for cleaning.
To remove a knob, pull it straight
off the knob stem.If knob is
difficultto remove, place a thin
cloth (like a handkerchief) or a
piece of string under and around
theknob edge and pull up.
Washknobs in soap and water, but
do not soak.
.%
t-
MoldedRib - ,,
%
(
‘q ‘
\
,+ Spring Clip
\
/’
\
l\
-)
Q- )
...
-----
IClear Groove
1-
1
I
Toreplace a knob, locatethe
grooveineachsideof theknob
—
~tem.Oneofthegroovescontains
a
spring clip and the other groove
is clear. Locate the molded rib
inside the knob. Fit the molded rib
of the knob into the clear gr-oove
on the knob stem.
ovenshelves
Ovenshelvesmaybe cleaned
witha mild abrasivecleanser.
Aftercleaning,rinsethe shelves
withcleanwateranddry with a
cleancloth.
Toremoveheavy,burned-onsoil,
soapymetalpadsmaybe used.
Afterscrubbing,washwithsoapy
water,rinseanddry.
(n
,$;!:’,“:;
,,”,..yr.,,
%2
Page 21

cleatingGtide
Nwm: Let 1“’mgehw!nparts cod beforetwhingor hm(mng.
—
Bake Unit ad
r(m unit
Ihiier Pan ad Ra
MATERIALS TX)USE
GENERAL DIRECYI’ION!3
Do
notcleanthebakeunitor broilunit.Anysoilwillburnoffwhentheunitisheated.
NOTE:Thebakeunitcanbe liftedgentlytocleantheovenfloor.If spillover,residue,
orashaccumulatesaroundthebakeunit,gentlywipearoundtheunitwithwarmwater.
*SoapandWater Drainfatandcoolpanandrackslightly.(Donotletsoiledpanandrackstandinovento
eSoap-FilledScouringPad
cool.)Sprinkleondetergent.Fillthepanwithwarmwaterandspreaddampclothor
~
CommercialOvenCleaner
paper towel over the rack. Let pan and rack stand for a few minutes.
Wash;scourif
(useonpanonly,not
racl
eDishwasher-Safe
+
~e;essary+Rinseand dry.OPT~ON:Thebroilerpanandrackmayalsobecleanedin
Pulloffknobs.Washgently,butdonotsoak.IXyandreturncontrolknobstorange,
makingsuretomatchflatareaontheknobandshaft,
IBMildSoapandWater
Chrome-PlatedD-i,
PansUnder
Plug-InUnits
~SoapandWater
eStiff-BristledBrush
~SoapFilledScouring
Pi
(Non-Metallic)
*DishwasherSafe
I Cleanasbeloworindishwasher.Wipeaftereachcooking,sounnoticedspatterwillnot
“burnon”nexttimeyoucook.Toremove“burned-on”spatters,useanyorallcleaning
materialsmentioned,Rublightlywithscouringpadtopreventscratchingofsurface.
Metal, including
ChromeSideTkim
@SoapandWater DO N(YI’USEsteel wool,
abrasives, amonia, acids
orcommercialovencleaners.
Wash,rinse,andthenpolishwithadrycloth.
Ch&de Glass Finis]
~SoapandWater Cleanoutsideofcooledblackglassdoorwitha glasscleanerthatdoesnotcontain
ammonia.Washotherglasswithclothdampenedinsoapywater.Rinseandpolishwith
a dry cloth.If knobsareremoved,donotallowwatertorun downinsidesurfaceof
glasswhilecleaning.
DOIIWYI’
USE oven
Toremoveovendoorforeasiercleaning:opento13R01L
cleaners, cleansing powders position,graspdoorbysidesandliftupandawayfrom
or
harsh abrasives.
hinges.Usesoapandwatertothoroughlycleanboththe
insideandoutsideofthedoor.Rinsewell.Toreplace:
graspdoorbysides,lineupdoorwithhingesandpush
firmlyintoplace.
NOTE: Soap left on doorliner causes additional
stains when the oven is reheated.
oven Door*
ISoapandWater
oven Liner*
SoapandWater
Soap-FilledScouringPaa
CommercialOvenCleane
Coolbeforecleaning.
FORLIGHTSOIL:Frequentwipingwithmildsoapandwater(especiallyaftercooking
meat)willprolongthetimebetweenmajorcleaning.
Rinse thoroughly.
PWYTE:Soapleft on liner causes additiona~stains when oven is reheated.
FORHEAVYSOIL:Chooseanon-abrasivecleanerandfollowpackageinstructions.
Useofrubberglovesisrecommended.Wipeorrublightlyonstubbornspots.Rinsewell.
Wipeoffanyovencleanerthatgetsonthermostatbulb.Whenrinsingovenafter
cleaning,alsowipethermostatbulb.
Porcelain Enamel
andPainted Surfaces
PaperTowel
DryCloth
~SoapandWater
DONOT USE oven
cleaners,cleansingpowders
or harsh abrasives.
These
mightscratchthesurface.
Ifacidicfoods,suchastomatoes,lemonjuice,etc.,
shouldspillontherangewhileit is hot,usea dry
papertowelorclothtowipeuprightaway.“Whenthe
surfacehascooled,washandrinse.Forotherspills,such
asfatsmatterings,etc., washwithsoapandwaterwhen
cooledandthenrinse.Polishwithadrycloth.
)Soap andWater
‘Dishwasher-Safe
ICommercialOvenCleaner
ISoap-FilledScouringPad
SoapandWater
Yourshelvescanbecleanedbyusinganyandallmentionedmaterials.Rinsethoroughly
toremoveallmaterialsaftercleaning.NOTE:Somecommercialovencleanerscause
darkeninganddiscoloration.Whenusingforthefirsttime,testcleaneronsmallpartof
shelfandcheckfordiscolorationbeforecompletelycleaning.
shelves
Forcleaning,removedrawerbypullingit all thewayopen,tilt upthefrontandlift out.
Wipewithdampclothorspongeandreplace.Neveruseharshabrasivesorscouringpads.
Nomge Drawer
surfaceunitcoils
DO N(M’ USEdishwasher.
W IWYF
immerseplug-in
unitin any kind of
liquid.
Spattersandspillsburnawaywhencoilsareheated.At
end of meal,heatsoiledunitsatH. Letsoilburn off,
aboutaminute,switchunitsto OFF.Avoidgetting
cleaningmaterialsoncoils.Wipeoffanycleaning
materialswithdamppapertowelbejoreheatingunit.
Letunitcoolcompletelybgjiirehandling.
&Ywi Ilaw of marinades,fruitjuices,tomatosauces andbastingmaterialscontainingacids may cause discoloration.Spilloversshouldbe wipedup
Page 22

Anti=TiDDevicebtiUationInstmctiom
forDetieeKtNo.342473
wAmING
eALL RANGESCANTIP
“ DJJKJRYCOULDlR.EsuLT
~
n’wmwLLABrIT-mm’
DE-VICE
PACKED
WH’HRANGE
eSEE msTRumloNs
Adjacent cabinet or final
location of range side panel
3=
Outside edge of bracketto be flush
with left or right side of range
\
Attachment to wall
II
./.
,.
‘,
I
Screw must
‘igwe 2
H
.,.
Bracket ~
‘-rods
Needed
~Phillips head screwdriver
01%“or adjustable wrench
The device attaches to floor or wall
2. If the device side of the range is
masonry, you can buy suitable
to hold either right or left rear leg
leveler. If fastening to floor, be
sure that screws do notpenetrate
electrical wiring or phlmbing. If
this cannot be determined, use
shorter screws that will not
penetrate through flooring.
If the device came with your
range, it is shipped attached to the
lower range back. Remove and
discard the shipping screw that
holds the device and then follow
the instructions below.
1. Decide whether the device will
be installed on the right or left side
of range location.
enter wood or metal
5\
‘*
plate
adjacentto a cabinet,placethe
device againstthe backwalland
cabinetas shownin l?igure1.
If thereisno adjacentcabinet,
determinewherethelocationof
therangeside(paintedoutside
panel)willbe. Placethedevice
withitsoutside edgeatthis
locationand againstthebackwall.
SeePigure 1.
3. Determinewhetheryouwill
anchor the deviceto theflooror
to thewall as showninI?igure2.
Fastenthedevicesecurelywith
the screwsprovided.Screwsare
self-driHingin wood,plywood,
particleand chip board,andmost
meta]framing.If attachingto
screws and anchors at a hardware
store. Use a masonry drill to drill
the required holes.
4. Using the wrench, back out the
four leg levelers at least two turns.
See your installationguidefor more
leveling information before
positioning the range.
5. Slide the range into place. Be
sure rear leg leveler fully engages
slot in device. If range cannot be
moved back far enough for rear leg
leveler to enter the device, move
device forward as required and
f-
22
Page 23

.—— .. .. =
———
—-
Figure 1
L
II 1!1
11
v
f’
30”
4
Min.
4
E
&/
B
MM.
I
1 T
.—
Ill / -i II
u
—
-_Ju
--
—.
Minimum dimensions between cooktop and walls above cooktop
i
/
/-
1<
2“
/
/
6%”
/
Preferred electrical outlet area
Roughed-in dimensions
*See Figures 1 and 2 for all rough-in and spacing
dimensions.These dimensionsmust be met for safe use
ofyourrange.Electricityto therangecanbediscomected
at the outlet without moving the range if the outlet is in
thepreferred location (remove lower drawer).
- “To eliminatetheriskofbumsor fire whenreaching
overhotsurfaceelements,cabinetstoragespaceabove
_
the coolctop should be avoided.If cabinet storage space
reducedby installingarangehoodthatsticksoutat
least5“beyondthefrontofthecabinets.Cabinets
installedabovea cooktopmaybeno deeperthan13“.
@TherangemaybeplacedwithO“clearance(flush)at
thebackwallandsidewallsof therangeif thefront
edgesoftherange sidepanelsstickoutbeyondthe
cabinetfrontsatleast 1/4”.SeeFigure2.
is to be pr&ided above the cooktop,the risk cfi be
Preparation
5. Level the range. For proper cooking and baking the
ra.rwemust be leveled:
1.Remove all tape andpackaging. Be sure to remove
clear plastic film that covers some chrome parts
(around glass oven doors, side trim) and any tape or
packaging from inside the oven.
2. Take the accessory pack out of the oven.
3. Check to be sure that no range parts
during shipping.
havecomeloose
Shippingwireortape
/ ‘~
~ & Removetheshippingwire or tapefromeachOfthe
._.
+f~}~ircooktopelements(coilcooktopelementmodels
=Joniy).
u
a.Installtheovenracks(seetheUsingYourOven
sectionofthisbookforinstructions).
b.Usea 1%”openendwrenchoranadjustable
wrenchtoequallybackoutthefourleglevelerstwa
or threeturns each,
c.Put aspiritlevelorglassmeasuringcuppartially
filledwithwaterononeoftheovenracks.
d.Usethewrenchtoadjusttheleglevelers.
?—.
Page 24

.-
..
E local codesrequirean ungrounded neutral:
a.
Removegroundstrap.
mectrkallconnection
Werecommendthatyouhave the electricalhookupof
yourrange done by a qualifiedelectrician. Have the
electricianshowyou whereyourrange disconnectis
located.
b. Fasten the white wire to the center terminal.
c. Use a groundingterminalor lead to ground unit in
accordancewith local codes.
Call your Electric Companyand ask which codes apply
in your area. If thereare no codes, you must follow the
NATIONALELECTRICAL CODE, ANSUNFPANO.
70-LatestEdition. YOUcan geta copy by writing:
To
MakeElectricalCkmmdion:
1.Removethejunctionblockaccesscover(onrange
back).SeeFigureAorFigureB.Somemodelswi!l
havea one-piecewirecovershownin Figure B.
Whenreinstallingtheone-piececover,makesurethat
wiredoesnotbecomepinchedbetweenwirecover
andmainback.
NationalFire Protection
Association
BatterymarchPark
Quincy,MA 02269
If you fail to wire yourrange in accordancewith
governingcodes, you may createa hazardous condition.
Youmust use a threewire, single-phaseAC 120/240
Voltor 208Yi120 Volt,60 Hertz electricalsystem to
operateyour range.
Figure B
FigureA
IL
—
-qtf---l
U
Use #8wire and 40 Amp fise or circuit breaker for
120/240Voltand 208Y/120 Voltsystems.
The range connector block is approved for copper wire
connectiononly. If you are connecting to aluminum
house wiring, you must use a specialU.L. approved
connectorforjoining copper to aluminum.
11
2. Usea 3-wire flexible cord kit marked for ranges. If
range is rated between 8,750-16,500 watts, cord must
be rated for 40 Amps-1251250Volts.If range is rated
between 16,501-22,500watts, then the cord must be
rated for 50 Amps-1251250Volts.Mobile homes or
installationswhere local codes do not allow grounding
through the neutral require a 4-wire flexible cord. The
same cord sizing conditions described above apply.
Three-wirecm-dCmmxtiml
/Ilk Iu Grounded
~ Neutral
\
Terminal
GroundScrew
,
u
h
GroundStraD
3. Whenusingacordrated40 Amps,removethenext
to outermostknockout(
178” diameter) in the connection
plate. Likewise, when using a cord rated 50
Amps,
removetheoutermostknockout(171”diameter)inthe
plate.
V’strain’e’iefc’amp
4. Terminations shallbe either closed loop terminals or
open-end spade lugs with upturned ends.
1.
Removethescrewsontheterminal block.
‘Y&Hmustuse a damporstrainrelieftoholdthecod
2. Installthethree-wirecordandthestrainreliefin the
holein thestrainreliefbracket.
3. Connecttheouterleadsto theouterterminalsand the
centerleadto the centerterminal.
4.
Push the cordupward(to relievestrain)while
tighteningthe strainreliefc1a.mP.
244=
-.
——
.—— .
Page 25

—.
Four-wirecord connection
und Screw
rain
ReliefClamp
1.Remove the screws on the terminal block.
2. Remove the ground screw,then remove the ground
strap.
3. Install the four-wire cord and strain relief in the hole
in the strain relief bracket.
4. Connect the red and black lead to the outside
terminals and the white lead to the center terminal.
5. Attach the green lead below the junction block with
theground screwthat was removed earlier (step 2).
6. Push the strain relief upward (to relieve strain), while
@teningthestrain relief clamp.
Page 26

.———
-——
—-
Questions?
m UseTtisProbIemSolvek*
—-
~
PROBLEM
OWN WILLNOT
WORK
FOOD
DOESNOT
BROILPROPERLY
FOODDOESNOT
ROASTORBAKE
PROPERLY
SURFACEUNITS
NOTFUNCTIONING
PROPERLY
POSSIBLECAUSE
ID
Mcakesurethermostatcapillarybulbs(locatedin upper portionof oven) are securely
heldbythemountingclips,arenottouching oven sides,andarenotcoatedwithanything.
~Plug on range isnot completelyinserted in theelectricaloutlet.
*The circuit breaker in your househas been tipped, or afuse hasbeen blown.
eOven controlsnotproperly set.
—
“OVEN CONTROL knob not setat BROIL.
Doornotleftajaras recommended.
Improper shelf positionbeing used. Check
Food is being cooked on hotpan.
Cookware is notsuitable for broiling.
Guide.
Aluminumfoilusedonbroilerpanrackhasnotbeenfittedproperlyandslit
as recommended.
@OVENCONTROLnot setcorrectly.
~Shelfpositionisincorrect.CheckRoastingorBakingGuide.
~Ovenshelfis notlevel.
gIncorrectcookwareorcookwareofimpropersizeis beingused.
JA foiltentwasnotusedwhenneededto slowdownbrowningduringroasting.
JSurfaceunitsarenotpluggedin solidly.
1Drippansarenotset securelyin the cooktop.
‘Surfaceunitcontrolsarenotproperlyset.
26
———..—
Page 27

we’llBeThere
WM thepurchase ofyour newRCA.appliance, receivethe
assurance that ifyou ever need itiormation or assistance,
we’lllx there. M you have to do iscdl-td-fke!
Our consumer serviceprofessionals
-.,-ill pro~de
expert repair serviceon
-J.oL[i
RCAappliance,scheduled at a
mnethat’sconvenientforyou.Many
X Consumer Servicecompany-
perated locationsoffer youservice
todayor tomorrow,or at your convenience(7:00a.m. to ‘7:00pm, weekdays,9:00a.m.to2:00p.m. Saturdays).
(’)urfactory-trainedtechniciansknow
,
your
appliance insideand out—so
mostrepairs can be handled injust
onevisit.
Consumers with ilmpairecl hearing or
speech who have access to a TDD or a
c(~nven(.ionalteletypewriter may call
NO-’TI)DGEAC
(860-833-4322jto
request service.
Youcanhavethe secure feeling that
GEConsumer Servicewillstillbe
there afteryourRCAproduct warrantyexpires.PurchaseaGEcontract
whileyourwarrantyisstillineffect
and you’ll receiveasubstantialdis-
count.Withamultiple-yearcontract,
you’reassured of future serviceat
today’sprices.
Telecommunication Device for the Deaf
I.ndivichdsapd.ifkdtoservice their
owna@iamxs canhaveneeded
partsoraccessoriessentdirectlyto
theirhome. Our partssystemprovidesaccessto over47,000Genuine
RenewalParts...and allare filly warranted. VISA,MasterCardand
Discovercardsare accepted.
user mairltenanceinstm.wtimls
containedin thisbookletcoverprocedures intended tobeperformed by
anywser.Other servicinggenerally
shouldbe
referreci tOqmlifiecl service ~ersmrmel. Gamtkm must be
exercisecl~ since i.rqmqxr servis%qj
maycause unsafe qerat.km.
Page 28

__.—
———
—-
YOUR RCAIUU’’JGEWAWW
Saveproof of originalpurchasedatesuchas yoLwsalessliporcancelledcheckto establishwarrantyperiod.
WHAT Is COVERED
FULLONE-YEARwARRAm
Foroneyear from date of originalpurchase,we
willprovide,freeofcharge, parts and servicelabor
in your hometo repairor replaceanypart of the
Rangethat fails because of a manufacturing defect.
This warranty is extended to the original purchaser
and any succeeding owner for products purchased
for ordinary home use in the 48 mainland states,
Hawaii and Washington, D.C. In Alaska the
warranty is the same except that it is LIMITED
because you must pay to ship the product to the
service shop or for the service technician’s travel
costs to your home.
FOR
SERWCE
Weat RCA strive to provide the highest quality
products and service. Therefore we have designated
GE CONEXJNIERSERVICE,a leader irt the service
industry to fulfillyour service
needs.Shouldyour
applianceneed service,during warranty period or
beyond,lookin the
White or YellowPages of your
te]ephonedirectoryforGE
CONSUMER SERWCE
or an authorized RCA APPLIANCE SER~CER.
WHAT’Is NOT Cavmum
~Service trips to your home to teach you how to
use the product.
Read your l.ke and Care mahxiaL If
you thenhave
anyquestionsaboutoperatingtheproduct,please
contactyourdealeror
lManager----ConsumerAffairs
RCAAppliances
ApplianceI?ark
Louisville,KY40225
@Improperinstallation.
[fyou
havean installationproblem, contactyour
dealer or installer.Youare responsiblefor providing
adequate electrical,gas, exhausting and other
connectingfacilitiesas described in the Installation
Instructionsprovicledwith the product.
@Replacementof house fuses or resetting of circuit
breakers.
~Failureofthe product ifit.isused forother than its
intended purpose or used commercially.
@Damage to product caused by accicknt,fire,
floodsor actsofGod.
WARRANTORISNOTRESIXXM3LEFOR
CON3EQUENJTIALDAMAGES.
Somestatesdonot allowtheexclusionorImitationofincidentalor
Warrantoc RCAAppliances
consequential damages, so the above limitation or exclusionmay not
apply to you. This warranty gives you specificlegalrights, and you
~~firt~~~ l@pI ~t3~~e~etl C0~t2e~~~~ ~~~~
may also have other rights which vary fromstate to state. To know
what your Iegalrights are in your state, consuItyour localor state
warranty,write:
consumer affairs officeor your state’s Attorney General.
Manager-Consumer Mfah
RCA Appliances
Appliance l?ark
Louisville, KY40225
B-
)
D
Ii)
PartNo. 164131913P065
PubNo. 79-4068
~~~~~(j7
L3BI15GL
L3B130GL
 Loading...