

Page 1
User's Guide
Version 1.0
RCA
REB 1100
Thomson Consumer Electronics, Inc.
10330 North Meridian Street
Indianapolis, IN 46290
©1995-2000. All Rights Reserved.
Thomson Consumer Electronics, Inc.
NuvoMedia, Inc.
eBook technology licensed from Gemstar. "Gemstar eBook" and the eBook logo are trademarks of Gemstar.
"Gemstar" and the Gemstar logo are registered trademarks of Gemstar. SMART MEDIA is a registered trademark of
Legato Systems, Inc.
Table of Contents
Note: The material in this manual is subject to change without notice.
About This Product
Safety Instructions
What You Get
What You Need
Page 2

Quick Tour
Getting Started
The eBook Screen
Reading an eBook Edition™
Choosing an Edition
Moving Within an Edition
Viewing Images and Playing Sound Clips
Getting More Editions
Getting Comfortable
Reorienting the Page View
Setting the Shortcut Icon
Lighting the Screen
Choosing Fonts and Font Sizes
Adjusting Contrast on the Screen
Using Reference Features
Marking Places With Bookmarks
Underlining Text
Adding Notes
Searching for Specific Text
Looking Up Words in the Dictionary
Using the Optional SMART MEDIA™ Card
Smart Media Connector
Maintaining Your eBook
Maintaining the Touch Screen
Checking the Status of Memory and Battery
Page 3

Charging the Battery
Freeing Up RCA eBook Memory
Appendix A: Entering Text
Using the On-Screen Keyboard
Writing With the Stylus
Other Information
Warranty
Canadian Warranty
License Agreement
FCC & Industry Canada Statements
About This Product
Safety Instructions
What You Get
What You Need
Safety Instructions
When using your RCA brand Gemstar eBook™, basic safety precautions should always be followed to reduce
the risk of fire, electric shock and injury to persons, including the following:
1. Do not use the eBook near water, for example, near a bathtub, washbowl, kitchen sink or laundry tub,
in a wet basement or near a swimming pool.
2. Avoid using the eBook during an electrical storm. There may be a remote risk of electric shock from
lightning.
3. Use only the power cord and batteries indicated in this manual. Do not dispose of batteries in a fire.
They may explode. Check with local codes for possible special disposal instructions.
4. CAUTION - To reduce the risk of fire, use only No. 26 AWG or larger telecommunication line cord.
5. CAUTION - Do not remove the cover (or back). There are no user serviceable parts inside. Refer
servicing to qualified service personnel.
Your eBook is a compact, handheld electronic reading device. It has a unique high-resolution, backlit screen
that provides an optimal reading experience regardless of the available light. At just 18 ounces, the eBook goes
anywhere. It's your portable bookshelf.
How does it work? You can buy specially prepared electronic reading materials, called "eBook Editions™ ".
Page 4

Look for the at online bookstores. The first thing you need to do before purchasing eBook Editions is to
register your eBook through the built-in modem. It is important you register your eBook because each eBook
Edition you buy is specially encoded so it can only be read on your specific eBook. The registration process
identifies you as the owner of your particular unit. The special encoding gives protection for both you and the
author's copyright, since it prevents copies of your Editions from being redistributed illegally. If you have not
already registered your eBook, refer to the registration setup in the Quick Start Guide. See
Modem Preferences
The modem also allows you to purchase eBook Editions without using a PC. Once your registration is
complete you can purchase eBook Editions through the eBook catalogs. After purchasing, simply download to
store them on your eBook. Because they are stored directly on your eBook, you can easily access the eBook
Editions at any time within the United States and Canada.
Your eBook has room to store multiple eBook Editions, and you can purchase an optional SMART
MEDIA™ card to increase the memory for additional storage space. If you have used all the memory and
want to download more eBook Editions,you can use a SMART MEDIA card with your Smart Media
connection. See for more details. You can even remove purchased
eBook Editions from your eBook and SMART MEDIA card without any problem, since you can always
download them again using the modem. You'll never have to buy the same eBook Edition twice!
for more details on using the modem.
You cannot play sound clips while using the modem.NOTE:
Using the Optional SMART MEDIA Card
Setting Your
What You Get
Your RCA brand Gemstar eBook package comes with the following items:
eBook with a stylus inserted in the side
USB cable
Telephone cable
Universal AC adapter
Slip case
Screen cleaning cloth
The eBook Librarian CD-ROM
Quick Start Guide
One eBook Edition, the eDictionary and "eBook User's Guide" (preloaded on the eBook and on the
eBook Librarian CD)
"eBook Librarian User's Guide" (on the eBook Librarian CD)
What You Need
You need an accessible analog phone jack to register your eBook using the modem.
Quick Tour
Getting Started
Turning Your eBook On and Off
Page 5

Setting Your Modem Preferences
Setting the Date and Time
Setting Your Passcode
Using the Touch Screen
The eBook Screen
Bookshelf Icon
Book Icon
Page Orientation Icon
Shortcut Icon
Audio Icon
Getting Started
Turning Your eBook On and Off
The Power Button for your eBook is located on the edge of the device.
To turn on your eBook, press the Power Button and wait a few seconds. You'll see the screen light up
On:
and, after a few seconds, the eBook logo appears. If you've previously opened an eBook Edition, text appears
a few seconds later,starting at the same place where you left off.
If you are turning on your eBook for the first time, there may be a few seconds before the screen lights up. If
you are unable to turn on the power to your eBook, you probably need to recharge the battery. Although the
battery was fully charged when it was shipped, its natural discharge may require that you recharge it before you
can use the device. See if you need to charge it now.Charging the Battery
To turn off your eBook, press and hold the Power Button until the screen goes blank. The screen dims
Off:
and the unit shuts down. Note that your eBook turns off automatically if you don't use it for 10 minutes. If you
want, you can change the amount of time the unit is idle before shutting off. See Setting the Automatic Shutoff
Delay in the "eBook Librarian User's Guide" on the CD-ROM for more information.
Setting Your Modem Preferences
The modem preferences allow you to do such things as dial using a prefix, choose the dial tone and change the
area code from which you are dialing. To change your preferences:
1. Tap the icon.Bookshelf
2. Tap .Settings
3. Tap .Modem
4. Tap when you are finished and your preferences will be saved.Done
Page 6

Setting the Date and Time
You can change the date and time on your eBook either through the device or the eBook Librarian. To change
the date and time through your eBook:
1. Tap the icon.Bookshelf
2. Tap .Settings
3. Tap .Date and Time
4. Tap in the field you want to change and then use the up and/or down arrows.
5. Tap when you are finished and your settings will be saved.Done
Setting Your Passcode
IMPORTANT: PLEASE READ CAREFULLY
If you want to protect your billing information when you purchase eBook Editions through the modem, you
must first set the passcode. If you do not set a passcode previous to making purchases, your billing information
will not be protected. To set your passcode:
1. Tap the icon.Bookshelf
2. Tap .Settings
3. Tap . Follow the on-screen instructions.Passcode
NOTE Change Passcode Forget
: If you forget your passcode, tap , then . Selecting this will
erase the billing information on the Order Form for security reasons.
Using the Touch Screen
The four usable screen icons and other screen controls (such as the ) are activated when
Page Navigation Bar
you press or tap them gently. You can use your finger or the stylus, stored in the side of the eBook, to activate
the touch screen. Do not use a pen or pencil, since that could damage the screen.
Try tapping an icon to display its menu. Tap it again to dismiss the menu. If you find that the touch screen isn't
responding properly, you should calibrate it. This is easy to do by tapping the bull's-eye from the
Orientation Calibrating the Touch Screen
icon. You can also see for more information.
Page
The eBook Screen
The eBook has the best available screen for reading text on a portable device. Its screen has a wide viewing
angle, user-adjustable contrast for various lighting conditions, and provides a backlight that illuminates the
screen for comfortable reading even in poorly lit areas.
The screen is also touch sensitive and provides four usable icon controls. These icons, along with the Page
Forward/Back buttons, provide access to everything you need while using your eBook.
Bookshelf Icon
The icon provides features that apply to your eBook. You can see the eBook Editions you have on
Bookshelf
your bookshelf, select one to read, or get information about your eBook device such as battery life and
available memory.
Page 7
Book Icon
The icon presents tasks you would perform while reading a particular eBook Edition. You can annotate
Book
your eBook Edition by making notes, setting bookmarks or underlining text. You can also search for specific
text in the eBook Edition or look up words in the preloaded dictionary.
Page Orientation Icon
The icon lets you change the orientation of the page view, using the directional arrows. It
Page Orientation
also lets you calibrate your screen, using the bull's-eye. See for more information.
Shortcut Icon
The icon lets you set up a shortcut to one of the options from the or menu, or to
Shortcut Bookshelf Book
the Page Forward or Page Back option on the menu. The eBook logo in the menu tells you which
item will be selected when you tap the icon.
Shortcut
Shortcut
Calibrating the Touch Screen
Audio Icon
The icon may be available to use in conjunction with future audio features.Audio
Reading an eBook Edition
Choosing an eBook Edition
Selecting a Recently Read eBook Edition
Selecting Another eBook Edition
Selecting an eBook Edition From the Newsstand
Moving Within an eBook Edition
Changing the Direction of Page Buttons
Hyperlinks
Page Navigation Bar
Go To First Page
Go To Previous Location
Page 8

Page Headers and Footers
Menu Links
Reference Features
Viewing Images and Playing Sound Clips
Panning Images
Playing Sound Clips
Getting More eBook Editions
Reading an eBook Edition on your eBook is simple. Four icons on the screen border bring the eBook features
to your fingertips.
Choosing an eBook Edition
An eBook Edition is the specially encoded electronic version of a text that you'll be reading on your eBook.
Two eBook Editions came preloaded on your eBook: the User's Guide and one other. You can purchase
additional eBook Editions as well. See for more information.Getting More eBook Editions
When you turn on your eBook, it automatically loads the eBook Edition you were reading last and sets the
display to the same page where you left off. If you deleted the last eBook Edition you read before turning off
your eBook, the next eBook Edition in the recently read menu is loaded when you turn it back on.
Selecting a Recently Read eBook Edition
Your eBook keeps track of the four eBook Editions you've read most recently. It does this to make them easy
to access:
1. Tap the icon.Bookshelf
The four eBook Editions you've read most recently are listed on the menu. The
current selection is identified with a check mark.
2. Tap the name of the eBook Edition you want to open.
The eBook opens automatically to the text where you left off.
Selecting Another eBook Edition
If the eBook Edition you want to read is not listed on the menu of most recent selections, it's still
Bookshelf
easy to access. To open any of your eBook Editions:
1. Tap the icon.Bookshelf
2. Tap .eBook Shelf
3. Tap .Books
A complete list of the eBook Editions currently loaded on your eBook is displayed.
Page 9

NOTE
: If you have more eBook Editions than can fit in the window, you can scroll through
the list by tapping the up and down arrows on the screen, or by using the Page Back and
Page Forward buttons.
You can also use the Find button to bring up the Find in Bookshelf window. Enter an
eBook Edition's name to quickly locate it in your Bookshelf. See
for more information on your text entry options.
Text
4. Tap the name of the eBook Edition you want to read.
5. Tap to open the eBook Edition.Open
The eBook opens the eBook Edition to the first page if you've never read it before.
Otherwise, the eBook Edition automatically opens to the text where you left off when
you read it last.
Note that the first page of an eBook Edition is like the very first page of a printed book: it
usually contains information from the publisher about the book. You may need to page
forward several times to view the first page of actual text.
Selecting an eBook Edition From the Newsstand
Appendix A: Entering
Your feature stores any periodicals you have purchased. To open any of your periodicals:Newsstand
1. Tap the icon.Bookshelf
2. Tap .eBook Shelf
3. Tap .Newsstand
A complete list of the periodicals currently loaded on your eBook is displayed.
NOTE
: If you have more periodicals than can fit in the window, you can scroll through the
list by tapping the up and down arrows on the screen, or by using the Page Back and Page
Forward buttons.
You can also use the Find button to bring up the Find in Bookshelf window. Enter a
periodical's name to quickly locate it in your Newsstand. See
for more information on your text entry options.
4. Tap the name of the periodical you want to read.
5. Tap to open the periodical.Open
The eBook opens the periodical to the first page if you've never read it before.
Otherwise, the periodical automatically opens to the text where you left off when you
read it last.
Appendix A: Entering Text
Note that the first page of a periodical is like the very first page of a printed book: it usually
contains information from the publisher about the periodical. You may need to page
forward several times to view the first page of actual text.
Moving Within an eBook Edition
Page 10

Typically, when you read a printed book, you move forward, reading one page at a time in order.
Occasionally, you may want to go back to the previous page. To move through an eBook Edition this way, you
use the Page Back and Page Forward buttons, located on the spine of the eBook.
You can also use a "silent reading" mode if you want to eliminate even the quiet click of the page buttons. To
do this, you can use the icon to perform the paging functions. See for more
Shortcut Setting the Shortcut Icon
information.
There are also times when you want to move through a book quickly, jumping from topic to topic rather than
going page by page. Your eBook has a number of features that allow you to move quickly to a specific
location.
Changing the Direction of Page Buttons
You have the ability to change the direction of the Page Back and Page Forward buttons. The default paging
direction for the top button is Page Forward and the bottom button is Page Back if you have the eBook in
portrait orientation. To change the direction of the buttons:
1. Tap the icon.Bookshelf
2. Tap .Settings
3. Depending which direction your page buttons are in, tap either or .Default Paging Reverse Paging
Hyperlinks
Some eBook Editions include hyperlinks that let you jump quickly between related information within the text,
just like links on a Web page. On an eBook, linked text is underlined. To jump to the link, simply tap the
underlined text. You cannot edit these hyperlinks in eBook Editions you've purchased. They must be in the
eBook Edition when you buy it.
Page Navigation Bar
Your eBook gives you a visual representation of where you are in your eBook Edition with the page navigation
bar. This is the thin bar that appears on the right edge of the screen when you read an eBook Edition. The
whole bar represents the entire eBook Edition. The dark part of the bar shows where you are with respect to
the whole text.
You can use the page navigation bar just like you use the thickness of a book to open to an approximate
location. You can also use the page navigation bar to find out how much of the text you have read. Note that
the percentage displayed is affected by the font and size you've selected, as well as by the page orientation.
This is because the amount of text that appears on an eBook page can change if you change these elements.
To move around the selected eBook Edition quickly using the page navigation bar:
1. Tap anywhere along the thin page navigation bar at the right edge of the screen.
A dark instruction banner with two page buttons appears. For example:
the page you're on currently.13%:
the page that corresponds to the place you tapped.Go To 48%:
Page 11

NOTE:
If the instruction banner covers text you want to read, you can tap the arrow on
the banner to move it to the opposite edge of the page.
2. Use your finger or stylus to slide up and down along the thin bar.
The percentage in the button changes as you move along the bar.Go To
3. When the percentage is what you want, tap the button.Go To
Your eBook displays the text at the location you selected.
NOTE:
You can tap the button showing the current percentage if you want to stay where you are
now.
Go To First Page
You can jump to the first page of your eBook Edition easily:
1. Tap the icon.Book
2. Tap .Go To
3. Tap .First Page
The eBook displays the first page of your eBook Edition. If your eBook Edition
provides a hyperlinked Table of Contents, you can get to it easily from here.
Go To Previous Location
Once you jump to a page, you can easily return to your previous location.
1. Tap the icon.Book
2. Tap .Previous Location
The eBook displays the page you were viewing previously.
Page Headers and Footers
Some eBook Editions have page headers and footers. To view these:
1. Tap the icon.Book
2. Tap . The Header and Footer windows will appear. Header/Footer
If there are not Headers or Footers in an eBook Edition, the option will be greyed
out.
Menu Links
Some eBook Editions provide menu links that make it easy to jump to sections of the text readers often want
to reference. For example, menu links might be provided to let you quickly jump to the table of contents or the
index.
To see which menu links the eBook Edition you're reading provides:
Page 12

1. Tap the icon.Book
2. Tap .Go To
The menu appears.Go To
If any menu links are provided, a separator appears on this menu and the menu links are
listed beneath it. You can tap one of the menu links to jump to its named location.
Reference Features
Your eBook also lets you mark up and search through your eBook Editions in a number of ways. You can also
use these features to jump quickly to the locations you've marked. See for more
Using Reference Features
information.
Viewing Images and Playing Sound Clips
The eBook lets you view large images and even has an audio output that allows you to listen to sound clips that
may be provided in certain eBook Editions.
Panning Images
If an illustration or diagram is larger than the screen, you can still view the entire image. Arrows appear along
the edges of the image that continue past the edge of the screen. You can tap the arrows to scroll the hidden
portion of the image into view. Alternatively, you can simply touch the image anywhere and drag on the screen
away from the arrows to bring the rest of it into view. When you are done viewing the illustration, use the Page
Back or Page Forward buttons to continue reading.
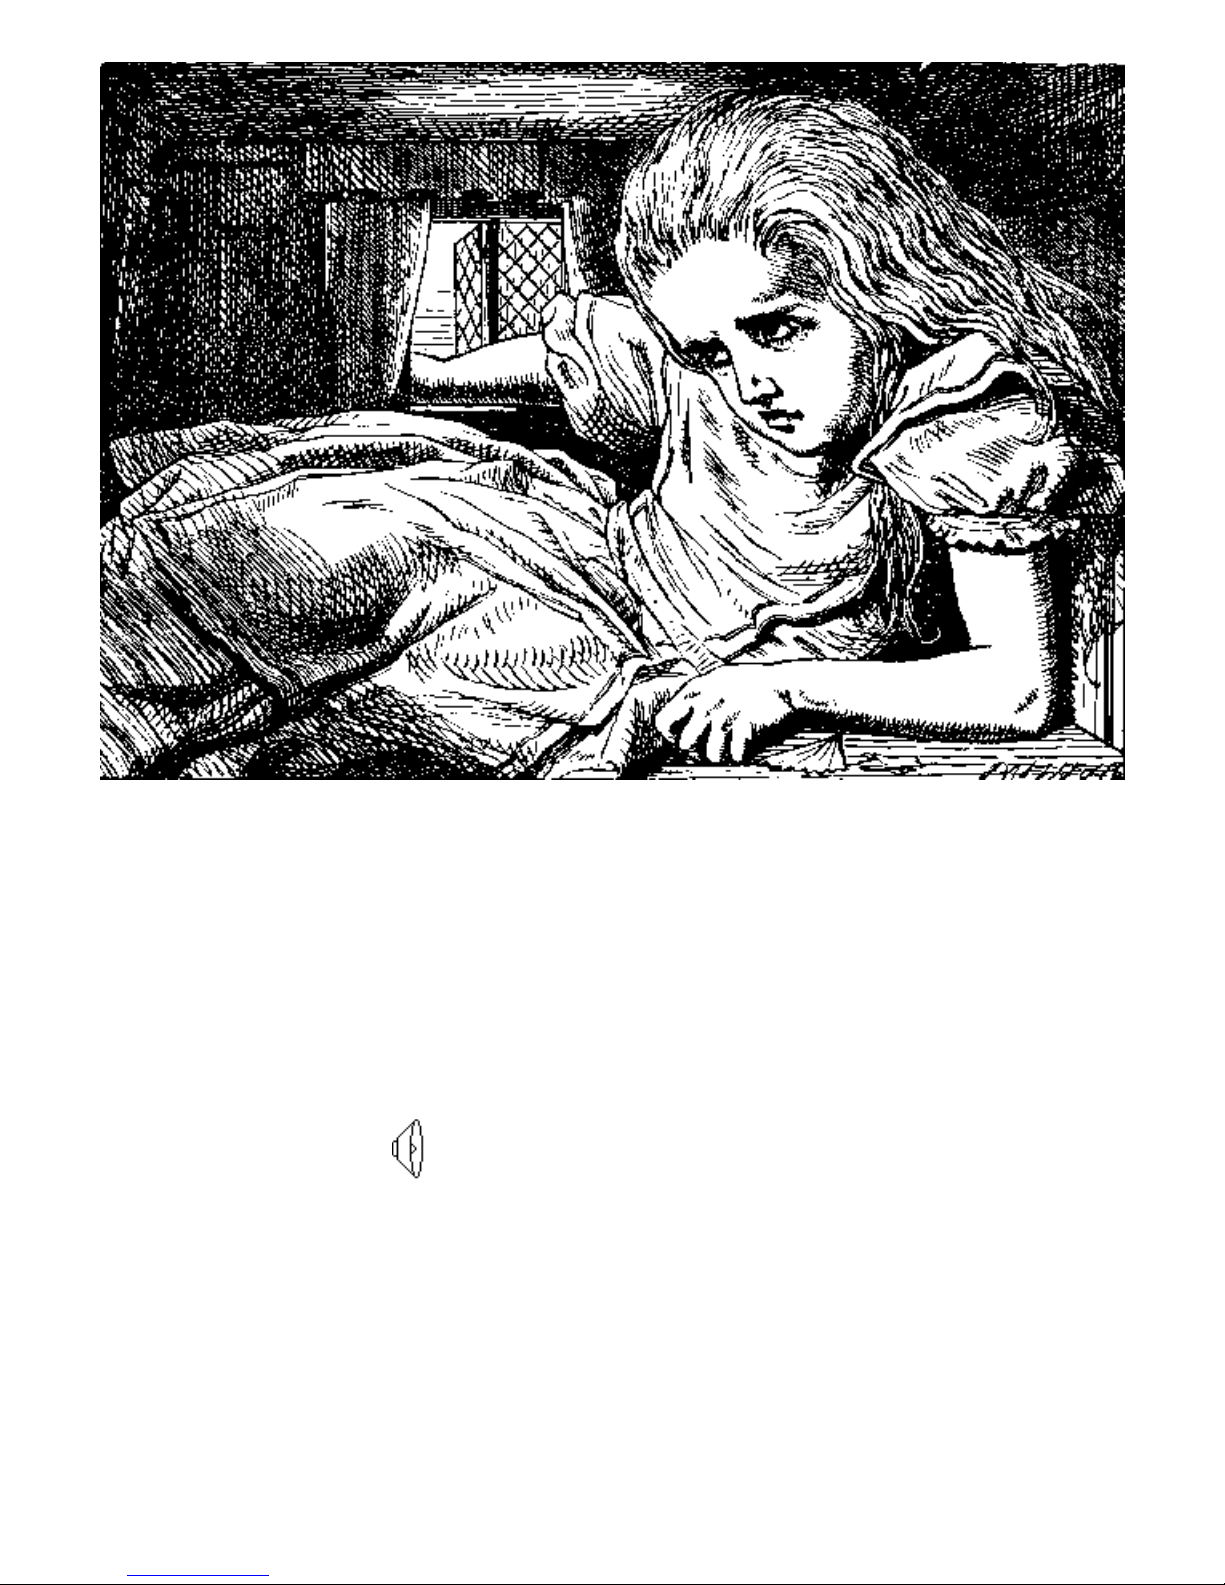
An example illustration is included below. If you are viewing this manual on an eBook, you can try using the
arrows to view the off-screen portion of the image.
Page 13
Playing Sound Clips
If the eBook Edition you are reading includes a sound clip, you can play it by clicking on the link provided. To
hear the sound clip, use any standard set of headphones or earbuds. You can stop playing it simply by tapping
anywhere on the screen. In the example given below, the sound clip is identified by a speaker icon. If you are
reading this manual on your eBook, plug in a set of standard headphones or earbuds into the headphone jack
on your eBook and tap on the speaker icon to listen to the sound clip. (If you are reading this on a browser
that is set up for sound capability, you can also click on the speaker icon to play it.)
You cannot use the modem while playing sound clips.NOTE:
"Alice In Wonderland" excerpt
Getting More eBook Editions
You can add more eBook Editions to your personal library by buying them from the Catalog. You must
register your eBook in order to make purchases.
As an eBook owner, you will be able to get the books you want to read earlier, faster, and easier then virtually
any other source for mobile electronic reading material.
Page 14

When you register using the modem, you will receive the latest Catalog free to your eBook Account. The
Catalog includes periodicals, newsletter and books which can be purchased and downloaded to your eBook.
The Catalog service will be organized by "themes" such as Mysteries, Thrillers or Science Fiction and within
each you'll find out about hot new best-selling titles and periodicals. The Catalog is updated regularly- new
releases are sent to you automatically whenever you connect your eBook with the modem. To view more
information about the Catalog and how to buy new eBook Editions:
1. Tap the icon.Bookshelf
2. Tap . eBook Shelf
3. Tap .Books
4. Select .Buying eBook Editions
5. Tap . There will be instructions on how the catalog works and how to purchase new eBook
To download the latest edition of the Catalog and any new eBook Editions you didn't download yet:
1. If you have not already done so, connect your eBook to an analog phone jack.
2. Tap the icon.Bookshelf
3. Tap .Online Bookshelf
4. Tap . Your eBook dials into your eBook Account.New
Open
Editions.
Your eBook will now display only your new eBook Editions.
5. Check the eBook Central™ box for the latest catalog. For other eBook Editions, check the appropriate
box next to the eBook Edition you want to download.
6. Tap .Download
You can also re-download eBook Editions you've already purchased from your eBook Account. To download
eBook Editions to your eBook:
1. Tap the icon.Bookshelf
2. Tap .Online Bookshelf
3. Tap . Your eBook dials into your eBook Account.All Titles
A list appears of all the eBook Editions you have purchased.
4. Select the eBook Edition(s) you want to download to your eBook and tap .Download
NOTE:
downloading.
The modem will automatically disconnect after your eBook Editions have finished
Getting Comfortable
Reorienting the Page View
Setting the Shortcut Icon
Lighting the Screen
Page 15

Choosing Fonts and Font Sizes
Adjusting Contrast on the Screen
The eBook gives you a number of choices that help you make your reading experience more comfortable. For
example, you can set how large the text appears or how the pages are oriented. If the preselected choices
aren't right for you, you can simply change the settings. If you tap the wrong icon by mistake when changing
settings, simply tap it again to close its menu.
Reorienting the Page View
Your eBook can be used in any orientation. This means that no matter how you like to hold your eBook,you
can rotate the page on the screen to view the text comfortably.
To reorient the page:
1. Tap the icon.Page Orientation
Arrows appear on the screen pointing in all four directions.
The arrow pointing to the
top of the current page is light with a dark border. The other arrows are dark.
2. Tap the dark arrow that points to the side you want as the top of the page.
The page display changes to the orientation you've chosen.
Setting the Shortcut Icon
The icon gives you a shortcut for selecting a menu item that you use frequently. It also gives you away
Shortcut
to page through your text without using the page buttons, to enable a completely silent reading mode.
When you first use your eBook, the icon is programmed to change screen print size from small to
Shortcut
large or vice versa. The eBook logo in the selected menu identifies the function to which the shortcut is
currently assigned. You can reassign the icon to any of the other items that appear on the or
Bookshelf
menus, including eBook Editions, or to the silent paging functions.
Shortcut Book
To assign the icon:Shortcut
1. Bring up the menu that contains the function you want to assign to the shortcut icon.
You can choose either the icon or the iconBook Bookshelf
To enable the "silent reading mode," choose the icon.NOTE: Book
2. Tap the icon.Shortcut
The screen displays the Assigning Shortcut window and tells you to tap a menu item.
If you selected the icon, the Assigning Shortcut window also includes paging
Book
functions.
3. Tap the function you want the icon to perform.Shortcut
Page 16

Choose one of the paging functions if you want to enable the silent reading mode.
The eBook logo appears in the menu, next to the function you selected.
4. Close the menu by tapping either the or icon again.Book Bookshelf
The next time you tap the icon, it performs the function you assigned.Shortcut
Lighting the Screen
The eBook screen has a backlight for extra illumination. This helps make sure you can read without straining
your eyes, no matter what the lighting conditions may be.
When the eBook is turned on, the backlight turns on automatically. This is because for most lighting conditions,
the screen contrast is best with the backlight set at 60%. However, the battery will last about twice as long with
the backlight off.
You can adjust the brightness of the backlight whenever you'd like to change it:
1. Tap the icon.Bookshelf
2. Tap .Settings
3. Tap .Backlight
4. Select the brightness setting you want.
The backlight setting is 60% by default. You can select one of the other options to make it
dimmer or brighter, as desired. Note that the brighter settings will drain the battery more
quickly.
The screen backlight changes to the brightness setting you selected.
5. Tap to close the selection window.Done Backlight
The eBook remembers which backlight setting you chose last and uses that the next time you turn it on.
Choosing Fonts and Font Sizes
Your eBook is preset with two display fonts, one for large print and one for small print. You also have the
option to choose other fonts.
To alternate between the large and small fonts:
1. Tap the icon.Bookshelf
2. Tap .Settings
3. Tap or , whichever appears.Large Print Small Print
The eBook remembers which size print you chose last and uses that the next time you turn
it on.
To choose different fonts or font sizes:
If you don't like the two defaults, you can use the eBook Librarian software to change them.
Page 17

To find out how to change the display fonts on your eBook, see the "eBook Librarian User's
Guide" on the CD-ROM for more details.
NOTE:
amount of text that fits on a page. As a result, the eBook re-calculates the pages
after you change the font selections.
Adjusting Contrast on the Screen
1. Tap the icon.Bookshelf
2. Tap .Settings
3. Tap .Contrast
You can adjust the contrast to be lower or higher by either dragging the bar with your
finger or stylus or by using the Page Forward and Page Back buttons.
4. Tap to save your settings and the Contrast window.Done
NOTE:
window, use the Page Forward and Page Back buttons to adjust the screen back. You can also
turn off your eBook and push the reset switch on the back of your eBook.
If you accidentally adjusted the screen such that you can no longer see the settings
Changing the available fonts and/or font sizes on your eBook changes the
Using Reference Features
Marking Places With Bookmarks
Jumping to a Bookmark
Bringing Up the Bookmarks Edit Window
Renaming a Bookmark
Deleting a Bookmark
Underlining Text
Adding Notes
Reading, Changing or Deleting Notes
Searching for Specific Text
Looking Up Words in the Dictionary
Your eBook has a number of features that make it easy to mark up your eBook Editions for future reference.
You can put bookmarks at places of special interest and underline important ideas. Or, if you're someone who
likes to jot down your thoughts on notes or in the margins, you can add notes.
Once you've added markups, you can easily find them again. See to find out how. Searching for Specific Text
Page 18

Your eBook also makes searching for specific text much easier than thumbing through pages. There's even a
dictionary included, to make it easy to find the definitions of words you don't know.
When you mark up your eBook Editions, the markups themselves use a small amount of memory, so there is
slightly less room for storing eBook Editions. See if you want to
Checking the Status of Memory and Batteries
find out how much memory is used by all the bookmarks, underlines and notes stored on your eBook.
You can delete an eBook Edition's markups from your eBook if you no longer need them or if you'd just like to
make a bit more room there. If you save your markups before deleting them, the markups will be present the
next time you send the eBook Edition to your eBook. See Capturing eBook Information in the "eBook
Librarian User's Guide" on the CD-ROM or for more information.Deleting a eBook Edition's Markups
Marking Places With Bookmarks
Your eBook lets you mark places of special interest in your eBook Editions using bookmarks. You can set as
many bookmarks as you like. Once a bookmark is set, you can jump to that location easily.
To set a bookmark:
1. Tap the icon.Book
2. Tap .Set Bookmark
The instruction banner appears.Bookmark
3. Find the paragraph that you want to mark, and tap it.
The banner disappears and a small triangle ( ) marks the paragraph you selected.
NOTE
: You can use the Page Back and Page Forward buttons to locate the paragraph. If text
you want to see is hidden by the instruction banner, tap the arrow on the banner to move it to the
opposite edge of the page.
Jumping to a Bookmark
You can review the list of bookmarks you set for the current eBook Edition and easily jump to one of the
places you marked. If you don't rename it, each bookmark is identified by the first few words of the paragraph
it marks. See to find out more.Renaming a Bookmark
To jump to the location of a bookmark you've set:
1. Tap the icon.Book
2. Tap . Note that this option is only available if you've set some bookmarks.Bookmarks
If there are only a few bookmarks, the menu is displayed. Tap the bookmark
you want to jump to.
The eBook displays the page with the bookmark you selected.
If there are many bookmarks, the edit window is displayed:Bookmarks
Bookmarks
Page 19

a. Tap the bookmark you want to jump to.
NOTE:
If you don't see the bookmark that you want, tap the arrows or use
the Page Back and Page Forward buttons to scroll up or down.
b. Tap .Go To
The eBook displays the page with the bookmark you selected.
Bringing Up the Bookmarks Edit Window
You can both rename a bookmark, or delete one when you're finished with it. To do these tasks, you need to
use the edit window. If you are reading a paragraph with a bookmark, you can simply tap the
bookmark triangle ( ) to bring up the edit window. Otherwise:
Bookmarks
Bookmarks
1. Tap the icon.Book
2. Tap .Bookmarks
If there are only a few bookmarks, the menu is displayed. Tap
Bookmarks
.
Bookmarks Edit
The edit window is displayed.Bookmarks
If there are many bookmarks, the edit window is displayed immediately.Bookmarks
While the edit window is on the screen, you can rename or delete bookmarks. See or
Deleting a Bookmark
for more information.
Renaming a Bookmark
Renaming a Bookmark
Sometimes the first few words of the paragraph you've chosen to mark are not helpful in identifying a
bookmark. If you'd like, you can rename the bookmark so it's more meaningful. To do this:
1. Bring up the edit window.Bookmarks
See if you need to find out how to bring up the
Bringing Up the Bookmarks Edit Window
window.
2. Tap the Bookmark you want to rename.
NOTE:
If you don't see the bookmark you want, tap the arrows or use the Page Back
and Page Forward buttons to scroll up or down.
3. Tap .Rename
The window appears, with the current bookmark text displayed
Rename a bookmark
in its text entry box.
4. Edit the bookmark's name using the available writing pad or choose the keyboard to type instead.
Page 20

Note that the current text is highlighted, and that a backspace deletes all highlighted text.
See for more information on your text entry options.Appendix A: Entering Text
5. When the new name is correct, tap .OK
The edit window reappears showing the new name in the bookmark list.Bookmarks
6. Tap to continue reading.Done
Deleting a Bookmark
You can also delete any bookmarks you decide you don't want. To delete a bookmark:
1. Bring up the edit window.Bookmarks
See if you need to find out how to bring up the
Bringing Up the Bookmarks Edit Window
window.
2. Tap a bookmark you want to delete.
NOTE:
If you don't see the bookmark you want, tap the arrows or use the Page Back
and Page Forward buttons to scroll up or down.
3. Tap .Delete
A confirmation window is displayed.
4. Tap if you're sure you want to delete the bookmark, and otherwise.Yes No
After you delete a bookmark, the window is redisplayed without the one
Bookmarks
you deleted.
5. Tap to continue reading.Done
Underlining Text
You can underline important text in your eBook Edition. Underlined text is easy to distinguish from hyperlinked
text because the underlines you add appear as dashes that are slightly offset below the line. To underline text:
1. Tap the icon.Book
2. Tap .Underline
The instruction banner appears.Underline
3. Locate the text you want to underline.
NOTE:
You can use the Page Back and Page Forward buttons to locate the text you
want. If text you need to see is hidden by the instruction banner, tap the arrow on the
banner to move it to the opposite edge of the page.
Page 21

4. Tap the beginning of the text you want underlined, then slide your stylus over the rest.
The text you select becomes highlighted as you slide over it. When you remove your
stylus from the screen, the text is underlined.
If you want to continue underlining on
another page, simply use the Page Back and Page Forward buttons and repeat this step.
5. When you've finished underlining, tap .Done
You can remove underlining as well. Simply perform the same steps, but select text that is
underlined. When you remove your stylus, the underlines will be removed.
Adding Notes
You can do the equivalent of writing in the margins of your eBook Edition by adding notes.
To add a note:
1. Tap the icon.Book
2. Tap .Add Note
The window appears.Add Note
3. Enter the text for the note using the available writing pad or choose the keyboard to type instead.
See for more information on your text entry options.Appendix A: Entering Text
4. When you're finished composing your note, tap .OK
The instruction banner appears.Attach Note
5. Find the text closest to where you want to attach the note.
NOTE:
You can use the Page Forward and Page Back buttons to locate the paragraph. If
text you want to see is hidden by the instruction banner, tap the arrow on the banner to
move it to the opposite edge of the page.
6. Select a word by tapping it with the stylus.
The eBook attaches the note and displays a small dark triangle ( ) to the right of
the word.
Reading, Changing or Deleting Notes
You can easily read, change or delete the notes you add to your text. See to find
out how to locate a particular note.
1. Tap the note triangle ( ) with the stylus.
The screen displays the note.
Searching for Specific Text
Page 22

2. There are four buttons from which you can choose:
If you want to change where the note is attached, tap .Move: Move
The instruction banner appears.Attach Note
Tap a word in a different area of the text to move the note to a new location.
If you want to change the text of the note, tap .Edit: Edit
The window appears, with the current note text displayed in
Edit Note
its text entry box.
Edit the note. Note that the current text is highlighted, and that a back space deletes all
highlighted text. See for more information on your text entry
Appendix A: Entering Text
options.
When you are done, tap .
in the window.Note Done
OK The text-entry box disappears and the new text appears
Tap .
If you want to delete the note, tap .Delete: Delete
Your eBook asks you to confirm that you want to delete the note. If you do,
tap . Otherwise, tap . After you delete a note, the note triangle
Yes No
disappears from the text.
If you simply want to read the note, do so and then tap .Done: Done
Searching for Specific Text
With your eBook you can look for a specific word or phrase and move directly to that page. Searches can be
done not only for text within the eBook Edition, but also for bookmarks, notes, and underlines.
1. Tap the icon to display a menu.Book
2. Tap .Go To
3. Tap .Find
The window appears.Find
4. Enter the word or phrase you want to find.
See for more information on your text entry options.Appendix A: Entering Text
NOTE:
If you want to jump to the next Note, Underline or Bookmark, leave the text box
blank, and continue with the next two steps.
5. Select where you want to search: , , , or .Text Notes Underlines Bookmarks
6. Tap or , to begin searching in the direction you choose.Forward Back
The screen displays a status box while the search is being performed.
cancel a search before it finishes, tap the button in the status box.
If you want to
Cancel
Page 23

If your text or annotation is found, the eBook displays that page. If not, the screen displays
an appropriate message.
You can search for the same text again. On the banner that's displayed on the screen, tap or
Back
to search in the direction you choose. If the banner is hiding some text you want to see, tap the arrow on
Find Forward
the banner to move it to the opposite edge of the page.
NOTE:
If the previous search failed, you may want to try the other direction, to be sure you don't
miss what you're looking for.
When you are finished searching, tap If you tap the button before the search completes, it will be
Done. Done
canceled.
Looking Up Words in the Dictionary
The eBook includes a convenient built-in dictionary that you can use when reading an eBook Edition. The
dictionary must be present on the eBook in order for you to use this feature.
To look up words in the dictionary:
1. Tap the icon.Book
2. Tap .Lookup
The instruction banner appears.Lookup
3. If several dictionaries are available, select the one you'd like to use.
If more than one dictionary is currently on your eBook, the dictionary menu appears, listing
all the dictionaries that are loaded.
4. Select the word you want to look up.
You can select a word that's displayed on the screen by tapping it with the stylus. Note that
you can use the Page Forward or Page Back buttons to locate the word you want. You
can also move the banner to the opposite edge of the page by tapping its arrow button, if
necessary.
NOTE:
You can also enter the text for a word or phrase you want to look up. To do this,
tap the button on the instruction banner labeled Type:
The window appears.Lookup
Enter the text for the word or phrase. See for more information
Appendix A: Entering Text
on your text entry options.
When you've entered the word, tap .Lookup
The screen displays the definition in a window.
Page 24

If you want to look up another word choose . Otherwise, tap to continue
reading.
New word Done
Using the Optional SMART MEDIA Card
Smart Media Connector
Your eBook has a feature allowing you to expand its memory to save your eBook Editions, called the SMART
MEDIA card. By using a SMART MEDIA card, you can add an additional 64MB of memory.
Smart Media Connector
To use a SMART MEDIA card:
1. Turn off your eBook.
2. Open the rubber flap on the back of your eBook.
3. Place the SMART MEDIA card in the connector by sliding the card in with the connectors facing down
towards the eBook. Then close the flap.
4. Turn on your eBook.
NOTE: Bookshelf
then go to , tap on and check how much memory you have. If
the memory has not increased, repeat the steps and check the memory again.
To make sure you have connected your card correctly, tap the icon,
About Your eBook Details
Maintaining Your eBook
Maintaining the Touch Screen
Calibrating the Touch Screen
Page 25

Cleaning the Screen
Checking the Status of Memory and Battery
Charging the Battery
Freeing Up eBook Memory
Deleting an eBook Edition from the eBook
Deleting an eBook Edition's Markups
Maintaining the Touch Screen
You can keep your touch screen in optimal working order by calibrating it. You can make sure the
screen continues to be easy to read by keeping it clean.
Calibrating the Touch Screen
Calibration ensures that when you tap the screen where there's an icon, menu, or button, it recognizes
that you want to perform a command. The eBook screen was calibrated for you at the factory, so it
should be ready to use when you receive it. However, if the screen doesn't perform like you think it
should, you can calibrate it again:
1. Tap the icon.Page Orientation
NOTE: Page Orientation
If the screen fails to respond when you tap the icon, turn
off your eBook. Then push the reset switch on the back of your eBook. Hold down
the page button closest to the headphone jack while turning the eBook back on.
Keep holding down the page button until the calibration screen appears.
2. Using the stylus, tap the center of the bull's-eye that appears in the center of the screen.
3. Continue using the stylus to tap the center of the series of circles that appear on the screen.
Page 26

That's all there is to it. The touch screen is now calibrated again.
Cleaning the Screen
To keep your eBook screen at its best, clean it occasionally with the screen cleaning cloth provided.
You can use lens cleaner, but you should avoid using solvents. Make sure that no moisture is allowed to
seep under the plastic frame at the edge of the screen.
Checking the Status of Memory and Battery
To find out how much memory or battery life is still available on your eBook:
1. Tap the icon.Bookshelf
2. Tap .About Your eBook
The screen displays the window.About Your eBook
the battery and memory status is given here, along with your eBook ID, the serial
number of your unit, and the date and time.
3. Tap the button.Details
A window appears and gives a graphical display for both battery life
Status
and memory.
Battery
When the battery is fully charged, the bar is completely dark. A fully charged battery
will last about 15 hours when using the backlight feature at the default intensity and
about 30 hours with the backlight off.
To recharge the battery, see .Charging the Battery
Memory
When no memory is left, the bar is completely dark. Numeric values are also shown
to give more details about the memory usage.
To free up some memory, see .Freeing Up eBook Memory
Notice that a summary of
: The dark bar on the graphical display shows how much battery life is left.
: The dark bar on the graphical display shows how much memory is used.
4. Tap the button on the window.Done Status
Charging the Battery
The eBook is powered by an internal, Lithium-Ion battery that recharges when you connect the power
adapter to the eBook and plug it into an outlet. If the battery is fully discharged, it takes about two hours
to recharge. Since batteries drain slowly even when not in use, it's a good idea to leave your eBook
recharging with the power adapter when you're not using it. That way, you'll be sure it's fully charged
when you need it.
For more information on the battery life, see Checking the Status of Memory and Battery.
NOTE:
Batteries and other eBook components are not user serviceable. Opening your
eBook can void the warranty.
Page 27

If you believe there is a problem with the battery in your unit, contact eBook Technical
Support. See Other Information for more information.
To recharge the battery:
1. Make sure the power adapter is connected to the eBook.
2. Plug the adapter into an outlet.
You do not need to turn off the eBook when recharging. If it's on, you can continue
reading. Otherwise, a battery status window appears on the screen:
: displayed while battery is chargingCharging
Charge complete
: displayed if battery is fully charged and AC adapter is still
connected
: displayed if AC adapter is disconnectedDischarging
DISPOSAL WARNING:
The rechargeable battery in the eBook could explode if the unit is disposed
of in high temperatures. It will explode if disposed of in a fire.
Freeing Up eBook Memory
Most of the eBook's memory is used to store the eBook Editions. However, some memory is also used
by the markups you've made while reading your eBook Editions. The markups could include
bookmarks, notes, and underlines. Additionally, if you select a font that is different from the default
settings, some memory is used to store that font (this memory is released if you select the default fonts
again, as described in Choosing Fonts and Font Sizes).
The number of eBook Editions you can store depends on the memory capacity of your eBook, the size
of your eBook Editions and on how much marking up you do within each eBook Edition. See
the Status of Memory and Battery
to find out more about the memory usage on your eBook. If you
Checking
begin to run out of memory, you can easily remove any eBook Editions you have finished reading.
Deleting an eBook Edition from the eBook
To delete an eBook Edition from your eBook:
1. Tap the icon.Bookshelf
2. Tap .eBook Shelf
3. Tap .Books
The screen displays a list of all the eBook Editions currently stored on the
eBook.
4. Tap the name of the eBook Edition you want to delete.
5. Tap .Delete
The eBook asks you to confirm that you want to delete the eBook Edition.
If you've marked up your eBook Edition by adding notes, underlines CAUTION:
Page 28

or bookmarks, these if you delete the eBook Edition from your eBook
without saving your markups first. See Capturing eBook Information in the "eBook
Librarian User's Guide" on the CD-ROM for more information.
6. Tap if you're sure you want to delete this eBook Edition, and otherwise.Yes No
If you choose to delete it, the screen redisplays the list of eBook Editions
without the deleted eBook Edition.
7. Tap to close the window.Done
Deleting an eBook Edition's Markups
If you've marked up an eBook Edition by adding notes, underlines, or bookmarks, you can free up
some space on your eBook by deleting them if you decide you no longer need them.
To delete an eBook Edition's markups:
1. Tap the icon.Book
2. Tap .About This Edition
will be lost
The screen displays the window.About This Edition
Editions, author and ISBN, along with information regarding how many underlines,
notes or bookmarks have been saved for this eBook Edition.
3. Tap .Remove Markups
A dialog box appears asking you if you are sure you want to delete the
markups.
NOTE:
from your eBook, you can restore them by sending the eBook Edition to your
eBook again. See Capturing eBook Information in the "eBook Librarian User's
Guide" on the CD-ROM for more information.
4. Tap to remove the markups, and otherwise.Yes No
If you choose to delete the markups, the window redisplays with the markup
counts set to zero.
5. Tap to close the window.Done
If you save your markups on the eBook Librarian before you delete them
This window lists eBook
Appendix A: Entering Text
Using the On-Screen Keyboard
Writing With the Stylus
Page 29

Using Allegro
The Allegro Alphabet
Punctuation and Symbols
Numbers
Accented Characters
Allegro Tips
As you use your eBook, you'll find that there are times when you need to enter some words or text of
your own. For example, you may want to enter a word to look up in the dictionary. Or, you might need
to enter a number of words, as when you're adding a note to an eBook Edition.
Whenever you need to enter text, your eBook gives you two options. You can either use the on-screen
keyboard and tap the letters, or you can use the on-screen writing pad and write the characters with
your stylus. Which ever text entry option you used last will be selected by default, but you can select the
other at any time.
NOTE:
characters, see
Accent marks can only be entered using the writing pad. To enter accented
Writing With the Stylus.
Using the On-Screen Keyboard
If you'd like to practice text entry but a text entry window is not already displayed on the screen, first
open an eBook Edition, then tap the icon and select .Book Add Note
To enter text with the on-screen keyboard,
1. Make sure the text entry window is in keyboard mode.
If the text entry window is currently showing the writing pad and not the keyboard,
select the button labeled Keyboard.
The text entry window redisplays in keyboard mode.
2. Using the stylus, tap the characters you want.
The letters appear in the text box above the keyboard as you tap each
character.
If you make a mistake typing a character, use the stylus to move the cursor to the
right of the mistake, then tap the backspace key (the left arrow, next to the letter p).
If you hold the stylus down on the backspace key, you can delete multiple letters
easily.
You can also delete highlighted text using the backspace key. To highlight a portion
of the text, tap the first letter you want to highlight, then slide the stylus over the rest.
Page 30

NOTE:
Calibrating the Touch Screen
If the keyboard doesn't respond as you think it should, try recalibrating the touch screen. See
for more information.
Writing With the Stylus
Your eBook includes the FonixAllegro™ handwriting recognition software. This software lets you use
your stylus to write simple stroke patterns on the on-screen writing pad, and they will be instantly
recognized as numbers, letters, or symbols. You'll probably find you can use the Allegro system
successfully and easily after only a few minutes of practice.
NOTE:
Different stroke patterns may be used with different handwriting recognition
systems. Be sure to review the stroke patterns for Allegro, given below, even if you are
familiar with other handwriting systems, such as Graffiti®, or Jot®.
If you'd like to practice text entry but a text entry window is not already displayed on the screen, first
open an eBook Edition,then tap the icon and select .Book Add Note
To enter text with the on-screen writing pad:
1. Make sure the text entry window is in Allegro mode.
If the text entry window is currently showing the keyboard and not the writing pad,
select the button labeled Allegro.
The text entry window redisplays in Allegro mode.
2. Using the stylus and the writing pad, draw the stroke patterns of the characters you'd like to enter.
The writing pad is located in the center of the text entry window. See the following
sections for details on using the Allegro handwriting software.
Using Allegro
The Allegro Alphabet
Punctuation and Symbols
Numbers
Accented Characters
provides additional information on successfully writing specific letters.Allegro Tips
The characters appear in the text box above the writing pad as you complete
them. Each stroke is finished when you lift your stylus.
If you make a mistake writing a character, use the stylus to move the cursor to the
right of the mistake, then draw the backspace stroke (a straightright-to-left line in the
center of the writing pad).
Page 31

You can also delete highlighted text using the backspace stroke. To highlight a
portion of the text, tap the first letter you want to highlight, then slide the stylus over
the rest.
NOTE:
Calibrating the Touch Screen
If the writing pad doesn't respond as you think it should, try recalibrating the touch screen. See
for more information.
Using Allegro
When you use handwriting software, you need to write each character in a particular way, so the
software can recognize it. One of Allegro's strengths is that it uses natural letter forms that are easy to
learn and fast to execute. It also allows considerable deviation from the basic letter shapes, as long as
certain key features are respected.
The figure below shows the first three letters of the Allegro alphabet.
Each letter is drawn in a single stroke, starting at the start-point, pictured by a solid dot. Many letters
and numbers are formed in the way you would naturally write them, but some are not. It's a good idea to
practice all of them, keeping the Allegro letter chart in front of you and copying each one closely. This
will give you a chance to become familiar with any strokes that might feel less natural to you.
Allegro also allows you to enterupper-case letters, punctuation, symbols and characters like space, tab,
and return. These all use special introducer strokes that change the interpretation of the next stroke you
make. As you'll see in the next sections, you can also use the on-screen mode selectors instead of the
introducer strokes. If you don't use Allegro very often, you may find it simplest to use these selectors
when you want to set the mode for entering capital letters or special characters.
Note that when you use introducer strokes, the mode selectors still update to reflect the current mode.
The Help button on the text entry screen displays the stroke chart for the current mode. The"Next >>"
and "<< Previous" buttons on the Help screen can then be used to cycle through the stroke charts for the
other modes.
The Allegro Alphabet
The strokes for the basic Allegro alphabet are given below. See for additional information
Allegro Tips
on successfully writing specific letters.
Page 32

Some additional basic strokes are listed below.
The horizontal line goes from left to right.Space:
Write two diagonal strokes starting at the upper left to get a period. Period:
Changes the usual case of the next letter. Shift*:
Toggle Caps Lock*:
Two upward strokes turns Caps Lock on or off. When Caps Lock is on,
all strokes interpreted as letters are converted to uppercase, unless shifted.
Backspace:
Erases the previous character. If done after an introducer stroke (like shift), it "erases"
the introducer only, canceling its mode.
This is the enter key. Return:
Think of tab as a shifted space. Tab:
* These introducer strokes have on-screen mode selectors that can be used instead of writing the stroke
shown. To use the mode selector, simply tap its button with your stylus.
Punctuation and Symbols
With Allegro, punctuation and symbols are written in symbol mode. You can turn on symbol mode either
by tapping the on-screen button labeled ".?!" or by writing the symbol mode introducer stroke on the
writing pad (a diagonal downward stroke that starts in the upper left corner). As a result, punctuation
and symbols require at least one additional tap or stroke before you write the symbol's stroke.
Some symbols must also be written in shiftmode. For these symbols, two taps or strokes are required
before you write the symbol's stroke: both symbol mode and shift mode must be enabled. Shift mode is
enabled by tapping the on-screen Shift button or by writing the shift modeintroducer stroke on the
writing pad (a vertical stroke that starts at the bottom center). Note that even in Caps Lock mode, shift
must be selected explicitly for these symbols.
Symbol mode, like shift mode, only applies to one character. After the stroke for the symbol is written,
the mode returns to its previous setting.
Page 33

The stroke charts for punctuation and symbols are given below.
* Before writing the stroke, first tap".?!" button, or write to enable symbol mode.
** Before writing the stroke, first tap both ".?!" and Shift buttons, or write to enable symbol and
shift modes.
Numbers
Allegro numbers are written in num lock mode. You can turn on num lock mode either by tapping the
on-screen button labeled "123" or by writing the num lock mode toggle stroke on the writing pad (a
diagonal upward stroke that starts in the lower left corner).Num lock is a toggle mode, which means that
it remains in effect until you explicitly return to normal text entry mode. Punctuation and symbols can be
entered while you are in num lock mode.
To exit num lock mode, you can tap the "abc" button or write the num lock toggle stroke again. This
returns you to normal, letter entry mode.
Page 34

The stroke chart for numbers is given below.
*Before writing any number strokes, first tap the "123" button, or write to toggle on numlock mode.
Accented Characters
Allegro also lets you enter accented characters for languages other than English. To do this, you first
need to enter accent mode, which is turned on either by tapping the on-screen button labeled "äõy´" or
by writing the accent mode introducer stroke on the writing pad (a diagonal downward stroke starting in
the upper right corner). After entering accent mode, you then enter the stroke for the letter. Finally you
enter the stroke for the accent itself.
Accent mode only applies to one character. After the strokes for the accented character are written, the
mode returns to its previous setting.
To enter a capitalized accented letter:
1. If you're not already in Caps Lock mode, enter shift mode (tap the on-screen Shift button, or
write the Shift introducer stroke).
2. Enter accent mode (tap the on-screen "äõy´" button, or write the accent introducer stroke).
3. Write the letter's stroke.
4. Write the accent's stroke.
Unknown character/accent combinations are interpreted as a "?" character.NOTE:
The stroke chart for accents is given below.
* Before writing the stroke for the accent, first tap the "äõy´" button, or write to enter accent mode,
then write the stroke for the letter (see ).
The Allegro Alphabet
Page 35

Allegro Tips
Some quick tips for successfully writing Allegro letters are given below:
- Make a round circle, and make the tail the same height as the circle (a long tail can cause confusion
a
with q).
- Complete the circle to distinguish from h.
b
- Avoid a hook at the start, which can make the letter look like e.
c
- Make the upstroke much higher than the initial circle, to avoid confusion with a.
d
- Start with a horizontal line, going from left to right.
e
- This variant form will probably need to be learned.
f
- Avoid looping the tail back, to avoid confusion with f, or t.
g
- A definite arch distinguishes this from b.
h
- Avoid hooks at the start and end of the downstroke.
i
- Avoid looping the tail back, to avoid confusion with t.
j
- The final downstroke can have a c shape.
k
- Making the upstroke and downstroke coincide avoids confusion with e.
l
- Starting m with an upstroke may require practice.
m
- Starting n with an upstroke may require practice.
n
- Start the circle at the topmost point.
o
- Complete the circle (p with a badly formed circle can look like f).
p
- The final rightward upstroke avoids confusion with g.
q
- Start with a vertical downstroke, then curve off the upstroke gradually to the right, finishing in a
r
rightward direction (to avoid confusion with v).
- Make the usual s-shape.
s
- Avoid an initial upward hook.
t
- Make the tail the same height as the u-shape.
u
- Two equal straight lines at a sharp angle, with the upstroke more vertical than horizontal, should
v
avoid confusion with r.
- Avoid an initial upward hook.
w
- This unusual way to make x takes some practice, but is quite unambiguous.
x
- Make the u-shape quite open to avoid confusion with g, and make the tail descend well below the
y
base of the u.
- Make the usual z-shape.
z
- This is the German character representing a double s.
Other Information
Warranty
Canadian Warranty
End-User License Agreement
FCC & Industry Canada Statements
Page 36

Warranty
RCA brand Gemstar eBook LIMITED WARRANTY
What your warranty covers:
Any defect in materials or workmanship.
For how long after your purchase:
90 day - Unit exchange, which includes parts and labor.
91 days to 1 year - Unit exchange, which includes parts only: you may pay the labor.
The warranty for rental units begins with the first rental or 45 days from the date of shipment to
the rental firm, whichever comes first.
What we will do:
During the initial 90 days:
Exchange your eBook with a new or, at our option, refurbished unit.
After the 90 days and within one year:
Exchange your eBook with a new or, at our option, refurbished unit.
We will charge you a flat exchange cost to replace a defective unit. This charge covers the labor
cost for its repairs.
How you get service:
For activation, account, or billing issues associated with eBook Editions, please call 1-800-386-
7389.
For all issues related to the use and operation of your eBook, please call 1-918-488-4151.
For warranty or repair issues for your eBook, call 1-877-632-6658 and have your unit’s date of
purchase and model/serial number ready. The model/serial number information is on the back of
your eBook.
A representative will troubleshoot your problem over the phone.
If the representative determines that you should receive a replacement eBook, you will be
provided with a Return Authorization (RA) number and the location of a nearby exchange point if
one exists. No returns will be accepted without the RA number.
If the representative determines that your eBook is defective they will arrange for its repair or
replacement.
Option I:
1. Provide your Discover, MasterCard or Visa account number and expiration date to your
phone representative. This is for security purposes only and your account will not be
charged at this time.
2. We will send you a replacement unit.
3. If you return the unit to us within 14 days from the date you were provided a RA number,
Page 37

Option II:
only items not covered by warranty will be charged to your account. If your unit is not
received within 14 days, the suggested retail value of the eBook will be charged to your
credit card. This amount will be credited, less than a $10 handling fee, if the unit is
subsequently received.
4. Ship your defective unit back to us using the replacement unit's carton. Shipping
instructions will be included on the carton along with your RA number which will allow you
to easily ship the unit back to us. Make sure you insure your shipment in case of damage or
loss. Include with the shipment:
Evidence of purchase date such as a bill of sale.
A brief note describing your eBook's problem.
Your name, address and phone number.
If the representative determines that your eBook is defective they will arrange for its
repair or replacement.
1. For a fee of $10.00, we will send a replacement eBook to your exchange point.
2. The exchange location will notify you of its arrival.
3. Take your unit and evidence of purchase date, such as a bill of sale, to the exchange
location and you will be provided the new or refurbished eBook. Please retain all
accessories.
4. If the repairs are covered by your warranty, you will not be billed.
Thomson assumes no responsibility for warranty shipments from the customer to the factory if
not shipped in the manner prescribed by Thomson.
To receive a replacement eBook after we have received your unit:
Write the RA number on the outside of the carton used to return the eBook. Make sure you
insure your shipment in case of damage or loss.
Carefully pack the unit using the original box and packing material if possible. Please retain all
accessories.
Include with the shipment:
1. Evidence of purchase date such as a bill of sale.
2. A brief note describing your eBook's problem.
3. Your name, address and phone number.
The representative will provide you with the address to mail a cashier's check or money order for
payment if there are any to of warranty labor or parts charges, and you elect not to use your
credit card.
After we receive your product, a new or refurbished unit will be shipped to you.
What your warranty does not cover:
Acts of nature, such as but not limited to lightning damage.
Adjustment of customer controls.
Damage from misuse or neglect.
Page 38

A unit that has been modified or incorporated into other products or is used for institutional or
other commercial purposes.
Units purchased or serviced outside the U.S.A.
Loss of programming.
Installation.
Shipping damage if the unit was not packed and shipped in the manner prescribed by Thomson.
Storage fees may be charged by the exchange point if you fail to pick up the replacement unit in a
timely manner.
Product Registration:
Please complete and mail the Product Registration Card packed with your eBook. It will make it
easier to contact you should it ever be necessary. The return of the card is not required for
warranty coverage.
How state law relates to warranty:
This warranty gives you specific legal rights and you may have other rights that vary from state to
state.
If you purchased your product outside the United States:
This warranty does not apply. See your dealer for warranty information.
Canadian Warranty
RCA brand Gemstar eBook CANADIAN LIMITED WARRANTY
What your warranty covers:
Any defect in materials or workmanship.
For how long after your purchase:
90 day - Unit exchange, which includes parts and labour.
91 days to 1 year - Unit exchange, which includes parts only: you may pay the labour.
The warranty for rental units begins with the first rental or 45 days from the date of shipment to
the rental firm, whichever comes first.
What we will do:
During the initial 90 days:
Exchange your eBook with a new or, at our option, refurbished unit.
After the 90 days and within one year:
Exchange your eBook with a new or, at our option, refurbished unit.
Page 39

We will charge you a flat exchange cost to replace a defective unit. This charge covers the labour
cost for its repairs.
How you get service:
For activation, account, or billing issues associated with eBook Editions, please call 1-800-386-
7389.
For all issues related to the use and operation of your eBook, please call 1-918-488-4151.
For warranty or repair issues for your eBook, call 1-877-632-6658 and have your unit’s date of
purchase and model/serial number ready. The model/serial number information is on the back of
your eBook.
A representative will troubleshoot your problem over the phone.
If the representative determines that you should receive a replacement eBook, you will be
provided with a Return Authorization (RA) number and the return address. No returns will be
accepted without the RA number.
If the representative determines that your eBook should be returned they will arrange for its repair
or replacement.
Option I:
1. Provide your MasterCard or Visa account number and expiration date to your phone
representative. This is for security purposes only and your account will not be charged at
this time.
2. We will send you a replacement unit.
3. If you return the unit to us within 14 days from the date you were provided a RA number,
only items not covered by warranty will be charged to your account. If your unit is not
received within 14 days, the suggested retail value of the eBook will be charged to your
credit card. This amount will be credited back to you, less than a $15 handling fee, if the
unit is subsequently received.
4. Ship your defective unit back to us using the replacement unit's carton. Shipping
instructions will be included on the carton along with your RA number which will allow you
to easily ship the unit back to us. Make sure you insure your shipment in case of damage or
loss. Include with the shipment:
Evidence of purchase date such as a bill of sale.
A brief note describing your eBook's problem.
Your name, address and phone number.
Option II:
To receive a replacement eBook after we have received your unit:
1. Write the RA number on the outside of the carton used to return the eBook. Make sure
you insure your shipment in case of damage or loss.
2. Carefully pack the unit using the original box and packing material if possible. Please retain
all accessories.
3. Include with the shipment:
Evidence of purchase date such as a bill of sale.
A brief note describing your eBook's problem.
Your name, address and phone number.
Page 40

4. The representative will provide you with the address to mail a cashier's check or money
order for payment if there are any out of warranty labour or parts charges, and you elect not
to use your credit card.
5. After we receive your product, a new or refurbished unit will be shipped to you.
Thomson assumes no responsibility for warranty shipments from the customer to the factory if
not shipped in the manner prescribed by Thomson.
What your warranty does not cover:
Acts of nature, such as but not limited to lightning damage.
Adjustment of customer controls.
Damage from misuse or neglect.
A unit that has been modified or incorporated into other products or is used for institutional or
other commercial purposes.
Units purchased or serviced outside Canada.
Loss of programming.
Installation.
Shipping damage if the unit was not packed and shipped in the manner prescribed by Thomson.
Product Registration:
Please complete and mail the Product Registration Card packed with your eBook. It will make it
easier to contact you should it ever be necessary. The return of the card is not required for
warranty coverage.
How Provincial Laws relate to warranty:
This warranty gives you specific legal rights and you may have other rights that vary from Province
to Province.
If you purchased your product outside Canada:
This warranty does not apply. See your dealer for warranty information.
End-User License Agreement
IMPORTANT--READ CAREFULLY:
This End-User License Agreement ("Agreement") is a legal
contract between you and Gemstar eBook Group Limited, Inc. ("Vendor") for eBook™ System
Software,which includes computer software embedded in the electronic reader device and, as
applicable, associated media, personal computer software intended for use in connection with the
electronic reader device, printed materials, and "online" or electronic documentation (collectively
referred to as the "Software Application").
BY USING, INSTALLING, OR OTHERWISE OPERATING THE SOFTWARE APPLICATION
YOU AGREE TO BE BOUND BY THE TERMS OF THIS AGREEMENT, INCLUDING THE
Page 41

WARRANTY DISCLAIMERS, LIMITATIONS OF LIABILITY AND TERMINATION
PROVISIONS BELOW,
and the provisions relating to third party purchases. IF YOU DO NOT
AGREE TO THE TERMS OF THIS AGREEMENT, DO NOT USE, INSTALL OR OTHER WISE
OPERATE THE SOFTWARE APPLICATION. IF YOU HAVE BEGUN THE PROCESS OF
INSTALLING THE SOFTWARE APPLICATION AND DO NOT AGREE TO THE TERMS OF
THIS AGREEMENT, CANCEL AND EXIT NOW.
Subject to the terms of the manufacturer's limited warranty and subject to the retailer's refund policy, if
you do not agree to the terms of this agreement, you may participate in the retailer's refund policy for the
Software Application and the electronic reader device by returning the device including any media and
materials in an unused condition within thirty (30) days of purchase to the place of purchase.
License Terms
Following acceptance of this Agreement, you may execute, install and use one (1) registered copy of the
Software Application for your own personal, individual use.
Use on a reader device.
You may use the single registered copy of the Software Application only with
the electronic reader device and electronic distribution system, authorized by Vendor.
Use on a PC.
You may install the single registered copy on one hard disk or other storage device for
one computer, and you may access and use the Software Application at that location so long as only one
copy of the Software Application is in operation. If you are a private business rather than an individual,
you may authorize the personnel associated with your business to use the Software Application, but only
one person at a time, on one computer at a time. The primary user of the computer on which the
Software Application is installed may make a second copy for his or her exclusive use on a backup or
portable computer, so long as each registered copy of the Software Application is used on only one
computer at a time.
OTHER LIMITATIONS
You may not rent, lease or lend the Software Application.
You may not reverse engineer, decompile, or disassemble the Software Application, except and only to
the extent that such activity is expressly permitted by applicable law notwithstanding this limitation.
Vendor may provide you with support services related to the Software Application ("Support
Services"). Use of Support Services isgoverned by Vendor policies and programs described in the user
manual, in "online" documentation, and/or in other Vendor-provided materials. Any supplemental
software code provided to you as part of the Support Services shall be considered part of the Software
Application and subject to the terms and conditions of this Agreement. With respect to technical
information you provide to Vendor as part of the registration of your license to the Software Application
or in connection with the Support Services, Vendor may use such information for its business purposes,
including for product support and development.
You may permanently transfer all of your rights under this Agreement, provided that you retain no
copies, you transfer all of the Software Application (including all component parts, the reader device, the
media and printed materials, any upgrades and your registration), and the recipient agrees to the terms of
this Agreement.
You may not translate, reverse engineer, decompile, disassemble or otherwise create derivative works
of the Software Application or attempt in any way to obtain the Software Application source code.
Page 42

You may not modify the Software Application or any portion thereof, or merge all or any part of the
Software Application with another program.
You may not alter, obscure or remove any labels or proprietary marks or notices on any portion of the
electronic reader device or on any portion of the Software Application.
Without prejudice to any other rights, Vendor may terminate this Agreement if you fail to comply with
the terms and conditions of this Agreement or if you violate Vendor's "Acceptable Use Policy" which
Vendor posts at . In such event, you must destroy all copies of the
http://www.ebook-gemstar.com
Software Application and all of its component parts, and Vendor may suspend or deactivate your use of
the Software Application with or without notice.
CATALOG AND THIRD PARTY PURCHASES
Online Purchases:
Purchases via eBook device using the Catalog.
The eBook requires access to an analog telephone
line for download of content as well as access to a power source for battery recharging. In addition you
must register and activate your eBook and provide a valid credit card that will be charged for content
purchases. It is important that you maintain a valid credit card. You must be at least 18 years of age to
place an order. All purchases are billed to your credit card on a per-transaction basis.
Purchases via Personal Computer.
All purchases of goods through an online store, using the Librarian
Software, are subject of the terms and conditions of the respective store accessed via the Internet.
Under no circumstances shall Gemstar eBook Group Limited be liable for any claim related to such a
purchase.
Third Party Goods:
Gemstar eBook Group Limited is not the publisher, producer, manufacturer or supplier of any of the
content, merchandise, and services provided through the catalog. All content, merchandise, and services
are supplied by third parties. Any opinions, advice, statements, services, offers, or other information
expressed or made available by third parties, are those of the respective authors or distributors and not
of Gemstar eBook Group Limited. Gemstar eBook Group Limited does not guarantee the accuracy,
completeness, or usefulness of any third party goods, not its merchantability or fitness for any particular
purpose. Under no circumstances shall Gemstar eBook Group Limited or its affiliates, or any of their
officers, directors, employees, or agents are liable for any loss, damage or harm caused by a User's
reliance on information obtained through the catalog. It is the responsibility of the User to evaluate the
information, opinion, advice, or other Content available through the catalog.
Termination of Third Party Purchase and Catalog Usage:
Gemstar eBook Group Limited may terminate User's access, or suspend any User's access, without
notice, for any conduct that Gemstar eBook Group Limited, in its sole discretion, believes is in violation
of any applicable law or is harmful to the interests of another User, a third-party Provider or a service
provider.
Usage by Minors:
Gemstar eBook Group Limited cannot prohibit minors from using the eBook and/or the catalog.
Page 43

Gemstar eBook Group Limited must rely on parents, guardians and those responsible for supervising
minors to decide which materials are appropriate for such minors to view and/or purchase. Gemstar
eBook Group Limited requires that all purchases be made by individuals 18 years of age or older.
PROPRIETARY RIGHTS
Copyright.
All title and copyrights in and to the Software Application (including, without limitation, any
images, photographs, animations, video, audio, music, text, and "applets" incorporated into the Software
Application), the accompanying media and printed materials, and any copies of the Software Product
are owned by Vendor or its suppliers. The Software Application is protected by copyright laws and
international treaty provisions. Therefore, you must treat the Software Application like any other
copyrighted material, subject to the provisions of this Agreement.
Catalog Information.
User acknowledges that the catalog may contain information, data, software,
photographs, videos, typefaces, graphics, music, sounds, and other material (collectively "Content") that
are protected by copyrights, trademarks, trade secrets, or other proprietary rights, and that these rights
are valid and protected in all forms, media and technologies existing now or hereinafter developed. User
may not modify, remove, delete, augment, add to, publish, transmit, participate in the transfer or sale of,
create derivative works from, or in any way exploit any of the Content, in whole or in part. User may not
upload, post, reproduce, or distribute in any way Content protected by copyright, or other proprietary
right, without obtaining permission of the owner of the copyright or other proprietary right. The
unauthorized submission or distribution of copyrighted or other proprietary Content is illegal and could
subject the User to criminal prosecution as well as personal liability for damages in a civil suit. User will
be liable for any damage resulting from any infringement of copyrights or proprietary rights, or from any
other harm arising from such submission.
U.S. Government Restricted Rights.
The Software Application and documentation are provided with
RESTRICTED RIGHTS. Use, duplication, or disclosure by the Government is subject to restrictions as
set forth in subparagraph (c)(1)(ii) of the Rights in Technical Data and Computer Software clause at
DFARS 252.227-7013 or subparagraphs (c)(1) and (2) of the Commercial Computer Software Restricted Rights at 48 CFR 52.227-19, as applicable. Manufacturer for such purpose is Gemstar
eBook Group Limited, Inc.
Submissions.
Should you decide to transmit to Vendor's website or to any website supporting the
electronic distribution authorized by VENDOR by any means or by any media any materials or other
information (including, without limitation, ideas, concepts or techniques for new or improved services
and products), whether as information, feedback, data, questions, comments, suggestions or the like,
you agree such submissions are unrestricted and shall be deemed non-confidential and you automatically
grant Vendor and its assigns a non-exclusive, royalty-free, worldwide, perpetual, irrevocable license,
with the right to sublicense, to use, copy, transmit, distribute, create derivative works of, display and
perform the same.
DISCLAIMER OF WARRANTY
THIS SOFTWARE AND THE ACCOMPANYING FILES ARE PROVIDED "AS IS".
VENDOR AND ITS SUPPLIERS DO NOT AND CANNOT WARRANT THE
PERFORMANCE OR RESULTS YOU MAY OBTAIN BY USING THE SOFTWARE OR
SUCH FILES. VENDOR AND ITS SUPPLIERS MAKE NO WARRANTIES, EXPRESS OR
IMPLIED, AS TO TITLE OR INFRINGEMENT OF THIRD-PARTY RIGHTS,
MERCHANTABILITY OR FITNESS FOR ANY PARTICULAR PURPOSE.
Page 44

Good data processing procedure dictates that any program be thoroughly tested with noncritical data before relying on it. The user must assume the entire risk of using the Software
Application. ANY LIABILITY OF VENDOR FOR A DEFECTIVE COPY OF THE
SOFTWARE APPLICATION WILL BE LIMITED EXCLUSIVELY TO REPLACEMENT
OF YOUR COPY OF THE SOFTWARE APPLICATION WITH ANOTHER COPY OR
REFUND OF ANY INITIAL LICENSE FEE VENDOR RECEIVED FROM YOU FOR THE
DEFECTIVE COPY OF THE SOFTWARE APPLICATION. IN NO EVENT WILL
VENDOR OR ITS SUPPLIERS BE LIABLE TO YOU FOR ANY CONSEQUENTIAL,
INCIDENTAL OR SPECIAL DAMAGES, INCLUDING ANY LOST PROFITS OR LOST
SAVINGS, EVEN IF A VENDOR REPRESENTATIVE HAS BEEN ADVISED OF THE
POSSIBILITY OF SUCH DAMAGES, OR FOR ANY CLAIM BY ANY THIRD PARTY.
User expressly agrees that use of the catalog is at User's sole risk. Neither Gemstar eBook
Group Limited, Inc., nor its affiliates, nor any of their officers, directors, or employees, agents,
third-party content providers, merchants, sponsors, licensors (collectively, "Providers"), or
the like, warrant that the catalog will be uninterrupted or error-free; nor do they make any
warranty as to the results that may be obtained from the use of the catalog or as to the
accuracy, reliability, or currency of any information content, service, or merchandise provided
through the catalog.
THE CATALOG IS PROVIDED BY GEMSTAR EBOOK GROUP LIMITED, INC. ON AN
"AS IS" AND "AS AVAILABLE" BASIS. GEMSTAR EBOOK GROUP LIMITED
MAKES NO REPRESENTATIONS OR WARRANTIES OF ANY KIND, EXPRESS OR
IMPLIED, AS TO THE OPERATION OF THE CATALOG, THE INFORMATION,
CONTENT, MATERIALS OR PRODUCTS, INCLUDED IN THE CATALOG. TO THE
FULL EXTENT PERMISSIBLE BY APPLICABLE LAW, GEMSTAR EBOOK GROUP
LIMITED DISCLAIMS ALL WARRANTIES, EXPRESS OR IMPLIED, INCLUDING BUT
NOT LIMITED TO, IMPLIED WARRANTIES OF MERCHANTABILITY AND FITNESS
FOR A PARTICULAR PURPOSE. GEMSTAR EBOOK GROUP LIMITED WILL NOT BE
LIABLE FOR ANY DAMAGES OF ANY KIND ARISING FROM THE USE OF THE
CATALOG, INCLUDING BUT NOT LIMITED TO DIRECT, INDIRECT, INCIDENTAL
PUNITIVE AND CONSEQUENTIAL DAMAGES. NO ORAL ADVICE OR WRITTEN
INFORMATION GIVEN BY GEMSTAR EBOOK GROUP LIMITED NOR ITS
AFFILIATES, NOR ANY OF THEIR OFFICERS, DIRECTORS, EMPLOYEES, AGENTS,
PROVIDERS, OR THE LIKE, SHALL CREATE A WARRANTY; NOR SHALL USER
RELY ON ANY SUCH INFORMATION OR ADVICE.
Under no circumstances shall Gemstar eBook Group Limited or any other party involved in
creating, producing, or distributing the catalog be liable for any direct, indirect, incidental,
special, or consequential damages that result from the use of or inability to use the catalog,
including but not limited to reliance by a User on any information obtained from Gemstar
eBook Group Limited or that result from mistakes, omissions, interruptions, deletion of files,
errors, defects, viruses, delays in operation or transmission, or any failure of performance,
whether or not resulting from acts of God, communications failure, theft, destruction, or
unauthorized access to Gemstar eBook Group Limited records, programs, or services. User
hereby acknowledges that this paragraph shall apply to all content, merchandise, and services
available through the catalog.
Some states or jurisdictions do not allow the exclusion or limitation of incidental, consequential
or special damages, or the exclusion of implied warranties or limitations on how long a given
warranty may last, so the above limitations may not apply to you.
Page 45

GOVERNING LAW
This Agreement shall be governed by the laws of the State of California.
DISPOSAL WARNING:
The rechargeable battery in the eBook could explode if the unit is disposed
of in high temperatures. It will explode if disposed of in fire.
FCC & Industry Canada Statements
U.S. Federal Communication Commission (FCC) Statement
This device complies with part 15 of the FCC Rules. Operation is subject to the following two
conditions: (1) This device may not cause harmful interference, and (2) this device must accept any
interference received, including interference that may cause undesired operation.
This equipment generates, uses, and can radiate radio frequency energy and, if not installed and used in
accordance with the instructions, may cause harmful interference to radio communications. It has been
tested and found to comply with the limits for a Class B digital device pursuant to Part 15 of the FCC
Rules. These limits are designed to provide reasonable protection against harmful interference in a
residential installation. However, there is no guarantee that interference will not occur in a particular
installation. If this equipment does cause harmful interference to radio or television reception, which can
be determined by turning the equipment off and on, the user is encouraged to try to correct the
interference by one or more of the following measures:
Reorient or relocate the receiving antenna.
Increase the separation between the eBook and the receiver.
Connect the eBook power adapter to an outlet on a circuit different from that to which the
receiver is connected.
Consult an experienced radio/TV technician for help.
Any unauthorized changes or modifications to the eBook could void the user's authority to operate the
equipment.
Note: This equipment complies with Part 68 of the FCC Rules. On the rear panel of this equipment is a
label that contains, among other information, the FCC Registration Number and Ringer Equivalence
Number (REN)for this equipment. You must, upon request, provide this information to your telephone
company.
Connection to the telephone network should be made by using standard modular telephone jacks, type
RJ11C. The RJ11C plugs and/or jacks must comply with FCC Part 68 rules.
If your telephone equipment causes harm to the telephone network, the Telephone Company may
discontinue your service temporarily. If possible, they will notify you in advance. But if advance notice
isn't practical, you will be notified as soon as possible. You will be informed of your right to file a
complaint with the FCC.
Your telephone company may make changes in its facilities, equipment, operations or procedures that
could affect the proper functioning of your equipment. If they do, you will be notified in advance to give
you an opportunity to maintain uninterrupted telephone service.
This equipment may not be used on coin service provided by the telephone company. Connection to
Page 46

party lines is subject to state tariff.
If you experience trouble with this telephone equipment, please contact Thomson Customer Service at
the address and phone number listed below. The telephone company may ask that you disconnect this
equipment from the network until the problem has been corrected or until you are sure that the
equipment is not malfunctioning.
Do not disassemble this equipment. It does not contain any user-serviceable parts.
Model: RCA brand Gemstar eBook REB1100
Responsible Party: Thomson Consumer Electronics
Address: 10330 North Meridian Street, Indianapolis,IN 46290 U.S.
1-800-386-7389
Industry Canada (IC) Statement
This digital apparatus does not exceed the Class B limits for radio noise emissions from digital apparatus
set out in the radio interference regulations of Industry Canada.
NOTICE: The Industry Canada Label identifies certified equipment. This certification means that the
equipment meets certain telecommunications network protective, operational and safety requirements, as
prescribed in the appropriate terminal equipment requirement document(s). The Department does not
guarantee the equipment will operate to the user's satisfaction.
Before installing this equipment, users should ensure that it is permissible to be connected to the facilities
of the local telecommunications company. The equipment must also be installed using an acceptable
method of connection. In some cases, the company's inside wiring associated with a single line individual
service may be extended by means of a certified connector assembly (telephone extension cord). The
customer should be aware that compliance with the above conditions may not prevent degradation of
service in some situations.
Repairs to certified equipment should be made by authorized Canadian maintenance facility designated
by the supplier. Any repairs or alterations made by the user to this equipment, or equipment
malfunctions, may give the telecommunications company cause to request the user to disconnect the
equipment.
Users should ensure for their own protection that the electrical ground connections of the power utility,
telephone lines and internal metallic water pipe system, if present, are connected together. This
precaution may be particularly important in rural areas.
CAUTION: Users should not attempt to make such connections themselves, but should contact the
appropriate electric inspection authority, or electrician, as appropriate.
The Ringer Equivalence Number (REN) assigned to each terminal device provides an indication of the
maximum number of terminals allowed to be connected to a telephone interface. The termination on an
Page 47

interface may consist of any combination of devices subject only to the requirement that the sum of the
Ringer Equivalence Numbers of all the devices does not exceed 5.
Model: RCA brand Gemstar eBook REB1100
Responsible Party: Thomson Consumer Electronics Canada, Inc.
Address: 6200 Edwards Blvd., Mississauga,ON, L5T 2V7 Canada
1-905-405-3023
TOCOM 1567074A
 Loading...