


COLOR TV OW
Important Information
I
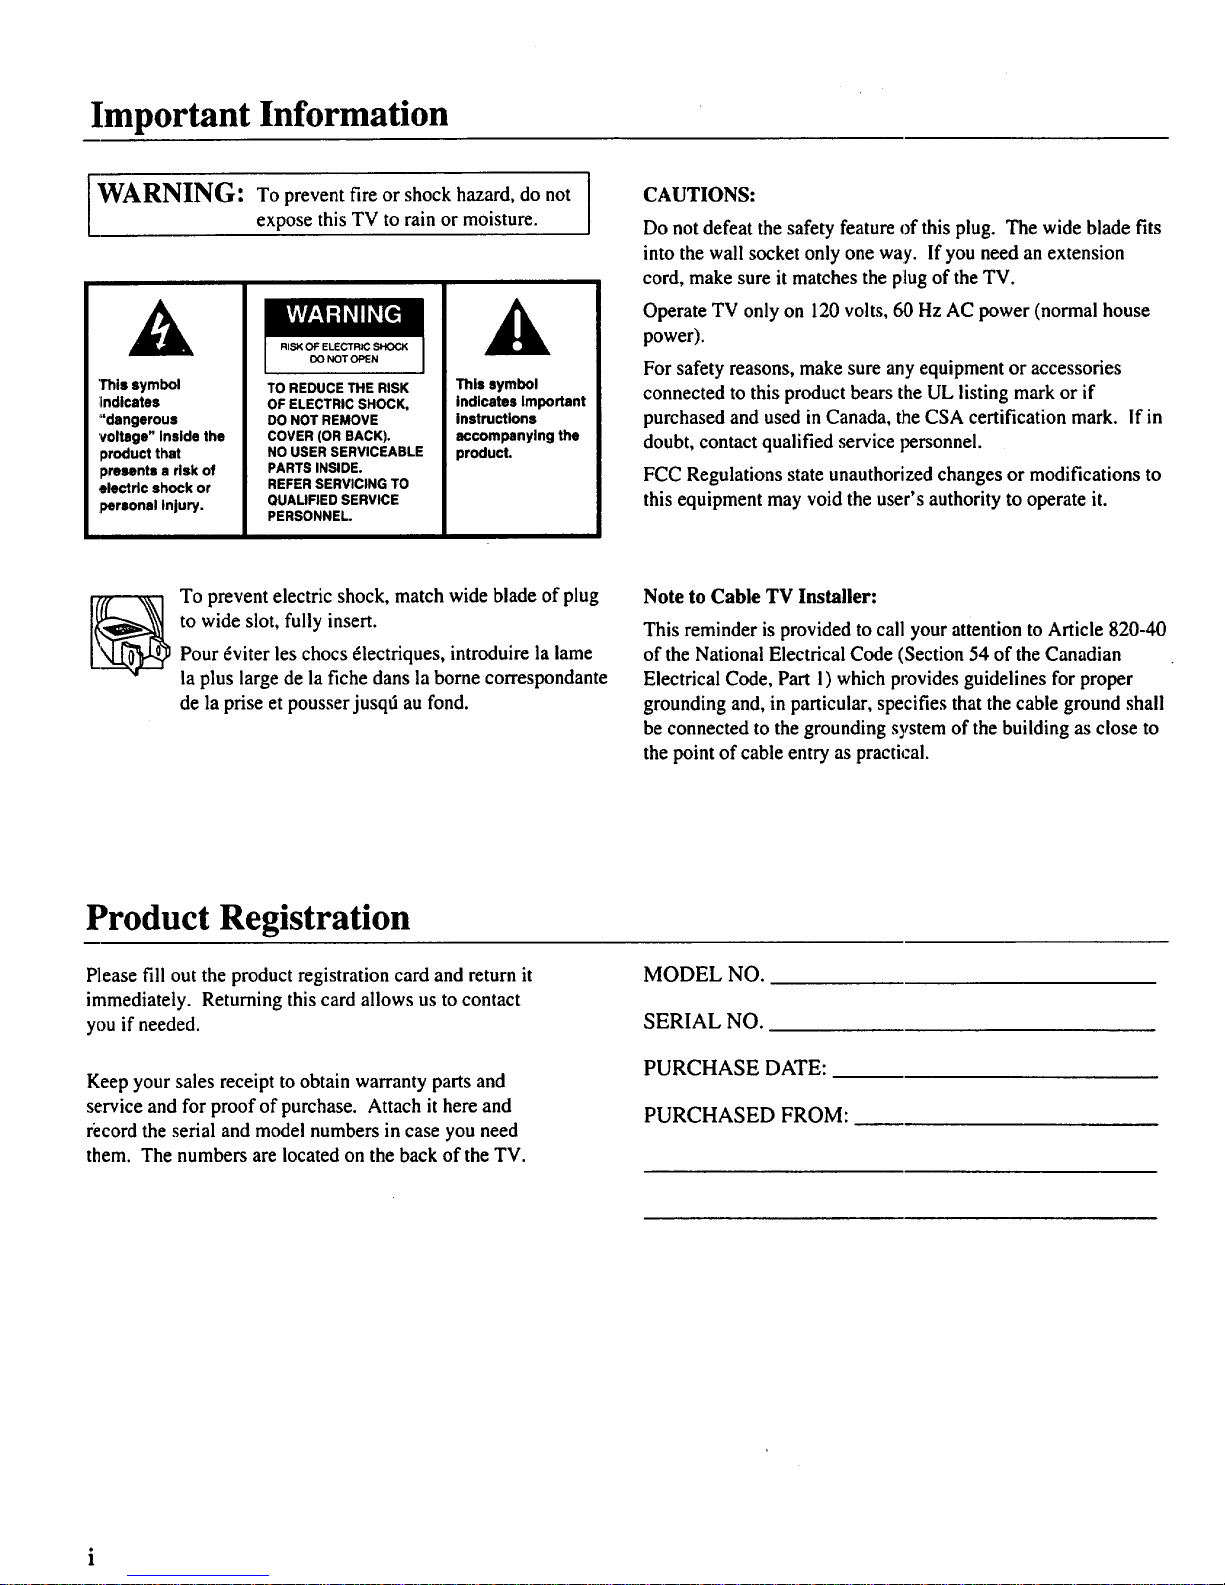
WARNING: To prevent fire or shock hazard, do not I
expose this TV to rain or moisture.
I
A
'This symbol
:indicates
"dangerous
voltage" Inside the
product that
presents a risk of
electric shock or
personal Injury.
RISK OF ELECTRIC SHOCK
OO NOTOPEN
TO REDUCE THE RISK
OF ELECTRIC SHOCK,
DO NOT REMOVE
COVER (OR BACK).
NO USER SERVICEABLE
PARTS INSIDE.
REFER SERVICING TO
QUALIFIED SERVICE
PERSONNEL.
A
This symbol
indicates Important
Instructions
accompanying the
product.
CAUTIONS:
Do not defeat the safety feature of this plug. The wide blade fits
into the wall socket only one way. If you need an extension
cord, make sure it matches the plug of the TV.
Operate TV only on 120 volts, 60 Hz AC power (normal house
power).
For safety reasons, make sure any equipment or accessories
connected to this product bears the UL listing mark or if
purchased and used in Canada, the CSA certification mark. If in
doubt, contact qualified service personnel.
FCC Regulations state unauthorized changes or modifications to
this equipment may void the user's authority to operate it.
To prevent electric shock, match wide blade of plug
to wide slot, fully insert.
Pour _viter les chocs _lectriques, introduire la lame
la plus large de la fiche dans la borne correspondante
de la prise et pousser jusqti au fond.
Note to Cable TV Installer:
This reminder is provided to call your attention to Article 820-40
of the National Electrical Code (Section 54 of the Canadian
Electrical Code, Part I) which provides guidelines for proper
grounding and, in particular, specifies that the cable ground shall
be connected to the grounding system of the building as close to
the point of cable entry as practical.
Product Registration
Please fill out the product registration card and return it
immediately. Returning this card allows us to contact
you if needed.
MODEL NO.
SERIAL NO.
Keep your sales receipt to obtain warranty parts and
service and for proof of purchase. Attach it here and
record the serial and model numbers in case you need
them. The numbers are located on the back of the TV.
PURCHASE DATE:
PURCHASED FROM:

Introduction
Thank you for choosing RCA
Yourtelevision is designed for long
life:and superior operation. Despite
its sophistication, your new TV is
amazingly simple to operate because
it has so many automatic features.
Table of Contents
Getting Started
First-Time Operation ................................................................... 2-3
Controlling Your TV
Front Panel and Headphone Jack .................................................... 4
On-Screen Displays ........................................................................ 5
Remote Operation ........................................................................ 6-7
Operating Features
FM Radio Operation ........................................................................ 8
VIDEO Menu .................................................................................. 9
Closed Captioning .......................................................................... 0
SETUP Menu ................................................................................ l
Sleep Timer Operation ................................................................... 2
Alarm Timer Operation ................................................................. 3
Autoprogramming Channel Memory ............................................ 4
Editing Channel Memory ....... ,....................................................... 14
Connecting Your TV
Antenna/Cable Information .......................................................... 15
Dipole Antenna Connection ........................................................... !6
Home Antenna Connections ......................................................... 17
Cahle-TV Connections .................................................................. 18
Cable-TV Operation ..................................................... ,................ 19
Caring for Your TV
Cleaning & Care ........................................................................... 20
Accessories
Accessories ................................................................................... 2 !
Order Form .............................................................................. 21-22
Trouble Checks .....................................................................23-24
Limited Warranty .....................................................................25
Getting Started
First-Time Operation
The steps below will help you get your TV connected and working quickly.
Page numbers are also listed for more details.
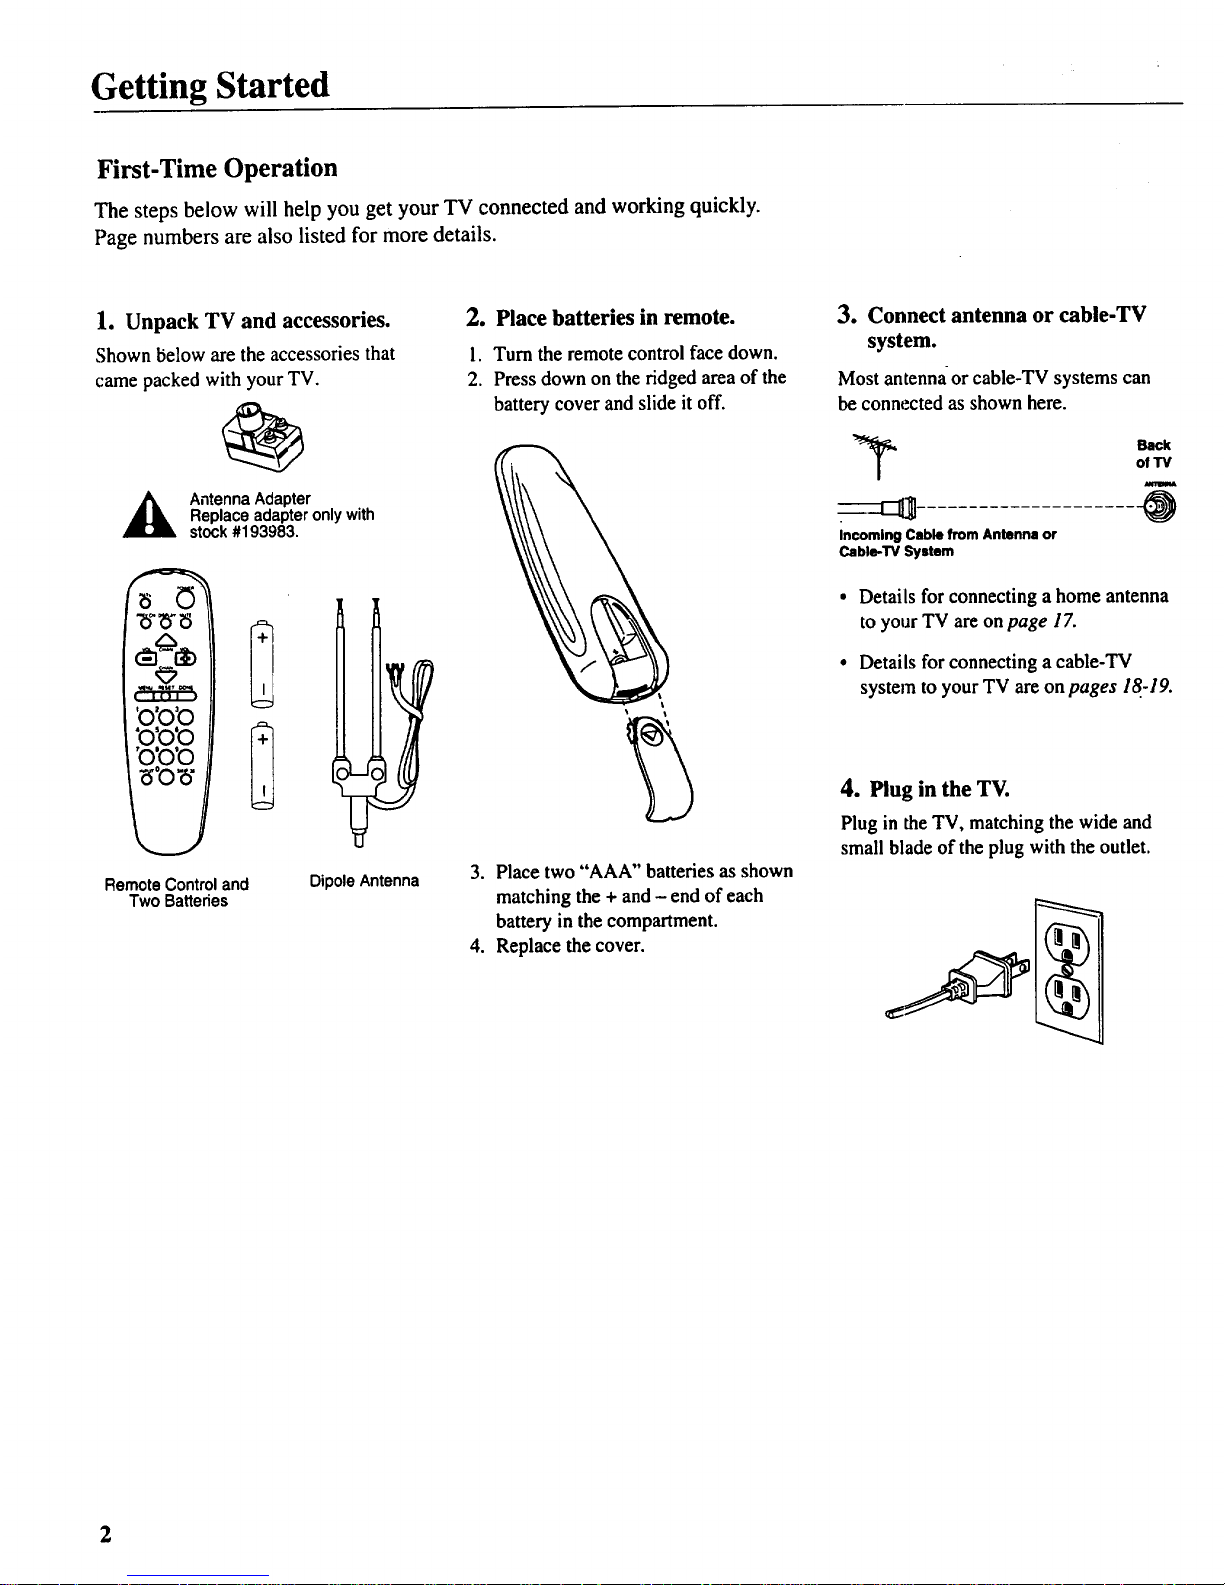
1. Unpack TV and accessories.
Shown below are the accessories that
came packed with your TV.
,_ Antenna Adapter
Replace adapter only with
stock #193983.
'o'o'o
'o'o'o
Remote Control and
Two Batteries
Dipole Antenna
2. Place batteries in remote.
1. Turn the remote control face down.
2. Press down on the ridged area of the
battery cover and slide it off.
3. Place two "AAA" batteries as shown
matching the + and - end of each
battery in the compartment.
4. Replace the cover.
3. Connect antenna or cable-TV
system.
Most antenna or cable-TV systems can
be connected as shown here.
Incoming Cable from Antenna or
Cable-TV System
Back
of 13/
@
Details for connecting a home antenna
to your TV are on page 17.
Details for connecting a cable-TV
system to your TV are on pages 18-19.
4. Plug in the TV.
Plug in the TV, matching the wide and
small blade of the plug with the outlet.
Getting Started
First-Time Operation
5. Turn on TV and place channels
in memory.
Your TV is designed to place active
channels into your TV's memory the first
time you turnit on.
000
_ _eMrr
'o'o'o
'o'o'o
'o'o'o
Press POWER on the TV or remote to
turn on the TV.
The TV automatically cycles through
all channel numbers and places active
channels into the channel memory.
When your TV is finished, it tunes to
the lowest channel number in its
channel memory.
6. Edit the channel memory.
You can add and erase channels from
memory as desired.
• Press MENU repeatedly to highlight
SETUP. Then press + to select the
SETUP menu.
• Press MENU repeatedly to highlight
EDIT CHANNELS.
Press MENU
repeatedly to
see 2nd setup
menu.
Press + to select EDIT CHANNELS.
Select the desired channel number by
pressing the CHANNEL up or down
button or by pressing two number
buttons.
7. Set the clock.
• Press MI:NU repeatedly until SETUP is
highlighted. Then press + to select the
SETUP raenu.
• Repeatedly press MENU to select
CLOCK
• Pressand hold - to set the correct hour.
Then press and hold + to set the correct
minutes
• Press DONE to remove the menu from
the screen.
• Then press + to add a channel, or
press- to erase a channel. Details
are on page 14.
• Press DONE to remove the menu from
the screen.
Controlling Your TV
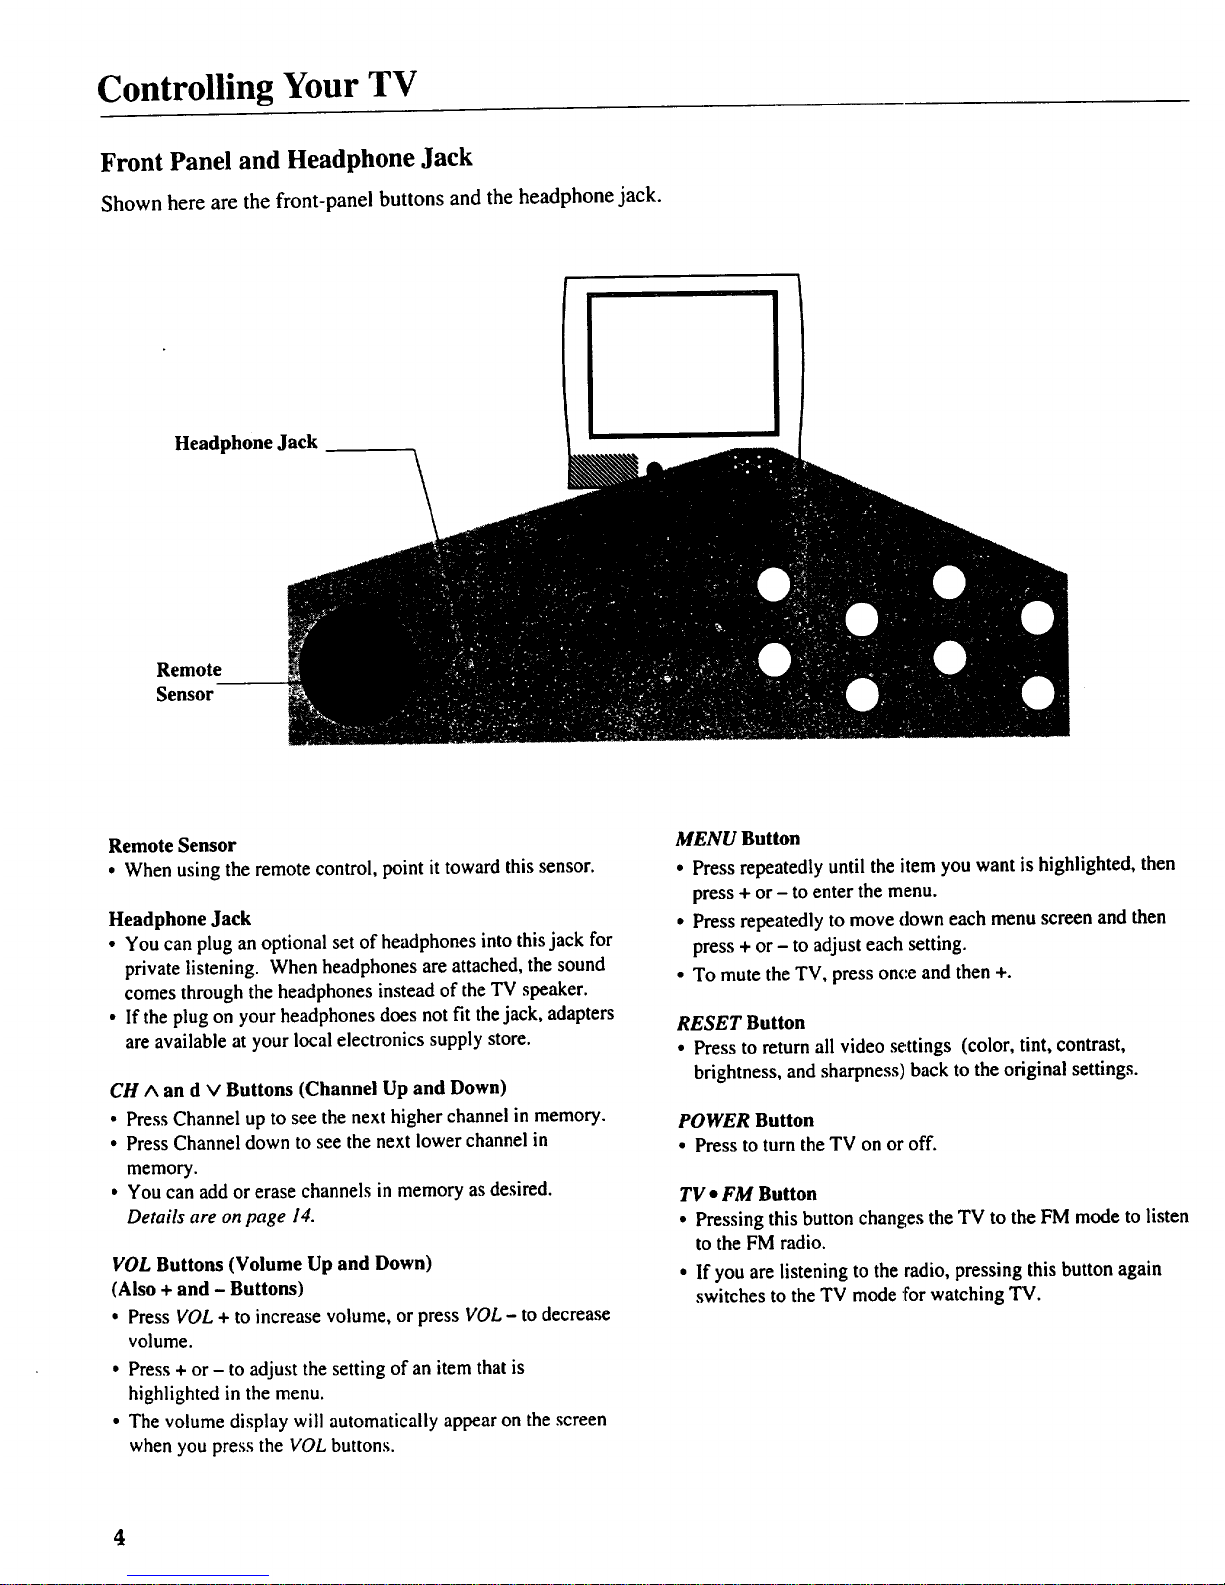
Front Panel and Headphone Jack
Shown here are the front-panel buttons and the headphone jack.
Headphone Jack
Remote
Sensor
Remote Sensor
• When using the remote control, point it toward this sensor.
Headphone Jack
• You can plug an optional set of headphones into this jack for
private listening. When headphones are attached, the sound
comes through the headphones instead of the TV speaker.
• If the plug on your headphones does not fit the jack, adapters
areavailable at your local electronics supply store.
CH ^ an d v Buttons (Channel Up and Down)
• Press Channel up to see the next higher channel in memory.
• Press Channel down to see the next lower channel in
memory.
• You can add or erase channels in memory as desired.
Details are on page 14.
VOL Buttons (Volume Up and Down)
(Also + and - Buttons)
• Press VOL + to increase volume, or press VOL - to decrease
volume.
• Press + or - to adjust the setting of an item that is
highlighted in the menu.
• The volume display will automatically appear on the screen
when you press the VOL buttons.
MENU Button
• Press repeatedly until the item you want is highlighted, then
press + or - to enter the menu.
• Press repeatedly to move clown each menu screen and then
press + or - to adjust each setting.
• To mute the TV, press once and then +.
RESET Button
• Press to return all video settings (color, tint, contrast,
brightness, and sharpness) back to the original settings.
POWER Button
• Press to turn the TV on or off.
TV * FM Button
• Pressing this buttonchanges the TV to the FM mode to listen
to the FM radio.
• If you are listening to the radio, pressing this button again
switches to the TV mode for watching TV.
4

Controlling Your TV
On-Screen Displays
(_)Sleel
(_) Alarm Timer.
FM Radio
Channel Number
(4_ Time
MUTE
d) Sleep Timer
This display appears when the sleep timer has been set.
Details are on page 12.
®
Time
This display appea_ after the clock is set whenever you
change channels or press DISPLAY on the remote.
®
Alarm Timer
This display appears when the alarm timer has been set.
Details are on page 13.
Q Channel Number
This display appears whenever you change channels or
press DISPLA Y on the remote.
_) MUTE
This display appears when the TV's sound is muted. Press
MUTEon the remote or select it through the main menu.
DetaiLv are on page 6.
®
FM Radio
This display appears whenever you change stations or
press DISPLAY while in the FM radio mode. Details are
on page 8.
5
Controlling Your TV
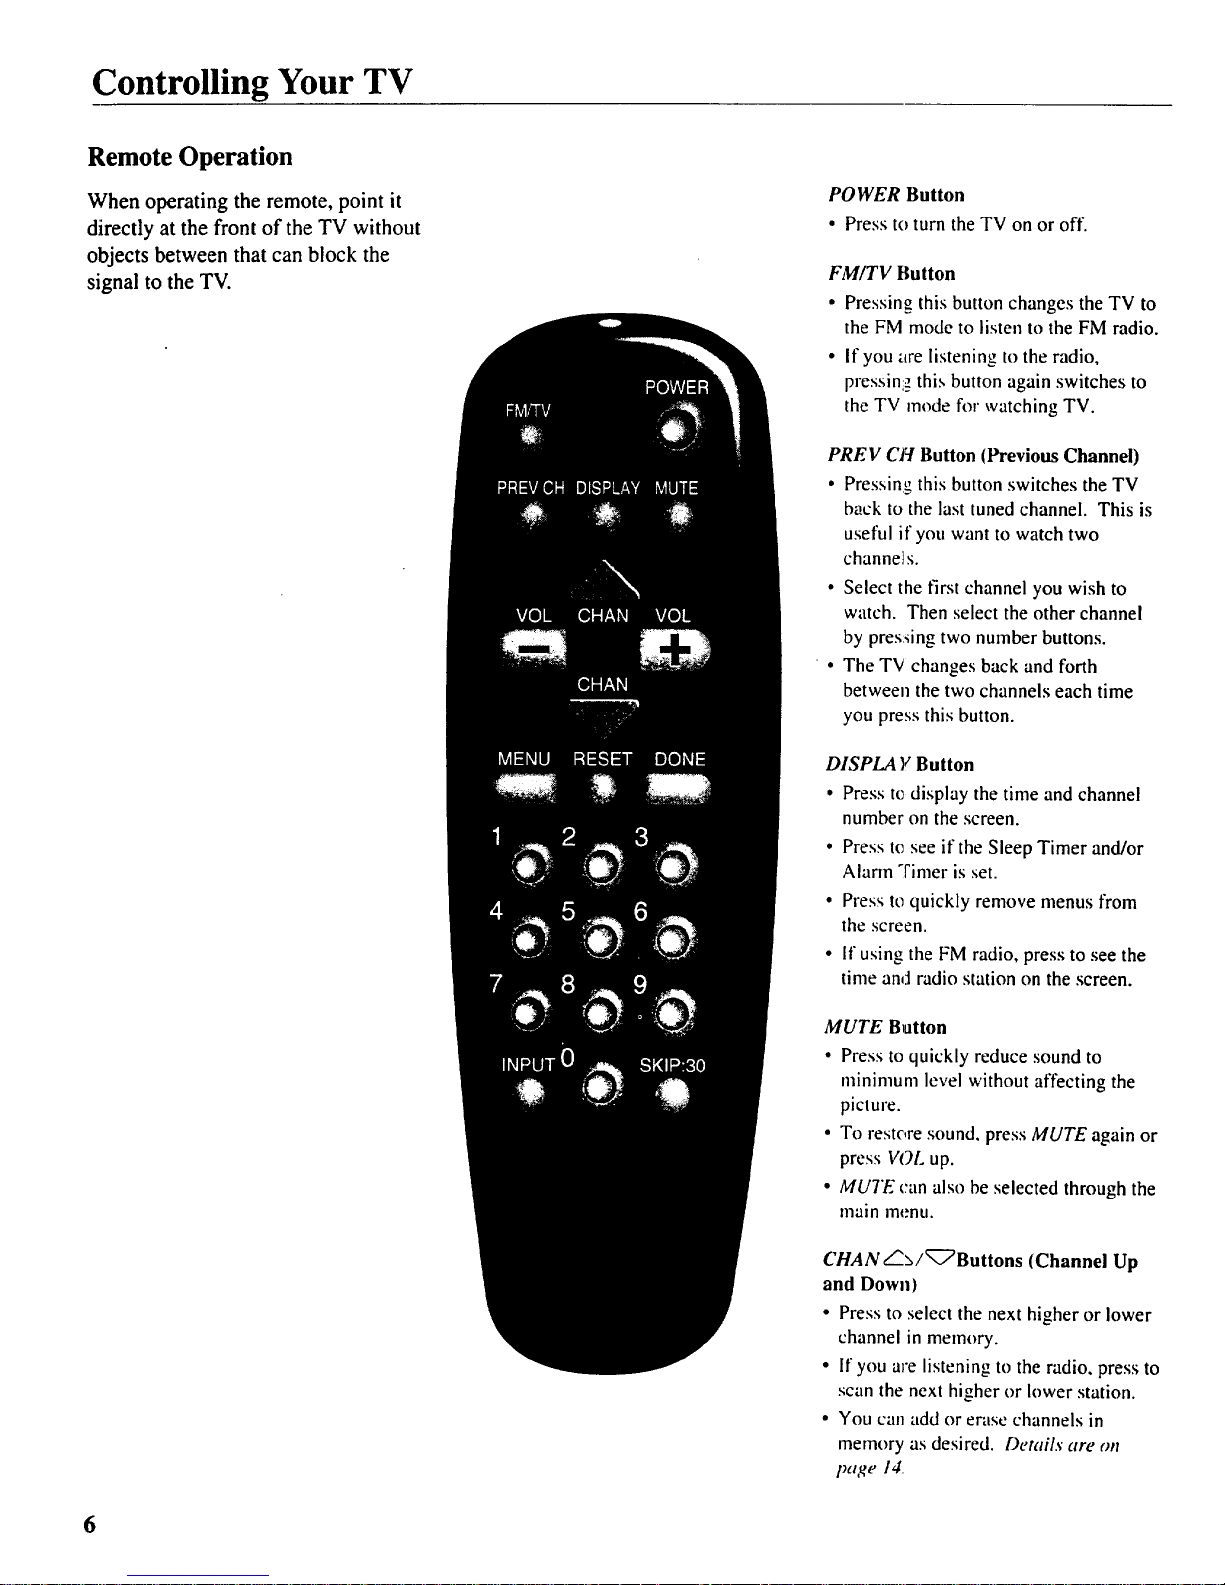
Remote Operation
When operating the remote, point it
directly at the front of the TV without
objects between that can block the
signal to the TV.
POWER Button
• Press to turn the TV on or off.
FM/TV Button
• Pressing this button changes the TV to
the FM mode to listen to the FM radio.
• If you are listening to the radio,
pressini_ this button again switches to
the TV mode for watching TV.
PREV CH Button (Previous Channel)
• Pressing this button switches the TV
back to the last tuned channel. This is
useful if you want to watch two
channels.
• Select the first channel you wish to
watch. Then select the other channel
by pres:_ing two number buttons.
• The TV changes back and forth
between the two channels each time
you press this button.
DISPLA Y Button
• Press te display the time andchannel
number on the screen.
• Press te see if the Sleep Timer and/or
Alarm "rimer is set.
• Press to quickly remove menus from
the screen.
• It"using the FM radio, press to see the
time and radio station on the screen.
MUTE Button
• Press to quickly reduce sound to
minimum level without affecting the
picture.
• To restore sound, press MUTE again or
press VOL up.
• MUTE can also be selected through the
main menu.
CHAN/'_/_7'Buttons (Channel Up
and Down)
• Press to select the next higher or lower
channel in memory.
• If you are listening to the radio, press to
scan the next higher or lower station.
• You can add or erase channels in
memory as desired. Details are on
page 14
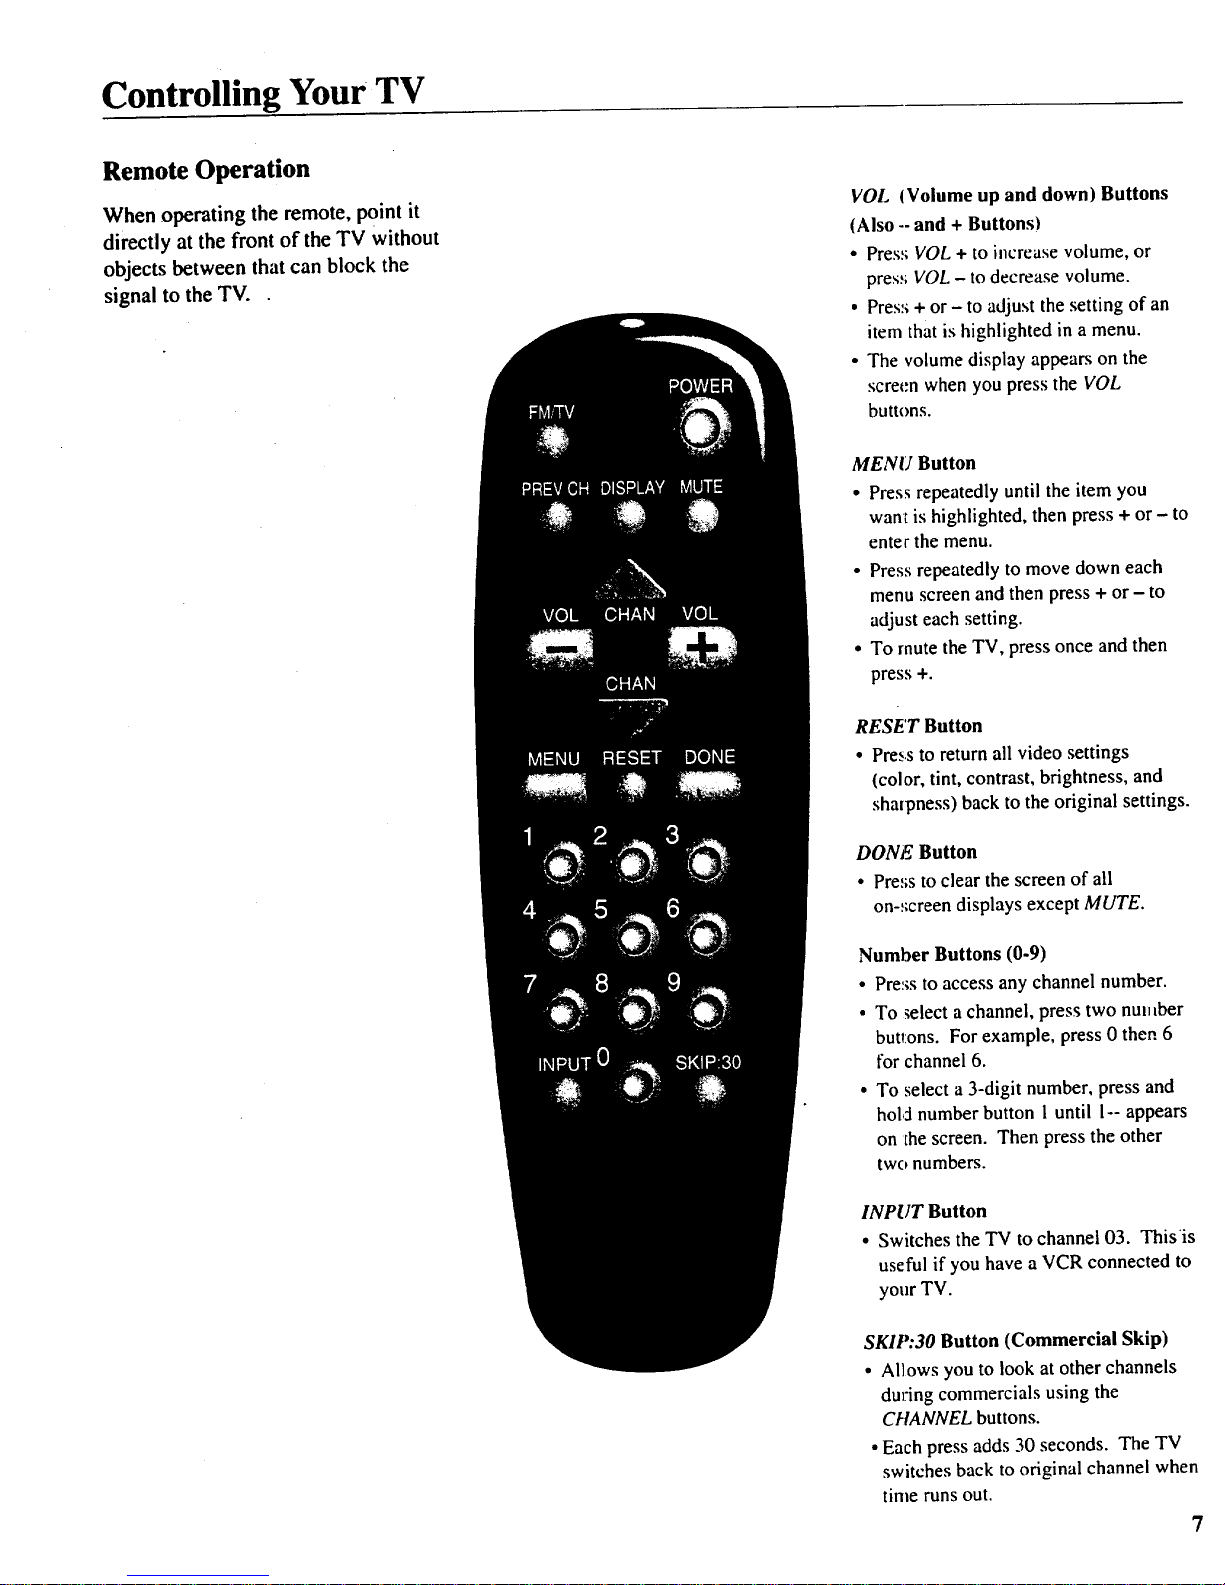
Controlling Your TV
Remote Operation
When operating the remote, point it
directly at the front of the TV without
objects between that can block the
signal to the TV.
VOL (Volume up and down) Buttons
(Also --and + Buttons)
• Pres:; VOL + to increase volume, or
pres:; VOL - to decrease volume.
• Pres:++ or - to adjust the setting of an
item that is highlighted in a menu.
• The volume display appears on the
scret,'n when you press the VOL
buttons.
MENU Button
• Press repeatedly until the item you
want is highlighted, then press + or - to
enter the menu.
• Press repeatedly to move down each
menu screen and then press + or - to
adjust each setting.
• To mute the TV, press once and then
press +.
RESET Button
• Press to return all video settings
(color, tint, contrast, brightness, and
sharpness) back to the original settings.
DONE Button
• Press to clear the screen of all
on-_;creen displays except MUTE.
Number Buttons (0-9)
• Pre:+sto access any channel number.
• To +elect a channel, press two number
buttons. For example, press 0 then 6
for channel 6.
• To select a 3-digit number, press and
hol,:inumber button 1until 1--appears
on the screen. Then press the other
two numbers.
INPUT Button
• Switches the TV to channel 03. This'is
useful if you have a VCR connected to
your TV.
SKIP:30 Button (Commercial Skip)
• Allows you to look at other channels
during commercials using the
CHANNEL buttons.
• Each press adds 30 seconds. The TV
switches back to original channel when
time runs out.
7
 Loading...