

DVD Player
User’s Guide
Changing Entertainment. Again.
Model DRC240N
DRC240. cov 3/15/04 10:01 AM Page 1
To reduce risk of electrical shock, do not
remove cover or back (no user
serviceable parts inside). Refer servicing
to qualified personnel.
FCC INFORMATION
This equipment has been tested and found to comply with the limits for a Class
B digital device, pursuant to Part 15 of the FCC rules. These limits are designed
to provide reasonable protection against harmful interference in a residential
installation. This equipment generates, uses and can radiate radio frequency
energy and, if not installed and used in accordance with the instructions, may
cause harmful interference to radio communications. However, there is no
guarantee that interference will not occur in a particular installation. If this
equipment does cause harmful interference to radio or television reception,
which can be determined by turning the equipment off and on, the user is
encouraged to try to correct the interference by one or more of the following
measures.
• Reorient or relocate the receiving antenna.
• Increase the separation between the equipment and receiver.
• Connect this equipment into an outlet on a circuit different from that to
which the receiver is connected.
• Consult the dealer or an experienced radio/TV technician for help.
This class B digital apparatus meets all requirements of the Canadian
Interference--Causing Equipment Regulations.
Note:
This device is protected by U.S.
patent numbers 4,631,603 and
4,577,216 and 4,819,098 and other
intellectual property rights. The use
of Macrovision’s copy protection
technology in the device must be
authorized by Macrovision and is
intended for home and other limited
pay-per-view uses only, unless
otherwise authorized in writing by
Macrovision. Reverse engineering or
disassembly is prohibited
This DVD player is designed and
manufactured to respond to the
Region Management Information. If
the Region number of a DVD disc
does not correspond to the Region
number of this DVD player, this
DVD player cannot play the disc.
The Region number for this DVD
player is Region No 1.
Refer to the identification/rating label located on the back
panel of your product for its proper operating voltage.
Caution: To prevent electric shock, match wide blade of plug
towide slot, fully insert.
Attention: Pour éviter les chocs électriques, introduire la
lame la plus large de la fiche dans la borne correspondante
de la prise et pousser jusqú au fond.
CAUTION
FCC Regulations state that
unauthorized changes or modifications to this equipment may void
the user’s authority to operate it.
CAUTION
THIS PRODUCT UTILIZES A LASER.
USE OF CONTROLS OR ADJUSTMENTS OR PERFORMANCE OF
PROCEDURES OTHER THAN THOSE
SPECIFIED HEREIN MAY RESULT IN
HAZARDOUS RADIATION
EXPOSURE. DO NOT OPEN COVERS
AND DO NOT REPAIR YOURSELF.
REFER SERVICING TO QUALIFIED
PERSONNEL.
WARNING
RISK OF ELECTRIC SHOCK.
DO NOT OPEN.
This symbol indicates
“dangerous voltage” inside the
product that presents a risk of
electric shock or personal injury.
This symbol indicates
important instructions
accompanying the product
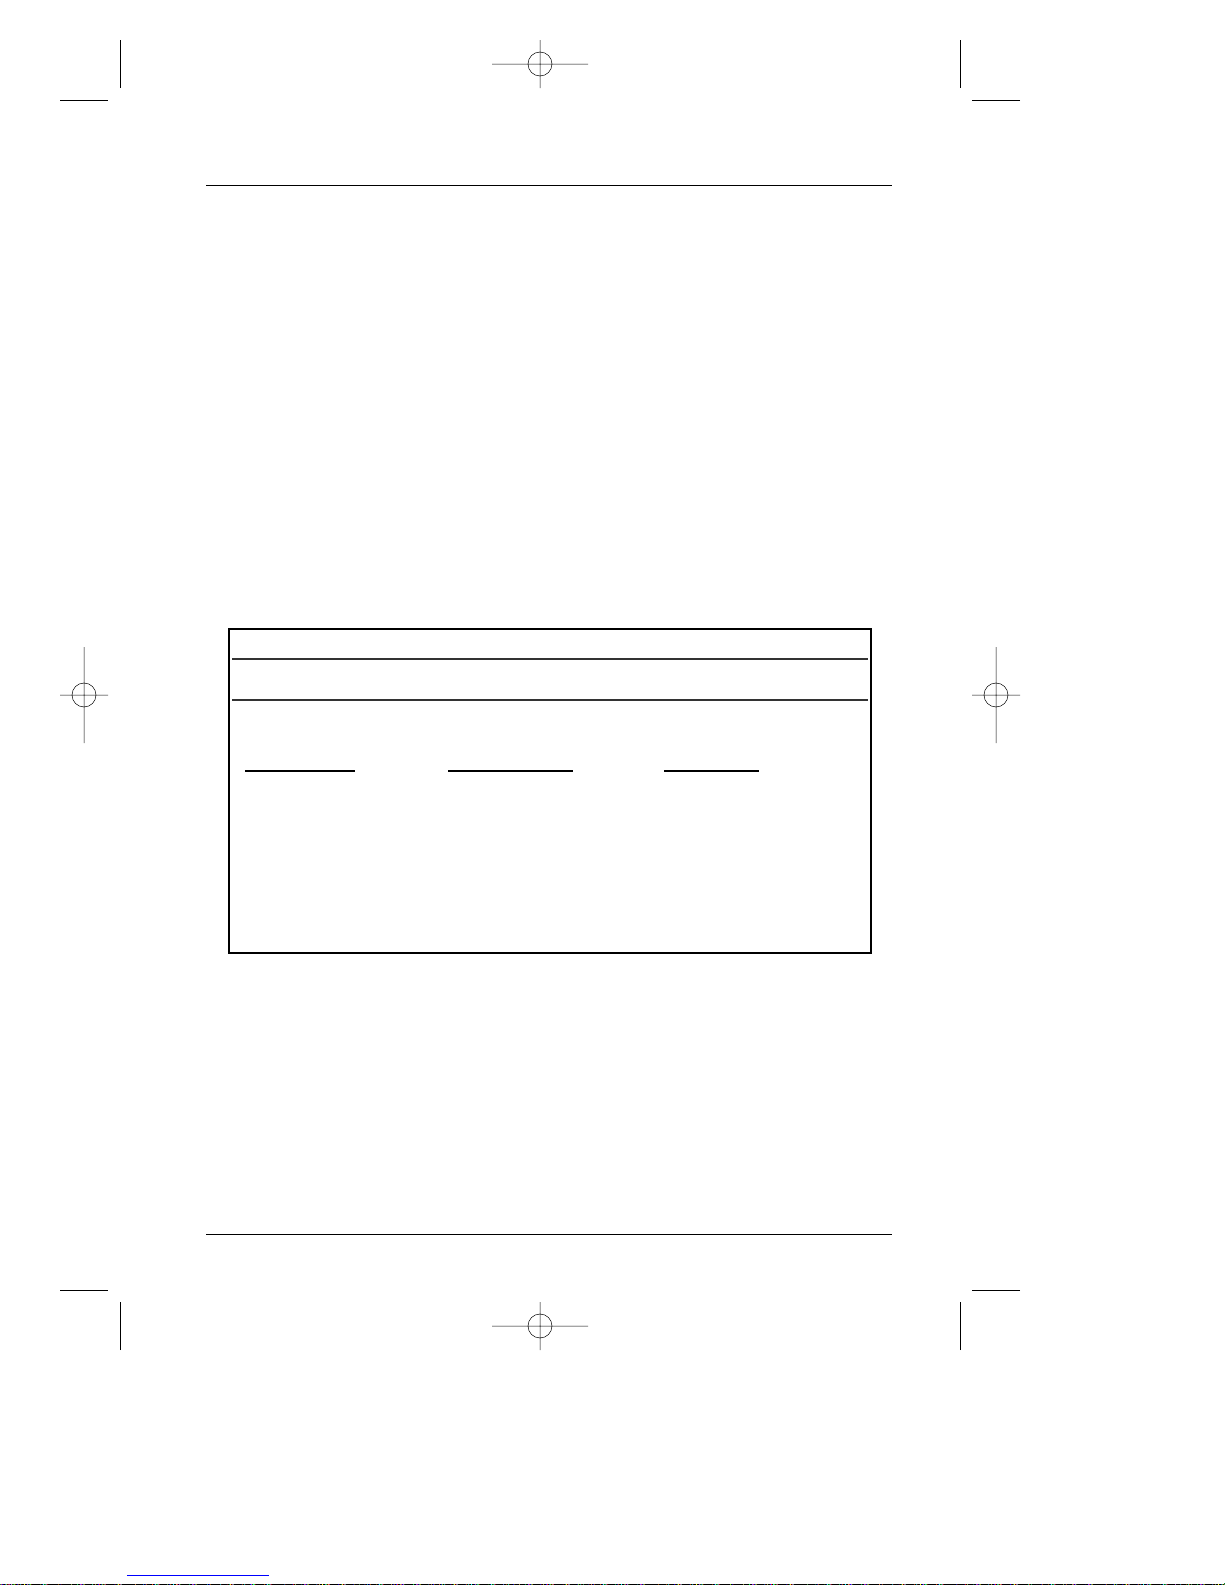
Keep your sales receipt to obtain warranty parts and service and for proof of
purchase. Attach it here and record the serial andmodel numbers in case you
need them. The numbers are located on the back of the player.
Model number: DRC240N Serial Number:
Purchase date:
Dealer address and phone:
CLASS 1
LASER
PRODUCT
Product Registration: Please fill out the product registration card (packed
separately) and return it immediately. For U.S. customers: Your RCA Consumer
Electronics product may also be registered at www.rca.com/productregistration
Registering this product allows us to contact you if necessary.
WARNING To reduce the risk of fire
or shock hazard, do not expose this
DVD player to rain or moisture. No
objects filled with liquids, such as
vases, shall be placed on the
apparatus.
Apparatus shall not be exposed to
dripping or splashing and that no
objects filled with liquids, such as
vases, shall be placed on the
apparatus.
DRC240. cov 3/15/04 10:01 AM Page 2

1
Table Of Contents
Chapter 1: Connections and Setup
Things to consider before you connect ......................2
Install batteries in the Remote....................................2
Back of the DVD Player:
Explanation of Jacks and
Cables ......................................................................................3
Front of the DVD Player ..............................................5
Player front display........................................................5
Connection: DVD+TV+VCR ........................................7
Point the Remote in the Right Direction....................8
Turn on the TV and the DVD Player ..........................8
Using Different Menus ..................................................8
How to find your TV’s Video Input Channel ..............9
Chapter 2:The Remote Control
Button Descriptions for DVD Mode..........................10
Button Descriptions for TV and VCR ........................11
Using the Remote to Navigate through On-Screen
Menus............................................................................11
Chapter 3: Playing Discs
Compatible Discs ........................................................12
Regional Coding ..........................................................12
How to load and play a disc ......................................12
Search Options ............................................................13
Playback Options ........................................................13
Chapter Advance ....................................................13
Zoom ........................................................................13
Scene Again ..............................................................13
Using the On-Screen Info Displays............................14
How to Navigate the Info Display......................15
Time Display ............................................................15
Title/Track Icon ......................................................15
Chapter Icon ............................................................15
Screen Fit Icon ........................................................15
Subtitles Icon............................................................16
Audio Language Icon..............................................16
Play Mode Icon ........................................................17
AB Repeat ................................................................18
Random ....................................................................18
Program Play ............................................................18
Introscan....................................................................18
Bookmark Icon ........................................................19
Camera Angle Icon ................................................20
DivX ..............................................................................20
How to use DivX ..................................................20
Playing mp3,WMA and JPEG Files ..........................22
Basic Playback ..........................................................23
Musical Slide Show: Playing JPEG files and mp3 or
WMA files at the same time ................................24
Chapter 4: Menu System
The DVD Player Menu System ..................................26
Play Menu ....................................................................26
Play Mode Menu ..........................................................26
Start (standard play) ..............................................26
Random Play ............................................................26
Program Play ............................................................27
AutoPlay....................................................................27
IntroScan ..................................................................27
DivX ..........................................................................27
Parental Control Menu ..............................................28
Locking your DVD Player ....................................28
Unlocking your DVD Player ................................29
Changing your Password ......................................29
Explanation of Ratings Limits ....................................29
Setting Ratings for Rated Titles............................30
Unrated Titles ..........................................................30
Display Menu................................................................31
TV Image ..................................................................31
Progressive Scan..........................................................32
Sound Menu ................................................................34
Night Mode ..............................................................34
Virtual Surround......................................................34
Voice+ ........................................................................35
Languages Menu ..........................................................35
Chapter 5:Additional Information
Tr oubleshooting ..........................................................36
Maintenance of Cabinet..............................................39
Limited Warranty........................................................40
Accessory Information ..............................................42
This product incorporates copyright protection technology that is protected by method claims of cer tain U.S. patents and
other intellectual property rights owned by Macrovision Corporation and other rights owners. Use of this copyright protection
technology must be authorized by Macrovision Corporation, and is intended for home use only unless otherwise authorized by
Macrovision Corporation. Reverse engineering or disassembly is prohibited.
DRC240.body 3/16/04 11:41 AM Page 1
2
Chapter 1 Connections and Setup
Things to consider before you connect
Protect components from overheating
• Don’t block ventilation holes on any of the components.Arrange the components so that air
can circulate freely.
• Don’t stack components.
• If you place components in a stand, make sure you allow adequate ventilation.
• If you connect an audio receiver or amplifier, place it on the top shelf.
Position cables properly to avoid audio interference
• Insert each cable firmly into the designated jack.
• If you place components above the TV, route all cables down the side of the back of the TV
instead of straight down the middle of the back of the TV.
• If your antenna uses 300-ohm twin lead cables, do not coil the cables. Also, keep the twin lead
cables away from audio/video cables.
Note: Some discs may not be compatible due to laser pickup and disc design.
Loading a Disc
The first time you turn on the unit, you might hear the internal disc compartment move into
place.This is normal.
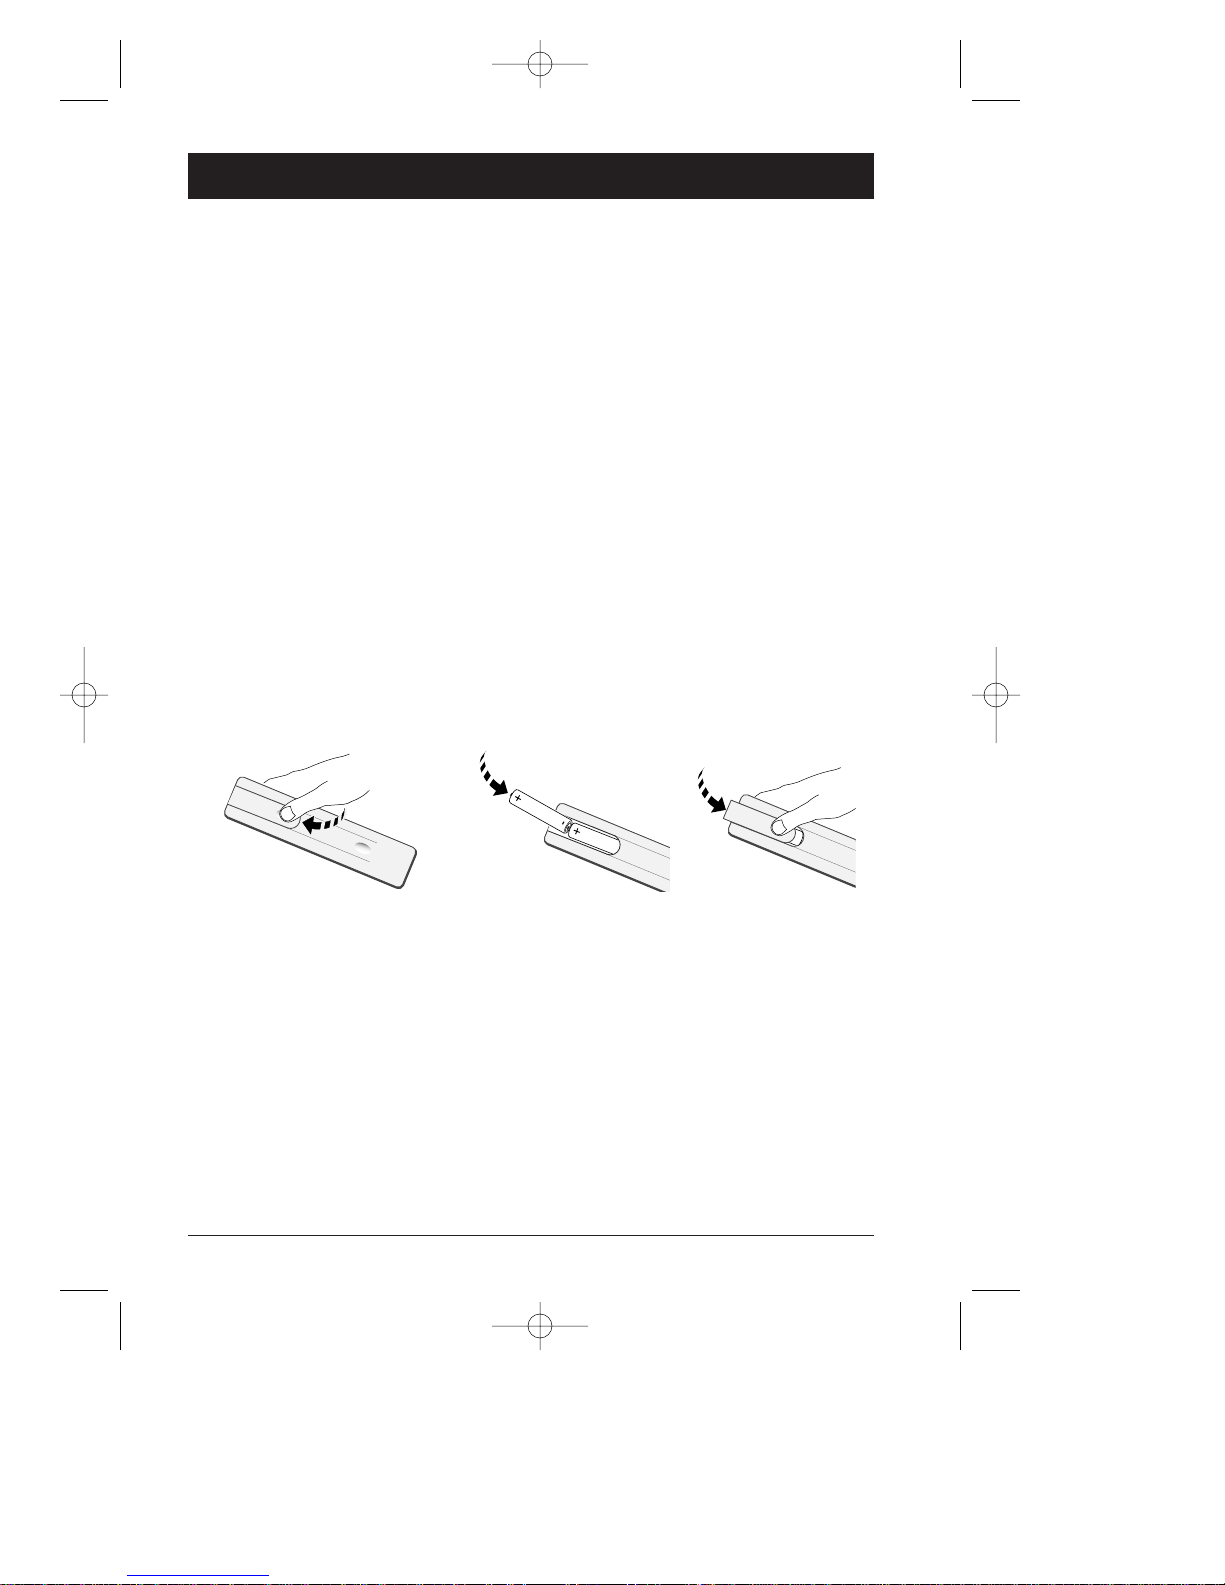
Install Batteries in the Remote
1. Remove the battery compartment cover.
2. Insert the batteries (provided), by matching the diagram in the battery compartment to make
sure + and – are in the proper position.
3. Put the battery cover back in place.
Important Battery Information
• If you’re not going to use the remote for a month or more, be sure to remove the batteries
because they can leak and cause damage.
• Dispose of batteries in the proper manner, according to federal, state, and local regulations.
•Any battery may leak electrolyte if mixed with a different battery type, if inserted incorrectly, if all
batteries are not replaced at the same time, if disposed of in fire, or if an attempt is made to
charge a battery not intended to be recharged.
• Discard leaky batteries immediately. Leaking batteries can cause skin burns or other personal injury.
123
DRC240.body 3/16/04 11:41 AM Page 2
Connections and Setup
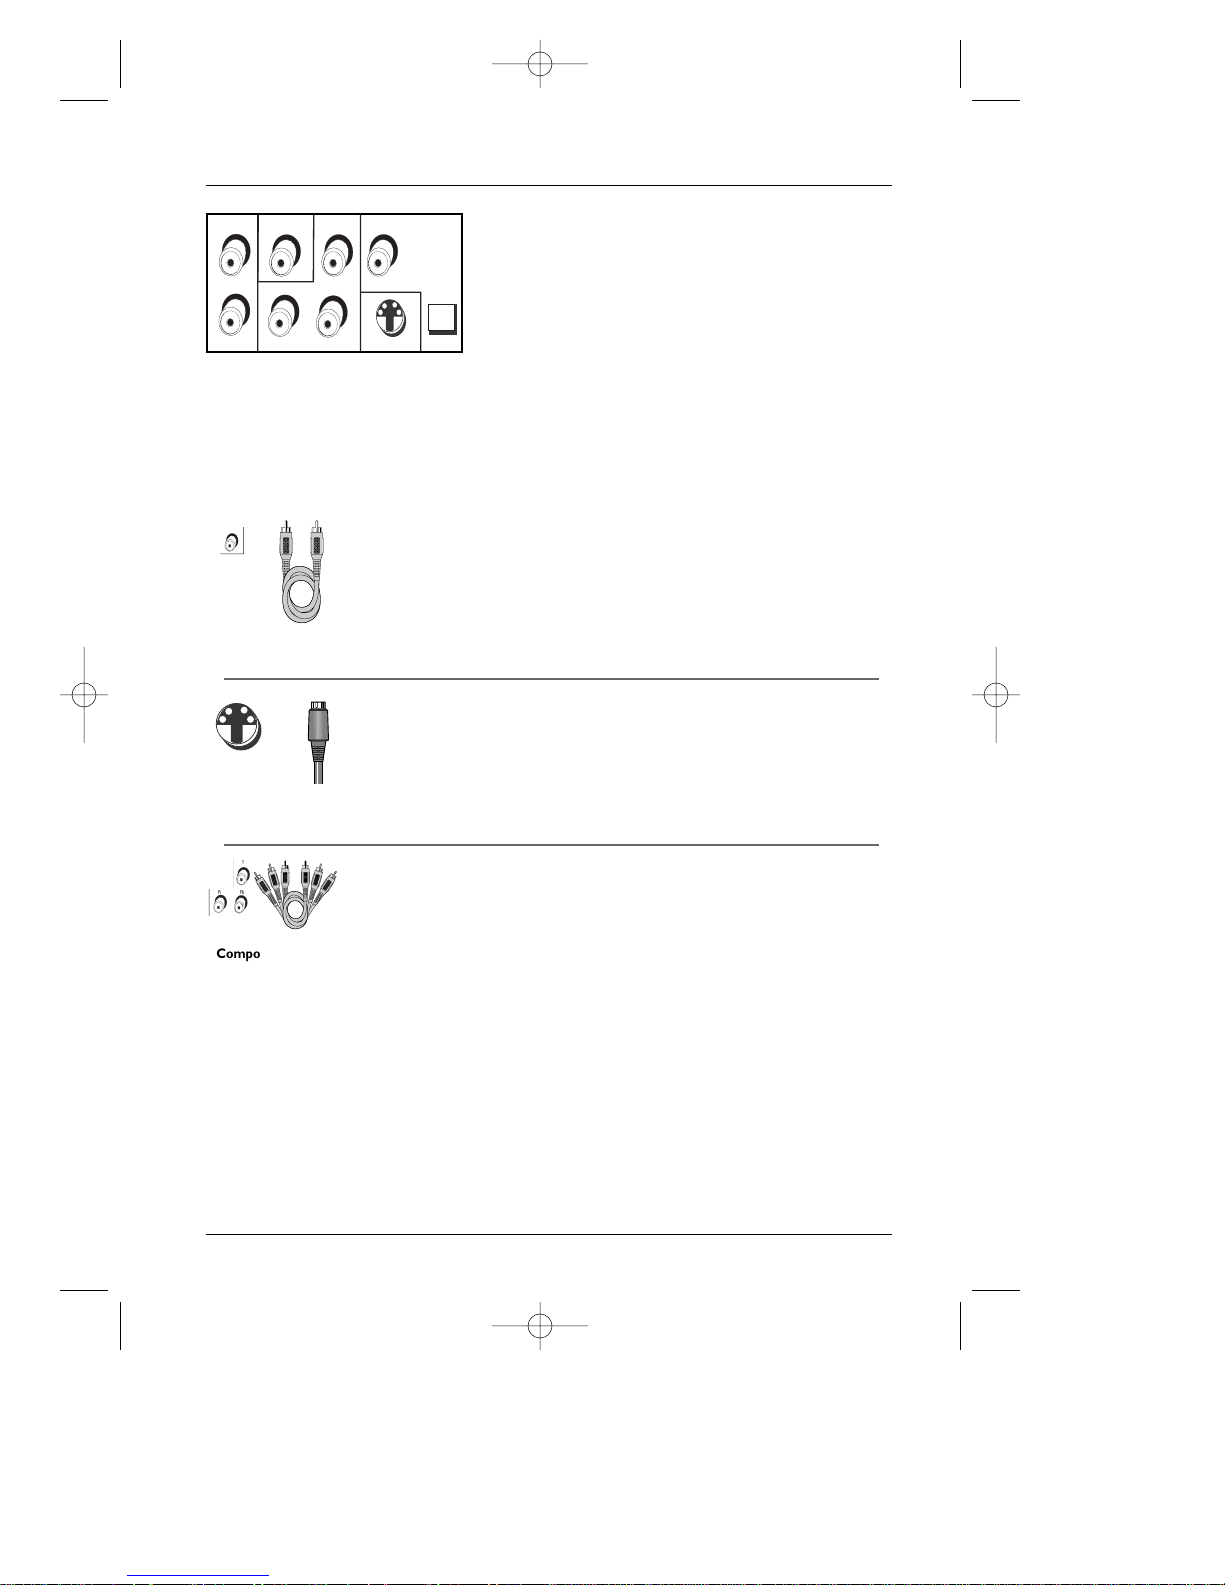
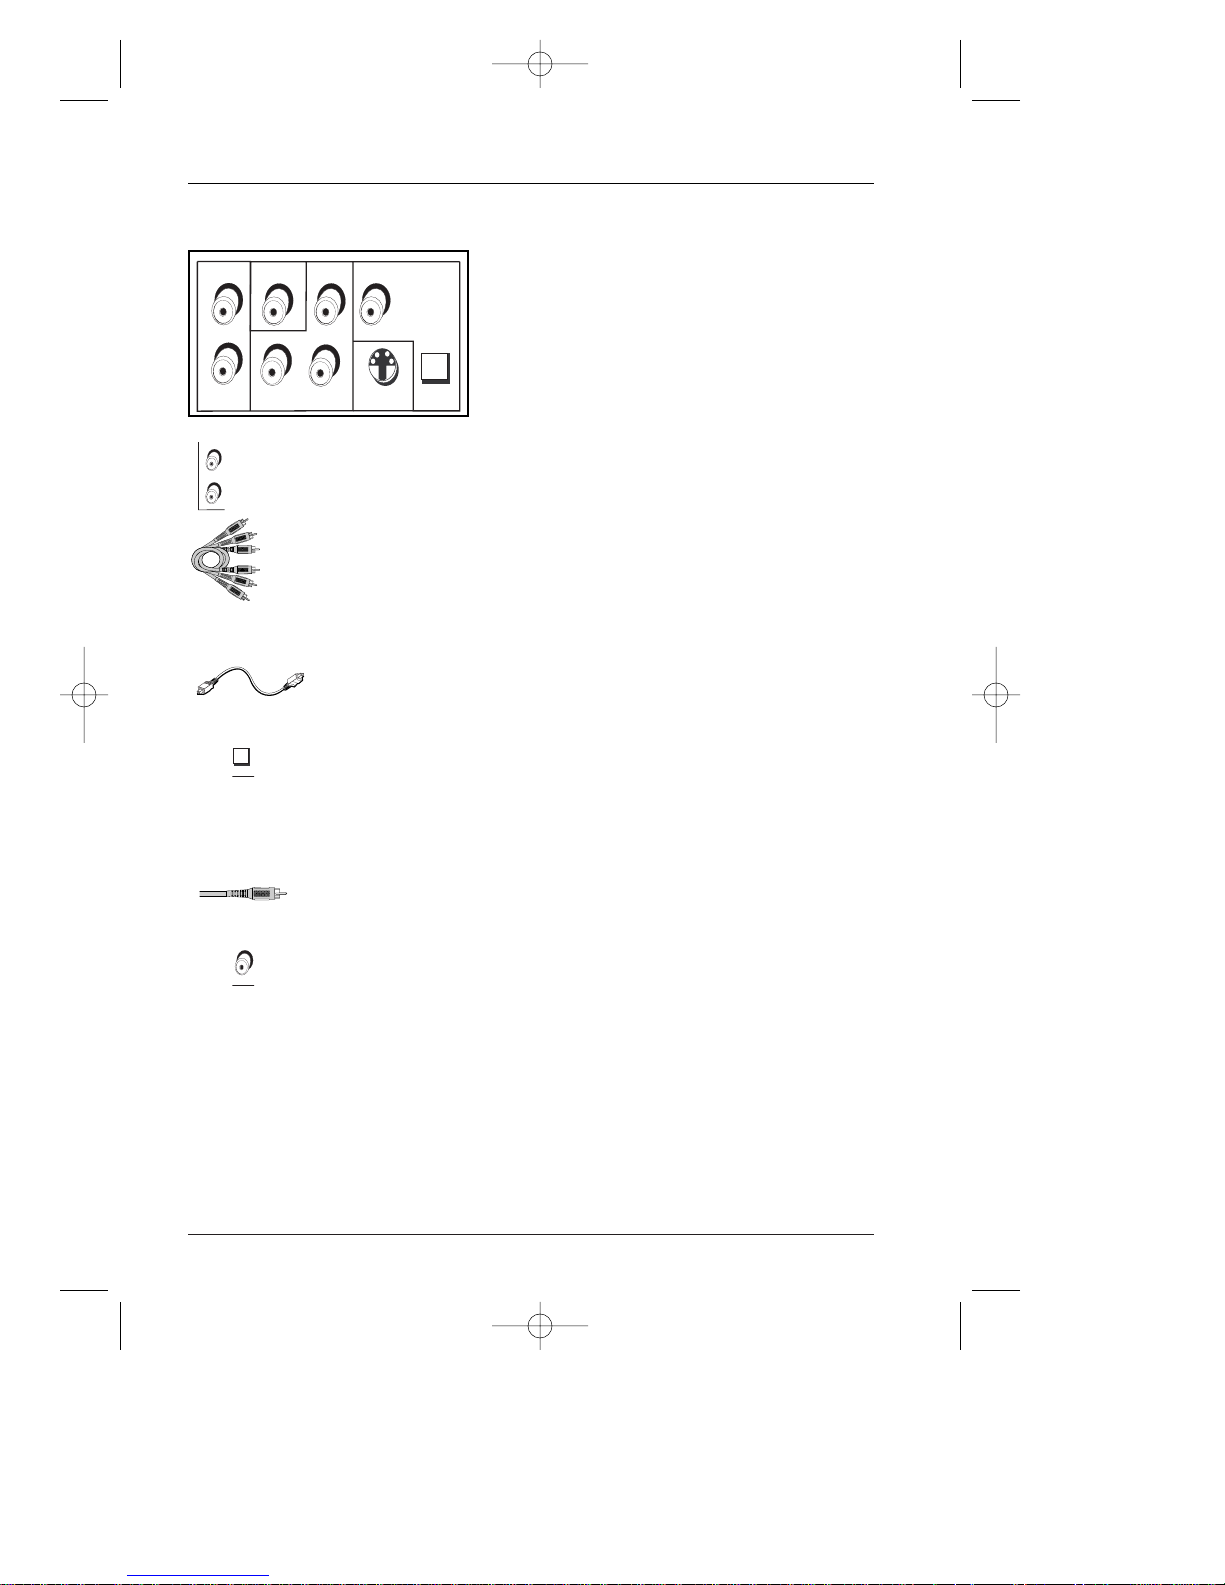
Back of DVD Player: Explanation of Jacks and Cables
There are several ways to connect your DVD Player to your TV depending upon the cables you
have and the jacks that are on the back of your TV. Different jacks and cables provide a different
level of performance.The jacks on the back of your DVD Player and the cables used to connect
them are explained below. A sample connection and instructions are on pages 6 and 7.
Back of the DVD
Player
L
A
T
Component video
jacks and cables are
often color-coded
(red, blue, and
green).
S-VIDEO jack
S-Video cable
VIDEO
OUT jack
Video cable (yellow)
Video Jacks and Cables
VIDEO OUT Jack and Cable
The basic Video jack (usually color-coded yellow) is also referred to as
composite video. Composite video is better than the video quality you get from
an RF coaxial cable (the type used to plug the cable feed into a TV). Usually the
video cable is bundled with the audio cables (white and red).
S-VIDEO OUT Jack and Cable
The S-VIDEO OUT (separate video) jack provides better picture quality than
composite video (the VIDEO OUT jack) because the color is kept separate
from the black and white part of the video signal. If your TV has an S-Video
jack, connect the DVD Player to the TV with an S-Video cable.
Note: Remember to connect the audio cables because the S-Video cable carries only the
picture signal, not the sound.
COMPONENT VIDEO OUT (Y, Pb, Pr) Jacks and Component Video Cables
The Y, Pb, Pr jacks provide optimum picture quality because the video signal is
separated into three parts.
To ensure maximum picture quality, use three video-grade cables (yellow) for
the connection.You can also buy bundled component video cables that are
color-coded to match the Y, Pb, Pr jacks (red, green, and blue).
Note: Remember to connect the audio cables because the component cable carries only
the picture signal, not the sound.
VIDEO OUT
3
DRC240.body 3/16/04 11:41 AM Page 3
L
R
UDIO OUT
VIDEO OUT
COMPONENT VIDEO OUT
Y
Pb
Pr
AUDIO OUT
S-VIDEO OUT
DIGITAL
COAXIAL
OPTICA
VID
EO OU
T
Y
Pb
P
r
4
Connections and Setup
Audio Jacks and Cables
AUDIO L (left) and R (right)
These jacks send the audio from the disc you’re playing to the TV.The audio
jacks and cables are often color-coded (red for right audio, and white for left
audio).You must connect audio cables to the AUDIO L and R jacks on the
DVD Player and the corresponding Audio Input Jacks on the TV no matter
which Video jack you connect (VIDEO; S-VIDEO; or Y, Pb, Pr).
If your component has only one input for audio (mono), connect it to the left (white
L/Mono) audio jack on the TV and don’t connect the right audio part of the cable.
DIGITAL AUDIO OUT/OPTICAL and COAXIAL
Use one of these jacks to connect your DVD Player to a Dolby* Digital or
DTS receiver or decoder. Some receivers have either the COAXIAL or
OPTICAL type of Digital Audio Input jack, and some have both. Under most
conditions, optical and coaxial connections work equally well — the only
difference is the type of cable you connect to the jack.
If you want to use a less expensive cable, connect a coaxial cable to the
COAXIAL jack if your receiver has a Coaxial Input Jack. Rarely, but
sometimes, coaxial digital cables — especially long ones, pick up radio
frequency (RF) interference from household appliances, nearby power lines,
and/or broadcast towers. If that is the case, connect an optical cable
(sometimes called SPDIF) to the DIGITAL AUDIO OUT/OPTICAL jack on
the DVD Player and a compatible Digital Input Optical Jack on the receiver.
*Manufactured under license from Dolby Laboratories. “Dolby” and the double-D symbol are
trademarks of Dolby Laboratories.
Digital Out Optical
cable
Digital Out Coaxial
cable
AUDIO OUT
O
Audio/
Video
cables
AUDIO R
and L jacks
DIGITAL OUT
OPTICAL jack
DIGITAL OUT
COAXIAL jack
L
Back of the DVD
Player
DRC240.body 3/16/04 11:41 AM Page 4
VIDEO OUT
L
R
COMPONENT VIDEO OUT
AUDIO OUT
(REGULAR AND PROG. SCAN)
R
L
Y
Pb
Pr
AUDIO OUT
S-VIDEO OUT
DIGITAL
COAXIAL
OPTICAL
PTICA
L
COAXI
A
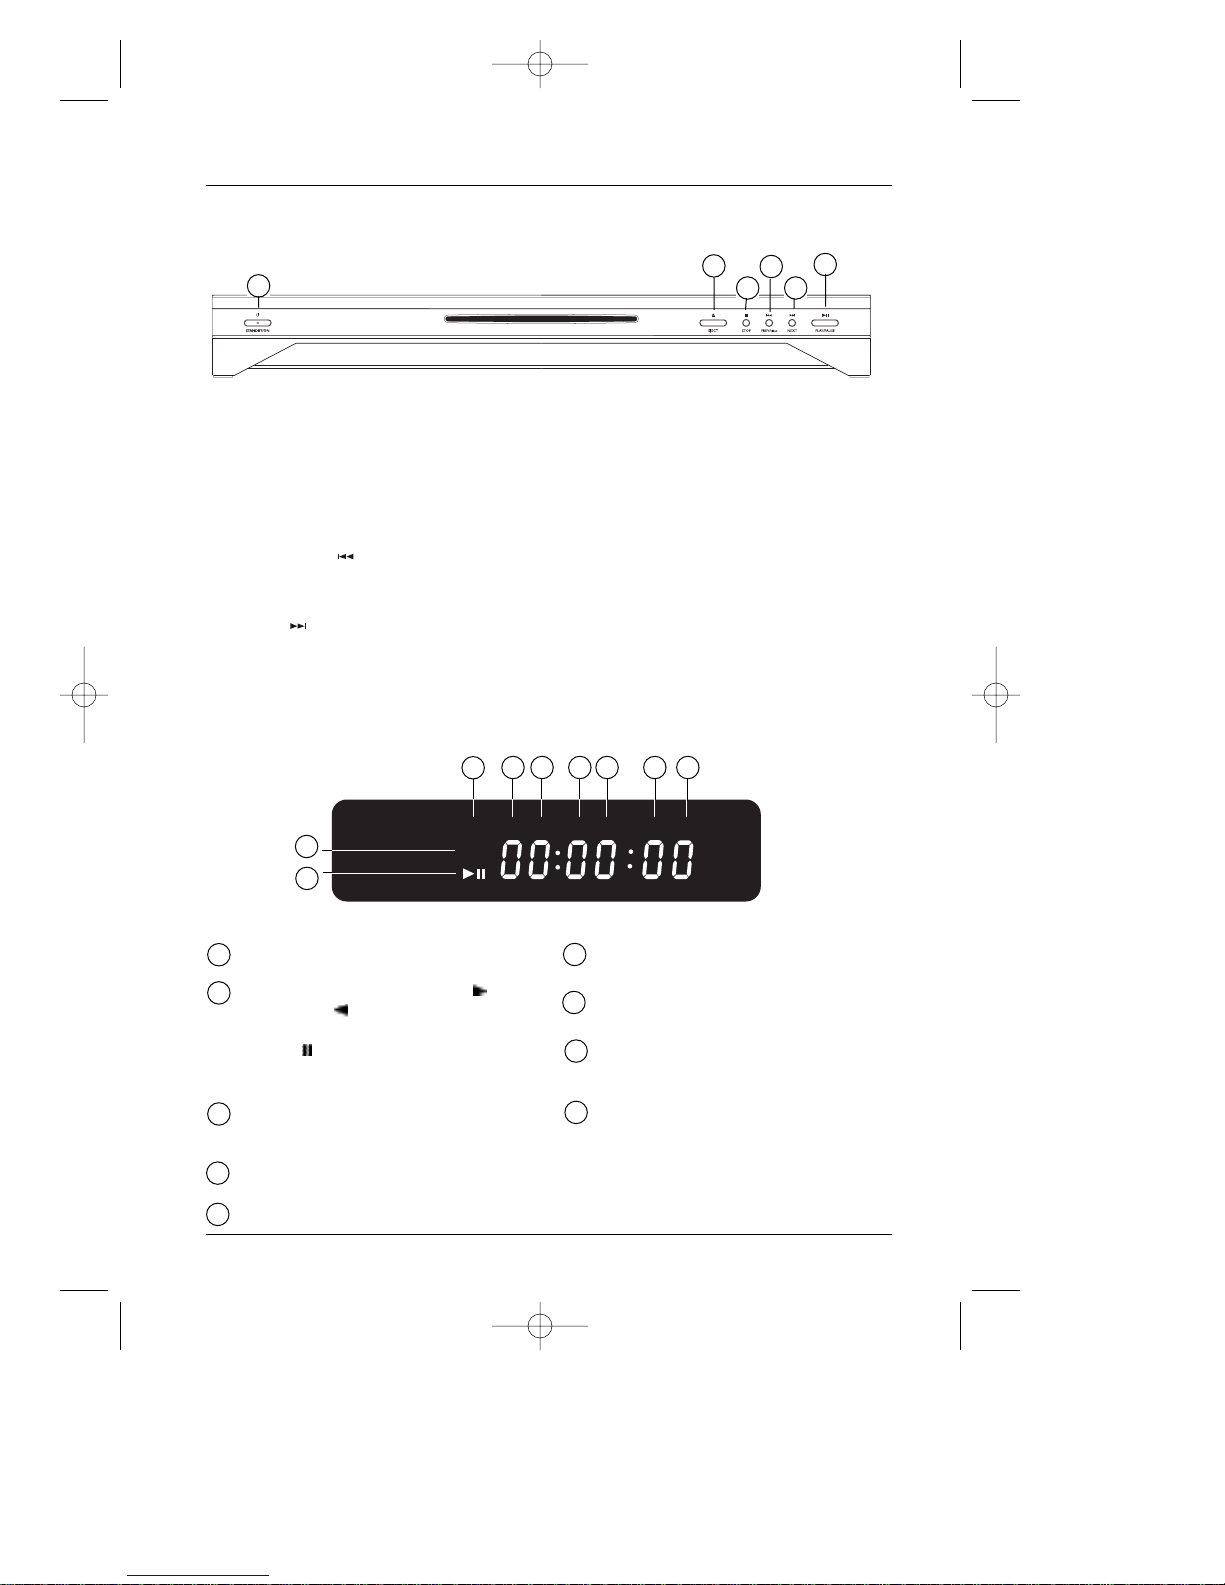
DVD: Lights when a DVD is playing.
Playback direction: Forward play ( ),
reverse play ( ) or while using the
PAUSE button- slow motion and slow
reverse ( ) on the chapter or track being
played.
VCD: Shows the type of disc playing is a
Video CD (VCD).
CD: Lights when a CD is being played.
TRK: Lights when a track is being played.
REP: Lights when a Repeat Play selection
has been made.
ALL: Indicates all tracks are repeated.
A-B: Lights when the A-B Repeat feature
is being used.
mp3: Lights when the mp3 format is
played.
15
Player front display
The display on the front of your DVD player provides information about discs and playback.
15
Connections and Setup
Front of the DVD Player (buttons appear left to right below)
2
345
6
1 STANDBY/ON - Turns the player on and off.
2 EJECT - Removes disc from player.
3 STOP - Stops disc play.
4 PREV/video - Goes to the beginning of the previous chapter or track.When you’re not
playing a disc, accesses Video Output options when you press and hold the button for 3 seconds
(see page 32).
5 NEXT - Skips to next chapter or track.
6 PLAY/PAUSE - Begins disc play or pauses disc play.
7
8
9
10
11
12
13
14
7
9
8
121110 13 14
1
5
DRC240.body 3/16/04 11:41 AM Page 5
V
CD
D
V
RK
CD
D
LL
A
R
EPT
MP3A
-
B
Connections and Setup
6
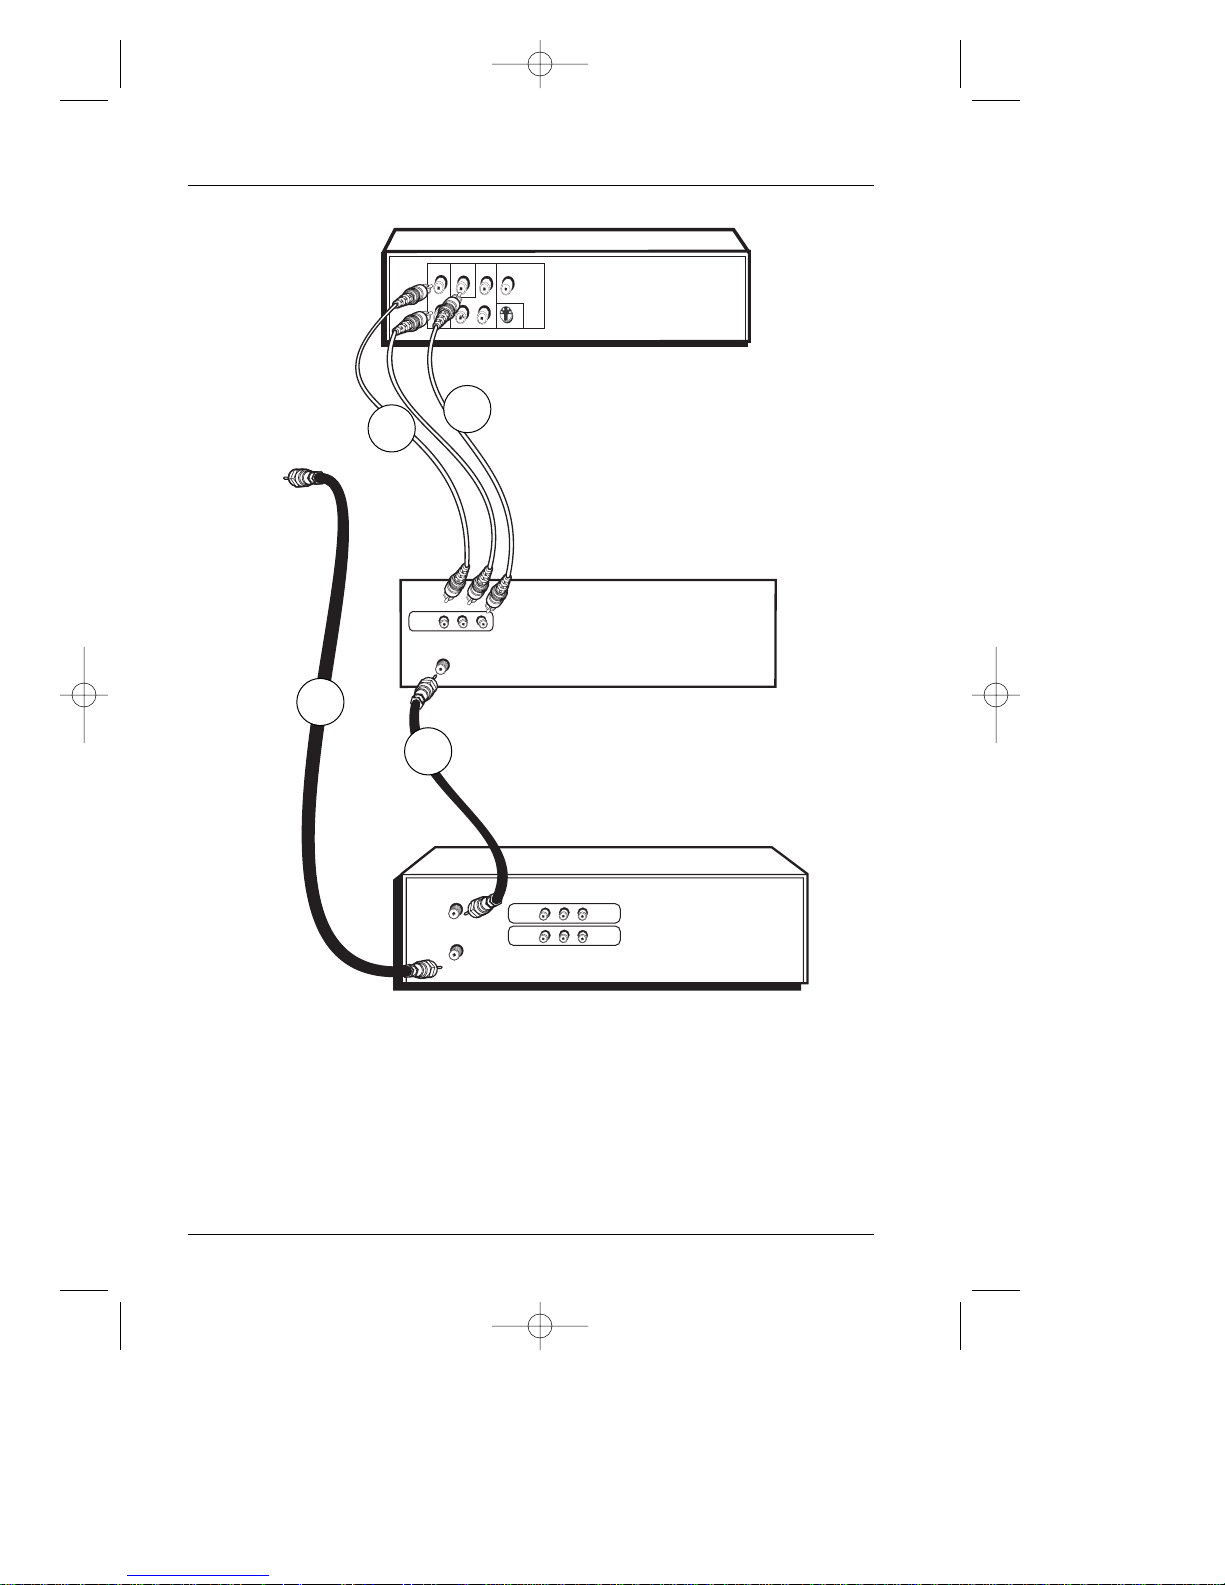
Notes:
The back of your TV and VCR might look different than the ones pictured here. Details about the different
kinds of cables used to connect your DVD player are on page 3.
Don’t connect the DVD player to the VCR, or through the VCR. Doing so could negatively affect the picture
quality and/or disable the DVD player.
For U.S. customers; If you prefer, we can provide you with the name of an Authorized Service Representative
who will visit your home for a fee to install your electronic entertainment system and to instruct you in its
operation. For details about this service, call 1-888-206-3359.
For additional assistance while using your RCA product, please visit www.rca.com/customersupport.
2
1
3
4
DRC240.body 3/16/04 11:41 AM Page 6
DVD PLAYER
VIDEO OUT
AUDIO OUT
L
Pr
R
Y
Pb
S-VIDEO OUT
DIGITAL AUDIO OUT
COAXIAL
From Cable
or Antenna
TV
INPUT1
CABLE/ANTENNA
VCR
L
VIDEO
R
OUT TO TV
IN FROM ANTENNA
INPUT
OUTPUT
VIDEO L
R

Connections and Setup
7
Connection: DVD + TV + VCR
1. Connect the audio cables to the AUDIO OUT L (left – white) and R (right – red) jacks on
the back of your DVD player, and to the corresponding Audio Input jacks on your TV
(sometimes labeled AUDIO IN L and R).
2. Connect the video cable.
Basic video connection – Connect the video cable (yellow) to the VIDEO OUT jack on
the back of your DVD Player, and to the Video Input jack on your TV (sometimes labeled
VIDEO IN).
Note: If your TV has an S-Video jack, connect the S-Video cable (not provided) to the
S-VIDEO OUT jack on the back of your DVD Player and to the S-VIDEO jack on your TV.
– OR –
If your TV has component video jacks (Y, Pb, Pr), use video-grade cables (not provided) to connect the
TV to the DVD player’s COMPONENT VIDEO OUT (Y, Pb, Pr) jacks. It is essential to match the color
coded connectors with a compatible TV.
If you have a Progressive Scan TV, you must use the Component Video connection (Y, Pb, Pr), and
activate Progressive Scan through the menu system or by pressing the PREV/video button on the
front of the DVD player (for instructions go to page 32).
3. Connect the antenna or cable to the Antenna Input jack on the VCR (sometimes labeled IN
FROM ANTENNA).
Note: Connecting a VCR is optional. It is only shown in this diagram because most households have a VCR
connected to the TV.
4. Connect a coaxial cable to the Antenna Output jack on the VCR (OUT TO TV) and to the
Antenna Input jack (CABLE/ANTENNA) on the TV.
5. Insert the power cord into the unit and into an AC outlet.
Go to page 8
Note:
You can’t
load a disc into the player until you’ve plugged it in and turned it on.You may hear a
slight noise the first time you turn on the DVD player because the internal disc compartment
may need to move into place.
Mor
e Information about Progressive Scan
Some high-end HDTVs and multimedia monitors offer progressive scanning of the video
signal instead of interlace. Progressive Scan provides a crisper picture—it eliminates the
“flicker” or “jitter” at the edges of the screen.Your DVD player is equipped to send a
progressive scan signal, but you must connect the DVD player via the COMPONENT jacks
(Y, Pb, Pr) to a Progressive Scan TV or monitor, AND you must turn on Progressive Scan in
the DVD Player’s menu system or by pressing the PREV/video button on the front of the DVD
player (for instructions go to page 32).
Note: If your TV doesn’t have Audio and Video Input Jacks and only has an RF jack, you need
to connect an RF modulator (not provided).
DRC240.body 3/16/04 11:41 AM Page 7

Connections and Setup
8
3. The first time you turn on your DVD player, a
Language Selection menu appears. If you want the
DVD player’s menus to appear in English, press the
OK button on the remote control. If you prefer
another language, press the button until that
language is highlighted and press OK to select it.
Using Different Menus
Each disc is programmed with different features.There
are three separate types of menus that you can use to
access features:
• The Disc menu – The Disc menu is part of each
disc and is separate from the DVD player’s menu.The
contents of each Disc menu vary according to how
the disc was authored and what features were
included on the disc.The Disc menu is turned on and
off (while the disc is playing) with the MENU button
on the remote.
• The DVD player’s Info Display – The Info Display
appears as icons across the top of the screen. It can
only be accessed while you are playing a disc. It’s
turned on and off with the INFO button on the
remote control.
• The DVD player menu – The DVD player’s menu
system is accessed only when a disc isn’t playing. It
appears automatically when you press the STOP
button on the remote.
Remember: A feature will only work if the disc was programmed
with that feature. For example, if you choose subtitles on the Info
Display, the subtitles will only appear if the disc was created with
subtitles. If a menu or icon is “grayed out” it means that item (or
feature) isn’t available.
Español
Francais
English
Select a Menu Language
Select langue de menu
Selecione Idioma Menu
Point the Remote in the Right Direction and Put it in DVD Mode
When you want the remote to operate the DVD Player, point the remote at the DVD Player, not
the TV. Make sure the remote is in DVD mode - press the DVD button.Also, you must make sure
there is a clear path between the remote control and the DVD Player because the remote
control uses infrared (IR) technology that sends a command from the remote control to the IR
sensor on the front of the DVD player.
Turn on the TV and DVD Player, and Select Your Language
1. Turn on your TV and tune it to the correct Video Input Channel (if you don’t know which
channel is the Video Input channel, go to page 9 for help).
2. Make sure the remote is in DVD mode (press the DVD button). Press the ON•OFF button
to turn on the DVD Player.
Sound
Play
Parental Control
Display
Play Mode
Languages
Press Play to resume playback.
Disc name: U571
0:08:45
DRC240.body 3/16/04 11:41 AM Page 8
Video Input Channel Variations
Button/Switch Button on the Channel
on the
TV TV remote Number
VIDEO VID1 S-VID 00 93
SIGNAL LINE INPUT 90 VID 1
VID 1 VID SOURCE 91 VID 2
VID 2 VIDEO AUX 92 INPUT
Connections and Setup
9
How to find your TV’s Video Input Channel
In order to see what’s playing on your DVD Player, you need to tune the TV to the Video Input
Channel that corresponds to the jacks you used to connect the DVD Player to the TV.The Video
Input Channel(s) varies for different brands and different models of TVs. If your TV is an RCA, GE,
or Proscan brand, the DVD’s remote probably operates it. Just press the TV button, and then
press the INPUT button until you see the DVD’s main menu, screen saver, or the disc you’re
playing. If your TV is another brand, check the list below:
Consult the instruction manual that came with your TV.
If you can’t find the information in the manual, or can’t find the manual, review the following list.
• There might be a button on the TV’s remote control that accesses the Video Input Channel
(see table below for examples).
•You might select the Video Input Channel from the TV’s on-screen menu system.
•You might tune to it by pressing a specific channel number (see table below).
•Press the Channel up and/or down buttons on the TV’s remote control (sometimes the Video
Input Channel is stored in your TV’s channel list).
Next Steps
Before you start playing discs, you might want to get familiar with the remote control – Chapter
2 has details. Playing Discs is found in Chapter 3; the menu system is outlined in Chapter 4; and
Chapter 5 contains troubleshooting, Limited Warranty, and accessory information.
DRC240.body 3/16/04 11:41 AM Page 9
10
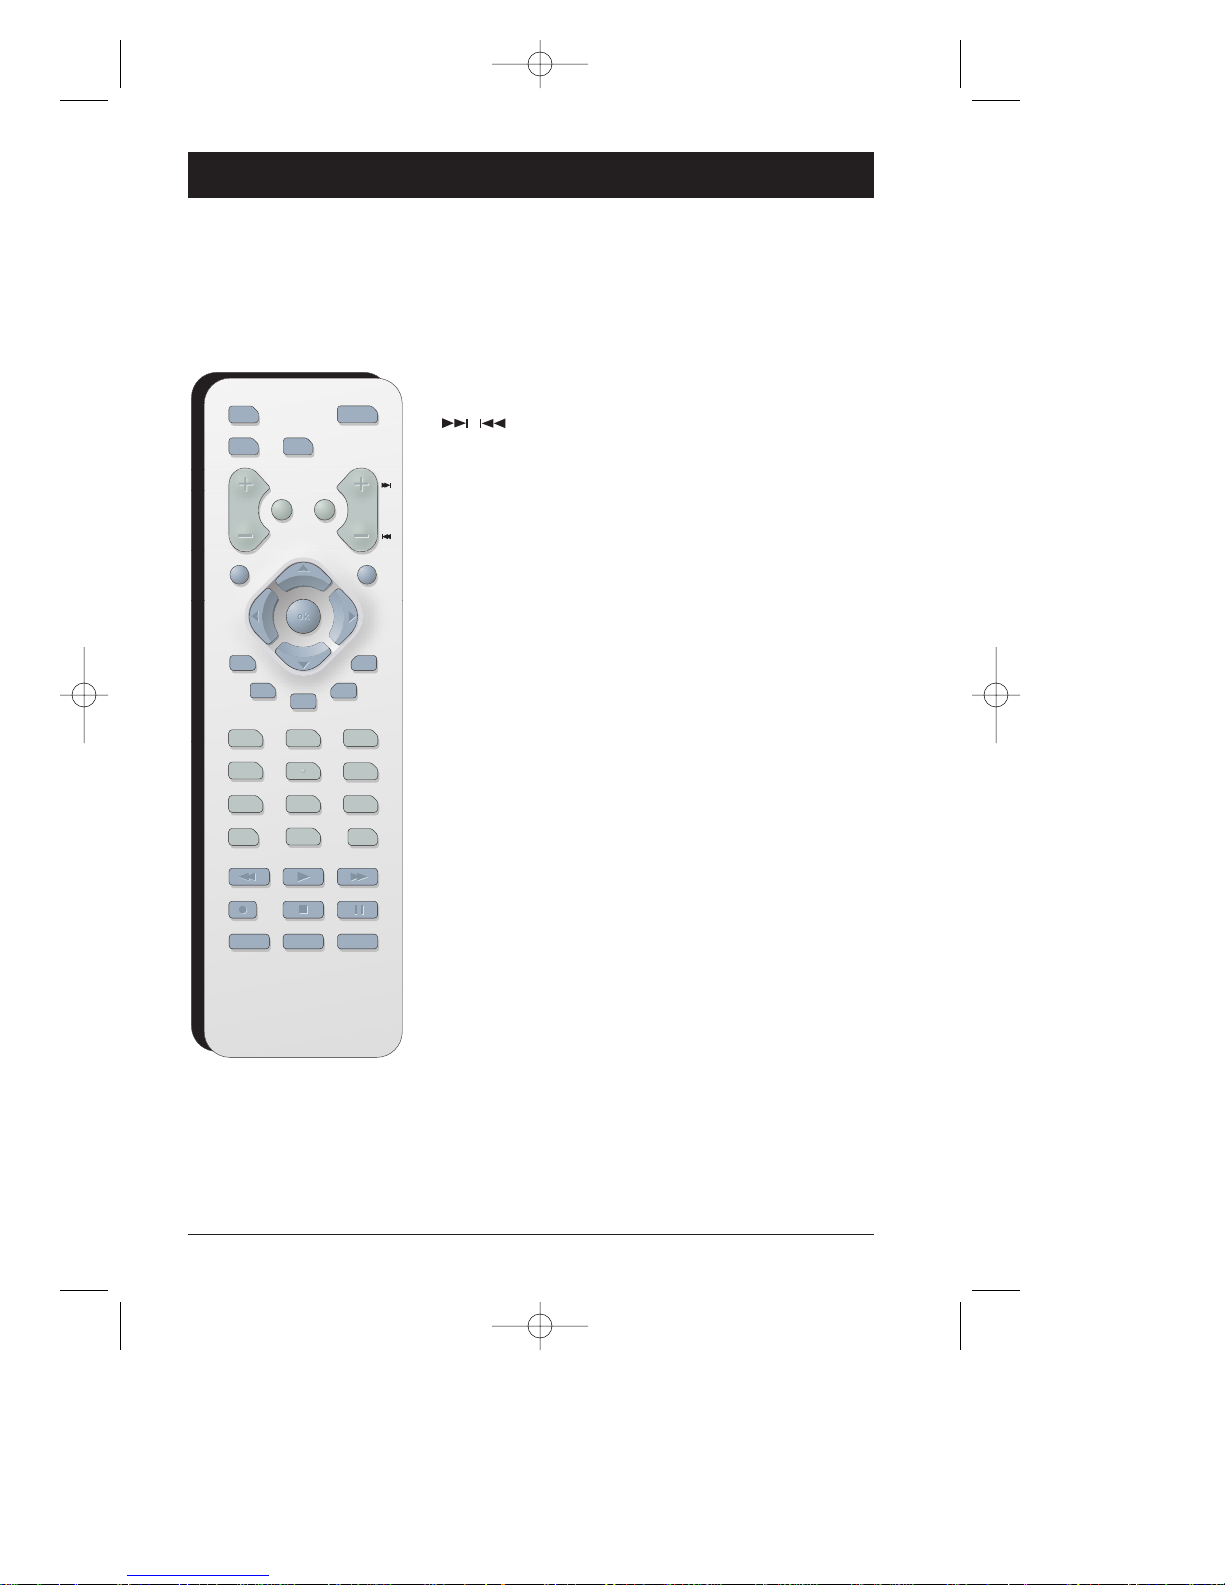
Button Descriptions for DVD Mode
In addition to operating your DVD Player, the remote that came with it will operate most RCA,
GE, and Proscan TVs and VCRs. However, this page only describes the buttons on the remote that
you will use with your DVD Player.
For descriptions of remote control buttons to be used with your TV and VCR (RCA, GE, and
Proscan only), go to the next page.
Chapter 2 The Remote Control
DVD function buttons listed alphabetically
Advances to the next/preceding chapter or track.
0-9 Use to input information such as chapter numbers,
track numbers, or to make selections on some menu
screens.
AGAIN Quick reverse - replays the last several seconds of a
DVD movie.
ANGLE Accesses the Camera Angle icon of DVD disc Info
Display. Also used to rotate JPEG files
90°.
AUDIO Accesses the Audio icon in the Info Display that
enables you to play a disc in a different language.
CH+/- Advances to the next/preceding chapter or track.
CLEAR Removes on-screen menus and displays.
DVD Puts the remote in DVD mode so it operates the DVD
player.
EJECT Removes the disc.
FORWARD Searches forward through the disc.
INFO Displays the on-screen Info Display when playing discs.
MENU When playing a disc, displays the disc’s menu.
ON•OFF Turns DVD player on and off.
OK Selects the setting or menu that is highlighted.
PAUSE Pauses disc play.With DVD discs, press two times to
search frame by frame.
PLAY Begins disc play.
PLAY MODE Accesses Play Mode icon in the Info Display.
RETURN Goes back to the previous menu.
REVERSE Searches backward through the disc.
STOP Stops playback. Press and hold to eject the disc. In
order to see the DVD Player menu, press the STOP
button.
SUBTITLE Accesses the Subtitle icon in the Info Display.
TITLE Accesses the DVD disc guide (if available).
ZOOM Enlarges the picture on the screen (DVD,VCD, and
JPEG only).
DRC240.body 3/16/04 11:41 AM Page 10
O
N•O
DVD
VCR
T
V
FF
VOL
GO BACK
MUT
E
RET
CLEAR
URN
MENU
C
H
AUDI
O
LOCK
SUBTITLE
TIMER
123
4
7809
INPUT
REVERSEPLAYFORWARD
RECORD
AGAIN
SPEED
TITL
E
GUIDE
INF
O
5
PLAY MODE
T
V•VCR
PAUSE
STO
P
OPE
N•CLOSE
ZOOM
SEARC
H
ANGLE
6
11
Button Descriptions for TV and VCR
This remote operates most TVs and VCRs that carry the RCA, GE, or Proscan brand.The
following list (in alphabetical order) provides basic information about how these buttons will
operate when in TV or VCR mode.
CH +/- In TV mode, changes channels.
GO BACK/RETURN In TV mode, goes back to the last channel the TV was tuned to.
GUIDE In TV mode, accesses the GUIDE Plus+ programming guide if the TV has that feature.
INPUT In TV mode, tunes to the TV’s Video Input Channel(s). For more information about
Video Input Channels, go to page 9.
LOCK In VCR mode, accesses the childlock feature if unit has one.
MUTE Lowers the volume to minimum level. Press again to restore volume.
RECORD In VCR mode, used to record a program.
SEARCH In VCR mode, accesses Index search feature.
SPEED In VCR mode, selects tape speed.
TIMER In VCR mode, accesses the timer recording menu in some models.
TV Puts the remote in TV mode so it operates the TV (RCA, GE, and Proscan TVs only).
TV•VCR Functions as a TV/VCR button in VCR mode.
VCR Puts the remote in VCR mode so it operates the VCR (RCA, GE, and Proscan VCRs only).
VOL </> Decreases and increases volume level.
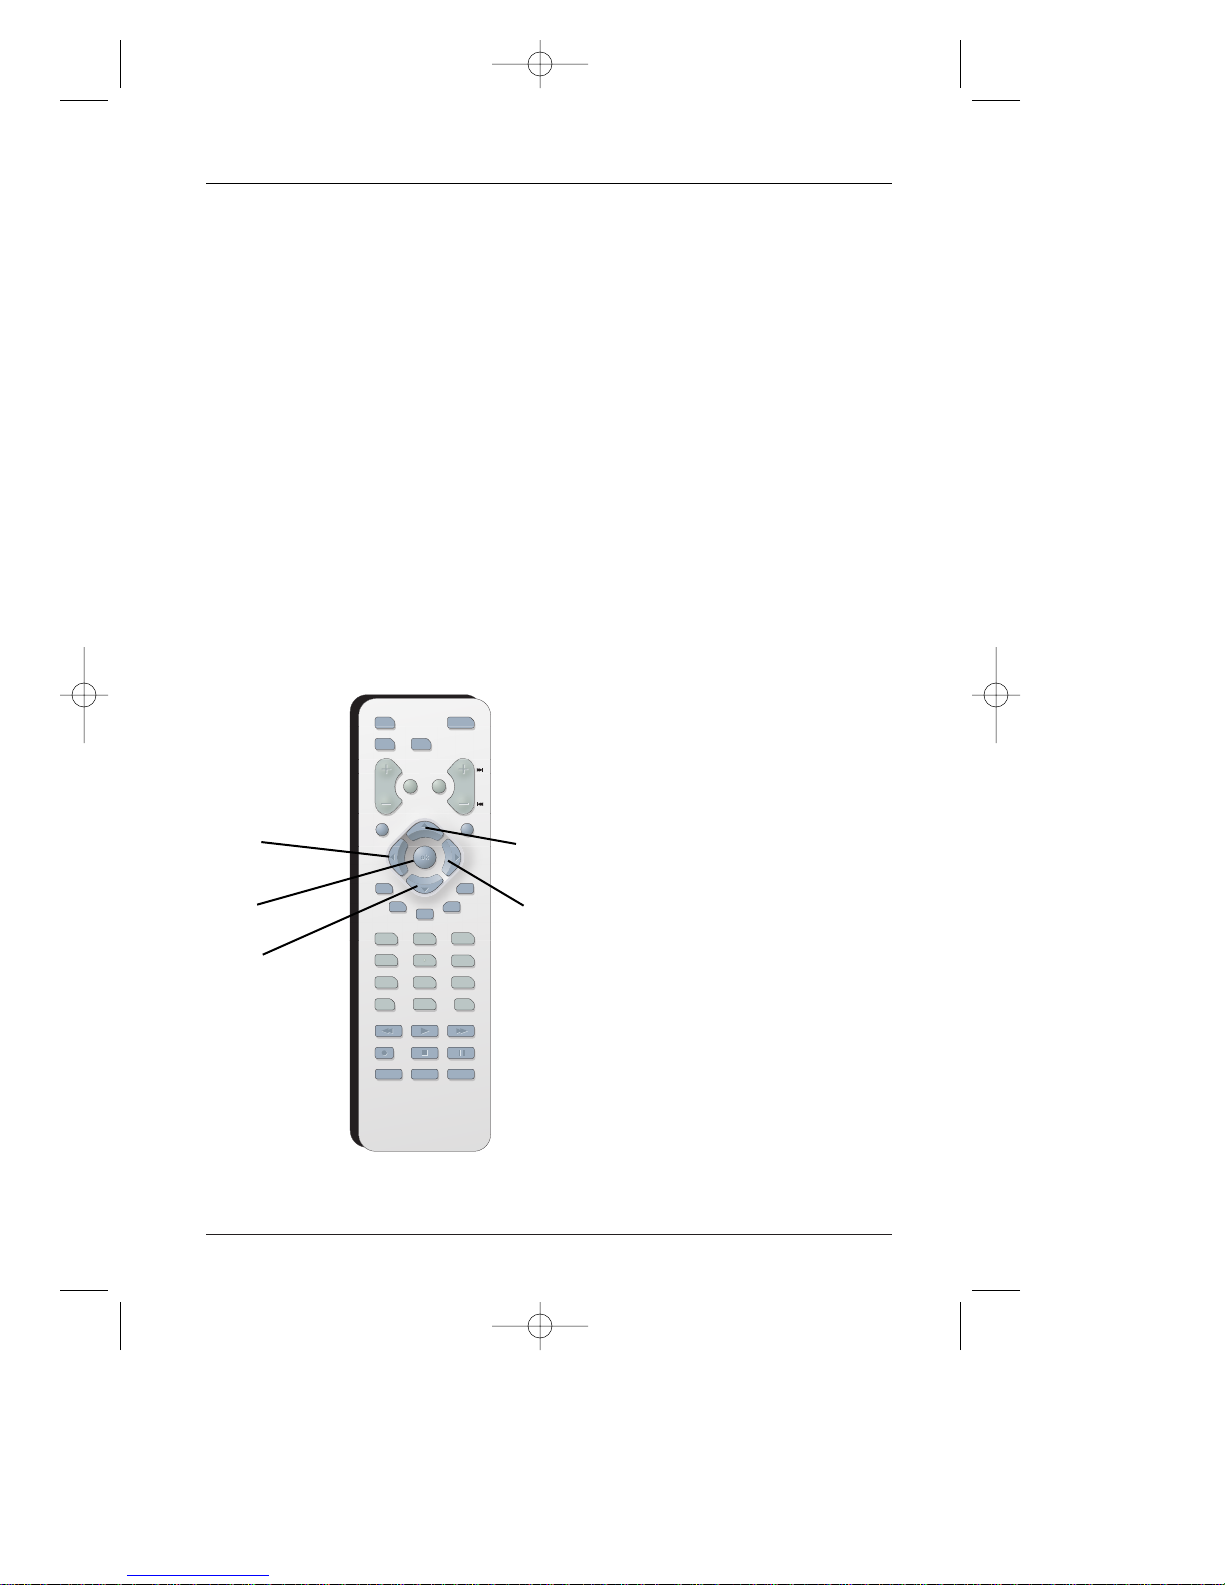
Using the Remote to
Navigate through
On-Screen Menus
No matter what on-screen display
you’re using (the DVD player’s menu,
the Info Display that appears during
playback, or a disc’s menu), you’ll use
the same buttons on the remote
control to navigate through the onscreen display: the four arrow
buttons and the OK button.
Use the arrow buttons on the
remote to move through on-screen
menus in the direction of the arrow
button (to move right, press the right
arrow button; to move left, press the
left arrow button, etc.).The left
arrow button
closes the current menu
and takes you to the previous one.
The arrow buttons are used to
highlight an option. Once highlighted,
press the OK button to select the
option that is highlighted.
Left
arrow
Down
arrow
OK
button
Up arrow
Right
arrow
Use the arrow buttons to highlight onscreen options. Use the OK button to
select an option that is highlighted.
The Remote Control
DRC240.body 3/16/04 11:41 AM Page 11
DVD
VCRTV
VOL
GO BACK
MUT
E
RET
CLEAR
AUDI
O
LOCK
SUBTITLE
TIMER
INF
O
123
4
5
7809
INPUT
REVERSEPLAYFORWARD
STO
P
RECORD
AGAIN
ZOOM
SPEED
SEARC
H
URN
TITL
GUIDE
OPE
O
N•O
ANGLE
E
PLAY MODE
T
V•VCR
PAUSE
N•CLOSE
FF
C
H
MENU
6

12
Chapter 3 Playing Discs
Regional Coding
Both the DVD Player and the discs are coded by region.These regional codes must match in
order for the disc to play.This player’s code is Region 1. ALL means all regions. Other regions
are: 2: Europe, the Middle East, Rep. of South Africa, Japan - 3: Southeast Asia,Taiwan - 4: Central
America, South America,Australia, Mexico, New Zealand - 5: Russian Federation,Africa (except
Egypt and Rep. of South Africa), India, Pakistan - 6: China.
How to load and play a disc
Turn on your DVD Player and your TV.
1. If necessary, tune the TV to its Video Input channel (for help, go to
page 9).
2. Place a disc gently into the slot with the disc’s label facing up (double-sided discs have content
on both sides, so you can place the disc with either side up).
3. The DVD Player reads the disc’s table of contents, and then one of three things happens
depending on how the disc was programmed:
• The disc starts playing
• The disc menu appears. One of the options will start playing the disc. Highlight that option
and press OK.
• The DVD Player’s main menu appears (since the
Play menu is already highlighted, just
press the OK button).
Compatible discs
This DVD Player is capable of playing the following types of discs: DVDs,
DVD+R, DVD+RW, DVD-R, DVD-RW,Audio DVDs,Audio CDs, CD-R, CDRW,Video CDs (VCDs), SVCDs. CDs with mp3 files,WMA files (Windows
Media Audio), JPEG files and properly encoded DivX discs. Before you put a
disc in the player, make sure it is compatible.
You can’t play the following types of discs: Laserdiscs, CD-I, CD-ROM
(computer-only discs), DVD-ROM,discs recorded using other broadcast
standards (i.e. PAL or SECAM), or CD-G discs.
In spite of progress made to ensure playability of all discs types, it is not
possible to guarantee playback of discs which are not in conformity with
DVD, CD,VCD or SVCD standards. This unit may not play some recordings
or files on CD-R, CD-RW, DVD-R, DVD-RW, DVD+R. DVD+RW due to
differences in recording formats, software used and disc types.
Note: Some discs may not be compatible due to laser pickup and design.
DRC240.body 3/16/04 11:41 AM Page 12
DVD+Rewritable

13
Search Options
To search a disc, you can use the FORWARD button or the REVERSE button.You can also use the
following search features:
Picture Scan - When you’re playing a disc, each time you press FORWARD or REVERSE, your
DVD Player scans the disc faster until you reach the fastest scan speed.To resume normal
playback, press PLAY.
Freeze Frame and Frame Advance – While a disc is playing, press PAUSE to freeze the
picture.To advance one frame at a time, press PAUSE again (the on-screen icon changes from
PAUSE to FRAME). Each time you press the FORWARD or REVERSE button, the picture goes to
the next (or previous) frame.To resume normal playback, press PLAY.
Note: If you pause a DVD disc or VCD disc for a long period of time, the video will disappear from the screen.
Press any button on the remote to revert to the place on the disc where you paused playback.
Slow Motion (in Freeze Frame Mode) – While a disc is playing, press PAUSE. Press REVERSE
or FORWARD (each time you press REVERSE or FORWARD the slow motion will get even
slower until you reach the slowest speed).To resume normal playback, press PLAY.
Playback Options
Many of your DVD Player’s playback features are accessed through the Info Display, the banner at
the top of the screen that appears during playback (for more information, go to page 14).
Additionally, with some discs you can access playback features directly from the remote control.
Chapter Advance
While a disc is playing, you can skip forward or backward a chapter or track at a time by pressing
the CH+ and/or CH- buttons—also labeled and .
Zoom
1.
While you’re playing a disc, press ZOOM (the player zooms in on the image). Each time you
press ZOOM, the picture is magnified even more (until you get to the maximum zoom level).
2. To see other parts of the picture when you’ve zoomed in on the image, try pressing the ,
, and buttons to go in corresponding directions.This feature is called pan and scan.
Scene Again™
While you’re playing a DVD disc, press the AGAIN button on the remote (the disc automatically
repeats the last several seconds of the movie).
Playing Discs
DRC240.body 3/16/04 11:41 AM Page 13
 Loading...