

Page 1

C 2 9 4 0 0
M 2 9 4 0 0
U S E R ’ S
G U I D E
It is important to read this manual before
operating this unit for the first time.
Page 2

Page 3

Important Information
WARNING
To reduce the risk of fire or
shock hazard, do not expose
this TV to rain or moisture.
Refer to the identification/rating label located on the back panel of your
product for its proper operating voltage.
FCC Regulations state that unauthorized changes or modifications to this
equipment may void the user’s authority to operate it.
If fixed (non-moving) images are left on the screen for long periods, they
may be permanently imprinted on the screen. Such images include network
logos, phone numbers, and video games. This damage is not covered by
your warranty. Extended viewing of channels displaying these images
should be avoided.
Cable TV Installer: This reminder is provided to call your attention to
Article 820-40 of the National Electrical Code which provides guidelines for
proper grounding and, in particular, specifies that the cable ground shall be
connected to the grounding system of the building as close to the point of
cable entry as practical.
WARNING
RISK OF ELECTRIC SHOCK
DO NOT OPEN
This symbol indicates
“dangerous voltage” inside
the product that presents a
risk of electric shock or
personal injury.
TO REDUCE THE RISK OF ELECTRIC SHOCK, DO
NOT REMOVE COVER (OR BACK). NO USER
SERVICEABLE PARTS INSIDE. REFER SERVICING
TO QUALIFIED SERVICE PERSONNEL.
This symbol indicates
important instructions
accompanying the
product.
Page 4

Table of Contents
Important Information Warning _____________________________________________________________________ i
Quick Guide to Your TV Startup ____________________________________________________________________ 2-3
Hook up, Plug in TV, Put Batteries in the Remote,
Turn on the TV, Place Channels into Memory, Set the Time
Basic Tour of the Remote ____________________________________________ 4
Basic Button Layout and Functions
Menu Basics ______________________________________________________________ 5
Colors, Menu Buttons, Moving through the Menus
Using Your TV and Remote With Remote Buttons ______________________________________________ 6-7
With VCRs ____________________________________________________________ 8-10
With a Satellite Receiver ___________________________________________ 11
With a Cable Box _________________________________________________ 12-13
With a Laserdisc Player ____________________________________________ 14
With Audio Equipment ____________________________________________ 15
Adjusting Your TV Overall Picture _________________________________________________________ 16
Picture Settings ________________________________________________________ 17
Color, Tint, Brightness, Sharpness, Autocolor, Picture Reset
Sound Settings ____________________________________________________ 18-19
Stereo, Expanded Stereo, SAP, Tone, Speakers
Using Advanced Features Placing Channels in Memory/Autoprogram ____________ 20
Adding and Deleting Channels in Memory ________________21
Naming the Channels ______________________________________________ 22
Setting the Sleep Timer _____________________________________________ 23
Setting the Alarm Clock ___________________________________________ 24
Selecting a Language _______________________________________________ 25
Watching Closed Captioning ____________________________________ 26
Setting Your TV for Antenna or Cable _______________________ 27
References Front Panel Buttons __________________________________________________ 30
Displays on the Screen _____________________________________________ 31
Trouble Checks ____________________________________________________ 32-33
Page 5

Quick Guide to Your TV
For Model C29400:
A. Plug cord into adapter as shown at
the left.
B. Plug the adapter into the outlet,
matching the prongs with the outlet.
Startup
The steps below will get your TV connected and ready for watching.
For more details, see the page numbers listed.
1. Hook up your TV
Details are in the Connections
Guide.
CAUTION: Choose the location for your TV carefully. Take precautions that the stand or other furniture on
which the TV is placed is properly located (see Important Safeguards sheet) and of adequate size and
strength to prevent the TV from accidentally being tipped over, pushed off, or pulled off. This could cause
damage to the TV and/or personal injury.
2. Plug in the TV
Hook up any antennas, cables or
other equipment to your TV before
you follow the steps below.
For Model M29400:
Plug the cord into the outlet,
matching the wide and the small
end of the plug with the outlet.
3. Put Batteries in the Remote
2
A. Pull off the cover of the battery
compartment.
B. Place the batteries, matching
the +and – end of each battery
in the compartment.
C. Replace the cover.
Page 6

Quick Guide to Your TV
A. Press MENU•PROG until the
Alarm menu is selected. This
menu is green.
B. The Clock is automatically
highlighted the first time you
set it. If it is not, press MOVE H
(down) to highlight it.
C. Press MOVE F to set the hour.
D. Press MOVE E to set the
minutes.
A. Press MENU•PROG until the
Setup menu is selected. This
menu is white.
B. Press MOVE E to start placing
channels in the TV’s memory.
C. Wait until TV has cycled through
all the channels and returns to
original channel.
6. Set the Time
5. Place all available
channels in memory
(Autoprogram)
Details for adding and deleting
channels are on page 21.
Press TV on the remote.
OR
Press POWER on the TV.
4. Turn on the TV
Startup
1 3
Controls Alarm Adjust Setup
E n g l i s h Français Español
A u t o p r o g r a m
Label: 13 C l e a r
Channel Memory: 13 Stored
Cable/Air: Cable
1 2 : 2 1 A M 1 3
Controls Alarm Adjust Setup
Alarm: Off
Alarm Channel: 07
On Time: Disabled
Off Time: Disabled
Clock: Use –/+ to set time.
Page 7
Quick Guide to Your TV
Turns the TV on.
Sets the remote to control the TV.
Operates TV when remote is set to
control the TV.
Operates the TV and advanced
features.
TV Power Button
Volume and Channel Controls
Details are on page 6.
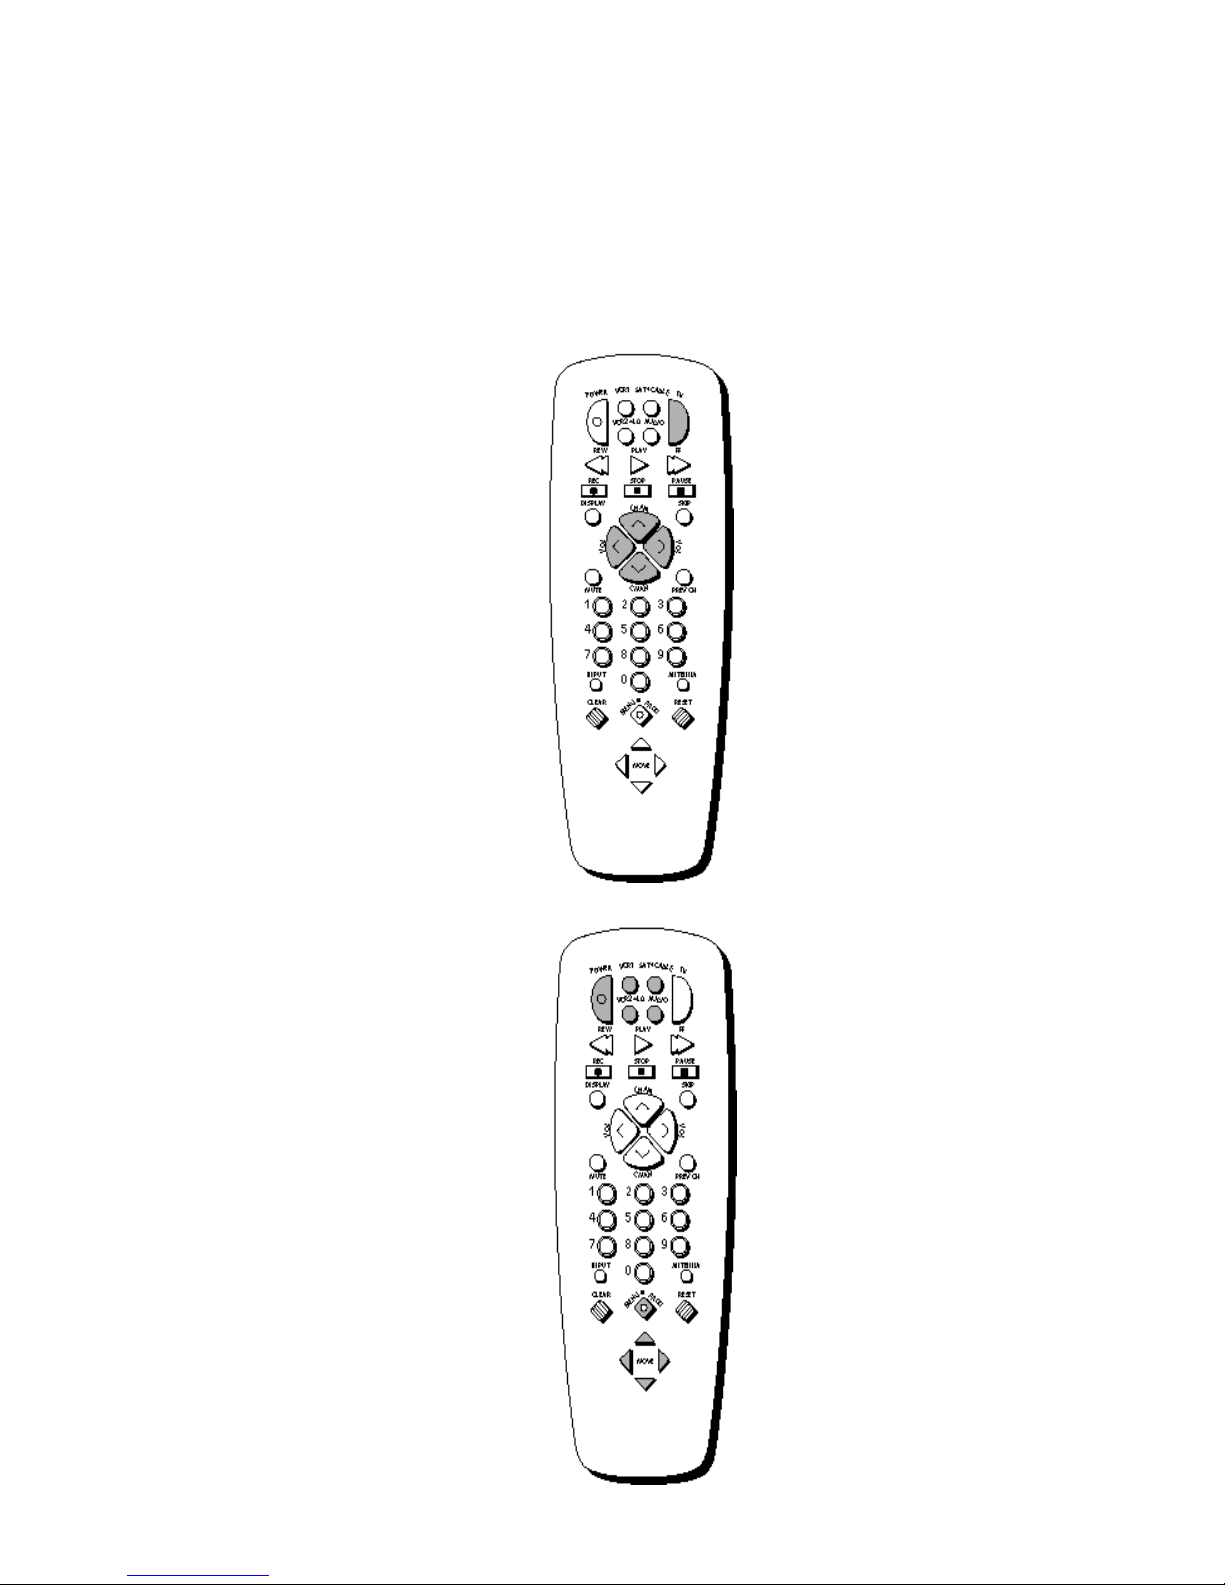
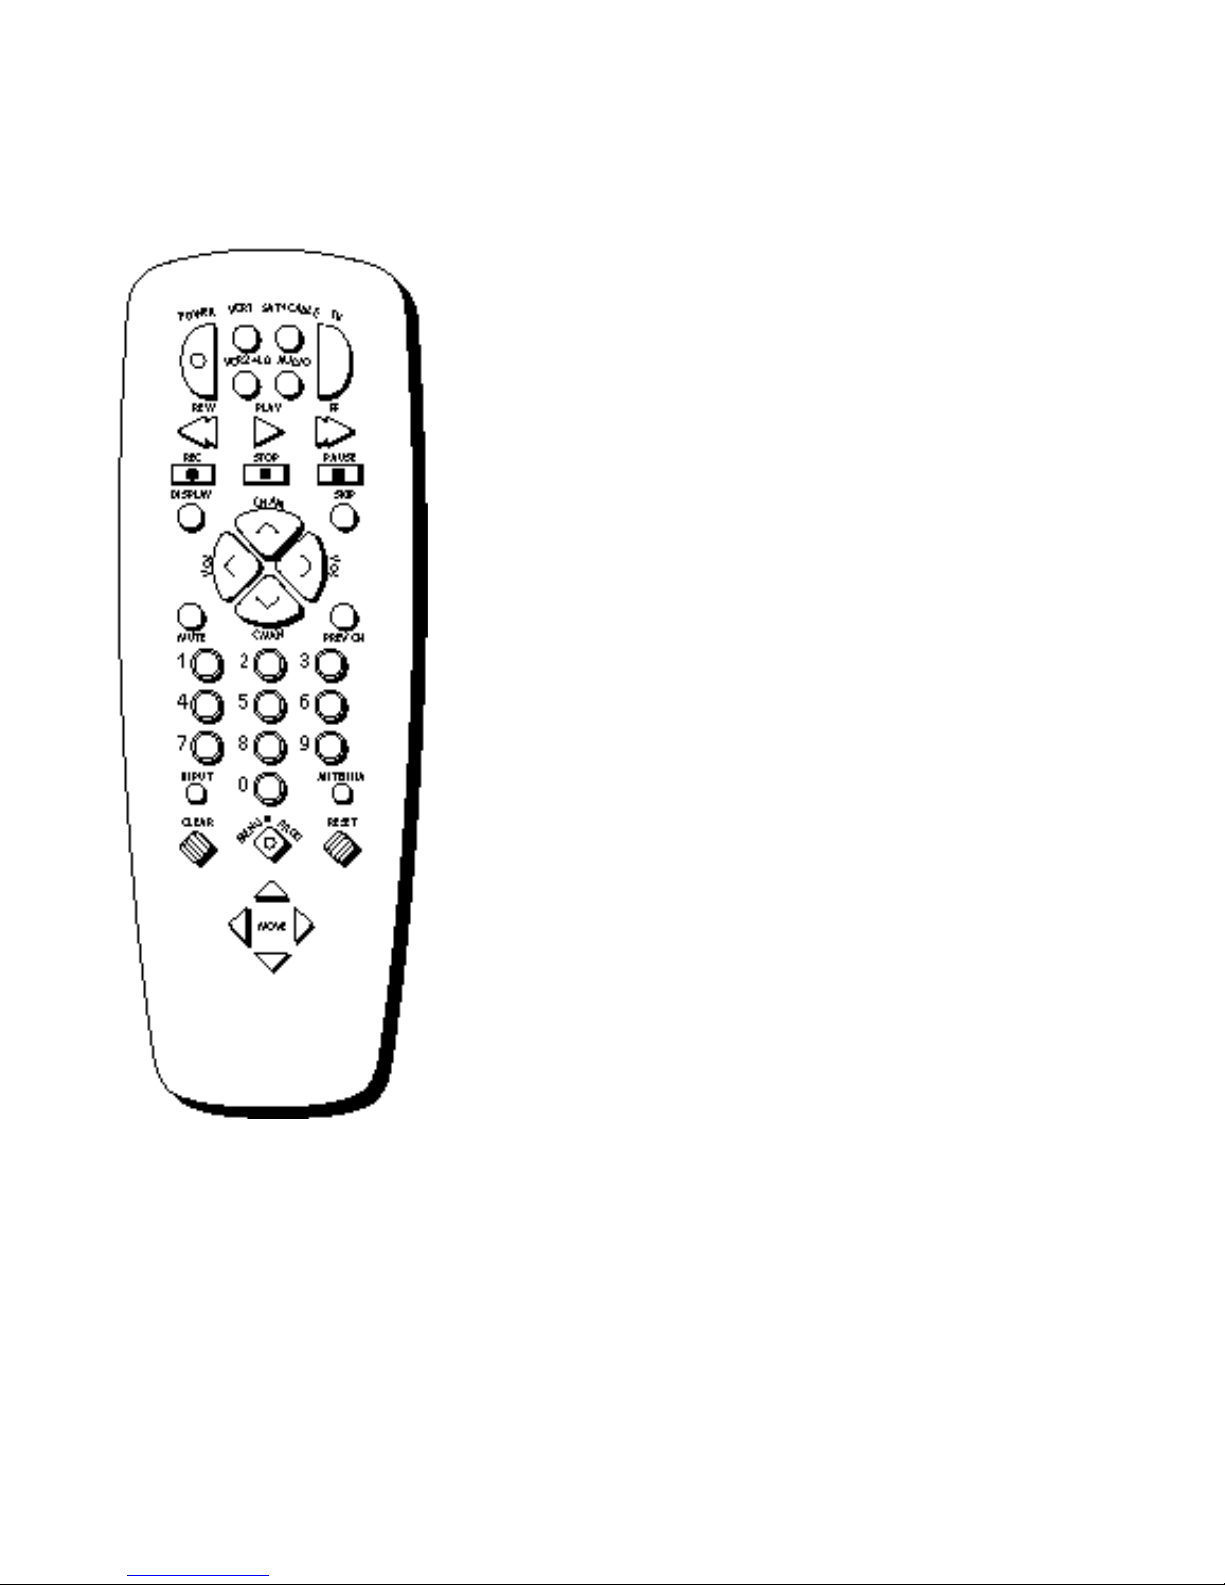
Basic information about your remote is shown below. This will give you a
general idea of how your remote works. For more details, see pages 6–15.
Controls components such as a
VCR, laserdisc player, audio
equipment, satellite receiver and a
cable box.
Changes the menus and features
on the screen.
Component Buttons
Details are on pages 8–15.
Menu Buttons
See next page for details.
Basic Tour of the Remote
Page 8

Quick Guide to Your TV
Colors
Menu Buttons
These buttons are used with the
TV’s menus to adjust the features.
You can use the menu buttons on
the remote or the front of the TV.
Press MENU•PROG repeatedly to
see each of the four menu colors.
Each menu has a different color
background as shown at the left.
Green Light
Blue
White
General information about using the on-screen menu system is shown
below. Details on using the remote buttons are on pages 6-7. Many menu items
are explained in detail in Using the Advanced Features starting on page 20.
Moving through the Menus
Controls Alarm Adjust Setup
E n g l i s h Français Español
A u t o p r o g r a m
Label: 13 C l e a r
Channel Memory: 13 Stored
Cable/Air: Cable
Controls Alarm Adjust Setup
E n g l i s h Français Español
A u t o p r o g r a m
Label: 13 C l e a r
Channel Memory: 13 Stored
Cable/Air: Cable
1. Press MENU•PROGon the
remote or MENU on the front
panel to move from menu to
menu.
2. Press MOVE or on the
remote or CHANNEL up/down
on the front panel to move up
and down through the features
in the menu.
3. Press MOVEF and E on the
remote or VOLUME + or – on
the front panel to move left and
right on the menu lines.
Menu Basics
Yellow
Page 9

Using Your TV and Remote
POWER
Turns off the TV.
Turns off compatible VCRs.
Turns on a component after a
component button is pressed.
AUDIO, VCR, VCR2•LD,
SAT•CABLE, TV
Sets the remote to control the
component. VCR2•LD can only be
programmed for one component:
either a VCR or a Laserdisc Player.
See Using the Remote with a VCR,
Cable Box, Laserdisc Player and Audio
equipment on pages 8–15.
TV
Turns on the TV.
Shows the displays on the screen.
Sets the remote to control the TV.
See Using the Remote with a VCR,
Cable Box, Laserdisc Player and Audio
equipment on pages 8–15.
REW (Rewind)
Rewinds a tape or laserdisc.
Searches backward while tape or
laserdisc is playing.
PLAY
Plays tape or laserdisc.
FF (Fast Forward)
Fast forwards a tape or laserdisc.
Searches forward while tape or
laserdisc is playing.
REC (Record)
Starts recording onto tape.
STOP
Stops tape or laserdisc.
PAUSE
Pauses tape or laserdisc.
DISPLAY
Shows displays on the screen.
Clears menus from the screen.
SKIP (Commercial Skip)
Allows you to scan other channels during commercials.
Each press adds 30 seconds. TV
switches back to original channel
when time runs out. Press
CLEAR to cancel SKIP.
CHAN and
(Channel up and down)
Scans up and down through
channels in the TV’s memory.
Moves through channels
in VCR’s memory.
VOL < and >
(Volume down and up)
Raises and lowers sound.
MUTE
Switches the TV sound on or off.
PREV CH (Previous Channel)
Changes back and forth between
two channels.
Select a channel and then select
another. Press PREV CH to
switch between the two channels.
With Remote Buttons
Page 10
Using Your TV and Remote
Number Buttons (0-9)
Selects any channel number.
Two numbers must be pressed for
each channel. Press 0 and 6 for
channel 6. For three digit channels, press and hold 1 until 1-appears on the screen. Then press
the other two numbers.
INPUT
Switches between the TV channels
and
Video 00.
ANTENNA (ANT A•B)
Used as TV/VCR button when
remote is set to control the VCR.
CLEAR
Clears menus and displays from
the screen.
Clears items from VCR timer
programs and VCR’s clock.
MENU•PROG (Program)
Shows menus on the screen and
moves from menu to menu.
Sets VCR clock and programs
timer on VCR.
RESET
Returns the picture adjustments to
the original settings.
MOVE F and E (left and right)
Moves left and right on a menu
line. See Menu Basics on page 5.
Changes a feature setting.
MOVE G and H (up and down)
Moves up and down menus. See
Menu Basics on page 5.
With Remote Buttons
Page 11

Using Your TV and Remote
With VCRs: Programming the Remote
Refer to the Connection Book or the VCR’s owners manual to hook up your VCRs.
The remote may need to be programmed for your VCR. This remote may
not operate all models of brands listed below. Use the codes below or on the
sheet packed in with your remote.
1.Test the remote
2.Program the remote for
your VCRs
VCR Codes
Aiwa.................................................15
Akai........................................03,22,23
Audio Dynamics........................14,16
Broksonic.........................................10
Canon...............................................08
Capehart...........................................01
Citizen..............................................09
Craig............................................07,12
Curtis Mathes........................00,08,15
Daewoo............................................13
dbx...............................................14,16
Dimensia..........................................00
Dynatech..........................................15
Emerson...09,10,13,15,20,23,24,34,41
Fisher............................02,12,18,19,43
Funai.................................................15
GE .................................00,07,08,32,37
Goldstar.......................................09,14
Harman Kardon..............................14
Hitachi...............................05,15,35,36
Instant Replay.................................08
JCL....................................................08
JCPenney.......02,05,07,08,14,16,30,35
JVC.....................................02,14,16,30
Kenwood...........................02,14,16,30
Lloyd ................................................15
Magnavox...................................08,29
Marantz...................02,08,14,16,29,30
Marta................................................09
MEI...................................................08
Memorex...........................08,09,12,15
MGA............................................04,27
Minolta........................................05,35
Mitsubishi....................04,05,27,35,40
Montgomery Ward.........................06
MTC.............................................07,15
Multitech...........................07,15,31,32
NEC...................................02,14,16,30
Panasonic.........................................08
Pentax..........................................05,35
Philco...........................................08,29
Philips..........................................08,29
Pioneer...................................05,16,33
ProScan.............................................00
Quartz...............................................02
Quasar..............................................08
RCA....................00,05,07,08,28,35,37
Realistic.........02,06,08,09,12,15,19,43
Samsung.......................07,13,22,32,42
Sansui...............................................16
A. Press VCR1 or VCR2 to turn
the VCR on.
B. Press the VCR buttons shown
at the left. If your VCR does
not work, program VCR1 or
VCR2 with a VCR code from
the list below.
A. Point the remote at the VCR
and hold VCR1.
B. Enter the code for your brand
from the code list below.
C. Release VCR1.
D. Press POWER. If nothing
happens, try pressing VCR1
and then POWER.
E. Repeat A–D with another code
if the first one does not work or
if a second VCR is connected.
Sanyo..........................................02,12
Scott.......................................04,13,41
Sears.............02,05,09,12,18,19,35,43
Sharp.....................................06,24,39
Shintom ................................17,26,31
Sony.......................................17,26,38
Sylvania................................08,15,29
Symphonic................................02,15
Tashiko...........................................09
Tatung.............................................30
Teac............................................15,30
Technics..........................................08
Teknika............................08,09,15,21
Toshiba.................................05,13,19
Totevision..................................07,09
Unitech...........................................07
Vector Research........................14,16
Victor ..............................................16
Video Concepts........................14,16
Videosonic......................................07
Wards..................................................
............05,06,07,08,12,13,15,25,31,35
Yamaha............................02,14,16,30
Zenith.........................................11,17
Page 12

Using Your TV and Remote
With VCRs: Setting the VCR1 Channel
The VCR 1 Channel works with the VCR1 button on the remote. If the
VCR 1 Channel is set, pressing VCR1 selects the channel to see the VCR
picture. The VCR 1 Channel setting depends on which diagram you have
used from the Connection Guide. If you want to turn this feature off, set
the VCR 1 Channel to Disable. Refer to the chart below for your setting.
1. Select the Setup Menu
2. Highlight VCR1 Channel
Controls Alarm Adjust Setup
E n g l i s h Français Español
A u t o p r o g r a m
Label: 13 C l e a r
Channel Memory: 13 Stored
Cable/Air: Cable
Controls Alarm Adjust Setup
E n g l i s h Français Español
A u t o p r o g r a m
Label: 13 C l e a r
Channel Memory: 13 Stored
Cable/Air: Cable
VCR 1 Channel: 0 3
1 3
1 3
A.Press TV to set the remote to
control the TV.
B. Press MENU•PROG to select the
Setup menu. This menu is
white.
A.Press MOVE H (down) to
highlight the VCR 1 Channel.
B. Press E to highlight the channel.
3. Enter channel number
Diagram used from the
Connection Guide:
1B, 1C, 2B, 2C, 3B, 3C, 4C, 5C
Controls Alarm Adjust Setup
E n g l i s h Français Español
A u t o p r o g r a m
Label: 13 C l e a r
Channel Memory: 13 Stored
Cable/Air: Cable
VCR 1 Channel: 00
Set VCR1 Channel to:
00
4B, 5B
3 or 4 (same as 3/4 switch)
1 3
A.Enter channel 00, 03, or 04.
Choose your setting from the
chart below. Press CHANNEL
down until “Disabled” is
displayed to turn the feature off.
Page 13

Using Your TV and Remote
With VCRs: Basic Operation
If the remote operates your VCR, this page and the next will show you
how to use it for basic functions. See page 7 for more details on buttons used
with your VCR.
Turn on the VCR
Turn off the VCR
Record one TV program
and watch another
A.Press channel 00 on the TV to
see what the VCR is doing.
B. Press VCR1 or VCR2 to set the
remote to control the VCR.
C. Press POWER to turn on the
VCR if it did not turn on when
you pressed VCR1 or VCR2.
A. Press VCR1 or VCR2 to set the
remote to control the VCR.
B. Press POWER.
A. Press VCR1 or VCR2 to set the
remote to control the VCR.
B. Tune the VCR to the channel
you want to record using
CHANNEL up and down or
pressing two number buttons.
C. Press RECORD to start
recording.
D. Press TV/VCR on the VCR.
E. Press TV to set the remote to
control the TV.
F. Press CHANNEL up or down to
change channels on the TV.
G. To see the channel you are
recording, tune the TV back to
channel 00.
Watch a tape in your VCR
10
A. Turn on VCR.
B. Insert a tape in the VCR.
C. Press PLAY to start the tape
playing.
D. Press STOP when you are
finished.
E. Press REW to rewind the tape.
Page 14

11
Using Your TV and Remote
With a Satellite Receiver: Basic Operation
A. Press SAT•CABLE to set the
remote to control the satellite
receiver.
B. Press POWER to turn on the
receiver if it did not turn on
when you pressed SAT•CABLE.
A. Press SAT•CABLE to set the
remote to control the satellite
receiver.
B. Press POWER to turn off the
receiver.
You may also be able to use the TV’s remote with RCA satellite receivers.
Refer to your Satellite Receiver owner’s manual to hook up your Satellite
Receiver. The remote may need to be programmed for other brands of
satellite receivers, but may not operate all models of the brands listed
below. Use the codes below or on the sheet packed in with your remote.
Follow the instructions below for basic operation of your receiver. You
may also want to experiment with other buttons on the remote to see if
they work with your receiver.
Turn off the Satellite
Receiver
Program the remote for your
Satellite Receiver
Turn on the Satellite
Receiver
A. Point the remote at the satellite
receiver and hold SAT•CABLE.
B. Enter the code for your brand
from the code list below.
C. Release SAT•CABLE.
D. Press POWER. If nothing
happens, try pressing
SAT•CABLE and then POWER.
Satellite Receiver Codes
Chaparral..........................80,81
Cheyenne...............................81
Drake.................................82,83
DSS..........................................00
GE............................................00
General Instruments...92,93,94
ProScan...................................00
RCA.........................................00
Realistic..................................84
Sierra I,II,III............................81
STS1.........................................85
STS2.........................................86
STS3.........................................87
STS4.........................................88
Toshiba...................................89
Uniden....................................90
Video Cipher II......................91
Page 15

Using Your TV and Remote
12
Refer to the Connection Book or contact your cable company to hook up your cable
box. If you have a cable box with its own remote, then you may also be able
to use the TV’s remote with your cable box. This remote may not operate
all models of brands listed below. Use the codes below or on the sheet packed in
with your remote.
Program the remote for your
cable box
A.Point the remote at the cable
box and hold SAT•CABLE.
B. Enter the code numbers for
your brand from the list below.
C. Release SAT•CABLE.
D.Press POWER to turn it on.
If nothing happens, try
pressing SAT•CABLE and
then POWER.
E. Repeat A-D with another code
if the first one does not work.
A.Tune TV to channel 02, 03, 04,
05, or 06--the cable box channel.
B. Point remote at the cable box
and press SAT•CABLE.
C. Press POWER to turn it on.
D.Press CHANNEL up or down to
change channels on the cable
box.
A. Press SAT•CABLE.
B. Press POWER to turn it off.
Basic Operation:
Turn on the Cable Box
Turn off the Cable Box
ABC..............................................22,46
Anvision.......................................07,08
Cablestar......................................07,08
Eagle..................................................08
Eastern International.......................02
General Instrument.............................
....................04,05,15,23,24,25,30,36,46
Hamlin...............................12,13,34,48
Hitachi.....................................37,43,46
Jerrold....................................................
..........04,05,15,23,24,25,30,36,45,46,47
MACOM......................................37,43
Magnavox.............................................
..........07,08,19,21,26,28,29,32,33,40,41
NSC...................................................09
Oak..........................................01,16,38
Oak Sigma........................................16
Panasonic................................03,27,39
Philips...................................................
..........07,08,19,21,26,28,29,32,33,40,41
Pioneer....................................18,20,44
Randtek........................................07,08
RCA..............................................00,27
Regal.............................................12,13
Regency........................................02,33
Samsung...........................................44
Scientific Atlanta....................03,22,35
Signature...........................................46
Sprucer..............................................27
Starcom.............................................46
Sylvania.............................................11
Teknika.............................................06
Texscan.........................................10,11
Tocom.................................17,21,49,50
Unika.......................................31,32,41
Viewstar................................................
..........07,08,19,21,26,28,29,32,33,40,41
Warner Amex...................................44
Zenith...........................................14,42
Cable Box Codes
With a Cable Box: Programming and Basic Operation
Page 16

Using Your TV and Remote
The Cable Channel works with SAT•CABLE on the remote. If the Cable
Channel is set, pressing SAT•CABLE selects the channel to see cable
channels. The Cable Channel setting depends on which channel your
cable box must be on to see cable channels. The channels usually used
are 02, 03, 04, 05 or 06. Consult your cable company for more information.
A.Press TV to set the remote to
control the TV.
B. Press MENU•PROG to select the
Setup menu. This menu is
white.
A.Press MOVE H (down) to move
down the menu until Cable
Channel is highlighted.
B. Press E to underline the
channel.
A.Enter the number for your cable
box, either 02,03,04,05 or 06.
Press CHANNEL down until
“Disabled” is displayed to turn
this feature off.
1. Select the Setup menu
2. Highlight Cable Channel
3. Enter channel number
VCR 1 Channel: 00
Cable Channel: 02
1 3
Controls Alarm Adjust Setup
E n g l i s h Français Español
A u t o p r o g r a m
Label: 13 C l e a r
Channel Memory: 13 Stored
Cable/Air: Cable
VCR 1 Channel: 00
Cable Channel: 02
1 3
Controls Alarm Adjust Setup
E n g l i s h Français Español
A u t o p r o g r a m
Label: 13 C l e a r
Channel Memory: 13 Stored
Cable/Air: Cable
VCR 1 Channel: 00
Cable Channel: 03
1 3
Controls Alarm Adjust Setup
E n g l i s h Français Español
A u t o p r o g r a m
Label: 13 C l e a r
Channel Memory: 13 Stored
Cable/Air: Cable
With a Cable Box: Setting the Cable Channel
Page 17

Using Your TV and Remote
Refer to your Laserdisc Player owner’s manual to hook up your Laserdisc Player.
The remote may need to be programmed for your laserdisc player. This
remote may not operate all models of brands listed below. Use the codes below
or on the sheet packed in with your remote.
A.Tune TV to channel 00, 03, or 04.
B. Point the remote at the laserdisc
player and press VCR2•LD.
C. Press POWER to turn it on.
D.Use the buttons on the remote
that relate to laserdisc player
functions. Not all buttons highlighted may work with your
laserdisc player.
E. Press POWER to turn it off.
Program the remote for
your Laserdisc Player
A.Point the remote at the laserdisc
player and hold VCR2•LD.
B. Enter the code for your brand
from the code list below.
C. Release VCR2•LD.
D.Press POWER. If nothing
happens, try pressing VCR2•LD
and then POWER.
Basic Operation
Pioneer........................33
ProScan.......................33
RCA.............................33
Laserdisc Player Codes
With a Laserdisc Player: Programming and Basic Operation
Page 18

Using Your TV and Remote
Basic Operation
Program the remote for
audio equipment
A. Point the remote at the audio
equipment and hold AUDIO.
B. Enter the code from the
code list.
C. Release AUDIO.
D. Press POWER to turn it on. If
nothing happens, try pressing
AUDIO and then POWER.
E. Repeat A–D with another code
if the first one does not work.
A. Point the remote at the audio
equipment and press AUDIO.
B. Press POWER to turn it on.
C. Use the buttons on the
remote that relate to audio
functions. Not all buttons
highlighted may work with
your equipment.
D. Turn the audio equipment off
using the audio component’s
power off button.
RCA/ Dimensia
AM/FM...........................03
CD....................................07
Tape.................................06
Phono..............................05
Aux..................................04
Audio Codes
Refer to the Connection Book or your Audio equipment owner’s manual to hook
up your audio equipment. Your remote controls only RCA audio equipment
such as a radio, CD player, tape player, turntable, or amplifier. The
remote may need to be programmed for your equipment. This remote
may not operate all models of brands listed below. Use the codes below or
on the sheet packed in with your remote.
With Audio Equipment: Programming and Basic Operation
Page 19

Adjusting Your TV
Overall Picture
Follow the steps below to lighten or darken the overall picture without
changing the color levels.
1. Select the Controls Menu
2. Highlight Picture
Controls Alarm Adjust Setup
Sleep Timer: -:--
Closed Captioning: Off
Picture -..... I. . . . . +
Stereo: On
SAP: Off
Controls Alarm Adjust Setup
Sleep Timer: -:-Closed Captioning: Off
Picture -.....
Stereo: On
SAP: Off
I
. . . . . +
Press MENU•PROG to select
the Controls menu. This menu
is yellow.
Press MOVE H (down) to
highlight Picture.
3. Use MOVE E and F to
adjust the Picture
16
Press MOVE E (right) to lighten
the picture.
OR
Press MOVE F (left) to darken
the picture.
Picture -....... I. . . +
Page 20

Adjusting Your TV
17
Controls Alarm Adjust Setup
C o l o r - . . . . .I
. . . . . +
T i n t G . . . . .I
. . . . . R
B r i g h t - . . . . .I
. . . . . +
S h a r p - . . . . .I
. . . . . +
Autocolor: On
Controls Alarm Adjust Setup
C o l o r - . . . . .
I
. . . . . +
T i n t G . . . . .
I
. . . . . R
B r i g h t - . . . . .
I
. . . . . +
S h a r p - . . . . .
I
. . . . . +
Autocolor: On
Picture Settings
Follow the steps below to change the picture on the screen to your
personal setting. The chart at the bottom of the page explains your options.
1. Select the Adjust Menu
2. Highlight item to change
3. Use MOVE E or F to
adjust each item
Picture Reset
Press MENU•PROG repeatedly to
select the Adjust menu. This menu
is light blue.
Press MOVE H (down) to
highlight the picture item you
want to adjust.
Press MOVE E or F to adjust
each item.
Color
Tint
Bright (Brightness)
Sharp (Sharpness)
Autocolor
Picture Reset
Press MOVE E to:
Increase color richness
Give red tint to skin color
Add more light to dark parts of
the picture
Show cleaner, clearer images
Turn on to keep Color and Tint in
proper balance each time you
change channels
Reset the picture back to the
factory settings
Press MOVE F to:
Decrease color to black and white
Give green tint to skin color
Add more dark to light parts of
the picture
Make picture more smooth
Turn off for manual adjustment
of Color and Tint
Reset the picture back to the
factory settings
Page 21

Adjusting Your TV
Sound Settings: Stereo, Expanded Stereo, SAP and Tone
Follow these steps to adjust the Stereo, Expanded Stereo, SAP or Tone of
your TV. SAP (Second Audio Program) is sometimes used to offer the
program being watched in another language. The chart below explains
your options.
1. Select the Controls Menu
2. Highlight item to change
3. Use MOVE E or F to
adjust each item
Controls Alarm Adjust Setup
Sleep Timer: -:-Closed Captioning: Off
Picture -.....
Stereo: On
SAP: Off
Controls Alarm Adjust Setup
Sleep Timer: -:-Closed Captioning: Off
Picture -.....
Stereo: Expanded
SAP: Off
Tone: High
I
. . . . . +
I
. . . . . +
Press MENU•PROG to select
the Controls menu. This menu
is yellow.
Press MOVE H (down) to
highlight the sound item you
want to adjust.
Press MOVE E or F to adjust
each item.
18
Stereo
SAP
Tone
On
Sound is automatically
reproduced in stereo or
mono, whichever the TV
station is broadcasting.
On
Sound is reproduced in
another sound channel.
If nothing happens,
your broadcast may not
have SAP.
High
High pitched sounds are
louder.
Off
Sound is reproduced in
mono.
Off
Sound is reproduced in
Stereo, Expanded Stereo
or Mono, whichever is
selected in the Stereo
Menu Item.
Low
Low pitched sounds are
louder.
Expanded
Expanded stereo adds greater
width and dimension to stereo
broadcasts creating a more
spacious stereo sound effect.
Page 22

Adjusting Your TV
19
1. Select the Setup Menu
Follow the steps below to turn the speakers on or off in your TV.
The chart below explains your options.
Press MENU•PROG repeatedly to
select the Setup menu. This menu
is white.
Press MOVE H (down) until
Speakers is highlighted.
Press MOVE E or F to turn the
speakers on or off.
2. Highlight speakers
3. Turn Speakers on or off
Cable Channel: 03
Speakers: Off
Off
No sound comes from the TV.
On
The sound comes from the TV's
internal speakers.
Speakers
Speakers: On
Controls Alarm Adjust Setup
E n g l i s h Français Español
A u t o p r o g r a m
L a b e l : 1 3 C l e a r
Channel Memory: 13 Stored
Cable/Air: Cable
Controls Alarm Adjust Setup
E n g l i s h Français Español
A u t o p r o g r a m
L a b e l : 1 3 C l e a r
Channel Memory: 13 Stored
Cable/Air: Cable
Controls Alarm Adjust Setup
E n g l i s h Français Español
A u t o p r o g r a m
L a b e l : 1 3 C l e a r
Channel Memory: 13 Stored
Cable/Air: Cable
VCR 1 Channel: Video
VCR 1 Channel: Video
Cable Channel: 03
Sound Settings: Speakers
VCR 1 Channel: Video
Cable Channel: 03
Speakers: Off
Page 23

Using Advanced Features
Placing Channels in Memory (Autoprogramming)
Only channels 2–13 appear in the TV’s memory when you first turn it on.
The channels available in your area must be programmed into the TV's
memory when you hook up your TV. Using CHANNEL up or down
allows you to scan through these channels.
You may want to add or delete a few channels if some stations have weak
signals or were off the air when the TV was programmed. Refer to the Add
or Delete Channels section on the next page.
Place channels in memory
(Autoprogram)
Controls Alarm Adjust Setup
E n g l i s h Français Español
A u t o p r o g r a m
L a b e l : 1 3 C e a r
Channel Memory: 13 Stored
Cable/Air: Cable
Controls Alarm Adjust Setup
E n g l i s h Français Español
A u t o p r o g r a m m i n g
L a b e l : 1 3 C l e a r
Channel Memory: 13 Stored
Cable/Air: Cable
1 3
1 5
A. Hook up an antenna, cable
or components before you
begin these steps or you will
not be able to add channels
into memory.
B. Press MENU•PROGrepeatedly
to select the Setup Menu. This
menu is white.
C. Press MOVE H (down) to
highlight Autoprogram.
D. Press MOVE (right) to start
the TV adding all active
channels into memory.
E. Wait until the TV has cycled
through all the channels and
returns to the original channel.
20
Page 24

21
Using Advanced Features
Adding and Deleting Channels in Memory
A. Press MENU•PROG repeatedly
to select the Setup menu. This
menu is white.
B. Press MOVE H (down) to
highlight Channel Memory.
C. Press MOVE E to underline
the channel number.
D. Select the channel number you
want to add or delete with the
number buttons.
E. Press MOVE E to add or delete
a channel (you will see Stored
on the screen when added and
Erased when deleted).
F. Repeat D and E for more
channels.
1 3
Controls Alarm Adjust Setup
E n g l i s h Français Español
A u t o p r o g r a m
L a b e l : 1 3 C l e a r
Channel Memory: 1 3 S t o r e d
Cable/Air: Cable
1 3
Controls Alarm Adjust Setup
E n g l i s h Français Español
A u t o p r o g r a m
L a b e l : 1 3 C l e a r
Channel Memory: 1 3 E r a s e d
Cable/Air: Cable
Adding and deleting
channels in memory
You may want to add or delete a few channels if some stations have weak
signals or were off the air when the TV was programmed. Refer to the Add
or Delete Channels section below.
Page 25

Using Advanced Features
Naming the Channels
You can name the channels using the character list below. Full appears
beside Label when the memory is used up. The TV can store up to 27
labels in memory. Fixed appears beside Label for channel 00--it cannot
be named.
A. Press MENU•PROG repeatedly
to select the Setup menu. This
menu is white.
B. Press MOVE H (down) to
highlight Label.
C. Press MOVE E to underline the
channel number.
D. Select the channel number with
the number buttons.
E. Press MOVE E to underline the
first character of the name.
F. Choose the character using
MOVE G or H (up or down).
G. Repeat E–F to complete the
name.
H. Press MOVE F to move
backward if you want to
change an item.
A. Follow A and B above.
B. Press MOVE E until clear is
underlined.
C. Press MOVE G or H (up or
down) to clear the name.
1 . Name a channel
2 . Erase a name
A B C D E F G H I J K L M N O P Q R S T U V W X Y Z &
’ ( ) á + , – . / 0 1 2 3 4 5 6 7 8 9 : ; < = > ? @ blank space
Character List
1 2
Controls Alarm Adjust Setup
E n g l i s h Français Español
A u t o p r o g r a m
Label 1 2 C l e a r
Channel Memory: 12 Stored
Cable/Air: Cable
XET 12
Controls Alarm Adjust Setup
E n g l i s h Français Español
A u t o p r o g r a m
Label 12 X E T C l e a r
Channel Memory: 13 Stored
Cable/Air: Cable
1 2
Controls Alarm Adjust Setup
E n g l i s h Français Español
A u t o p r o g r a m
Label 12 C l e a r
Channel Memory: 13 Stored
Cable/Air: Cable
Page 26

Using Advanced Features
Setting the Sleep Timer
You can set your TV to turn itself off. If you’re watching TV at night and
fall asleep, the TV will turn off for you.
1. Set Sleep Timer
2. Add more time
Controls Alarm Adjust Setup
Sleep Timer: – : ––
Closed Captioning: Off
Picture -.....
Stereo: On
SAP: Off
I
. . . . . +
11:00 PM 1 3
S l e e p
Controls Alarm Adjust Setup
Sleep Timer: 0 : 1 5
Closed Captioning: Off
Picture -..... I
Stereo: On
SAP: Off
Controls Alarm Adjust Setup
Sleep Timer: 0 : 01
Closed Captioning: Off
Picture -..... I
Stereo: On
SAP: Off
. . . . . +
. . . . . +
A. Press MENU•PROG to select
the Controls menu and
highlight Sleep Timer. This
menu is yellow.
B. Press MOVE E to enter the
amount of time you want to
watch TV before it shuts off.
Each press equals 15 minutes.
C. Press MOVE F to subtract time
from the sleep timer.
A. When 0:01 appears on the
screen, the TV will shut off in
one minute. Press MOVE E to
add more time.
3. Cancel the Timer
Controls Alarm Adjust Setup
Sleep Timer: – : ––
Closed Captioning: Off
Picture -.....
Stereo: On
SAP: Off
I
. . . . . +
A. Press MENU•PROG to select
the Controls menu and
highlight Sleep Timer.
B. Press MOVE F until the time
reaches – : – –.
23
Page 27

Using Advanced Features
24
The TV can be set to turn on each day like your alarm clock. You can set
it to turn on to your favorite channel at a certain time. You can also set it
to turn itself off again. The Alarm cannot be used until the clock is set.
1. Turn on the Alarm
2. Set the Alarm Channel
3. Set On and Off Times
12:34 A M 1 3
A l a r m
Controls Alarm Adjust Setup
Alarm: On
Alarm Channel: 07
On Time: Disabled
Off Time: Disabled
Clock: 12 : 34 AM
12:34 A M 1 3
A l a r m
Controls Alarm Adjust Setup
Alarm: On
Alarm Channel: 07
On Time: Disabled
Off Time: Disabled
Clock: 12 : 34 AM
12:34 A M 1 3
A l a r m
Controls Alarm Adjust Setup
Alarm: On
Alarm Channel: 07
On Time: 7 : 30 AM
Off Time: Disabled
Clock: 12 : 34 AM
12:34 A M 1 3
A l a r m
Controls Alarm Adjust Setup
Alarm: On
Alarm Channel: 07
On Time: 7 : 30 AM
Off Time: Disabled
Clock: 12 : 34 AM
A. Press MENU•PROGto select
the Alarm menu and highlight
Alarm. This menu is green.
B. Press MOVE E or F to select
On or Off.
A. Press MOVE H (down) to
highlight the Alarm Channel.
B. Press MOVE E to highlight the
channel number.
C. Enter the channel that you
want the TV to turn on to with
the number buttons.
A. Press MOVE H (down) to
highlight the On or Off Time.
B. Press MOVE F to set the hour.
C. Press MOVE E to set the
minutes.
D. Press and hold MOVE F to
choose Disabled. This turns
the TV only on or only off at a
certain time each day.
Setting the Alarm Clock
Page 28

25
Using Advanced Features
Selecting a Language
The on-screen displays in this TV can be displayed in three languages:
English, French, and Spanish. When you select a language, most of the
displays will be shown on the screen in your preferred language.
1 3
Controls Alarm Adjust Setup
E n g l i s h Français Español
A u t o p r o g r a m
Label: 13 C l e a r
Channel Memory: 13 Stored
Cable/Air: Cable
1. Select the Setup menu
2. Select Language
Press MENU repeatedly to
select the Setup menu. This
menu is white.
Press MOVE F or E to select
English, Français (French), or
Español (Spanish).
Page 29

Using Advanced Features
Watching Closed Captioning
Closed captioning displays the audio portion of a program as words on
the TV screen. It is useful for the deaf, hearing impaired, or anyone who
wants to watch a program without sound. If you have turned Closed
Captioning on and it does not appear on the screen, it is not available on
the channel you are watching. This TV does not support the text mode.
Text information typically consists of program information, weather bulletins, local activities, etc.
1. Select the Controls Menu
2.Highlight Closed
Captioning
3.Select Setting
Controls Alarm Adjust Setup
Sleep Timer: – : ––
Closed Captioning: Off
Picture -..... I
Stereo: On
SAP: Off
Controls Alarm Adjust Setup
Sleep Timer: – : ––
Closed Captioning: C1
Picture -..... I
Stereo: On
SAP: Off
. . . . . +
. . . . . +
Press MENU•PROG to select
the Controls menu. This menu
is yellow.
Press MOVE H (down) to highlight
Closed Captioning.
Press MOVE F or E to select Off,
C1, or C2. Select C1 for full trans-
lation of the primary language in
your area. Select C2 for secondary
language translation, simplified
English, or whatever is being
broadcast in your area.
26
Page 30

Using Advanced Features
Setting Your TV for Antenna or Cable
Your TV automatically adjusts this feature when the TV places channels
in memory (autoprogram). Follow the steps below to change the setting
as needed.
1. Select the Setup menu
2. Highlight Cable/Air
Controls Alarm Adjust Setup
E n g l i s h Français Español
A u t o p r o g r a m
Label: 13 C l e a r
Channel Memory: 13 Stored
Cable/Air: Cable
Controls Alarm Adjust Setup
E n g l i s h Français Español
A u t o p r o g r a m
Label: 13 C l e a r
Channel Memory: 13 Stored
Cable/Air: Cable
1 3
1 3
Press MENU•PROG repeatedly to
select the Setup menu. This menu
is white.
Press MOVE H (down) to
highlight Cable/Air.
3. Select Cable or Air
Controls Alarm Adjust Setup
E n g l i s h Français Español
A u t o p r o g r a m
Label:. 13 C l e a r
Channel Memory: 13 Stored
Cable/Air: Air
1 3
Press MOVE F or E to select
Cable or Air. Select Cable if you
have cable. Select Air if you have
a home antenna connected to your
TV.
27
Page 31

References
28
MENU
CH and
VOL + and –
POWER
+ and –
Shows menus on screen.
Moves from menu to menu.
Channel up and down.
Scans up and down through channels in the TV’s memory.
Moves up and down menus.
Volume up and down.
Raises and lowers sound.
Moves left and right on a menu line.
Changes a features setting.
Turns the TV on or off.
Same as VOL + and – buttons.
Front Panel Buttons
For details on using buttons with menus, see Menu Basics on page 5. The front panel
below shows a typical button layout. The exact look of the buttons may be different from
those on the front of your TV.
Page 32

References
29
Your TV shows the settings of several features on the screen. To see what
features have been set on your TV, press DISPLAY on the remote.
Screen Display Description
12:00 AM Time of the clock. Details are on page 3.
XETU Name you chose to describe the channel. Details are on page 22.
13 Channel number you are watching.
Video 00 Indicates that a component is connected to the VIDEO jack on the back of
the TV, it is turned on, and channel 00 is selected.
Alarm Alarm clock is set to turn on or off. Details are on page 24.
Sleep Sleep Timer is set to turn off the TV. Details are on page 23.
Volume Sound level of the TV.
Unusable Signal No signal is coming in on video input channel 00.
Mute There is no sound. See MUTE button on page 6.
Stereo The sound is being broadcast in stereo. Details are on page 18.
Stereo* SAP is selected in the menu, but it is not available for the program being
broadcast. Details are on page 18.
SAP Secondary Audio Program. SAP is selected and it is available for the
program being broadcast. Details are on page 18.
1:55 The time remaining for commercial skip. Details are on page 6.
or
Video 00
or
Unusable Signal
or
Stereo*, SAP
Displays on the Screen
12:00 AM XETU 13
Alarm Sleep
Volume – . . . . . . . I . . . . . . . +
Mute Stereo 1:55
Page 33

References
Trouble Checks
You may have problems that can be fixed with a few minor adjustments. Look for the type of problem you are
having below and then try the suggestions to get your TV going again.
Trouble
Power
TV will not turn on
No picture, no sound but
TV has power
Picture
Blank screen or Unusable
Signal appears on screen
Checks and Adjustments
Plug TV in.
Plug something else into the outlet to make sure it is working.
Make sure batteries in the remote are not dead.
Aim the remote at the TV and press TV.
Make sure batteries are placed in the remote the right way. See batteries on
page 2.
Unplug TV for a few minutes and then turn it on again.
Check antenna connections.
Check position of Cable/Air feature. See page 27.
Try another channel. Inactive channel may be tuned.
Make sure component connected to the VIDEO INPUT jacks is turned on
if you choose channel 00.
Make sure TV is tuned to the same channel as the switch on back of VCR
if watching a VCR.
Make sure TV/VCR button on VCR is in correct position when using VCR.
Try another channel.
Scan the channels.
Picture poor, sound okay
Sound
Noisy stereo reception
Picture okay, no sound
Picture okay, sound poor
No stereo on stereo station
Check antenna connections.
Adjust TV picture. See pages 16–17.
Turn Stereo off. The stereo broadcast may not be clear. See page 18.
Press VOLUME + or MUTE to restore sound.
Make sure TV’s speakers are on. Details are on page 19.
Try another channel.
Try adjusting the Tone. See page 18.
Change Stereo to off. The stereo broadcast may not be clear. See page 18.
Make sure Stereo is turned on. See page 18.
Page 34

References
Trouble Checks
Trouble
Remote
Buttons don't work when
you press them
Works part or none of
the time
Can’t select certain channel
Checks and Adjustments
Press TV to set the remote to control the TV. See buttons on page 6-7.
Remove batteries and hold number 1 for at least 60 seconds to drain the
microprocessor inside the remote. Release number 1, replace the batteries, and (if necessary) reprogram the remote.
Remove all batteries for approximately 12 hours. Then replace batteries
and (if necessary) reprogram the remote.
Clear the path between the remote and TV of any objects.
Aim the remote at the component you are trying to control.
Press TV so remote will control TV.
Make sure batteries in the remote are not dead.
See if batteries are placed in remote correctly. See batteries, page 2.
Press number buttons. Channel may not be in memory. See autoprogram
on page 20.
Make sure TV/VCR switch on VCR is in the TV position.
For numbers over 100, press and hold 1 until 1-- appears, then press the
other two numbers.
Set Cable/Air feature to Cable for channels higher than 69. See page 27.
TV Turns on or off
Turns off by itself
Turns on by itself
Does not turn off at
Alarm Time
Check Sleep Timer. See sleep timer on page 23.
Wait 30 seconds and turn on again, a power surge may have occured.
Check Alarm Off time. See alarm clock on page 24.
Check Alarm On Time. See alarm clock on page 24.
Check clock time. See clock on page 3.
Make sure alarm is turned on or off. See alarm clock on page 24.
Check clock time. See clock on page 3.
Page 35

EXPORTED BY:
10330 North Meridian Street
Indianapolis, IN 46290-1024
©1997 Thomson Consumer Electronics, Inc.
Trademark(s)® Registered
Marca(s) Registrada(s)
Printed in the USA
TOCOM 15257750
COUNTRY OF ORIGIN:
USA
Page 36

 Loading...