

Page 1

User Manual vi.o
MP3 Digital Player
B100128/B100512
Page 2

Thank you for choosing our MP3 Digital Piayer. Please read through the
user manual carefully before operating the machine in order to maximize
the ability and life of our product. Please take good care of this manual
for future reference. The appearance of our players shown In the
manual may differ from the actual products since all pictures are based
on the prototype of our models.
As some components would take up space in the flash memory, It Is
normal to find that the available memory size Is less than normal.
CONTENT
Content
Overview
Overview
LCD Overview
Accessory Overview
Features
Operation notes
Operation notes
Batterv/turn on or off
Two Modes
Primary functions
Advanced functions
Functions overview
Music
Voice
Settlnp
3
4
4
5
5
8
9
10-12
14
15
15-16
17-20
Page 3

Connection
Connection
Driver installation
Down load music files
Disconnect from PC
Formattino
Update the player
DRM
General ouestion and answers
Menu summary chart
If you want to connect this player to the computer, please first connect
the USB cable to the player and then to the PC. If you want to disconnect
the player from the PC, please first unplug the cable from the PC. Our
company will not take the responsibility for damage caused by any
inappropriate operation.
1 .Do NOT replace battery or connect or disconnect with
the computer when reading, writing or deleting
A
documents
2.The digital player will operate at a slower speed when
the number of document files created exceeds 50.
22
23-24
25
26
27
28
29-30
31
32
r*iS» Tested To Comply
with FCC Standards
FOR HOME OR OFFICE USE
This digital player complies with the
Part 15 of the Provisions of FCC and
wiii be operationai under the
foiiowing circumstances,
1 ).The digitai piayer wiii not cause any damage to the externai
environment
2) .The digital player is vulnerable to distortions caused by
improper operations in the external environment
3) .Under the environment with electrostatic discharge, the MP3
player may malfunction and require user to replay the MP3 player.
Page 4

Overview
This player is an MP3 player with rewritable flash memory based storage
device. It is user-friendly, easy to operate and provides recording ,music
playback and many more functions.
Player overview:
10
11-
12
13
14-
15-
1. Play/STOP/power supply 6. Battery cover
2. Fastforward/next(FF) 7. USB socket cover
3. Rewind(REW) 8. Neck strap loop
4. Volume + 9. Internal microphone
5. Volume- 10. Earphone socket 15. USB socket
Note: Press the lock key to a direction to lock the player,
1 or to a'direction to unlock it.
11. A-B/EQ/REC
12. MENU
13. LCD
14. Lock key
)
Page 5
LCD
0 @ H H [g
□] Function status
^ Current file playback time
_i_J
OC1:01H
/MUSIC.^/IP3
RO
CK
m
S Track information
H A-B
H EQ/Playback Mode
H Lock status
E Battery level
-a
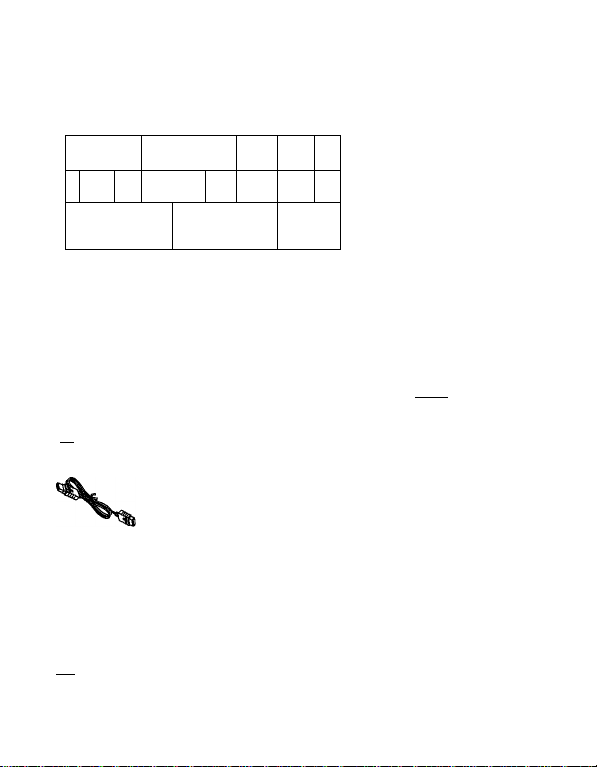
Accessories
fi—)
m 1 X installation [2] 1 X user manual [3] 1 X AAA battery
driver disk
[5IXUSB [5] 1 X Earphone (with [61 1 X neck strap
extension cable sponge)
PtI IX Quick start IX Product
guide registration
9 1 X call out
Page 6

Product Features
■ Playback MP3/WMA/WAV multi-format files
■ 7 Equalizer mode options: Normal, Bass, Rock, Jazz, Class , POP&
CUSTOM
■ LCD screen display, 7 color backlight with more fashionable effect.
■ A-B repeat function
■ Long recording time
■ 12 Mb full speed USB transfer
■ No driver required for windows me/2000/xp (except for Windows 98SE)
■ Compact, light weight and stylish design
■ Multi-language Version
Operational notes
I
The following operating notes are written to enable readers to correctly
use the player and keep the player in good operating condition. Please
read carefully and comply strictly with the notes.
I
The MP3 player should be kept in areas free from extreme temperature
changes (above 35 degrees C or below 5 degrees C), moisture and static
electricity.
I Please do not hit the player against any hard objects; do not let foreign
objects enter the Inner parts of the player; do not place heavy objects on
the player; do not put the player In close contact with chemicals.
I
If the MP3 player will not be operated fora prolonged period, remove the
battery to avoid possible damage caused by electrical leakage.
I Please avoid placing the player under direct source of light or heat
emitting devices; avoid places with extreme dust and smoke.
■ Please do not dismantle, repair or change this player.
■ Please keep a copy of the files stored In the player as the company
will not be responsible for any loss of such data.
I
It Is an offence of Infringement of other people's intellectual rights to
provide WMAor MP3 format musical documents without their prior
approval.
I
Do not use the player or earphone when driving or cycling.
I
For the protection of your ears, please do not listen to the player at high
volume for a long period of time.
■ Please separate useless packaging materials, batteries and out-dated
electronic products when disposing in order to protect the environment.
Page 7

Data reference
Size(LXWXH)
Weight 30g(excluding battery)
Power source 1.5V AAA battery
Encode ISO 11172-3 (MPEG 1.0 Layer 3),ADPCM
Bit Rate: 64 Kbps-320Kbps
Frequency 8KHz-48KHz
Frequency Range 20Hz-20KHz
Distortion
Signai-Noise Ratio >80db
MP3 Sound Track Separation >80db
MP3 Dynamic Range >93db
Recorder Length 16 bit
Transfer Speed 12 Mb Full Speed USB
Deiivery Speed about4 Mbps
Power Out >5mWx2
86x38.5 X 18.2 mm(Not include USB covei
(1 KHz) 0.1%
Page 8

Operating instructions
Page 9
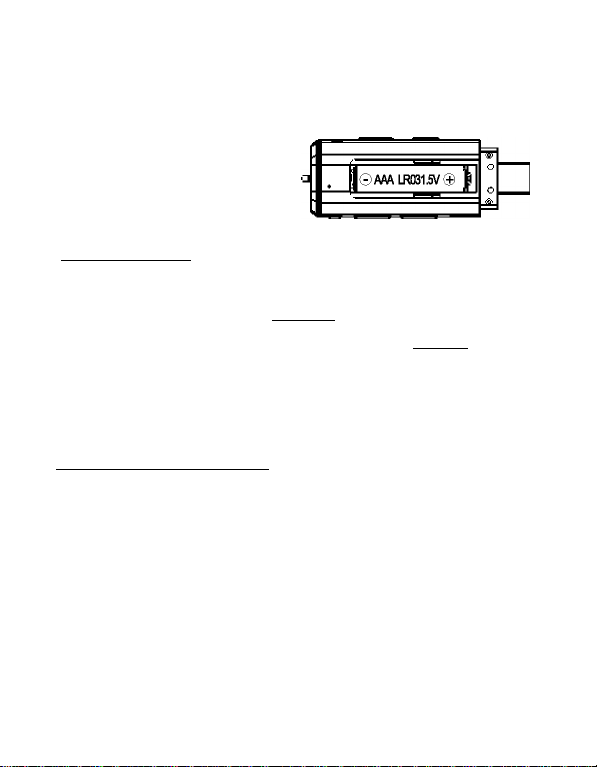
Load battery
Pull out the usb cover, open the battery compartment and load one AAA
battery as directed by “+” and markings.
Change battery
When the LCD displays “Low Battery” , You should replace the battery
with a new one. pull out the USB cover and open the battery cover,then
you can replace the old battery with a new one.
[0001:01 ROCKi □
/MUSIC.MP3
Turning the power on/off
The OSD with backlight appears when ^ button Is pressed. The user
can set the length for the backlight time. Press the ^ button for an
extended period the player will switch off after a few seconds and will turn
off the picture on the screen. When the player Is idled fora while, auto
power off will activate according to the time set by user. You can also set
“disable” function to let the player cancel this function.
SHUTTING DDUN
Page 10
Two functions of this piayer: Music piaying, Voice recording
Shortly press “MENU” to select music playback mode. Then press
“MENU” to confirm. Then you can play MP3 and WMAformat files
under this mode. The machine will automatically switch back to music
mode If no operation for more than 10 seconds.
001:01 ROCKi iB
/MUSIC.MP3
Shortly press “MENU” button to enter music mode. Press “ ”
button to select voice mode and press “MENU” button again to
confirm this mode. It Is the same procedure while transferring from
“voice mode” to music mode.
Shortly press “MENU”, press “►W ” and to loop between MUSIC,
VOICE, EQUALIZER, REPEAT, CONTRAST, POWER SAVING,
BACKLIGHT, BACKLIGHT COLOR, LANGUAGE, DELETE, ABOUT
and EXIT mode. Press “MENU” to confirm and enter into the
corresponding choice, (please Ref. Page 14)
When you enter music mode, the player will be In stop status as the
following picture shows.
No matter under play, pause, or the stop
mode, the icon will alternate as the picture shows.
----------------------
№1 001:0031 ROCK *"l
/MUSIC.MP3
Page 11

Music playing function: Play/pause/stop
Press ^ once to play music.
While the music is playing, the LCD shows —
the current playing time as the picture shows.
To press the ^ again will enter pause state, press the button again to
resume play.
LCD will displaythe --------------------
pause time at the pause state.
Under play or pause mode, press and hold ^ button once to enter the
stop mode, slightly press ► to resume play mode.
Press-button to skip to next song, press button to go back to last
song.
REW/FF Button operation will cause
change of song information
Noteiskip to the previous file (applicable when the current file has
been Played for shorter than 4 seconds)
Reverse to the beginning of the current file (applicable when the
Current file has been played for at least 4 seconds)
^001:44
/MUSIC.MP3
® 001:44
/MUSIC.MP3
m [2]
I
rockI
Page 12

REW/FF function
Long press on the ^ for FF. resume playing while stopped press. Long
press on the|^ for REW function.
The current playing time may
change frequently when the REW and
FF works.
VOL+/VOL-
By pressing VOL+ or VOL- button, you can control the volume under either
Play of Pause mode.
Volume; 20
m IB
Repeat A-B function
Under music/volce mode, while the player Is In play or pause mode, you
can press REC button to select A and B, then A-B music or voice will play
continuously, particularly convenient for learning foreign languages.
Swith between “A” “B” and Cancel setting by pressing repeatelly this
button. Repeat A-B setting display
Page 13

Equalizer mode
Under music or voice mode, long press REC button to do cyclical
selection of the equalizer modes. The digital player has the below EQ
setting (for another set method please refer to P. 17)
LCD displays as:
Note: Under the stop mode the A-B repeat function is out
of work, long press REC button for EQ setting, lightly
press for A-B repeat function.
________________________________________J
12
Page 14

Advanced functions
Page 15

After you are familiar with basic operation of this Mp3 player, we will
describe more particular and advanced functional settings of the player
to hepi you become an advanced user. It mainly includes the menu
system contained in the “Setting" menu.
Shortly press Menu button to enter the above functions. Press “ ”
or“ ” to do cyclical selecting of the above 12 functions and press
“MENU” to confirm your choice.
Note; Apart from the recording mode that denies acess to
menu options ,you can make your Setting in play, pause or
stop mode. The digital player will return to play mode (the
last setting mode), automatically if idle for 10 seconds in
this selection.
14
Page 16

Music mode
This is the default mode of the digital player. You can play MP3 or
WMA music files under this mode. You can also operate the songs
with functions of REW, FF, Volume Adjustment, Sound Effect Setting,
Repeat and Sequence (Refer to page 10-12).
Voice mode
Underthe music mode, press “MENU” button and “ buttonto
select voice mode then press “MENU” button to confirm. Under voice
mode, you can select play/record/repeat/A-B/REW/FF/VOL+,VOL-/EQ
setting.
1.Play/REW/FF/VOL+,VOL-(Ref. P. 10-11)
2.Recording
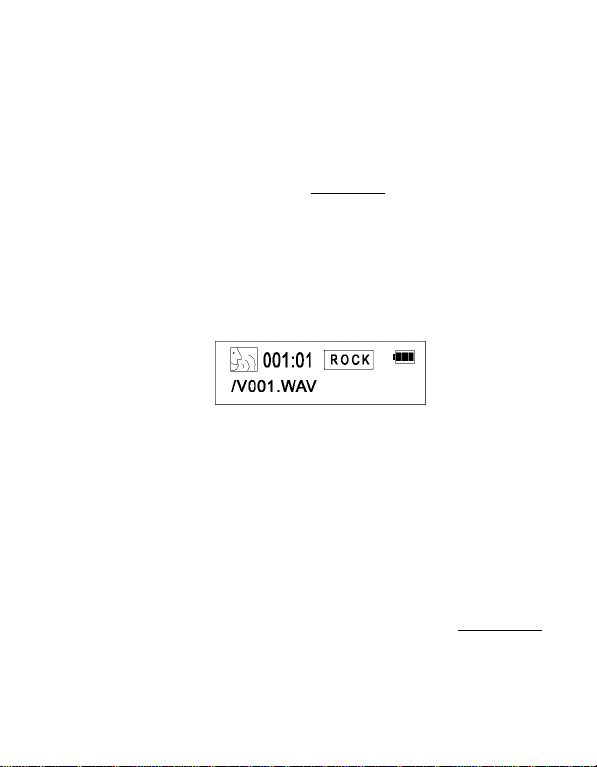
Under voice mode, LCD displays as:
m Recorded file information
m Voice status mode
m Current voice file number
m Number of stored voice files
Note: The recorded file only can be in WAV format
instead of MP3 format.
Q] Q] 03
J001:001
/V001.WAV
15
Page 17

start recording
In voice mode under the stop state, press
recording, the LCD display is as follows
Press “REC” button again to stop recording, LCD displays as the
previous page shows.
Playback recorded file
The operation procedure is the same as music playback (Ref. P. 10-11).
Name the recorded file
For the large quantity of recorded files. It is suggested that you rename
each file with an easily recognized name.
Note: A-B Segment repeat function only works under the
play/pause mode and It can't work under recording or stop
mode. Press “REC” for a while and then users can adjust
the EQ mode in play/pause/stop status. Users can't use this
function in recording mode.
“REC” button to start
Page 18

The EQ setting
Press “MENU” button to enter the menu interface, press “►W ”
“ ” for the EQ setting, press “MENU” button to confirm. Aii
together? modes forthis setting (for another method piease Ref. P.12)
When you choose the equaiizer mode, you can press and
r,
to enter the CUSTOM mode to customize your own equaiizer
settings. First of aii, press the “Menu” button to confirm. Then, you
may press “►W ” or to choose on different frequency range.
Finaiiy, press “VOL+” and “VOL-” to increase or to decrease each
frequency range by your own preference.
Press “MENU” button to enter the interface as the foiiowing picture
shows, press “WH” for the repeat mode and press “MENU”
button to confirm. Long press on “MENU” button to cycie the piay
mode, aitogether 5 piaying modes are inciuded.
17
Page 19

Repeat Mode and Sound Effect LCD Display
The digital player will display repeat mode and sound effect In 3-second
Intervals alternately at the same position.
3-second intervals alternate display
This function consists of five different Idle time settings while the digital
player Is In music mode or voice mode. The digital player will be switched
off automatically after the idle period for saving battery. The digital player
can also be set to forbid automatic swItch-off. Press the “MENU” button
to enter the menu screen, then press orM4” to select power
saving setting. Press the “MENU” button to confirm your selection.
EmasisL
This consists of three settings of backlight: When you operate the
digital player In Idle status, the backlight will turn on automatically for
convenience of use at night. You can set the time of backlight Is on,
or you can choose to have the backlight always off or always on. Press
the “MENU” button to enter the menu screen, then press “ or
” to select backlight setting. Press the “MENU” button to
confirm your selection.
BACKLIGHT
Disable
18
Page 20

Backlight color
This Item includes 7 types of backlight color. You can select your
favorite color and the corresponding color will display when you
operating the player. Press the “MENU” button to enter the menu
screen, the press “►W ” or “ ” to select backlight setting.
Press the “MENU” button to confirm your selection.
Language
There are various types of languages to choose. Press the “MENU”
button to enter the menu screen, then press “ ^ or ” to select
language setting. Press the “MENU” button to confirm your selection.
LANGUAGE
ENGLISH
Erase files
Press the “MENU” button to enter the menu screen, then press “
orM< ” to select deletion setting. Press the “MENU” button to confirm
your selection.
DELETE tm
Music File
Voice File
Delete file
Following the step of the previous page enter Into the delete mode,
choosethefileyou want to delete, press “MENU” enterthe
relevant choice, press “VOL+,VOL-” to cycle selecting “Yes/No”
and then the “MENU” button to confirm. Press or to choose the
correspondening file with It's name display (the file you will delete should
be in the WAV format).
file name
tn
Page 21

When the file is deleted, it displays as below and return to the status as
the above picture shows, press ► to exit and back to the delete mode.
Delete Successful
System information
Press “MENU” button to enter the menu interface, press “►WorM<”
button to choose about, press “ MENU” button to confirm and then
the Information about this player may display as below.
VERSION: :x.xxx
MEMORY: :xx/xxxMB
Press “MENU” to enter the menu interface, press “►W or button
to choose backward then “MENU” to confirm and backward to the
music/volce mode (the latest setting mode)
Note: As some components would take up space In the
flash memory, it Is normal to find out that the available
memory size Is less than normal.
Note: Under this mode, 10 seconds standby time can
cause the machine to return to music playing/volce mode
(the latest setting one)
________________________________________y
20
Page 22

CONNECTION WITH COMPUTER
21
Page 23

Requirement for computer system
1 .Operating system: Microsoft Windows 98 SE, Windows Me,
2.CPU: Intei Pentiums, Pentium 4 and other CPU with
3. Memory:
4. HD:
5.interface:
6.CD-ROM
Windows 2000, Windows XP
the reievant functions,
above 64 MB
200MB idie memory and above
fuii-speed USB
Connect with computer
Connect the player to the
computer with the USB cable
provided.
Installation of the communication software
No additional driver software is required for Windows 2000/Me/XP &
Macintosh after connecting the player to the computer via USB. It will
be recognized automatically as a “Removable drive” for Windows 98
SE, please install the driver software from CD-ROM provided.
The icon will appear here after
installstion
■
^0tOr.(E.>
The icon will appear inside ^‘my computer”
after installation
22
Page 24

Windows 98 SE CD-ROM installation_________________
Put bundled CD-ROM into computer, and follow the instruction to finish
the installation.
Eita Edt ^ F«yi7№ ¡ecu
* •* • ¡ftsudi ^ )3*
Wen ISHrivTii
Eita Edt ^ F«yi7№ ¡4dt
* •* - ;^ ¡ftsudi -[^Fd№ '
ST?. miaiisi
?< ^ Sh
***■
23
Page 25

24
Page 26

Save and rename downloaded music and voice files
After successfully connecting the player to the computer, It will appear as
a “ Removable disk” Double click this disk, it will show as following:
READY
I □□□□□□□□nnn
while the voice file opened
U ei ei ei
VOICE N001.V
Voice File
^ Note: While the file Is deleted. It may disappear until the
new recording start.
Note: This player can recognize and play the music file In
;q?:
MP3 and .WMAformat, the voice file in .WAV format.
Music File
Voice File
1
Page 27

The operating procedure of the removable flash disk is the same as
normai USB storage device. Users may copy files to relevant folder. You
may also rename it for your own convenience.
READY
1 nnnnnnnnnnn 1
this icon may display after
proper connected with the
computer
Disconnection with comouter
The switch on/off buttons will not function when the digital player is
linked up with the computer. To disconnect with the computer, please
operate as follows, hit the right button and the “Safe Delete Hard
Disk” will appear with a dialogue box. Confirm and disconnect
accordingly.
NoteiDO NOT unplug the player from the computer's USB
port until Windows prompt that it is safe to do so. Otherwise
data loss or even physical damage to the player may occur.
Our company will not be responsible for any damage/loss
caused by inappropriate operation .
26
Page 28

Formattin
Apart from the above-mentioned operations, the digital player can
also be formatted. Hit the right button on the keyboard and a window
wili appear. Make sure the format chosen for formatting must be
“FAT’ . If others formats like “FAT32’ or “NTFS” are chosen, the
digital player will lose the function of piaying music and can only
perform as a mobile hard disk. To restore the functionality of the
digital music player, choose “FAT” format again for re-formatting.
27
Page 29

Update the player
Use the installation driver on computer to update and maintain firmware
1. Connect the piayerwith computer,and run "Update device" on PC port
Shut Down,..
I ®
2. Then click "Start" button to
start installation
_9w6Fyh__|
I || o»- il
3. Click "Close" to exit after
finishing Installation
g Vgwn_
Page 30

Digital Rights Management of Documents
There is a copyright protection measure for WM A formatted songs to
protect songs from being iliegaily copied without obtaining the necessary
authorization from the owner. As such, users shouid not downioad songs
without proper authorization and pi ay with this digitai piayer. Users
shouid pay attention to the format of the musicai document and the type
of piayer to pi ay the musicai document. There are different means of
obtaining proper authorization and payment detaiis for different piayers
and hence users shouid go to the website of the particuiar piayer for
detaiis of the above. Users need to carry out the foiiowing instructions
to obtain the necessary authorization and then proceed to downioad
and save in the player if they want to play songs without the proper auth
orization. (This process is based on the example of the authorization
process of Version 9 of the Windows Media Player).
1. Ascertain if the computer has Instailed the software Windows Media
Player. A copy of the software can be downloaded from the Microsoft
website
http://www.microsoft.com/windows/windowsmedia. (The
Windows Media Player software is provided free by Microsoft
Corporation for playing WM A formatted songs).
2. Start the “document” in the Windows Media Player menu and
“open” a WMA formatted song with no proper authorization. If the
user has not obtained the Individual permit to play, the digital player
will automatically linkup with the Microsoft Corporation website (as
shown in Diagram 1) and after the user successfully obtains the
approval (as shown in Diagram 2), the WMA formatted song can be
opened.
(Picture 1) (Picture 2)
29
Page 31

3. After finishing the above, it is now possible to open WMA formatted
songs with no proper authority as shown in Diagram 3.
(Pictured)
4. After finishing the above, connect the piayer using the right USB
connecting cabie. Choose the "moblie drive” and hit "dupiicate”
to copy the music and save it under the “mobile drive” as Drive i as
shown in Diagram 4.
Notice;
1 .The document will automatically be saved to under VOICE document
file when the user selects it and it can only be played under the VOICE
mode (in WAV format). It can be played under the music mode again if
saved under other than the VOICE mode.
2.0nly musical documents that can be played using the Windows Media
Player can be duplicated, saved and played using this player.
3.lt is only when the player can play the musical document can the same
player be used to duplicate and save the music to this product.
4.The operation and functioning of players will be different depending on
the version of the player. Please refer to the operating manual for actual
details of the operation of player of a particular version level.
30
Page 32

General questions & answers
Problems
• Unable to switch
on the player
•No sound from
the earphone
• No display on
the LCD screen
•Can't
upload/download
MP3/WMA/WAV
files
• Cannot record voice
Possible causes Suggested solutions
• Check if battery is
exhausted
• Check if battery is
correctly loaded
• Loosen plug
• Volume is “0”
• Check the battery
status
• Check the plug for
whether it has been
oxidized or covered
by any dirty stain
• Damage to the MP3
or WAV files
• Wrong language
setting
• Not support the
certain language
• Check the battery
status
• Check the
connection to PC
• Out of memory
• No more space in
memory
• Change new batteries
• Reload batteries again
according to “+” and
signs correctly
• Re-plug the earphone
• Increase the volume
• Change the battery
• Clean the plug
• Re-download related files
• Set the correct language
• Brows our website for
latest version
• Change the battery
• Reconnect the USB cable
• Delete files to release
more memory
• Delete some files in order
to release more storage
space
Page 33

 Loading...