


TV User's Guide
Changing Entertainment. Again.
Important Information
WARNING
To reduce the risk of
fire or shock hazard,
do not expose this
TV to rain or
moisture.
Caution: To reduce the risk of electric shock, match wide blade of plug to wide
slot, fully insert.
Attention: Pour éviter les chocs électriques, introduire la lame la plus large de
la fiche dans la borne correspondante de la prise et pousser jusqú au fond.
Refer to the identification/rating label located on the back panel of your
product for its proper operating voltage.
FCC Regulations state that unauthorized changes or modifications to this equipment may void the
user’s authority to operate it.
If fixed (non-moving) images are left on the screen for long periods, they may be permanently
imprinted on the screen. Such images include network logos, phone numbers, and video games.
This damage is not covered by your warranty. Extended viewing of channels displaying these
images should be avoided.
Cable TV Installer: This reminder is provided to call your attention to Article 820-40 of the National
Electrical Code (Section 54 of the Canadian Electrical Code, Part 1) which provides guidelines for
proper grounding and, in particular, specifies that the cable ground shall be connected to the
grounding system of the building as close to the point of cable entry as practical.
WARNING
RISK OF ELECTRIC
SHOCK DO NOT OPEN
This symbol indicates
"dangerous voltage" inside
the product that presents
a risk of electric shock or
personal injury.
To reduce the risk of electric shock, do
not remove cover (or back). No user
serviceable parts inside. Refer servicing
to qualified service personnel.
This symbol indicates
important instructions
accompanying the
product.
Product Registration
Please fill out the product registration card (packed separately) and return it immediately. Returning
the card allows us to contact you if needed.-
Product Information
Keep your sales receipt to obtain warranty parts and service and for proof of purchase. Attach it here
and record the serial and model numbers in case you need them. These numbers are located on the
product.
Model No. ____________________ Serial No.______________ Purchase Date: __________
Dealer/Address/Phone: __________________________________________________________

Table of Contents
Connecting Other Components to Your TV .................................. 2
Explanation of Jacks and Cables ................................................... 3
Video Jacks and Cables...............................................................................3
Audio Jacks and Cables ..............................................................................3
The Front Panel Controls of Your TV............................................. 3
Front Panel Buttons..................................................................................... 3
Putting Batteries in the Remote.................................................... 3
The Buttons On the Remote control ............................................. 4
TV Function Buttons .................................................................................... 4
DVD Function Buttons ................................................................................4
Complete the Initial Setup ............................................................. 5
Set the Language .........................................................................................5
Complete Auto Channel Search ............................................................... 5
TV Menus ......................................................................................... 6
TV Menu Navigation.................................................................................... 6
The PICTURE menu....................................................................................... 6
The SOUND menu......................................................................................... 7
The TIMER menu........................................................................................... 7
The FUNCTION menu................................................................................... 7
The PARENTAL CONTROL menu
and V-CHIP ...................................................................................... 8
Blocking TV Ratings ................................................................................... 10
Blocking Specific Content Themes ........................................................ 10
V-Chip Movie Rating Limit...................................................................... 10
Parental Guide On (Activate V-Chip).................................................... 11
Child Lock ..................................................................................................... 11
Change Password .......................................................................................11
Troubleshooting ............................................................................. 12
Additional Information ................................................................. 13
Maintenance of Cabinet ......................................................................... 13
Limited Warranty .......................................................................... 14
Table of Contents 1
Connections and Setup
VCR
VIDEO
AUDI
O
OU
T
L
R
I
N
L
R
OUT TO TV
IN FROM ANT
3
CH3
CH4
TV
(
back panel
2
F
rom
C
abl
e
o
r
A
ntenna
1A
ANTENNA IN
)
VIDEO
L (MONO
)
R
2
1
INPUT
1B
DVD
VIDEO
L
R
Connecting Other Components to your TV
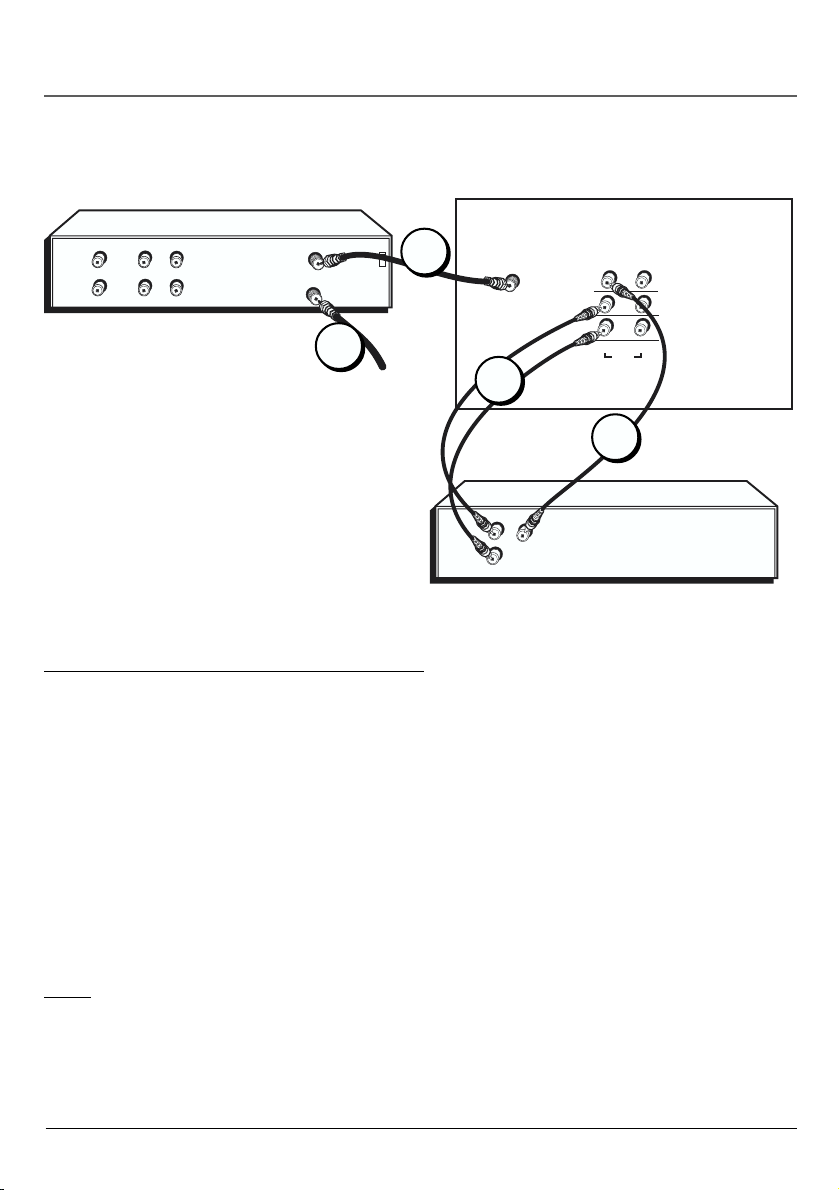
TV + DVD + VCR
1. Connect your DVD Player to your TV.
A. Connect the audio (white and red) cables to the R and L/MONO AUDIO jacks on the back of the TV and to the
Audio Output jacks on the DVD player (sometimes labeled L and R).
B. Connect a video cable (yellow) to the Video Output Jack on the DVD player and to the VIDEO jack on the
back of the TV.
2. Connect your TV to your VCR
Connect a coaxial cable to the ANTENNA IN jack on your TV and to the RF Output jack on your VCR (sometimes
labeled OUT TO TV).
3. Make sure cable or antenna is connected to your VCR.
Connect the coaxial cable from your cable outlet or antenna to the antenna input on the VCR (sometimes labeled
In From Antenna).
Note: If you do not connect a cable, antenna, or another component to your TV, the TV will automatically
shut off after 15 minutes to save power.
2 Connections and Setup
Connections and Setup
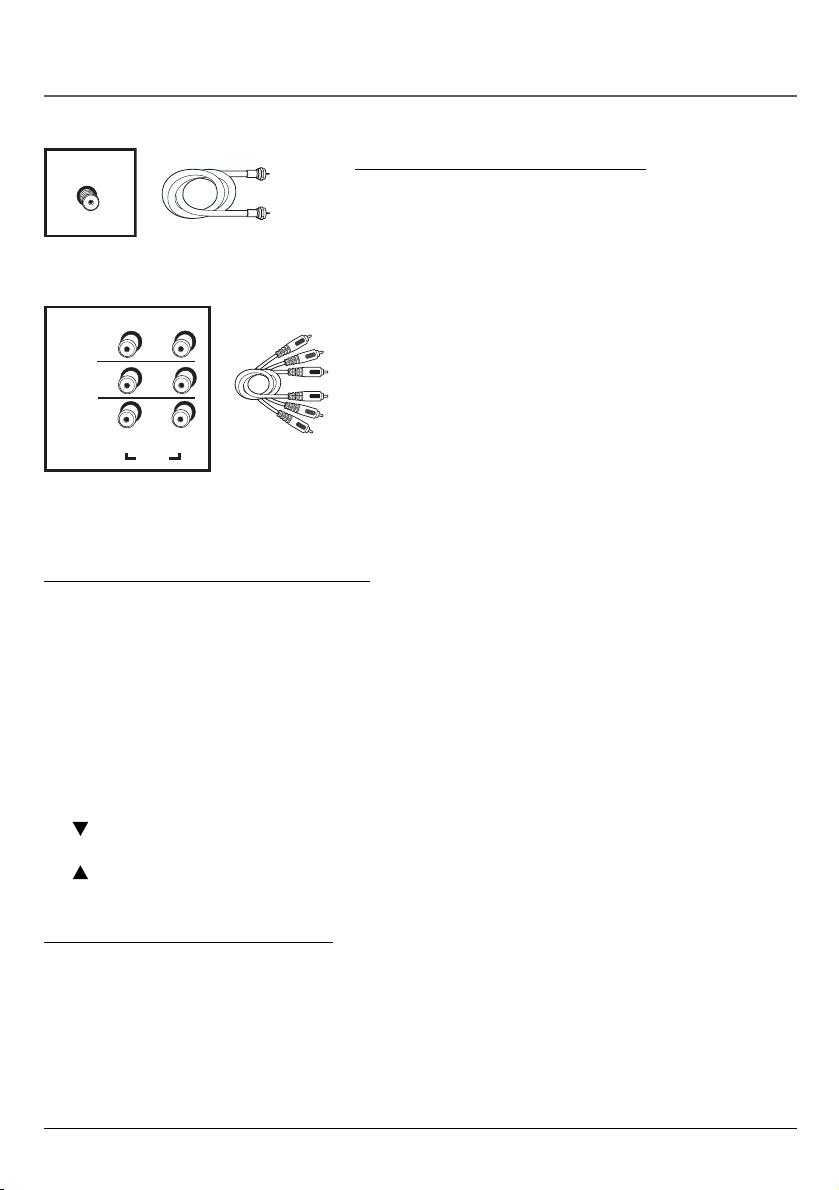
ANTENNA IN
ANTENNA IN jack and coaxial cable.
VIDEO
L (MONO
)
R
1
2
INPUT
VIDEO 1 and VIDEO 2 jacks, audio/video
cables, and S-Video cable.
Explanation of Jacks and Cables
ANTENNA IN Lets you connect a coaxial cable to receive the
signal from the antenna, cable, cable box, or
a VCR.
R (RIGHT) AUDIO Provides right audio connection. The right audio
connector is usually red.
L/MONO AUDIO Provides left audio connection. The left audio
connector is usually white.
VIDEO Provides composite video connection. The video
connector is usually yellow.
The Front Panel Controls of Your TV
If you cannot locate your remote, you can use the front panel buttons of your TV to operate many of the TV’s
features.
POWER Turns the TV on and off.
INPUT Toggles the Video Input Channels for a video game system, VCR, etc., connected to the audio/video jacks on
the front and back of the TV.
MENU Brings up the Main menu. In the menu system, it selects highlighted items.
VOL- Decreases the volume. In the menu system, acts like the left arrow button on the remote control and adjusts
menu controls.
VOL+ Increases the volume. In the menu system, acts like the right arrow button on the remote control and
adjusts menu controls.
CH ( ) Scans down through the current channel list. In the menu system, acts like the down arrow button on the
remote control and adjusts menu controls.
CH ( ) Scans up through the channel list. In the menu system, acts like the up arrow button on the remote control
and adjusts menu controls.
Putting Batteries in the Remote
Remove the cover of the battery compartment. Insert two AAA batteries, with the polarities as indicated, inside the
compartment. Replace the cover.
Note: If you are not going to use the remote for a long period of time, remove the batteries to avoid damage due to
leakage.
Connections and Setup 3
Connections and Setup
VOL
MUTEGO BACK
CLEAR
OKO
K
PRESETS
CC
SLEE
P
123
4
56
7
89
INPUT
0
ON OFF
INF
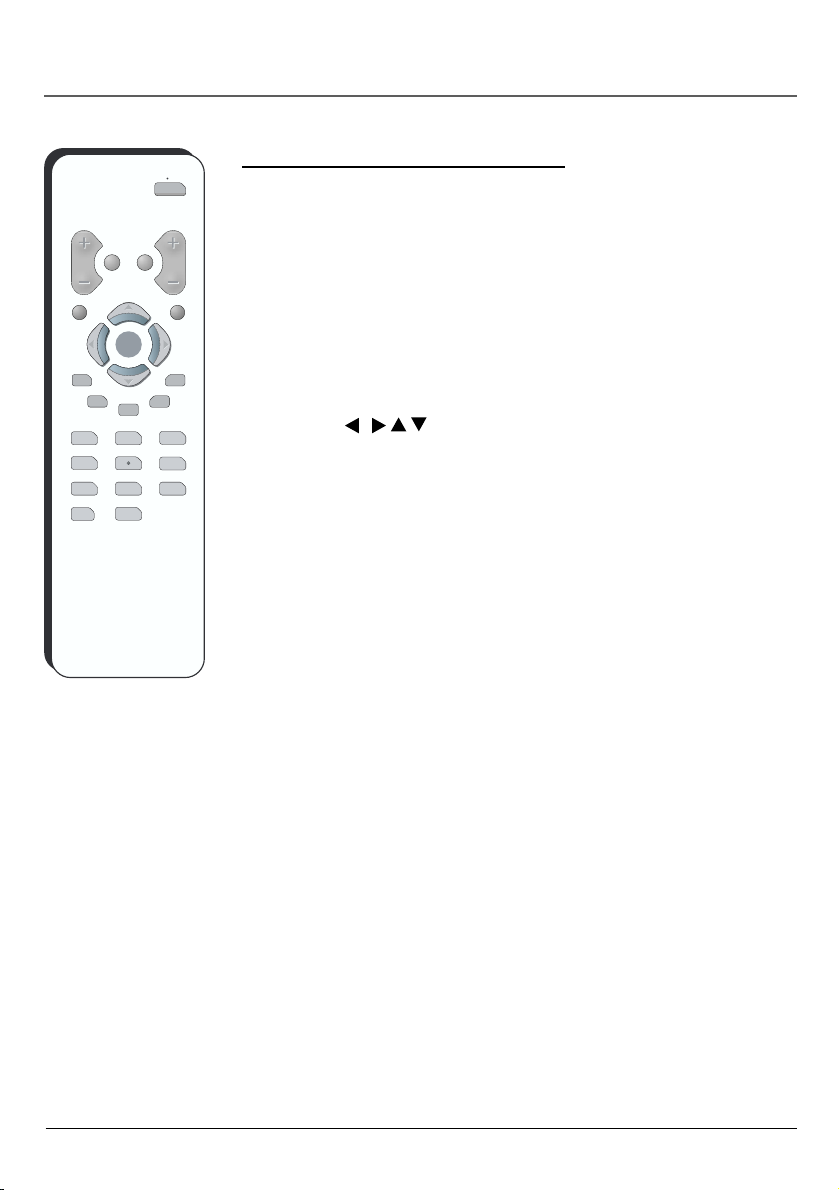
The Buttons On the Remote control
ON•OFF Turns the TV on and off.
VOL (+/-) buttons Decreases or increases the volume.
Mute Lowers the volume to the minimum level. Press again to restore volume.
C
H
Go Back Returns to the previous channel. If you are in the menu system, GO BACK
takes you to the previous menu screen.
MENU
SKI
P
O
CH (+/-) buttons Scans up or down through the current channel list. Press once to
change the channel; press and hold to continue changing channels.
CLEAR Removes a menu or display from the screen and returns you to TV viewing.
For menus with digit inputs, pressing CLEAR will clear the last number entered.
MENU Displays the TV’s main menu.
Arrow buttons ( / / / ) Press the arrow buttons to navigate through the on-
screen menu system.
OK button When a menu is on screen, press OK to select the item that is highlighted.
PRESETS Brings up picture presets.
SKIP Press the button twice to begin channel scan. Press again to select the current
channel.
CC Turns closed captioning on and off.
INFO Displays channel information.
SLEEP Adjusts the sleep timer.
0-9 (Number buttons) Use the number buttons to enter channel numbers. To enter a
two-digit channel, press the two digits. To enter a three-digit channel, press and hold
the first digit for two seconds until two dashes appear to the right of the number,
then add the second two. Example: to tune a channel 123, press and hold 1 for two
seconds, press 2, then press 3.
INPUT Toggles between available inputs.
4 Connections and Setup
PICTURE
CONTRAST 1
BRIGHTNESS 18
COLOR 50
SHARPNESS 50
TINT 0
COLOR TEMP NORMAL
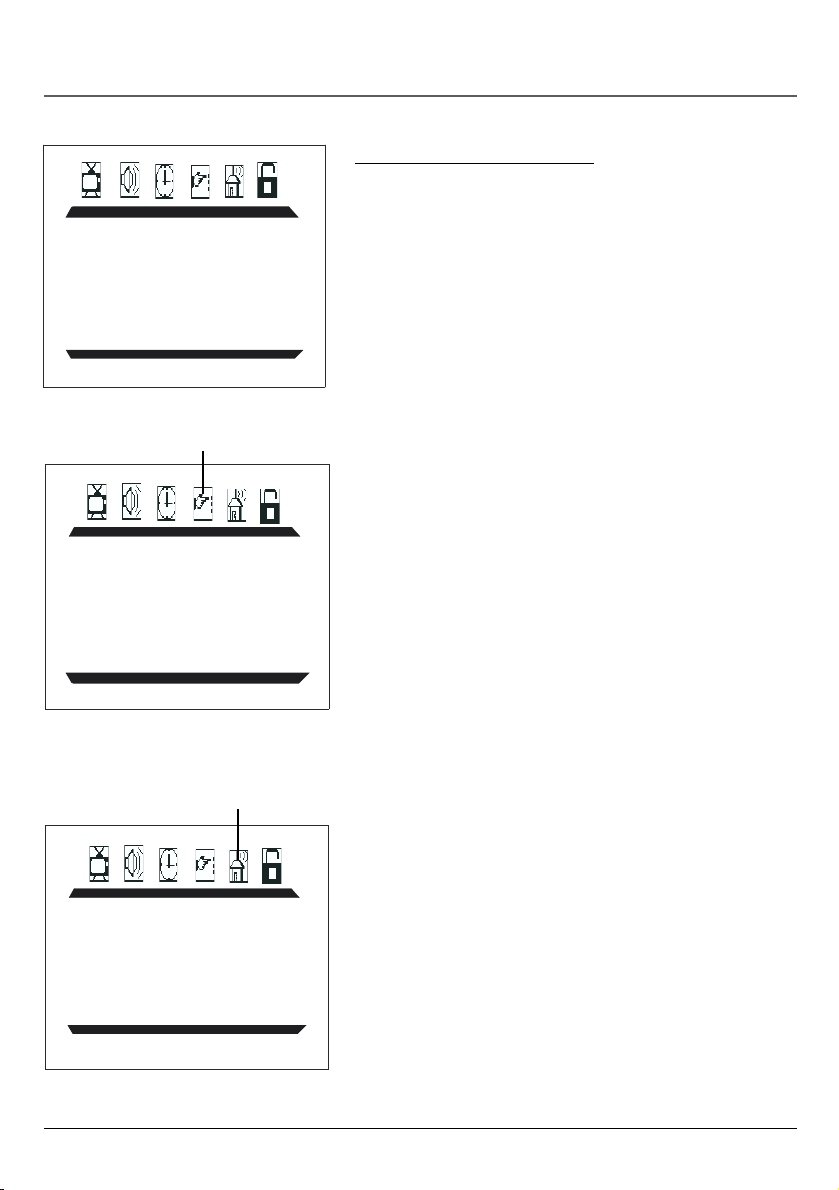
Function icon
FUNCTION
LANGUAGE ENGLISH
BACKGROUND ON
BLACK STRETCH OFF
NOISE REDUCE OFF
CLOSE CAPTION CC1
CC ON MUTE ON
Connections and Setup
Complete the Initial Setup
The menu system in your TV allows the TV’s features to work
properly. You’ll need to set a few important menu items the first
time you turn on your TV.
Set the Language
The language setting determines the language in which the onscreen displays and menus appear. You can choose from English,
Spanish, or French. The default is English.
1. Press MENU on the remote control (the Main menu appears).
2. Press the right arrow button until the Function icon is
highlighted.
3. Press the down arrow button until LANGUAGE is highlighted,
then press the right arrow button to change the language.
4. When finished, press MENU to exit.
The Function Menu
Tuning icon
Complete Auto Channel Search
This part of the setup allows the TV to search for all channels
viewable through your antenna or cable TV system. This is sometimes
TUNING
SOURCE AIR
CHANNEL 10
DELETE CH NO
FINE TUNE
AUTO SEARCH
The Tuning Menu
called auto programming.
1. Press MENU on the remote control (the Main menu appears).
2. Press the right arrow button until the Tuning icon is highlighted.
3. Press the down arrow button until SOURCE is highlighted, then
press the right arrow button to set the signal type (CABLE or
AIR).
4. Press the down arrow button until AUTO SEARCH is highlighted.
Press the right arrow button to begin the auto channel search.
To cancel at any time, press OK.
Once the search is complete, you can begin watching TV.
Connections and Setup 5
Using TV Menus
TV Menus
TV Menus let you control picture quality and features available for TV viewing.
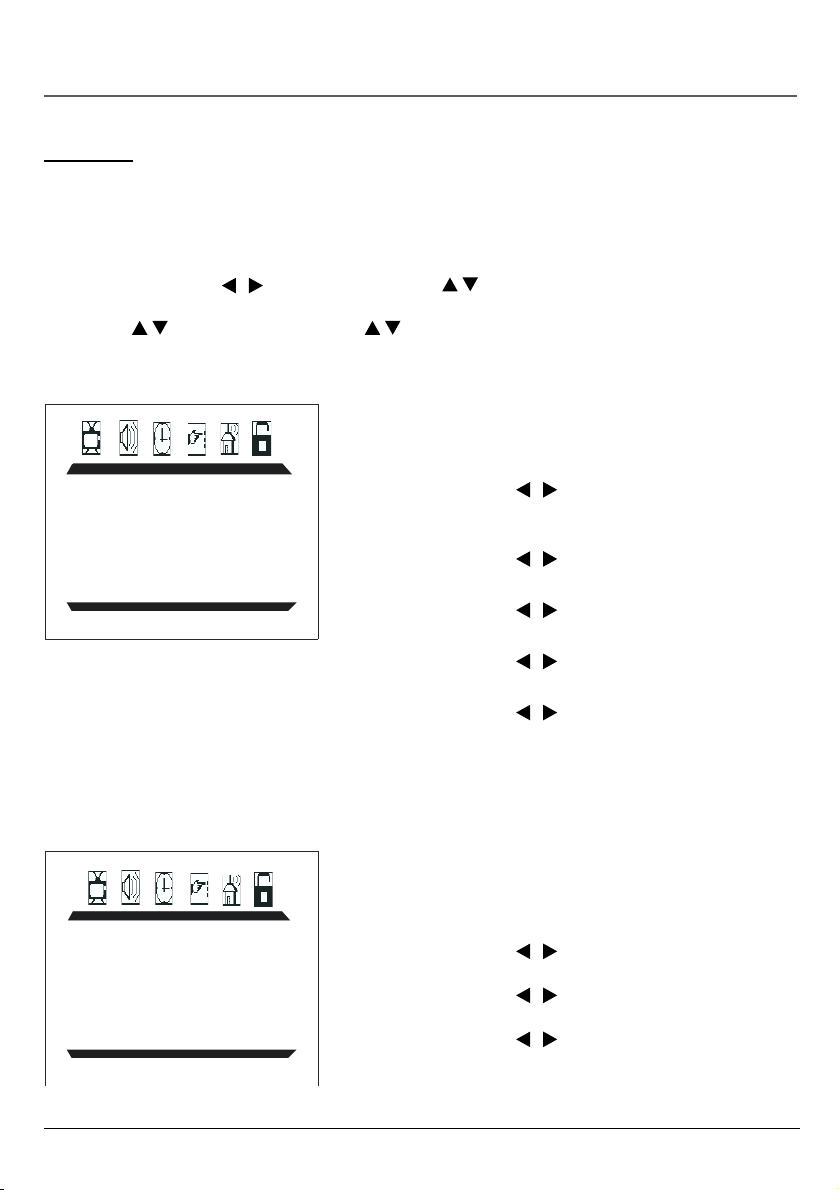
TV Menu Navigation
1. To bring up the TV menu, press the MENU button.
2. Use the arrow buttons ( /
submenu icon at the top of the menu.
3. Press the
4. Press the menu button to exit the menu system.
PICTURE
CONTRAST 1
BRIGHTNESS 18
COLOR 50
SHARPNESS 50
TINT 0
COLOR TEMP NORMAL
/ buttons on the remote (or CH / on the front of TV) to select the option.
) on the remote (or the VOL / buttons on the front of TV) to highlight a
The PICTURE menu
The PICTURE menu allows you make adjustments to your picture
settings.
CONTRAST Use the / arrow buttons to adjust the
contrast between the light and dark areas of
the picture.
BRIGHTNESS Use the / arrow buttons to adjust the
brightness of the picture.
COLOR Use the / arrow buttons to adjust the color
intensity or saturation.
SHARPNESS Use the / arrow buttons to adjust the
sharpness of the picture.
TINT Use the / arrow buttons to adjust the
balance between the red and green levels.
COLOR TEMP Provides three color adjustments: Cold for more
blue in the picture, Normal, and Warm for more
red in the picture.
The SOUND menu
The SOUND menu offers different audio options.
PRESET Provides four preset audio settings (USER /SPEECH/
SOUND
PRESET USER
BASS 50
TREBLE 50
BALANCE 0
SURROUND OFF
THEATER/MUSIC).
BASS Use the / arrow buttons to decease/increase
low-pitched sound.
TREBLE Use the / arrow buttons to decease/increase
high-pitched sound.
BALANCE Use the / arrow buttons to adjust left/right
speaker balance.
SURROUND Turns the surround sound on or off.
6 Using TV Menus

TIMER
SLEEP TIMER 20
FUNCTION
LANGUAGE ENGLISH
BACKGROUND ON
BLACK STRETCH OFF
NOISE REDUCE OFF
CLOSE CAPTION CC1
CC ON MUTE ON
Using TV Menus
The TIMER menu
SLEEP TIMER Lets you set the time you want the TV to turn itself
off after a given time. With the SLEEP TIMER option highlighted,
press the right arrow to add 10 minutes to the clock (up to two
hours).
The FUNCTION menu
LANGUAGE Selects the language you want the menus to
be displayed in.
BACKGROUND When BACKGROUND is ON and there is no
signal, shows blue background. When
BACKGROUND is OFF and there is no signal,
background is black (in AV mode only).
NOISE REDUCE Turns the noise reduce function on or off.
BLACK STRETCH Turns the black stretch function on or off.
CLOSE CAPTION Offers eight closed captioned modes, including
four text modes.
CC ON MUTE When turned on, automatically brings
up close captioning when the MUTE button
is pressed.
The TUNING menu
TUNING
SOURCE AIR
CHANNEL 10
DELETE CH NO
FINE TUNE
AUTO SEARCH
SOURCE Selects AIR or CABLE. Select AIR to receive
CHANNEL Use the / buttons on the remote ( or
DELETE CH Select YES to skip the channel above. Select
FINE TUNE Fine tunes a channel for best reception.
AUTO SEARCH Starts channel search and stores the
a radio broadcast signal. Select CABLE to
receive a CATV signal.
the VOL / button on the front of the
TV) to scroll through the channels available
via your antenna. You can enter the
channel number directly using the
number buttons.
NO to go to the channel above.
channels automatically.
Using TV Menus 7
Using TV Menus
The PARENTAL CONTROL menu and V-CHIP
The Parental Controls menu letsyou to program your TV so that children cannot see certain programs and channels.
The Parental Controls menu involve software inside your TV (V-Chip) which allows you to “block” TV programs and
movies based on violence, sex, or other content you think children should not view. It lets you program your TV so it
will not display certain programs. You can “unblock” programs by entering a password.
When Parental Controls is ON the software reads a code that most broadcasters send with programs. That code tells the
software the program’s age-based rating (TV-MA, TV-14, etc.) and content themes (Violence (V), Adult Language (L), etc.).
Broadcasters are not required to provide content themes, so programs received with no content themes will only be
blocked if you block their age-based rating. You can also block out programs that have been given a rating of “Not
Rated,” and programs that are considered “unrated” because no code has been sent by the broadcaster.
The TV age-based ratings are listed below.
PASSWORD You need a password to enter the PARENTAL CONTROL menu. The initial password is 1234.
PARENTAL GUIDE Select “OFF” to turn V-CHIP off. Select “ON” to activate V-CHIP.
TV RATING Select to display the TV Rating submenu.
The TV ratings and content themes you can block are listed in the following tables.
The first time you use this menu you should change the password. If you forget your
password, please contact the service center.
When you enter the correct password, the PARENTAL GUIDE menu is displayed.
Rating
TV-MA
TV-14
TV-PG
TV-G
TV-Y7
TV-Y
Description and Content Themes for Age-Based Ratings
Mature Audience Only. Specifically designed to be viewed by adults; may be unsuitable for children
under 17. Contains one or more of the following content themes: crude indecent language (L),
explicit sexual activity (S), or graphic violence (V).
Parents Strongly Cautioned. Contains some material that parents would find unsuitable for children
under 14. Parents are strongly urged to exercise greater care in monitoring this program and are
cautioned against letting children under the age of 14 watch unattended. This program contains one or
more of the following content themes: intensely suggestive dialogue (D), strong coarse language
(L), intense sexual situations (S), or intense violence (V).
Parental Guidance Suggested. Contains material that parents may find unsuitable for younger children.
Parents may want to watch it with their younger children. The program contains one or more of the
following content themes: some suggestive dialogue (D), infrequent coarse language (L), some
sexual situations (S), or moderate violence (V) .
General Audience. Most parents would find this program suitable for all ages. Contains little or no
sexual dialogue (D), no strong language (L) little or no sexual situations (S), or violence (V).
Designed for children ages 7 and above. May be more appropriate for children who have acquired the
developmental skills needed to distinguish between make-believe and reality. Themes and elements in
this program may include mild fantasy violence (FV) or comedic violence, or may frighten children
under the age of 7.
All Children. Themes and elements in this program are designed for a young audience, including children
from ages 2-6. It is not expected to frighten younger children.
8 Using TV Menus
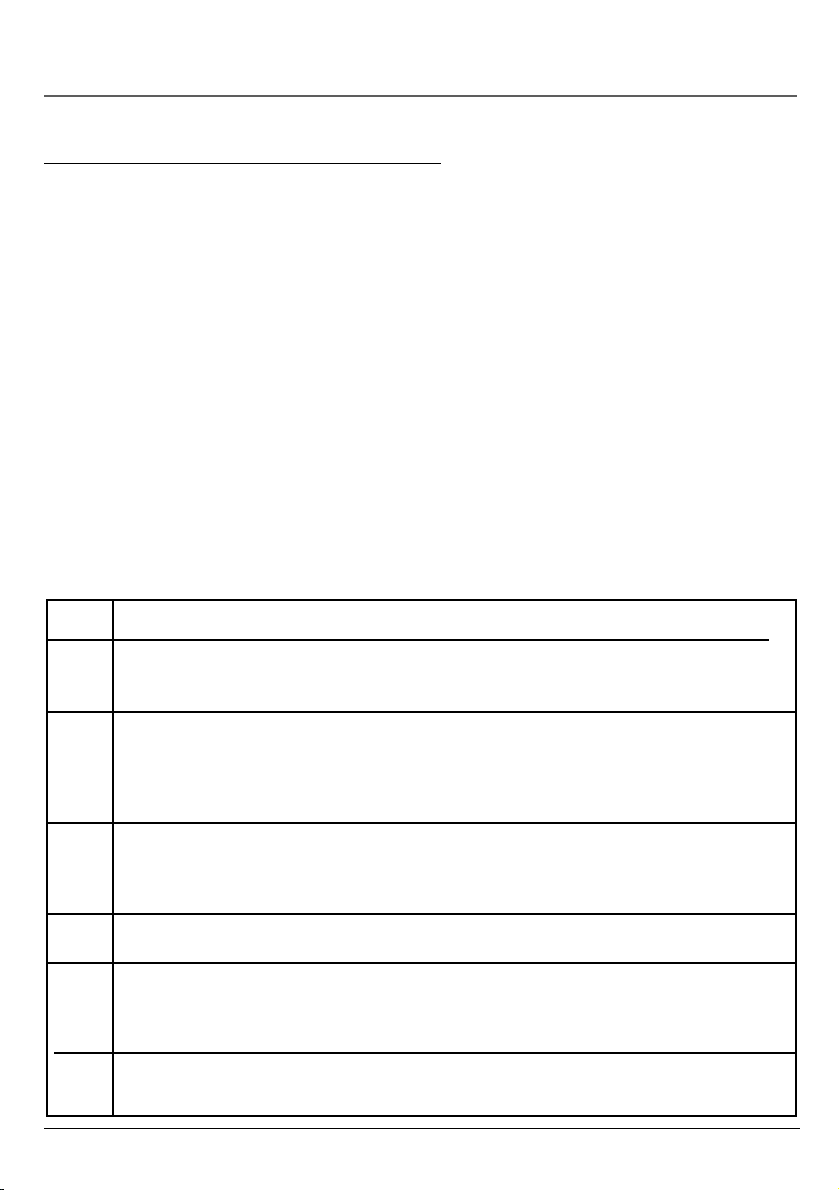
Rating Field
Lets you select from a
list of age-based
ratings you can block
or unblock.
Using TV Menus
The TV Rating Limit Screen Rating Screen
Rating Status Field
Lets you select whether the status of the age-based rating limit to the
left is Unblock or Block.
Content Themes
Lists the content
themes you can block
TV RATING
RATING FV D L S V
TV-Y >U
TV-Y7 U U
TV-G U
TV-PG U U U U U
TV-14
UUU UU
UU UUTV-MA
Rating Settings Area
Lets you see the current block/view state of age-based ratings and associated
content.
or unblock.
Content Status Fields
Lets you select which
content themes to view for
the selected rating, and
whether the status of the
content theme is currently
Unblock (U) or Block (B).
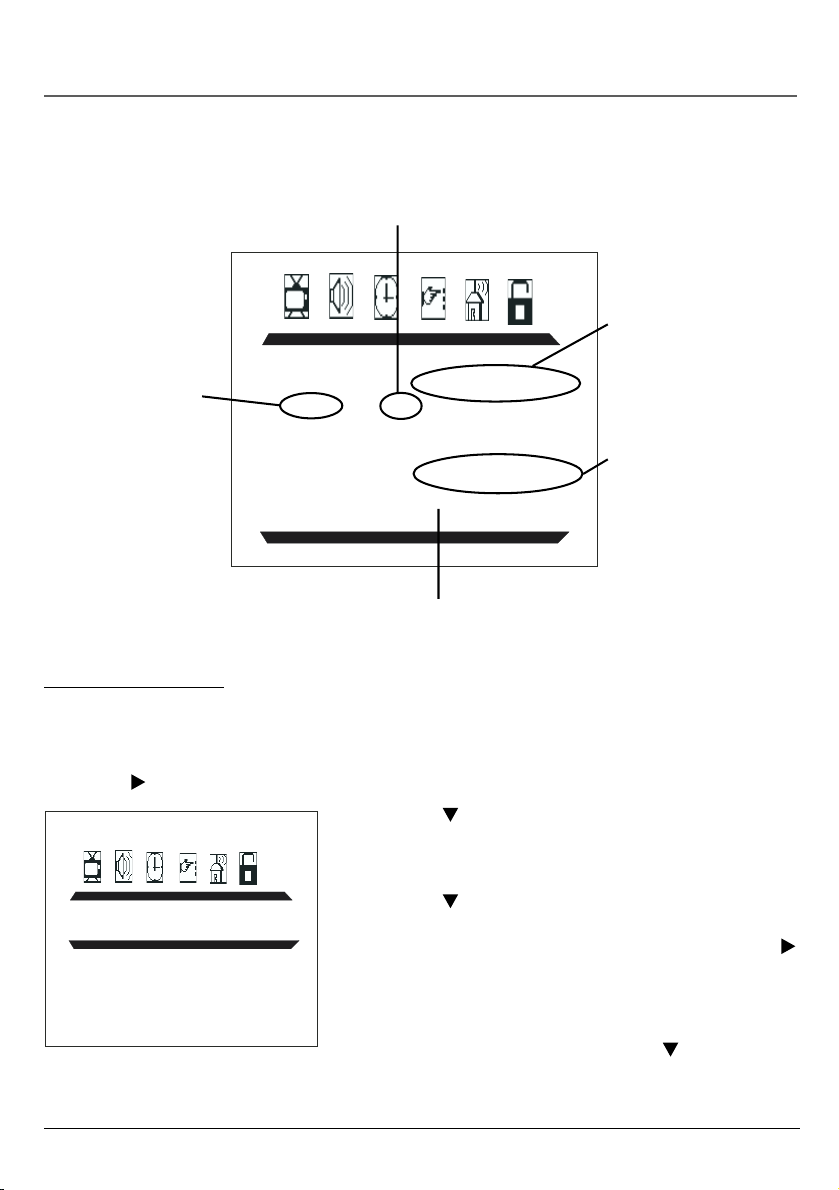
Blocking TV Ratings
You can automatically block all program ratings above a specified TV rating level. To block channels with higher (or
lower) ratings:
1. Press MENU on the remote control (the Main menu appears).
2. Press the button until the Parental Control icon is highlighted.
3. Press the button on the remote (or CH button on the front of
TV) until the bottom PASSWORD is highlighted.
4. Enter your password using the numbers buttons on the remote
(the PARENTAL GUIDE menu appears).
PASSWORD
PASSWORD
Using TV Menus 9
5. Press the button until TV RATING is highlighted, then press
the right arrow button (the TV RATING screen appears).
6. Use the down arrow button to select the rating, then press the
button to change the status of a TV program rating or content
theme from U (Unblock) to B (Block).
7. Press the GO BACK button to return the PARENTAL CONTROLS
menu.
8. Make sure PARENTAL GUIDE is on. Press the button to
highlight PARENTAL GUIDE, then press the right arrow button to
turn it on. It must be on for rating limits to take effect.

Using TV Menus
The following sections give you more details about how to change the status of TV program limits.
Note: If you forget your password, you can reset it. Enter 5898 as the password and then change it to a new one.
Blocking Specific Content Themes
Content Themes
D Sexually Explicit Dialogue
L Adult Language
S Sexual Situations
VViolence
FV Fantasy Violence
MPAA RATING
G B
PG B
PG-13 B
R B
NC-17 B
X B
You can block programs based on their content. (Content is
represented by the FV, D, L, S, and V on your screen.) When you block
a content theme for a particular rating, you automatically block that
content theme for higher rated programs as well.
To block program content:
1. Determine the content themes you want to block.
2. Press and hold the button until the content theme you want
to change is highlighted.
3. Press the button to change its status to B (Block).
4. Press OK to return to the previous menu.
Notes: Broadcasters are not required to provide content themes or
age-based ratings.
You must remember to activate Parental Controls for rating limits to
take effect.
V-Chip Movie Rating Limit
Set movie rating limits by blocking movies rated above a specified
level.
To access the MPAA RATING (Movie Rating Limit) menu:
1. Press MENU on the remote control (the Main menu appears).
2. Press the button until the Parental Control icon is highlighted.
3. Press the button until the bottom PASSWORD is highlighted,
then press the button to access the password entry.
4. Enter your password using the numbers buttons on the remote
(the PARENTAL GUIDE menu appears).
5. Press the button until MPAA RATING is highlighted, then
press the button (the MPAA RATING screen appears).
6. Use the button to select the rating, then press the button
to change the status of a TV program rating or content theme
from U (Unblock) to B (Block).
7. Make sure PARENTAL GUIDE is on. Press the GO BACK button to
return the PARENTAL CONTROLS menu.
8. Press the button to highlight PARENTAL GUIDE, then press
the button to turn it on. It must be on for rating limits to
take effect.
Note: If you forget your password, you can reset it. Enter 5898 as the
password and then change it to a new one.
You must remember to activate Parental Controls for rating limits to
take effect.
10 Using TV Menus

Using TV Menus
Parental Guide On (Activate V-Chip)
Selecting this option lets you activate and deactivate parental control settings.
1. Press MENU on the remote control (the Main menu appears).
2. Press the
3. Press the
entry.
4. Enter your password using the numbers buttons on the remote (the PARENTAL GUIDE menu appears).
5. Press the button to highlight PARENTAL GUIDE OFF, then press the button to turn it on. It must be on for
rating limits to take effect.
If you do not activate V-Chip, none of the settings for V-Chip will take effect.
If you forget your password, you can reset it. Enter 5898 as the password and then change it to a new one.
Child Lock
Selecting this option lets you lock (disable) or unlock (enable) the TV’s front panel. The remote still tunes to any
channel. When using this as a Parental Control method, remove access to any remote that is capable of operating the
television.
1. Press MENU on the remote control (the Main menu appears).
2. Press the button until the Parental Control icon is highlighted.
3. Press the button until the bottom PASSWORD is highlighted, then press the button to access the password
entry.
4. Enter your password using the numbers buttons on the remote (the PARENTAL GUIDE menu appears).
5. Press the button to highlight CHILD LOCK, then press the button to turn it on.
button until the Parental Control icon is highlighted.
button until the bottom PASSWORD is highlighted, then press the button to access the password
Change Password
Selecting this option lets you simply create a new password at any time. Once you enter a new password from
CHANGE PASSWORD in the PARENTAL CONTROL menu, it is the password you use until you change it again.
1. Press MENU on the remote control (the Main menu appears).
2. Press the button until the Parental Control icon is highlighted.
3. Press the button until the bottom PASSWORD is highlighted, then press the button to access the password
entry.
4. Enter your password using the numbers buttons on the remote (the PARENTAL GUIDE menu appears).
5. Press the button to highlight CHANGE PASSWORD, then press the button to select it.
6. Press the button to highlight NEW PASSWORD, and use the number buttons on the remote to enter the new
password. Enter it again in the confirm field to confirm the new password.
Using TV Menus 11

Other Information
Troubleshooting
Most problems you encounter with your TV/DVD can be corrected by consulting the following troubleshooting
list.
TV won’t turn on
• Make sure the TV is plugged in.
• Check the wall receptacle (or extension cord) to make sure it is “live” by plugging in something else.
• Something might be wrong with your remote control. Press the POWER button on the front of the TV.
TV turns off unexpectedly
• Sleep timer might have been activated.
• Electronic protection circuit may have been activated because of a power surge. Wait 30 seconds and then turn
on again. If this happens frequently, the voltage in your house may be abnormally high or low.
• Unplug TV. Wait five minutes. Plug it in again..
No sound, picture okay
• Maybe the sound is muted. Try pressing the volume up button to restore sound.
Can’t select certain channel
• Channel may be blocked or not approved through the V-Chip.
No picture, no sound but TV is on
• Maybe the signal type is set wrong. Go to page 8 for detailed instructions.
• The channel might be blank — change channels.
Sound okay, picture poor
• Check antenna connections. Make sure all of the cables are firmly connected to the jacks.
•Try adjusting sharpness function to improve weak signals.
Black box appears on the screen
• Closed caption might be on.
The Remote Control Doesn’t Work
• Something might be between the remote and the remote sensor on the component. Make sure there is a clear
path.
• Maybe batteries in remote are weak, dead, or installed incorrectly. Put new batteries in the remote.
•You might need to reset the remote: remove batteries and press the number 1 button for at least 60 seconds.
Release the 1 button, replace the batteries, and (if necessary) program the remote again.
Problems with V-Chip/Parental Controls
The rating limits don’t work
•You must activate the settings.
I don’t remember my password and I want to unlock the TV
• If you forget your password you can reset it. Enter 5898 as the password and then change it to a new one.
12 Other Information

Other Information
Additional Information
Maintenance of Cabinet
For safety reasons, when cleaning the cabinet be sure to disconnect the AC power cord from the AC outlet.
• Do not use benzene, thinner, or other solvents for cleaning.
• Wipe the cabinet with a soft cloth.
Other Information 13

Other Information
RCA TruFlat TV LIMITED WARRANTY
What your warranty covers:
• Defects in materials or workmanship.
For how long after your purchase:
• One year from date of purchase for labor charges.
• One year from date of purchase for parts.
•Two years from date of purchase for the picture tube.
The warranty period for rental units begins with the first rental or 45 days from date of shipment to the rental firm,
whichever comes first.
What we will do:
•Pay any Authorized RCA Television Service Center the labor charges to repair your television.
•Pay any Authorized RCA Television Service Center for the new or, at our option, refurbished replacement parts and
picture tube required to repair your television.
How you get service:
• For screen sizes 20” and smaller: Take your RCA television to any Authorized RCA Television Service Center and pick up
when repairs are complete.
• For screen sizes larger than 20”: Request home or pick up, repair, and return service from any Authorized RCA Television
Service Center, provided that your television is located within the geographic territory covered by an Authorized RCA
Television Service Center. If not, you must take your television to the Service Center location at your own expense, or
pay for the cost the Service Center may charge to transport your television to and from your home.
•To identify your nearest Authorized RCA Television Service Center, ask your dealer, look in the Yellow Pages, visit
www.rca.com, or call 1-800-336-1900.
•Proof of purchase in the form of a bill of sale or receipted invoice which is evidence that the product is within the
warranty period must be presented to obtain warranty service. For rental firms, proof of first rental is also required.
What your warranty does not cover:
• Customer instruction. (Your Owner’s Manual describes how to install, adjust, and operate your television. Any additional
information should be obtained from your dealer.)
• Installation and related adjustments.
• Signal reception problems not caused by your television.
• Damage from misuse or neglect.
• Batteries.
• Customer replacement fuses.
• Images burnt onto the screen.
•A television that has been modified or incorporated into other products or is used for institutional or other commercial
purposes.
•A television purchased or serviced outside the U.S.A.
• Acts of nature, such as but not limited to lightning damage.
14 Other Information


Visit the RCA web site at www.rca.com
Please do not send any products to the Indianapolis address listed in this manual
or on the carton. This will only add delays in service for your product.
Thomson Inc.
10330 North Meridian Street
Indianapolis, IN 46290
©2003 Thomson Inc.
Trademark(s)® Registered
Marca(s) Registrada(s)
Printed in China
TOCOM 1627189A
As an ENERGY STAR® Partner, Thomson Inc.
has determined that this product meets the
ENERGY STAR guidelines for energy efficiency.
ENERGY STAR is a U.S. registered mark.
THOMSON

Guide de
l’utilisateur
du téléviseur
Transforme encore le divertissement.

Information importante
AVERTISSEMENT
Afin de réduire le risque
d’incendie et de choc électrique,
ne pas exposer ce produit à la
pluie ou l’humidité.
Caution: To reduce the risk of electric shock, match wide blade of plug to wide slot,
fully insert.
Attention : Pour éviter les chocs électriques, introduire la lame la plus large de la fiche
dans la borne correspondante de la prise et pousser jusqu’au fond.
Se reporter à l’étiquette d’identification/capacité nominale située sur le panneau
arrière du produit pour connaître la tension de fonctionnement adéquate.
Le règlement de la FCC stipule que toute modification non autorisée de ce produit peut annuler le privilège
d’utilisation de l’utilisateur.
Si des images fixes (sans mouvement) restent affichées pendant de longues périodes, elles pourraient
s’imprimer en permanence dans l’écran. Ces images comprennent les logos des réseaux, les numéros de
téléphone et les jeux vidéos. Ces dommages ne sont pas couverts par votre garantie. Le visionnement
prolongé de canaux affichant ces images devrait être évité.
À l’installateur de câble : Ce rappel à pour but d’attirer l’attention sur l’article 54 du Code canadien de
l’électricité, partie 1 (article 820-40 du code de l’électricité des États-Unis) qui énonce des directives de
mise à la terre et stipule que le fil de terre du câble doit être connecté au système de mise à la terre de
l’édifice, aussi près que possible du point d’entrée.
AVERTISSEMENT
RISQUE DE CHOC
ÉLECTRIQUE,
NE PAS OUVRIR
Ce symbole indique une
« tension dangereuse »
dans le produit qui
présente un risque
d’électrocution ou de
blessure.
Afin de réduire le risque de choc
électrique, ne pas enlever le
couvercle (ou l’arrière). Ne contient
aucune pièce réparable par
l’utilisateur. Confiez l’entretien à du
personnel qualifié.
Ce symbole
indique des
instructions
importantes
accompagnant le
produit.
Enregistrement du produit
Veuillez remplir la carte d’enregistrement du produit (emballée séparément) et la retourner
immédiatement. Le renvoi de cette carte nous permet de vous contacter si nécessaire.
Information sur le produit
Conservez votre facture comme preuve d’achat ainsi que pour obtenir des pièces ou un service sous
garantie. Attachez-la ici et inscrivez le numéro de série et de modèle au cas où vous en auriez besoin. Ces
numéros se trouvent sur le produit.
N° de modèle ____________________ N° de série ____________________ Date d’achat : _________
Détaillant / Adresse / Téléphone : ________________________________________________________

Table des matières
Connexion d’autres composants à votre téléviseur ........... 2
Explication des prises et des câbles .................................... 2
Commandes du panneau avant du téléviseur ..................... 3
Insertion des piles dans la télécommande .......................... 3
Les touches de la télécommande......................................... 3
Exécution du réglage initial ................................................. 5
Réglage de la langue ............................................................. 5
Recherche automatique complète de canaux ................ 5
Menu du téléviseur ............................................................... 6
Navigation dans les menus du téléviseur ........................ 6
Menu IMAGE ............................................................................ 6
Menu SON................................................................................. 6
Menu HEURE ............................................................................ 7
Menu CONFIGURATION......................................................... 7
Menu SYNTONISATION.......................................................... 7
Menu NIVEAU FILTRAGE et puce V..................................... 8
Blocage du Filtrage TV ........................................................ 10
Blocage de thèmes particuliers ........................................ 10
Filtrage des films (puce V).................................................. 11
Niveau filtrage Oui (Activation de la puce V)............... 11
Contrôle parent .....................................................................12
Changement du mot de passe ..........................................12
Dépannage ...........................................................................13
Informations supplémentaires............................................ 14
Entretien du boîtier .............................................................. 14
Garantie limitée .................................................................. 15
Table des matières 1

Connexions et réglage
ble ou
T
2
ANTENNA IN
e
VIDEO
L (MONO
)
R
2
1
INPUT
M
a
gn
VIDEO
AUDI
O
OU
T
R
L
I
N
L
R
OUT TO TV
IN FROM ANT
CH3
CH4
3
Du câ
d
e l’antenn
1A
DVD
VIDEO
L
R
Connexion d’autres composants à votre téléviseur
Téléviseur + lecteur DVD + magnétoscope
1. Connectez votre lecteur DVD à votre téléviseur.
A. Connectez les câbles audio (blanc et rouge) aux prises R et L/MONO AUDIO à l’arrière du téléviseur et aux
prises de sortie audio sur lecteur DVD (parfois marquées R [droite] et L [gauche]).
B. Connectez le câble vidéo (jaune) dans la prise de sortie vidéo du lecteur DVD et à la prise VIDEO à l’arrière du
téléviseur.
2. Connectez votre téléviseur à votre magnétoscope.
Connectez un câble coaxial dans la prise ANTENNA IN de votre téléviseur et dans la prise de sortie RF de votre
magnétoscope (parfois marquée OUT TO TV).
3. Assurez-vous d’avoir connecté le câble ou l’antenne à votre magnétoscope.
Connectez le câble coaxial de votre prise de câble ou d’antenne à l’entrée d’antenne sur le magnétoscope (parfois
marquée In From Antenna).
1B
Nota : Si vous ne connectez pas un câble, une antenne ou un autre composant à votre téléviseur, le téléviseur
s’éteindra automatiquement après quinze minutes pour économiser l’énergie.
ANTENNA IN
Explication des prises et des câbles
ANTENNA IN Vous permet de connecter un câble coaxial afin de
recevoir un signal d’antenne, de câble ou de câblosélecteur ou de
magnétoscope.
Prise ANTENNA IN et câble coaxial.
R (DROITE) AUDIO Permet une connexion audio droite. Le connecteur
audio droit est généralement rouge.
VIDEO
L (MONO
)
R
1
2
INPUT
L/ MONO AUDIO Permet une connexion audio gauche. Le connecteur
audio droit est généralement blanc.
VIDEO Permet une connexion vidéo composite. Le connecteur vidéo est
généralement jaune.
Prises VIDEO 1 et VIDEO 2,
câbles audio/vidéo, et câble S-vidéo.
2 Connexions et réglage

Connexions et réglage
Commandes du panneau avant du téléviseur
Si vous ne trouvez pas votre télécommande, vous pouvez utiliser les boutons du panneau avant de votre téléviseur
pour activer de nombreuses fonctions de votre téléviseur.
POWER (Alimentation) Allume et éteint le téléviseur.
INPUT (Entrée) Alterne entre les canaux d’entrée vidéo d’un système de jeux vidéo, d’un magnétoscope, etc. connecté
aux prises audio/vidéo à l’avant et à l’arrière du téléviseur.
MENU Affiche le menu principal du téléviseur. Dans le système de menus, il sélectionne les articles mis en
surbrillance.
VOL- Abaisse le volume. Dans le système de menus, agit comme une touche à flèche vers la gauche de la
télécommande et règle les commandes de menu.
VOL+ Augmente le volume. Dans le système de menus, agit comme une touche à flèche vers la droite de la
télécommande et règle les commandes de menu.
CH ( ) Permet de passer au canal précédent. Dans le système de menus, agit comme une touche à flèche vers le bas
de la télécommande et règle les commandes de menu.
CH ( ) Permet de faire défiler la liste des canaux. Dans le système de menus, agit comme une touche à flèche vers le
haut de la télécommande et règle les commandes de menu.
Insertion des piles dans la télécommande
Enlevez le couvercle du compartiment à piles. Insérez deux piles de type AAA en suivant la polarité indiquée à
l’intérieur du compartiment à piles. Remettez en place le couvercle.
Nota : Si vous prévoyez ne pas utiliser la télécommande pendant une période prolongée, enlevez les piles pour éviter
Les touches de la télécommande
VOL
MUTEGO BACK
CLEAR
OKO
K
PRESETS
CC
SLEE
P
123
4
7
INPUT
ON OFF
MENU
SKI
INF
O
56
89
0
ON•OFF (Marche/arrêt) Allume et éteint le téléviseur.
Touches VOL+/- Abaissent ou augmentent le volume du téléviseur.
Mute (Son coupé) Abaisse le volume à son niveau minimal. Appuyez de nouveau pour
C
H
rétablir le volume.
Go back (Retour) Cette touche vous permet de revenir au canal précédent. Si vous êtres
dans le système de menus, GO BACK vous fait revenir à l’écran précédent.
Touches CH (+/-) Font défiler vers le haut ou vers le bas la liste de canaux affichée.
Appuyez une fois pour changer de canal ou maintenez la touche enfoncée pour
continuer à changer les canaux.
P
CLEAR (Effacer) Efface les menus ou les messages de l’écran et vous permet de regarder
à nouveau la télévision. Pour les menus qui comportent des entrées numériques, le fait
d’appuyer sur CLEAR efface le dernier numéro entré.
MENU Affiche le menu principal du téléviseur.
Touches à flèche ( / / / ) Appuyez sur les touches à flèche pour vous déplacer
dans le système de menus à l’écran.
Touche OK Lorsqu’un menu est affiché, appuyez sur OK pour sélectionner l’article mis
en surbrillance.
PRESETS (Préréglages): Affiche les préréglages de l'image.
SKIP (Sauter) Appuyez deux fois sur la touche pour commencer un balayage de canal.
Appuyez de nouveau pour sélectionner le canal en cours.
CC (Sous-titres) Alterne entre l’activation et la désactivation des sous-titres.
INFO Cette touche affiche les informations sur le canal.
Connexions et réglage 3

Connexions et réglage
SLEEP (Veilleuse): Règle l'heure d'autoextinction du téléviseur.
0-9 (Touches numériques) Permettent d’entrer les numéros de canaux. Pour entrer un canal à
deux chiffres, appuyez sur les deux chiffres. Pour entrer un canal à trois chiffres, appuyez sur la
première touche et maintenez-la enfoncée pendant deux secondes jusqu’à l’apparition de deux
tirets (– –) à droite du chiffre, puis entrez les deux autres chiffres. Exemple : pour régler sur le
canal 123, appuyez sur 1 et maintenez cette touche enfoncée pendant deux secondes, appuyez
sur 2, puis appuyez sur 3.
INPUT (Entrée) Alterne entre les entrées disponibles.
4 Connexions et réglage

Utilisation des menus du téléviseur
Icône de
configuration
IMAGE
CONTRASTE 1
LUMINANCE 18
COULEUR 50
NETTETE 50
TEINTE 0
TEMP. COULEUR NORMALE
CONFIGURATION
LANGUE ENGLISH
FOND BLEU OUI
NOIR ACCENTUE NON
BRUIT REDUIT NON
SOUS-TITRAGE CC1
ST SON COUPÉ OUI
Menu Configuration
Exécution du réglage initial
Le système de menus de votre téléviseur vous permet de régler les
fonctions du téléviseur. La première fois que allumez votre téléviseur,
vous devez régler quelques articles de menus importants.
Réglage de la langue
Le réglage de la langue détermine la langue affichée dans les affichages
et les menus. Vous pouvez choisir entre English, Español et Français. La
langue par défaut est l’anglais English.
1. Appuyez sur la touche MENU de la télécommande (le Menu principal
apparaît).
2. Appuyez sur la touche à flèche vers la droite jusqu’à ce que l’icône
de Configuration soit en surbrillance.
3. Appuyez sur la touche à flèche vers le bas jusqu’à ce que LANGUE
soit mis en surbrillance, puis sur la touche à flèche vers la droite
pour changer la langue.
4. Lorsque vous avez terminé, appuyez sur MENU pour quitter.
Icône de
syntonisation
Recherche automatique complète de canaux
Cette portion du réglage permet au téléviseur de rechercher tous les
canaux que peux capter votre antenne ou votre câblosélecteur. Cette
fonction est parfois appelée auto-programmation.
1. Appuyez sur la touche MENU de la télécommande (le Menu principal
apparaît).
SYNTONISATION
SOURCE ANTENNE
CANAL 10
SUPPRIMER CANAL NON
REGLAGE FIN
RECHERCHE AUTO
2. Appuyez sur la touche à flèche vers la droite jusqu’à ce que l’icône
de Syntonisation soit en surbrillance.
3. Appuyez sur la touche à flèche vers le bas jusqu’à ce que SOURCE
soit mis en surbrillance, puis sur la touche à flèche vers la droite
pour régler le type de signal (CABLE ou ANTENNE).
4. Appuyez sur la touche à flèche vers le bas pour mettre en
surbrillance RECHERCHE AUTO. Appuyez sur la touche à flèche vers
la droite pour commencer la recherche automatique de canal.
Pour annuler en tout temps, appuyez sur OK.
Une fois la recherche terminée, vous pouvez visionner les émissions
télévisées. Pour obtenir des informations sur la personnalisation de vos
canaux ou de vos options de menu, voyez le chapitre 3.
Utilisation des menus du téléviseur 5

Utilisation des menus du téléviseur
Menu du téléviseur
Les menus du téléviseur vous permettent de contrôler la qualité de l’image et les fonctions disponibles pour le
visionnement du téléviseur.
Navigation dans les menus du téléviseur
1. Pour afficher le menu du téléviseur, appuyez sur la touche MENU.
2. Utilisez les touches à flèche ( /
mettre en surbrillance une icône de sous-menu située au-dessus du menu.
3. Appuyez sur les touches
l’option.
4. Appuyez sur la touche du menu pour quitter le système de menus.
) de la télécommande (ou les touches VOL / à l’avant du téléviseur) pour
/ de la télécommande (ou CH / à l’avant du téléviseur) pour sélectionner
Menu IMAGE
Le menu IMAGE vous permet d’effectuer des réglages d’image.
IMAGE
CONTRASTE 1
LUMINANCE 18
COULEUR 50
NETTETE 50
TEINTE 0
TEMP. COULEUR NORMALE
SON
PREREGLE PERSONNALISER
GRAVES 50
AIGUES 50
EQUILIBRE 0
AMBIOPHONIE NON
CONTRASTE Utilisez les touches à flèche / pour régler le
contraste entre les zones sombres et claires de
l’image.
LUMINANCE Utilisez les touches à flèche / pour régler la
luminance de l’image.
COULEUR Utilisez les touches à flèche / pour régler
l’intensité de couleur ou la saturation.
NETTETE Utilisez les touches à flèche / pour régler la
netteté de l’image.
TEINTE Utilisez les touches à flèche / pour régler
l’équilibre entre les niveaux de rouge et de vert.
TEMP. COULEUR Permet d’effectuer trois ajustements de couleur :
Froide pour augmenter le bleu dans l’image,
Normale et Chaude pour augmenter le rouge dans
l’image.
Menu SON
Le menu SON offre une variété d’options audio.
PREREGLE Offre quatre préréglages audio (PERSONNALISER/
VOIX/THEATRE/MUSIQUE).
GRAVES Utilisez les touches à flèche / pour réduire ou
augmenter les sons de basses fréquences.
AIGUES Utilisez les touches à flèche / pour réduire ou
augmenter les sons de hautes fréquences.
EQUILIBRE Utilisez les touches à flèche / pour équilibrer le
son des haut-parleurs gauche et droit.
AMBIOPHONIE Active ou désactive l’ambiophonie.
6 Utilisation des menus du téléviseur

HEURE
ARRET PROGRAMME 20
CONFIGURATION
LANGUE ENGLISH
FOND BLEU OUI
NOIR ACCENTUE NON
BRUIT REDUIT NON
SOUS-TITRAGE CC1
ST SON COUPÉ OUI
Utilisation des menus du téléviseur
Menu HEURE
ARRET PROGRAMME Vous permet de régler l’heure d’autoextinction
du téléviseur. Lorsque l’option ARRET
PROGRAMME est mise en surbrillance, appuyez
sur la touche à flèche vers la droite pour ajouter
dix minutes à l’horloge (jusqu’à deux heures).
Menu CONFIGURATION
LANGUE Sélectionne la langue d’affichage des menus.
FOND BLEU Active (FOND BLEU visible en mode AV) ou Désactive
(fond d'écran noir en cas de non réception de signal)
la fonction FOND BLEU.
NOIR ACCENTUE Active ou désactive l’accentuation du noir.
BRUIT REDUIT Active ou désactive la fonction de réduction
du bruit.
SOUS-TITRAGE Offre huit modes de sous-titrage, dont quatre
ST SON COUPÉ Lorsqu’il est activé, affiche automatiquement les
sous-titres avec une pression sur la touche MUTE.
modes texte.
Menu SYNTONISATION
SYNTONISATION
SOURCE ANTENNE
CANAL 10
SUPPRIMER CANAL NON
REGLAGE FIN
RECHERCHE AUTO
SOURCE Permet de sélectionner l’option d’ANTENNE ou de
CANAL Utilisez les touches / sur la télécommande
SUPPRIMER CANAL Sélectionnez OUI pour sauter le canal suivant.
REGLAGE FIN Raffine le réglage d’un canal pour obtenir la
RECHERCHE AUTO Exécute une recherche de canaux et les
CABLE. Sélectionne ANTENNE pour recevoir un
signal d’émission radio. Sélectionnez CABLE pour
recevoir un signal de télévision câblée CATV.
(ou les boutons VOL / à l’avant du téléviseur)
pour faire défiler les canaux disponibles par
l’antenne. Vous pouvez introduire le numéro du
canal directement au moyen des touches
numériques.
Sélectionnez NON pour passer au canal suivant.
meilleure réception.
sauvegarde automatiquement.
Utilisation des menus du téléviseur 7

Utilisation des menus du téléviseur
Menu NIVEAU FILTRAGE et puce V
Le menu NIVEAU FILTRAGE vous permet de programmer votre téléviseur de façon que les enfants ne puissent
visionner certaines émissions.
Les trois premières options du menu Réglage des filtrages dépendent d’un élément logiciel (communément appelé
puce V) à l’intérieur du téléviseur, qui permet de « bloquer » les émissions et les films contenant de la violence, du
sexe ou un thème qui, selon vous, ne devrait pas être regardés par des enfants. Ce menu vous permet de programmer
votre téléviseur de façon qu’il ne diffuse pas certaines émissions. Vous pouvez « déverrouiller » les émissions si vous
entrez un mot de passe.
Lorsqu’elle est activée (OUI), le logiciel de du niveau filtrage lit un code que la plupart des diffuseurs envoient avec
leurs émissions. Ce code indique au logiciel la tranche d’âge visée (TV-MA, TV-14, etc.) et les thèmes abordés (Violence
[V], Langage adulte [L], etc.).
Les diffuseurs ne sont pas obligés de fournir les thèmes de leurs émissions, par conséquent les émissions reçues sans
thème ne seront bloquées que si vous les bloquez d’après la catégorie d’âge. Vous pouvez bloquer également les
émissions sans catégorie « Not Rated » (non cotées) ou considérées comme telles parce qu’elles sont diffusées sans
code de catégorie par le diffuseur.
Les catégories d’âge pour la télévision figurent dans la liste ci-dessous.
MOT DE PASSE Vous avez besoin d’un mot de passe pour accéder au menu NIVEAU FILTRAGE. Le mot de passe
NIVEAU FILTRAGE Sélectionnez « NON » pour désactiver la puce V. Sélectionnez « OUI » pour activer la puce V.
FILTRAGE TV Sélectionnez cette option pour afficher le sous-menu de FILTRAGE TV.
initial est 1234. Vous devriez changer le mot de passe la première fois que vous utilisez ce
menu. Si vous oubliez votre mot de passe, veuillez contacter le centre de service.
Lorsque vous entrez le bon mot de passe, le menu NIVEAU FILTRAGE apparaît.
8 Utilisation des menus du téléviseur

Utilisation des menus du téléviseur
Les classifications d’âge et les thèmes que vous pouvez bloquer sont répertoriés dans les tableaux ci-dessous.
Catégorie
TV-MA
TV-14
TV-PG
TV-G
TV-Y7
TV-Y
Adultes seulement. Cette émission est destinée spécifiquement aux adultes et risque de ne pas convenir à des
enfants de moins de 17 ans. Elle contient un ou plusieurs des thèmes suivants : langage indécent et vulgaire
(L), activité sexuelle explicite (S) ou violence graphique (V).
Parents sérieusement mis en garde. Cette émission contient des scènes que de nombreux parents
considéreraient inadéquates pour des enfants de moins de 14 ans. On recommande sérieusement aux
parents d’user de vigilance et de ne pas laisser les enfants de moins de 14 ans regarder cette émission
seuls. Cette émission contient un ou plusieurs des thèmes suivants : dialogues très suggestifs (D),
langage très grossier (L), scènes à caractère sexuel intense (S) ou beaucoup de violence (V).
Surveillance parentale suggérée. Cette émission contient des scènes que les parents risquent de considérer
inadéquates pour de jeunes enfants. Il est conseillé aux parents de regarder l’émission avec leurs jeunes
enfants. Cette émission contient un ou plusieurs des thèmes suivants : quelques dialogues suggestifs (D),
peu de langage grossier (L), quelques scènes à caractère sexuel (S) ou violence modérée (V).
Tout public. La plupart des parents considéreraient cette émission adéquate pour tous les âges. Elle
contient peu ou pas de dialogue à caractère sexuel (D), pas de langage grossier (L) et peu ou pas de
situations à caractère sexuel (S) ou violentes (V).
Cette émission est destinée aux enfants de 7 ans et plus. Elle est davantage conseillée aux enfants qui ont
acquis la maturité requise pour faire la distinction entre la fiction et la réalité. Les thèmes et les éléments
comme la violence fictive légère (FV) ou violence de comédie risquent d’être présents dans ce
programme et d’effrayer des enfants de moins de 7 ans.
Enfants de tous âges. Les thèmes et les éléments de ce type d’émission sont conçus pour un jeune
auditoire, dont les enfants de 2 à 6 ans. Cette émission ne devrait pas effrayer les tout jeunes enfants.
Description et thèmes abordés par catégorie d’âge
La grille des limites de filtrage TV
Champ d’état de la catégorie
Vous permet de choisir Débloquer ou Bloquer
en fonction de la catégorie à gauche.
Thèmes
Énumère les thèmes que
vous pouvez bloquer ou
débloquer.
Champ de la catégorie
Vous permet de sélectionner
dans une liste les catégories
d’âge à bloquer ou à débloquer.
FITRAGE TV
FITRAGE FV D L S V
TV-Y >U
TV-Y7 U U
TV-G U
TV-PG U U U U U
TV-14
Paramètres de la catégorie
Vous permet de voir si les catégories d’âge et
les thèmes associés sont sur voir ou bloquer.
UUU UU
UUUUTV-MA
Champs d’état du thème
Permettent de sélectionner
les thèmes à accepter selon
la catégorie sélectionnée et
indiquent si l’état actuel du
thème est Débloquer (U)
ou Bloquer (B).
Utilisation des menus du téléviseur 9

Utilisation des menus du téléviseur
Blocage du Filtrage TV
Vous pouvez bloquer automatiquement toutes les émissions dont la
catégorie est supérieure à un niveau de filtrage spécifié. Pour bloquer les
canaux avec un niveau de filtrage supérieur (ou inférieur) :
1. Appuyez sur la touche MENU de la télécommande (le Menu principal
apparaît).
2. Appuyez sur la touche jusqu’à ce que l’icône de contrôle parental
(niveau de filtrage) soit en surbrillance.
3. Appuyez sur la touche
l’avant du téléviseur) jusqu’à ce que l’expression MOT DE PASSE du bas
soit mis en surbrillance.
4. Entrez votre mot de passe en utilisant les touches numériques de la
télécommande (le menu NIVEAU FILTRAGE apparaît).
5. Appuyez sur la touche
surbrillance, puis sur la touche à
flèche vers la droite (l’écran de FILTRAGE TV apparaît).
6. Utilisez les touches à flèche vers le haut ou vers le bas pour
sélectionner le niveau de filtrage et appuyez sur la touche pour
modifier l’état du niveau de filtrage du téléviseur ou du thème de
U (Débloquer) à B (Bloquer).
7. Appuyez sur la touche GO BACK pour revenir au menu de NIVEAU
FILTRAGE.
8. Assurez-vous que NIVEAU FILTRAGE est activé. Appuyez sur la touche
pour mettre en surbrillance NIVEAU FILTRAGE, puis sur la touche à
flèche vers la droite pour l’activer. Il doit être activé pour que les
niveaux de filtrage soient fonctionnels.
La section suivante vous donne davantage de précisions sur la façon de
changer l’état des restrictions.
Nota : Si vous oubliez votre mot de passe, vous pouvez le réinitialiser. Entrez
5898 comme mot de passe, puis changez-le pour un nouveau.
de la télécommande (ou sur le bouton CH à
jusqu’à ce que FILTRAGE TV soit en
Blocage de thèmes particuliers
Thèmes
D Dialogue sexuel explicite
L Langage adulte
S Situations à caractère sexuel
VViolence
FV Violence fictive
Vous pouvez bloquer des émissions d’après leur thème. (Le contenu est
représenté à l’écran par les lettres FV, D, L, S et V.) Lorsque vous bloquez un
thème, dans le cas d’une catégorie d’âge, vous bloquez automatiquement
ce thème pour les émissions de catégorie d’âge supérieure.
Pour bloquer les émissions d’après leur thème :
1. Déterminez le contenu des thèmes que vous voulez bloquer.
2. Maintenez appuyée la touche jusqu’à ce que le thème que vous
voulez modifier soit mis en surbrillance.
3. Appuyez sur la touche pour changer son état à B (Bloquer).
4. Appuyez sur OK pour revenir au menu précédent.
Nota : Les diffuseurs ne sont pas obligés de fournir les thèmes et les catégories
d’âge.
Vous devez verrouiller les niveaux de filtrage pour que les limites entrent en
vigueur.
10 Utilisation des menus du téléviseur

FILTRAGE MPAA
G B
PG B
PG-13 B
R B
NC-17 B
X B
Utilisation des menus du téléviseur
Filtrage des films (puce V)
Fixez les limites en bloquant les films qui dépassent une catégorie d’âge
spécifique.
Pour accéder au menu FILTRAGE MPAA (filtrage des films) :
1. Appuyez sur la touche MENU de la télécommande (le Menu principal
apparaît).
2. Appuyez sur la touche jusqu’à ce que l’icône de contrôle parental
(niveau de filtrage) soit en surbrillance.
3. Appuyez sur la touche
surbrillance, puis sur la touche pour accéder à l’entrée de mot de
passe.
4. Entrez votre mot de passe en utilisant les touches numériques de la
télécommande (le menu NIVEAU FILTRAGE apparaît).
5. Appuyez sur la touche
surbrillance, puis sur la touche (l’écran de FILTRAGE MPAA
apparaît).
6. Utilisez les touches à flèche vers le haut ou vers le bas pour
sélectionner le niveau de filtrage et appuyez sur la touche pour
modifier l’état du niveau de filtrage du téléviseur ou du thème de
U (Débloquer) à B (Bloquer).
7. Assurez-vous que NIVEAU FILTRAGE est activé. Appuyez sur la touche
GO BACK pour revenir au menu de NIVEAU FILTRAGE.
8. Appuyez sur la touche pour mettre en surbrillance NIVEAU
FILTRAGE, puis sur la touche pour l’activer. Il doit être activé pour
que les niveaux de filtrage soient fonctionnels.
Nota : Si vous oubliez votre mot de passe, vous pouvez le réinitialiser. Entrez
5898 comme mot de passe, puis changez-le pour un nouveau.
Vous devez verrouiller les niveaux de filtrage pour que les limites entrent en
vigueur.
jusqu’à ce que MOT DE PASSE soit en
jusqu’à ce que FILTRAGE MPAA soit en
Niveau filtrage Oui (Activation de la puce V)
Le fait de sélectionner cette option vous permet d’activer ou de désactiver les réglages du niveau de filtrage.
1. Appuyez sur la touche MENU de la télécommande (le Menu principal apparaît).
2. Appuyez sur la touche jusqu’à ce que l’icône de réglage des filtrages soit en surbrillance.
3. Appuyez sur la touche jusqu’à ce que MOT DE PASSE soit en surbrillance, puis sur la touche pour accéder à
l’entrée de mot de passe.
4. Entrez votre mot de passe en utilisant les touches numériques de la télécommande (le menu NIVEAU FILTRAGE
apparaît).
5. Appuyez sur la touche pour mettre en surbrillance NIVEAU FILTRAGE NON, puis sur la touche pour l’activer.
Il doit être activé pour que les niveaux de filtrage soient fonctionnels.
Si vous n’activez pas le V-chip, aucun des réglages du V-chip ne sera opérationnel.
Si vous oubliez votre mot de passe, vous pouvez le réinitialiser. Entrez 5898 comme mot de passe, puis changez-le
pour un nouveau.
Utilisation des menus du téléviseur 11

Utilisation des menus du téléviseur
Contrôle parent
Cette option vous permet de verrouiller (désactiver) ou de déverrouiller (activer) le panneau avant du téléviseur. La
télécommande syntonise néanmoins le téléviseur sur n’importe quel canal. Si vous utilisez cette méthode de réglage
de filtrage, empêchez l’accès à toute télécommande capable de faire fonctionner le téléviseur.
1. Appuyez sur la touche MENU de la télécommande (le Menu principal apparaît).
2. Appuyez sur la touche
3. Appuyez sur la touche
l’entrée de mot de passe.
4. Entrez votre mot de passe en utilisant les touches numériques de la télécommande (le menu NIVEAU FILTRAGE
apparaît).
5. Appuyez sur la touche pour mettre en surbrillance CONTROLE PARENT, puis sur la touche pour l’activer.
Changement de mot de passe
Sélectionner cette option vous permet de créer un nouveau mot de passe en tout temps. Une fois que vous avez entré
votre mot de passe à partir de CHAN. MOT PASSE dans le menu NIVEAU FILTRAGE, vous devez l’utiliser tant que vous
ne le changerez pas de nouveau.
1. Appuyez sur la touche MENU de la télécommande (le Menu principal apparaît).
2. Appuyez sur la touche
3. Appuyez sur la touche jusqu’à ce que MOT DE PASSE soit en surbrillance, puis sur la touche pour accéder à
l’entrée de mot de passe.
4. Entrez votre mot de passe en utilisant les touches numériques de la télécommande (le menu NIVEAU FILTRAGE
apparaît).
5. Appuyez sur la touche pour mettre en surbrillance CHAN. MOT PASSE, puis sur la touche pour le
sélectionner.
6. Appuyez sur la touche pour mettre en surbrillance NOUV. MOT PASSE et utilisez les touches numériques de la
télécommande pour entrer le nouveau mot de passe. Entrez-le une deuxième fois dans le champ de confirmation
du nouveau mot de passe.
jusqu’à ce que l’icône de réglage de filtrage soit en surbrillance.
jusqu’à ce que MOT DE PASSE soit en surbrillance, puis sur la touche pour accéder à
jusqu’à ce que l’icône de réglage de filtrage soit en surbrillance.
12 Utilisation des menus du téléviseur

Autres informations
Dépannage
La plupart des problèmes posés par votre téléviseur peuvent être corrigés en consultant la liste de dépannage qui suit.
Le téléviseur ne s’allume pas
• Assurez-vous que le téléviseur est branché.
• Assurez-vous que la prise murale (ou la rallonge) est « sous tension » en branchant un autre appareil.
• La télécommande pourrait être défectueuse. Appuyez sur le bouton POWER à l’avant du téléviseur.
Le téléviseur s’éteint à l’improviste
• Le minuteur de mise en veille pourrait avoir été activé.
• Le circuit de protection électronique a peut-être été activé à cause d’une surtension. Attendez 30 secondes, puis
rallumez le téléviseur. Si cela se produit fréquemment, la tension dans votre domicile est peut-être anormalement
élevée ou faible.
• Débranchez le téléviseur. Attendez cinq minutes. Rebranchez.
Écran vide
• Essayez un autre canal.
Pas de son, image normale
• Le son a peut-être été coupé. Essayez d’appuyer sur la touche d’augmentation du volume pour rétablir le son.
Impossible de sélectionner certains canaux
• Le canal peut être bloqué ou non approuvé dans par la puce V.
Pas d’image, pas de son mais le téléviseur est allumé
• Le type de signal est peut être mal réglé. Voyez à la page 8 les instructions détaillées.
• Le canal est peut-être vide — changez de canal.
Son normal, mauvaise image
• Vérifiez les connexions d’antenne. Assurez-vous que tous les câbles sont solidement connectés aux prises.
• Essayez de régler la fonction netteté pour améliorer les signaux faibles.
Une boîte noire apparaît à l’écran
• Les sous-titres sont peut-être activés.
La télécommande ne fonctionne pas
• Il y a peut-être un objet entre la télécommande et le capteur de télécommande du composant. Assurez-vous que
la voie est libre.
• Les piles de la télécommande sont peut-être faibles, mortes ou mal installées. Mettez des piles neuves dans la
télécommande.
•Vous pourriez avoir à réinitialiser la télécommande : retirez les piles et appuyez sur la touche 1 pendant au moins
une minute. Relâchez la touche, installez les piles et (au besoin) reprogrammez la télécommande.
Problèmes avec le Niveau filtrage ou la puce V
Les limites fixées ne fonctionnent pas
•Vous devez activer les paramètres.
J’ai oublié mon mot de passe et je veux déverrouiller le téléviseur
• Si vous oubliez votre mot de passe, vous pouvez le réinitialiser. Entrez 5898 comme mot de passe, puis changez-le
pour un nouveau.
Autres informations 13

Autres informations
Informations supplémentaires
Entretien du boîtier
Par mesure de précaution, lorsque vous nettoyez le boîtier, assurez-vous de débrancher le cordon d’alimentation de la
prise secteur (c.a.).
• N’utilisez pas du benzène, du diluant ou d’autres solvants pour le nettoyage.
• Essuyez le boîtier avec un chiffon doux.
14 Autres informations

Autres informations
Téléviseur RCA TruFlat
GARANTIE LIMITÉE
Ce que couvre votre garantie :
• Les défauts de matériaux ou de fabrication.
Durée après l’achat :
• Un (1) an à partir de la date d’achat pour la main-d’oeuvre.
• Un (1) an à partir de la date d’achat pour les pièces.
• Deux (2) ans à partir de la date d’achat pour le tube cathodique.
La période de garantie pour les appareils loués commence dès la première location ou 45 jours à compter de la date
d’expédition, selon la première échéance.
Ce que nous ferons :
• Nous rembourserons à tout centre de service agréé pour les téléviseurs RCA les frais de main-d’œuvre encourus pour
réparer votre téléviseur.
• Nous rembourserons à tout centre de service agréé pour les téléviseurs RCA le coût du tube cathodique à image et des
pièces de rechange neuves ou remises à neuf, à notre choix, que nécessitera la réparation de votre téléviseur.
Pour obtenir le service :
•Pour les écrans de 20 po et moins : Apportez votre téléviseur RCA à un centre de service agréé pour les téléviseurs RCA et
allez le chercher une fois les réparations complétées.
•Pour les écrans de plus 20 po : Demandez la réparation à domicile ou la cueillette et la livraison d’un centre de service
agréé pour les téléviseurs RCA, à condition que le téléviseur se trouve dans une région desservie par un centre de service
agréé pour les téléviseurs RCA. Dans le cas contraire, vous devez apporter votre téléviseur, à vos frais, au centre de service
ou payer les frais facturés par le centre de service pour le transport de l’appareil entre votre domicile et le centre.
•Pour connaître le centre de service agréé pour les téléviseurs RCA le plus près de chez vous, demandez à votre dépositaire,
consultez les Pages Jaunes, visitez le www.rca.com, ou téléphonez au 1 800 336-1900.
• Un preuve d’achat, comme une facture ou une quittance de facture qui indique que le produit respecte la période de la
garantie, doit être présentée pour obtenir un service sous garantie. Pour les entreprises de location, la preuve de la
première location est également exigée.
Ce que ne couvre pas votre garantie :
• La formation client. (Votre Manuel de l’utilisateur décrit l’installation, les réglages et le fonctionnement de votre
téléviseur. Toute information supplémentaire devrait être obtenue auprès de votre dépositaire.)
•L’installation et les réglages connexes.
• Les problèmes de réception de signal qui ne sont pas causés par votre téléviseur.
• Les dommages dus au mauvais usage ou à la négligence.
• Les piles.
• Les fusibles remplaçables par le client.
• Les images brûlées sur l’écran.
• Les téléviseurs modifiés, incorporés à d’autres produits ou utilisés à des fins institutionnelles ou commerciales.
• Les téléviseurs achetés ou réparés à l’extérieur des États-Unis.
• Les cas de force majeure tels que, mais sans s’y limiter, les dommages par la foudre.
Autres informations 15

¸ titr e de partenaire ENERGY STAR¤, Thomson Inc.
a d termin que ce pr oduit satisfait les normes
d ENERGY STAR en mati r e d efficacit nerg tique.
ENERGY STAR est une marque d pos e aux .-U.
Visitez le site Web RCA à l’adresse www.rca.com
Nous vous prions de ne pas envoyer de produits à l’adresse d’Indianapolis
indiquée dans ce manuel ou sur l’emballage, ce qui ne ferait que retarder la
réparation de votre produit.
Thomson Inc.
10330 North Meridian Street
Indianapolis, IN 46290
©2003 Thomson Inc.
Marque(s) de commerce® déposée(s)
Marca(s) Registrada(s)
Imprimé en Chine
TOCOM 1627189A
THOMSON
 Loading...