

Page 1
Operating Instructions
SelfCookingCenter
®
whitefficiency
®
Page 2
Dear Customer,
Congratulations on your new SelfCookingCenter
®
whitefficiency
®
. Thanks to an easily
understandable visual control concept, you and your SelfCookingCenter
®
whitefficiency
®
will achieve excellent results in no time at all – with hardly any time or expense spent on
training.
In SelfCooking Control
®
mode you simply select the relevant food and the desired cooking
result at the push of a button – that’s it! There is no longer any need for conventional
inputs such as temperature, time and humidity or complicated programming and constant
monitoring.
Of course the SelfCookingCenter
®
whitefficiency
®
also provides the versatile facilities of
a perfect Combi-steamer. It takes no time at all to create your own cooking programs in
Programming Mode.
We give a 24 month warranty from the date of initial installation, providing the warranty
registration has been filled in and completed. The warranty excludes glass damage, light
bulbs and seals as well as damage caused by improper installation, use, maintenance,
repair or descaling. We hope that enjoy using your new SelfCookingCenter
®
whitefficiency
®
.
Your
RATIONAL AG
You can reach our technical Customer Support Service 7 days a week on +44 (0) 1582
480388
For any queries relating to us please ring the RATIONAL Chef✆Line: +44 (0) 7743 389863
We reserve the right to make technical changes in the interest of progress!
Dealer: Installer:
installed on:
Unit number:
Page 3
Contents
Explanation of the pictograms 5
Initial start-up 6
Safety Instructions 8
Liability 12
Care, inspection, maintenance and repair 13
Features 16
Notes on using your unit 17
Working with the core temperature probe 20
Working with the hand shower 22
General instructions for use 23
General notes 24
Help function 25
Explanation of pictograms 25
Overview of the cooking modes 26
Display after switch-on 26
3 different operating modes 27
SelfCookingControl ® mode 28
Explanation of pictograms 28
Information and requests during the cooking process 29
Options following the end of cooking 29
Information button 30
Combi-steamer mode 31
Explanation of pictograms 31
Programming mode 33
Explanation of pictograms 33
Image view 35
Cleaning request 36
Page 4
Contents
Starting cleaning 38
Cleaning stages 42
CleanJet ® +care failure 43
Maintenance 44
Air filter service 44
Replacing the door seal 45
Replacing the halogen lamp 45
Descaling the moisturing nozzle 46
Fault messages 48
Before you call Service: 53
Club RATIONAL 56
EU Declaration of Conformity for electrical appliances 57
EU Declaration of Conformity for gas appliances 58
Page 5
Explanation of the pictograms
5 / 61
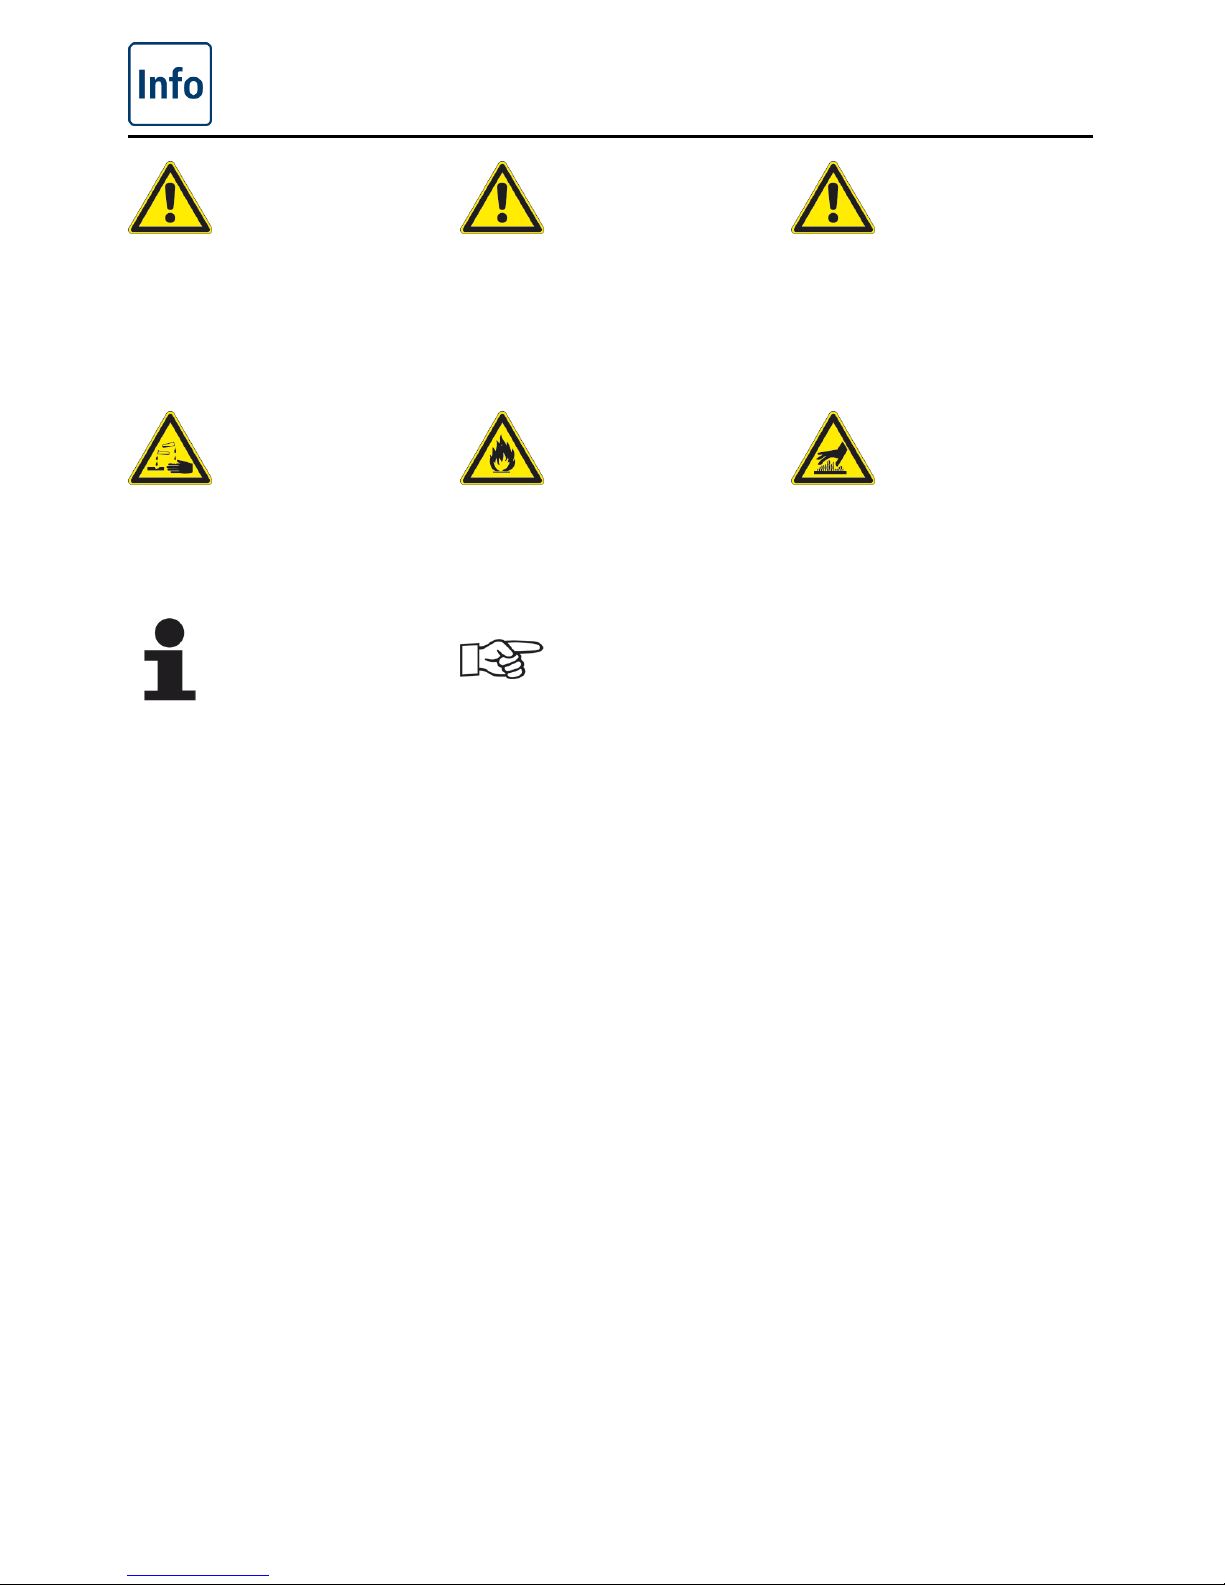
Danger!
Imminently hazardous
situation, which, if not
avoided, will result in severe
injuries or death.
Warning!
Potentially hazardous
situation that may result in
severe injury or death.
Caution!
Potentially hazardous
situation that may result in
severe injury or death.
Corrosive
substances
Risk of fire! Risk of burns!
Attention:
Damage may be caused if
this is ignored.
Handy tips for everyday use
Page 6
Initial start-up
6 / 61
During initial start-up of your new device, you will be requested to start an automatic one-off
self-test. This self-test takes about 45 minutes and is used to adapt the device to the specific
environmental conditions. Please note the following:
- For the self-test to be carried out, all the packaging materials must be have been removed
from the device; check the grid shelves and the air baffle for a correct fit.
- The device must be connected in accordance with the installation instructions.
- For device size 6 x 1/1, 10 x 1/1, 6 x 2/1 and 10 x 2/1 GN place a flat GN container with
the opening facing downwards into the centre of the grid shelves.
- For the device size 20 x 1/1 and 20 x 2/1 GN place two GN containers in the mobile oven
rack. Place one flat container with the opening facing downwards in the centre in front of
both the upper and lower fan wheel.
- For further details please follow the instructions shown on the display and the installation
manual.
Risk of fire!
Remove the packaging material, starter kit as well as grids and containers.
The cooking cabinet door must not be opened during the self-test. Opening the cooking cabinet
door will lead to failure of the self-test. Restart the self-test by switching the device off. Always
allow a hot device to cool down first. If the test is interrupted you will be requested next day by
the device to start the self-test again.
step info/button instructions
1
START
Follow the instructions on the display. Press
the button to start the self-test.
2
Select type of connection to normal or soft
water.
3
Next
Click “next” to confirm.
Page 7
Initial start-up
7 / 61
step info/button instructions
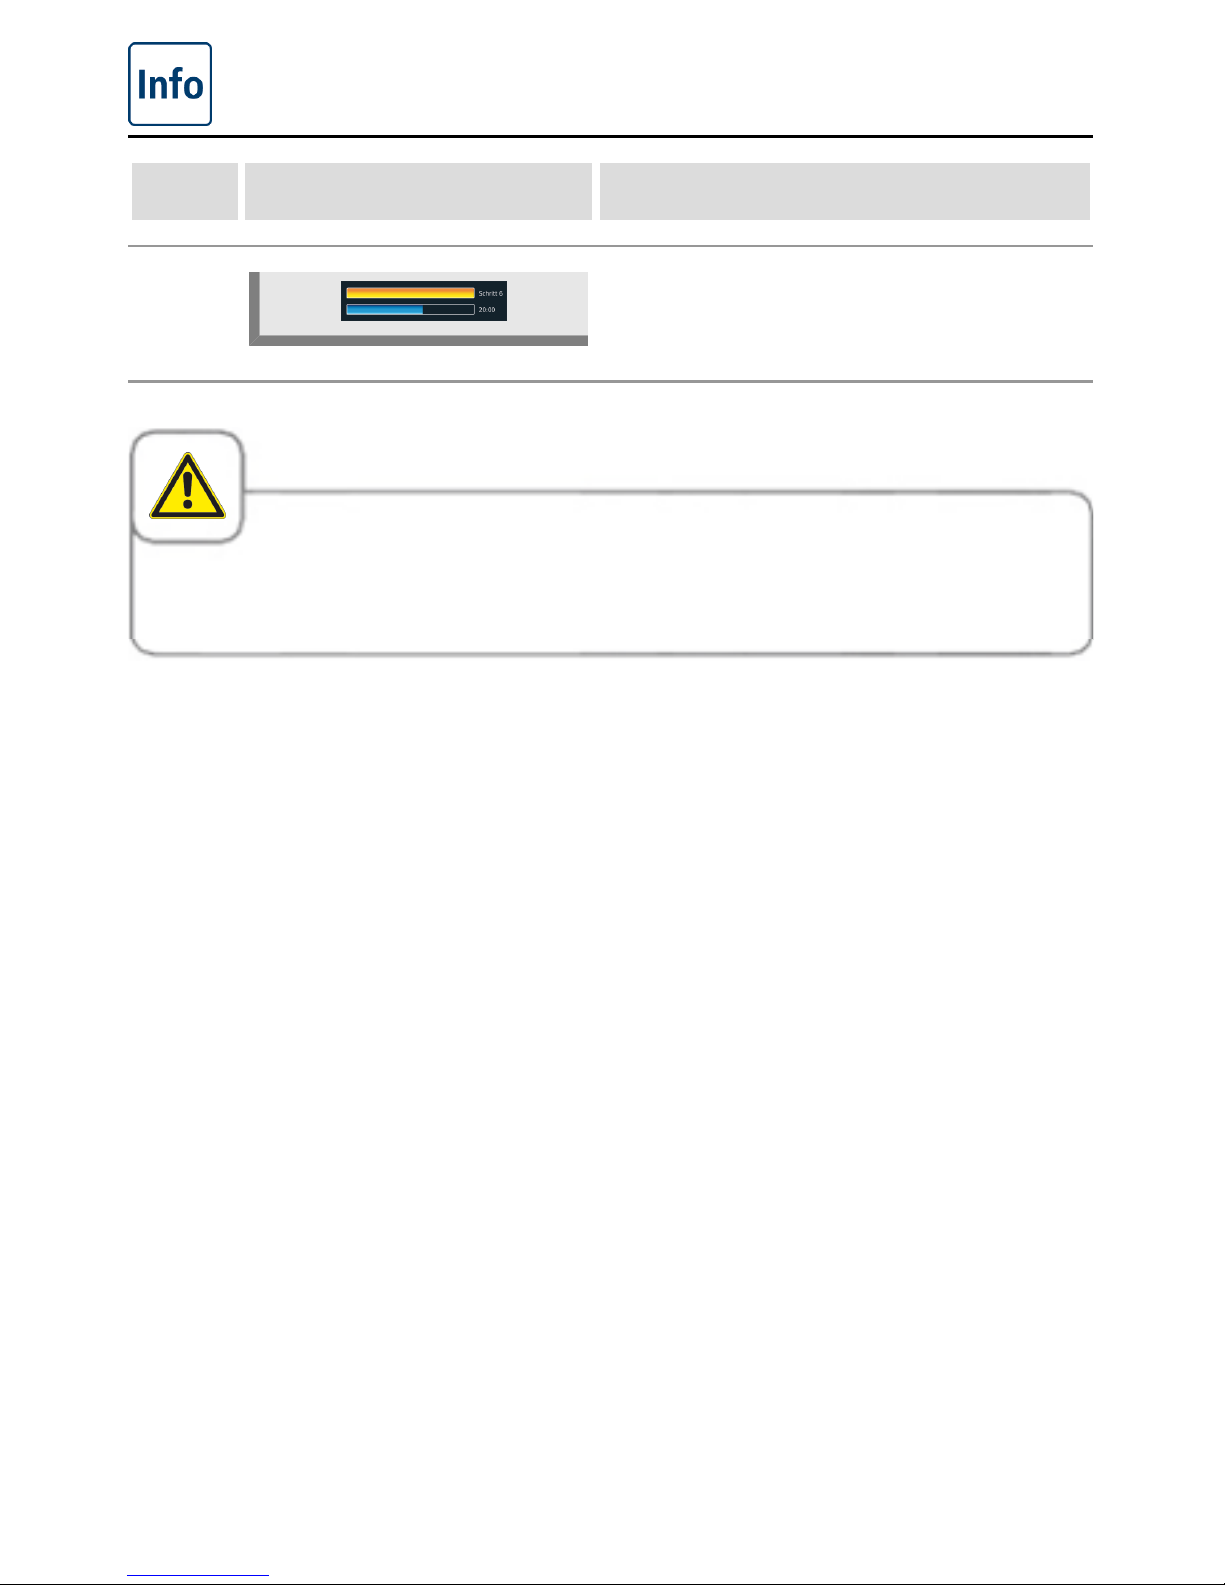
4
The following test will take place automatically.
The status is displayed in the upper field, the
time remaining until the self-test has been
completed is shown in the lower time field.
Where gas appliances are used, exhaust gas measurement must always be carried out when
the self-test has been completed.
Page 8

Safety Instructions
8 / 61
Keep this manual handy so that it can always be consulted by anyone using the unit.
This unit may not be used by children or anyone with limited physical, sensory or mental
abilities or a lack of experience and/or knowledge, unless these people are supervised by
someone responsible for safety.
Only use your hands to operate the controls. Damage caused by the use of pointed, sharp
or other objects will invalidate the warranty.
We recommend regular training of your staff to avoid the risk of accident or damage to the
unit. Operators must also receive regular safety instruction.
Warning!
Daily checks before switching on and use
- Lock the air baffle at the top and bottom as per the instructions - risk of injury from the
rotating fan wheel.
- Make sure that the hanging racks or mobile oven rack are correctly locked in place in the
cooking cabinet – Containers with hot liquids can fall through or slip out of the cooking
cabinet – risk of burns.
- Make sure that there are no residues of cleaning agents in the cooking cabinet before you
start cooking with the unit. Remove any cleaning agent residue and rinse thoroughly with
a hand shower – risk of chemical burns.
Page 9

Safety Instructions
9 / 61
Warning!
Country-specific and local standards and regulations relating to the installation and
operation of industrial cooking devices must be complied with.
Incorrect installation, servicing, maintenance, cleaning or modifications to the unit may
result in damage, injury or death. Read these operating instructions carefully before you
start to use the unit.
This unit must only be used to cook food in catering establishments. Any other use is not
intended and is therefore considered dangerous.
It must not be used to cook food containing flammable materials (such as food with
alcohol). Substances with a low flash point can ignite spontaneously - Risk of fire
Cleaning and descaling products and the associated accessories must only be used for
the purposes described in this manual. Any other use is not intended and is therefore
considered dangerous.
In case of damage to the glass plate, please replace the entire plate immediately.
Page 10

Safety Instructions
10 / 61
Warning!
Gas units only
- If your appliance is installed under an extractor hood, this must be switched on when the
appliance is in use – Combustion gases!
- If your appliance is connected to a chimney, the flue duct must be cleaned in compliance
with specific regional regulations – risk of fire. (Contact your installer.)
- Do not put objects on your unit's exhaust pipes – risk of fire.
- Do not let objects block or obstruct the area below the unit's base – risk of fire.
- The unit must only be used in still conditions – risk of fire.
What to do if you smell gas:
- Shut off the gas supply immediately
- Do not touch any electrical controls
- Make sure the area is well ventilated
- Avoid naked flames or sparking
- Use an external telephone to notify the appropriate gas supplier (if the gas supplier is
unobtainable call the emergency services on 999).
Page 11

Safety instructions and liability
11 / 61
Warning!
Safety instructions during use
- If containers are filled with liquid or contents which liquefy during cooking, only use rack
levels at a height at which the user can see into the slide-in containers – risk of burns.
There is a warning sticker enclosed with the unit.
- Always open the cooking cabinet door very slowly (hot vapors) – risk of burns.
- Always wear thermal protective clothing to hold accessories and other objects in the hot
cooking cabinet – risk of burns.
- The external temperatures of the unit may exceed 60 °C. Only touch the unit at the controls
– risk of burns.
- Hand shower and hand shower water may be hot – risk of burns.
- Cool-down mode – Do not use the cool down function unless the air baffle has been locked
correctly – risk of injury.
- Do not touch the fan wheel – risk of injury.
- Cleaning – aggressive chemical fluid – risk of chemical burns. Always wear the correct
protective clothing, safety goggles, gloves and facemask during cleaning. Follow the safety
instructions in the “CareControl” section.
- Do not store highly flammable or combustible materials near the unit – risk of fire.
- Apply the parking brakes on mobile units and mobile oven racks when these are not being
moved. Racks could roll away on uneven floors – risk of injury.
- If mobile oven racks are used, you must always apply the container lock. Cover any
containers with liquids to prevent the hot liquid spilling out - Risk of burns.
- The transport trolley must be correctly fixed to the unit when you load and remove the
mobile plate rack or mobile oven rack – risk of injury.
- Mobile oven racks, mobile plate racks, transport trolleys and units on casters can tip over
when being moved over an inclined plane or threshold – risk of injury.
Page 12

Safety instructions and liability
12 / 61
Liability
Installations and repairs that are not carried out by authorised specialists or using genuine
spare parts, and any technical change that is not approved by the manufacturer will invalidate
the manufacturer’s warranty and product liability.
Page 13
Care, inspection, maintenance and repair
13 / 61
Your unit must be cleaned every day or when a request for cleaning appears to maintain the
high quality of the stainless steel, for hygiene reasons and to avoid operating faults. To do
this, follow the instructions in the “CareControl” section.
Continuous operation at high cooking cabinet temperatures (≥260°C) or the use of high
browning levels (brown 4/5) and a production with predominantly high-fat and gelatincontaining foods may lead to more rapid wear of the door seal.
Daily cleaning of the cooking cabinet seal with a non-abrasive cleaning agent will extend the
service life.
Warning!
If the unit is not cleaned or is not cleaned well enough, deposits of grease and/or food
residues in the cooking cabinet may catch fire – risk of fire.
- To avoid corrosion in the cooking cabinet, your unit must be cleaned every day, even if it
is only operated in “moist heat” (steaming) mode.
- Apply vegetable oil or grease to the inside of the cooking cabinet at regular intervals (every
2 weeks or so) to prevent corrosion.
- The unit must not be cleaned with high pressure cleaner, steam cleaner or a direct water
jet.
- Do not treat the unit with acids or expose to acid fumes since this will damage the
passivated coating of the nickel-chromium steel and the unit might discolour.
- Only use cleaning agents made by the unit manufacturer. Cleaning agents from other
manufacturers may cause damage and invalidate the warranty.
- Do not use scouring products or scratchy cleaning agents.
Page 14

Care, inspection, maintenance and repair
14 / 61
Warning!
Servicing the incoming air filter. The device automatically recognises when the air filter is
soiled. You receive a service message and a request to clean or replace the air filter when the
air filter is soiled. The unit must not be operated without air filter. Please heed the following
when replacing the air filter:
Unit size 6 x 1/1 GN, 6 x 2/1 GN, 10 x 1/1 GN and 10 x 2/1 GN
Air filter part number: 40.03.461
This air filter can be removed and cleaned by the user. During replacement the air filter must
be locked carefully into the right position. Please follow the instructions in the “Maintenance”
section on how to replace the air filter.
Unit size 20 x 1/1 GN and 20 x 2/1 GN
This air filter can only be replaced by an authorised service partner.
Warning! The device’s water jet protection is only guaranteed with the filter and cover
completely mounted.
Page 15

Care, inspection, maintenance and repair
15 / 61
Inspection, maintenance and repair
Danger – high voltage
- Inspection, maintenance and repair work may only be carried out by trained technicians.
-
The unit must be switched off at the mains on-site when cleaning (except CleanJet
®
+care
cleaning), carrying out inspection, maintenance or repair work.
- If the appliance is installed on casters (mobile versions) freedom of movement of the
appliance must be restricted so that energy, water and drainage pipes cannot be damaged
when the unit is moved. If the unit is removed, make sure that power, water and drainage
lines are correctly disconnected. If the unit is returned to its original position, make sure
that the retention device, energy, water and drainage pipes are correctly connected.
- Your unit should be serviced at least once a year by an authorised service partner to
guarantee its perfect technical condition.
Page 16
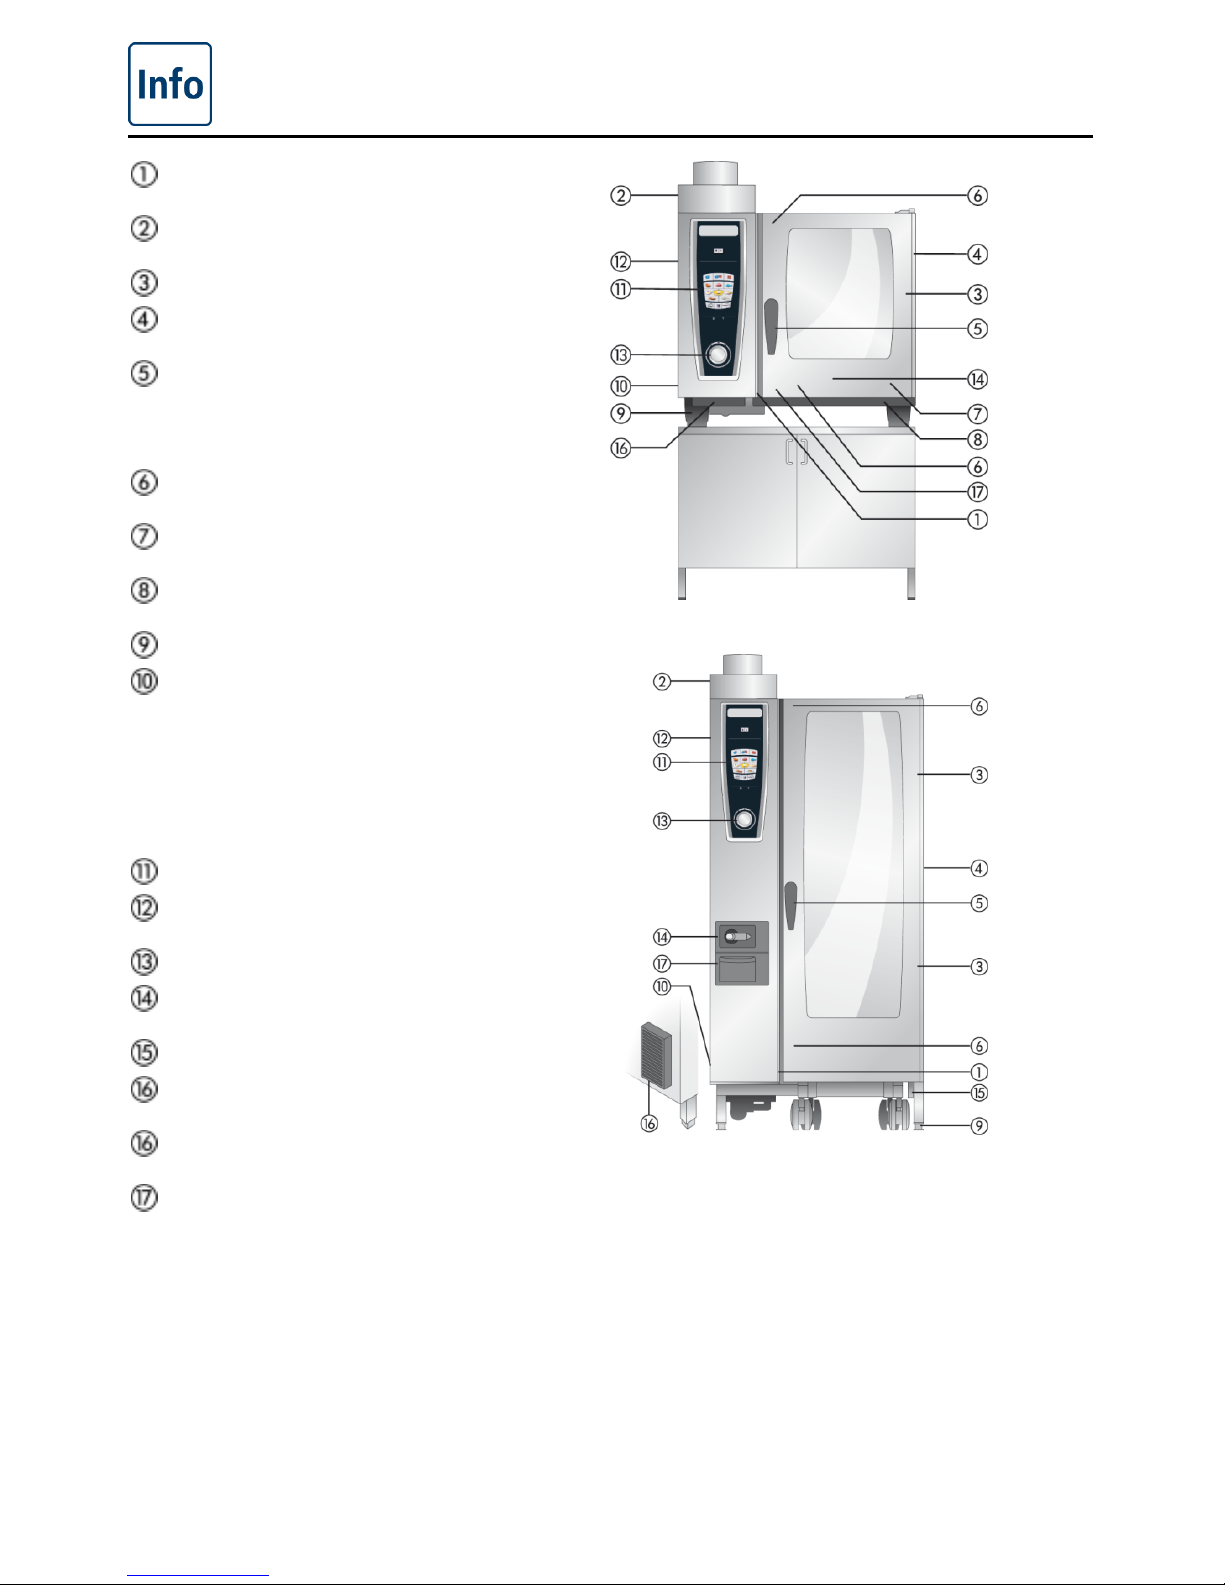
Features
16 / 61
Appliance number
(visible only when door is open)
Draft diverter (optional)
(gas appliances only)
Interior lighting
Appliance door with double glass
panel
Door handle
Table-top units: One-handed operation
with slam function
Floor units: One-handed operation
Unlocking device to open double
glass door panel (inside)
Integrated and self-emptying door drip
pan (inside)
Drip collector connected directly to
appliance drain
Unit feet (height-adjustable)
Rating plate
(contains important data such as power
consumption, type of gas, voltage,
number of phases and frequency, as
well as device type, device number (see
the section on device type and software
identification) and option number)
Control panel
Protective cover for electrical
installation area
Central dial
Hand shower (with automatic retraction
system)
Run-in guide (floor units)
Air filter table-top unit (installation area
ventilation)
Air filter floor unit (installation area
ventilation, back of the unit)
Drawer/flap for care tabs
Table-top unit on base cabinet US IV
Floor unit
Page 17

Notes on using your unit
17 / 61
- Avoid having heat sources (e.g. grill plates, deep-fat fryers etc.) near the unit.
- Only use the unit in areas with a room temperature > 5 °C. For ambient temperatures of
less than + 5 °C, you must heat the unit to a temperature > + 5 °C before starting.
- As soon as you open the cooking cabinet door, the heating and fan wheel shut down
automatically. The integrated fan wheel brake becomes active and the fan wheel runs on
briefly.
- A drip tray should always be inserted under the food when grilling and roasting (e.g.
chicken) in order to catch the fat.
- Only use genuine heatproof accessories made by the unit manufacturer.
- Always clean accessories before use.
- Leave the unit door slightly open if it is going to be idle for a prolonged period (e.g.
overnight).
- The cooking cabinet door has a slam function; the door of the floor unit is not closed tight
unless the door handle is vertical.
- For long stoppages (e.g. non-work day), shut off the water, power and gas supplies to
the unit.
- This unit must not be disposed of with general waste nor can it be delivered to a local
authority collecting point. We will be happy to help you with the disposal of your unit.
Please contact our technical customer services by calling 0044 (0) 1582 480388
If the unit is without voltage or switched off for less than 15 minutes, the
process being executed will continue from where it was interrupted.
Page 18
Notes on using your unit
18 / 61
Max. load sizes for each unit size
6 x 1/1 GN 30 kg (max. 15 kg per rack)
6 x 2/1 GN 60 kg (max. 30 kg per rack)
10 x 1/1 GN 45 kg (max. 15 kg per rack)
10 x 2/1 GN 90 kg (max. 30 kg per rack)
20 x 1/1 GN 90 kg (max. 15 kg per rack)
20 x 2/1 GN 180 kg (max. 30 kg per rack)
Exceeding the maximum load size can lead to damage on the device.
Please note the specifications for maximum load sizes for food in the application manual.
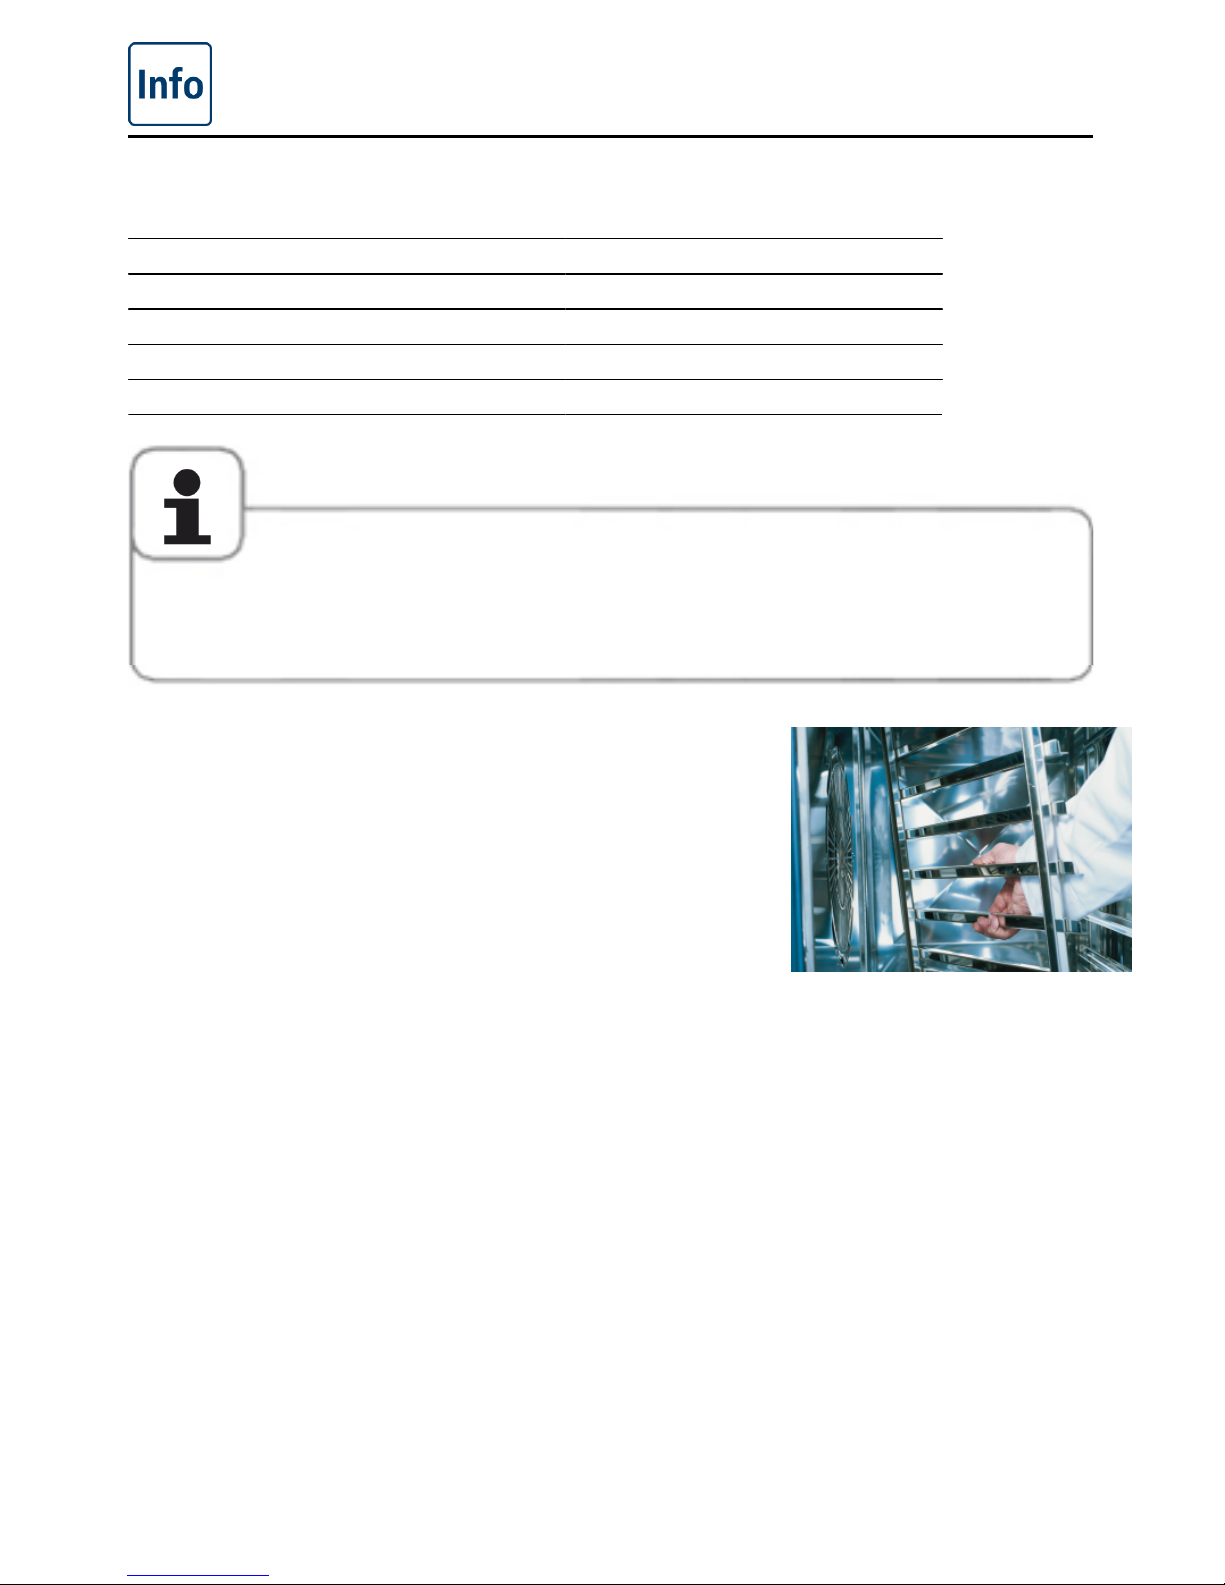
Table-top units with hanging racks
(6 x 1/1 GN, 6 x 2/1 GN, 10 x 1/1 GN, 10 x 2/1 GN)
- To remove, raise the hanging rack slightly in the middle.
Pull it out of the front locking mechanism first, then
the lower mechanism and finally the upper locking
mechanism.
- Swivel the hanging rack to the middle of the cooking
cabinet.
- Release the hanging rack from its fixing by lifting it up.
Reverse the above sequence to reset.
Page 19
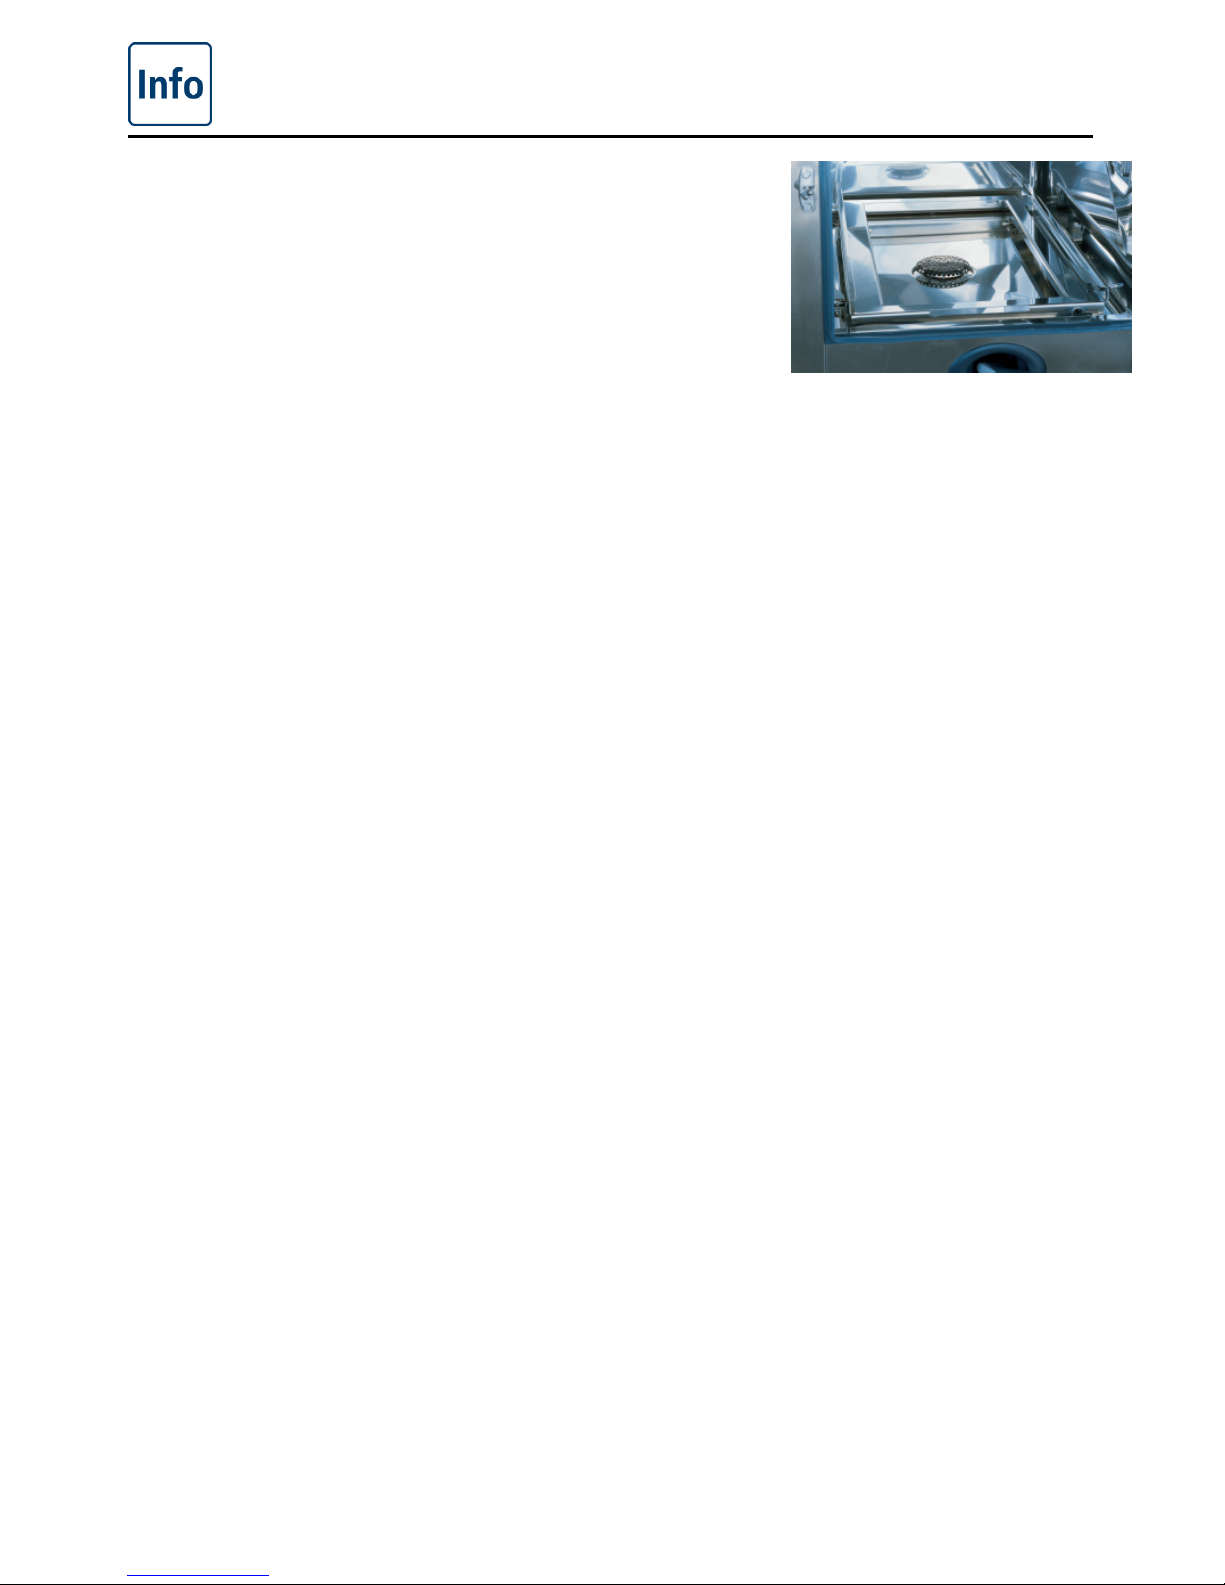
Notes on using your unit
19 / 61
Working with mobile oven racks, mobile plate racks
and transport trolleys for table-top units (option)
- Remove the hanging rack as described above.
- Place the run-in rail on the fixing provided on the unit's
base. Make sure it is fixed accurately in place (4 pins).
- Remember that the unit must be matched to the exact
height of the transport trolley and must be levelled.
- Move the transport trolley as far as it will go on the
run-in rail and make sure that the transport trolley is
correctly locked on the unit.
- Push the mobile oven rack or mobile plate rack into
the unit as far as it will go, and check that the locking
mechanism in the unit is working correctly.
- To remove the mobile oven rack or mobile plate rack,
release the locking mechanism and pull the rack out of
the cooking cabinet. First insert the core temperature
probe with the run-in rail in the park position.
- Make sure that the mobile oven rack or mobile plate
rack is securely locked on the transport trolley during
transportation.
Page 20
Notes on using your unit
20 / 61
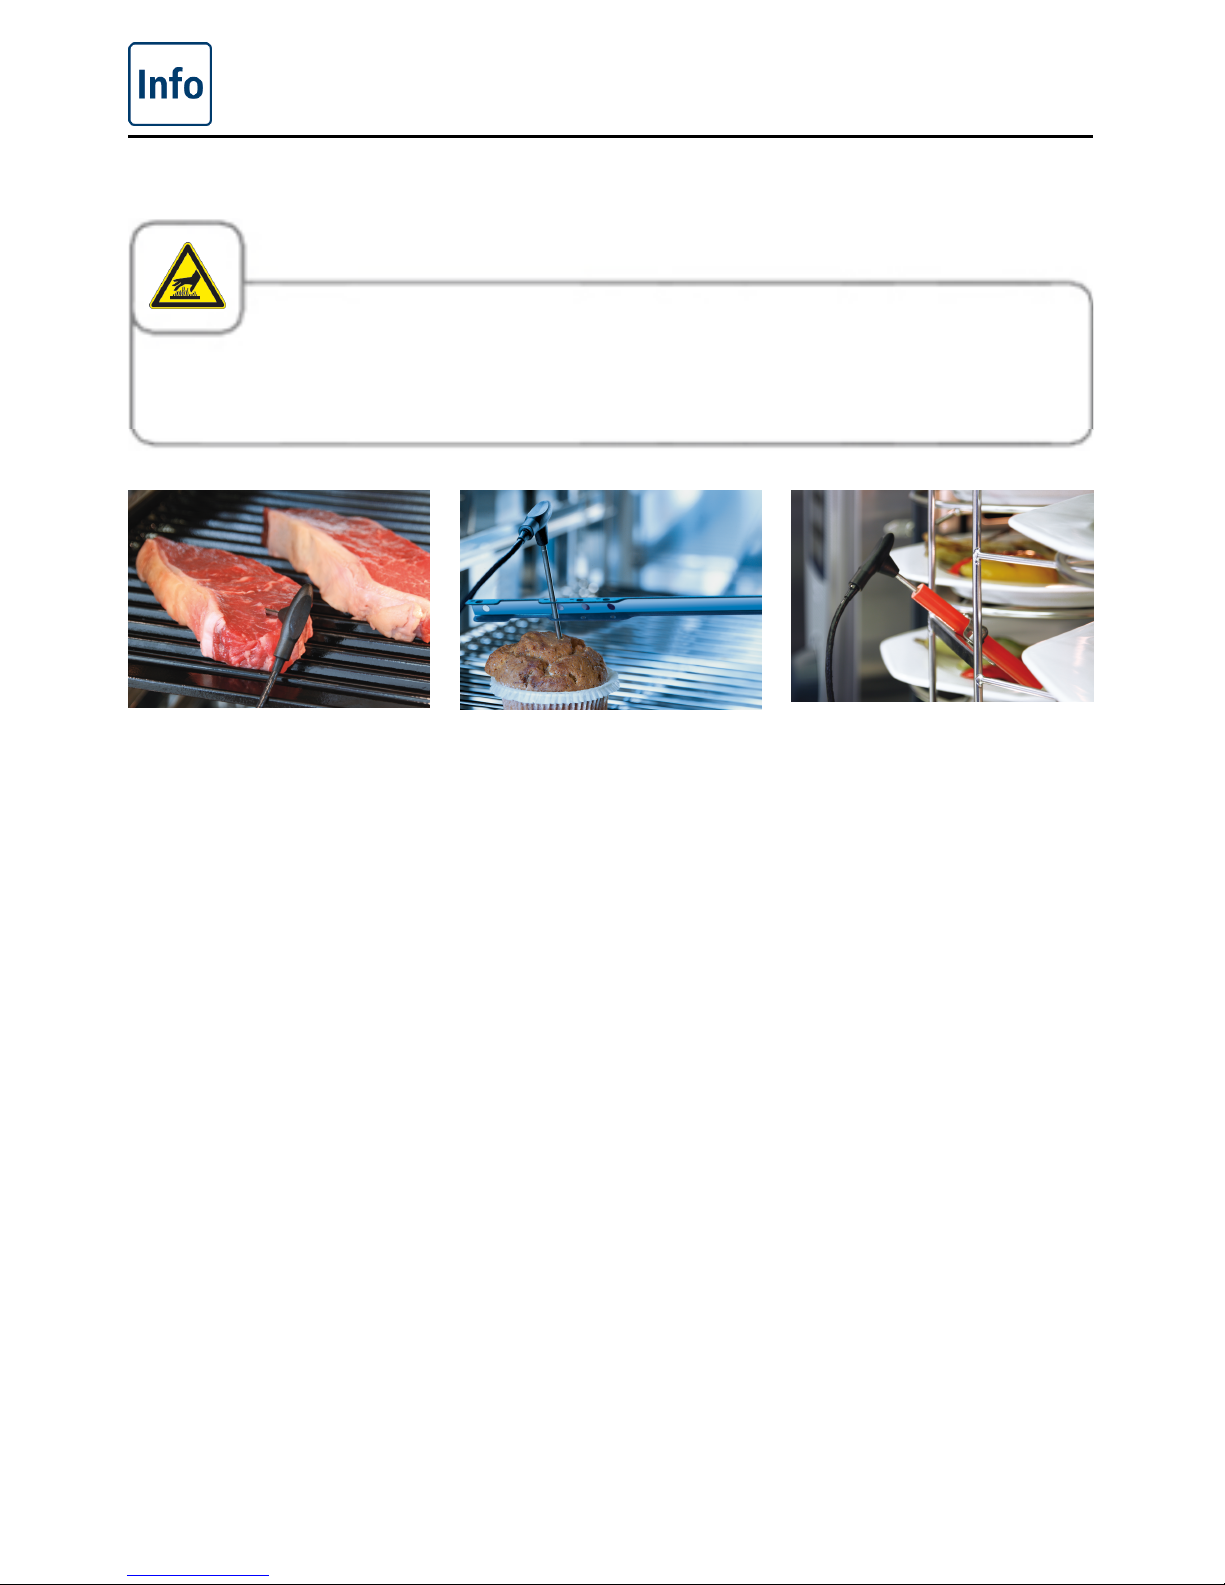
Working with the core temperature probe
Caution!
The core temperature probe and its positioning aid may both be hot – risk of burns.
Insert the core temperature
probe into the thickest point
of your cooking product.
You must insert the needle
through the middle of
the food (see application
manual).
Use the positioning aid if
the core temperature probe
could fall out of the food
(for instance if the food
to be cooked is of a soft
consistency or not very
thick).
For Finishing
®
with the
plate rack, insert the core
temperature probe into the
ceramic tube on the mobile
plate rack.
Page 21
Notes on using your unit
21 / 61
Use a starting bit to make a hole in frozen foods. Drill a hole in the
thickest part of the food to be cooked. To do this, place the food on a
firm base and protect your hands.
- Always correctly position the core temperature probe and the positioning aid in the park position
provided – risk of damage.
- Do not let the core temperature probe hang out of cooking cabinet – risk of damage.
- Remove the core temperature probe from the food before you take the food from the cooking
cabinet – risk of damage.
If necessary, cool down the core temperature probe using the hand shower before use.
Caution!
Protect your arms and hands from burns and from the probe tip – risk of injury.
Page 22
Notes on using your unit
22 / 61
Working with the hand shower
- If you use the hand shower, please pull the hose at least 20 cm out of the park position.
- You can select 2 jet strengths by pressing the control button.
- Always let the hand shower slide slowly back into the park position.
Caution!
The hand shower and water from the hand shower may be hot – risk of burns.
- If you pull hard on the hand shower and it exceeds the maximum available hose length, it will
damage the hose.
- Make sure that the hand shower hose is fully rewound after use.
- You must not use the hand shower to cool the cooking cabinet. – Risk of damage to the cooking
cabinet and air baffle, or of the cooking cabinet glass cracking.
- According to WRAS-standard the handshower should be used only for rinsing the internal
cabinet.
Page 23
General instructions for use
23 / 61
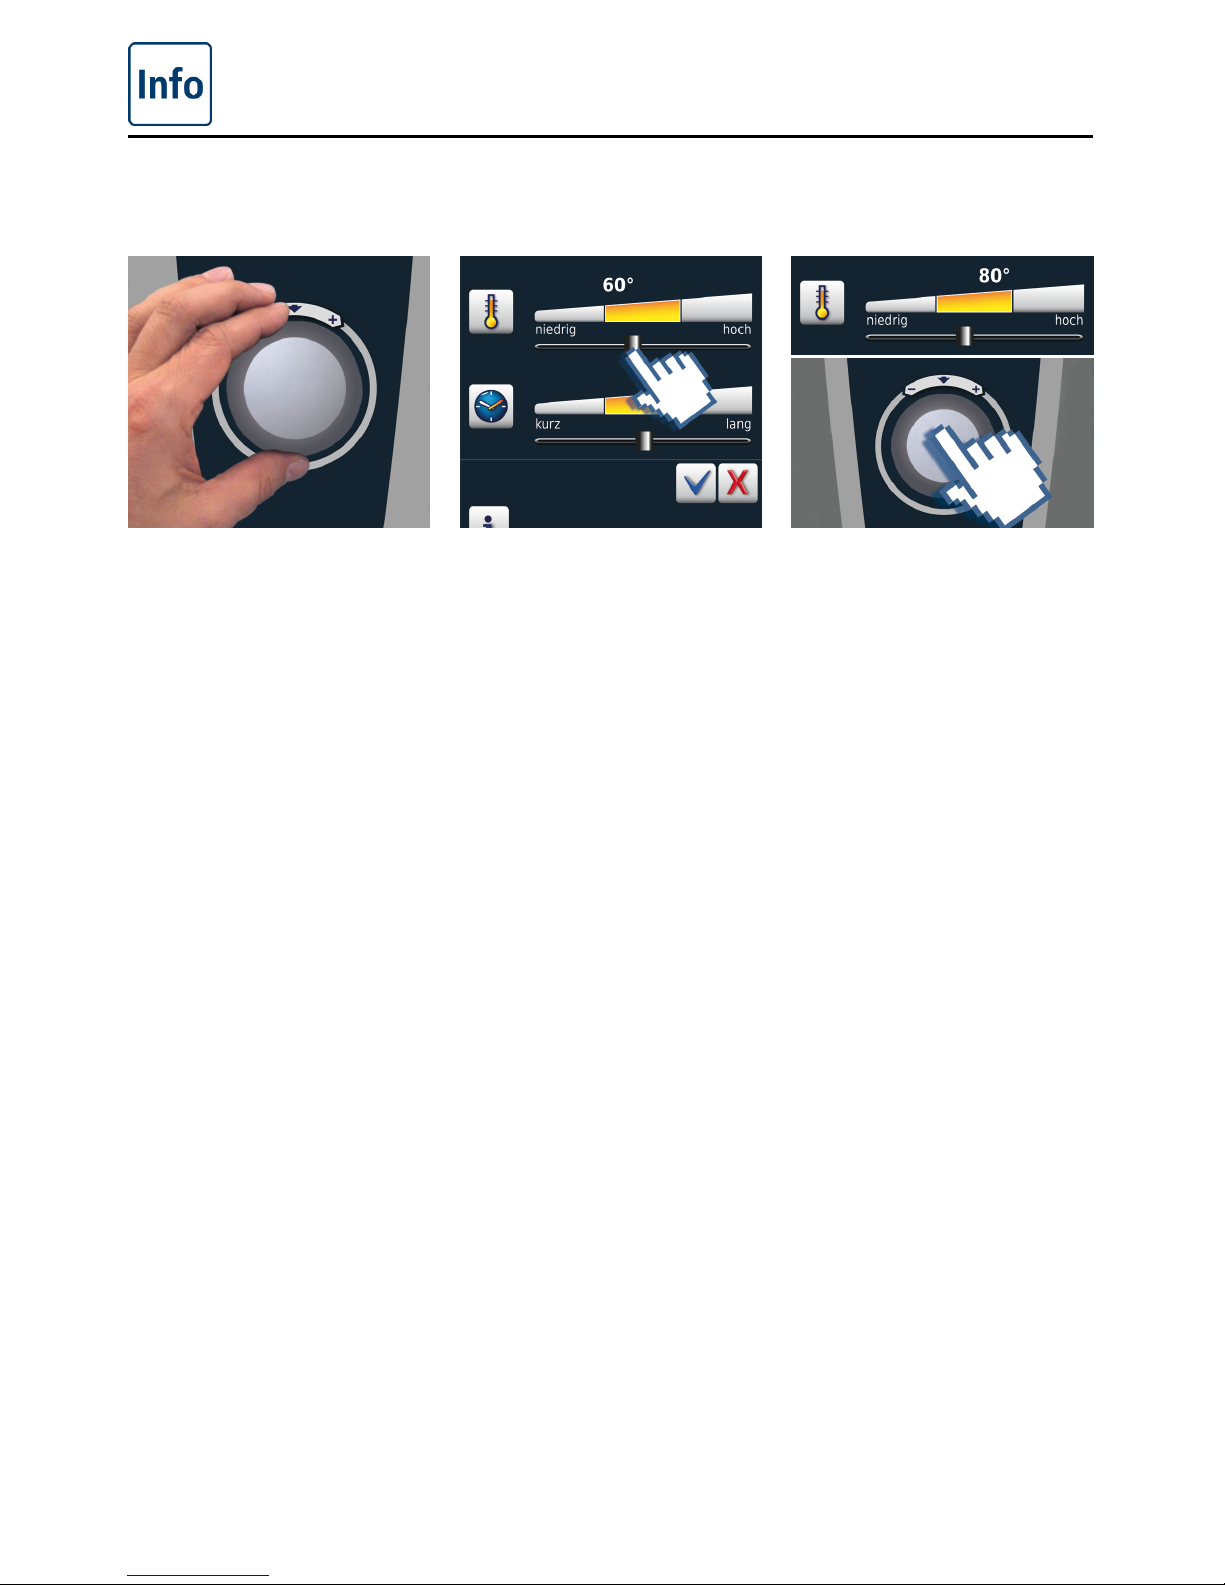
Your unit has a touch screen. You can make settings on your unit by just touching it lightly
with your finger.
You can change the
settings using the central
dial.
Alternatively, rough settings
can be made by adjusting/
pulling the slide.
Your settings are accepted
within 4 seconds. Otherwise
you can press the central
dial.
Page 24

General instructions for use
24 / 61
General notes
Back to start level Help function Programming mode
Status display preheat,
red arrow for preheat, blue
arrow for cool down.
Cooking cabinet too hot
– button flashing (see
the “Cool Down” section
on cooling the cooking
cabinet).
The end of cooking is
indicated by an acoustic
signal and animated
graphics.
Low water level – Open the
water tap. Display goes out
after filling.
“Gas burner fault” Press
“RESET GAS” – New
ignition process. If the
display lights up repeatedly,
inform Service!
back/cancel
Page 25
General instructions for use
25 / 61
Help function
So that you can use your device’s many possibilities as easily and efficiently as possible,
detailed operating instructions and user help texts with practical examples and useful tips are
stored on the device. The help function can be selected using the “?” button. The following
functions are available in the help function.
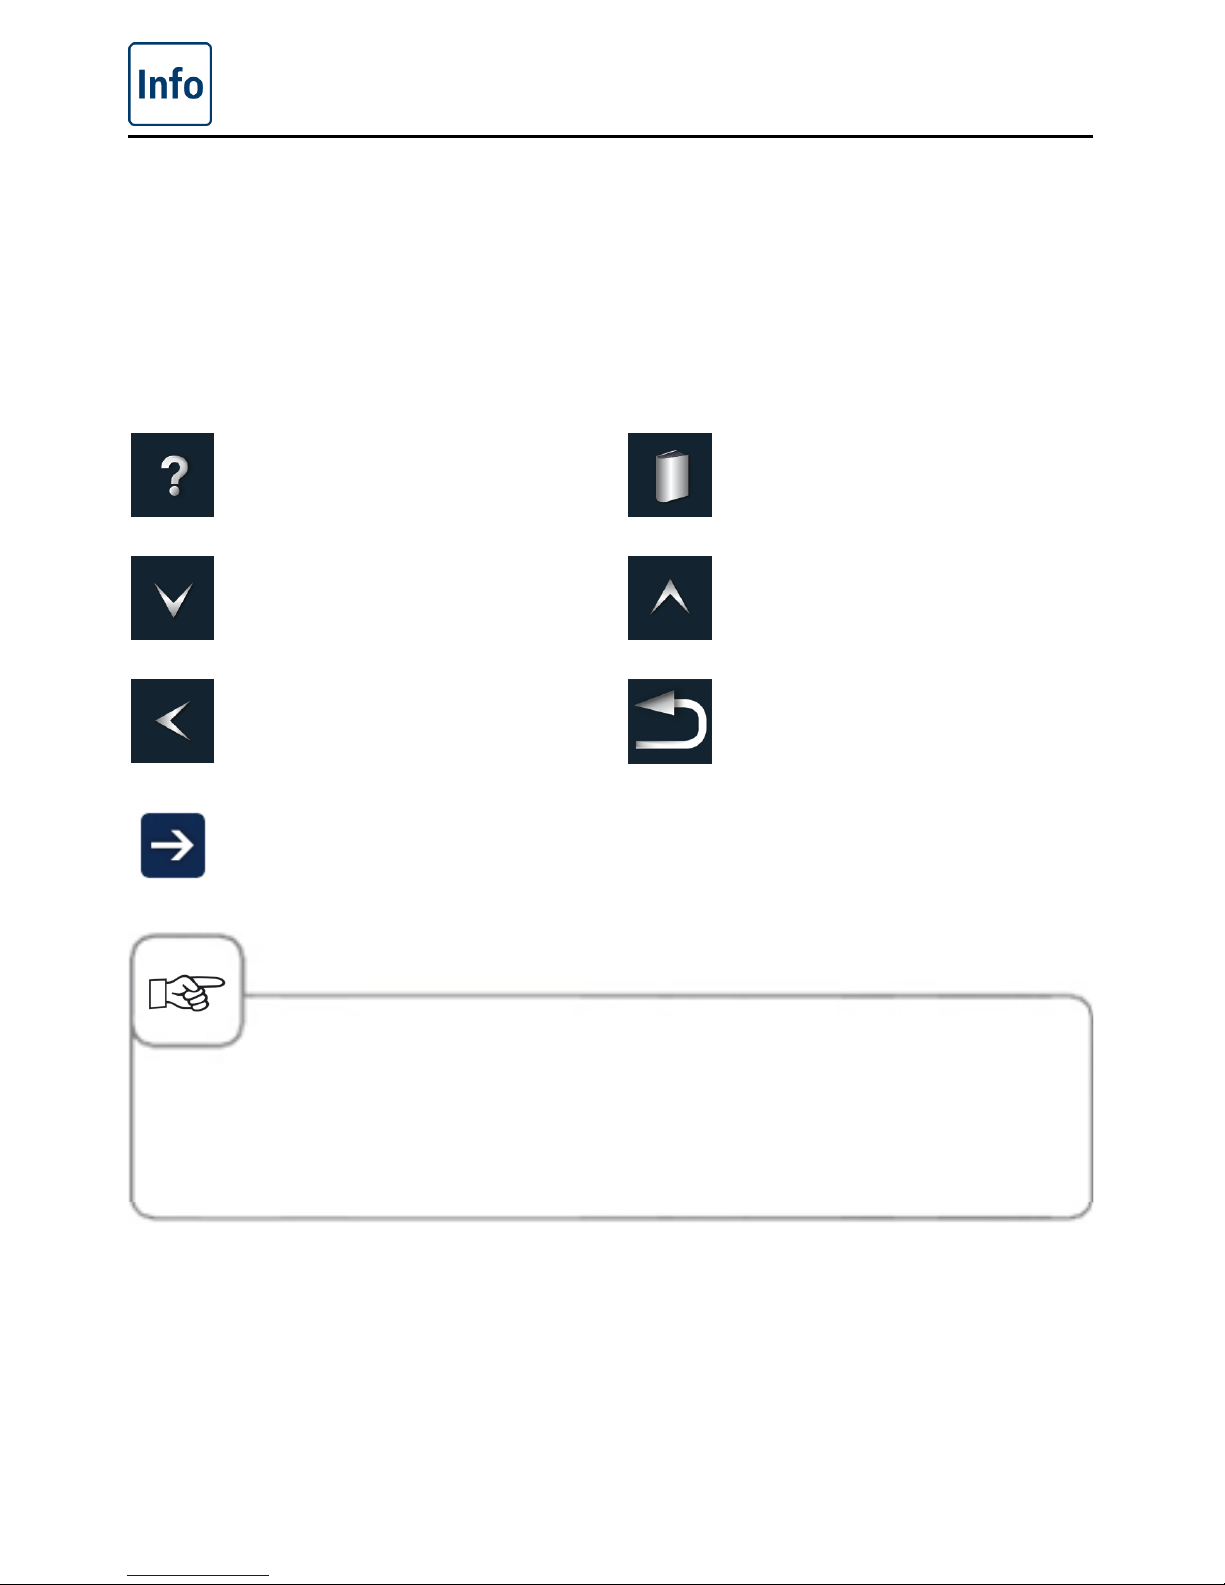
Explanation of pictograms
Start help function
Scroll forward one page
Open the previous chapter
Next chapter/more information
Open the selection menu and
select manual
Scroll back one page
Leave the help function
- The respective table of contents will open when you select a manual. Choose the chapter you
are interested in.
- If the help function is opened during cooking operation, the help function is closed automatically
as soon as an action becomes necessary.
Page 26

Overview of the cooking modes
26 / 61
Display after switch-on
On/Off switch
MySCC
Help function
CareControl
Combi-steamer mode
Steam
Dry heat
Combination of steam and dry
heat
SelfCooking Control mode
Meat
Poultry
Fish
Side dishes
Egg dishes/dessert
Baking
Finishing
®
Further functions
Efficient LevelControl
®
system
mode
Programming mode
Page 27

Overview of the cooking modes
27 / 61
3 different operating modes
SelfCooking Control
mode
Combi-steamer mode Programming mode
After switching on or
operating the home button
you enter SelfCooking
Control
®
mode.
See the SelfCooking
Control
®
mode section for a
description.
You enter combi-steamer
mode by pressing
the button “steam”,
“combination” or “dry heat”.
See the Combi-steamer
mode section for a
description.
Pressing the “program”
button switches to
programming mode.
See Programming mode
chapter for description.
Page 28

SelfCookingControl
®
mode
28 / 61
SelfCookingControl
®
detects the size of the food and the load size. Cooking time,
temperature and cooking cabinet humidity are adapted continually. The remaining time is
displayed. See the application manual for examples and useful tips.
Explanation of pictograms
Cooking speed
Delta-T
Cooking time
Browning
Food thickness
Proving volume
Cooking cabinet humidity
Moisturing
Air speed
Core temperature/cooking level
Core temperature/cooking level
Core temperature/cooking level
Core temperature/cooking level
How well done
Size of food
Searing temperature
Crisp
Gratinate
Page 29

SelfCookingControl
®
mode
29 / 61
Convenience level Steam baking
Information and requests during the cooking process
Preheat display
Cool down display
Request to cancel
Score
Add liquid
Options following the end of cooking
Keep at temperature
Heat to serving temperature
Crisp
Reposition core temperature
probe
Continue with time
Load new batch
Page 30

SelfCookingControl
®
mode
30 / 61
Information button
The information button always shows you how many process steps the current cooking
process is made up of and which subsequent options can be selected in addition.
Indication of cooking sequence
As an example, here is the cooking sequence for “roasting”:
Preheat Load Set CT Sear Cool
Cook
Options
Continue
with transfer
Hold New load
Page 31

Combi-steamer mode
31 / 61
All combi-steamer functions are available in combi-steamer mode. You enter combisteamer mode by pressing the button “steam”, “dry heat” or “combination of steam and dry
heat”.
3 manual operating modes
Steam
Dry heat
Combination of steam and dry
heat
Explanation of pictograms
MySCC
CareControl
Exact percentage setting for
humidity in the cooking cabinet
Cooking cabinet temperature
setting
Cooking time setting
Core temperature setting
Preheat
Continuous operation
Moisturing
Page 32
Combi-steamer mode
32 / 61
Help function
Request the programming
function
back/cancel
Air speed
Cool down
The current cooking data such as actual cooking cabinet humidity and temperature can be
requested by pressing the cooking cabinet temperature button.
Hold the button down for 10 seconds to display the actual values continuously until the next
setting is made.
Page 33
Programming mode
33 / 61
It takes no time at all to create your own cooking programs in programming mode. The
7 operating modes (meat, poultry, fish, bakery products, side dishes, egg dishes/dessert,
finishing) can be copied, adapted and saved under a new name according to your individual
requirements, or you can create your own manual programs with up to 12 steps.
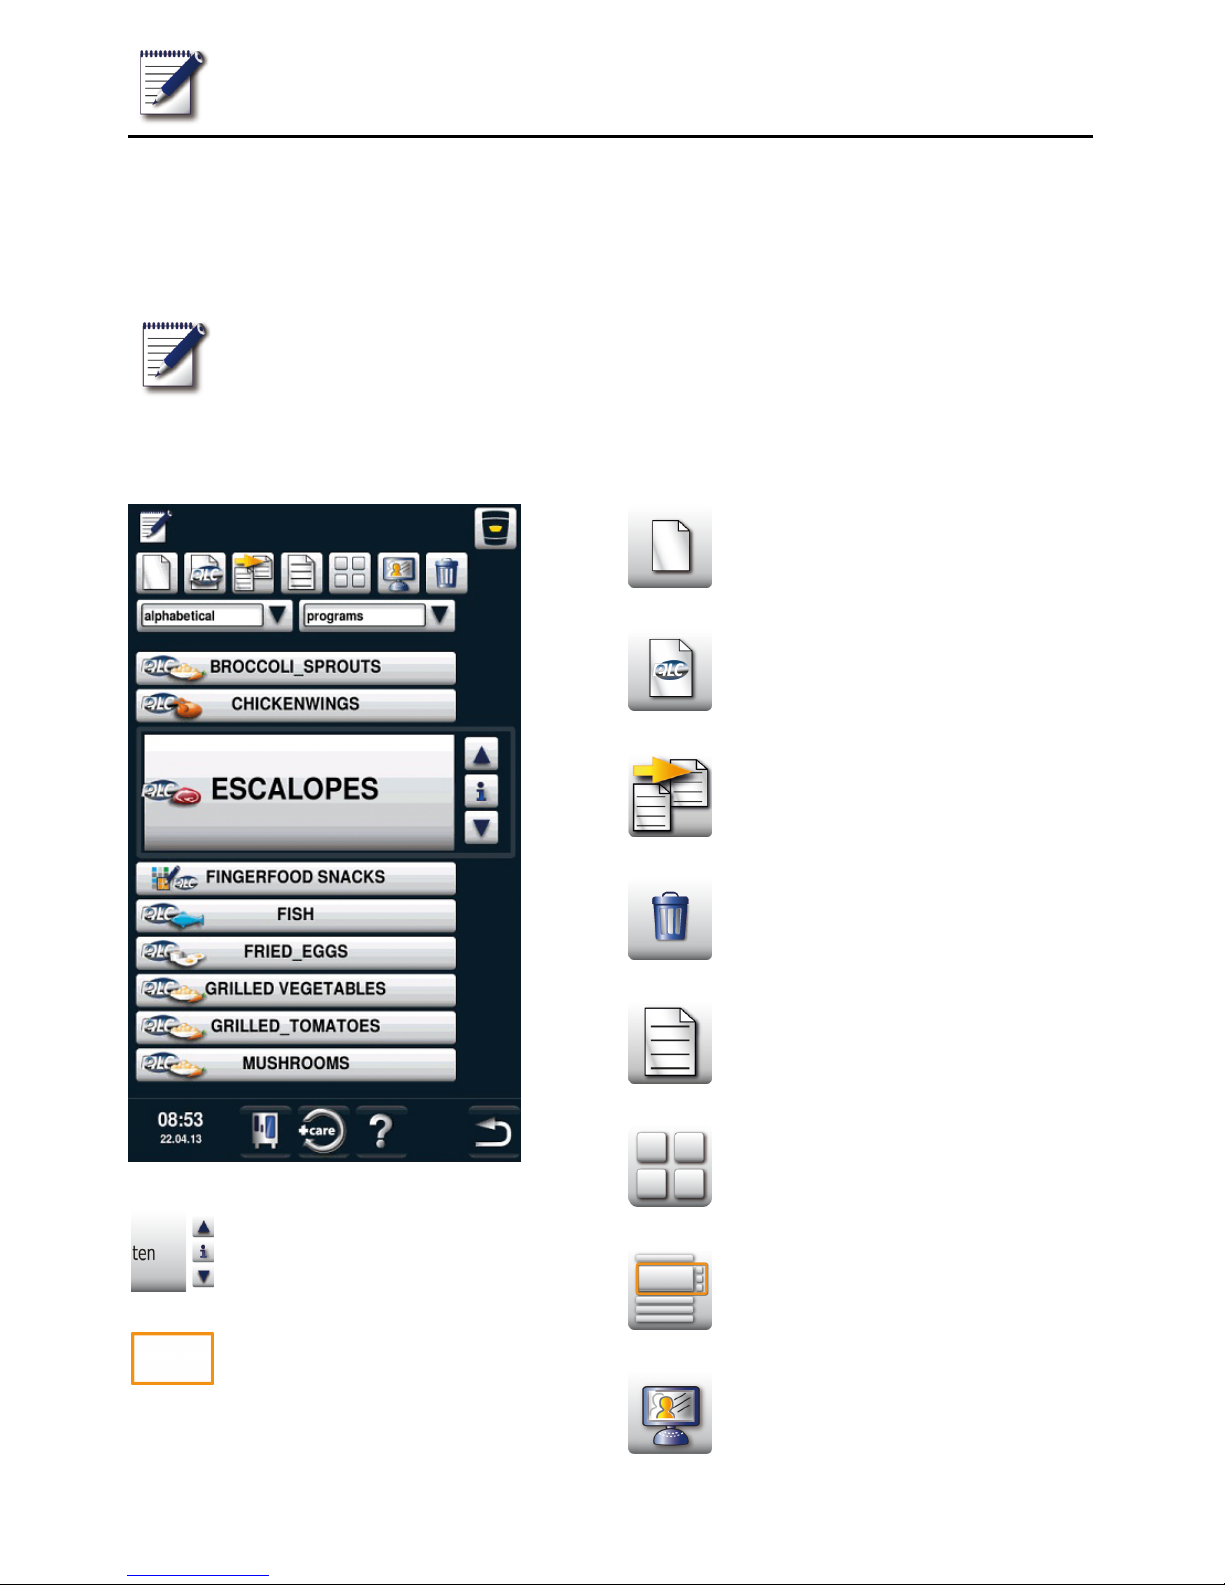
Press the button to enter
programming mode.
Explanation of pictograms
Select program
Selection window – start program
New program
New ELC program
Copy program
Delete program
Change program
Image view
List view
Open MyDisplay
Page 34
Programming mode
34 / 61
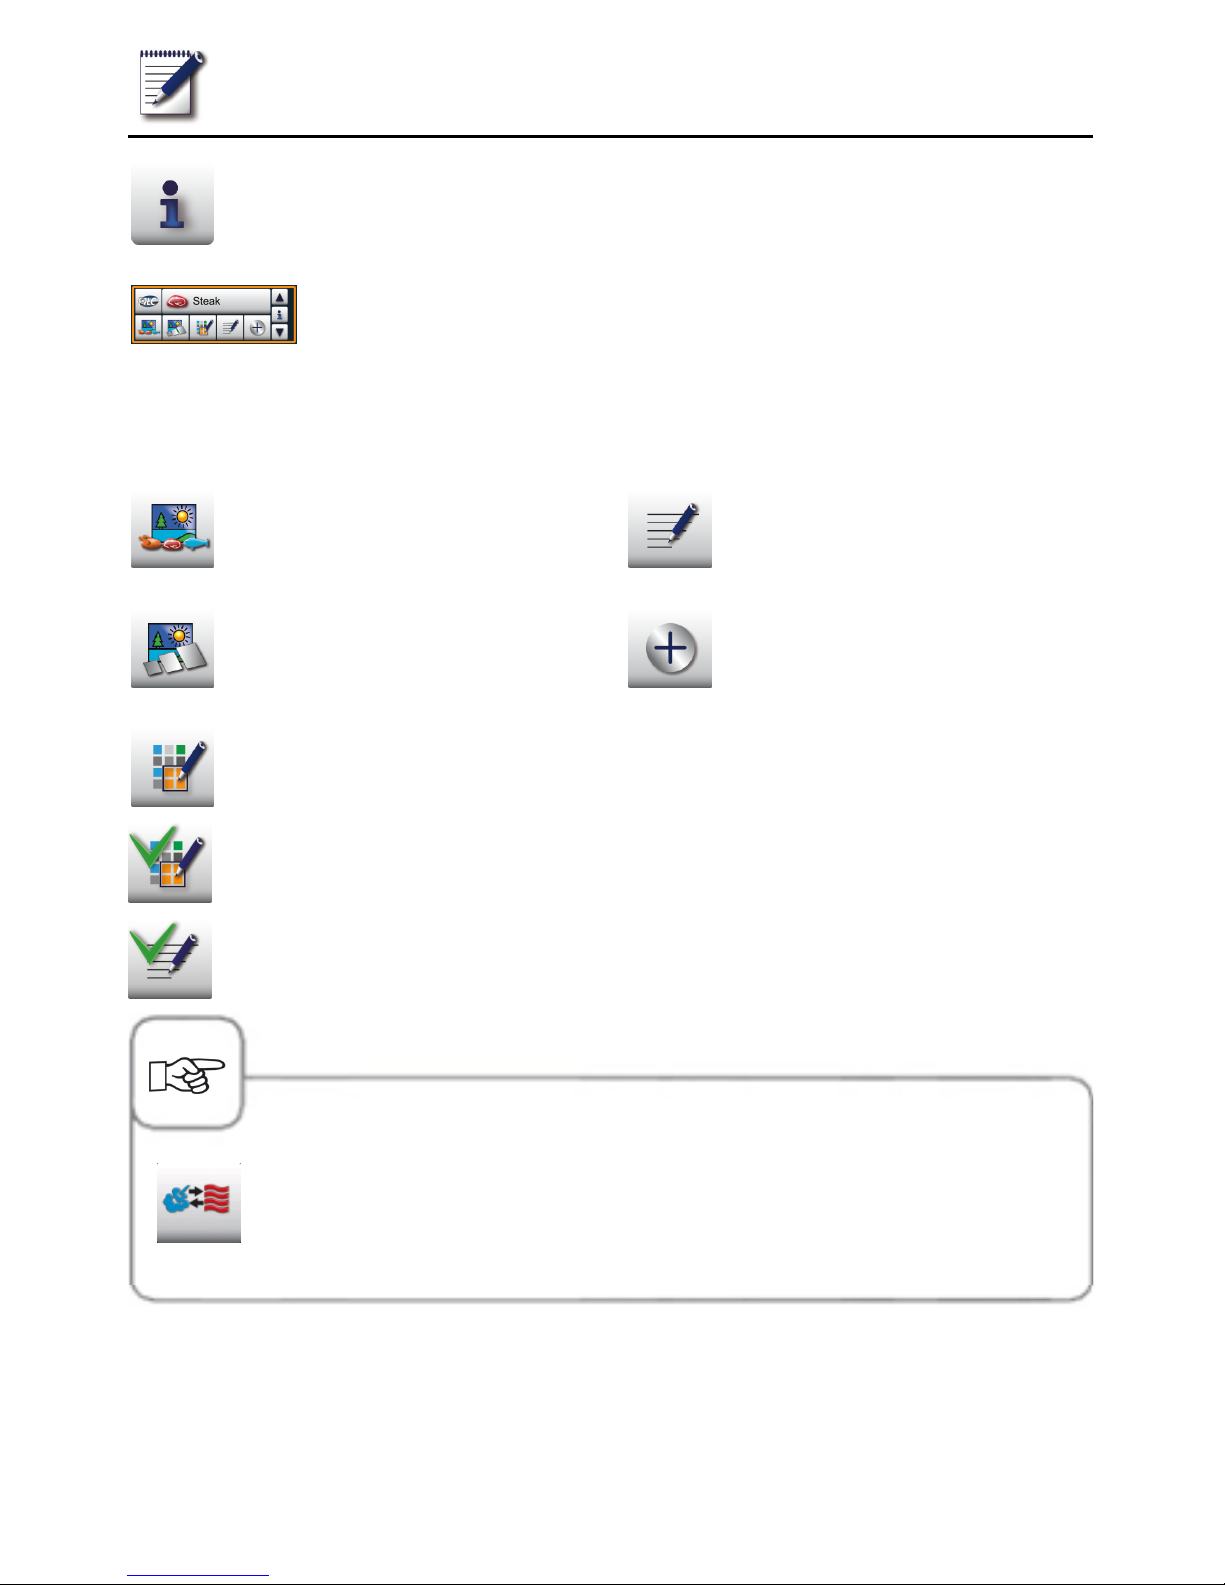
Selection window – indicate
program details
Selection window with
the information button
pressed
In addition to the program names, further information can be requested or stored using the
following buttons.
Image of the food for the program
Image of the accessories for the
program
Group allocation (e.g. breakfast)
Notes on the program
Additional attributes can be
selected
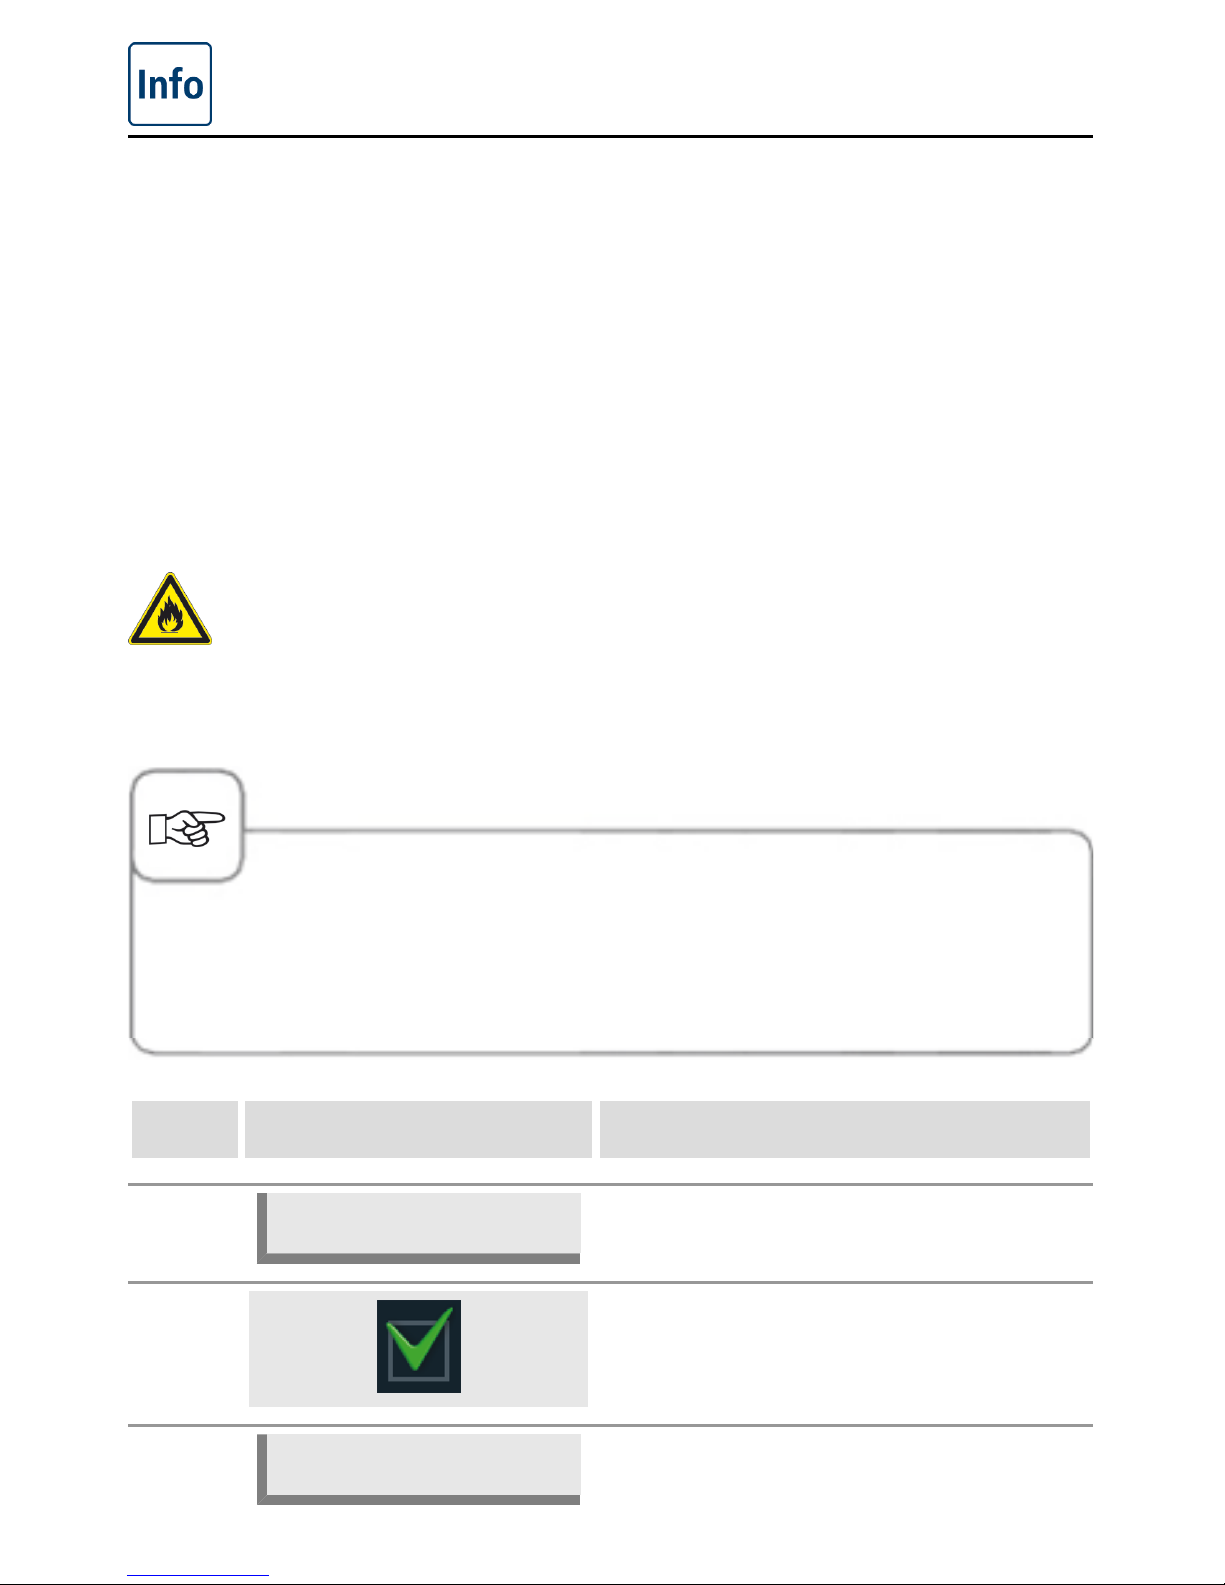
The assignment to a group is indicated by pressing the "Group assignment"
button.
An existing assignment is signalled by a green check mark.
Programme notes saved are displayed directly by pressing the "Notes"
button. Available notes are signalled by a green check mark.
The pictogram shows the operating mode of the stored program such as
combination of steam and dry heat, for example. Other pictograms are
shown correspondingly for SelfCooking Control® cooking processes and
EPS.
Page 35
Programming mode
35 / 61
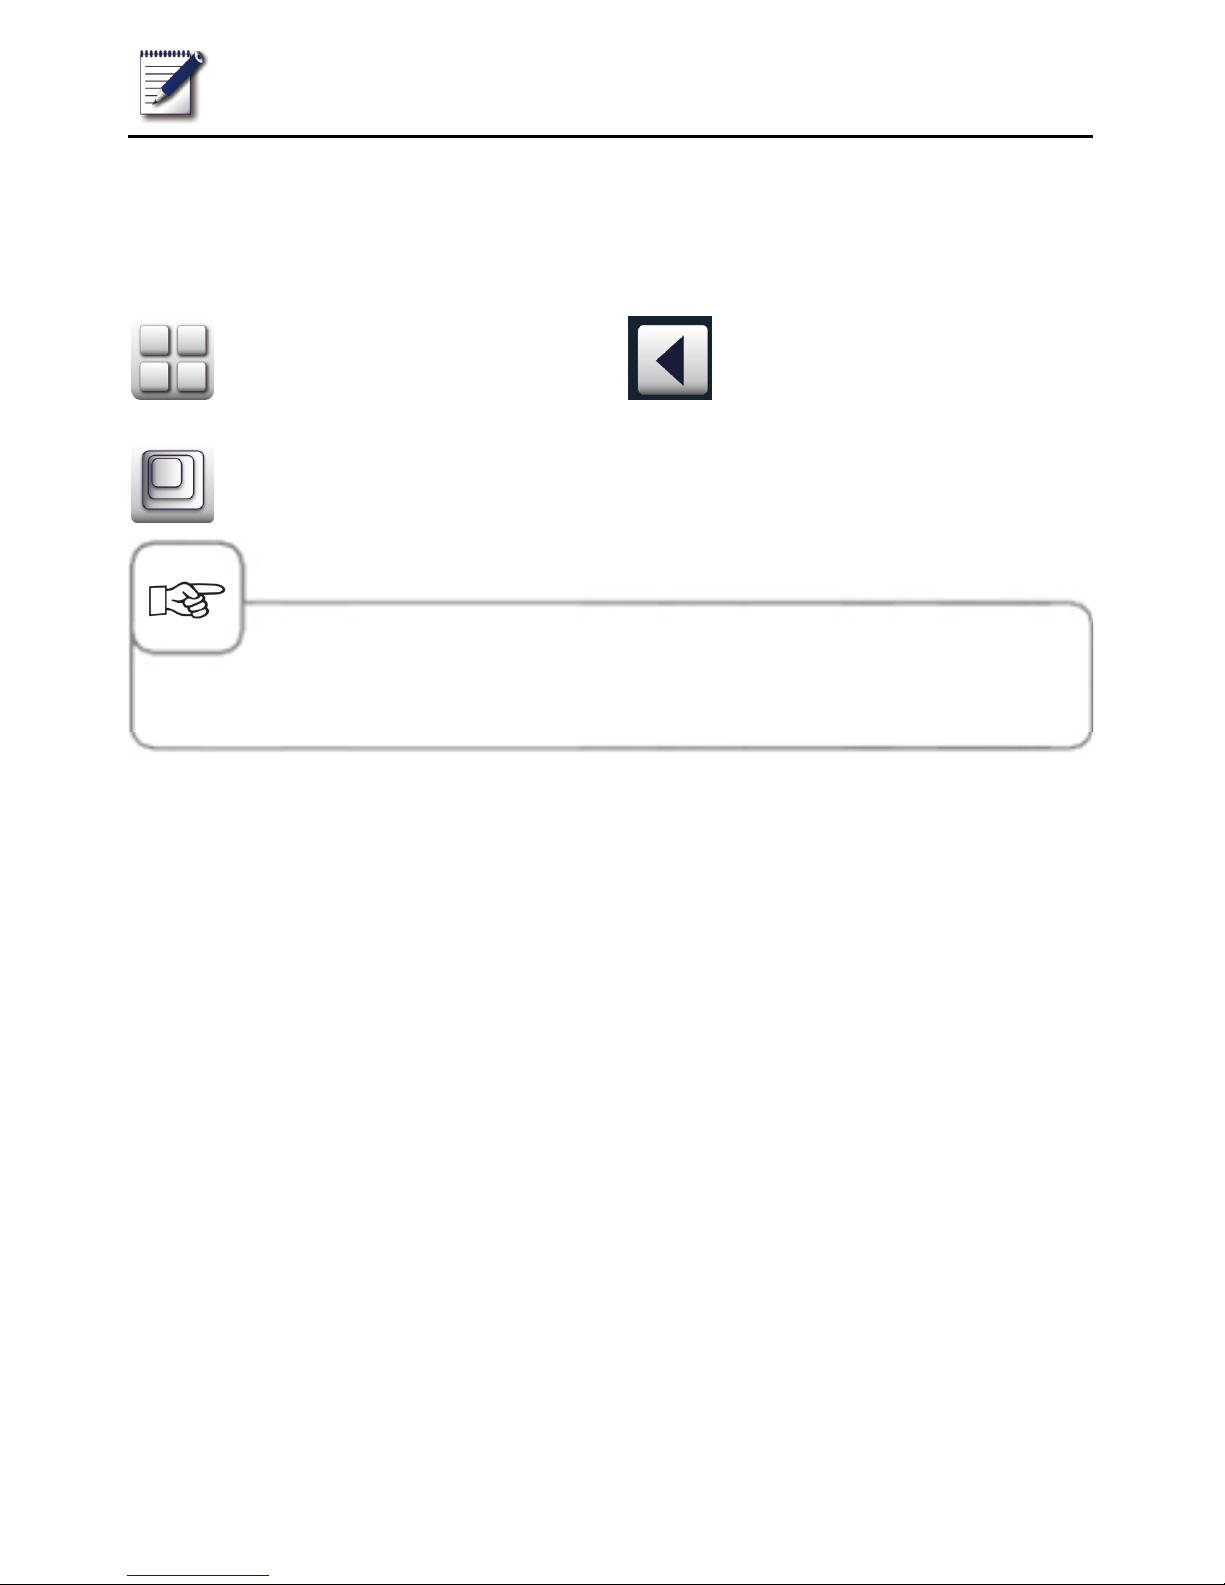
Image view
In the image view, the representation of all programs is reduced to a title image. If there is
no image available, the title of the program is shown as a text in the image view.
Change to the image view.
Change the view from 20 images
to 16 images per side, for
example.
You can scroll in your view by
pressing the arrow or using the
setting wheel.
The last image chosen is always shown when the view is requested again.
Page 36
CareControl
36 / 61
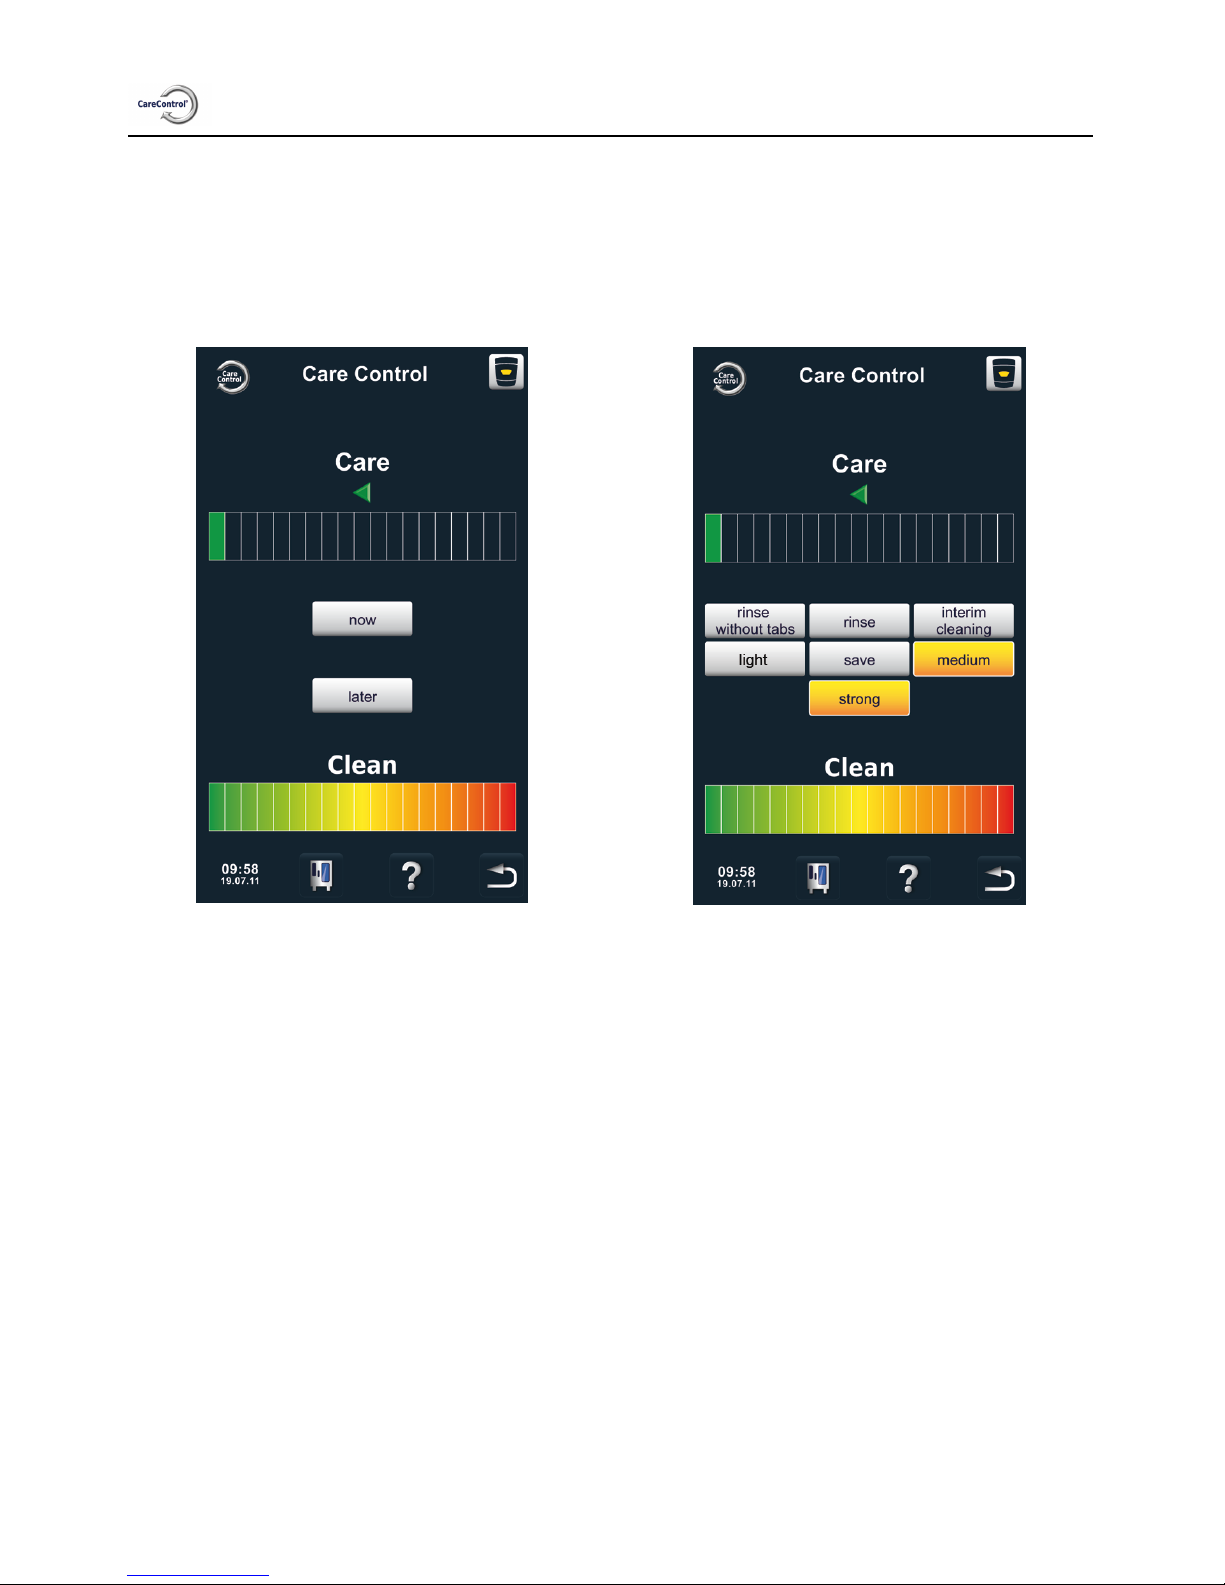
Cleaning request
CareControl recognises when CleanJet
®
+care cleaning has to be carried out. CareControl
takes individual cleaning and working habits into account, such as longer breaks or the end
of work. The recommended cleaning stages are marked in different colours.
Automatic display of cleaning request
as soon as CleanJet
®
+care cleaning is
necessary.
The recommended cleaning stage is
highlighted in colour.
Page 37
CareControl
37 / 61
step info/button instructions
1
Please clean + care
You are requested to clean the unit.
2
CleanJet+care
Start CleanJet
®
+care by pressing the button
or select “later”.
3
medium
Select the recommended cleaning stage
highlighted in colour e.g. “medium” and follow
the instructions shown in the menu.
The CleanJet
®
+cleaning request is repeated at regular intervals until a CleanJet
®
+care
cleaning process is carried out.
Page 38
CareControl
38 / 61
Starting cleaning
CleanJet
®
+care is the automatic cleaning system for cleaning the cooking cabinet.
With 7 cleaning steps, it allows you to adjust the cleaning process to match the individual
degree of soiling.
Warning!
- For hygiene reasons and to prevent malfunctions it is essential to clean the unit every day - risk
of fire.
- Please note that your unit must be cleaned every day, even if only “steaming” operation is used.
- Use only the appliance manufacturer’s cleaning agent and care tabs. The use of other chemical
cleaners may damage the appliance. We will not be liable for the consequences!
- You may experience foaming if too much chemical cleaner is used.
- Never put tabs in the hot cooking cabinet (>60 °C).
- Leave the unit door slightly open if it is going to be idle for a prolonged period (e.g. overnight).
- Cleaning the cooking cabinet seal every day will extend the service life. Use a soft cloth and
cleaning agent to clean the cooking cabinet seal. Do not use scouring products.
- Clean the glass windows on the inside and out and the outer panels of the unit, ideally using a
soft, damp cloth. Do not use a scouring product.
Page 39
CareControl
39 / 61
step info/button instructions
1 Press the button
2
The cooking
cabinet is too hot
“Cooking cabinet too hot” appears when the
cooking cabinet temperature exceeds 75 °C.
Select “cool down” (see the “Cool Down”
section).
4
light
Select cleaning stage e.g. “light”.
5
Open door
Open the cooking cabinet door, remove
containers and trays (stainless steel grids,
CombiFry
®
and superspike poultry grids can
remain in the cooking cabinet).
6
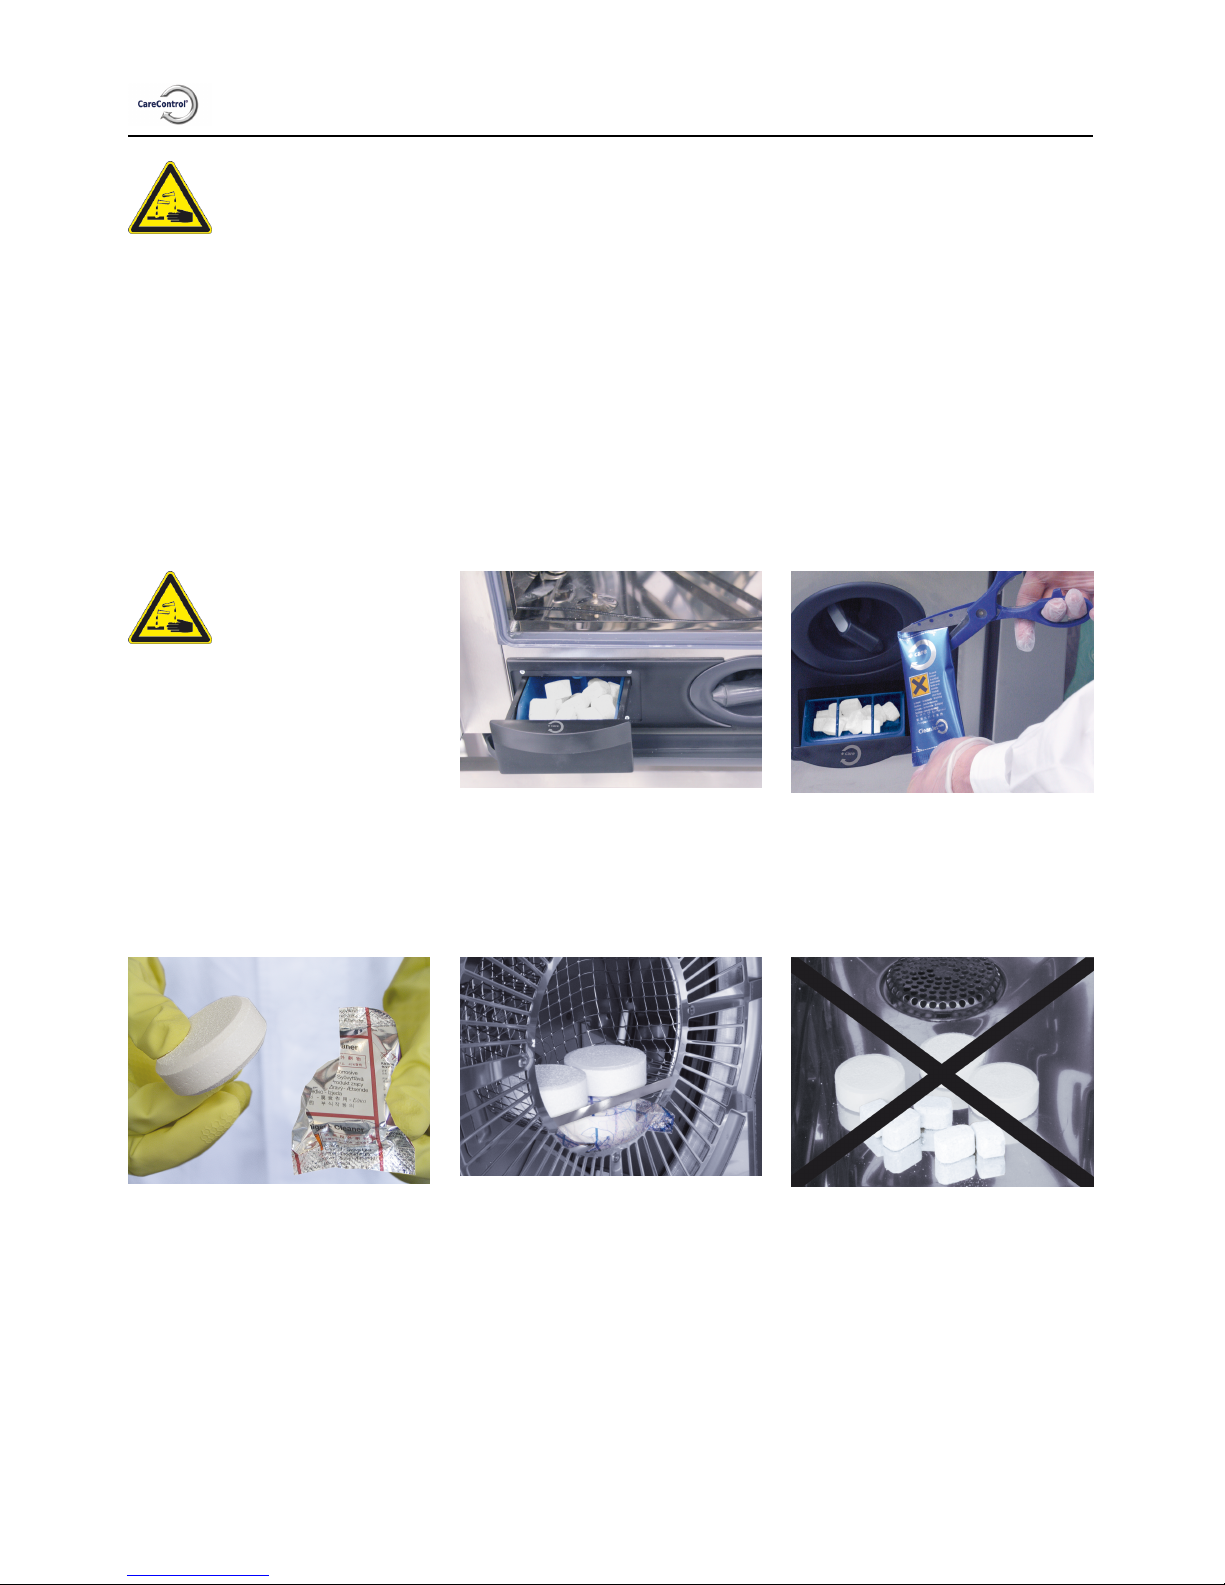
Warning!
Always wear gloves when handling cleaner and
care tabs – risk of chemical burns.
7
Unpack the number of cleaner tabs indicated
and place them in the recess in the air baffle
(tab basket) in the cooking cabinet. See photo
below.
8
Unpack the number of care tab packages
indicated and fill these into the care container.
See photo below.
8
close door
Cleaning starts automatically when oven door
was closed!
Page 40
CareControl
40 / 61
Warning!
- Do not open the cooking cabinet door while cleaning is in progress – chemical cleaner
and hot vapour may escape – risk of chemical burns and scalding.
-
After terminating or after CleanJet
®
+care cleaning has been completed, check the
complete cooking cabinet for cleaner residue (including behind the air baffle). Remove
residue and use the hand shower to rinse the complete cooking cabinet thoroughly
(including behind the air baffle) – risk of chemical burns.
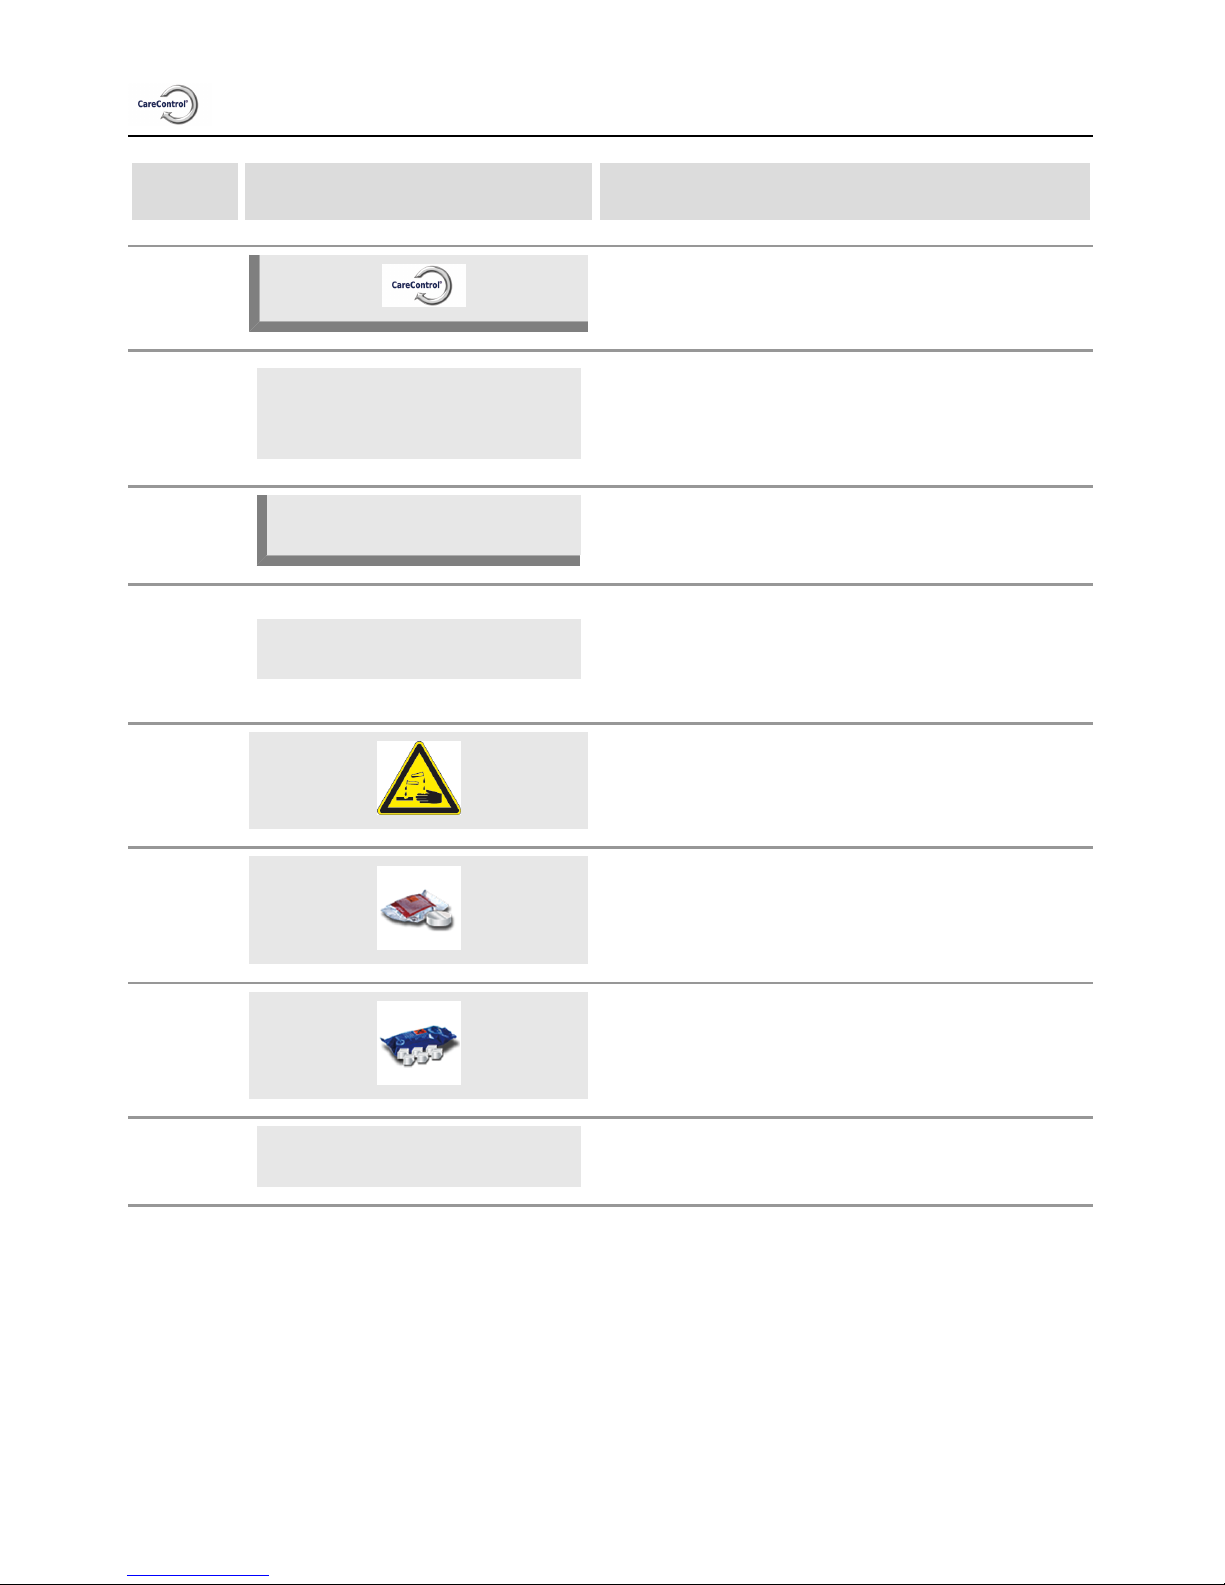
Instructions on handling chemicals:
Warning!
Always take suitable safety
precautions when using
cleaner and care tabs, e.g.
only touch the tabs when
wearing gloves – risk of
chemical burns.
Table-top units: Fill
the number of care tabs
packages indicated into the
drawer.
Floor units: Fill the number
of care tabs packages
indicated into the flap.
Cleaner tab: remove
protective foil.
Place cleaner tabs into the
recess in the air baffle.
Do not place tabs in the
cooking cabinet - risk of
damage.
Page 41
CareControl
41 / 61
Before you start the CleanJet
®
+care cleaning, make sure that the hanging racks or mobile
oven rack are inserted correctly in the cooking cabinet.
If you are using softened water, you can reduce the recommended number of cleaner tabs by
up to 50 %. If foaming occurs even though the amount is correct, then the number of detergent
tablets should be reduced. If heavy foaming still occurs despite low dosage, please contact
your Service Partner/Customer Service for the use of further measures such as the defoamer
tab.
Page 42

CareControl
42 / 61
Cleaning stages
cleaning stage description/application tabs
rinse without tabs Rinse cooking cabinet with warm water. No
rinse
For non-greasy limescale deposits, e.g. after
baking or steaming.
Care
interim cleaning
“Short cleaning time” - for all soiling, but
without drying and rinsing.
Cleaning agent
light
For lighter soiling, e.g. after mixed loads,
applications up to 200 °C.
Cleaning agent &
Care
save
For light soiling (up to 200°C) with as
economical a use of chemicals and water as
possible.
Cleaning agent &
Care
medium
For roasting and grilling deposits, e.g. after
cooking chicken, steaks or grilled fish.
Cleaning agent &
Care
strong
For heavy roasting and grilling deposits, e.g.
multiple loads of chicken, steaks, etc.
Cleaning agent &
Care
Page 43

CareControl
43 / 61
CleanJet
®
+care failure
After a power failure lasting longer than 10 minutes or after the unit is switched off the display
reads "Interrupt CleanJet". If Interrupt CleanJet
®
is not confirmed within 20 seconds by
pressing the display, the activated CleanJet
®
+care program runs through to the end without
interruption.
step info/button instructions
1 Switch the unit off and then on again.
2
cancel CleanJet?
Press the button and confirm cancellation.
3
Open door
Follow the instructions on the display and
open the door carefully – hot vapours!
4
Warning!
Always wear gloves when handling cleaner tabs
– risk of chemical burns.
5
Remove tabs
Remove cleaner tabs (if still present) and
close the cooking cabinet door.
6
00:09
The cooking cabinet is rinsed automatically,
the remaining time till the end is indicated.
7
Cleaning incomplete
You can now use your unit for cooking again.
Page 44

Maintenance
44 / 61
Air filter service
Table-top units type 6 x 1/1 GN, 6 x 2/1 GN, 10 x 1/1
GN and 10 x 2/1 GN:
Loosen the air filter by pressing the frame in the two
roughened spots. Tilt the filter down and remove it
completely from the unit.
Clean the air filter in the dishwasher (not with CleanJet
®
!) and then allow it to dry. If the air filter is still very
sticky and soiled after cleaning it will have to be
replaced.
Then insert the air filter with the rear hooks in the holes
on the underside of the unit first, and then lock in place
by pushing from bottom to top (opposite procedure to
removing the filter).
Air filter no.: 40.03.461
Floor units type 20 x 1/1 GN and 20 x 2/1 GN:
Please contact your Service partner for replacement of
the air filters on the floor units 20 x 1/1 GN and 20 x 2/1
GN.
Page 45

Maintenance
45 / 61
Replacing the door seal
The door seal is fitted in a groove on the cooking
cabinet.
- Pull the old seal out of the groove.
- Clean the guide rail.
- Insert new seal into the groove (moisten the
retaining lips with soapy water).
- The rectangular part of the seal must be seated fully
in the holding frame.
Cooking cabinet seal:
6 x 1/1 GN No: 20.00.394
6 x 2/1 GN No: 20.00.395
10 x 1/1 GN No: 20.00.396
10 x 2/1 GN No: 20.00.397
20 x 1/1 GN No: 20.00.398
20 x 2/1 GN
No: 20.00.399
Replacing the halogen lamp
First switch off the unit at the mains!
- Cover the unit drain in the cooking cabinet.
- Remove the frame with glass and seal.
- Replace halogen bulb (article no.: 3024.0201), do
not touch the bulb with your hands).
- Replace sealing frame as well (article no.:
40.00.094).
- Screw the frame in place with glass and seals.
Page 46

Descaling the moisturing nozzle
46 / 61
Please check the moisturing nozzle for scale residue once a month.
step info/button instructions
1 Switch the unit off
2
Swing the hanging rack and the air baffle into
the centre.
3
Loosen the union nut on the moisturing nozzle
(turn anti-clockwise – spanner size 15).
Warning!
Aggressive chemical liquid – risk of chemical
burns!
Wear: protective clothing, safety goggles,
protective gloves, face mask.
Following descaling, rinse the moisturing nozzle
thoroughly with water.
4
Place the moisturing nozzle in the descaling
liquid and allow it to react (moisturing nozzle
must be free of scale)
Page 47

Descaling the moisturing nozzle
47 / 61
step info/button instructions
5
Assemble in reverse order – note the
installation position
Page 48
Fault messages
48 / 61
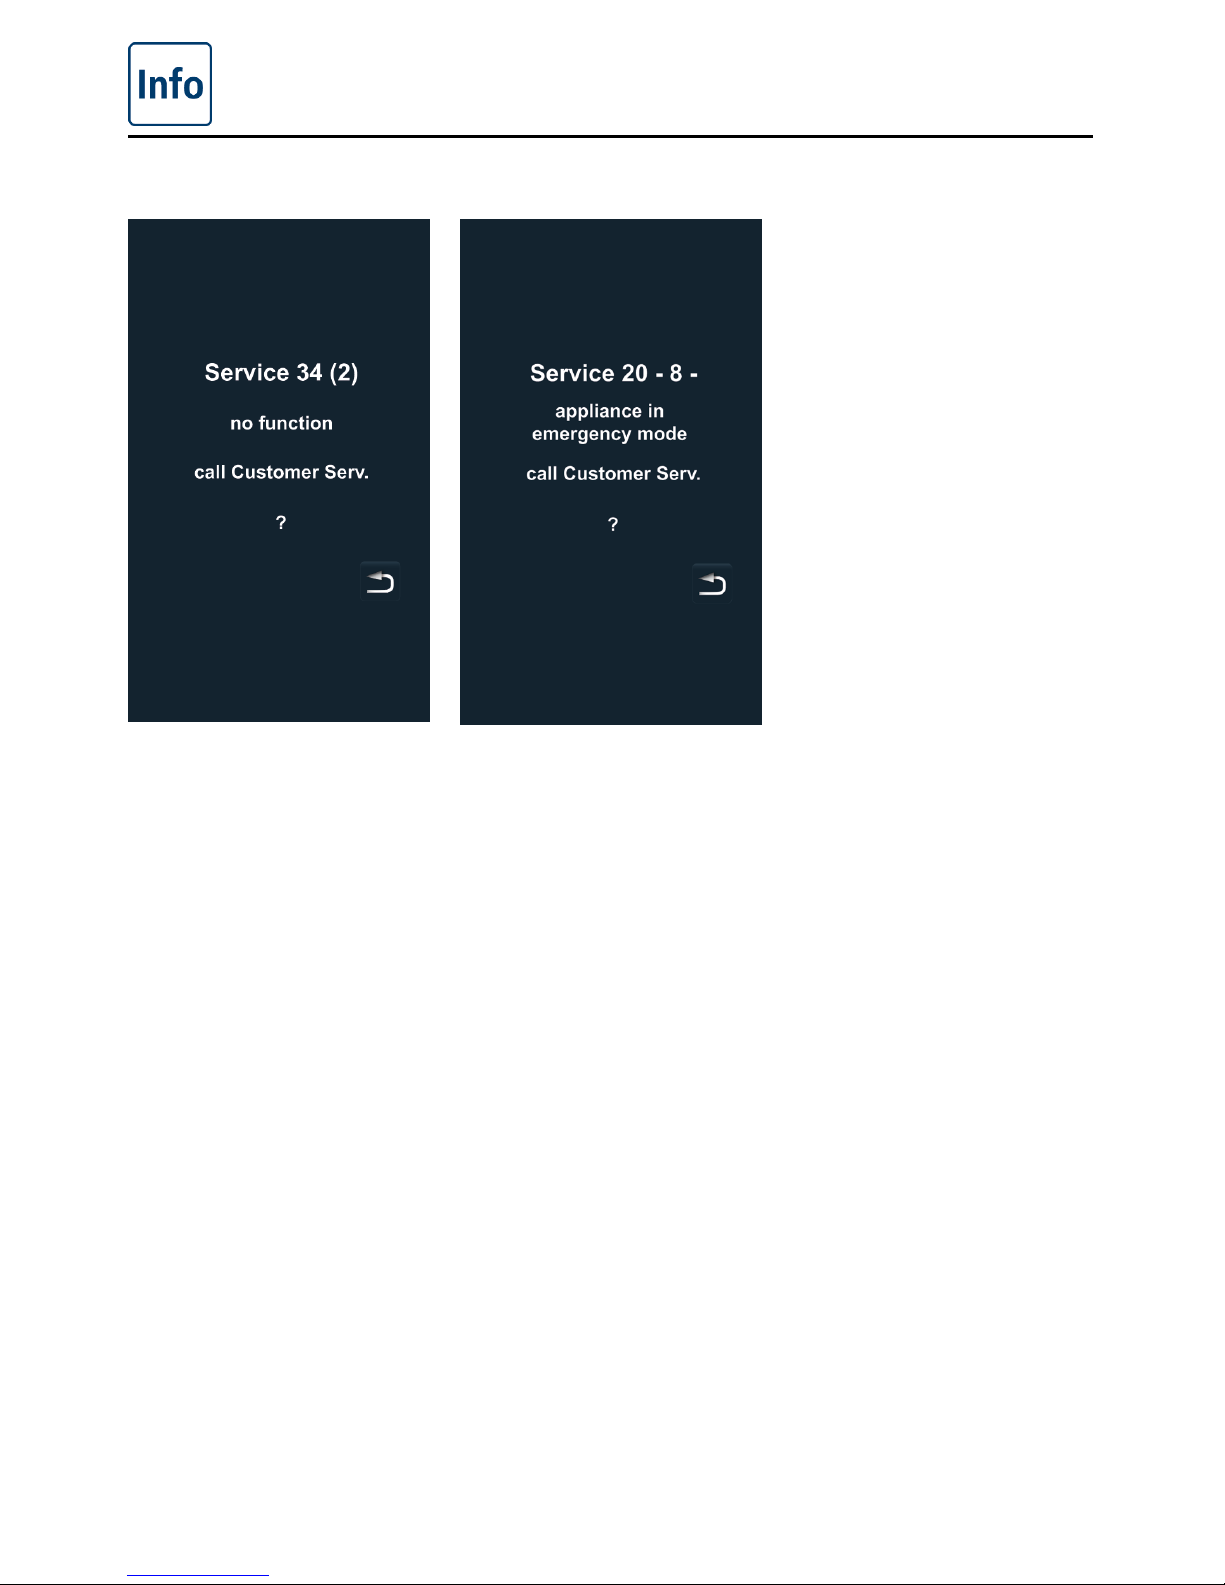
Displays for general faults
If faults occur on your unit,
they are indicated on the
display: Please note the
phone number for fast
contact with your customer
service department.
Faults on your unit which
allow you to carry on
cooking can be suppressed
by pressing the “back”
button.
Page 49
Fault messages
49 / 61
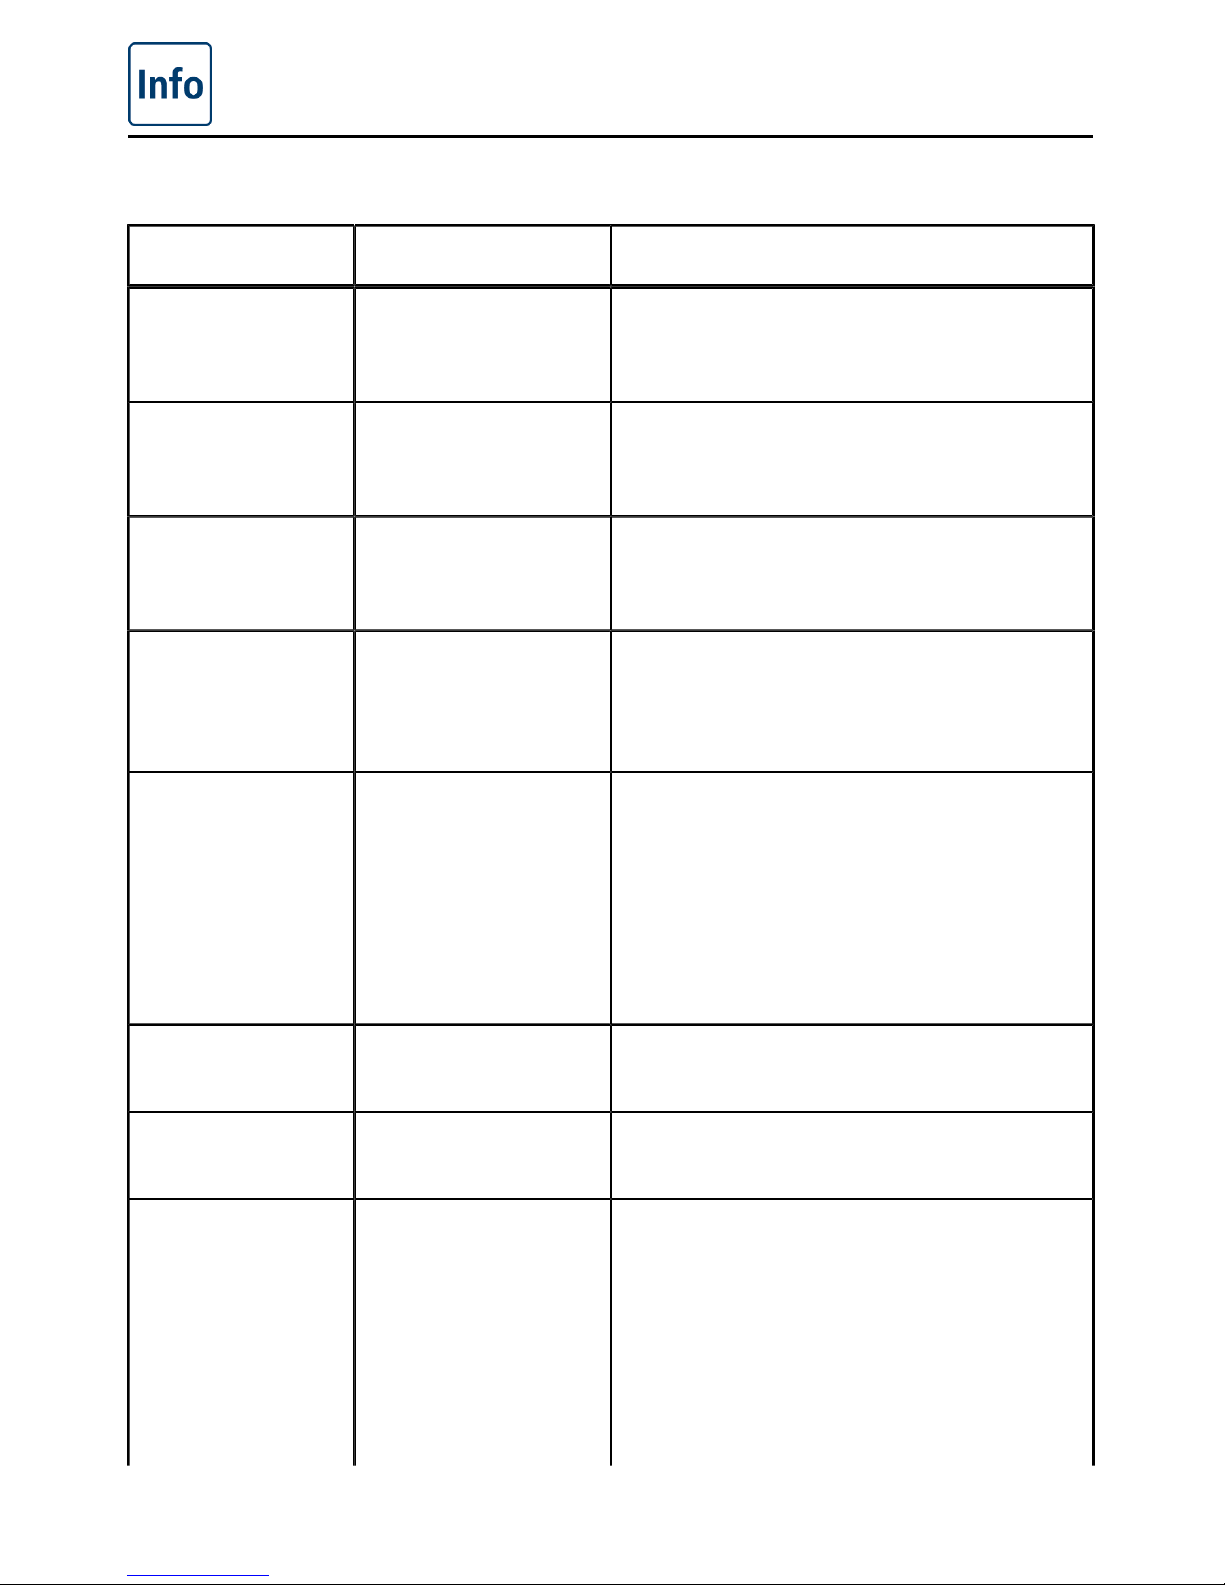
Please follow the remedial measure suggested in the table below.
fault indication when and how remedial action
Service 10 When it has been
switched on for 30
seconds,
Can be rejected by pressing the “back”
button. The unit can be used for cooking.
Please notify Customer Service.
Service 11 When it has been
switched on for 30
seconds,
Can be rejected by pressing the “back”
button. The unit can be used for cooking.
Please notify Customer Service.
Service 12 When it has been
switched on for 30
seconds,
Can be rejected by pressing the “back”
button. The unit can be used for cooking.
Please notify Customer Service.
Service 14 When it has been
switched on for 30
seconds,
Can be rejected by pressing the “back”
button. The unit can only be used in “dry
heat” cooking mode. Please notify Customer
Service.
Service 20 Displayed for 30
seconds when
the cooking mode
is changed, on
switching on and
when the SelfCooking
Control
®
modes are
selected.
Working with SelfCooking Control
®
- cooking
modes and programs is not possible.
It is possible to work in combi-steamer
mode with some restrictions. Please notify
Customer Service.
Service 23 Displayed
continuously.
Switch the unit off and notify Customer
Service.
Service 24 Displayed
continuously.
Switch the unit off and notify Customer
Service.
Service 25 Displayed for 30
seconds during
CleanJet
®
+care
cleaning.
CleanJet
®
+care is not working.
- Open the water tap fully.
- Check the incoming screen - Remove the
container from the cooking cabinet.
- If no faults are found, please notify
Customer Service.
-
If Service 25 occurs during CleanJet
®
+care cleaning, please remove the tabs
from the cooking cabinet and rinse the
Page 50
Fault messages
50 / 61
fault indication when and how remedial action
cooking cabinet thoroughly with the hand
shower (also behind the air baffle).
- The unit can be used for cooking
temporarily.
Please notify Customer Service.
Service 26 Displayed
continuously.
If the fault message occurs during CleanJet
®
cleaning, please run "Interrupt CleanJet
®
. If
the fault message continues to be displayed
after running "Interrupt CleanJet
®
", remove
the tabs from the cooking cabinet and rinse
the cooking cabinet thoroughly with the hand
shower (also behind the air baffle). Please
notify Customer Service.
Service 27 When it has been
switched on for 30
seconds,
CleanJet
®
+care is not possible. Switch off
the power at the mains for 5 seconds, then
switch on again.
Service 28 When it has been
switched on for 30
seconds,
Please notify Customer Service.
Service 29 Displayed
continuously.
Check the air filter under the control panel,
and replace if necessary. Check whether
the unit is being affected by an external heat
source. If the service message persists,
notify Customer Service.
Service 31 When it has been
switched on for 30
seconds,
Core temperature probe is defective. The
unit can be used for cooking without the core
temperature probe. Please notify Customer
Service.
Service 32 Gas
units
Displayed
continuously.
Close the gas valve. Please notify Customer
Service.
Service 33 Gas
units
This is displayed
continuously after
being reset 4 times.
Close the gas valve. Please notify Customer
Service.
Service 34 Displayed
continuously.
Follow any requests shown on the display,
if the fault is not eliminated, please notify
Customer Service.
Page 51
Fault messages
51 / 61
fault indication when and how remedial action
Service 35 When it has been
switched on for 30
seconds,
Please connect UltraVent
®
to the power
supply.
Service 36 Displayed for 30
seconds after
switch-on and when
operating mode is
changed.
Cooking only possible with some restrictions
– Notify Customer Service.
Service 37 Displayed for 30
seconds after
switch-on and when
operating mode is
changed.
Cooking only possible with some restrictions
– Notify Customer Service.
Service 40 Displayed for 30
seconds during
CleanJet
®
+care
cleaning.
Restart CleanJet
®
+care cleaning. If the
error occurs again, please contact Customer
Service.
Service 41 Displayed for 30
seconds during
CleanJet
®
+care
cleaning.
Restart CleanJet
®
+care cleaning. If the
error occurs again, please contact Customer
Service.
Service 42 Displayed for 30
seconds during
CleanJet
®
+care
cleaning.
Restart CleanJet
®
+care cleaning. If the
error occurs again, please contact Customer
Service.
Service 43 Displayed for 30
seconds during
CleanJet ®+care
cleaning.
Restart CleanJet
®
+care cleaning. If the
error occurs again, please contact Customer
Service.
Service 44 Displayed for 30
seconds during
CleanJet
®
+care
cleaning.
Restart CleanJet
®
+care cleaning. If the
error occurs again, please contact Customer
Service.
Service 110 Displayed
continuously.
Please notify Customer Service.
Page 52

Fault messages
52 / 61
fault indication when and how remedial action
Service 120 Displayed
continuously.
Please notify Customer Service.
Page 53
Before you call Service:
53 / 61
error possible cause Rectification
Water dripping out of
the unit’s door.
Door is not closed
correctly.
If the door is closed correctly, the door
handle will point down on floor units.
Door seal is worn or
damaged.
Replace the door seal (see the
"Maintenance” section of the manual).
Care instructions for a maximum service
life:
- At the end of production, always
clean the door seal thoroughly with a
damp cloth.
- If lots of grilled products are cooked
(considerable build-up of grease),
then the door seal must also be
cleaned with a damp cloth between
cycles.
- If the unit is to be operated for a
long time without products, we
recommend that the cooking cabinet
temperature should not exceed 180
°C.
Noise is heard in the
cooking cabinet while
the unit is in use.
Air baffles, hanging
racks, etc., are not
fixed correctly.
Fix the air baffles and hanging racks
correctly in the cooking cabinet.
Cooking cabinet light
not working.
Halogen lamp is
defective.
Replace the lamp (see the
“Maintenance” section of the manual).
Low water level, water
tap symbol is flashing.
Water tap closed. Open the water tap.
Water intake filter on
the unit is clogged.
Check and clean the filter. To do this:
Close the water tap, unscrew the water
intake on the unit, then remove and
clean the filter in the water intake. Insert
the filter, connect the water intake and
check for leaks.
Water running out of
the bottom of the unit.
The unit is not level. Level the unit using a spirit level (see
Installation Manual).
Drain is blocked. Remove and clean the outlet (HT pipe)
on the back of the unit. Blockages can
occur if products with a high proportion
Page 54
Before you call Service:
54 / 61
of fat are cooked frequently or if the
drop on the outlet pipe is too shallow.
To remedy: Run the outlet pipe as
described in the installation instructions.
Clean the unit regularly with CleanJet
®
+care.
The unit does not
indicate a function
after it is switched on.
External main switch is
switched off.
Switch on at the main switch.
Fuse on the premises’
distribution board has
tripped.
Check the fuses on the premises’
distribution board.
The ambient
temperature after
switching the unit off
remained below 5 °C
(41 °F) for a long time.
Heat the cooking cabinet to above 20
°C (68 °F). The appliance must only
be used in frost-free conditions (see
installation instructions).
Foam forms on the
unit at the top of the
outlet pipe during
CleanJet
®
+care
cleaning.
Water is too soft.
Please notify Customer Service.
The outlet is not
installed correctly.
Install the outlet as described in the
installation manual.
The run time is
suddenly incremented
once more during
a CleanJet
®
+care
process.
The CleanJet
®
+care
process is interrupted.
Make sure that the air baffle and the
grid shelves are fixed correctly in the
cooking cabinet. There must be no
containers or sheets in the cooking
cabinet during the CleanJet
®
+care
process.
Device indicates
“Please replace filter”.
The air filter is soiled. Please replace the air filter. See also
the “Maintenance” section. Press the
“back” arrow to confirm the message.
The gas unit indicates
“change polarity”.
The power supply is
not connected with the
correct polarity.
If the gas unit is connected to a socket,
remove the connector and turn through
180°.
Have an electrician permanently
connect the unit with the correct polarity
(without a connector).
Page 55
Before you call Service:
55 / 61
Gas unit constantly
displays Reset.
The gas supply to the
unit is interrupted.
Open the gas tap, switch on the
ventilation cover.
The gas pressure is
too low.
Have the gas supply to the unit
checked.
Cooking mode button
flashing.
The cooking cabinet is
too hot.
Use Cool Down to cool the cooking
cabinet (see the “Cool Down” section of
the “General User Instructions” manual).
Page 56

Club RATIONAL
56 / 61
As an active SelfCookingCenter
®
whitefficiency
®
user we would like to warmly invite you
to attend the Academy RATIONAL day seminar. Here you can experience in a relaxed
atmosphere how you can use the SelfCookingCenter
®
whitefficiency
®
optimally and
efficiently in your kitchen. Dates and locations as well as your personal invitation can be
obtained through your specialist retailer or directly from: www.club-rational.com. Participation
in the seminar is free of charge.
Register now and become a member.
Members of the Club RATIONAL also have access to a wide range of information and free
downloads, and can also communicate with RATIONAL chefs or colleagues. Register for the
club now under www.club-rational.com. Membership of Club RATIONAL is also free.
Your club benefits at a glance:
Free upgrades
So you always have the latest SelfCookingCenter
®
software
Recipes – simply at the push of a button
The best recipes for your SelfCookingCenter
®
whitefficiency
®
!
Download area
Documentation for all unit series
Chef Line also by e-mail
Expert help from one chef to another
Service Info also by e-mail
RATIONAL Service – always there for you
Quarterly newsletter
So you are always well-informed
Frequently-Asked Questions
What you've always wanted to know
Register right away!
www.club-rational.com
Page 57
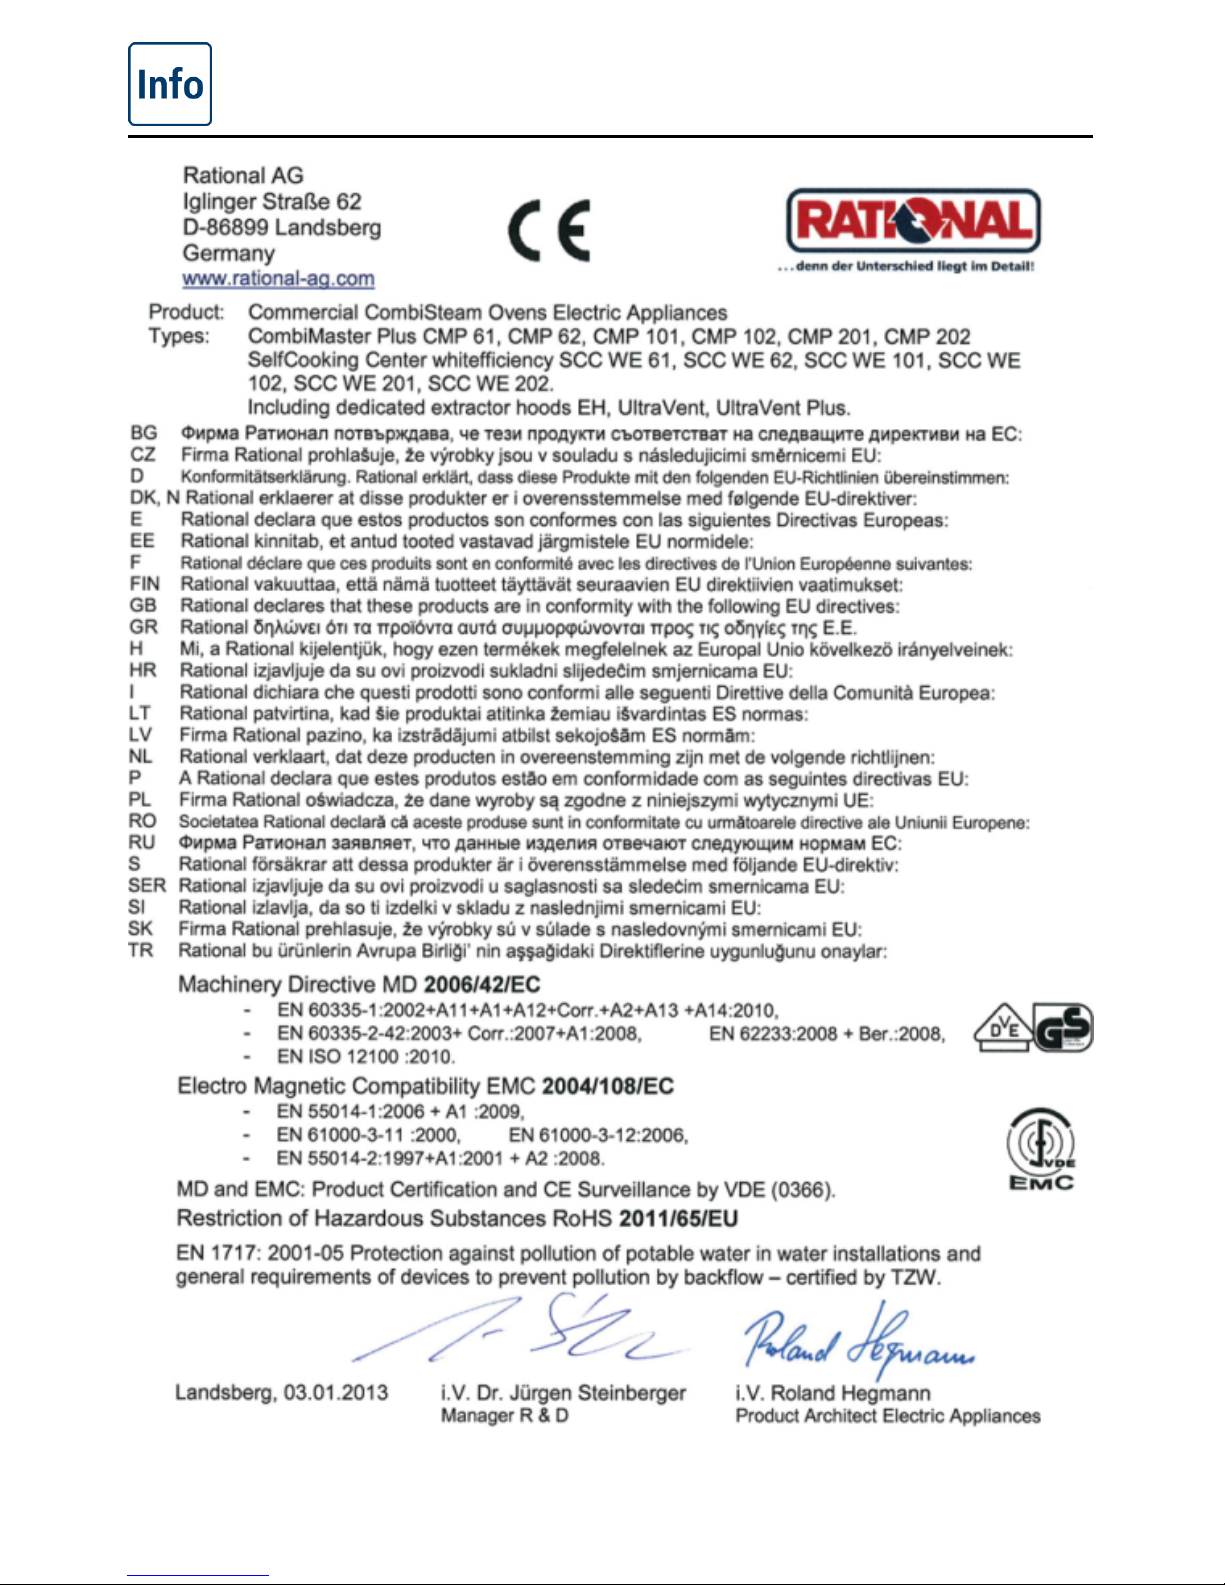
EU Declaration of Conformity for electrical
appliances
57 / 61
Page 58

EU Declaration of Conformity for gas appliances
58 / 61
Page 59

...
59 / 61
SelfCooking Center
®
whitefficiency
®
, CombiMaster
®
Plus are trademarks of RATIONAL AG.
This product incorporates the following software:
1. the software developed independently by RATIONAL AG
2. the software licensed under the GNU Gerneral Public License, Version 2 (GPL v2)
3. the software licensed under the GNU LESSER General Public License, Version 2.1 (LGPL
v2.1) and/or,
4. open sourced software other than the software licensed under the GPL v2 and/or LGPL
v2.1
For the software categorized as (3), (4) and (5), please refer to the terms and conditions of
GPL v2 and LGPL v2.1, as the case may be at
http://www.gnu.org/licenses/old-licenses/gpl.-2.0.html and
http://www.gnu.org/licenses/old-licenses/lgpl-2.1.html
At least three (3) years from delivery of products, RATIONAL AG will give to any third party
who contact us at the contact information provided below, for a charge no more than our cost
of physically performing source code distribution, a complete machinereadable copy of the
corresponding source code covered under GPL v2/LGPL v2.1.
Contact Information:
sourcecode@rational-online.com
Page 60

80.05.002 · V-04 · MDS/Ad · 08/13 · englisch
 Loading...