

Page 1
by Honeywell
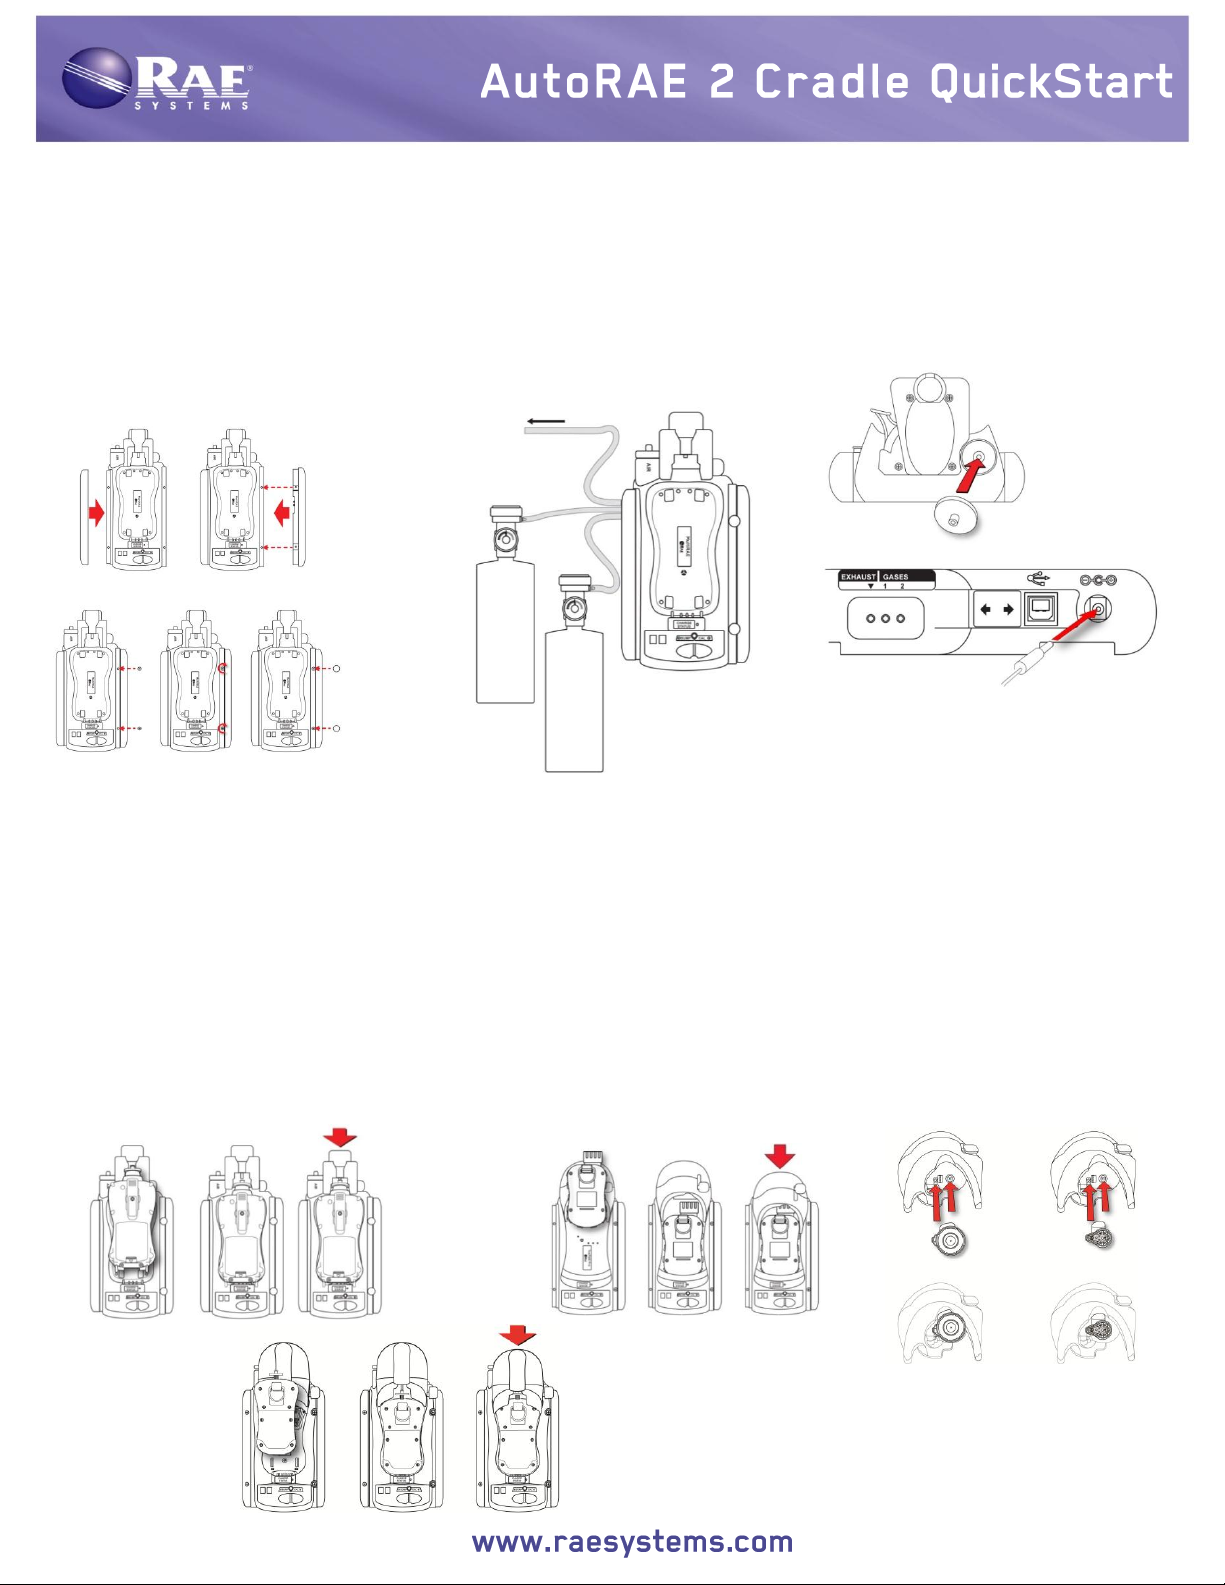
Setup
Exhaust
Calibration
Cylinder 1
Calibration
Cylinder 2
Press filter onto
end of Cradle
Plug barrel from AC
Install left and right end caps
Connect gas cylinders with gas inlets
The ToxiRAE Pro Cradle
mechanism. ToxiRAE Pro
and ToxiRAE Pro PID (R).
MultiRAE
ToxiRAE Pro
QRAE 3
Before using the AutoRAE 2 Cradle to bump test or calibrate ToxiRAE Pro-family and/or QRAE 3 and/or
MultiRAE-family (pumped versions) instruments, make sure the AutoRAE 2 Cradle and (if one is used) the
AutoRAE 2 Controller is running latest firmware. Also, follow the instructions in the AutoRAE 2 User’s Guide for
programming the gas configurations. Note: Each calibration gas cylinder must have a demand-flow regulator.
Connections
Gas
Gas
adapter into jack, then
AC Adapter to AC power
source
IMPORTANT!
Always check that the gas configuration and the type/concentration of the calibration gases connected to the
AutoRAE 2 Cradle match before you begin any bump test or calibration. Make sure there is enough gas in the
cylinder(s). Set the RTC (real-time clock) date and time on the Cradle via ProRAE Studio II before first use.
receptacle at
Placing An Instrument In The Cradle
Important! If the Cradle is for a ToxiRAE Pro-family instrument, make sure the correct calibration adapter is in place.
1. Make sure the filter on the instrument is not dirty or clogged.
2. Make sure the instrument is turned off or in AutoRAE 2 Mode.
3. Place the instrument into the cradle face-down, making check that it is aligned correctly with the contacts on the
AutoRAE 2 Cradle’s charging port.
4. Press in on the capture mechanism to lock the instrument in place.
requires an adapter to be
inserted in the capture
and ToxiRAE Pro LEL (L)
Page 2
by Honeywell
Automatic Warm-Up Before Bump Testing Or Calibrating
When you place an instrument in the cradle and lock the capture mechanism, the instrument begins charging and is
automatically warmed up. Warm-up time depends on the sensors installed in the instrument and their individual
warm-up requirements.
Performing A Bump Test
1. Insert an instrument in the AutoRAE 2 Cradle.
2. Press “Bump.” If the instrument is warmed up (both LEDs are glowing green), the bump test begins.
Consult the Bump & Cal Error & Status chart for an explanation of the LED indications that tell you which
operations are underway and which LED indications tell you of errors during calibration.
Note: If the instrument does not successfully pass a bump test, the AutoRAE 2 Cradle automatically begins a full
calibration.
Performing A Calibration
Always perform a full calibration after replacing a sensor, using a new ToxiRAE Pro, QRAE 3, or MultiRAE, or if
the instrument has been unused for a long period of time. In addition, if the instrument has failed a bump test,
perform a full calibration.
1. Make sure the span value in the monitor(s) and the AutoRAE 2 Controller match.
2. Make sure the correct Gas Configuration has been selected (use G8; G1 through G7 are not supported).
3. Insert a ToxiRAE Pro, QRAE 3, or MultiRAE monitor in the AutoRAE 2 Cradle.
4. Press “Cal.”
When the instrument is warmed up (both LEDs are glowing green), calibration begins.
Note: For MultiRAE and QRAE 3 instruments, calibration order is important. Refer to cross-interference
information in section 21.2 (Connecting Calibration Gas) in the AutoRAE 2 User’s Guide and RAE Systems
Technical Note TN-114: Sensor Specifications And Cross-Sensitivities (available for free download from
www.raesystems.com).
Page 3

by Honeywell
Bump And Cal Errors And Status Messages
Status
Bump LED
Cal LED
User Action
Warm-up in
progress
Orange (blinking in alternation)
Do not remove the instrument from the cradle, or the warm-up
process will be interrupted. Pressing keys has no effect.
Warm-up error
Red (blinking in alternation)
Remove the instrument from the cradle and take the action
indicated on the instrument’s display.
Warm-up
completed
successfully
Green
Green
Press Bump or Cal key to perform a bump test or calibration.
Bump test in
progress
Green
(blinking)
Off
Do not remove the instrument, or the process will be
interrupted. Pressing keys has no effect.
Bump test
completed
successfully
Green
Off
The bump test result (pass) has been logged. You may remove the
instrument from the Cradle for use or leave it on the Cradle for the
next AutoRAE 2 operation or to charge its battery.
Bump test failed
Red (blinking
slowly)
Off
The bump test result (fail) has been logged. The AutoRAE 2
will perform calibration on failed sensor(s) automatically.
Calibration in
progress
Off
Green
(blinking)
Do not remove the instrument, or the process will be
interrupted. Pressing keys has no effect.
Calibration
completed
successfully
Off
Green
The result has been logged in the instrument. You may
remove the instrument from the Cradle.
Calibration
failed
Off
Red (blinking
slowly)
The result has been logged in the instrument; you may remove
it from the Cradle and read its display for an error code.
Sleep mode
Orange
Orange
Charging continues when in sleep mode. Press either key to
wake up the instrument.
Monitor not
connected /
system idle
Off
Off
Check to make sure the monitor is properly installed in the
cradle and the capture mechanism is fully engaged.
Check to make sure the monitor is in AutoRAE 2
Communications Mode or turned off.
Cradle error
Red (blinking slowly)
Take the action indicated in the Controller’s display.
Otherwise, contact RAE Systems service.
Page 4

CORPORATE HEADQUARTERS
RAE Systems by Honeywell
3775 N. First St.
San Jose, CA 95134 USA
Phone: 408.952.8200 Fax: 408.952.8480
customerserv@raesystems.com
WORLDWIDE SALES OFFICES
USA/Canada: 1.877.723.2878
Europe: +45.86.52.51.55
Middle East: +00971.4.440.5949
China: +86.10.5885.8788-3000
Asia Pacific: +852.2669.0828
by Honeywell
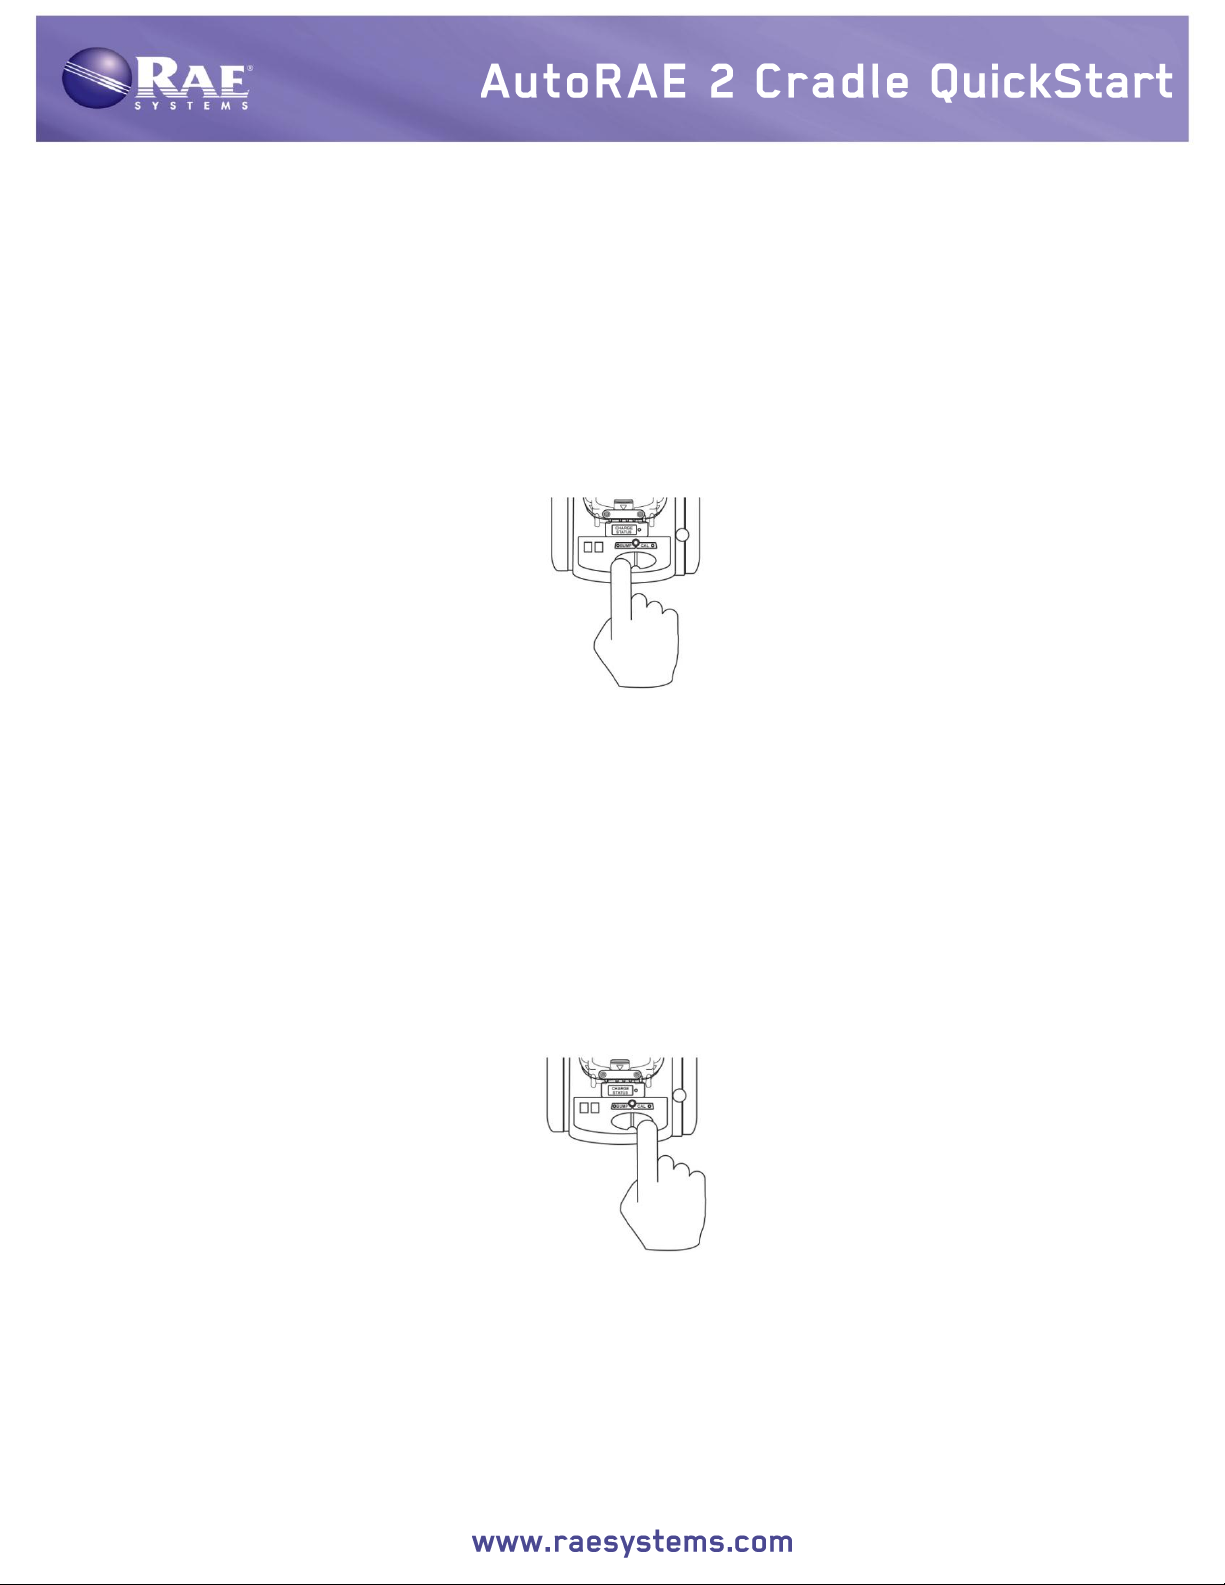
Removing An instrument From The Cradle
Printer Port
Serial port on
Serial
Rev C April 2014
P/N T02-4014-000
MultiRAE
ToxiRAE Pro
QRAE 3
To remove an instrument from the cradle, press the button to release the capture mechanism. Then lift the
instrument from its inlet end.
Charging An Instrument’s Battery
The AutoRAE 2 Cradle automatically charges an instrument’s battery when it is docked. The Charge Status LED
glows red to indicate that charging is taking place. When the instrument’s battery is fully charged, the LED glows
green.
Printing Bump/Calibration Reports
The AutoRAE Cradle has a port for connecting to a serial printer (or you can use a serial-to-USB adapter to drive a
compatible USB printer).
Connect the serial port of the AutoRAE Cradle to the serial port on a printer.
Cable
printer
When you perform a bump test or calibration with a printer attached to an AutoRAE 2 Cradle, a full report is sent
to the printer after the bump test or calibration concludes. If a bump test fails, the AutoRAE 2 Cradle sends the
report to the printer and it initiates a full calibration. When the calibration is complete, the results are then also sent
automatically to the printer.
 Loading...