

Page 1

PC Camera
Owner’s Manual
Please read before using this equipment.
Page 2

ˆ
Introduction
Your RadioShack PC Camera is designed
for PCs that have a universal serial bus
(USB) port. You can use the camera to make
a video, capture still images, or post live video, chat, still pictures, and video clips to the
World Wide Web. With the supplied fun-touse application software, your camera is a
powerful addition to your PC.
Camera Features
USB Operation
and begin using the camera. The camera
uses the power provided through the USB
bus directly from your computer — no batteries needed!
CMOS Sensor
images.
— lets you easily connect
— provides high qu ality video
1
2
-Foot USB Cord
6
/
camera almost anywhere.
— lets you use the
Supplied Software
WDM (Windows Device Model) TWAIN
(Technology Without An Important Name)
for Windows 98/2000 —
and transfer images from the camera to image editing programs such as Adobe PhotoShop, MGI PhotoSuite or Corel.
Presto
— helps you create and manage
your video and photo archives.
Microsoft Internet Explorer Version 5.0 —
web browser that lets you quickly view multimedia files such as image, GIF animation,
video or sound files in your computer.
lets you capture
320
240 Pixels C olor Resolution (3 52
××××
288 Pixels Maximum Resolution)
vides excellent video quality.
Snapshot Button
age captured by your camer a.
Auto Exposure Control —
software works with your camera to let you
set the band frequency according to your local frequency and the set exposure speed.
Auto White Balance Control —
change the color image to your preference.
Backlight Compensation —
automatically compensates for poor image
backlighting.
Edge Enhancement —
matically provides clearer and sharper images.
— lets you freez e any im-
the camera auto-
RadioShack and RadioShack.com are trademarks used by RadioShack Corporation.
— pro-
the supplied
lets you
the camera
©
2001 RadioShack Corporation.
All Rights Reserved.
Ulead Photo Explorer
××××
viewer and image management tool for programs such as Microsoft Front Page or
Netscape Navigator Gold, and a perfect image editor for programs such as Adobe PhotoShop and PhotoDeluxe, JASC PaintShop
Pro, and Microsoft Picture It.
— a perfect image
FCC STATEMENT
This equipment has been tested and found
to comply with the limits for a Class B digital
device, pursuant to Part 15 of the
. These limits are designed to provide
Rules
reasonable protection against harmful interference in a residential installation. This
equipment generates, uses and can radiate
radio frequency energy and, if not installed
and used in accord an ce with the instru cti ons ,
may cause harmful interference to radio
communications.
FCC
2
Introduction
Page 3
However, there is no guarantee that interference will not occur in a particular installation.
If this equipment does cause harmful interference to radio or television reception,
which can be determined by turning the
equipment off and on, the user is encouraged to try to correct the interference by one
or more of the following measures:
• Reorient or relocate the receiving
antenna.
• Increase the separation between the
equipment and receiver.
• Connect the equipment into an outlet on
a circuit different from that to which the
receiver is connected.
SYSTEM REQUIREMENTS
•IBM
• CD-ROM drive
• VGA or SVGA monitor
PC Pentium 266 MHz or compati-
ble with one available USB port
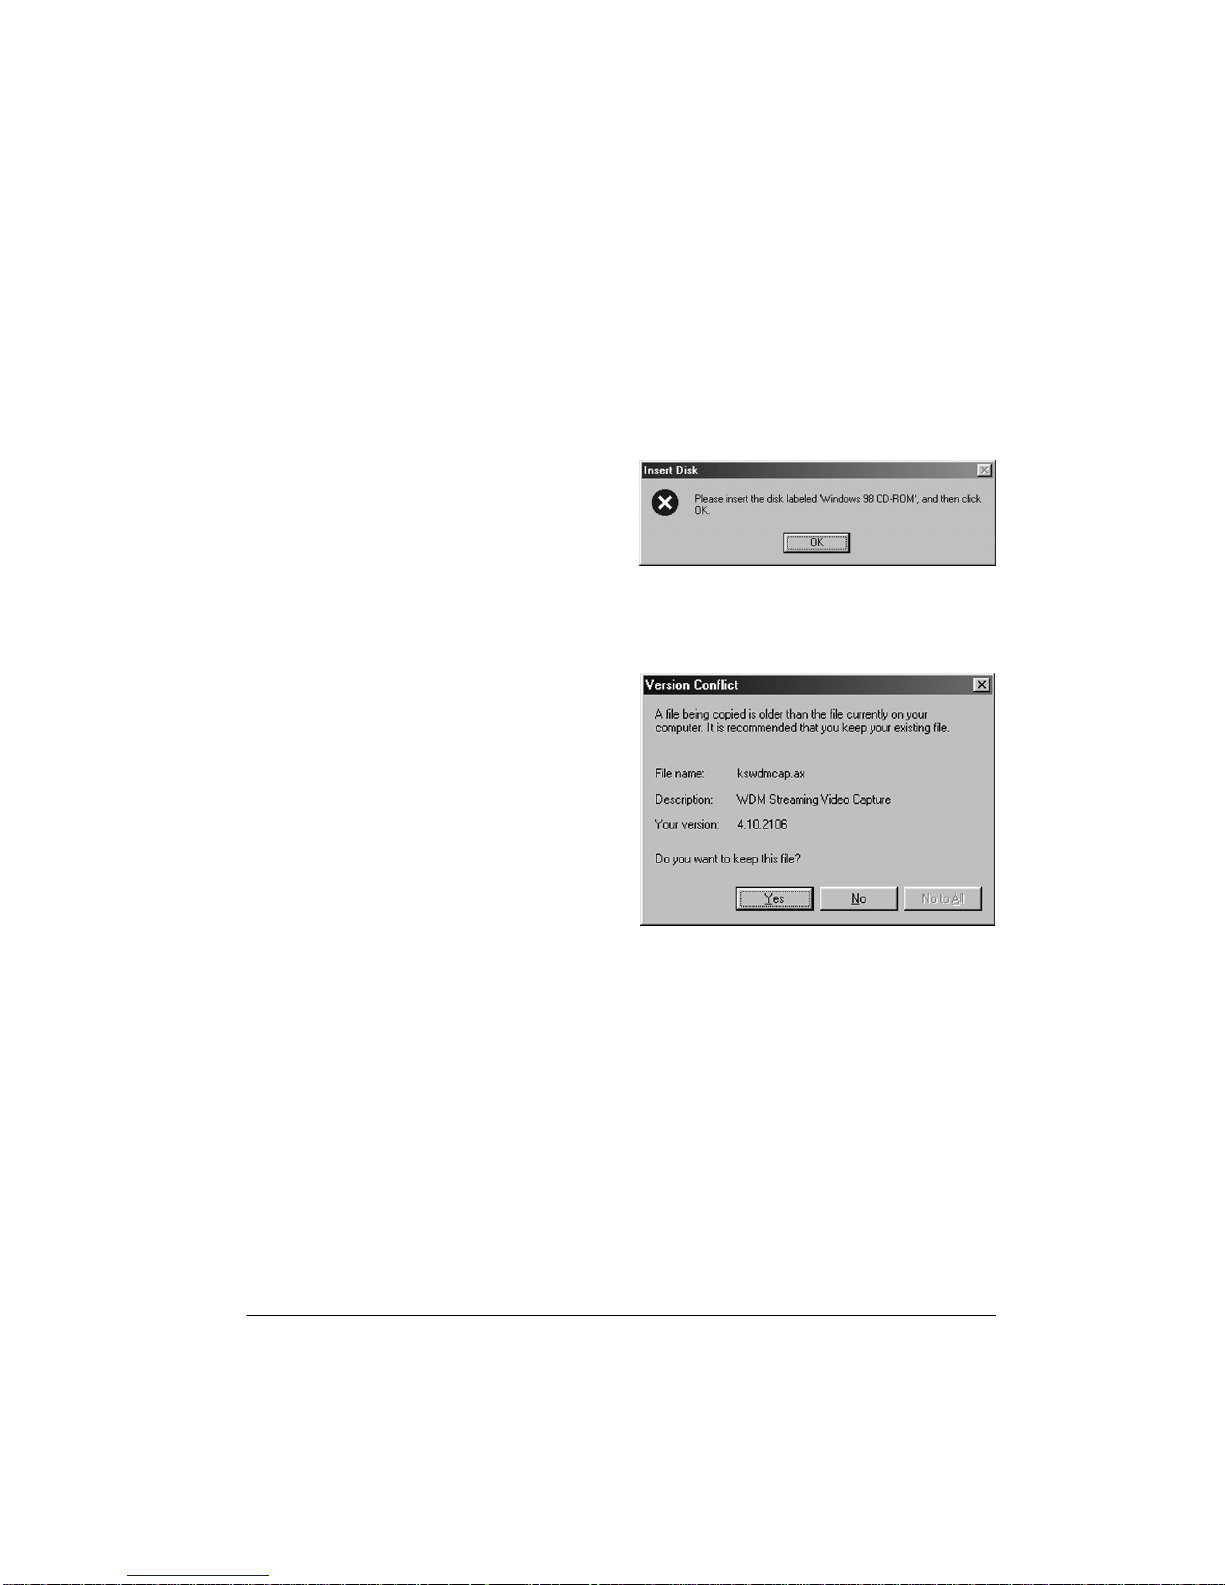
To avoid ins tal lation problems, insta ll th e
supplied iCam 320 driver software
before connecting the camera to your
PC. Before installing the driver software,
have your original Windows CD handy
(this is not necessary if the Windows
installation files are lo ca ted o n your hard
drive). When an
Insert Disk
box appears
while you are installing the driver software, click OK and insert the CD.
If you have Windows 98 installed, a
sion Conflict
box appears. Click
Yes
Ver-
to
keep the file.
• 32MB or more of available internal
memory (RAM)
• 150MB of free hard disk space
• Microsoft Windows
98, Windows
SE, Windows 2000, or Windows Me
• Microphone and speakers (optional)
Important:
• Your camera will not work with Windows
95. You must have Windows 98, Windows 98 SE, Windows 2000, or Windows Me installed on your computer to
use the camera.
• Some soft ware featur es might not w ork
correctly on computers running Windows 98 First Release. For best compatibility, upgrade to Windows 98 SE or
later.
98
Introduction
APPLICATION SOFTWARE
Your camera comes with a CD-ROM that includes the drivers you need to operate the
camera, as well as these applications. You
can install the applications you want when
you install the drivers. (See “Installing/Testing the Software/Hardware” on Page 4.)
TWAIN Drivers and Utility
image editing program, such as Adobe PhotoShop, MGI PhotoSuite, or Corel, to use the
camera and all of the program’s functions.
lets you use an
3
Page 4
Presto! Image Folio LE
media image processing program which lets
you quickly create new images or enhance
old ones.
is a complete multi-
Microsoft Internet Explorer 5.0
browser that lets you quickly view any multimedia file (such as image, GIF animation,
video or sound file) stored in your computer.
is a web
Presto! Mr. Photo 1.5
solution that lets you work with digital images, create images, use other applications
with images, transmit images over the Internet, and mor e.
Presto! VideoWorks 4.2
video editing program that lets you create
live presen tations.
Ulead Photo Explorer 6.0
front end for Microsoft Front Page, Netscape
Navigator Gold, or almost any other image
editor.
ˆ
Preparation
is a single package
is a quick and ea sy
is a perfect visual
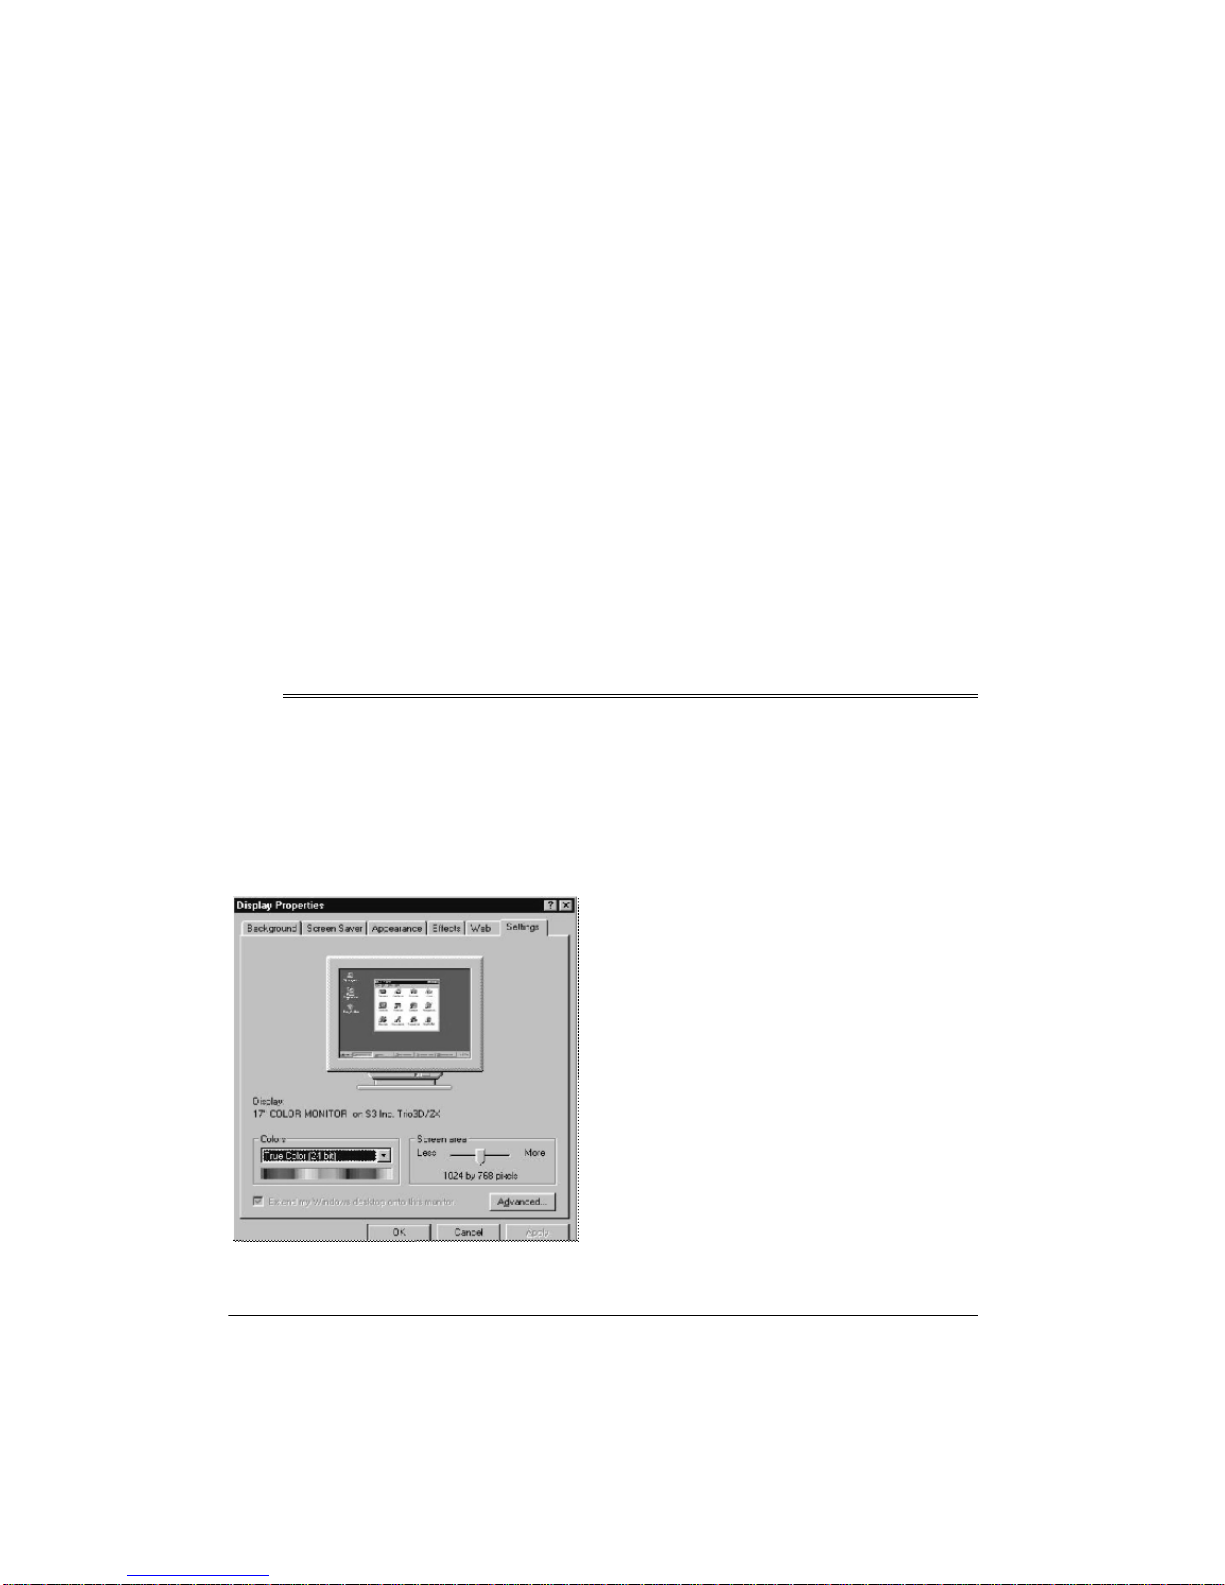
CONFIGURING THE
MONITOR
1. Open the Windows
ble-click
Display
, then click
Control Panel
Settings
, dou-
.
Adobe Acrobat Reader 3.01
which lets y ou read docume nts and ma terial
prepared in the popular .PDF format.
Notes:
• For information about Presto! applications, refer to their user’s manuals
included in the supplied CD-ROM (at
Start/Programs/Presto! (application
name)/(application name)UserManual
• For information about Ulead Photo
Explorer, refer to its online helps
included on the supplied CD-ROM.
Color
2. Set
Color (24- or 32-bit)
we recommend
Screen area
3. Set
els.
High Color (16-bit)
to
. (For the best display,
True Color
to at least 800 × 600 pix-
is a program
Tru e
or
).
).
INSTALLING/TESTING THE
SOFTWARE/HARDWARE
The driver software and application software
supplied with the camera is included in the
supplied CD-ROM. It includes a Setup Wizard that makes installation easy.
Important:
you how to install the software using Windows 98. If you have Windows 98 SE, Windows 2000, or Windows Me, the steps might
differ. Follow the prompts you see while using Windows 98 SE, Windows 2000 or Windows Me to install the software.
4
Preparation
The steps in this section show
Page 5

Follow these steps to install the software,
connect the camera to your computer, and
test the camera and software together.
1. Start Windows 98 and quit all applications.
2. Insert the software CD into your CDROM drive. The CD starts automatically.
Note:
If the CD does not start automatically, make sure the CD-ROM's door is
completely shut. If the CD still does not
start, the auto run option on your computer might be turned off. If this happens, click
My Computer
. The window
shows the available drives on your computer. Then double-click the icon for
your CD-ROM drive and double-click
setup.exe
Select Components
3. Click on
installation) or
. The CD starts and the
screen appears.
Typical
(to select complete
Custom
(to select custo m
installation if you are installing a Presto!
application), then click
Continue
.
4. Follow the prompts to install the driver
and software for any or all of the applications listed under “Application Software”
on Page 3 from the CD-ROM. Follow the
instructions provid ed with the applicat ion
software to install them.
Note:
Some subsequent steps in this
section assume that you installed the
Presto! Mr. Photo 1.5 application software in Step 4. If you did not install this
application software, the screens you
see might differ from those documented
here.
Notes:
• The cable f its on ly one way. If it does
not fit, do not force it. Turn it over and
try again.
• Refer to your computer’s owner’s
manual for the location of the USB
port.
• Some new computers also have a
keyboard with a built-in USB port. In
such cases, you can plug the camera’s cable in to ei the r the ke yb oard or
the computer.
7. To confirm that the camera is operating
properly when you first install it, click
Start
on the task bar, then click
Presto! Mr. Photo 1.5
grams
,
Photo 1.5
. The Mr. Photo application
, and
Pro-
Mr.
software runs.
8. Place the camera on a steady and l evel
surface, then slowly rotate the camera
so it aims at the target image.
9. Place a light source behind the camera,
facing the subject.
5. After you finish installing the software,
restart your computer.
6. Plug one end of the built-in cable into
your computer’s USB port.
Preparation
Important:
Do not aim the camera
directly at the light source.
Hint:
For better images, maintain a consistent li ghting envi ronment. Do not mix
fluorescent and other light types.
5
Page 6

10. Click on the camera icon at the top left
of the screen. The TWAIN window
opens and you see the image captured
by the camera.
Delete
Setting
Image
Take
Picture
In-Use LED
Focus Adjustment Ring
Snapshot Button
Transfer to
Application
11. To adjust the focus of the image you
see, simply turn the focus adjustment
ring on the front of the camera in either
direction until you see the clearest
image.
ˆ
Software Operation
Size
Exit
Delay Time
RECORDING VIDEO CLIPS
OR CAPTURING STILL
IMAGES
Use the camera with the supplied application
software to record video clips and capture
still images.
USING TWAIN TO ACQUIRE
IMAGES
Use the camera with the suppli ed T WAIN application software to acquire pictures using
the supplied image editing program, other
image editing programs, or other programs
that can accept images. Any program that
supports TWAIN can access the camera and
make full use of its functions. These pro-
Uninstalling the Software Driver
If you need to remove the driver, go to
trol Panel
grams
click
stalling/Testing the Software/Hardware” on
Page 4).
grams include Presto ! M r. Pho to, MGI PhotoSuite, Adobe PhotoShop, CorelDraw, Ulead
Photo Explorer, MetaCreation Painter, Adobe PhotoDeluxe, Ulead PhotoImpact, NewSoft Presto! PageManager, etc.
This section describes the TWAIN inter face
in detail and explains all the c am era s etti ngs .
then double click
. Select the driver for your camera,
Add/Remove
, then reinstall it (see “In-
Add/Remove Pro-
Con-
Using Camera Commands
Note:
The steps in this section are general
descriptions of actions you can take to use
your camera’s commands. The screens you
actually see might differ from those documented here.
6
Software Operation
Page 7

After you install the camera and software,
follow these steps to fi nd and use th e camera
commands.
Note:
The larger the image size you choose,
the more memory space it occupies and the
longer the file takes to transfer.
1. From the application software you are
using, select
iCam320
as the source.
2. From the application software you are
using, acquire the camera. The TWAIN
window opens and you see the image
captured by the camera.
Image Forma t S e tti n g s
You can choose different image sizes, depending on your monitor’s display si ze. The
application software offers five image size
choices. Select lower image sizes for lowresolution images or high image sizes
for high-resolution images.
Size
To change the image size, click on
the TWAIN window. The
Still Image
appears.
on
screen
Color Space/Compression
— Your camera
can work with video images that are processed with characteristics called
space
and
compression
. Your camera’s de fault color space/compression setting is
Advanced users can adjust this value to
SP62, IYUV
, or
RGB24
.
color
I420
I420
Capturing and Transferring
Images
Once you open the TWAIN window, the process used to capture and transfer images is
the same, regardless of the application software you used with your camera.
Note
: Depending on the application software
you use to capture and transfer images, the
steps you use might be different than these
steps.
1. Start the application software you want
to use to capture and transfer images.
2. Use the application software you chose
to scan a new picture. The target image
appears.
3. To capture an image, press the snapshot button on top of the camera or click
Take Picture
on
The camera freezes t he image and displays it on the left screen of the TWAIN
window.
on the TWAIN window.
.
,
Size
— Your camera’s default image size
setting is
value to
480
320 * 240
160 * 120, 176 * 144, 352 * 288
, but you can adjust this
.
640*
, or
Software Operation
4. To take more than one photo or direct
transfer an image to an application, click
Delay Time
on the lower right side of
the screen, then click the related button.
The
Setup Self Time
dialog box
appears.
5. To repeatedly tak e a p hoto, click on
picture repeatedly
, then select a display
Take
interval (from 1 to 100 s ec ond s) for e ac h
7
Page 8

picture. The still images you selected
appear, one by one, on the left side of
the screen at the time interval you
selected.
6. To adjust a photo’s quality to your pref-
Setting
erence, click
on the TWAIN window, then adjust the video setting or the
video processor/amplifier (shown under
“Adjusting Video Setting” on Page 8 and
“Adjusting Video Proc Amp (Processor/
Size
Amplifier)” on Page 8). Or, click
to
adjust the photo’s image size.
7. To transfer a photo to your application
software for future editing or posting,
click the photo on the left side of the
screen, then click
tion
. The photo you selected is trans-
Transfer To Applica-
ferred to your application software.
8. To delete an unwanted photo, click the
Delete
photo then click
.
9. To return to the TWAIN-compliant application software, click
Exit
.
ADJUSTING VIDEO SETTING
To adjust your camera’s video settings, click
Setting
on
erties
on the TWAIN window. The
screen appears.
Prop-
For the best results, follow these hints:
Brightness and Contrast
— Your camera
comes with an intelligent light detector that
automatically adjusts the light source’s
brightness according to your environment’s
ambient light. You can also slide
Contrast
and
(also known as tone correction)
Brightness
according to the way your environment is lit.
Hue
— Slide
Hue
to adjust the hue o f the co l-
or you see to your preferences.
Saturation
— Slide
Saturation
to adjust the
image’s color intensity. The higher the saturation level (up to 20), the greater the color
intensity. If you adjust the saturation level to
0 (zero), the image appears in gray scale.
Sharpness
— Slide
Sharpness
to adjust the
image’s sharpness to your preferences. Increasing the sharpness sharpens the image,
decreasing it blurs the image.
White Balance
— Your camera automatically adjusts the color you see (called white balance) according to the ambient light in your
environment. You can also slide
ance
to adjust the white balance you see
White Bal-
through the camera.
Default
— Return all settings to their default
values.
ADJUSTING VIDEO PROC
AMP (PROCESSOR/
AMPLIFIER)
Your camera’s video processor/amplifier lets
you adjus t more of the camer a’s video settings. To adjust the camera’s video proces-
Setting
sor/amplifier settings, click on
TWAIN window. The
pears. Then click on
Properties
8
Software Operation
screen.
Properties
Video Setting
on the
screen ap-
on the
Page 9

Type:
For the best results, follow these hints.
Bandwidth
Your camera and other USB devices connected to your computer use differing
amounts of
bandwidth
(an amount of information per unit of time) as they work with the
computer. The USB controller in your computer has a fixed amount of bandwidth,
which all attached USB devices must share.
Your camera’s default bandwidth setting is
You might need to adjust this value in either
of the following circumstances:
USB Controller Bandwidth Ex-
•
ceeded
happens, select
appears in Windows. If this
5
to reduce t he amou nt
of USB bandwidth used by the camera.
Note:
Selecting 5 might reduce the c am -
era’s frame rate.
• The camera’s frame rate is too slow for
7
your needs. If this happens, select
to
increase the amount of USB bandwidth
used by the camera.
Auto Exposure
Adjust these values in any of the following
circumstances.
•Select
Band 50Hz
if your AC power
source’s frequency is 50 Hz.
•Select
Band 60Hz
if your AC power
source’s frequenc y i s 6 0 Hz (m os t AC
power in the United States is 60 Hz).
•Select
Normal AE
(Auto Exposure) to
set the camera to its auto exposure
mode.
Speed:
•Select
Stop AE
•Select
to stop auto exposure.
Fast
to expose the image to
light at fast speed.
Medium
•Select
to expose the image
to light at medium speed.
•Select
Slow
to expose the image to
light at sl ow speed.
Color Correction
6
.
Adjust these values in any of the following
circumstances.
AWB
(Auto White Balance):
•Select
Stop AWB
to turn off auto white
balance.
Fast
•Select
to turn on fast auto white
balance.
•Select
Medium
to turn on medium
auto white balance.
Slow
•Select
to turn on slow auto white
balance.
Light Source:
Overall
•Select
for images using a mixture of light sources, or if you are not
sure what type of light source will be
available.
Software Operation
9
Page 10

•Select
•Select
ˆ
This section provides information about maintaining the camera and helping you solve problems you might encounter while using it. If you continue to experience problems, or the problem you have is not covered in this manual, contact your local RadioShack store.
The camera does not work. Make sure the camera is connected correctly to the com-
Home
for images using a typi-
cal home light source.
Office
for images using a typi-
cal office light source.
•Select
Troubleshooting
Problem Solution
puter.
Outdoor
outdoor light source.
for images using an
No capture device
found
appears.
Camera not
directed
Image display window appears black, blue, or green
or no image appears.
No camera imag e or no motion in video.
appears.
Make sure the camera is connected correctly to the computer.
Locate the camera in the Windows
Multimedia
click
vices
. If the camera is not listed, unplug the camera, plug it
in again, then reinstall the driver (see “Installing/Testing the
Software/Hardware” on Page4). If the camera is listed but
other cameras are also installed, disable all cameras, enable the camera, then try again.
To remove the driver, go to
tem
the driver for your camera, click
driver (see “Installing/Testing the Software/Hardware” on
Page 4).
Unplug the camera then plug it back in. Then restart your
computer.
Reinstal l the software.
Make sure the camera is connected correctly to your com-
puter and the lens is clean and not obstructed by other objects.
Unplug the camera then plug it back in. Then restart your
computer.
Device Manager
, click
, click
Devices
Control Panel
, and select
, then select
Control Panel
Image Devices
Remove
, then reinstall the
Video Capture De-
, double click
, double
Sys-
. Select
10
Troubleshooting
Page 11

Problem Solution
After installing the camera
software, the software does
not detect the camera.
Blurred video/still image. 1. Adjust the focus (see “Installing/Testing the Software/
Camera software stops
working after installing other application programs.
USB Controller
Bandwidth Exceeded
appears.
If you have any questions regarding the bundled application software, contact the respective
software companies listed in the software’s owner’s manuals.
Some computers are shipped without the USB port mode
enabled. To enable the USB port, you must run your computer’s CMOS setup program. This setup program is only
available when you power u p the c omput er. Sinc e the p rocedure is different for each system, refer to your computer’s
owner’s manual for details.
Hardware” on Page 4).
2. Use the application software to adjust the sharpness
settings.
Installing other applications sometimes changes the computer’s system registry so that the camera no longer works.
If this happens, reinstall the camera’s driver (see “Installing/
Testing the Software/Hardware” on Page 4).
Adjust the bandwidth within your camera’s video processor/
amplifier settings. See
sor/Amplifier)” on Page 8.
If your computer has more than one USB port, try plugging
the camera into a different port.
Unplug any unneeded USB devices.
“Adjusting Video Proc Amp (Proces-
CARE
Keep the camera dry; if it gets wet, wipe it
dry immediately. Use and store the camera
only in normal temperature environments.
Handle the camera carefully; do not drop it.
Never use harsh or abrasive cleaners or organic solvents on the camera or on any of its
parts.
To remove dust and dirt, blow gently on the
camera’s lens. Moisten the lens by breathing
lightly on it.
Wipe the lens gently with a soft lint-free cloth
or an untreated lens-cleaning tissue.
Troubleshooting
Do not use a cleaning s oluti on unle ss it i s designed specifically for PC camera lenses.
Do not wipe the camera’s l ens with chemi cally treated eyeglass lens tissues as it might
scratch the lens.
Modifying or tampering with the camera’s internal components can cause a malfunction
and might invalidate its warranty. If your
camera is not performing as it should, take it
to your local RadioShack store for assistance.
11
Page 12

Limited Ninety-Day Warranty
This product is warrante d by RadioShack aga inst manufacturi ng defects in mate rial and workma nship under normal u se for nine ty (90) days from the date of purchase fro m RadioShack companyowned stores and authorized RadioShack franchisees and dealers. EXCEPT AS PROVIDED
HEREIN, RadioShack MAKES NO EXPRESS WARRANTIES AND ANY IMPLIED WARRANTIES,
INCLUDING THOSE OF MERCHANTABILITY AND FITNESS FOR A PARTICULAR PURPOSE,
ARE LIMITED IN DURATION TO THE DURATION OF THE WRITTEN LIMITED WARRANTIES
CONTAINED HEREIN. EXCEPT AS PROVIDED HEREIN, RadioShack SHALL HAVE NO LIABILITY OR RESPONSIBILITY TO CUSTOMER OR ANY OTHER PERSON OR ENTITY WITH RESPECT TO ANY LIABILITY, LOSS OR DAMAGE CAUSED DIRECTLY OR INDIRECTLY BY USE
OR PERFORMANCE OF THE PRODUCT OR ARISING OUT OF ANY BREACH OF THIS WARRANTY, INCLUDING, BUT NOT LIMITED TO, ANY DAMAGES RESULTING FROM INCONVENIENCE, LOSS OF TIME, DATA, PROPERTY, REVENUE, OR PROFIT OR ANY INDIRECT,
SPECIAL, INCIDENTA L, OR CONSEQUENT IAL DAMAGES, EVEN I F RadioShack HAS BEEN ADVISED OF THE POSSIBILITY OF SUCH DAMAGES.
Some states do not allow limitations on how long an implied warranty lasts or the exclusion or limitation of incidental or consequential damages, so the above limitations or exclusions may not apply to
you.
In the event of a pro duct defect duri ng the warranty period, take t he product and th e RadioShack
sales receipt as proof of purchase date to any RadioShack store. RadioShack will, at its option, unless otherwise provid ed by law: (a) correct the de fect by product repair with ou t ch arg e f or par ts a nd
labor; (b) replace the product w ith one of the same or similar design; or (c) refund the purch ase
price. All replace d parts a nd produ cts, and p roducts on which a refund is made, become th e property of RadioShack. New or recond itioned parts and products may be used in the performance of
warranty service. Re paired or repl aced parts and pro ducts are warr anted for the r emainder of the
original warranty period. You will be charged for repair or replacement of the product made after the
expiration of the warranty period.
This warranty does not cover: (a) damage or failure caused by or attributable to acts of God, abuse,
accident, misuse, improper or abnorm al usag e, failure to fo llow instru ction s, improp er instal lation or
maintenance, alteratio n, lightning or other incidence of excess voltage or cur rent; (b) any repairs
other than those provided by a RadioShack Authorized Service Facility; (c) consumables such as
fuses or batteries; (d) cosmetic dama ge; (e) tra nsporta tion, shippi ng or insura nce costs; o r (f) costs
of product removal, installation, set-up service adjustment or reinstallation.
This warranty give s you specific le gal rights, an d you may also h ave other right s which vary fr om
state to state.
RadioShack Customer Relations, 200 Taylor Street, 6th Floor, Fort Worth, TX 76102
We Service What We S ell
12/99
RadioShack Corporati on
Fort Worth, Texas 76102
25-3006
03A01
Printed in China
 Loading...