

Page 1

Hi-Power CD+G
Karaoke System
Owner’s Manual
Please read before using this equipment.
Page 2
ˆ
The FCC Wants You to Know
This equipm ent has been tested and found
to comply with the limits for a Class B digital
device, pursuant to Part 15 of the
. These limits are designed to provide
Rules
FCC
reasonable protection against harmful interference in a residential installation. This
equipment generates, uses and can radiate
radio frequency energy and, if not installed
and used in accordance with the instruc tions ,
may cause harmful interference to radio
communications.
However, there is no guarantee that interference will not occur in a particular installation.
If this equipment does cause harmful interference to radio or television reception,
which can be determined by turning the
equipment off and on, the user is encouraged to try to correct the interference by one
or more of the following measures:
• Reorient or relocate the receiving
antenna.
• Increase the separation between the
equipment and receiver.
• Connect the equipment into an outlet on
a circuit different from that to which the
receiver is connected.
• Consult your local RadioShack store or
an experienced radio/TV technician for
help.
WARNING:
shock hazard, do not expose this product to rain
or moisture.
To reduce the risk of fire or
CAUTION
RISK OF ELECTRIC SHOCK.
DO NOT OPEN.
CAUTION:
ELECTRIC SHOCK, DO NOT REMOVE
COVER OR BACK. NO USER-SERVICEABLE PARTS INSIDE. REFER SERVICING
TO QUALIFIED PERSONNEL.
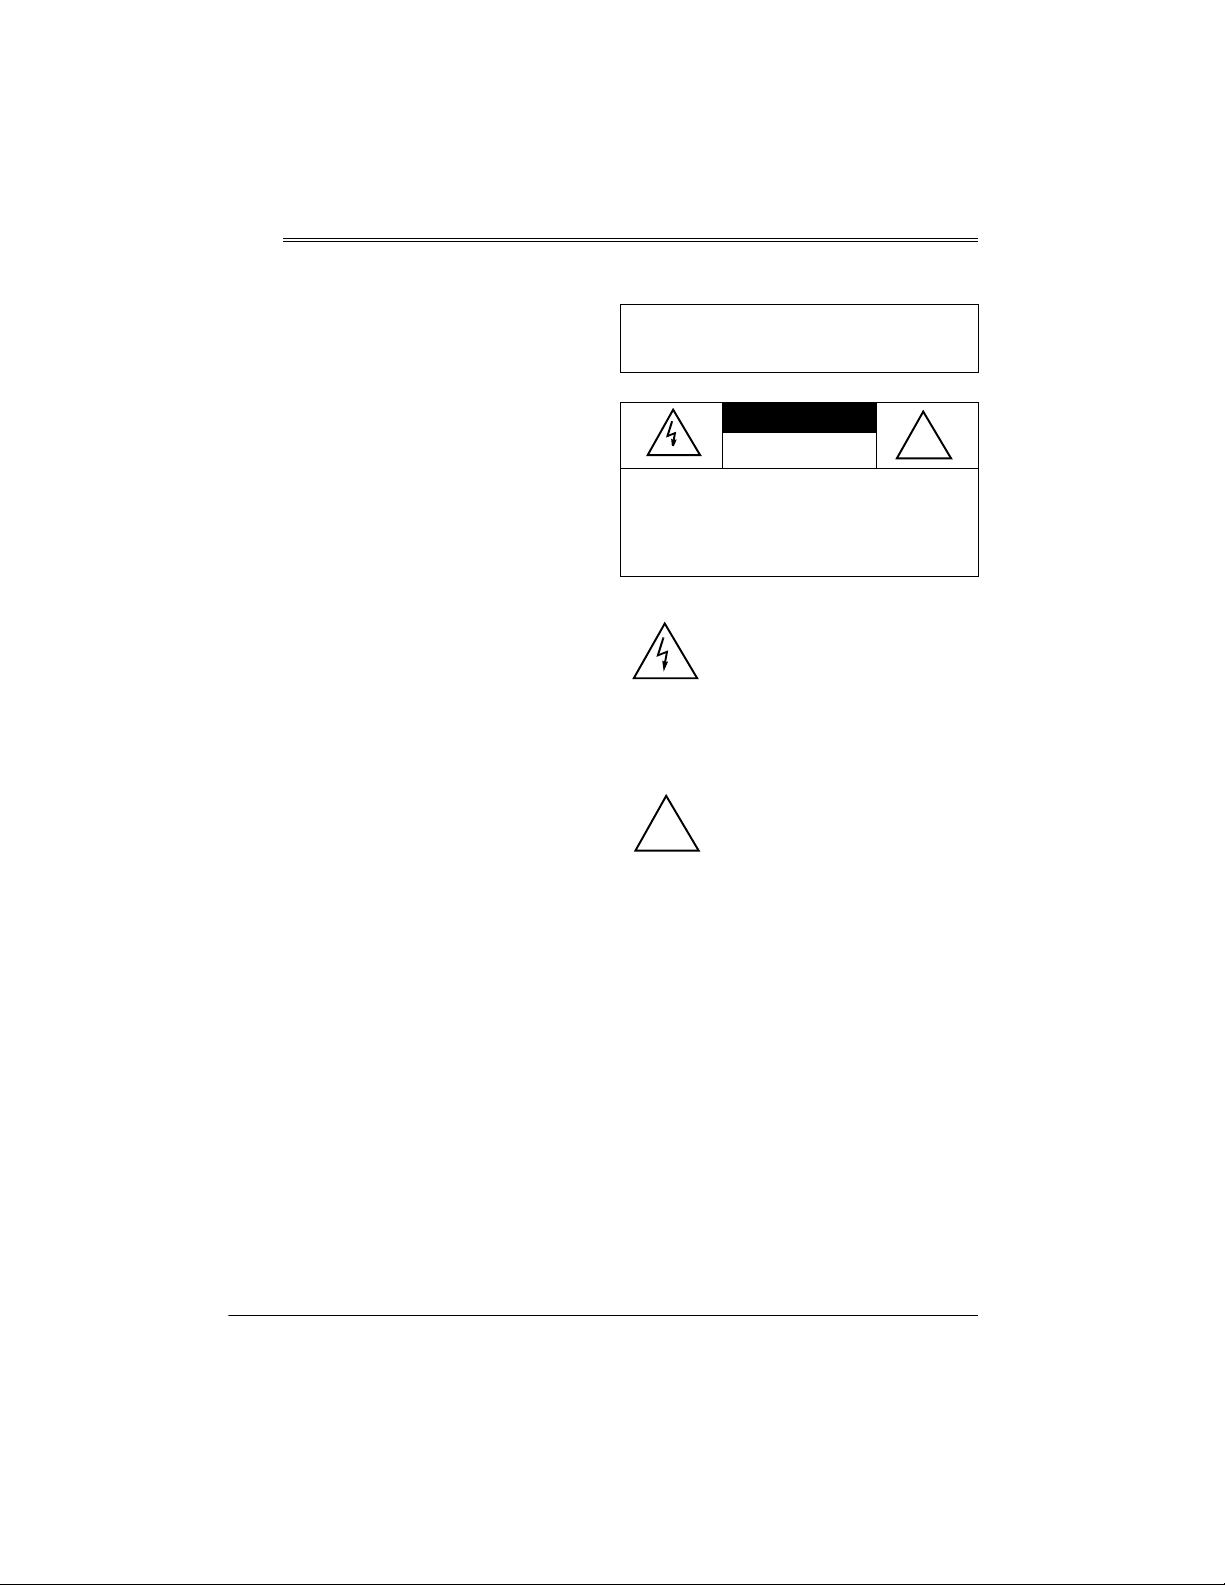
!
The graphical symbols with supplemental markings are located on the back of the product.
TO REDUCE THE RISK OF
This symbol is intended to alert
you to the presence of uninsulated dangerous voltage within
the product’s enclosure that might
be of sufficient magnitude to constitute a risk of electric shock. Do
not open the product’s case.
This symbol is intended to inform
you that important operating and
maintenance instructions are
included in the literature accompanying this product.
!
• If you cannot eliminate the interference,
the FCC requires that you stop using
your karaoke system.
You must use shielded interface cables with
this equipment.
©
2000, 2001 RadioShack Corporation.
RadioShack and RadioShack.com are trademarks used by RadioShack Corporation.
2
All Rights Reserved.
The FCC Wants You to Know
Page 3

ˆ
Contents
Features .................................................................................................................................. 4
Connections ........................................................................................................................... 5
Connecting Microphones ................................. ..... .................................. ...... ..... ...... ......... 5
Connecting Other Audio Components .............................................................................. 5
Connecting Power ........................................................... .................................. ...... ..... .... 6
Installing the Remote Control’s Batteries ......................................................................... 6
A Quick Look at Your Karaoke System ............................................................................... 7
Singing Along/Quick Start .................................................................................................... 8
Singing with a CD/CD+G or Cassette Tape ...................................................................... 8
Singing With Another Audio Source ................................................................................. 9
CD/CD+G Player Operation ................................................................................................... 9
Using the Remote Control ................................................................................................ 9
Playing a CD/CD+G ......................................................................................................... 9
Special CD/CD+G Player Features ................................................................................ 10
Programmed Play ............................................ ..... ...... ..... ...... .................................. ..... ... 11
CD/CD+G Care Tips ....................................................................................................... 12
Cassette Deck Operation .................................................................................................... 12
Loading a Tape ............................................................................................................... 12
Playing a Tape ................................................................................................................ 13
Recording a Cassette Tape ............................................................................................ 13
Recording Tips ............................................................................................................... 14
Recording Your Voice with Music ................................................................................... 14
Dubbing a Cassette Tape ............................................................................................... 14
Tape Tips ........................................................................................................................ 15
Using Optional Components .............................................................................................. 15
Listening to Another Audio Source ................................................................................. 15
Listening Through Another Audio Component ............................................................... 16
Troubles hooting ................................................................................................................... 16
Care ................................................................................................................................ 17
Cleaning the Tape-Handling Parts .................................................................................. 17
Specifications ...................................................................................................................... 18
Contents
3
Page 4

ˆ
Features
Your RadioShack Hi-Power CDG Karaoke
System is one of the most versatile karaoke
systems available. It lets you be the “star” as
you sing along with your favorite recordings
on a CD, a CD+G (a compact disc with a
graphic track), a cassette tape, or a video
tape, and hear your voice with the music
through the powerful built-in speaker.
Your karaoke system's CD+G capability lets
you connect th e karaoke system to a TV or
monitor and read the lyrics of your favorite
tunes as they scroll by in front of a still video
graphic, such as a picture or drawing related
to the music.
You can sing along without video graphics
using special karaoke audio cassette tapes
(not supplied) that let you balance the volume of the original singer's voice and the
music tracks. Or, you can sing along with a
regular prerecorded cassette tape or CD.
You can also connect another audio source
(such as a stere o VCR) to the kara oke system and play a karaoke video cassette (not
supplied).
Plus, your karaoke system can be used as a
small PA system for speaking at parties or
other gatherings — just plug in the microphone and turn on the power!
Your karaoke system's features include:
CD/CD+G Player
karaoke CDs, or CD+ Gs so you can experience digital images — the latest in karaoke
fun! Plus, the player's 1-bit D/A converter
and 8 times o ver sam pl in g produce high quality sound.
50-Watt Output Power
along and listen through one of the biggest
amplifiers offered in a karaoke system.
Built-In 3-Way Speaker System
tem includes a 10-inch woofer, 4-inch
midrange speaker, and 3-inch tweeter.
— lets you play regular or
— lets you sing
— the sys-
21-Key Remote Control
most of the system's functions from up to 23
feet away.
OSD (On Screen Display)
mation including the current function (CD/
CD+G, cassette, or auxiliary) currently in use
on your TV screen.
Digital Echo Control
echo to the sound for a concert hall effect.
Digital Key Control
musical key that suits your voice best so you
can give your best performance.
Dual Cassette Decks
cassette tapes in a row , or dub from on e tape
to another.
Bass and Treble
the tone and sound to your preference and
your room's unique acoustics.
Automatic Voice Control
place the prerecorded original singer's voice
with your voice when you use a karaoke tape
or CD, so you can sing solo.
Auto-Stop
when it finishes playing or recording, to protect the tape and tape-handling parts.
30-Track Programmable Memory
you plan your own performance by programming up to 30 CD tracks in the order you
want to hear them.
25-Watt External Speaker Jack
connect an external speaker for stereo effects.
Mute
— lets you temporarily silence the
sound.
Auxiliary Input Jacks
other audio source, such as a stereo VCR or
another CD player.
— lets you precisely ad just
— automatically stops a tape
— lets you control
— displays infor-
— lets you add an
— lets you choose the
— let you play two
— lets you re-
— lets
— lets you
— let you connect a n-
4
Features
Page 5

Auxiliary Output Jacks
another audio component, such as an equalizer/booster or a PA system.
— for connecting
Audio Select
singing along to the music with or without the
original singer's voice or a stereo effect.
— lets you choose between
Automatic Search
and play any track on the loaded CD/CD+G.
Audible Se arch
particular section of track while it is playing.
Intro Scan
onds of each track on a CD/CD+G to help
you locate a c ertain track.
Repeat Play
track, or a programmed sequence of tracks.
Random Play
in random order.
ˆ
Warning:
connect the system to AC power until all other connections are complete.
— lets you play the firs t 10 sec-
Connections
To avoid electrical shock, do not
— lets you quickly locate
— lets you quickly locate a
— repeats a ll tracks, a single
— lets you play all the tracks
CONNECTING
MICROPHONES
Supplied CD+G Demo Disc
along with the music, adjust the volume of
the prerecorded voice and music, and see
the words to the music on a connected TV.
Note:
The supplied CD+G demo disc does
not include video graphics.
Dual Microphone Jacks
supplied microphone and an optional microphone simultaneously to sing duets or for
lead and background vocals.
Recording
accompanying music as you sing along with
a tape or CD/CD+G or an external audio
source connected to the system.
If you are connecting only one microphone,
plug it into
microphone, plug it into
— lets you record your voice and
MIC 1
. If you are adding a second
— lets you sing
— let you use t he
MIC 2
.
CONNECTING OTHER
AUDIO COMPONENTS
The system has two microphone jacks so
you can use the supplied microphone to sing
along to your favorite recordings, and connect an additional microphone (not supplied)
for duets or lead and background vocals.
For the best performance, the additional microphone should be a unidirectional 600ohm dynamic microphone with a
(6.35 mm) plug and an ON/OFF switch. Your
local RadioShack store has a wide selection
of microphones.
Before you connect a microphone, always
VOLUME
rotate
you are connecting an additional microphone).
to
MIN
on
MIC 1
, (and
1
/4-inch
MIC 2
Connections
You can connect an external audio source or
component to the karaoke system, so you
can sing along with other audio formats or
videos, or hear the karaoke’s sound from another speaker or a PA system. To make the
connection, you need optional audio patch
cables.
Connecting an External Audio
Source for Input
You can connect another audio source, such
as a stereo VCR or another CD player, so
you can sing along with the audio source’s
if
sound. Connect the source’s stereo audio
5
Page 6

output jacks t o
karaoke system.
Note:
If your audio source does not have
AUX OUT R and L jacks, but has only a
headphone or line o ut jack (such as on a po rtable tape or CD player), use a shielded Yadapter cord with phono jacks on each end.
Connect the single-plug end to the audio
source’s headphone or line out jack, and
connect
karaoke system.
AUX IN R
AUX IN R
and
AUX IN L
and
AUX IN L
on the
on the
Connecting an External Audio
Component for Output
You can broadcast the karaoke system’s
sound through an external audio component,
such as a PA system amplifier. Connect the
external audio compon ent ’s audio in put jacks
AUX OUT R
to
system.
and
AUX OUT L
on the karaoke
CONNECTING POWER
When you have made all other connections,
plug your system’s power cord into a standard AC outlet. STANDBY lights.
Caution:
larized plug that fits into the outlet only one
way. If the plug does not fit properly, turn it
over and try again. Do not force it.
The supplied power cord has a po-
INSTALLING THE REMOTE
CONTROL’S BATTERIES
Your karaoke system’s remote control requires two AAA batteries (not supplied) for
power. For the best performance and longes t
life, we recommend RadioShack alkaline
batteries.
Cautions:
• Use only f resh batteries of the required
size and recommended type.
Connecting an External Speaker
You can connect an external 25-watt external
speaker with 8-ohm impedance to the
karaoke system for a stereo effect. Plug the
speaker’s phono plug into
ER RIGHT CHANNEL
EXT. 8 OHM SPEAK-
on the karaoke system.
Connecting to a TV
You can connect your karaoke system to a
TV or monitor and s ee t he w o rds an d im ag es
produced by a special karaoke video cassette or CD/CD+G. Plug one end of the supplied cable into
into your TV’s VIDEO IN jack.
Note:
For TVs that do not have an audio/video input jack, use a video RF modulator.
Connect the RF modul ator to
to the TV’s 75-ohm VHF input terminal, following the instructions in the modulator’s
owner’s manual.
6
VIDEO OUT
and the other end
VIDEO OUT
and
Connections
• Do not mix old and new batteries or different types of batteries (standard, alkaline, or rechargeable), or rechargeable
batteries of different capacities.
Follow these steps to install batteries.
1. Slide the battery compartment cover in
the direction of the arrow to remove it.
2. Place the batteries in the compartment
as indicated by the polarity symbols (+
and –) marked inside.
3. Replace the cover.
You can use the remote control from up to 23
feet (7 meters) away from the karaoke system. When the remote control stops operating properly, replace the batteries.
Warning:
and properly. Do not burn or bury them.
Caution:
control for a month or more, remove the batteries. Batteries can leak chemicals that can
destroy electronic parts.
Dispose of ol d batteries prompt ly
If you do not plan to use t he remo te
Page 7

ˆ
A Quick Look at Your Karaoke System
AUTO VOICE CONTROL
— While you play a
karaoke audio cassette
tape or CD, you can use
AUTO VOICE CONTROL
to replace the prerecorded voice with your voice.
When you stop singing
into the microphone, the
prerecorded singer’s
voice returns.
(Auto voice control works
like your karaoke system’s vocal cancel feature, but you can adjust it
to your own voice).
To turn on voice control,
AUTO VOICE
rotate
CONTROL
it clicks. Then adjust it toward
loud voice or toward
if you have a soft voice.
When you finish, rotate it
counterclockwise until it
clicks to turn it off.
BASS/TREBLE
Adjust
TREBLE
tomize the sound.
Both of these controls let you adjust
the sound level in a
specific frequency
range.
clockwise until
LOW
if you have a
BASS
to cus-
HIGH
—
and
MUTE
— Press
control to temporarily silence the sound.
appears and MUTE on the
087(
087(
087(087(
karaoke system lights. Press
again to restore sound.
MUTE
on the remote
MASTER VOLUME
— Set the karaoke
system to the desired vol ume level by
repeatedly pressing
MASTER VOLUME
toward
UP
MUTE
.
DOWN
or
ECHO
— You can adjust
to add an echo effect to your
voice while you sing. Repeatedly press
appears to set echo.
MODE
until
ECHO
.$5$2.(
.$5$2.(
.$5$2.(.$5$2.(
KEY CONTROL
To adjust the key of
recorded music
from your karaoke
system to match
your vocal range,
repeatedly press
MODE
.$5$2.(
.$5$2.(
.$5$2.(.$5$2.(
then repeatedly
press
TROL
DOWN
key) or toward UP
(for a higher key)
as you sing along.
The key control remains set until you
adjust it or switch
out of the karaoke
mode.
until
KEY CON-
toward
(for a lower
—
appears,
A Quick Look at Your Karaoke System
7
Page 8

ˆ
Singing Along/Quick Start
The instructions in this section provide a
quick reference to help you get started singing along with your karaoke CD/CD+G system.
SINGING WITH A CD/CD+G
OR CASSETTE TAPE
Follow these steps to sing along with a CD/
CD+G (such as the one supplied) or a cassette tape.
1. Press
2. Press
3. Set
4. Repeatedly press
5. Repeatedly press
STANDBY
system. STANDBY on the front of the
karaoke system turns off.
OPEN/CLOSE
CD+G in the CD compartment. Press
OPEN/CLOSE
ment.
Or, if you want to sing along with a pre-
recorded tape, press
load a tape in
close the cassette door.
FUNCTION SELECTOR
TAPE
. CD/CDG or TAPE lights.
appears.
Note:
If you want to use the system to
play music without singing along, press
MODE
1250$/
1250$/
.
1250$/1250$/
steps for playing a CD/CD+G or cassette.
AUDIO SELECT
or
until one of the following appears on the
display.
/()7
/()7
— to enjoy the music without the
•
/()7/()7
original singer’s voice, so you can
sing alone.
to turn on the karaoke
, then load a CD or
to close the CD compart-
STOP/EJECT
TAP E 1
MODE
appears. Then follow the
AUDIO
on the remote control
TAP E 2
or
to
until
on the system
and
, then
CD/CDG
.$5$2.(
.$5$2.(
.$5$2.(.$5$2.(
or
5,*+7#
5,*+7#
•
•
•
6. To start play, press
PLAY on a connected tape deck).
7. If you are using a karaoke cassette tape
or CD+G, adjust
BASS
erences.
8. Set each connected microphone’s ON/
OFF switch to ON. Sing directly into the
microphone along with the mu si c.
9. Adjust
UME
phone.
10. Adjust
desired reverberation and pitch.
11. Adjust
desired effect.
Note:
recorded ca ssette tape or C D, you cannot adjust the v ol ume o f t he pre r ec orde d
original s inger’s voice in re lation to the
music.
12. When you finish, press
karaoke system. Then press
CLOSE
and remove the CD.
— to enjoy the original singer’s
5,*+7#5,*+7#
voice. (You hear the music at a low
volume in the background).
91# &$
91# &$ 1& (/ #
1&(/#
91# &$91# &$
and original sing along, the original
singer’s voice is cancelled. (
&$1&(/
&$1&(/
&$1&(/&$1&(/
TV.)
/()7
/()7
/()7/()7
original singer’s voice and the background music. (
on a connected TV.)
to adjust the volume of each micro-
— to enjoy both the music
1&(/#1&(/#
92&$/
92&$/
92&$/92&$/
also appears on a connected
5,*+7
5,*+7
and
, and
MIC 1 VOLUME
ECHO
AUTO VOICE CONTROL
With a regular (non-karaoke) pre-
to open the compartment door
— to enjoy both the
5,*+75,*+7
67(5(2
67(5(2
67(5(267(5(2
PLAY/PAUSE
MASTER VOLUME
TREBLE
to match your pref-
and/or
KEY CONTROL
and
also appears
MIC 2 VOL-
for the
for the
STOP
on the
OPEN/
(or
,
8
Singing Along/Quick Start
Page 9

13. To stop a tape, press
the deck you are using. Press
EJECT
again to open the cassette com-
partment door and remove the tape.
14. Set each microphone’s ON/OFF switch
to OFF, then press
the system. STANDBY lights.
STOP/EJECT
STANDBY
on
STOP/
to turn off
2. Set
3. Turn on the audio source or other com-
4. Use the karaoke system’s controls to
FUNCTION SELECTOR
lights.
ponent.
adjust the sound.
to
AUX
$8;
$8;
.
$8;$8;
SINGING WITH ANOTHER
AUDIO SOURCE
If you connected another audio source or
other audio components, follow these steps
to sing along with that audio source.
1. Press
ˆ
STANDBY
STANDBY turns off.
CD/CD+G Player Operation
USING THE REMOTE
to turn on the system.
PLAYING A CD/CD+G
CONTROL
The remote control makes it easy to use the
karaoke system while playing a CD/CD+G.
All of the buttons that operate the CD/CD+G
player on the system are duplicated on the
remote. Plus,
To use the remote control, point it toward
REMOTE SENSOR o n the karaoke system
and press the buttons.
Notes:
• Make sure you have a clear path
between the remote control and the sensor.
• Weak batteries or direct sunlight on the
remote sensor reduce the remote control’s operating range.
MUTE
is only on the remote.
5. Set each connected microphone’s ON/
OFF switch to ON. Sing directly into the
microphone along with the mu si c.
6. Use
7. When you finish, set each microphone’s
1. Press
2. Set
3. Press
4. Place a CD/CD+G in the compartment
5. Press
6. If
MIC 1 VOLUME
UME
to adjust your voice’s volume.
ON/OFF switch to OFF, press
to turn off the system, then turn off the
audio source or other component.
STANDBY
STANDBY on the front of the karaoke
system turns off.
FUNCTION SELECTOR
CD/CD+G lights.
OPEN/CLOSE
CD+G compartment.
tray, label side up.
OPEN/CLOSE
CD/CD+G compartment. You see the
CD/CD+G’s total number of tracks and
total playing time.
.$5$2.(
.$5$2.(
.$5$2.(.$5$2.(
MODE
appears, repeatedly press
1250$/
1250$/
until
1250$/1250$/
and/or
to turn on the system.
to open the CD/
again to close the
appears.
MIC 2 VOL-
STANDBY
CD/CDG
to
.
CD/CD+G Player Operation
9
Page 10

7. Press
begins to play from Track 1 and the
track’s elapsed play time appears.
PLAY/PAUSE
. The CD/CD+G
• Repeatedly press
to search forward to the beginning
of the desired track.
SEARCH/SKIP
Note:
While a CD/CD+G is playing,
REMAIN
press
time of the cur rent disc .
Press
elapsed time display.
8. Use the controls to adjust the sound. To
sing along, see “Singing Along/Quick
Start” on Page 8.
9. The system automatically stops play at
the end of the CD/CD+G’s last track. To
stop it sooner, press
CD+G’s total number of tracks and playing time appear.
Notes:
• To temporarily stop play, press
PAUSE
the elapsed time stops and flashes. To
resume play, press
• During playback, if the system is subjected to a sudden shock or jolt, the
speed of rotation might change, or some
noise might be produced. This is not a
malfunction.
to see the remaining play
5(0$,1
5(0$,1
appears.
5(0$,15(0$,1
REMAIN
. The track number appears and
again to return to the
STOP
. The CD/
PLAY/
PLAY/PAUSE
again.
SPECIAL CD/CD+G PLAYER
FEATURES
Automatic Se a rc h
The automati c se arc h fe atur e le ts yo u quic kly locate the beginning of any track on a CD/
CD+G, including the track currently playing.
You can us e automatic searc h when a CD/
CD+G is playing or stopped.
If a CD/CD+G is playing:
•Press
SEARCH/SKIP
back to the beginning of the current
track.
once to skip
• Repeatedly press
to search back ward to the begin-
ning of the desired track.
If the CD/CD+G is stopped or paused, repeatedly press
SEARCH/SKIP
the number of the track you want to play,
then press
player starts playing the selected track.
SEARCH/SKIP
until the system displays
PLAY/PAUSE
SEARCH/SKIP
or
. The CD/CD+G
Audible Search
On a CD, hold down
SKIP
search rapidly forward or backward during
play. The CD plays rapidly, and you hear the
sound at a high speed and low volume. Release the button to resume normal play.
SEARCH/SKIP
or
SEARCH/
to
Intro Scan
You can set the system to play the first 10
seconds of each track on the CD/CD+G so
you can quickly find the one you want.
To begin scanning, press
pears and th e kara oke sys tem pl ays the f irst
10 seconds of each track, beginning with the
first track, then stops.
You can also use repeat play and search
during intro play.
To cancel intro play during or after play,
INTRO
press
intro scan during play, the CD/CD+G player
begins norm al play.
,1752
,1752
.
disappears. If you can ce l
,1752,1752
INTRO
.
,1752
,1752
,1752,1752
ap-
Repeat Play
You can repeat a single track, all the tracks
on a CD/CD+G, or an entire programm ed sequence.
10
CD/CD+G Player Operation
Page 11

To continuously repeat a single track
REPEAT
ing.
once while the desi red track is play-
5(3($7#4
5(3($7#4
5(3($7#45(3($7#4
appears.
, press
To continuously repeat all tracks on the CD/
, repeatedly press
CD+G
$//
$//
appears.
$//$//
REPEAT
until
5(3($7
5(3($7
5(3($75(3($7
PROGRAMMED PLAY
You can program the CD/CD+G player during normal or karaoke operation to play up to
30 tracks in any order you choose, and you
can program the same track to play more
than once.
To cancel repeat play during or after play
REPEAT
press
cancel repeat play during play, the CD/
CD+G player resumes normal play.
5(3($7
5(3($7
.
5(3($75(3($7
disappears. If you
Random Play
You can set the system to play al l tracks on a
loaded CD/CD+G in random order before or
during play.
5$1'20
5$1'20
5$1'205$1'20
, press
, press
disap-
To set up random play before play
RANDOM
flashes, then the first randomly selected
track begins to play and its ela ps ed pl ay time
appears. The karao ke sy stem pl ays a ll t racks
in random order, then automatically stops.
5$1'20
5$1'20
.
5$1'205$1'20
appears and [ ] briefly
To set up random play during play
RANDOM
track finishes playing, [ ] briefly flashes,
then the karaoke system randomly selects
the next track and begin to play.
Notes:
• To replay the current track, press
• To play the next random track, press
5$1'20
5$1'20
.
5$1'205$1'20
SEARCH/SKIP
SEARCH/SKIP
appears. After the current
.
.
To stop the CD player at any time during ran-
STOP
dom play
number of tracks and playing time appear.
When you press
tem resumes normal play.
, press
. The CD/CD+G’s total
PLAY/PAUSE
again, the sys-
To cancel random play and resume normal
, press
play
pears and the CD/CD+G player resumes
normal play.
RANDOM
again.
,
1. Repeatedly press
displays the total number of tracks and
the total playing time.
2. Press
3. Repeatedly press
4. Press
5. Repeat Steps 3 and 4 to program up to
6. Press
PROGRAM
gram number) appear and the track
number flashes.
erase the programmed sequence.
SEARCH/SKIP
track.
PROGRAM
track. The programmed track’s number
flashes, and the total playing time of the
programmed tracks appears.
Note:
If you enter the wrong track number, you can erase the sequence by
pressing
Step 1.
30 tracks.
Note:
tracks. If you try to program a 31st track,
the karaoke system records over the
first prog rammed track.
grammed tracks. The fi rst track number
appears with the elapsed time of the
track in play.
Notes:
• You cannot use random play to play a
• You can repeat or search through
STOP
You cannot store more than 30
PLAY/PAUSE
programmed sequence.
programmed tracks. To repeat the
STOP
until the system
352*
352*
.
and
352*352*
352*
352*
appears until you
352*352*
SEARCH/SKIP
to select the desired
to store the selected
twice. Then start over at
to play the pro-
3333 ²²²² 4444
(pro-
or
CD/CD+G Player Operation
11
Page 12

programmed sequence, see “Repeat
Play” on Page 10. To search through
programmed tracks, see “Automatic
Search” on Page 10.
CD/CD+G CARE TIPS
Even though a compact disc is durable, treat
the CD surface with care.
7. Programmed play automatically stops at
the end of the last programmed track. To
stop the karaoke system at any time
during programmed play, press
The CD/CD+G’s programmed number
of tracks and playing time appear.
To review the programmed sequence
play is stopped, repeatedly press
To replace a programme d track
GRAM
until the position number of the track
you want to replace appears. Then repeat
Steps 3 and 4 to select and store the new
track.
STOP
, while
PROGRAM
, press
PRO-
To erase a programmed sequence during
programming
, press
twice.
STOP
To erase a programmed sequence after programming
twice.
, press
PROG
then press
STOP
To erase a programmed sequence at any
, press
time
BY
. STANDBY lights.
OPEN/CLOSE
. Or, press
STAND-
• Do not write on either side of the CD/
CD+G, particularly the non-label side.
(Signals are read from the non-label
.
.
side.)
• Do not store CDs/CD+Gs in high temperature or high humidity areas. They
might warp.
• Keep CDs/CD+Gs dry. A water drop can
act as a lens and affect the laser beam's
focus.
• Always handle a CD/CD+G by the
edges to avoid fingerpri nts . Alway s kee p
it in its protective case or sleeve when it
is not in us e. F ing erpr int s an d scr at ches
on the CDs/CD+Gs surface can prevent
the laser beam from correctly reading
the digital information. If the CD/CD+G
gets scratched, use RadioShack
Scratch ‘n Fix to repair the disc.
ˆ
Cassette Deck Operation
You can play a cassette tape in either cassette deck, and record tapes in TAPE 1.
Notes:
• The remot e control i s for the C D player
only.
• Do not use metal cassette tapes in the
cassette deck.
12
Cassette Deck Operation
LOADING A TAPE
1. Take up any slack in the tape by turning
the cassette’s hub with a pencil or your
finger. If you do not remove excess
slack, the tape might become tangled in
the record/playback mechanism. Avoid
touching the tape.
2. Press
3. Load the cassette tape with its open
STOP/EJECT
compartment.
edge facing down, the side you want to
to open the cassette
Page 13

play or record on facing you, and the full
reel to the left.
4. Close the compartment door.
Notes:
• To temporarily stop play, press
PAUSE
Press
again to resume play.
PAUSE
.
PLAYING A TAPE
You can play a cassette tape in either TAPE
1 or TAPE 2, or you can load cassette tapes
in both decks and play them consecutively.
to
PLAY
MAS-
TAPE
to
Warning:
TER VOLUME
To protect your hearing, set
MIN
to
before you play a cas-
sette tape.
Normal Play
Follow thes e st eps to pla y a ca sset te ta pe i n
TAPE 1 or TAPE 2.
1. Load a cassette tape in TAPE 1 or TAPE
2.
2. Press
3. Set
4. Press
5. Use the controls to adjust the sound. To
6. Press
7. Turn the tape over and press
STANDBY
(if necessary) to turn on
the system. STANDBY turns off.
FUNCTION SELECTOR
TAPE lights.
PLAY
on the deck where the tape
is loaded.
sing along with the cassette tape, see
“Singing with a CD/CD+G or Cassette
Tape” on Page 8.
Press
STOP/EJECT
STOP/EJECT
to stop the tape.
again to open the
cassette compartm ent. The n remo ve the
cassette tape.
play the other side.
• To rapidly wind the tape forward or bac kward, press
STOP/EJECT
FAS T-F
when you reach the
or
REWIND
desired section.
Consecutive Play
Follow these steps to play one side of the
tape in TAPE 2, then play one side of the
tape in TAPE 1.
1. Load a cassette tape in TAPE 1 and
TAPE 2.
2. Press
STANDBY
(if necessary) to turn on
the system. STANDBY turns off.
3. Set
FUNCTION SELECTOR
TAPE lights.
PLAY
PAUSE
on TAPE 2.
PLAY
then
on TAPE 1.
.
4. Press
5. Press
The tape in TAPE 2 plays to the side’s end.
Then the tape in TAPE 1 plays to its side’s
end.
RECORDING A CASSETTE
TAPE
You can become a recording star! Your
karaoke system lets you record your voice
on a blank or reusable tape as you sing
along with a special karaoke cassette tape,
video tape, CD/CD+G or another audio
source. You can also rec ord fro m an ext erna l
audio source or dub from one cassette tape
to another.
to
. Press
TAPE
.
Cassette Deck Operation
13
Page 14

RECORDING TIPS
• Tape quality greatly affects the quality of
the recording. We recommend
RadioShack Supertape Extended
Range or Low-Noise Type 1 tape. We
do not recommend long-play cassette
tapes, such as C-120s, because they
are thin and can easily tangle in the cassette mechanism. For low-noise, siderange recordings, use normal-bias tape.
• Before re cording, be sure the tape you
are using has its e rase-pro tectio n tabs in
place. See “Preventing Accidental Erasure” on Page 15.
• Recording automatically stops when the
tape in TAPE 1 reaches the end. To
record on the other side, turn over the
tape.
RECORDING YOUR VOICE
WITH MUSIC
Follow these steps to record your voice
along with music from a tape in TAPE 2, a
CD/CD+G, or an audio source connected to
the system’s AUX INPUT jacks.
1. Load a blank tape, or one that you want
to record over , i nto TAPE 1, with the side
you want to record on facing you, and
the full reel to the left.
2. Follow Steps 1–10 unde r “Sing ing w ith a
CD/CD+G or Cassette Tape” on Pa ge 8
or Steps 1–6 under “Singing With
Another Audio Source” on Page9.
3. Press
RECORD
recording.
down.
Note:
Press
porarily stop recording. Press
again to resume recording.
on TAPE 1 to begin
RECORD
PAUSE
PLAY
and
on TAPE 1 to tem-
both locks
PAUSE
4. Press
5. Press
STOP/EJECT
recording.
STOP/EJECT
RECORD
on TAPE 1 to stop
PLAY
and
release.
on TAPE 2 or stop
the audio source.
DUBBING A CASSETTE
TAPE
You can dub (copy) any cassette tape on the
karaoke system’s dual cassette decks using
a source tape with the music or sound you
want to copy and a blank or reus able tape to
record on.
Follow these steps to dub from one cassette
tape to another.
1. Turn on the system by pressing
STANDBY
2. Set
TAPE lights.
3. Load the cassette you want to copy into
TAPE 2 with the side you want to record
from facing you.
4. Load a blank tape (or one you want to
record over) into TAPE 1 with the side
you want to record on facing you.
5. Press
RECORD
6. Press
ing.
releases.
Note:
in TAPE 2 as you copy it. Set
VOLUME
ume setting does not affect the recording level.
7. Press
recording.
8. Press
playing the tape.
. STANDBY turns off.
FUNCTION SELECTOR
PAUSE
and
PLAY
PAUSE
RECORD
then
PLAY
both lock down.
on TAPE 2 to begin record on TAPE 1 automatically
TAPE
to
on TAPE 1.
You can list en to the t ape pla ying
MASTER
to a comfor ta bl e le vel. T h e v ol -
STOP/EJECT
RECORD
STOP/EJECT
on TAPE 1 to stop
PLAY
and
release.
on TAPE 2 to stop
.
14
Cassette Deck Operation
Page 15

TAPE TIPS
Restoring Tape Tension and
Sound Quality
After you p lay a cass ett e tap e se vera l ti mes,
the tape might become tightly wound on the
reels. This can cause playback sound quality
to deteriorate.
To restore the sound qu ali ty, fast-forward the
tape from the beginning to the end of one
side, then completely rewind it. Then loosen
the tape reels by ge ntly ta ppi ng eac h edge of
the cassette on a flat surface.
Caution:
sette when tapping it. Do not touch the exposed tape or allow any sharp objects near
the cassette.
Erasing Tapes
To record over a cassette tape, simply
record as usual. The cassette deck records
over the previous recording.
Be careful not to damage the cas-
You can quickly erase both sides of a cassette tape using a RadioShack bulk tape
eraser.
Note
: If you use metal or high-bias type tap e,
the recorded sound might not be erased
properly.
Preventing Accidental Erasure
Cassette tapes have two erase-protection
tabs — one for each side. When a tab is in
place, you can record on that side.
To prevent accidental erasure of a tape recording, use a screwdriver to remove one or
both of the cassette tape’s erase-protection
tabs. This prevents
pressed.
If you later decide to record on a tape side after you have removed the erase-protection
tab, place a piece of strong plastic tape over
that side’s erase-protection hole. Be sure
you cover only the hole originally covered by
the erase-protection tab.
Caution:
tabs does not prevent a bulk eraser from
erasing a cassette tape.
Removing the erase-protection
RECORD
from being
ˆ
Using Optional Components
Warning:
vent damage to the karaoke system, an audio source and/or an audio component,
always set thei r volume controls t o the lowest settings before turning them on.
To protect your hearing and pre-
1. Press
2. Set
3. Turn on the audio sour ce .
LISTENING TO ANOTHER
AUDIO SOURCE
If you connected another audio source, follow these steps to listen to that source
through your karaoke system.
Using Optional Components
4. Use the controls to adjust the sound.
5. To turn off the system, press
STANDBY
STANDBY turns off.
FUNCTION SELECTOR
lights.
STA NDBY l i ghts . The n turn of f the audio
source.
to turn on the system.
AUX
to
. AUX
STANDBY
15
.
Page 16

LISTENING THROUGH
ANOTHER AUDIO
COMPONENT
If you connected an audio component (such
as a PA system) to your karaoke system, follow these steps to listen to the karaoke system’s sound through that component.
1. Press
2. Set
ˆ
If you have problems operating your Hi-Power CD+G Karaoke System, use this chart to determine the problem and possible solutions. If you still have problems, contact your local
RadioShack store for ass ist anc e.
STANDBY
STANDBY turns off.
FUNCTION SELECTOR
lights.
to turn on the system.
AUX
to
Troubleshooting
Problem Possib le Cause Solution
. AUX
3. Turn on the audio compo ne nt.
4. Play a cassette, CD, or CD+G in the
karaoke system.
5. Use the c ontr ols to adjus t the s ound. To
sing along with a CD or CD+G, see
“Singing with a CD/CD+G or Cassette
Tape” on Page 8.
6. To turn off the system, press
STANDBY lights and AUX turns off.
Then turn off the audio component.
STANDBY
.
The karaoke system does not
work.
A CD/CD+G is loaded, but the
CD/CD+G player does not
start.
16
No power. Make sure the power cord is
properly plugged into a n AC
outlet.
Power is on standby. Make sure STANDBY is off.
The CD/CD+G is loaded
upside down.
The CD/CD+G is dirty or
defective.
Moisture has condensed
on the pickup lens.
Troubleshooting
Reload the CD/CD+G, label
side up.
Clean the CD/CD+G and
reload it, or try a different
CD/CD+G.
Unplug the system and w ait
1 hour for the moisture to
evaporate.
Page 17

CARE
Keep the karaoke system dry; if it gets wet,
wipe it dry immediately. Use and store the
karaoke system only in normal temperature
environments. Handle the karaoke system
carefully; do not drop it. Keep the karaoke
system away from dust and dirt, and wipe it
with a damp cloth occasionally to keep it
looking new.
Modifying or tampering with the karaoke system’s internal components can cause a malfunction and might invalidate its warranty. If
your karaoke system is not performing as it
should, take it to your local RadioShack store
for assistance.
CLEANING THE TAPEHANDLING PARTS
Dirt, dust or particles of the tape's coating
can accumulate on the tape heads and other
parts that the tape touches. This can greatly
reduce the performance of the cassette player. After every 20 hours of tape player operation, follow these steps to clean the tapehandling parts or use a RadioShack cassette
deck cleaning kit.
1. Disconnect the AC power cord.
2. Open the cassette compartment door on
PLAY
TAPE 1 and T APE 2 then pres s
both to expose the tape-handling parts.
3. Use a cotton swab dipped in denatured
alcohol or tape head cl eaning solution to
clean the tape guides, record/play head,
erase head, pinch roller, and capstan.
Tape Guide
Record/Play Head
Tape Guide
on
4. When you finish cleaning, press
Troubleshooting
Capstan
Pinch Roller
EJECT
on TAPE 1 and TAPE 2 then
close both cassette compartment doors.
Then reconnect powe r.
Erase Head
STOP/
17
Page 18

ˆ
Specifications
Power Output (at 10% THD) ..................................................................................... 25 Watts per Channel
Bass ..................................................................................................................................... 100 Hz ±10 dB
Treble .......... ........................................................................................................................... 10 kHz ±10 dB
Track System ................................................................................................ 4 Track, Two Channel Stereo
Recording System .......................................................................................................................... AC Bias
Erasing System ..................................................................................................................................... AC
Wow and Flutter (WRMS) ................................................................................................ Less Than 0.35%
Record/Play Frequency Response (at ±3 dB) ...................................................................... 125 – 8000 Hz
Signal-To-Noise .......................................................................................................................... 40 – 60 dB
Dynamic Range ................................................................................................. ....... .... .. More Than 80 dB
Speaker .................................. .... .... .... ....... 10-inch woofer, 4-inch midrange, and 3-inch tweeter (8 ohms)
Microphone (Monaural) Impedance ........................................................................... .... .... .. .... ... 600 Ohms
Power Source ........................................................................................................ AC 120V, 60 Hz, 120W
Dimensions (HWD) .............................................................................................. 21.8 × 17.9 × 13.9 inches
Weight .... ......................... .......................... ............................................................. .......................... 917 oz
Included Accessories ..... Microphone with Metal Case, Video Cable, Remote Control, CD+G Demo Disc
Specifications are typical; individual units might vary. Specifications are subject to change and Improvement without notice.
(55.3 × 45.5 × 35.3 cm)
(26 kg)
18
Specifications
Page 19

ˆ
Notes
Notes
19
Page 20

Limited Ninety-Day Warranty
This product is warrante d by RadioShack aga inst manufact uring defects in mate rial and workma nship under normal u se for nine ty (90) days from the date of purchase fro m RadioShack companyowned stores and authorized RadioShack franchisees and dealers. EXCEPT AS PROVIDED
HEREIN, RadioShack MAKES NO EXPRESS WARRANTIES AND ANY IMPLIED WARRANTIES,
INCLUDING THOSE OF MERCHANTABILITY AND FITNESS FOR A PARTICULAR PURPOSE,
ARE LIMITED IN DURATION TO THE DURATION OF THE WRITTEN LIMITED WARRANT IES
CONTAINED HEREIN. EXCEPT AS PROVIDED HEREIN, RadioShack SHALL HAVE NO LIABILITY OR RESPONSIBILITY TO CUSTOMER OR ANY OTHER PERSON OR ENTITY WITH RESPECT TO ANY LIABILITY, LOSS OR DAMAGE CAUSED DIRECTLY OR INDIRECTLY BY USE
OR PERFORMANCE OF THE PRODUCT OR ARISING OUT OF ANY BREACH OF THIS WARRANTY, INCLUDING, BUT NOT LIMITED TO, ANY DAMAGES RESULTING FROM INCONVENIENCE, LOSS OF TIME, DATA, PROPERTY, REVENUE, OR PROFIT OR ANY INDIRECT,
SPECIAL, INCIDENTA L, OR CONSEQUENT IAL DAMAGES, EVEN IF RadioShack HAS B EEN ADVISED OF THE POSSIBILITY OF SUCH DAMAGES.
Some states do not allow limitations on how long an implied warranty lasts or the exclusion or limitation of incidental or consequential damages, so the above limitations or exclusions may not apply to
you.
In the event of a pr oduct defect durin g the warranty pe riod, take the product and the RadioShack
sales receipt as proof of purchase date to any RadioShack store. RadioShack will, at its option, unless otherwise provid ed by la w : ( a) correct the defect by pro du ct r epa i r with ou t ch arg e for parts and
labor; (b) replace the product w ith one of the same or similar design; or (c) refund the purchase
price. All replace d parts a nd produ cts, and p roducts o n which a refund is made, become th e pro perty of RadioShack. New or recond itioned parts and products may be used in the performance of
warranty service. Re paired or replace d parts and pro ducts are warran ted for the rem ainder of the
original warranty period. You will be charged for repair or replacement of the product made after the
expiration of the warranty period.
This warranty does not cover: (a) damage or failure caused by or attributable to acts of God, abuse,
accident, misuse, improper or abnorm al usag e, failure to follow instru ctio ns, improp er install ation or
maintenance, alterati on, lightning or other incidence of excess voltage or cur rent; (b) any repairs
other than those provided by a RadioShack Authorized Service Facility; (c) consumables such as
fuses or batteries; (d) cosmetic dama ge; (e) tra nsportation , shipping or insurance co sts; or (f) costs
of product removal, installation, set-up service adjustment or reinstallation.
This warranty give s you specific le gal rights, an d you may also h ave other right s which vary fr om
state to state.
RadioShack Customer Relations, 200 Taylor Street, 6th Floor, Fort Worth, TX 76102
We Service What We Sell
12/99
RadioShack Corporati on
Fort Worth, Texas 76102
32-1175
04A01
Printed in Hong Kong
 Loading...