

Rac 107 Instruction Manual
FoV
RAC 107 HD
Dash Cam
Designed and tested by experts
INSTRUCTION MANUAL
3.0
120

Congratulations on
choosing the RAC 107
HD Dash Cam.
Please read these
instructions carefully
before use.

Contents
Product Features P01
Unpacking P01
Identification of Controls P02
Preparing for Use P03
Installing the Dash Cam P04
Connecting to Power P04
Powering the Dash Cam On / Off P05
Set the Date / Time P06
Mode Selection P06
Using the Dash Cam P06
Recording Screen P07
Emergency File Protection P07
Motion Detection P09
G-sensor Collision
Recording Protection P09
Audio On /Off P09
Menu Options P10
Menu Settings Mode P11
Taking Picture P13
Still Capture P13
P14
Playback Menu Options P15
Battery Warning and
Installation Notes
P16
Caution P17
Warranty P17
Specification P18
Playing Back Videos and Photos

Product Features
› HD Dash Cam
› 1 Megapixel CMOS Sensor
› 3.0” TFT Display
› 120˚ Wide Angle Lens
› Support up to 32GB Class10 Micro SD Memory Card
› G-sensor Collision Recording Protection
› Motion Detection
› Seamless Loop Recording
Unpacking
Unpack the contents of the box and ensure the following components
are present.
› RAC 107 Dash Cam
› Micro SD Card
› In Car Charger
› Suction Pad
› Quick Start Guide
› Windows Sticker
01
RAC 107 HD Dash Cam

Identification of Controls
Controls:
1. USB Port for power adaptor
2. Lens
3. LCD
4.
SD card slot
5. Up button
6. Menu button
7.
OK button8.
Mode button9.
Lock button10.
Power button11.
Microphone
12.
Reset button
www.proofcam.com
02
1
2
3
12 13
4
5
6
7
8
9
10
11
Down button
13.
Preparing for Use
Battery Indicator and Charging
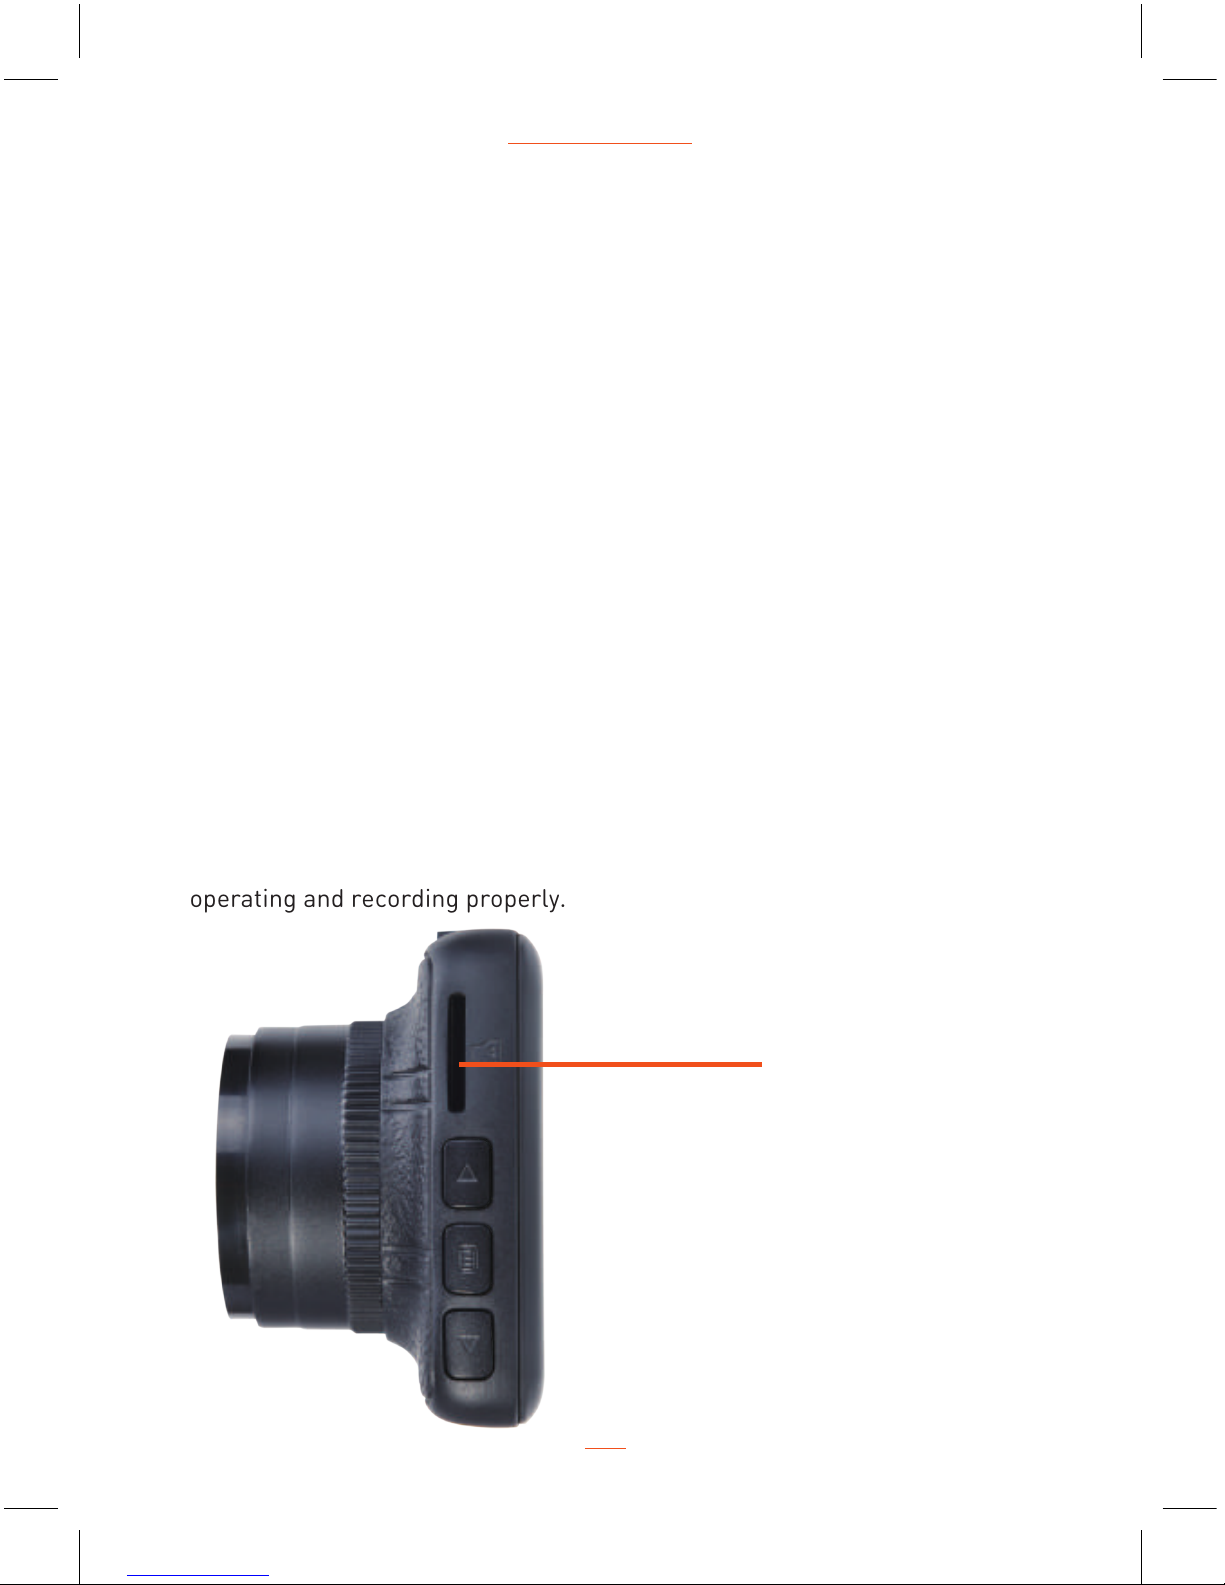
Inserting the SD Card (included)
Follow the direction indicated on the dash cam to insert the Micro SD card,
a click sound is heard indicating the Micro SD card is in position.
To remove the Micro SD card, push to eject the Micro SD card out of the slot.
NOTE:
1. Do not remove or insert the Micro SD card when the dash cam is turned on.
This may damage the Micro SD card.
2. Please use a minimum Class 10 or higher rating Micro SD card, maximum
up to 32GB.
3. Please format the micro SD card before the initial use.
4. When removing the Micro SD card, be careful that the card may spring out
and get lost. The Micro SD card slot has this spring-out feature for easy
removal of the card.
Micro SD Card slot
03
RAC 107 HD Dash Cam
5. Dash Cam pre-installed a 8GB Class 10 Micro SD card, which has six months
warranty. The warranty date is deemed to be from the date you received your
dash cam.
6.
Please format the micro SD card at least once a month to make sure it is
operating and recording properly.

Installing the Dash Cam
1. Push the suction pad into the slot on the top of the dash cam, make sure the
suction pad is securely locked in place.
2. Remove the protective film from the suction cup, with the suction-cup laying
flat, position the suction-cap on the windshield, and then press down the
clamp to suction pad the holder to the windshield. Make sure the base is
securely locked in place.
3. Loosen the knob to swivel the dash cam vertically. Lock the knob, to confirm
that the dash cam is securely locked in place.
4. Rotate the dash cam 360° to have proper view if required.
Connecting to Power
Use only the supplied in car charger for activating the dash cam and charging
the built-in battery.
1.
Connect one end of car charger to USB port on the dash cam.
2.
Plug the other end of the car charger to the in car power socket of your
vehicle. Once the vehicle engine is started, the dash cam automatically
turns on.
www.proofcam.com
04
Note:
1. 2.Some vehicles have an in car power supply that remains on, even if the
engine is turned off. If this is the case, you will need to manually turn the
dash cam on and off, using the power button, when you enter and leave
the vehicle.
Any excess cable can normally be tucked into the ceiling of the vehicle.
We have a video to advise on how best to fit the RAC 107 which is available
at www.proofcam.com and visit “ Dash Cam Resources”. You can also
search “How to fit an RAC 107” on YouTube.
 Loading...