

Page 1
QUPIR
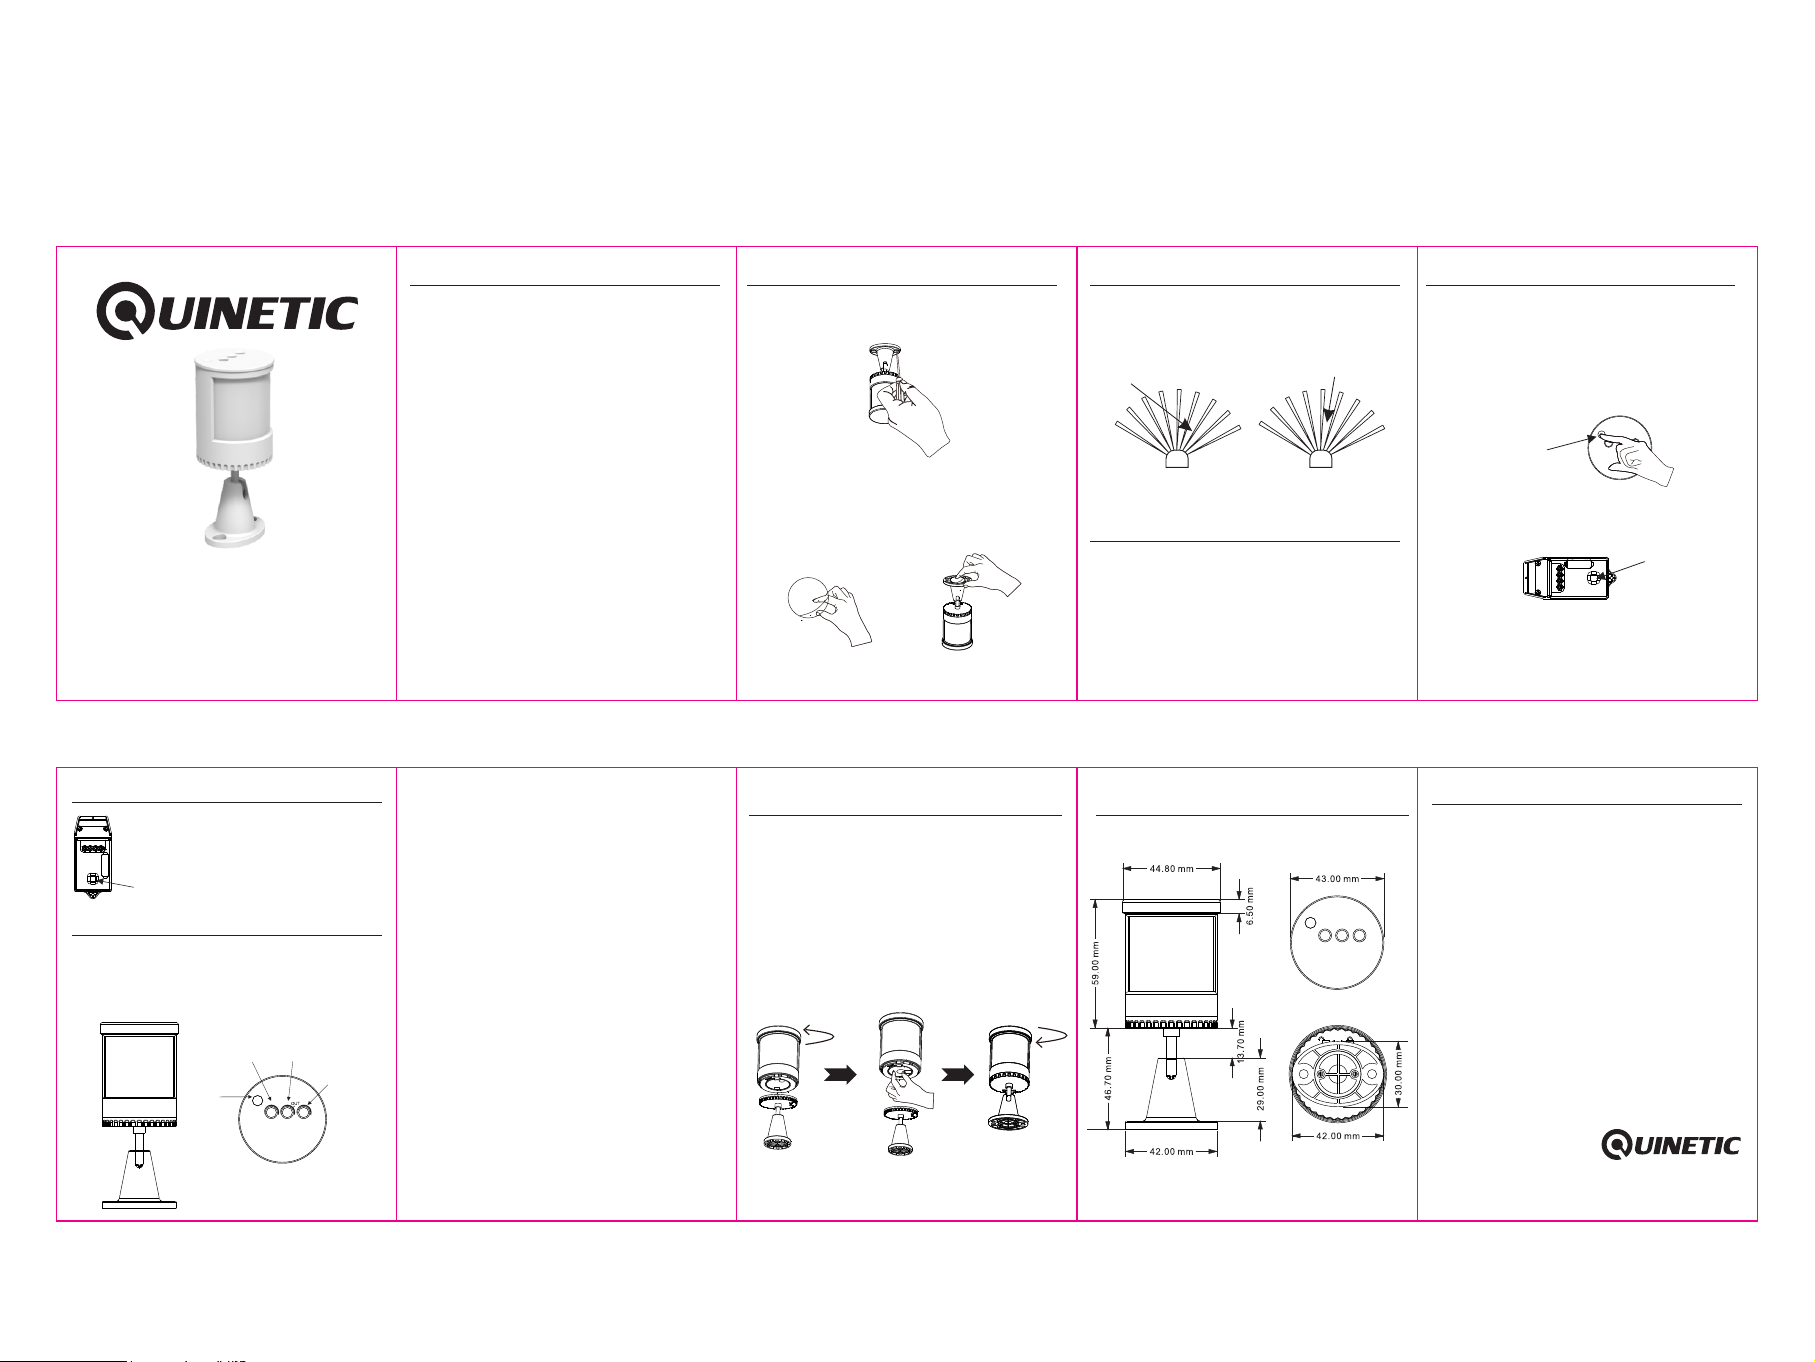
Wireless PIR Sensor Instructions 80*60mm
QUPIR
Wireless PIR Sensor
In st al la ti on I ns tr uc ti on s
Clear Pairing:
Long press the pairing button on the controller
for 10-15 seconds (depending on the model),
until the red indicator light goes out.
The pairing with the PIR sensor will be cleared.
Pairing Button
PIR Sensor Setting:
Remove the silicone cover and use the knobs on the
top of the QUPIR sensor to adjust the lux level, the
sensitivity and the delay time.
Turn the knobs clockwise to increase the value, or
counter-clockwise to decrease the value.
Lux
Sensitivity
-+-+-
Time
+
Pairing
Button
Specifications
Wireless PIR Sensor Technical Parameters:
Switc h Typ e: P IR Sensor
Power S up pl y: 1 x C R2 450 Batte ry ( in cl ud ed)
Battery L if e: U p to 2 y ears
Communi ca ti ng F requenc y: R F 43 3M hz
Contr ol D is ta nc e: up to 20m
Contr ol M et ho d: P airing wi th Q ui ne ti c Control le rs
IP Ra ti ng : IP 65 (using i nc lu de d Si licone Co ve r)
Sensiti vi ty R an ge: up to 10m i nd oo r / 7m o ut door
Lux Lev el : 30 -3 50 0lux
Tim e Ra ng e: 3 sec to 10mi n
Detecti on Angl e: 1 70 ˚
Operati ng Te mperatu re : -1 0˚ C ~ +4 5˚C
Wor ki ng H um idity: 10 % ~ 25 %R H
(No con de ns at io n)
Insta ll at io n: 3 M sticker o r sc re ws ( in cluded)
Fixed bra ck et ( ad justabl e in st al la tion angl e,
360 ro ta ta bl e)
War ra nty: 3 Years (e xc lu di ng b attery)
Read instructions carefully before installation
LUX ADJUSTMENT
The LUX adjustment determines at what light level the
PIR sensor will start operating the lights when it senses
movement. Simply set the LUX control knob from
night time (30lux) to daylight (3500lux).
SENSITIVITY ADJUSTMENT
The sensitivity may be adjusted to compensate for
seasonal variations in temperature and to reduce
unwanted triggering.
For outdoor installation the optimum sensitivity can be
achieved by setting the control knob to 70% (~7m),
observing the "OUT" marking on the sensor.
For indoor installation adjust the control knob clockwise
to increase the detecting distance (up to 10m) or
anti-clockwise to decrease the detecting distance.
TIME ADJUSTMENT
The TIME adjustment controls how long the light will stay
on after the last movement has been detected.
Turn the control knob clockwise to increase the delay time
(up to about 10 minutes) or anti-clockwise to decrease
the time delay (down to about 3 seconds).
0
Insta llation :
Screw Installation:
Use the provided screws to install the infrared sensor
on a wall or on the ceiling, indoor or outdoor (Fig.1).
Fig. 1
Adhesive Installation:
Choose the installation position; clean the surface to
ensure there is no oil/water etc.
Take the double sided adhesive tape (included) and
tear the film on one side (Fig.2).
Paste the tape on the bottom of the PIR (Fig.3).
Fig. 2 Fig. 3
Place the switch in the required position. The glue will
be dry after 24 hours depending on conditions.
Replacing the Battery:
If the PIR remote control becomes insensitive after a
period of time or the control distance becomes much
shorter please replace the battery.
When the battery level is under 10% a Red LED indicator
will flash quickly.
To replace the battery follow the steps below:
1. Turn the PIR counter-clockwise to open the battery
compartment (Fig.6).
2. Replace the battery with a CR2450 Lithium battery.
3. Close the battery compartment by turning the PIR
clockwise.
Fig.6 Replacing the battery
Choosing a M oun ting Location:
• For the best results, fix your sensor on a solid surface,
1.8~2.5M above the ground.
• When choosing the mounting position consider that the
sensor is more sensitive to motion across the detection
field (A) and less sensitive to motion directly towards
the sensor (B).
A B
SENSOR
MORE SENSITIVE
SENSOR
LESS SENSITIVE
Outdoor Mo unt ing Location:
• For outdoor installation the sensor strength is lower
than indoors, so the sensitivity knob must be set
to 70% observing the "OUT" marking on the sensor.
• For outdoor a location under eaves is preferable.
• Avoid aiming the motion sensor at pools, heating vents,
air conditioners or objects that may change temperature
rapidly.
• Do not allow sunlight to fall directly on the front of unit.
• Try to avoid pointing the unit at trees or shrubs or
where the motion of pets may be detected.
Product dimensions:
Pairing Method :
Before pairing the PIR sensor, open the battery
compartment and remove the plastic protection film
from the battery to activate the PIR. (see how to open
the compartment next page in "Battery Replacement")
Step 1: Press and hold the pairing button on the PIR
sensor (Fig.4) for 3 seconds; the green LED sensor
indicator will flash slowly (flashing once per second)
and then release the button.
Pairing
Button
Fig. 4
Step 2: Press the pairing button on the controller (Fig.5)
for 3 seconds, the controller indicator flashes slowly
(flashing once every second) and then release the
button. The controller enters the pairing mode.
Fig. 5
Step 3: Press the pairing button on the PIR sensor once;
after the indicator on the controller stops flashing, the
pairing is successful. This pairing method will control the
light automatically by turning it on when a person is
sensed, and the light will automatically be turned off if
the person leaves the area.
Pairing
Button
Troubleshooti ng:
1. If pairing does not work, first check if the indicator
light is lit. Follow the pairing steps to re-pair the sensor.
2. If the sensor does not respond check the following:
- The battery transparent film has been removed.
- The battery is not low level. If the red indicator light
flashes, replace the battery.
- Check the that distance from the sensor to the
Quinetic controller does not exceed the maximum
controlling distance.
- Ensure sensor is mounted correctly, facing the desired
detection area.
- Ensure the Lux level and Sensitivity are set up
correctly.
*For more informaon about pairing, instrucons and troubleshoot
please visit www.tlc-direct.co.uk website.
 Loading...