

Page 1

pdQ™ Applications
Handbook
QUALCOMM Incorporated, 6455 Lusk Boulevard, San Diego,
California 92121-2779 U.S.A.
http://www.qualcomm.com
Page 2

Software changes may have occurred after this printing. QUALCOMM reserves the right to make
changes in technical and product specifications without prior notice. The products and equipment
described in this documentation are manufactured under one or more of the following U.S. Patents:
4,901,307 5,056,109 5,099,204 5,101,501 5,103,459 5,107,225 5,109,390 5,193,094
5,228,054 5,257,283 5,265,119 5,267,261 5,267,262 5,280,472 5,283,536 5,289,527
5,307,405 5,309,474 5,337,338 5,339,046 5,341,456 5,383,219 5,392,287 5,396,516
D356,560 5,408,697 5,414,728 5,414,796 5,416,797 5,426,392 5,437,055 D361,065
5,442,322 5,442,627 5,452,473 5,461,639 5,469,115 5,469,471 5,471,497 5,475,870
5,479,475 5,483,696 5,485,486 5,487,175 5,490,165 5,497,395 5,499,280 5,504,773
5,506,865 5,509,015 5,509,035 5,511,067 5,511,073 5,513,176 5,515,177 5,517,323
5,519,761 5,528,593 5,530,928 5,533,011 5,535,239 5,539,531 5,544,196 5,544,223
5,546,459 5,548,812 5,559,881 5,559,865 5,561,618 5,564,083 5,566,000 5,566,206
5,566,357 5,568,483 5,574,773 5,574,987 D375,740 5,576,662 5,577,022 5,577,265
D375,937 5,588,043 D376,804 5,589,756 5,590,069 5,590,406 5,590,408 5,592,548
5,594,718 5,596,570 5,600,754 5,602,834 5,602,833 5,603,096 5,604,459 5,604,730
5,608,722 5,614,806 5,617,060 5,621,752 5,621,784 5,621,853 5,625,876 5,627,857
5,629,955 5,629,975 5,638,412 5,640,414 5,642,398 5,644,591 5,644,596 5,646,991
5,652,814 5,654,979 5,655,220 5,657,420 5,659,569 5,663,807 5,666,122 5,673,259
5,675,581 5,675,644 5,680,395 5,687,229 D386,186 5,689,557 5,691,974 5,692,006
5,696,468 5,697,055 5,703,902 5,704,001 5,708,448 5,710,521 5,710,758 5,710,768
5,710,784 5,715,236 5,715,526 5,722,044 5,722,053 5,722,061 5,722,063 5,724,385
5,727,123 5,729,540 5,732,134 5,732,341 5,734,716 5,737,687 5,737,708 5,742,734
D393,856 5,748,104 5,751,725 5,751,761 5,751,901 5,754,533 5,754,542 5,754,733
5,757,767 5,757,858 5,758,266 5,761,204 5,764,687 5,774,496 5,777,990 5,778,024
5,778,338 5,781,543 5,781,856 5,781,867 5,784,406 5,784,532 5,790,589 5,790,632
5,793,338 D397,110 5,799,005 5,799,254 5,802,105 5,805,648 5,805,843 5,812,036
5,812,094 5,812,097 5,812,538 5,812,607 5,812,651 5,812,938 5,818,871 5,822,318
5,825,253 5,828,348 5,828,661 5,835,065 5,835,847 5,839,052 5,841,806 5,842,124
5,844,784 5,844,885 5,844,899 5,844,985 5,848,063 5,848,099 5,850,612 5,852,421
5,854,565 5,854,786 5,857,147 5,859,612 5,859,838 5,859,840 5,861,844 5,862,471
5,862,474 5,864,760 5,864,763 5,867,527 5,867,763 5,870,427 5,870,431 5,870,674
5,872,481 5,872,774 5,872,775 5,872,823 5,877,942 5,878,036 5,870,631 5,881,053
5,881,368 5,884,157 5,884,193 5,884,196 Other patents pending.
FCC/IC Notice
This computer peripheral complies with part 15 of the FCC Rules. Operation is subject to the followi ng
two conditions: (1) This device may not cause harmful interference, and (2) this device must accept
any interference received, including interference that may cause undesired operation. This receiver
complies with part 15 of the FCC Rules. Operation is subject to the condition that this device does not
cause harmful interference.
Caution
The user is cautioned that changes or modifications not expressly approved by the party responsible
for compliance could void the warranty and user’s authority to operate the equipment.
Warning
Use only QUALCOMM-approved accessories with QUALCOMM phones. Use of any unauthorized
accessories may be dangerous and will invalidate the phone warranty if said accessories cause
damage or a defect to the phone. The use of any other type will invalidate the warranty and may be
dangerous.
Customer Service
Your service provider’s customer support department should be able to answer all of your questions.
If they are unable to assist you, then please call (800) 349-4478 toll free (United States and Canada) or
(619) 651-4028 ( w orldwide).
QUALCOMM is a registered trademark and registered service mark, Eudora is a registered
trademark, and pdQ, pdQsuite, pdQalert, pdQbrowser, Smart Keys, and pdQmail are trademarks of
QUALCOMM Incorporated. 3Com, the 3Com logo, Palm Computing, Graffiti, and HotSync are
registered trademarks, and PalmPilot, Palm III, Palm OS, Palm, the Palm Computing platform logo,
the PalmPilot logo, and the Palm III logo are trademarks of Palm Computing Inc., 3Com Corporation,
or its subsidiaries. Microsoft, Windows, Windows NT, and other Microsoft products referenced
herein are either trademarks or registered trademarks of Microsoft Corporation. Other product and
brand names may be trademarks or registered trademarks of their respective owners.
Copyright © 1999 QUALCOMM Incorporated. All rights reserved. Portions of this document are
Copyright © 1998 3Com Corporation or its subsidiaries. Reprinted with permission. Printed in the
United States of America.
80-68789-1 Rev. A
Page 3

Contents
Chapter 1 Address Book . . . . . . . . . . . . . . . . . . . . . . . . . . . . . . . . . . . . . . . . . . .1
Creating Address Book Entries . . . . . . . . . . . . . . . . . . . . . . . . . . . . . . . . . 2
Working with Address Book Entries. . . . . . . . . . . . . . . . . . . . . . . . . . . . . 5
Using the Address Book Menus. . . . . . . . . . . . . . . . . . . . . . . . . . . . . . . . 11
Chapter 2 Calculator. . . . . . . . . . . . . . . . . . . . . . . . . . . . . . . . . . . . . . . . . . . . . .13
Using the Calculator. . . . . . . . . . . . . . . . . . . . . . . . . . . . . . . . . . . . . . . . . . 14
Using the Calculator Menus . . . . . . . . . . . . . . . . . . . . . . . . . . . . . . . . . . . 15
Chapter 3 Call History . . . . . . . . . . . . . . . . . . . . . . . . . . . . . . . . . . . . . . . . . . . .17
Opening Call History. . . . . . . . . . . . . . . . . . . . . . . . . . . . . . . . . . . . . . . . . 18
Making a Call from Call History . . . . . . . . . . . . . . . . . . . . . . . . . . . . . . . 18
Tracking Your Calls . . . . . . . . . . . . . . . . . . . . . . . . . . . . . . . . . . . . . . . . . . 18
Creating an Expense Record. . . . . . . . . . . . . . . . . . . . . . . . . . . . . . . . . . . 21
Using the Menus in Call History . . . . . . . . . . . . . . . . . . . . . . . . . . . . . . . 23
Chapter 4 Date Book . . . . . . . . . . . . . . . . . . . . . . . . . . . . . . . . . . . . . . . . . . . . .25
Scheduling Events in the Date Book . . . . . . . . . . . . . . . . . . . . . . . . . . . . 26
Scheduling Repeating Events . . . . . . . . . . . . . . . . . . . . . . . . . . . . . . . . . . 30
Deleting an Event . . . . . . . . . . . . . . . . . . . . . . . . . . . . . . . . . . . . . . . . . . . . 31
Changing the Date Book View . . . . . . . . . . . . . . . . . . . . . . . . . . . . . . . . . 31
Using the Date Book Menus . . . . . . . . . . . . . . . . . . . . . . . . . . . . . . . . . . . 34
Chapter 5 Dialer . . . . . . . . . . . . . . . . . . . . . . . . . . . . . . . . . . . . . . . . . . . . . . . . .37
Making Calls from the Dialer . . . . . . . . . . . . . . . . . . . . . . . . . . . . . . . . . . 38
Chapter 6 Expense . . . . . . . . . . . . . . . . . . . . . . . . . . . . . . . . . . . . . . . . . . . . . . .39
Creating an Expense Item . . . . . . . . . . . . . . . . . . . . . . . . . . . . . . . . . . . . . 40
Entering Receipt Details . . . . . . . . . . . . . . . . . . . . . . . . . . . . . . . . . . . . . . 41
Transferring Your Data to Microsoft Excel. . . . . . . . . . . . . . . . . . . . . . . 45
Using the Expense Menus. . . . . . . . . . . . . . . . . . . . . . . . . . . . . . . . . . . . . 48
Chapter 7 HotSync Technology . . . . . . . . . . . . . . . . . . . . . . . . . . . . . . . . . . . .49
HotSync Technology and the HotSync Manager. . . . . . . . . . . . . . . . . . 50
Setting Up Your First HotSync Operation . . . . . . . . . . . . . . . . . . . . . . . 50
Performing a Local HotSync Operation . . . . . . . . . . . . . . . . . . . . . . . . . 51
Selecting HotSync Setup Options. . . . . . . . . . . . . . . . . . . . . . . . . . . . . . . 52
Customizing HotSync Operations . . . . . . . . . . . . . . . . . . . . . . . . . . . . . . 53
Chapter 8 Memo Pad . . . . . . . . . . . . . . . . . . . . . . . . . . . . . . . . . . . . . . . . . . . . .57
Creating Memos . . . . . . . . . . . . . . . . . . . . . . . . . . . . . . . . . . . . . . . . . . . . . 58
Reviewing and Editing Memos . . . . . . . . . . . . . . . . . . . . . . . . . . . . . . . . 58
Beaming a Memo . . . . . . . . . . . . . . . . . . . . . . . . . . . . . . . . . . . . . . . . . . . . 60
Deleting a Memo. . . . . . . . . . . . . . . . . . . . . . . . . . . . . . . . . . . . . . . . . . . . . 60
Using Memo Pad Menus. . . . . . . . . . . . . . . . . . . . . . . . . . . . . . . . . . . . . . 61
Contents iii
Page 4

Contents
Chapter 9 Modem Emulation. . . . . . . . . . . . . . . . . . . . . . . . . . . . . . . . . . . . . . .63
Setting Up Modem Emulation . . . . . . . . . . . . . . . . . . . . . . . . . . . . . . . . . 64
Opening Modem Emulation. . . . . . . . . . . . . . . . . . . . . . . . . . . . . . . . . . . 65
Exiting Modem Emulation . . . . . . . . . . . . . . . . . . . . . . . . . . . . . . . . . . . . 66
Tips and Troubleshooting. . . . . . . . . . . . . . . . . . . . . . . . . . . . . . . . . . . . . 66
Chapter 10 Palm Mail . . . . . . . . . . . . . . . . . . . . . . . . . . . . . . . . . . . . . . . . . . . . . .67
Deciding Which E-mail Application to Use . . . . . . . . . . . . . . . . . . . . . . 68
Setting Up Palm Mail. . . . . . . . . . . . . . . . . . . . . . . . . . . . . . . . . . . . . . . . . 68
Viewing Messages . . . . . . . . . . . . . . . . . . . . . . . . . . . . . . . . . . . . . . . . . . . 70
Creating Messages . . . . . . . . . . . . . . . . . . . . . . . . . . . . . . . . . . . . . . . . . . . 71
Sending Messages. . . . . . . . . . . . . . . . . . . . . . . . . . . . . . . . . . . . . . . . . . . . 76
Deleting Messages . . . . . . . . . . . . . . . . . . . . . . . . . . . . . . . . . . . . . . . . . . . 78
Managing the Message List. . . . . . . . . . . . . . . . . . . . . . . . . . . . . . . . . . . . 79
Setting HotSync Options. . . . . . . . . . . . . . . . . . . . . . . . . . . . . . . . . . . . . . 81
Working with Filters . . . . . . . . . . . . . . . . . . . . . . . . . . . . . . . . . . . . . . . . . 82
Using the Mail Menu Commands . . . . . . . . . . . . . . . . . . . . . . . . . . . . . . 86
Chapter 11 pdQalert. . . . . . . . . . . . . . . . . . . . . . . . . . . . . . . . . . . . . . . . . . . . . . .87
Setting Up pdQalert. . . . . . . . . . . . . . . . . . . . . . . . . . . . . . . . . . . . . . . . . . 88
Receiving pdQalert Messages. . . . . . . . . . . . . . . . . . . . . . . . . . . . . . . . . . 88
Responding to pdQalert Messages . . . . . . . . . . . . . . . . . . . . . . . . . . . . . 89
Checking Messages with the Keypad Closed . . . . . . . . . . . . . . . . . . . . 90
Chapter 12 pdQbrowser. . . . . . . . . . . . . . . . . . . . . . . . . . . . . . . . . . . . . . . . . . . .91
Getting Started with pdQbrowser . . . . . . . . . . . . . . . . . . . . . . . . . . . . . . 92
Maintaining pdQbrowser Preferences . . . . . . . . . . . . . . . . . . . . . . . . . . 93
Connecting to the Internet. . . . . . . . . . . . . . . . . . . . . . . . . . . . . . . . . . . . . 95
Working with Bookmarks. . . . . . . . . . . . . . . . . . . . . . . . . . . . . . . . . . . . . 96
Copying Text from a Web Site to Applications . . . . . . . . . . . . . . . . . . . 98
Disconnecting from the Internet . . . . . . . . . . . . . . . . . . . . . . . . . . . . . . . 99
Chapter 13 pdQmail . . . . . . . . . . . . . . . . . . . . . . . . . . . . . . . . . . . . . . . . . . . . . .101
Deciding Which E-Mail Application to Use. . . . . . . . . . . . . . . . . . . . . 102
Setting Up pdQmail . . . . . . . . . . . . . . . . . . . . . . . . . . . . . . . . . . . . . . . . 102
Opening pdQmail. . . . . . . . . . . . . . . . . . . . . . . . . . . . . . . . . . . . . . . . . . . 108
Checking Your Incoming E-mail Messages . . . . . . . . . . . . . . . . . . . . . 108
Creating and Sending E-mail Messages . . . . . . . . . . . . . . . . . . . . . . . . 110
Working with Mailboxes. . . . . . . . . . . . . . . . . . . . . . . . . . . . . . . . . . . . . 115
Organizing Your Incoming Messages Using Filters . . . . . . . . . . . . . . 119
Setting or Adjusting pdQmail Preferences. . . . . . . . . . . . . . . . . . . . . . 124
Changing Your Password . . . . . . . . . . . . . . . . . . . . . . . . . . . . . . . . . . . . 129
Disconnecting from the Server. . . . . . . . . . . . . . . . . . . . . . . . . . . . . . . . 130
Chapter 14 Preferences . . . . . . . . . . . . . . . . . . . . . . . . . . . . . . . . . . . . . . . . . . .131
About Preferences . . . . . . . . . . . . . . . . . . . . . . . . . . . . . . . . . . . . . . . . . . 132
Selecting Alerts . . . . . . . . . . . . . . . . . . . . . . . . . . . . . . . . . . . . . . . . . . . . . 133
Changing Button Preferences. . . . . . . . . . . . . . . . . . . . . . . . . . . . . . . . . 134
Using the Digitizer . . . . . . . . . . . . . . . . . . . . . . . . . . . . . . . . . . . . . . . . . . 136
Selecting Formats . . . . . . . . . . . . . . . . . . . . . . . . . . . . . . . . . . . . . . . . . . . 137
iv pdQ Applications Handbook
Page 5

Contents
Setting General Preferences . . . . . . . . . . . . . . . . . . . . . . . . . . . . . . . . . . 138
Setting Modem Preferences. . . . . . . . . . . . . . . . . . . . . . . . . . . . . . . . . . . 139
Setting Network Preferences. . . . . . . . . . . . . . . . . . . . . . . . . . . . . . . . . . 140
Recording Owner Preferences . . . . . . . . . . . . . . . . . . . . . . . . . . . . . . . . 142
Setting Phone Preferences. . . . . . . . . . . . . . . . . . . . . . . . . . . . . . . . . . . . 143
Setting Registry Preferences . . . . . . . . . . . . . . . . . . . . . . . . . . . . . . . . . . 147
Creating ShortCuts. . . . . . . . . . . . . . . . . . . . . . . . . . . . . . . . . . . . . . . . . . 148
Changing the SideStrip Icons . . . . . . . . . . . . . . . . . . . . . . . . . . . . . . . . . 149
Chapter 15 Security . . . . . . . . . . . . . . . . . . . . . . . . . . . . . . . . . . . . . . . . . . . . . .151
Setting Up Passwords . . . . . . . . . . . . . . . . . . . . . . . . . . . . . . . . . . . . . . . 152
Showing or Hiding Private Entries . . . . . . . . . . . . . . . . . . . . . . . . . . . . 154
Locking the pdQ Smartphone. . . . . . . . . . . . . . . . . . . . . . . . . . . . . . . . . 155
Restricting the pdQ Smartphone . . . . . . . . . . . . . . . . . . . . . . . . . . . . . . 156
Chapter 16 Speed Dial . . . . . . . . . . . . . . . . . . . . . . . . . . . . . . . . . . . . . . . . . . . .157
Adding Phone Numbers to the Speed Dial List. . . . . . . . . . . . . . . . . . 158
Making Calls Using Speed Dial . . . . . . . . . . . . . . . . . . . . . . . . . . . . . . . 159
Modifying Entries in the Speed Dial List . . . . . . . . . . . . . . . . . . . . . . . 160
Removing Entries from the Speed Dial List . . . . . . . . . . . . . . . . . . . . . 161
Chapter 17 To Do List. . . . . . . . . . . . . . . . . . . . . . . . . . . . . . . . . . . . . . . . . . . . .163
Creating To Do Items. . . . . . . . . . . . . . . . . . . . . . . . . . . . . . . . . . . . . . . . 164
Setting Item Details . . . . . . . . . . . . . . . . . . . . . . . . . . . . . . . . . . . . . . . . . 165
Displaying Your To Do List . . . . . . . . . . . . . . . . . . . . . . . . . . . . . . . . . . 167
Using the To Do List Menus . . . . . . . . . . . . . . . . . . . . . . . . . . . . . . . . . . 168
Appendix A Expense Reports. . . . . . . . . . . . . . . . . . . . . . . . . . . . . . . . . . . . . . .169
Customizing the Expense Reports. . . . . . . . . . . . . . . . . . . . . . . . . . . . . 173
Appendix B Non-ASCII Characters for Login Scripts. . . . . . . . . . . . . . . . . . . .179
About Non-ASCII Characters. . . . . . . . . . . . . . . . . . . . . . . . . . . . . . . . . 179
Use of ^ char . . . . . . . . . . . . . . . . . . . . . . . . . . . . . . . . . . . . . . . . . . . . . . . 179
Carriage Return and Line Feed. . . . . . . . . . . . . . . . . . . . . . . . . . . . . . . . 179
Literal Characters . . . . . . . . . . . . . . . . . . . . . . . . . . . . . . . . . . . . . . . . . . . 180
Index . . . . . . . . . . . . . . . . . . . . . . . . . . . . . . . . . . . . . . . . . . . . . . . . . . . . . . . . . . . .181
Contents v
Page 6

Page 7

Chapter 1
Address Book
Using the Palm™ Address Book, you can easily keep track of names,
addresses, phone numbers, e-mail addresses, URLs, and other information
about your personal and business contacts.
With the Palm Address Book, you can...
Make a phone call, send e-mail, or open web sites directly from the Address
List.
Enter up to five phone numbers, e-mail addresses, or web addresses (UR Ls)
for each contact. Select which of these numbers appea rs in the Address List.
Attach a note to an Address Book entry for additional information.
Assign categories to your Address Book entries, so you can quickly sort and
view your entries in logical groups.
Define the contacts to include in the Speed Dial list.
In this chapter, you’ll find...
Creating Address Book Entries page 2
Working with Address Book Entries page 5
Using the Address Book Menus page 11
Page 8

Creating A ddress Book Entries
Creating Address Book Entries
An Address Book entry is the name, address, and phone information you are
keeping for a person or business. You can create these entries on the pdQ
smartphone, or you can use the Palm™ Desktop software to create them on
your computer and download them to your pdQ smartphone during a
HotSync
Note: Palm Desktop software also has data import capabilities that allow
To create a new Address Book entry:
1. Press the button to open the Address List.
2. From the Address List, tap New to display the Address Edit screen.
®
operation. For procedures, see “Chapter 7—HotSync Technology.”
you to load database files into the Address Book. Refer to the online
documentation supplied with the Palm Desktop for details.
Tap New.
3. Enter the last name of a person you want to add to your Address Book.
You can write with the stylus or use the on-screen keyboard. The first
letter is capitalized automatically (except for numeric and e-mail
information). For details about entering text, see the pdQ Basics Handbook.
4. Move to the next line either by tapping it or by writing , the Next Field
Graffiti stroke.
5. Enter the person's first name on the First Name line.
6. Enter the rest of the information for this person or business.
Notice that you can enter e-mail addresses or web addresses (URLs) in any
of the five phone number fields. To add pauses, see “Entering Pauses” on
page 5.
7. Tap to move to the next page.
8. When you have finished, tap Done to return to the Address List screen.
Adding an Address Book Entry to the Speed Dial List
If you want the entry you are creating to appear in the Speed Dial list, follow
these steps. Contacts are always added to the Speed Dial list from the Address
Book so you only have to maintain the phone numbers in one place.
2 pdQ Applications Handbook
Page 9

Creating Address Book Entries
To add a phone number to the Speed Dial list:
1. In the Address List, locate the person or business you want to add to the
Speed Dial list. Tap the name in the left column.
Note: Be sure to tap the name in the left column, not the number in the
right column. Tapping the name opens the Address View screen
for editing information; tapping the number starts a phone call.
2. Tap Edit to display the Address Edit screen.
A plus sign (+) appears to the right of numbers that have not been added
to the Speed Dial list.
Tap the
plus sign.
3. Tap the plus sign beside the number you want to add. The Assign Speed
Dial Number dialog appears.
Address Book
4. Tap the up arrow or the down arrow to select a specific Speed Dial
number. Tap Add.
5. In the confirmation dialog, tap Yes to add the number.
6. Tap Do ne.
7. If you want to verify that the number has been added to the Speed Dial list,
tap to open the Applications Launcher.
8. Tap to open Speed Dial. Your new entry is in the Speed Dial list.
Making a Call from the Address Book
After you create an Address Book entry, you can make a call from it directly.
If you have entered e-mail addresses or URLs in the Address Book, you can
also make direct connections to them if your service provider supports
over-the-air data.
Note: You cannot initiate conference calls from the Address Book. If your
service provider supports conference calls, you can initiate a
three-way call by entering the numbers directly on the keypad or the
Dialer.
Chapter 1 Address Book 3
Page 10

Creating A ddress Book Entries
To make a phone call from the Address Book:
1. If the pdQ smartphone is not already on, tap to turn it on.
2. If the num ber you want to call appears in the list, do the following:
a. Tap the phone icon beside the number you want to call.
Tap the icon to call this number directly.
Tap the phone number to see all of the
available numb ers, i nclud in g e-ma il ad dress es
or URLs, for this person or business.
b. In the confirmation dialog, tap Dial. To eliminate the confirmation
dialog when you make future calls from the Address Book, tap Do not
ask me again.
3. To choose a different phone number for a person or business in your
Address List, do the following:
a. Locate the entry and tap the number.
Be sure to tap the number, not the name or icon. A dialog shows all of
the numbers for that person or business.
If you select an e-mail ad dress or a
URL, the Dial button changes to Email
or Browse.
b. Tap the number you want to call and tap Dial.
If you select an e-mail address or URL, the pdQ smartphone
recognizes these addresses and makes the appropriate connection.
4. When you have finished your call, tap End to hang up.
4 pdQ Applications Handbook
Page 11

Working with Address Book Entries
Working with Address Book Entries
In the Address Book, you can locate your entries quickly, edit them, display
them by name or company name, and group them by category. You can also
choose the type of information you want your entries to include and exchange
Address Book information with other pdQ smartphones or Palm organizers.
Editing an Address Book Entry
To edit an Address Book entry:
1. In the Address List, tap the name of the entry you want to change.
Tap the name in the left column, not the phone number in the right column.
Tapping the phone number initiates a call.
2. Tap Edit. The Address Edit screen appears.
Address Book
3. Tap any line (such as Address or City). Enter or change the information.
4. When you have finished, tap Done.
Entering Pauses
When you call automated systems, you often have to dial a series of numbers
with pauses between them (for example, when sending a page or entering a
password). You can place these pauses in the Address Book.
To enter pauses in a phone number:
1. Open the Address Edit screen for the appropriate person or business.
2. In the phone number, enter a percent sign (%) for a hard pause or a comma
(,) for a timed pause wherever necessary.
Hard Pause
(%)
Timed Pause
(,)
When you call this number, the pdQ smartphone pauses at
this point. It does not continue with the next set of numbers
until you tap Resume.
When you call this number, the pdQ smartphone pauses for
two seconds before continuing with the next set of numbers.
You can enter as many commas as necessary to extend the
length of the pause.
Chapter 1 Address Book 5
Page 12

Working with Address Book Entries
Looking Up an Address Book Entry
You can find entries in your Address Book quickly either by scrolling through
it or by using the Look Up line in the Address List screen.
To scroll through the Address Book:
Press the up and down buttons on the front panel of the pdQ smartphone.
In the Address List screen, you move up or down by a screen of entries.
In the Address View screen, you move to the previous or next entry.
To look up an Address Book entry:
1. In the Address List, enter the first letter of the name you want to find.
Write the first letter or two in the Look Up line.
The list scrolls to the first entry beginning with that letter. If you write a
second letter, the list scrolls to the first entry beginning with those two
letters.
2. Tap any entry to view its contents.
Note: You can also look up entries in your Address Book with the pdQ
smartphone’s keypad closed. See “Chapter 3—Using Phone and
Messaging Features” in the pdQ Basics Handbook.
Choosing and Displaying Phone Numbers
In your Address Book, you can keep up to five phone numbers, e-mail
addresses, or URLs for each entry. You can select the labels for these numbers
individually. For example, you might want to keep a fax number for one
person and a pager number for another. You can also choose which of these
numbers you want to see in the Address List for each entry.
To choose other types of phone numbers in an Address Book entry:
1. In the Address List, tap the name of the entry you want to change.
Tap the name in the left column, not the phone number in the right column.
2. Tap Edit to display the Address Edit screen.
6 pdQ Applications Handbook
Page 13

Working with Address Book Entries
3. Tap the beside the phone number you want to change.
Tap the arrow
to open the
pick list.
4. From the list, tap the label (for example, Fax or Pager) you want to use.
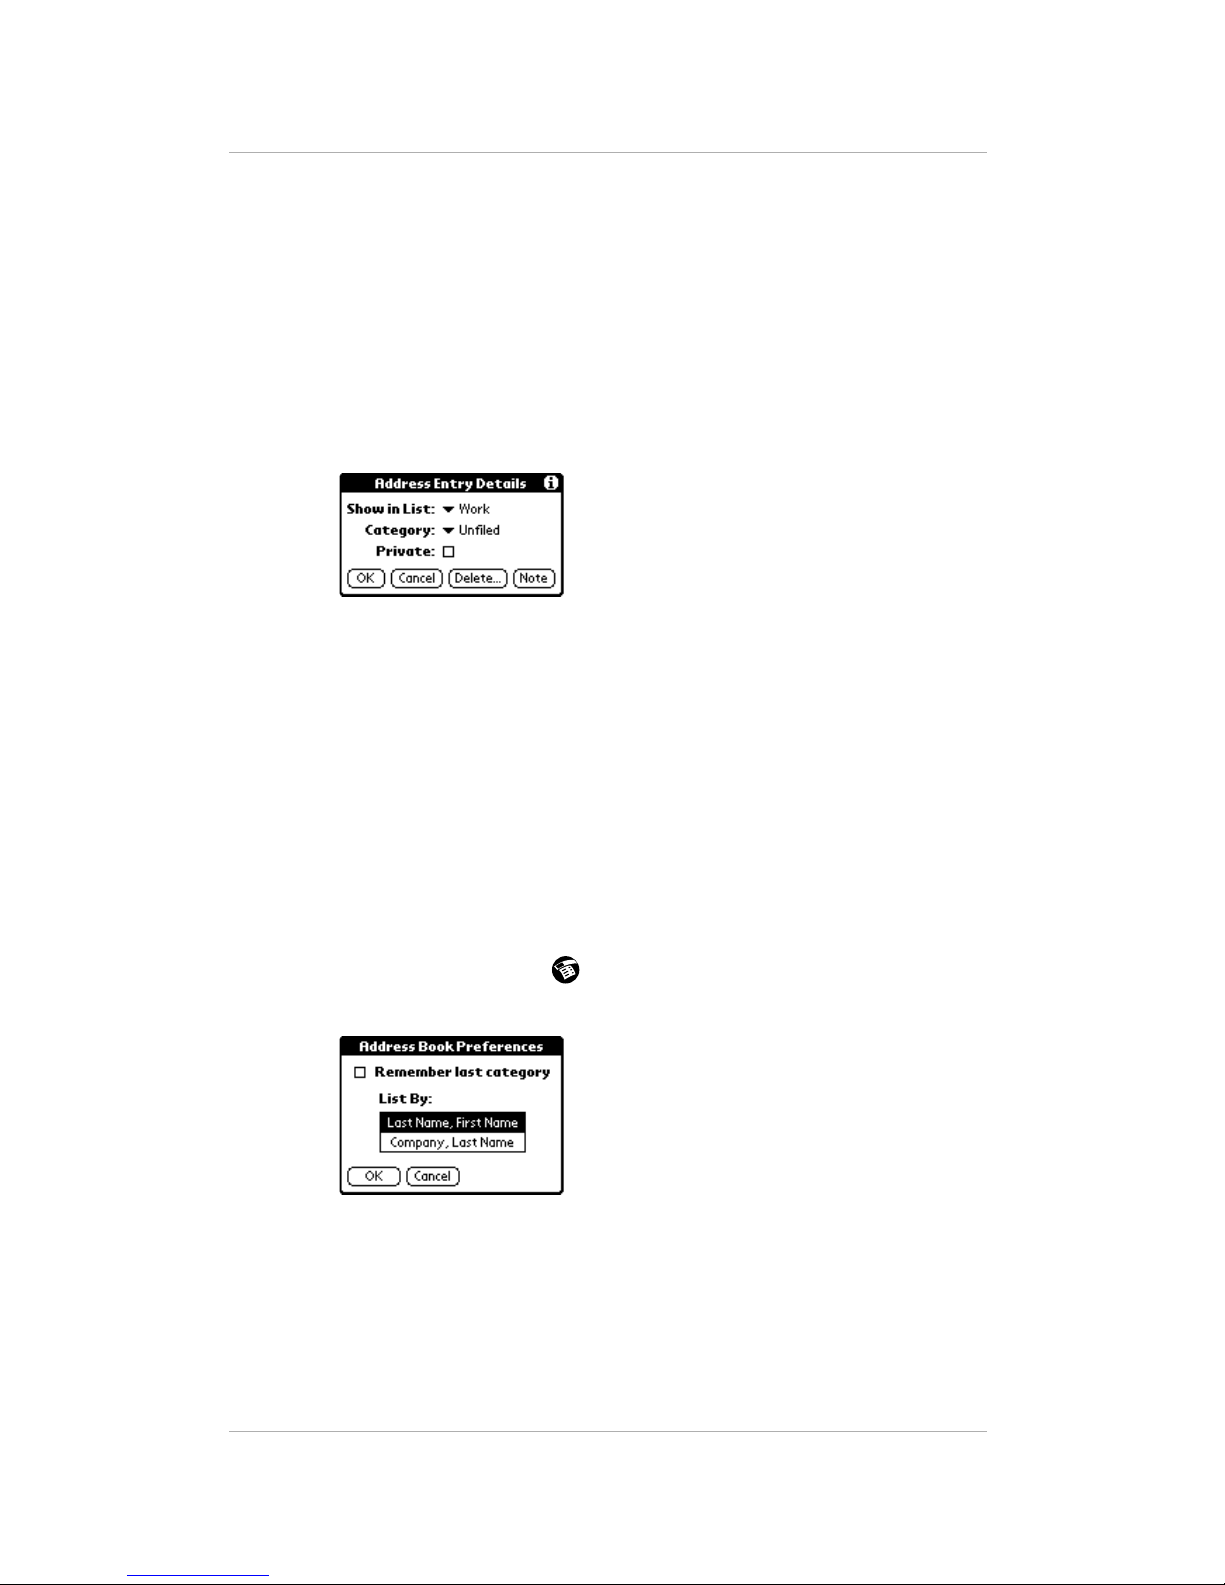
5. If you want to select which phone number appears in the Address List, tap
Details to display the Address Entry Details dialog. If you don’t want to
change this setting, skip to step 8.
6. Tap the beside Show in List. Select a label to identify which phone
number appears in the Address List.
Address Book
7. Tap OK .
8. Tap Do ne.
Assigning Address Categories
Categories can help you file your Address Book entries into groups for easy
review. For more information about creating and using categories, see “Using
Categories” in the pdQ Basics Handbook.
To assign a category to an Address Book entry:
1. In the Address List, tap the name you want to assign to a category.
Tap the name in the left column, not the phone number in the right column.
2. Tap Edit in the Address View screen to display the Address Edit screen.
3. In the Address Edit screen, tap the pick list in the upper-right corner. From
the list, tap the category you want to assign to this entry .
4. Tap Do ne.
Chapter 1 Address Book 7
Page 14
Working with Address Book Entries
Marking an Address Book Entry as Private
You can mark any entry as private. When the security features are turned on,
private entries are not visible. You must enter a passw ord to see them.
To mark an entry as private:
1. In the Address List, tap the name you want to mark as private.
Tap the name in the left column, not the phone number in the right column.
2. Tap Edit to display the Address Edit screen.
3. Tap Details to open the Address Entry Details dialog.
4. Tap the Private check box.
5. Tap OK.
6. In the confirmation dialog, tap OK.
7. Tap Done.
Sorting the Address List by Name or Company
You can sort the entries in the Address List screen by Company and Last
Name, rather than by Last Name and First Name. These settings do not change
your Address Book data in any way; they merely change the view.
To sort the entries in the Address List screen:
1. In the Address List, tap to open the Address Book menus.
2. Tap Options. In the Options menu, tap Preferences.
3. Tap the setting that you want for the Address List screen.
4. Tap OK.
The Address List is resorted based on your choice. Entries with no
company name are always sorted by last name.
8 pdQ Applications Handbook
Page 15

Working with Address Book Entries
Beaming Address Book Entries to Other pdQ Smartphones
Using the infrared (IR) port, you can beam Address Book entries to other pdQ
smartphones or Palm organizers.
Note: To conserve power, your pdQ smartphone is delivered with the beam
feature turned off. To turn it on, see “Setting General Preferences” in
the pdQ Basics Handbook.
Once the beam feature is turned on, you can beam any of the following:
■ Your business card—The business card is a specially designated entry
containing information you want to exchange with business contacts. You
can send your business card quickly with one-touch beaming.
■ An address entry—You can select and beam any entry in your Address
Book.
■ A category of address entries—You can beam all of the entries in a
category. For example, you can share a list of restaurants with a friend.
For more information on the IR port, see “Beaming Inform ation to Other pdQ
Smartphones” in the pdQ Basics Handbook.
To create a business card:
1. In the Address List, tap New. Create an Address Book entry containing the
information you want on your business card.
2. Tap to open the Address Book menus.
Address Book
3. Tap Select Business Card from the Record menu. Tap Yes to accept this
entry as your business card.
4. Tap Done. Notice that in the Address View, the icon identifies this
record as your business card.
To beam a business card:
1. In the Address List, tap the name of your business card entry to display
the Address View screen.
Tap the name in the left column, not the phone number in the right column.
2. Tap to open the Address Book menus.
3. Tap Beam Business Card from the Record menu to beam your card.
You can also press for about two seconds to beam your card.
To beam the current entry:
1.
In the Address List, tap the name of an entry you want to beam.
Tap the name in the left column, not the phone number in the right column.
2. Tap to open the Address Book menus.
3. Tap Beam Address from the Record menu to beam the current entry.
If you beam entries often, you can set the full-screen pen stroke to beam
the current entry. See “Pen Preferences” on page 135.
Chapter 1 Address Book 9
Page 16

Working with Address Book Entries
To beam the current category:
1. In the Address List, tap the pick list in the upper-right corner. From the
list, select the category you want to beam.
2. Tap to open the Address Book menus.
3. Tap Beam Category from the Record menu.
Removing an Address Book Entry from the Speed Dial List
You can remove a phone number from the Speed Dia l list without deleting the
entry entirely from the Address Book.
To remove an Address Book entry from the Speed Dial list:
1. In the Address List, tap the name of the entry you want to remove.
Tap the name in the left column, not the phone number in the right column.
2. Tap Edit to display the Address Edit screen.
3. Tap the Speed Dial number.
4. Tap Remove.
5. In the confirmation dialog, tap Yes to remove this number from the Speed
Dial list or No to keep it.
6. Tap Done.
Deleting an Address Book Entry
To delete an entry in the Address Book:
1. In the Address List, tap the name of the entry you want to delete.
Tap the name in the left column, not the phone number in the right column.
2. Tap Edit to display the Address Edit screen.
3. Tap Details.
4. Tap Delete. Tap OK. The entry is removed from both the Address Book
and the Speed Dial list.
Tap Remove.
10 pdQ Applications Handbook
Page 17

Using the Address Book Menus
Using the Address Book Menus
This section outlines menu commands specific to the Address Book. See
“Using Menus” in the pdQ Basics Handbook for inform ation about menu
commands common to all applications.
Record Menu
The commands in the Record menu vary depending on which screen is open.
If Address List is open If Address View is open
Delete Address Remove an Address Book entry. In the alert dialog, tap OK to
delete the entry. The entry is remo ved from the Address Book, but
a copy is sent to an archive file on your computer during your next
HotSync operation. To delete the entry completely, remove the
check mark from the Save archive copy on PC check box.
Attach Note Create a note for the current entry.
Delete Note Remove a note attached to an Address Book entry. In the alert
dialog, tap OK to del ete the note or Cancel to keep the note.
Address Book
Beam Address Beam the current Address Book entry to another pdQ smartphone
through the IR port.
Beam Category Beam all Address Book entries in the current category to another
pdQ smartphone through the IR port.
Select
Business Card
Beam
Business Card
Select the current Address Book entry as your business card. To
beam your business card, use the Beam Business Card command.
Send the current business card to another pdQ smartphone
through the IR port. You can also beam your business card by
holding down the Address Book button for at least two seconds.
Chapter 1 Address Book 11
Page 18

Using the Address Book Menus
Options Menu
The commands on the Option menu va ry depending o n wh ich screen is open .
If Address List is open
Font Choose a different font (text) style for your entries.
Preferences Set how you want the Address Book to list information.
Remember last catego ry—If you select th is check box, the Address
Book shows the last category you used when you return to it from
another application. If you clear it, the Address Book shows the
entries for all categories.
List By—Sort address entries by last name or by company.
Rename
Custom Fields
Create your own names for the four custom fields. Your changes
apply to all of your Address Book entries.
If Address View is open
About
Address Bo ok
12 pdQ Applications Handbook
Show version information for the Address Book application.
Page 19

Chapter 2
Calculator
Using the Calculator, you can quickly perform basic ca lculations. The
Calculator is designed to perform addition, subtraction, multiplication, and
division operations.
You can also store and retrieve values in the Calculator’s memory.
In this chapter, you’ll find...
Using the Calculator page 14
Using the Calculator Menus page 15
Page 20

Using the Calculator
Using the Calculator
To open and use the Calculator:
1. Open the keypad. Tap to open the Applications Launcher.
2. Tap to dis play the Calcul ator.
3. Use your fingers or the stylus to tap the Calculator buttons on the screen.
Using the Calculator Functions
Use the Calculator function keys to perform the following calculations.
Clears the last number you entered. Use this button if you make a mistake
while entering a number in the middle of a calculation. When you tap this
button, you can re-enter a number without starting over.
Clears the entire calculation and allows you to begin a fresh calculation.
Toggles the current number between a negative va lue and a positive value. If
you want to enter a negative number, enter the number first and then press the
+/- button.
Places the current number in to Memory. Each new number you enter with the
M+ button is added to the total already stored in memory . The number that you
add can be either a calculated value or any number you enter by pressing the
number buttons. Pressing this button has no effect on the current calculation
(or series of calculations); it merely places the value into memory until it is
recalled.
Recalls the stored value from memory and i nserts it in the cur rent calculation .
Removes any value that is stored in the Calculator memory.
14 pdQ Applications Handbook
Page 21

Using the Calculator Menus
Using the Calculator Menus
The Calculator supports the Copy and Paste commands. You can use these
commands to copy a value from the Calculator and paste it into another
application on the pdQ smartphone. Similarly, you can copy values from other
applications on the pdQ smartphone, such as Expense, and paste the values
into the Calculator. For additional information on the Copy and Paste
commands, see “Using Menus” in the pdQ Basics Handbook.
Recent Calculations
The Recent Calculations command enables you to review the last series of
calculations. It is particularly useful for confirming a series of “chain”
calculations.
To display the last series of calculations:
1. Tap to open the Calculator menu.
2. Fro m th e Options menu, tap Recent Calculations to display the Recent
Calculations screen.
Calculator
3. After you finish reviewing the dialog, tap OK to close the Recent
Calculations dialog and return to the Calculator.
Chapter 2 Calculator 15
Page 22

Page 23

Chapter 3
Call History
Call History maintains a list of your incoming, outgoing, and missed calls. By
default, the pdQ smartphone is set to keep 99 calls in Call History, but you can
adjust this number as high as 999 if you choose. The pdQ smartphone
automatically replaces older entrie s with new entries.
Using Call History, you can see exactly when some one called you and return
the call directly. You can also track data about your calls and export it to the
Expense application.
With Call History, you can...
Return a call directly.
View and sort calls in three categories: Incoming, Outgoing, and Missed.
In this chapter, you’ll find...
Opening Call History page 18
Making a Call from Call History page 18
Tracking Your Calls page 18
Creating an Expense Record page 21
Using the Menus in Call Histor y page 23
Page 24

Opening Call History
Opening Call History
To open Call History:
Open the keypad. Tap to open the Call History list.
The screen shows the calls you have made or received, including th e date,
time, and length. If the phone number is in your Address Book, the pdQ
smartphone displays the associated name in the Who column. Otherwise,
it displays the phone number. If you haven’t made or received any calls
yet, the Call History screen is empty.
If you synchronize more than one pdQ smartphone with the same user
name, the Call History screen displays calls from all of them. (Notice,
however, that synchronizing more than one device with the same user
name is not recommended.)
The icons show what type of call was made:
Incoming call
Outgoing call
Data call (for example, a call to a
web site)
Making a Call from Call History
You can quickly return a phone call directly from the Call History list.
To make a call from the Call History list:
1. Open the keypad. Tap to turn on the phone.
You can view or edit the calls in Call History with your pdQ smartphone
turned off, but it must be turned on to make a call.
2. Tap to open the Call History list.
3. Tap the entry you want to call.
4. Tap Dial.
Tracking Your Calls
Call History is a valuable tool for keeping track of your incoming and outgoing
calls. You can sort the Call History list, copy inf ormation from it into the
Address Book or the Clipboard, and delete entries.
18 pdQ Applications Handbook
Page 25

Tracking Your Calls
Copying Information from Call History
You can copy the name and phone number of any caller into your Address
Book or onto the Clipboard so it can be pasted into other applications.
To copy information from Call History to the Address Book:
1. Tap the entry you want to add to (or modify) in the Address Book. The
Call Detail dialog appears.
2. Do one of the following:
■ To add a new entry, tap Create Address Book Entry. Tap OK in the
confirmation dialog. The pdQ smartphone opens the Address Edit
screen where you can verify or change the entry.
■ To change an existing entry, tap Update Address Book Entry. In the
confirmation message, tap OK. The pdQ smartphone opens the
Address Book where you can verify or change the entry.
Call History
To copy information from Call History to the Clipboard:
1. Tap the entry you want to copy.
2. Tap to open the Call History menus.
3. Tap Copy Number to Clipboard from the Record menu.
Sorting the Call History List
With a single click, you can sort the Call History list by the name or phone
number of the caller, by date and time, or by length of call. No matter which
sequence you choose, new calls automatically appear at the top of the list.
To sort by name or phone number:
1. Tap Who in the column heading. Calls are listed by phone number firs t,
then by name in alphabetical order.
2. Tap Who again to resort the list by name first.
Chapter 3 Call History 19
Page 26

Tracking Your Calls
To sort by the date or time the call was received:
1. Tap Date in the column heading. Calls are listed by date, with all the calls
on a single day listed by time. For calls received or made during the
current day, only the time is displayed, not the date.
2. Tap Date again to resort the list based on the most recent time.
To sort by length of call:
1. Tap Length in the column heading. Calls are listed from longest to
shortest.
2. Tap Length again to resort the list from shortest call to longest call.
Deleting Calls
To delete one entry from the Call History list:
1. Tap the entry you want to delete.
2. Tap Delete. The call is removed from the list.
To delete all entries from the Call History List:
1. From the Call History list, tap to open the menus.
2. Tap Delete All Calls from the Record menu. All the calls are removed from
your Call History list.
Tracking Call Length
Your pdQ smartphone keeps statistics on the number and length of calls (in
minutes) made or received on the phone.
Notice that these statistics may not match the number of calls on the Call
History screen if you have synchronized more than one pdQ smartphone with
the same user name. That is, the Call History screen shows the calls one user
made or received on several devices, while the Call Statistics screen shows the
calls made or received on one device.
Notice also that the durations of call-waiting and conference calls are not
logged, since the pdQ smartphone cannot distinguish between the first and
second conversations.
To track call statistics:
1. From the Call History list, tap to open the menus.
20 pdQ Applications Handbook
Page 27

Creating an Expense Record
2. Tap Recent Calls from the Statistics menu.
The screen shows the total calls and total minutes for both Home and
Roaming calls.
3. To reset either of these counters, tap the appropriate Reset button.
4. To view all the minutes of calls in the lifetime of your pdQ smartphone,
tap Lifetime Calls from the Statistics menu. You cannot reset the Lifetime
Calls number.
Setting Up Your Call History Preferences
To define Call History preferences:
1. In the Cal l History application, tap .
2. Tap Preferences from the Options menu.
3. If you don’t want caller names to appear in the Who column even if this
information is available, tap Don ’t show name in summary.
4. To delete calls after a specific number of days, tap Delete calls after ___
days. Enter the number of days on the line.
5. To set the maximum number of calls to be listed in Call History, enter a
number between 1 and 999 on the Maximum # of Calls line.
6. Tap OK when you have finish ed.
Creating an Expense Record
If you need to keep a financial record of your calls for billing or expense
reports, you can generate an expense record from Call History. The calls you
select are copied to the Expense application where you can edit them, place
them in categories, and export them to Microsoft
®
Excel.
Call History
Chapter 3 Call History 21
Page 28

Creating an Expense Record
To create an expense record:
1. In the Call History list, tap a call you want to track on your expense record.
The Call Detail screen appears.
2. Tap Create Expense Record.
3. Tap the Expense category pick list and select the appropriate category for
this call.
4. Tap the Cost pick list and select hour or minute. Select the unit of currency.
Enter the amount to be charged per hour or minute.
Note: You can change the default settings in the category and cost fields
using the Options menu. See “Options Menu” on page 24.
5. If necessary, change the estimated duration of the call (for example, if you
spent billable time before or after the call that you want to in clude) .
6. Enter any additional information you want to record (for example, the
purpose or subject of the call) in the Notes area. The text you write here
will appear as a Note in the Expense record of this call.
7. Tap Create.
8. Tap Done.
Information about this call is moved to the Expense application where you
can edit it and export it to Microsoft Excel. For details, see
“Chapter 6—Expense.”
22 pdQ Applications Handbook
Page 29

Using the M enus in Call History
Using the Menus in Call History
This section outlines menu comm ands specific to Call History. See “Using
Menus” in the pdQ Basics Handbook for information about menu commands
common to all applications.
Record Menu
The commands on the Record menu vary depending on which screen is open.
From Call History From Call Details
Delete All Calls Remove all records from the Call History List.
Look Up Names From the Call History screen, scan the Address Book to update
the information in Call History. If you have made a number of
changes to your Address Book, you can select this menu option
to refresh the information in Call History.
Note that if you have 250 or more names in the Address Book,
you may want to turn off this feature to increase the
performance speed of Call History.
Copy Number
to Clipboard
From the Call Details screen, copy information from a call to
your Address Book.
Call History
Look up Name
in Address Book
Statistics Menu
Lifetime Calls View the total minutes for all calls received during the lifetime of
Recent Calls View the total number of calls and minutes since you last reset the
These statistics may not match the calls on the Call History screen if you have
synchronized more than one pdQ smartphone with the same user name. The
Statistics count the calls on one pdQ smartphone. The Call History screen shows
the calls made by one user on all devices synchronized under the same name.
From the Call Details screen , scan the Addr ess Book for an entry
that matches this number. The pdQ smartphone makes this scan
automatically after each call. However, if you have made a
number of changes to your Address Book, you can select this
menu option to update information in Call History.
your pdQ smartphone. You cannot reset this number.
pdQ smartphone. Calls are divided into Home and Roam areas.
You can reset either or both of these numbers.
Chapter 3 Call History 23
Page 30

Using the Menus in Call History
Options Menu
Preferences Manage the way calls are handled by Call History.
■ Display phone numbers only, without names.
■ Disable the lookup feature that updates Call History
with names from the Address Book. If you have more
than 250 names in the Address Book, it is recommended
that you disable automatic lookup to improve phone
performance.
■ Delete calls after X days.
■ Set the maximum number of calls to be kept in Call
History.
Auto-Expense Automatically generate expense reports based on your
incoming or outgoing calls.
■ Generate reports for all calls or for calls in a category.
■ Enter your cost per minute or hour in any currency you
have set up.
About Call History View version information for the Call History application.
24 pdQ Applications Handbook
Page 31

Chapter 4
Date Book
Using the Palm™ Date Book, you can quickly and easily schedule
appointments or any kind of activity associated with a specific time and date.
With the Palm Date Book, you can...
Enter your appointment and assign it to a time and date.
Display weekly and monthly charts of your appointments to spot potential
overlaps or conflicts.
Set an alarm to sound prior to a scheduled activity.
Create reminders for events such as birthdays and anniversaries.
Attach notes to events for clarification of the entry.
In this chapter, you’ll find...
Scheduling Events in the Date Book page 26
Scheduling Repeating Events page 30
Deleting an Event page 31
Changing the Date Book View page 31
Using the Date Book Menus page 34
Page 32

Scheduling Events in the Date Book
Scheduling Events in the Date Book
An event is any activity that you schedule for a particular day. When you
create an event, its description appears on the time line, and its duration is set
to one hour. You can easily change the start time and duration for any event.
You can also include events in your Date Book that have no start or end time,
such as birthdays, holidays, and anniversaries. These untimed events appear at
the top of the Date Book screen and are noted by a diamond.
To schedule an event for the current day:
1. Flip o pen the keypad. Press the button.
2. Tap the time line that corresponds to your event in the Date Book screen.
Tap a time line.
3. Enter information about the event.
4. To set the time of the event, do one of the following:
■ If your appointment is longer or shorter than an hour, tap the time of
the event to open the Set Time dialog.
■ If your appointment is exactly one hour long, skip to step 7.
You can also select a starting time for an appointment by making sure that
no event is selected, and then writing a number on the number side of the
Graffiti writing area.
Tap the time of an
event.
5. Tap the appropriate hour and minute in the time columns on the right side
of the dialog to set the Start Time.
26 pdQ Applications Handbook
Page 33

Scheduling Events in the Date Book
he start time
s highlighted.
Tap to scroll to earlier hours.
Tap to change hours.
Tap to change minutes.
Tap to scroll to later hours.
6. Tap the End Time box. Tap the appropriate hour and minute in the time
columns to set the End Time.
7. Tap OK to confirm your selection and close the Set Time dialog.
8. Tap a blank area of the screen to deselect the event. A vertical line appears
next to the time, showing the duration of the event.
To schedule an event for another day:
1. Select the date you want for the event by doing one of the following:
■ Tap the day of the week you want to choose in the Date Bar at the top
of the Date Book screen. Tap the left arrow to move to the previous
week or the right arrow to move to the next week.
Next week
Previous
week
Tap to select the day of the
current week.
■ Press the scroll up key to move to the previous day or the scroll down
key to move to the next day.
■ Tap Go To to open the Go to Date dialog. Select a date by tapping a
year, month, and day in the calendar.
Previous
year
Next year
Tap the month.
Tap the day.
Tap to select the current date.
2. After you locate the date, follow the steps in the previous section, “To
schedule an event for the current day.”
Chapter 4 Date Book 27
Date Book
Page 34

Scheduling Events in the Date Book
To schedule an untimed event:
1. Select the date as described in the previous section. Tap New to open the
Set Time dialog.
2. Tap OK, so that no start or end time is defined for the new event. You can
also create a new untimed event by making sure that no event is selected,
and then writing letters in the Graffiti w riting area.
3. Enter a description for the event. The untimed event appears at the top of
the Date Book screen.
New untimed
event
4. Tap a blank area on the screen to deselect the untimed event.
If you create an event and decide later that it has no particular start or end
time, you can easily change it to an untimed event. Tap the tim e of the
event in the Date Book screen, tap No Time, and then tap OK.
Rescheduling an Event
You can easily make changes to your schedule with your pdQ sma r tphone.
To reschedule an event:
1. Tap the event you want to reschedule.
2. Tap Details to open the Event Details dialog for that event.
3. Tap the Time box. Select the new time.
4. Tap the Date box. Select the new date.
5. Tap OK to return to the Date Book screen.
No time selected
28 pdQ Applications Handbook
Page 35

Scheduling Events in the Date Book
Setting an Alarm for an Event
You can set an audible alarm to remind yourself of upcoming events. The
alarm sounds even if the pdQ smartphone is turned off.
The default alarm setting is five minutes before an event, but you can change
this time period to any number of minutes, hours, or days. When you set an
alarm, appears to the far right of the event. When the a larm tone sounds, a
message also appears on the pdQ smartphone’s screen.
To set an alarm for an event:
1. Tap the event to which you want to assign an alarm. Tap Details.
2. To activate the alarm, tap the Alarm check box.
Tap here to select minutes, hours, or days.
Enter the number of minutes, hours, or days.
3. Tap to select Minutes, Hours, or Days.
4. Enter any number from 0 to 99 (inclusive) as the numeric alarm setting.
5. Tap OK to return to the Date Book screen.
Note: If you set an alarm for an untimed event, the alarm sounds a tone
at the specified number of minutes, hours, or days before
midnight of that day. A reminder message remains on the screen
until you tap OK.
Marking a Private Event
You can designate events as “private.” When you activate the Security
features, the pdQ smartphone hides all private entries. You must enter a
password to see them.
To mark an event as private:
1. Tap the event you want to mark as private.
2. Tap Details to open the Event Details dialog for that event.
3. Tap the Private check box.
4. Tap OK to return to the Date Book screen.
Date Book
Chapter 4 Date Book 29
Page 36

Scheduling Repeating Events
Scheduling Repeating Events
You can easily set up repeating events such as weekly m eet ings or birthdays.
After you enter a repeating event, appears to the far right of the event.
To schedule a repeating event:
1. Tap anywhere on the text of an event in the Date Book screen.
2. Tap Details to open the Event Details dialog.
3. Tap Repeat to open the Change Repeat dialog.
Tap the Repeat
box.
4. Tap Day, Week, Month or Year in the Change Repeat dialog.
5. In the Every line, write how frequently the event repeats. For example, if
you select Week and enter 2, the event repeats every other week.
6. To specify an ending date, tap the beside End. Tap Choose Date.
7. On the calendar, tap the end date.
8. Tap OK to activate your settings.
Considerations for Repeating Events
When you schedule or change a repeating event, be aware of the following:
■ If you change the start date, the pdQ smartphone calculates the number of
days you have moved the event and changes the end date to m aintain the
same duration.
■ If you change the repeat type (for example, daily to weekly), a new
repeating event is created. Past occurrences are not changed.
■ If you change the date and apply the change to all occurrences, the new
date becomes the start date of the repeating event. The end date is adjusted
to maintain the same duration.
■ If you change other repeat settings (such as time, alarm, or private) and
apply the change to all occurrences, a new event is created. The start d ate
is the day you made the changes. Past occurrences are not changed.
■ If you make a change to one o ccurrence of a repeating even t (such as time),
that occurrence no longer shows the Repeat icon.
30 pdQ Applications Handbook
Page 37

Deleting an Event
Deleting an Event
There are three ways to delete an event from the Date Book application:
■ Simply delete the text of the event. If you use this method to delete one
instance of a recurring event, all instances of the event are removed.
■ Use the Delete commands in the Record menu. Using this method, you can
choose to delete only one occurrence or all occurrences of the event. See
“Record Menu” on page 34.
■ Use the Event Details dialog. Using this method, you can choose to delete
only one occurrence or all occurrences of the event.
To delete an event with the Event Details dialog:
1. Tap anywhere in the text area of the event to delete it.
2. Tap Details to open the Event Details dialog.
3. Tap Delete.
4. Tap OK to confirm you want to delete the event.
Changing the Date Book View
In addition to displaying the calendar for a specific day, you can also view
your Date Book by the week or month, and you can display the current time.
To toggle through the views:
Press the Date Book button repeatedly to display the next view.
To display the current time:
Tap the date in the Date Book title bar to display the current time.
Tap the date. The current time appears.
After a few seconds, the title bar reverts to show the date.
Working in Week View
The Week View shows a chart of your events for an entire week so you can
quickly review your appointments and available time slots. In addition, the
graphical display helps you spot overlaps and conflicts in your schedule.
Date Book
Chapter 4 Date Book 31
Page 38

Changing the Date Book View
To display the Week View:
1. Tap Week View in the Date Book screen.
2. Tap the navigation controls to move forward or backward a week at a
time, or to display details of an event. The Week View also shows untimed
events and events that are before and after the range of times shown.
Week view
Previous
week
Next
week
Tap for that day.
Bar indicates event above display.
Dot indicates untimed event.
Bar indicates event below display.
3. Tap any of your events to show a description of the event.
Event details
Tap to show Event details.
4. To reschedule an event, tap and drag the event to a different time or day.
You can tap a blank time on any day to move to that day and time. Or you
can tap any of the days and dates that a ppear at the top of the Week View
to move directly to that day without selecting an event.
Note: The Week View shows the time span defined by the Start Time
and End Time in the Date Book Preferences settings. If you have
an event before or after this time span, a bar a ppears a t th e top or
bottom of that day’s column. The on-screen scroll arrows
appear if your scheduled events go beyond the displayed time
range.
32 pdQ Applications Handbook
Page 39

Changing the Date Book View
Spotting Event Conflicts in Week View
With the ability to define specific start and end times for any event, it’s
possible to schedule events that overlap. In this case, any event conflict (time
overlap) appears in the Week View as overlapping bars. The Day View
displays bracketed bars to the left of the conflicting times.
Event
conflicts
Working in Month View
The Month View screen shows which days have events scheduled. Dots and
lines in the Month View indicate events, repeating events, and untimed events.
Previous/next month
Dashed line indicates daily repeating event.
Dots on right side indicate events.
Dot below date indicates untimed events.
Month view button
1. Tap any day that appears in the Month View screen to move directly to the
Day View screen for that day.
2. Tap the arrows at the top to move forward or backward a month.
3. Tap Go To to open the Date Picker and choose a different month.
4. When the Month View is on the screen, press the scroll up and scroll down
keys to move between months.
Note: To modify the dots and lines that appear in the Month View, use
the Options menu. See page 35.
Date Book
Chapter 4 Date Book 33
Page 40

Using the Date Book Menus
Using the Date Book Menus
This section explains the menu commands that are specific to the Date Book.
See “Using Menus” in the pdQ Basics Handbook for information about menu
commands common to all applications.
Record Menu
New Event Create an event. The Set Time dialog appears, where you can
choose start and end times for the new event. If you do not enter
start and end times, the event is untimed.
Delete Event Remove an event from the Date Book. In the confirmation di alog,
tap OK to delete the event or Cancel to keep it. You must tap an
event before you use the Delete Event command.
By default, the event is removed from th e Date Book, but a copy is
transferred to an archive file on your computer during your next
HotSync operation. To remove the event completely, uncheck the
Save archive copy on PC check box.
Attach Note Create a note for the current event.
Delete Note Delete the note attached to an event. In the confirmat io n dialog,
tap OK to delete the note or Cancel to save it.
Purge Remove events older than a certain time to conserve memory.
By default, the events are removed from the Date Book, but copies
are transferred to an archive file on your computer during your
next HotSync operation. To remove the event completely,
uncheck the Save archive copy on PC check box.
The Purge command deletes repeating events if they end before
the date that you activate the Purge command.
Beam Event Beam the current event to another pdQ smartphone through the
IR port. See “Beaming Information to Other pdQ Smartphones”
in the pdQ Basics Hand bo ok for more information.
34 pdQ Applications Handbook
Page 41

Using the Date Book Menus
Options Menu
Font Choose a font (text) style for your Date Book entries. See
Preferences Set preferences for Date Book times and alarms.
“Choosing Fonts” in the pdQ Basics Handbo ok for details.
Start/End Time sets the st ar t and
end times for the screen.
Alarm Preset automatically sets
an alarm for each new event.
Alarm Sound controls the type of
tone the alarm generates.
Remind Me defines how ma ny
times the alarm sounds. The
choices are 1, 2, 3, 5, and 10 times.
Play Every defines how often the
alarm sounds. The choices are 1,
5, 10, and 30 minutes.
Display Options Change the Date Book’s appearance and the events that appear.
Show Time Bars turns on time
bars in the Day View. Time bars
show the duration of events and
illustrate event conflicts.
Compress Day View controls
how times appear in the Day
View. If you remove the check
mark, all time slots appear. If you
check it, start and end times for
each event appear, bu t blank ti me
slots at the bottom of the screen
disappear.
Check any or all of the Month
View Settings to show timed,
untimed, or daily repeating
events in the month view.
Phone Lookup Activate the Phone Lookup feat ure. See “Using Phone Lookup” in
the pdQ Basics Handbook.
About Date Book Show version information for the Date Book application.
Date Book
Chapter 4 Date Book 35
Page 42

Page 43

Chapter 5
Dialer
The Dialer gives you access to an on-screen keypad while the keypad on the
front of the pdQ smartphone is flipped open. The Dialer’s keypad works the
same as the keypad on the front of the pdQ smartphone.
Because the key areas on the Dialer are large, you can tap them with your
fingers as well as the stylus.
With the Dialer, you can...
Make phone calls as if you were using the pdQ smartpho ne keypad.
Make phone calls using the Address Book.
Make phone calls using Speed Dial.
In this chapter, you’ll find...
Making Calls from the Dialer page 38
Page 44

Making Calls from the Dialer
Making Calls from the Dialer
To make a call using the Dialer:
Use the Dialer to make phone calls with the keypad open .
1. Open the keypad. Tap to turn on the phone.
2. Tap to display the on-screen keypad.
3. Tap or press keys to enter a phone number. Tap Send.
While the call is in progress, you can use the Dialer to enter other numbers
as necessary, such as extensions or passwords.
4. Tap End when you have finished your call.
To call a number in your Speed Dial list:
Since the Dialer works like the pdQ smartphone’s regular keypad, you can use
your Speed Dial numbers on this screen.
1. Open the keypad. Tap to turn on the phone.
2. Tap to display the on-screen keypad.
3. Tap or press the Speed Dial number you want to call.
4. Tap Send.
5. When you have finished your call, tap End. To close the Dialer, tap Done.
Dialer Tips
■ You can copy phone numbers from applications such as the Memo Pad or
■ You can enter a phone number in the dialer by writing in the Graffiti area
The number and name of this entry appear at the top of the screen.
pdQmail into the Dialer. For example, suppose someone sends you a
phone number in a text message. Just highlight the phone number and
select Copy from the Edit menu. Then open the Dialer. The first 32 dialable
characters are copied into the Dialer. Tap Send to make the call.
or using the on-screen keyboard, if you prefer.
38 pdQ Applications Handbook
Page 45

Chapter 6
$
Expense
The Palm™ Expense application enables you to keep track of your expenses
and then transfer the information to a spreadsheet on your computer.
With the Palm Expense application you can:
Record dates, types of expenses, amount spent, payment metho d, and other
details associated with any money th at you spend.
Create categories for your expenses, such as business and personal
expenses associated with a range of dates.
Keep track of vendors (companies) and people involved with each
particular expense.
Log miles traveled for a particular date or expense category.
Sort your expenses by date or expense type.
Transfer your expense information to a Microsoft® Excel spreadsheet
(version 5.0 or later) on your computer. (Microsoft Excel is not included
with the pdQ smartphone package.)
In this chapter
Creating an Expense Item page 40
Entering Receipt Details page 41
Transferring Your Data to Microsoft Excel page 45
Using the Expense Menus page 48
Page 46

Creating an Expense It em
Creating an Expense Item
Using Expense, you can record the date, expense type, and amount spent on
an item; sort your expense items into categories; and add other information.
To open Expense:
1. Fli p open the keypad. Tap to open the Applications Launcher.
2. Tap to display the Expense List screen.
$
To create an expense item:
1. Tap New in the Expense List to create a new item.
Cursor of
new item
Tap New.
2. Enter the amount of the expense.
3. Tap Expense Type and select a type from the pick list.
As soon as you select an expense type, your pdQ smartphone saves your
entry. If you do not select an expense type, it does not save the entry.
40 pdQ Applications Handbook
Tap here to open
the pick list.
Page 47

Entering Receipt Details
Note: A quick way to create a new expense item is to make sure that no
expense item is selected in the list, write the first letter(s) of the
expense type, and then write the expense amount. The automatic
fill feature completes the information. See “Options Menu” on
page 48.
Changing the Expense Item Date
Initially, expense items appear with the date you enter them on the pdQ
smartphone. You can use the Expense application to change the date
associated with any expense item.
To change the date of an expense item:
1. Tap the expense item you want to modify.
2. Tap the date of the selected item to open the Date dialog.
Expense
Tap the date.
3. Tap the date you want for the expense item.
Entering Receipt Details
To open the Receipt Details dialog:
1. Tap the expense item you want to modify.
2. Tap Details .
Chapter 6 Expense 41
Page 48

Entering Receipt Details
3. S elect any of the follow ing options:
Category Select a category for this item. Two sample categories (New
Type Select the expense type.
Payment Set the payment method. If the item is prepaid (such as airline
Currency Set the type of currency for this item.
York and Paris) are included to show how you might sort your
expenses by business trips. Choose Edit Categories from the
pick list to create new categories or change existing ones.
tickets supplied by your company), choose Prepaid to place the
expense correctly in the expense report . See “Tran sferring Your
Data to Microsoft Excel” on page 45.
To change the default currency, see “Options Menu” on page 48.
You can also display up to four other common types of currency.
See the next section, “Customizing the Currency Pick List.”
Vendor
and City
Attendees Display the
Record the name of the
the city where the expense was incurred. For example, a
business lunch might be at Rosie's Cafe (Vendor) in San
Francisco (City).
Memo Pad. Use this screen to list the people who attended the
event or to make any other notes about the expense.
Attendees screen, which resembles a memo in the
Tap here.
vendor associated with the expense and
4. Tap Lookup to display the name s and companies of people in your
Address Book.
5. Tap OK to activate your selections.
Customizing the Currency Pick List
You can select the currencies and symbols that appear in the Currency pick list.
To customize the Currency pick list:
1. In the Receipt Details dialog, tap the Currency pick list.
42 pdQ Applications Handbook
Page 49

Entering Receipt Details
2. Tap Edit currencies.
Tap Edit
currencies.
3. Tap each Currency pick list to choose the country whose currency you
want to display on that line.
4. Tap OK to activate your selection s.
If the correct currency is not in the list of countries, you can create your
own country and currency symbol. See the next section, “Setting Up a
Custom Currency Symbol.”
Setting Up a Custom Currency Symbol
Expense
To define a custom currency symbol:
1. From the Expenses screen, tap to open the Expenses menu.
2. Choose Custom Currencies from the Options menu.
Tap a Country button.
3. Tap one of the Country boxes to open the Currency Properties dialog.
4. Enter the name of the country and the symbol you want to appear in the
Expense application. Tap OK.
5. Tap OK to close the Custom Currencies dialog.
Chapter 6 Expense 43
Page 50

Entering Receipt Details
Note: To use your custom currency symbol as the default for all Expense
entries, choose the symbol in the Preferences dialog. To use your
custom currency symbol only for particular expense items, choose
the symbol in the Receipt Details dialog associated with those
items.
Using Show Options
You can define the sort order and other settings for your expense items.
To open the Show Options dialog:
1. Tap Show in the Expense List to open the Show Options dialog.
Tap Show.
2. S elect any of the follow ing options:
Sort By
Distance
Show Currency
3. Tap OK to activate your selections.
Sort the Expense entries by date or expense type.
Display Mileage entries in miles or kilometers.
Show or hide the currency symbol in the expense list.
44 pdQ Applications Handbook
Page 51

Transferring Your Data to Microsoft Excel
Transferring Your Data to Microsoft Excel
After you enter your expenses on the pdQ smartphone, you can view and print
the data on your computer using the Palm Desktop software.
You need Microsoft Excel version 5.0 (or later). Microsoft Excel is not included
with the pdQ smartphone. The procedures in this section assume that you
have installed the Palm Desktop software. See “Installing Palm Desktop
Software” in the pdQ Basics Handbook for more information.
Printing an Expense Report
To print your expense report:
1. Perform a HotSync operation to transfer your latest Expense data to your
computer. See “Chapter 7—HotSync Technology” for details.
2. On the computer, click Expense in the Palm Desktop to open Microsoft
Excel and the Expense Report configuration dialog.
If you open Expense from the Start menu (instead of the Palm Desktop),
you must first choose the pdQ smartphone user name.
3. Cli ck the expense category that you want to print.
Expense
Click to select Categories.
Shift+click to select multiple categories. To view the expenses for all of
your Expense categories, click All in the Categories area.
4. To define an end date for the report, enter the date in the End Date area.
If you do not specify an end date, all expense entries for the selected
categories will appear — up to the date of the last HotSync operation.
Chapter 6 Expense 45
Page 52

Transferring Your Data to Microsoft Excel
5. Click Print to display the expense report in the Print Preview window.
6. Click Print in the Microsoft Excel window to print your expense report.
To view your Expense data in a Microsoft Excel spreadsheet:
1. Perform a HotSync operation to transfer your latest Expense data to your
computer and make it available to the Palm Desktop.
2. Click Expense in the Palm Desktop to open Microsoft Excel and the
Expense Report configuration dialog. If you open Expense from the Start
menu (instead of the Palm Desktop), choose the pdQ smartphone user
name.
Click to select Categories.
3. Click the expense ca tegory that you want to use. Shift+click to select
multiple categories. To view the expenses for all categories, click All.
4. To define an end date for the report, enter the date in the End Date area.
If you do not specify an end date, all expense entries for the selected
categories appear up to the date of the last HotSync operation.
46 pdQ Applications Handbook
Page 53

Transferring Your Data to Microsoft Excel
5. Click Create to open a Microsoft Excel spreadsheet containing your data.
You can enter information, make formatting changes, save, and print the
file in the normal manner.
Using Expense Report Templates
Palm Desktop software comes with several Excel templates you can use or
customize. See Appendix A—Expense Reports for details.
Expense
To view your Expense data using a Microsoft Excel template:
1. Open your Expense data in a Microsoft Excel spreadsheet.
2. Click Options.
Enter name and other information.
Choose an expense template.
3. Enter name, department, and other information for your expense report.
4. Cli ck the Templates menu. Then click an expense template.
You can create custom expense templates and add them to the Template
menu. See Appendix A—Expense Reports for details.
5. Cli ck OK to return to the Expense Report Options dialog.
Chapter 6 Expense 47
Page 54

Using the Expense Menus
Using the Expense Menus
This section explains the menu commands in the Expense application. See
“Using Menus” in the pdQ Basics Handbook for information about menu
commands that are common to all applications.
Record Menu
Delete Item Delete an expense item. You must tap the item you want to delete
before Delete Item appears in t he menu. The item is r emoved from
the pdQ smartphone, but a copy is transferred to an archive file on
your computer during your next HotSync operation. To remove
the item completely, uncheck the Save archive copy on PC check
box.
Purge Conserve mem ory by deleting expense categories you no longer
use. An alert dialog prompts you to confirm that you want to
purge all records from the selected category.
Options Menu
Preferences Set the automatic fill feature and the default currency symbol.
Custom
Currencies
About Expense View version information for the Expense application.
Use automatic fill to select an
expense type by writing its first
letter in the Graffiti writing area.
Default currency sets the default
currency symbol for the Expense
application.
Define additional currency symbols for the Expense application.
Use this command only if the symbol you need is not availab le in
the Currency pick list. (See “Setting Up a Custom Currency
Symbol” on page 43.)
48 pdQ Applications Handbook
Page 55

Chapter 7
HotSync Technology
HotSync® technology automatically synchroniz e s data between your pdQ
smartphone and the Palm™ Desktop software on your computer. Changes
you make on either the pdQ smartphone or the computer appear in both
places. Once you complete a few simple setup steps, performing a HotSync
operation is as simple as tapping an icon.
With HotSync technology, you can...
Synchronize the Date Book, Address Book, To Do List, Memo Pad, Expense
entries, and e-mail messages on the pdQ smartphone with the entries on
your computer.
Manage individual or multiple pdQ smartphones with a centralized
computer.
Keep your data safe by automatically creating backup copies each time you
synchronize.
In this chapter, you’ll find...
HotSync Technology and the HotSync Manager page 50
Setting Up Your First HotSync Operation page 50
Performing a Local HotSync Operation page 51
Selecting HotSync Setup Options page 52
Customizing HotSync Operations page 53
Using File Link page 56
Page 56

HotSync Technology and the HotSync Manager
HotSync Technology and the HotSync Manager
The HotSync Manager oversees the synchronization process. It runs in the
background and monitors a communications port on your computer for a
HotSync command from a pdQ sm art pho ne.
When it “hears” a HotSync command, HotSync M anager synchronizes data in
the Date Book, Address Book, To Do List, Memo Pad, Palm Mail, pdQmail,
and Expense applications. It can synchronize the data even when the Palm
Desktop software is not running.
You can synchronize your data by connecting the pdQ smartphone directly to
your computer with the HotSync cradle or indirectly to a network.
Note: This chapter covers HotSync operations for computers running
Microsoft Windows. To perform a HotSync operation with a
Macintosh
Contact Palm Computing at 800-881-7256 (USA), 800-891-6342
(Canada), or 801-431-1536 (worldwide). You can also visit the Palm
Connected Organizers web site at http://www.palm.com.
®
computer, you must purchase a MacPac connection kit.
Setting Up Your First HotSync Operation
The first time you synchronize your data, you must enter user information on
both the pdQ smartphone and the computer. Once you enter this information
and synchronize, the HotSync Manager recognizes your pdQ smartphone and
doesn’t ask for this information again. If you are a System Administrator
preparing several pdQ smartphones for a group of users, see “Creating a User
Profile” on page 55 before performing the following steps.
To perform a HotSync operation for the first time:
1. Connect the pdQ smartphone cradle to your computer and plug the power
cord into an outlet.
2. If the Palm Desktop is not already running, double-click the Palm Desktop
icon on the Windows desktop (or select Palm Desktop from the Start
menu) to start it.
3. Click in the Windows taskbar to open the HotSync Manager menu.
4. Click Local from the HotSync Manager menu.
Tap Local to indicate that you are
using the cradle to synchronize.
50 pdQ Applications Handbook
Page 57

Performing a Local HotSync Operation
5. Slide the pdQ smartphone into the cradle. You’ll hear a click when it is
inserted properly.
6. Open the keypad. Tap to open the Applications Launcher.
7. Tap . Because you are performing your first HotSync operation for this
pdQ smartphone, the New User dialog appears.
8. Enter a user name for your pdQ smartphone.
Note: Every pdQ smartphone must have a unique name. Never try to
synchronize more than one pdQ smartphone using the same user
name.
9. Click OK to start the synchronizati on process.
HotSync Technology
10. Wait for a message indicating that the process is complete.
Performing a Local HotSync Operation
After you have completed your first HotSync operation, the HotSync process
is even faster and easier.
Note: It does not matter whether the pdQ smartphone is turned on or off
when you perform a HotSync operation. However, do not power the
phone on or off during a HotSync operation.
To perform a local HotSync operation:
1. Connect the pdQ smartphone cradle to your computer and plug the power
cord into an outlet. Insert the pdQ smartphone into its cradle.
2. If the HotSync Manager is not running on your computer, start it.
3. Tap on the pdQ smartphone screen to begin the HotSync operation.
4. Wait f or a message indicating that the process is complete.
To perform a local HotSync operation with the keypad closed:
1. In sert the pdQ smartphone into its cradle.
2. If the HotSync Manager is not running on your computer, start it.
3. Press and hold on the keypad to turn on the phone.
4. Press the left smart key under Menu.
Chapter 7 HotSync Technology 51
Page 58
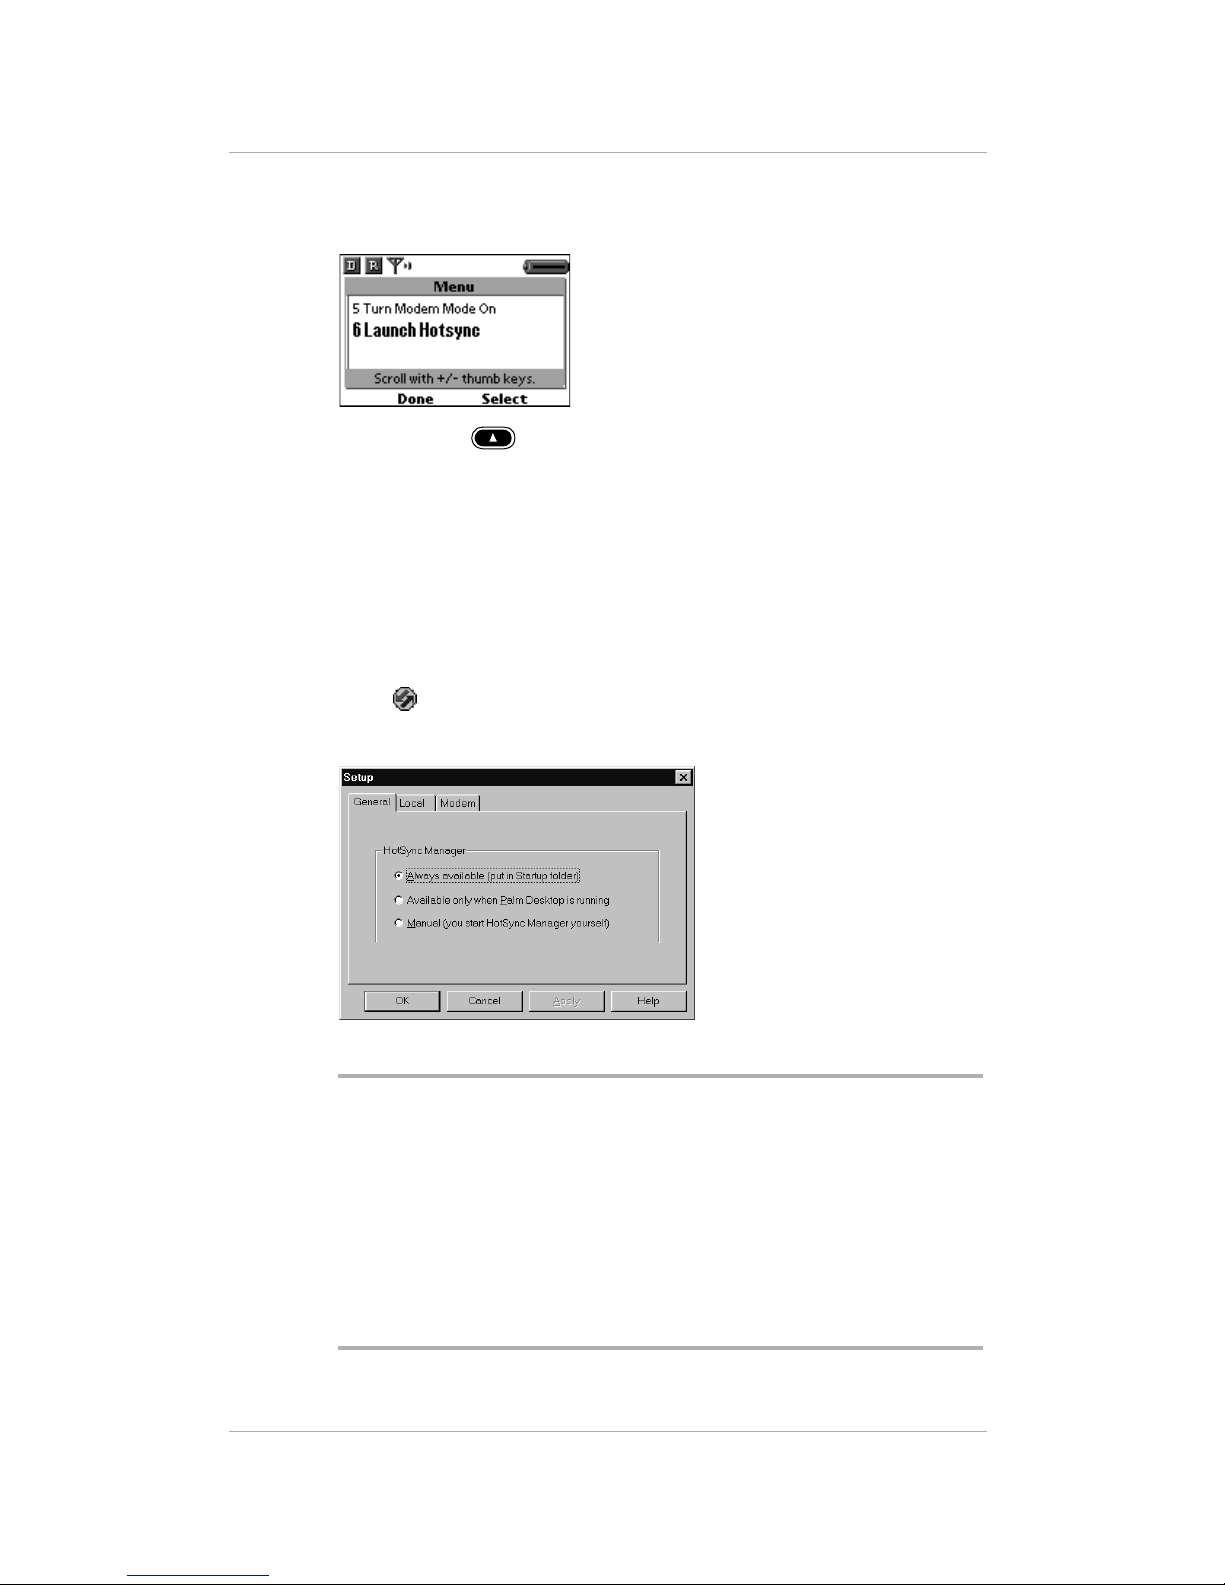
Selecting HotSync Setup Options
5. Use the Volume Control keys on the left side panel of the pdQ smartphone
to scroll through the menu until 6 Launch Hotsync is bold.
6. Press the right smart key under Select.
7. Wait f or a message indicating that the process is complete.
Selecting HotSync Setup Options
You can choose when you want HotSync Manager to run, and you can adjust
the local and modem HotSync settings.
To set the HotSync Options:
1. Click in the Windows taskbar to open the HotSync Manager menu.
2. Click Setup on the HotSync Manager menu.
3. Click the Gen e ral ta b and select one of the following options:
Always available Adds HotSync Manager to the Startup folder and
constantly monitors the communication port for
synchronization requests. W ith this option, the HotSync
Manager conducts synchronizations even when the
Palm Desktop software is not running.
Available only
when Palm Desktop
is running
Manual Starts the HotSync Manager and monitors requests only
Starts HotSync Manager and monitors requests
automatically when you open the Palm Desktop
software.
when you select HotSync Manager from the Start menu.
52 pdQ Applications Handbook
Page 59

Customizing HotSync Operations
If you’re not sure which option to use, select Always available.
4. Click the Local tab to display the settings for the connection between your
PC and the pdQ smartphone’s cradle.
5. Adjust the following options as needed.
Serial Port Identifies which port the Palm Desktop software will use to
communicate with the cradle. This selection should match the
port number where you connected the cradle.
The pdQ smartphone cannot share this port with an internal
modem or other device. If you have trouble determining the
correct port, see “Troubleshooting Tips” in the pdQ Basics
Handbook.
HotSync Technology
Speed Determines the speed at which data is transferred between the
pdQ smartphone and the Palm Desktop software. We suggest you
try the As Fast As Possible rate first, and adjust downward if you
experience problems. This setting allows the pdQ smartphone
and the Palm Desktop s oftware to find and use the fastest speed.
6. Cli ck OK to close the Setup dialog.
Customizing HotSync Operations
For each application, a program called a conduit controls how the records are
moved during synchronization. There are conduits for the Date Book, Addre ss
Book, To Do List, Memo Pad, and Expense applications, as well as System and
Install conduits.
In most cases, you won’t need to make any changes in the default conduit
settings. However, in the following cases, you m ust customize these settings:
■ To overwrite data on either the pdQ smartphone or the Palm Desktop.
■ To avoid synchronizing a particular type of file because you don’t use it.
Note: You must also set up a conduit to use the pdQmail application. See
“Setting Up the pdQmail Conduit” on page 105.
Chapter 7 HotSync Technology 53
Page 60

Customizing HotSync Operations
Customizing HotSync Conduit Settings
To customize HotSync conduit settings:
1. Click in the Windows taskbar to open the HotSync Manager menu.
2. From the HotSync Manager menu, click Custom.
3. Select the appropriate user name from the list at the top of the dialog.
4. Sel e ct the application in the Conduit list you want to change.
5. Click Change. The Change HotSync Action dialog appears.
6. Click the direction in which you want to write data, or click Do Nothing to
skip data transfer for an application.
Note: Changing the HotSync setting from the default affects only the
next HotSync operation. Thereafter, the HotSync Actions revert to
their default settings. To use a new setting on an ongo ing basis,
select the Set As Default box. Thereafter, just click Default in the
Custom dialog to revert to the default settings.
7. Repeat steps 3–6 to change conduit settings for other applications or for a
different user name.
8. Click OK to activate your settings.
54 pdQ Applications Handbook
Page 61

Customizing HotSync Operations
Performing a HotSync Operation via a Network
Using Network HotSync software, you can take advantage of the network
connectivity available in many office environments. This software, which is
available separately from Palm Computing, enables you to perform a HotSync
operation using a cradle that is connected to any PC on your Local Area
Network (LAN) or Wide Area Network (WAN). It is available for Windows 95
and Windows NT 4.0 systems only.
If you want to set up this capability, first contact the network administrator of
your company Intranet for details about the network security precautions in
place at your company. You can download the HotSync Network Connection
for Palm Desktop 3.0 from the Palm Computing web site. The download
includes both files and documentation. For complete information, see
www.Palm.com. Select Support and Palm III series.
Creating a User Profile
If you need to configure a number of pdQ smartphones with specific
information (such as a company phone list) before distributing them to their
actual users, you can create a User Profile to load the data into a pdQ
smartphone without associating that data with a user name. The User Profile
feature is designed only for the first-time HotSync operation, before you
assign a User ID to a particular pdQ smartphone. See“Using File Link” on
page 56 for info rmation about loading data after you assign a User ID.
HotSync Technology
To create a User Profile:
1. Open the Palm Desktop software.
2. Click Users from the Tools menu to open the Users dialog.
3. Cli ck Profiles to open the Profiles dialog.
4. Click New to open the New Profile dialog.
5. Enter a name for the Profile and click OK.
Chapter 7 HotSync Technology 55
Page 62

Customizing HotSync Operations
6. Repeat steps 4–5 for each Profile you want to create.
7. When you have finished, click OK to return to the Palm Desktop.
8. Select the Profile from the User list and create the data for the Profile (such
as company phone list).
To use a profile for the first-time HotSync operation:
1. Place the new pdQ smartphone in the cradle, then tap to open the
Users dialog.
2. Click Profiles to open the Profiles dialog.
3. Cho ose the profile you want to install on the pdQ sma r tphone. Click OK.
4. Click Yes to transfer all the Profile data to the pdQ smartphone.
The next time you use HotSync, the Palm Desktop softw are wi ll prompt
you to assign a User name to the pdQ smartphone .
Using File Link
Using File Link, you can synchronize the Address Book and Memo Pad
information on your pdQ smartphone with an external file, such as a company
phone list.
HotSync Manager stores the data in a separate cate gory on your Palm Desktop
and your pdQ smartphone. You can configure the File Link feature to ch eck for
changes to the external file when you perform a HotSync operation. For
information on how to set up a File Link, see the Palm Desktop Software online
Help.
With File Link you can synchronize data stored in any of these formats:
■ Comma-separated (*.csv) ■ Address Book archive (*.aba)
■ Memo Pad archive (*.mpa) ■ Text (*.txt)
56 pdQ Applications Handbook
Page 63

Chapter 8
Memo Pad
The Palm™ Memo Pad provides a place to take notes that are not associated
with Date Book, Address Book, or To Do items.
With the Palm Memo Pad, you can...
Take notes or write any kind of message on your pdQ smartphone.
Drag and drop memos into popular computer applications like Microsoft
®
when you synchronize using Palm Desktop software and HotSync
Word
technology.
Assign categories for memos so you can quickly view just your
business-related memos, personal memos, or any other category that you
define.
®
Quickly jot down phone numbers and other types of information. Later,
you can copy and paste this information to other applications.
Beam memos to other pdQ smartphones or Palm devices.
In this chapter, you’ll find...
Creating Memos page 58
Reviewing and Editing Memos page 58
Deleting a Memo page 60
Using Memo Pad Menus page 61
Page 64

Creating Memos
Creating Memos
A memo can contain up to 4,000 characters; the number of memos you can
store is dependent only on the memory available on your pdQ smartphone.
To create a memo:
1. Fli p open the keypad. Press the button.
The Memo List shows the first line of every memo you have created.
2. Tap New to create a new memo.
If you just begin writing in the Graffiti writing area w hile th e Memo List
screen is open, a new memo is automatically created.
Tap New.
3. Enter the text you want to appear in the memo. The first letter is
automatically capitalized. Write (the carriage return stroke) to move
down to new lines in the memo.
4. When you have finished, tap Done to return to the Memo List screen.
Reviewing and Editing Memos
Each time you create a memo, the f irst line of the me mo appea rs in the M emo
List screen. This makes it easy to locate and review your memos.
To review the contents of a memo:
1. Tap the text of the memo that appears in the Memo List screen to display
the memo on the screen.
Tap a memo to
review its
contents.
58 pdQ Applications Handbook
Page 65

Reviewing and Editing Memos
2. Review or edit the text in the memo.
3. Tap Done to save your changes and return to the Memo List screen.
Arranging Memos
You can sort your memos alphabetically or in any order that you want.
To select a sort option:
1. Tap to open the Memo Pad menus in the Memo List screen.
2. Tap Preferences from the Options menu.
3. From the Sort pick list, select Manual or Alphabetic.
4. Tap OK to activate your setting.
Manually Arranging the Memo List
If you choose the Manual option for the Sort by setting, you can manually
rearrange the order of the memos in the Memo List screen. When you
rearrange your memos, the pdQ smartphone renumbers all the memos to
reflect the new order.
Memo Pad
The Manual setting of the Memo Preferences is not transferred to the Palm
Desktop. If you choose to display your memos alph abetically on the Palm
Desktop and then perform a HotSync operation, the arrangement of the
memos on your pdQ smartphone will still be in the order defined in the Memo
Preferences setting.
To rearrange the order of your memos:
1. Select the Manual option in the Preferences dialog as described in the
previous procedure.
2. In the Memo List screen, tap and drag the memo to a new location in the
list. When you lift the stylus from the pdQ smartphone’s screen, the memo
appears in its new location.
Choosing a Memo Category
Categories are used to file individual memos into groups for easy review. You
can assign and edit categories by using the Categories pick list (in the
upper-right corner of the screen) or the Details dialog. See “Using Categories”
in the pdQ Basics Handbook for a complete description of categories.
Chapter 8 Memo Pad 59
Page 66

Beaming a Memo
Marking a Priva t e Memo
You can designate any memo as “private.” When you activate the Security
features, the pdQ smartphone hides all private entries. You must enter a
password to display them on the screen.
To mark a memo as private:
1. Tap the memo you want to mark as private to display it on the screen.
2. Tap Details to open the Memo Details dialog for that memo.
3. Select the Private check box.
4. Tap OK to close the Memo Details dialog and return to the memo screen.
Beaming a Memo
To beam a memo:
1. Open the memo you want to beam. Tap to open the menus.
2. To beam one memo, tap Beam Memo from the Record menu.
3. To beam all the memos in the current category, tap Beam Category from
the Record menu.
Note: Your pdQ smartphone is shipped with the Beam feature disabled
to save battery power. To turn it on, see “Setting General
Preferences” on page 138.
Deleting a Memo
There are three ways to delete a memo—simply delete the text of the memo,
use the Menu Command (see “Record Menu” on page 61), or use the Memo
Details dialog.
To delete a memo with the Memo Details dialog:
1. Tap the memo you want to delete.
2. Tap Details.
3. Tap Delete.
4. In the Delete Memo dialog, tap OK.
60 pdQ Applications Handbook
Page 67

Using Memo Pad Menus
Using Memo Pad Menus
The Memo Pad includes menu commands to make it fast and easy to perform
common file and editing tasks. See “Using Menus” in the pdQ Basics Handbook
for information about menu commands common to all applications.
Record Menu
The commands on the Record menu vary, depending on which screen is open.
Memo List Memo screen
New Memo Create a new memo.
Delete Memo Delete the current memo. In the conf irmation dialog, tap OK to
delete the memo or tap Cancel to keep the memo.
By default, the memo is removed from the Memo List, but a copy
is transferred to an archive file on your computer during your
next HotSync
uncheck the Save archive copy on PC check box.
Beam Memo Beam the cu rrent memo to another pdQ smartphone throu g h the
IR port.
operation. To remove the memo completely,
Memo Pad
Beam Category Beam all memos in the current category to another pdQ
smartphone through the IR port.
Chapter 8 Memo Pad 61
Page 68

Using Memo Pad Menus
Options Menu
The commands on the Options menu vary, depending on what screen is open.
Memo List Memo screen
Font Choose a font (text) style for your memos.
Go to Top of Page Move to the top (first) line of the memo.
Go to Bottom
of Page
Phone Lookup Activate the Phone Lookup feature. See “Using Phone
Preferences Open the Preferences dialog where you can set up the sort
About Memo Pad Show version information for the Memo Pad.
Move to the bottom (last) line of the memo.
Lookup” in the pdQ Basics Handbook.
order for your memos.
62 pdQ Applications Handbook
Page 69

Chapter 9
Modem Emulation
Your pdQ smartphone has a built-in wireless modem. Using the Modem
Emulation application, you can put your pdQ smartphone in the cradle and
use it like a modem for communication between your computer and other
computers or networks.
If you prefer, you can connect the pdQ smartphone to your computer with a
data cable, instead of the cradle. The data cable is not included in your
package, but it is available as an accesso ry.
With Modem Emulation, you can...
Operate the pdQ smartphone as a 19,200 baud modem. For example, you
can connect to a remote file server or an Internet site using the pdQ
smartphone in its cradle exactly as you would use any standard modem. Be
aware, however, that you cannot send or receive voice calls while you are
using the modem in this way.
In this chapter, you’ll find...
Setting Up Modem Emulation page 64
Opening Modem Emulation page 65
Exiting Modem Emulation page 66
Tips and Troubleshooting page 66
Page 70

Setting Up Modem Emulation
Setting Up Modem Emulation
To set up Modem Emulation:
1. Fli p open the keypad. Tap to turn on the phone.
2. Tap to display the Applications Launcher.
3. Tap to open the Modem Emulation application.
You see status information beginning with
“Initializing Modem” and continuing to
“Modem Ready.”
4. Tap to open the Modem Emulation menu.
5. From the Options menu, tap Settings.
This screen shows the serial communications settings between your
computer and the pdQ smartphone. Match your comp uter’s settings to
these values. You can change these settings if necessary. Refer to your
computer user guide.
6. Tap Baud Rate and select 9600, 19200, or 38400.
Note: This setting controls the baud rate for communication between
your computer and the modem. It does not affect the baud rate at
which the modem communicates with the outside world, which is
set at 19,200.
7. Tap Data Bits and select 8, 7, 6, or 5.
8. Tap Parity and select None, Even, or Odd.
64 pdQ Applications Handbook
Page 71

Opening Modem Emulation
9. Tap Stop Bits and select 1 or 2.
10. Do not change the Flow Control setting. Leave Flow Control set to
Hardware.
11. Tap Done.
Opening Modem Emulation
You can use the Modem Emulation application with the keypad flipped open
or closed. Notice, however, that you cannot make or receive voice calls or use
any other applications while the pdQ smartphone modem is in use. Incoming
phone calls will receive a busy signal. Opening any other application
terminates the modem call.
To start Modem Emulation with the keypad open:
1. Slide the pdQ smartphone into the cradle. If the cradle is attached to the
port you use for HotSync operations, turn off HotSync on your computer.
If you are using a data cable and/or a different port than the one you use
for HotSync operations, it is not necessary to turn off H otSync.
2. Fl ip open the keypad. If the smartphone is not on, tap to turn it on.
3. Tap to display the Applications Launcher.
4. Tap to open the Modem Emulation application.
You see status information beginning with “Initializing Modem” and
continuing to “Modem Ready.”
5. From the computer, make the connection you want to initiate.
When Modem Emulation is running, the
status information displays “Modem InUse.”
You cannot receive voice calls or open
other applications while Modem Emulation
is running.
To start Modem Emulation with the keypad closed:
1. Slide the pdQ smartphone into the cradle. If the cradle is attached to the
port you use for HotSync operations, turn off HotSync on your computer.
If you are using a data cable and/or a different port than the one you use
for HotSync operations, it is not necessary to turn off H otSync.
Modem Emulation
Chapter 9 Modem Emulati on 65
Page 72

Exiting Modem Emulation
2. If the smartphone is not already on, press the button to turn it on.
3. Press the left smart key under Menu.
4. Press the down volume button to scroll through the menu. When 5 Turn
Modem Mode On is bold, press the right smart key under Select.
The message Modem Mode On appears on the screen.
5. From the computer, make the connection you want to initiate.
Exiting Modem Emulation
To exit Modem Emulation with the keypad open:
Tap the Applications Launcher and select a different application or tap
End. The session terminates automatically.
To exit Modem Emulation with the keypad closed:
1. Press the left smart key under Menu.
2. Press the down volume button to scroll through the menu. When 5 Turn
Modem Mode Off is bold, press the right smart key under Select.
The message Modem Mode Off appears on the screen.
Tips and Troubleshooting
❑ If you see the message “Failed to Initialize Modem,” make sure the pdQ
smartphone is turned on. Exit Modem Emulation by tapping the
Applications Launcher. Turn on the pdQ smartphone and resta rt Modem
Emulation.
❑ You may also see “Failed to Ini tialize Modem” if you attempt to make a
modem connection while you are in a voice call. You cannot make a voice
call and a data call simultaneously using the same modem.
❑ When Modem Emulation is in the “Modem Ready” state, you can make
and receive calls on the pdQ smartphone. Once it is in the “Modem InUse”
state, you can no longer make or receive voice calls until you end the
modem session.
❑ You cannot use other Palm or pdQ smartphone applications while
running Modem Emulation. If you open another application, your m odem
session automatically terminates.
66 pdQ Applications Handbook
Page 73

Chapter 10
Palm Mail
With the Palm™ Mail application, you can...
Use your pdQ smartphone to read e-mail m e ssages that you have
downloaded from your computer’s e-mail application.
View, delete, file, and reply to incoming mail.
Create outgoing messages and drafts of messages to finish later.
Create both simple and complex filters to control the types of e-mail your
pdQ smartphone retrieves from your computer’s e-mail application.
In this chapter, you’ll find...
Deciding Which E-mail Application to Use page 68
Setting Up Palm Mail page 68
Viewing Messages page 70
Creating Messages page 71
Sending Messages page 76
Deleting Messages page 78
Managing the Message List page 79
Setting HotSync Options page 81
Working with Filters page 82
Using the Mail Menu Comman ds page 86
Page 74

Deciding W hich E-mail Application to Use
Deciding Which E-mail Application to Use
The pdQ smartphone is delivered with two e-mail applications—Palm Mail
and pdQmail. Choose which one you wan t to use ba sed on how you handle
your e-mail and what e-mail program you are running on your computer.
Application Method Use this method if...
pdQmail over the air Use this method to send and receive e-mail
wirelessly on your pdQ smartphone. In this
method, you connect to a mail server from
your phone. Your telephone service provider
must offer digital data coverage in your area. All
your e-mail messages must be kept on an
Internet server. See “Chapter 13—pdQmail.”
using
HotSync
Technology
Palm Mail using
HotSync
Technology
Use this method to send and receive e-mail via
your computer using a MAPI-compliant
e-mail program such as Eudora or Microsoft
Outlook Express. You transfer e-mail
messages to and from your pdQ smartphone
using a HotSync operation. See
“Chapter 13—pdQmail.”
Use this method to send and receive e-mail via
your computer using an e-mail program other
than Eudora or Outlook Express. You transfer
messages to and from your pdQ smartphone
using a HotSync operation.
Setting Up Palm Mail
Before you use Palm Mail for the first time, your computer’s e-mail application
should be up and running. You must also set up the Pa lm Desktop organizer
software for use with your computer’s e-mail applicatio n.
The following instructions assume that you have already installed Palm
Desktop software on your computer and that you did not set up P alm Mail
during the installation. If you have not yet install e d the Palm Desktop
software, you will be prompted to set up Palm Mail as part of the Palm
Desktop software installation.
To set up Palm Mail:
1. Click the Windows Start menu.
2. From the Start menu, choose Programs; choose Palm Desktop; and then
choose Mail Setup.
3. Follow the instructions on the screen to set up your pdQ smartphone for
use with your computer’s e-mail application.
68 pdQ Applications Handbook
Page 75

Setting Up Palm Mail
To select HotSync options:
1. Cli ck in the Windows taskbar to open the HotSync menu.
2. Cli ck Custom from the HotSync menu to open the Custom dialog.
You can also click Custom from the HotSync menu in the Palm Desktop.
3. Click Mail in the Custom list box.
4. Click Change to open the Change HotSync Action dialog.
5. Click one of the following settings:
Synchronize
the files
Desktop
overwrites
handheld
Do Nothing Turn off communication between your pdQ smartphone
Synchronize the mail on the pdQ smartphone and your
computer’s e-mail application.
Replace the mail on your pdQ sma rtphone w ith th e mail in
your computer’s e-mail application. Use th is opt ion o nly if
the two In boxes get out of sync. It applies for one HotSync
operation and then reverts back to the default setting.
and computer’s e-mail application for one HotSync
operation.
6. To change the default setting on an ongoing basis, click the Set As Default
check box.
Note: To turn off the Palm Mail application, select Do Nothing and then
select the Set as Default check box.
To change your Palm Mail setup options
1.
Click in the Windows taskbar to open the HotSync menu.
:
2. Cli ck Custom from the HotSync menu.
You can also click Custom from the HotSync menu in Palm Desktop.
Palm Mail
3. Click Mail in the Conduit list.
Chapter 10 Palm Mail 69
Page 76

Viewing Messages
4. Click Change to open the Change HotSync Action dialog.
5. Modify your settings as needed. Click OK to confirm your changes.
Synchronizing Palm Mail with Your E-Mail Application
After you have configured Palm Mail, perform a HotSync operation to
synchronize Palm Mail with y our computer’s e-mail application. For details,
see “Chapter 7—H otS ync Technology.”
Viewing Messages
To open Palm Mail:
1. Open the keypad. Tap to open the Applications Launcher.
2. Tap to display the Message List screen.
The Message List lists your incoming messages, who sent them, and the
date they were received. A check mark appears beside messages you’ve
read. High-priority messages appear in bold.
Previously read
To open a message:
Tap a message in the list to open it.
Header mode—Abbreviated or Complete
Recipient
Sender
Subject
Time and date sent
Message body
Messages appear by default in the abbreviated mode. To switch to the full
header mode, see “Displaying Full Header Information” on page 71.
70 pdQ Applications Handbook
Page 77

Creating Messages
To close a message:
Tap Done to close the message and return to the Message List.
Changing the Message Fonts
You can modify the way messages appear by changing the font (text) style. See
“Choosing Fonts” in the pdQ Basics Handbook for details.
Displaying Full Header Information
By default, Palm Mail displays abbreviated header information showing only
the From and Subject lines. Palm Mail uses the header type you select for all
your messages.
To display full header information:
1. Open a message.
2. Tap the Complete Header icon to display the full header.
3. To redisplay the short header, tap the Abbreviated Header icon .
Creating Messages
You create messages on the pdQ smartphone the same way you create
messages with your computer’s e-mail application—you identify the
recipient(s) of the message, enter a subject, and create the body of the message.
You create messages and replies in the New Message screen. All messages
must, at the very least, contain information in the To and Subject lines.
To create a message:
1. Tap New in the Message List screen to display the New Mess age screen.
You can also open this screen by tapping New from the Message menu.
2. Use the stylus to write Graffiti character strokes (or use the on-screen
keyboard) to enter the e-mail address of the recipient. The cursor indicates
where new text will appear.
Tap New.
Palm Mail
Chapter 10 Palm Mail 71
Page 78

Creating Messages
Enter the address as if you are using your computer’s e-mail application.
For example, if you are sending a message to a user on the same network,
you don’t need to add Internet information, such as @qualcomm.com.
3. To send a carbon copy of this message to additional recipients, tap the CC
line. Write the e-mail addresses of the other recipients, separating the
addresses with a comma followed by a space.
4. Tap the Subj line. Enter a subject for your message.
5. Tap the Body line. Enter the body text.
6. If the information you are entering in the address, CC, subject, or body of
the message is too long to see on screen, tap the line label to expand the
line. Tap the Done button to return to the New Message screen.
Tap the line label
to expand the
line.
Tap Done to
return to the New
Message screen.
7. When you have finished, go to “Sending Messages” on page 76.
To reply to a message:
1. Tap a message in the Message List to display it on the screen.
2. Tap the Reply button to open the Reply Options dialog.
3. Select the recipient(s). You can reply to the sender only, reply to all
recipients including the sender, or forward the message to someone else.
4. Select whether to Include original text and Comment original text.
5. Tap OK to return to the New Message screen.
6. Enter your reply text.
You have several message options i ncluding setting the priority. See
“Adding Message Details” on page 74.
72 pdQ Applications Handbook
Page 79

Creating Messages
7. Tap Send to place your reply in the Outbox. The message will be moved to
your computer’s e-mail program during your next HotSync operation.
Looking Up an Address
If you are not sure of a recipient’s e-mail address, you can look it up in your
Address Book, using the Look Up command.
To look up an address:
1. Tap either the To or CC line name to expand one of these fields.
2. Enter a few letters of the address you want to find.
3. Tap Lookup.
If the letters you enter identify a listing from your Address Book, the pdQ
smartphone completes the address for you. If not, the Lookup dialog
appears. (You can also tap Lookup from the Options menu to open it.)
Tap here.
4. Enter the first letter of the entry you want to find. The list scrolls to the first
entry beginning with that letter. If you write an additional letter, the list
scrolls to the first entry beginning with those two letters.
5. Tap an address to select it.
6. Tap Add to enter the address in the To or CC line.
Tap to select the address.
Tap here to put the selected address in the
header of your message.
Palm Mail
Chapter 10 Palm Mail 73
Page 80

Creating Messages
Adding Message Details
Before you send your message, you can attach additional attributes to it, such
as a signature or a high-priority flag. These attributes, which you select in the
Message Detail screen, are dependent on your computer’s e-mail application.
If your e-mail application does not support the attribute, the pdQ smartphone
cannot use it in your message.
Select from the following attributes:
Priority Flags a message as high, normal, or low priority.
BCC Creates a blind carbon copy line in the New Message screen.
Signature Attaches a previously defined signature. See “Adding a
Signature to Your Message” on page 75 for details.
Confirm Read Requests confirmation when the message is read.
Confirm Delivery Requests confirmation when the message is delivered.
Note: The Priority and BCC settings are valid only for the current message.
You must set them individually for subsequent messages you create.
Setting a Priority
If your computer e-mail application supports setting priorities, you can flag
messages on your pdQ smartphone with a specific priority.
To set a priority for your message:
1. Tap Details in the New Message screen.
2. Tap the Priority pick list and select the priority you want to assign.
3. Tap OK.
Sending a Blind Carbon Copy
To add a BCC line to your message:
Tap here.
1. Sele ct the BCC check box in the Message Details dialog.
74 pdQ Applications Handbook
Page 81

Creating Messages
2. Tap OK. A BCC line is added to the New Message screen.
3. Tap the BCC line and enter the address.
Adding a Signature to Your Message
To add a signature to your messages, you must first create the signature. Then
you select the signature option from the Message Detail dialog.
To create a signature:
1. Tap the icon to open the Palm Mail menus.
BCC line
2. Tap Preferences from the Options menu.
Add your signature text here.
3. Tap the Signature Text line. Enter up to six lines of text.
4. When you have finished, tap OK.
To add a signature to your message:
1. Tap Details in the New Message screen to open the Message Details
dialog.
2. Select the Signature check box.
3. Tap OK. The signature block does not appear in the message you see on
the screen. The recipient sees it when he or she reads your message.
Palm Mail
Chapter 10 Palm Mail 75
Page 82

Sending Messages
Requesting Confirmations
You can request confirmation when a message is received or when it is read.
To request a confirmation:
1. Tap Details in the New Message screen.
2. In th e Message Details dialog, tap the type of confirmation you wa nt:
■ Confirm Read— you are notified when the recipient opens the
message.
■ Confirm Delivery—you are notified when the message is delivered.
3. Tap OK.
Sending Messages
When you send Palm Mail messages from your pdQ smartphone, they are
stored in the Outbox folder until you perform a HotSync operation. During
synchronization, they are transferred to the Outbox fo lder in your computer’s
e-mail application. They are transmitted to the recipients the next time you
send mail from your computer’s e-mail application.
To send a message:
After you create a message, tap Send in the New Message screen.
Editing an Unsent Message
You can make changes to any message in the Outbox, as long as you have not
performed a HotSync operation.
To retrieve and edit a message:
1. In the Message List screen, select Outbox from the pick list.
2. Tap the message you want to retrieve.
3. Tap Edit to remove the message from the Outbox folder and place it back
in the New Message screen.
76 pdQ Applications Handbook
Page 83

Sending Messages
Working with Draft Messages
There may be times when you don’t want to send a message immediately. For
example, you may want to add more information before sending it. You can
save these incomplete messages as drafts in the Draft folder.
To save a message as a draft:
1. Create a message in the New Message screen.
2. Tap to open the Palm Mail menus.
3. Tap Save Draft from the Message menu.
To edit a message saved as a draft:
1. In the Message List screen, select Draft from the pick list.
2. Tap the draft you want to display.
Tap here to select
a message.
3. Tap Edit to move your draft to the New Message screen.
4. Enter your changes.
5. When you have finished, tap Send to put the message in the Outbox.
Filing a Message
You can store any message you receive or create in the Filed folder. The
messages in this folder are not synchronized with your computer’s e-mail
application during a HotSync operation. However, the pdQ smartphone do es
store a backup copy of the Filed folder on your computer hard drive.
To file a message:
1. Open a message.
2. Tap to open the Palm Mail menus.
3. Tap File f r om the Message menu.
4. Tap No to save the message and move it to the Filed folder or tap Yes to
file the message and keep a copy in the Inbox.
Tap to edit the draft
in the New Message
screen.
Palm Mail
Chapter 10 Palm Mail 77
Page 84

Deleting Messages
To remove a message you created from the Filed folder:
1. In the Message List screen, select Filed from the pick list.
2. From the list, tap the message you want to restore.
3. Tap Edit to display and modify the message. After you edit the message,
you can send it, save it as a draft, or return it to the Filed folder.
Deleting Messages
Messages you have deleted are stored in the Deleted folder until you perform
a HotSync operation. During synchronization, the message is deleted from
both the pdQ smartphone and your computer’s e-mail application.
To delete a message:
1. Open the message you want to delete.
2. Tap Delete.
3. If a confirmation alert appears, tap Yes to delete the current message.
Removing a Message from the Deleted Folder
If you decide not to delete a message, you can remove it from the Deleted
folder as long as you have not performed a HotSync operation or purged the
contents of the Deleted folder.
To remove a message you received from the Deleted folder:
1. In the Message List screen, select Deleted from the pick list.
2. From the list, tap the message you want to restore.
3. Tap Undelete to move the selected message to the Inbox.
To remove a message you created from the Deleted folder:
1. In the Message List screen, select Deleted from the pick list.
2. Tap the message you want to restore.
3. Tap Edit to display and modify the message. You can then send the
message or save it as a draft.
Purging Deleted Messages
Because deleted messages are stored in the Deleted folder until you perform a
HotSync operation, this folder can become very large. To save space, purge the
contents of the Deleted folder periodically. Messages that you purge are
removed from the pdQ smartphone immediately; they are then deleted from
your computer’s e-mail application during the next HotSync operation.
Be aware that you cannot restore messages after you have purged them.
78 pdQ Applications Handbook
Page 85

Managing the Message List
To purge the contents of the Deleted folder:
1. Tap to open the Palm Mail menus.
2. Tap Purge Deleted from the Message menu.
3. In the confirmation dialog, tap Yes to purge the contents of the folder.
Managing the Message List
After you have used Palm Mail on your pdQ smartphone for a while, you may
have many messages. To help you keep track of them, you can modify the way
messages are displayed in the Message List.
Selecting Message Categories
The Message List has five folders, each containing mail in a specific category
(for example, messages you have sent or those you have filed). Wh en you look
at the Message List, you select which of these five folders you wa nt to see. The
folders provide an efficient way to manage the mail you send and receive.
To select a folder:
1. Tap the in the upper-right corner to open the following list of folders.
Inbox Contains the mail from your computer’s e-mail application Inbox,
minus any that you have excluded using filtering options. See
“Working with Filters” on page 82.
Outbox Contains the mail you created and sent on the pdQ smartphone since
the last HotSync operation.
Deleted Contains the messages you deleted since the last HotSync operation.
Filed Contains the messages you want to store on your pdQ smartphone.
Draft Contains the messages you created using the pdQ smartphone but
are not yet ready to send.
2. Tap to select the folder you want to display in the Message List screen.
Checking the Date of a Message
The Date Column is optional in the Message List. By default, the Date Column
is hidden to increase the available screen space.
Palm Mail
Chapter 10 Palm Mail 79
Page 86

Managing the Message List
To show the Date Column:
1. Tap Show in the Message List to open the Show Options dialog.
2. Tap the Show Date check box.
3. Tap OK.
Sorting the Message List
You can sort the Message List to display your e-mail messages by date, by
sender, or by subject. High-priority messages always appear first, no matter
how you sort your message list.
Tap Show.
To sort the Message List:
1. Tap Show in the Message List to open the Show Options dialog.
2. Tap the Sort by pick list and select one of the following options:
Date Sort messages by date. Display the most recent message at the top.
Sender Sort messages by sender. Display them in ascending alphabetical
order based on the first word of the sender line.
Subject Sort messages by subject. Display them in ascending alphabetical
order based on the first word of the subject line.
3. Tap OK to close the Show Options dialog.
80 pdQ Applications Handbook
Page 87

Setting HotSync Options
Setting HotSync Options
Using HotSync Options, you can mana ge your e-mail more effectively by
selecting which messages are downloaded during synchronization. You can
use different settings for local and remote synchronization. For example, you
might want to download all messages during local synchronization and only
urgent messages during remote synchronization.
To set the HotSync Options:
1. Tap to open the Palm Mail menus.
2. Tap HotSync Options from the Options menu.
3. Se lect Local HotSync or Remote HotSync from the Settings pick list. For
more information, see “Chapter 7—HotSync Technology.”
Tap here to display
HotSync options.
4. Ta p the filtering option you want to apply during synchronization.
All All messages in your computer’s e-mail Inbox synchronize with
your pdQ smartphone, and all messages in your pdQ smartphone
Outbox are sent to your computer.
Send Only Only the messages in the pdQ smartphone Out box a re sent to your
computer’s e-mail application. They are then sent to their recipients.
Filter All messages in the pdQ smartphone Outbox are sent to your
computer’s e-mail application, and messages in your computer’s
e-mail Inbox that meet your filter criteria are downloaded to the
pdQ smartphone. A dialog displays additional filter settings you
can choose. See “Working with Filters” on page 82.
Unread Only unread messages are downloaded to the pdQ smartphone
from your computer’s e-mail Inbox. All messages in your pdQ
smartphone Outbox are sent to your computer’s e-mail application.
Note: The All setting does not mean that all information in each message
is downloaded. Truncation settings (see page 85) still apply. Also,
Palm Mail does not download a ttachments. The text message
appears, but attachments are left on your computer.
5. If you selected All, Send Only, or Unread, tap OK to confirm your
selection. If you selected Filter, continue to the next section.
Palm Mail
Chapter 10 Palm Mail 81
Page 88

Working with Filter s
Working with Filters
You can create filters to control which messages are downloaded to your pdQ
smartphone during synchronization. Filters work on the premise of ignoring
or retrieving messages that contain specific information in their header fields.
To create a filter, you must decide whether you want to ignore or retrieve
certain messages. Then you must tell your pdQ smartphone what it needs to
look for in the To, From, and Subject header fields to single out those messages.
To open the filter settings:
Tap the Filter box in the HotSync Options dialog.
Tap to display the
Filter options.
Ignoring or Receiving Messages
The first step in establishing a filter is to determine whether you want to ignore
or retrieve messages that match the information you specify.
To define whether to ignore or receive messages:
Tap the in the center of the dialog and select a filter option:
Tap here.
Select Filter option.
82 pdQ Applications Handbook
Page 89

Working with Filters
Ignore Messages
Containing
Retrieve Only
Messages
Containing
Defining Filter Strings
Messages are filtered based on the information in their To, From, and Subject
header fields. The information that defines what the pdQ smartphone is
looking for is called a filter string . You create a filter string by listing the words
you want the pdQ smartphone to find and separating them with either a
comma or a space. Each word in the filter string is joined by an implicit OR;
because of this, you should not enter connecting words such as AND or OR.
To create a more complex filter, you can define filter strings for the To, From,
and Subject fields simultaneously. The pdQ smartphone joins the filter strings
for these fields using an implicit AND. Once again, you sh ould not add
connecting words. Your pdQ smartphone will do that for you.
For example, suppose you want to receive only messages from John Smith
(jsmith@qualcomm.com) or Jack Jones (jjones@qualcomm.com) concerning
the Apollo Project. You would create the following filter strings:
Exclude the messages that meet the defined criteria and
download all ot her messa g es du rin g s ynchronization. In
general, this filter downloads more mail because it
blocks only one subset of mail.
Include only the messages that meet the defined criteria
and ignore all other messages during synchronization.
This filter has the potential to b lock more mail bec ause it
downloads only one subset of mail.
To field filter string: jsmith@qualcomm.com, jjones@qualcomm.com
Subject field filter string: Apollo Project
The pdQ smartphone interprets this as, “Accept messages about the Apollo
Project from John Smith or Jack Jones. Do not accept messages from other
people. Do not accept messages from John or Jack about any other subject.”
The pdQ smartphone searches for any instance of that collection of charact ers
in the string. For example, if you create a filter that retrieves only messages
containing the string “info,” the pdQ smartphone considers “info,”
“rainforest” and “kinfolk” appropriate matches.
Palm Mail
Chapter 10 Palm Mail 83
Page 90

Working with Filter s
To define filter strings:
1. Tap a header field in the HotSync Options dialog.
2. Enter your filter string for the selected header field using commas or
spaces to separate the words. Do not add connecting words such as AND
or OR between words in a string.
3. If your string exceeds the length of the field, tap the name of the field to
open the Notes screen for that field.
Tap here to
insert the cursor.
Enter the filter
data.
4. Tap Done.
5. Tap OK to confirm your filter strings and close the dialog.
High-Priority Messages
If your computer e-mail application has the capacity to flag high-priority
messages, you can set your pdQ smartphone to retrieve all messages marked
high-priority, even if those messages would have been blocked by a filter.
To retrieve high-priority messages:
1. Tap the Filter box in the HotSync Options dialog .
Tap here.
84 pdQ Applications Handbook
Page 91

Working with Filters
2. Tap the Retrieve All High Priority check box.
3. Tap OK to confirm your selection.
Truncating Messages
You can truncate long messag es when you download them to save stora ge
space and synchronization time. By default, the Truncate value is 4,000
characters. Truncation is separate and independent from filtering.
To truncate messages:
Tap the check box.
1. Tap Truncate in the HotSync Options dialog.
Tap Truncate.
Tap to select
maximum lengt h.
2. Tap to select the truncation setting (250–8,000 characters). If you select a
low truncation value, you will have more room to store messages.
3. Tap OK to confirm your selection.
Palm Mail
Chapter 10 Palm Mail 85
Page 92

Using the Mail Menu Commands
Using the Mail Menu Commands
This section explains the menu commands that are specific to the Palm Mail
application. For information about menu commands common to all
applications, see “Using Menus” in the pdQ Basics Handbook.
Message Menu
The Message menu commands vary depending on whether you a re viewing a
message, creating a message, or viewing the Message List.
Message List
New Create a new e-mail message.
Save Draft Save the message as a draft and move it to the Draft folder.
File Move the current message to the Filed folder.
Purge Deleted Remove all the messages in the Deleted folder.
Options Menu
The commands on the Options menu vary depending on whether you are
creating or editing a message.
Message List
View Message
New Message
New Message
Font Adjust the size of the text on the screen.
Preferences Define a signature and to select whether or not the pdQ
HotSync Options Select ways to filter mess ag es (includ ing sepa rate filters f or loca l
Look Up Select an address to put in the To field of a new message.
About Mail View version information for the Palm Mail application.
86 pdQ Applications Handbook
smartphone displays an alert when you delete a message.
and remote synchronization).
Page 93

Chapter 11
pdQalert
The pdQalert™ application lets you know if you have received text or pager
messages and whether or not your voice mailbox contains voice mail.
With the pdQalert application, you can...
Distinguish between read and unread messages. All unread messages
appear in bold while read messages appear as plain text.
See if your voice mail box contains voice mail messages.
Respond to text and pager messages directly.
In this chapter, you’ll find...
Setting Up pdQalert page 88
Receiving pdQalert Messages page 88
Responding to pdQalert Messages page 89
Checking Messages with the Keypad Closed page 90
Page 94
Setting Up pdQalert
Setting Up pdQalert
The pdQalert application tells you when you have received voice mail or
pages. To use pdQalert, you must first set up a voice mail a ccount with your
service provider.
Once you have this account, get the appropriate phone number from your
service provider and enter it in the Phone Preferences screen. For details, see
“Setting Phone Preferences” in the pdQ Basics Handbook.
Receiving pdQalert Messages
When you receive a pdQalert message, the light on the front of the pdQ
smartphone flashes red five times, the backlight turns on, and the envelope
icon appears on the screen.
To open the pdQalert application:
1. Fli p open the keypad. Tap to open the Applications Launcher.
2. Tap the pdQalert icon .
The icons show you what kind of message
you have received. You can tap the icon s to
respond to the alert messages.
The Message List shows you what kinds of messages you have (voice mail
or pages, for example) and how many of each type you h ave received. The
first entry in the Message List is always Voice Mail.
You can view your messages with the pdQ smartphone turned on or off,
but to respond to them, the pdQ smartphone must be turned on.
To read a message:
1. The first part of any text message appears on the Message List screen. To
see the complete message, just tap the text.
2. If the message contains a URL (Web address), tap either the URL text or
the icon to open the Web site.
Note: Your pdQ smartphone recognizes many different types of URLs,
including Tel: (a URL format for phone numbers) and MailTo: (a
URL format for e-mail addresses). It will attempt to follow these
links and open other applications as identified in the URL.
88 pdQ Applications Handbook
Page 95

Responding to pdQalert Messages
Responding to pdQalert Messages
Using the Message List, you can quickly view your messages and respond to
them with a single tap.
To respond to a pdQalert message:
1. Open the keypad. Tap to turn on the pdQ smartphone.
2. Tap to open the Applications Launcher.
3. Tap to open pdQalert.
4. Tap the icon beside the message to respond.
If you have... Tap the icon to...
Voice mail Call the voice mail center. This number is
provided by your service provider. (See
“Setting Phone Preferences” on page 143.)
A text message. Read the message.
A page. Call back the pager number.
pdQalert
A hyperlink message (a message
with an embedded Web address)
A message with an embedded
phone number.
A special function (depending
on the application)
Open the Web address or other appropriate
application.
Open the Dialer. Tap Send to call back the
number.
Varies, depending on the application
To copy or save text:
You may sometimes want to copy information from a message and use it in
another message or a memo.
1. Tap the message to open it. To copy a portion of the message, highlight the
text you want to copy. To copy the entire message, you don’t need to
highlight it.
2. Tap to open the pdQalert menus. From the Message menu, tap any of
the following:
■ Tap Copy to copy the highlighted portion of the message to the
Clipboard. You can then paste it into another application.
■ Tap Select All to copy the entire message. You can then paste it into
another application.
■ Tap Save as Memo to copy the entire message into the Memo Pad.
3. Tap Do ne.
Chapter 11 pdQalert 89
Page 96

Checking Messages with the Keypad Closed
To remove all entries in pdQalert:
1. In the Messages screen, tap to open the pdQalert menus.
2. Tap Purge to remove all acknowledged messages on this pdQ smartphone
from pdQalert.
Checking Messages with the Keypad Closed
When the pdQ smartphone is turned on, you can check your pdQalert
messages without opening the pdQalert application.
1. If the pdQ smartphone is not on, press and hold on the keypad.
2. Press the key.
3. Press the Volume Control buttons on the left side of the pdQ smartphone
to move through the items listed.
4. To see details about a message, press the left smart key under
Details.
The left smart key toggles between the List screen and the Details
screen.
Note: If you flip open the keypad while you are checking a message, the
pdQalert application opens automatically so you can check
additional details of the message.
5. When you have finished, press the right smart key under Done.
90 pdQ Applications Handbook
Page 97

Chapter 12
pdQbrowser
If your phone service provider offers over-the-air digital data coverage in your
area, you can use the pdQbrowser™ application for wireless access to Internet
sites.
This text-only browser makes moving between sites and scrolling through
documents a snap. Once the pdQbrowser application is set up, it takes only a
few taps to visit an Internet site anywhere in the world.
With the pdQbrowser application, you can...
Create an unlimited number of bookmarks (to Web addresses).
Sort Web site bookmarks by categories.
Navigate the Web using a scroll bar and hotlinks.
Launch other types of URLs in addition to Web pages (for example, Tel: an d
MailTo: URLs or URLs that open other applications). The application used
to launch each URL type is set up in Registry Preferences. See “Setting
Registry Preferences” on page 147.
Open the pdQbrowser application and launch a URL directly from the
Address Book, if you have a URL set up in an address record.
In this chapter, you’ll find...
Getting Started with pdQbrowser page 92
Maintaining pdQbrowser Preferences page 93
Connecting to the Internet page 95
Working with Bookmarks page 96
Copying Text from a Web Site to Applications page 98
Disconnecting from the Internet page 99
Page 98

Getting Started with pdQbrowser
Getting Started with pdQbrowser
Before Using pdQbrowser
Access to the Internet varies depending on the service provider. Before you
use pdQbrowser, check with your wireless service provider to see if you have
Internet access. Also, before you use pdQbrowser, you must define your
network preferences. See “Chapter 8—Setting Network Preferences” in the
pdQ Basics Handbook.
Opening pdQbrowser
To start pdQbrowser:
1. Fli p open the keypad. Tap to turn on the phone.
The pdQ smartphone must be turned on to use pdQbrowser.
2. Tap to open the Applications Launcher.
3. Tap to open pdQbrowser.
The application displays the screen that appeared when pdQbrowser was
last used, either the Bookmarks screen or a Web page.
Tips for Working with pdQbrowser
The pdQbrowser application is optimized to display Web site information in
a compact way. Here are a few tips to use when you are visiting a Web site
using pdQbrowser:
Tap underlined text to launch a linked page.
Tap the pick list to open more options.
Tap Bookmarks to return to your Bookmarks
screen.
■ Tap the scroll bar on the right of the screen to scroll through text. Tap the
arrows on the bottom of the screen to move forward and backward.
■ A dotted line under text indicates a link. Tap the text to open a linked page
or site.
■ To return to your Bookmarks list from a site, tap Bookmarks.
■ Tap Details to learn more about a site. (The Page Details screen appear s.)
■ To bookmark a site, tap Bookmark this Page on the Page Details screen.
■ To reload a site, tap Refresh this Page on the Page Details screen.
92 pdQ Applications Handbook
Page 99

Maintaining pdQbrowser Preferences
■ You cannot tag Web sites as private. The pdQbrowser application does not
support private records.
■ You cannot beam or receive Web addresses using the IR port.
■ Be aware that you may not be able to view all Web sites. The pdQbrowser
application does not support sites using JavaScript, images, or frames.
■ If you are finished searching the Internet and are not going to use other
network applications, you may want to disconnect from the network. (If
you don’t disconnect, the connection will be dropped based on the timeout
setting in the Network preferences Details dialog. For more information,
see “Disconnecting from the Internet” on page 99.)
pdQbrowser ShortCuts
The pdQbrowser application includes ShortCuts that give you quick access to
menu options. ShortCuts, entered using Graffiti script, appear to the right of
applicable menu options.
You can also create your own ShortCuts to frequently-used Web sites in the
Preferences application. (See “Creating ShortCuts” on page 148.)
To use a shortcut:
On the left side of the Graffiti writing area, write a slash . Then write the
letter that corresponds to the shortcut you wan t to use.
Maintaining pdQbrowser Preferences
You can change how much cache memory you want the pdQ smartphone to
use for storing Web pages. Cache memory is the amount of memory available
for an application to use. If you assign a high cache size to pdQbrowser, you
can store more Web pages and save network interaction time. However, that
memory cannot be used by other applications. The default cache limit is 300K.
pdQbrowser
Note: If you tend to have a lot of free memory on your pdQ smartphone and
are a heavy Web user, you may want to consider increasing the
maximum cache limit. However, if the pdQ smartphone runs low on
memory, consider lowering the maximum cache limit.
You can also manually delete the cache. The least-recently-viewed entries in
the cache are automatically deleted when the cache size limit is reached.
However, you may want to delete the cache manually to eliminate the
possibility of getting an old copy of a Web page.
To display the pdQbrowser Preferences dialog:
1. From pdQbrowser, tap to open the menus.
Chapter 12 pdQbrowser 93
Page 100

Maintaining pdQbrowser Preferences
2. Tap Preferences from the Options menu.
3. If you need to add a proxy server, do the following steps:
A proxy server is used to provide access outside a corporate “firewall.”
Most users will not need to set up a proxy server. Generally, you only need
to add a proxy server if your Network Preferences are set up to dial a
modem inside a corporate network. Check with your network
administrator to see if you need to complete these fields. If needed, obtain
the information you enter in the fields from your network administrator.
a. Tap the box next to Proxy (by default this show s None).
b. Tap the Host line. Enter the proxy server name or Internet address.
c. Tap the Port line. Enter the configuration parameter for the proxy
server.
d. Tap the Exceptions line. Enter the domain-name endings for which the
browser should not use the proxy. (A domain name identifies the
server on the Internet; it is the dot-separated words you see in a URL
after the characters http://.) Typically, the exceptions list includes
domain names for servers inside the firewall. You must separate
multiple domain names by commas.
4. In the Maximum Cache Size line, write the memory size of the cache.
5. If you want to delete the cache, tap Delete Cache.
6. Tap OK when you have finished.
94 pdQ Applications Handbook
 Loading...