

Page 1
Qualcast
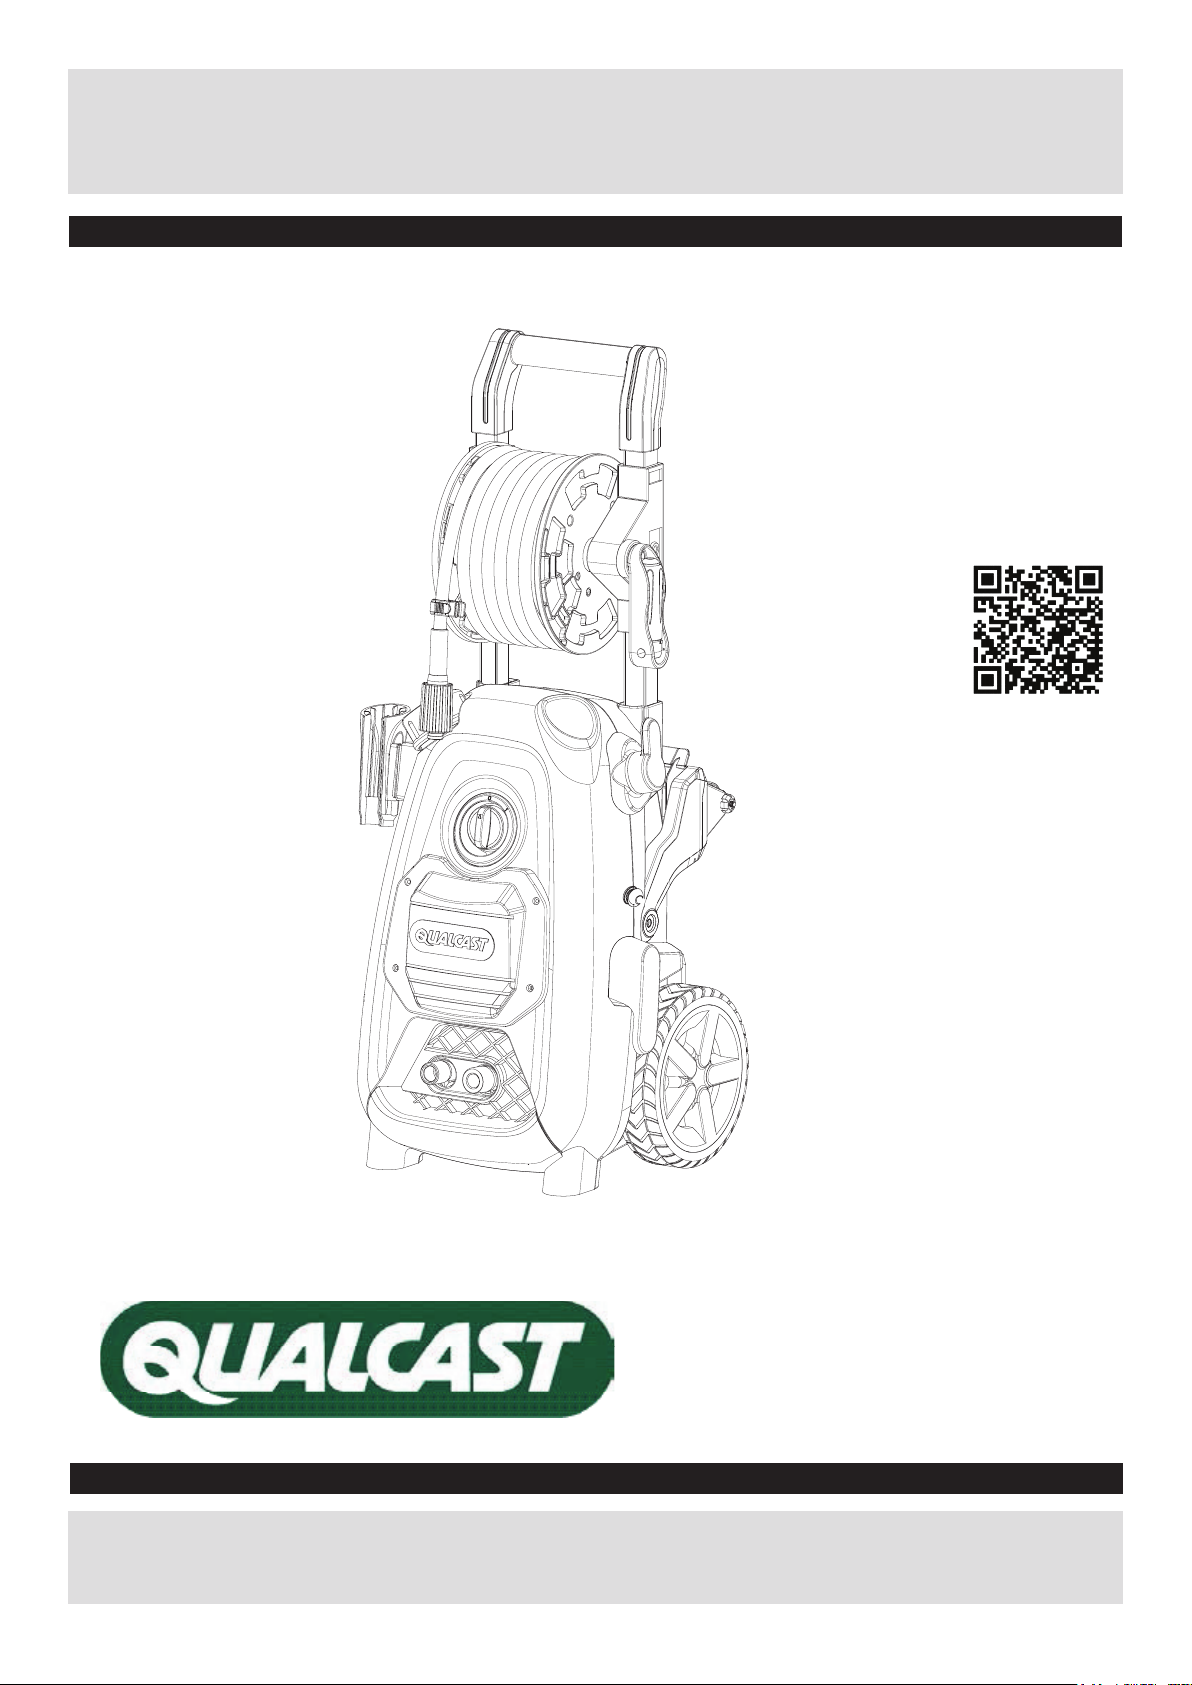
2000W High Pressure Washer
Original instruction manual Q1W-SP15-1900
Scan to watch
our new
instruction
videos!
Important –Please read these instructions fully before operating or maintaining your pressure washer.
These instructions contain important information that will help you get the best from your
pressure washer, ensuring it is assembled correctly and safely.
Oct 2014 Rev A
Page 2

Safety Information
Contents
Important - Please read these instructions fully before operating or maintaining
Safety Information......................................................................................................................................3
Warning Symbols .................................................................................................................................3
General Safety......................................................................................................................................4
Personal Safety.....................................................................................................................................4
Operating Safety....................................................................................................................................6
Maintenance and Storage Safety..........................................................................................................7
Intended Use........................................................................................................................................7
Service..................................................................................................................................................7
In the Box ..................................................................................................................................................8
Assemble the Pressure Washer................................................................................................................9
Preparing to Operate the Pressure washer...............................................................................................10
Operating the Pressure Washer................................................................................................................13
Maintenance and Repair...........................................................................................................................17
Storage and Transportation.......................................................................................................................17
Troubleshooting.........................................................................................................................................18
Technical Data........................................................................................................................................... 19
Recycling and Disposal.............................................................................................................................19
Plug Replacement.....................................................................................................................................20
Getting Help...............................................................................................................................................21
Guarantee..................................................................................................................................................22
Declaration of Conformity...........................................................................................................................23
Customer Helpline 01904 727500
www.gardenservicecentre.co.uk
Page 3
Safety Information
Important - Please read these instructions fully before operating or maintaining
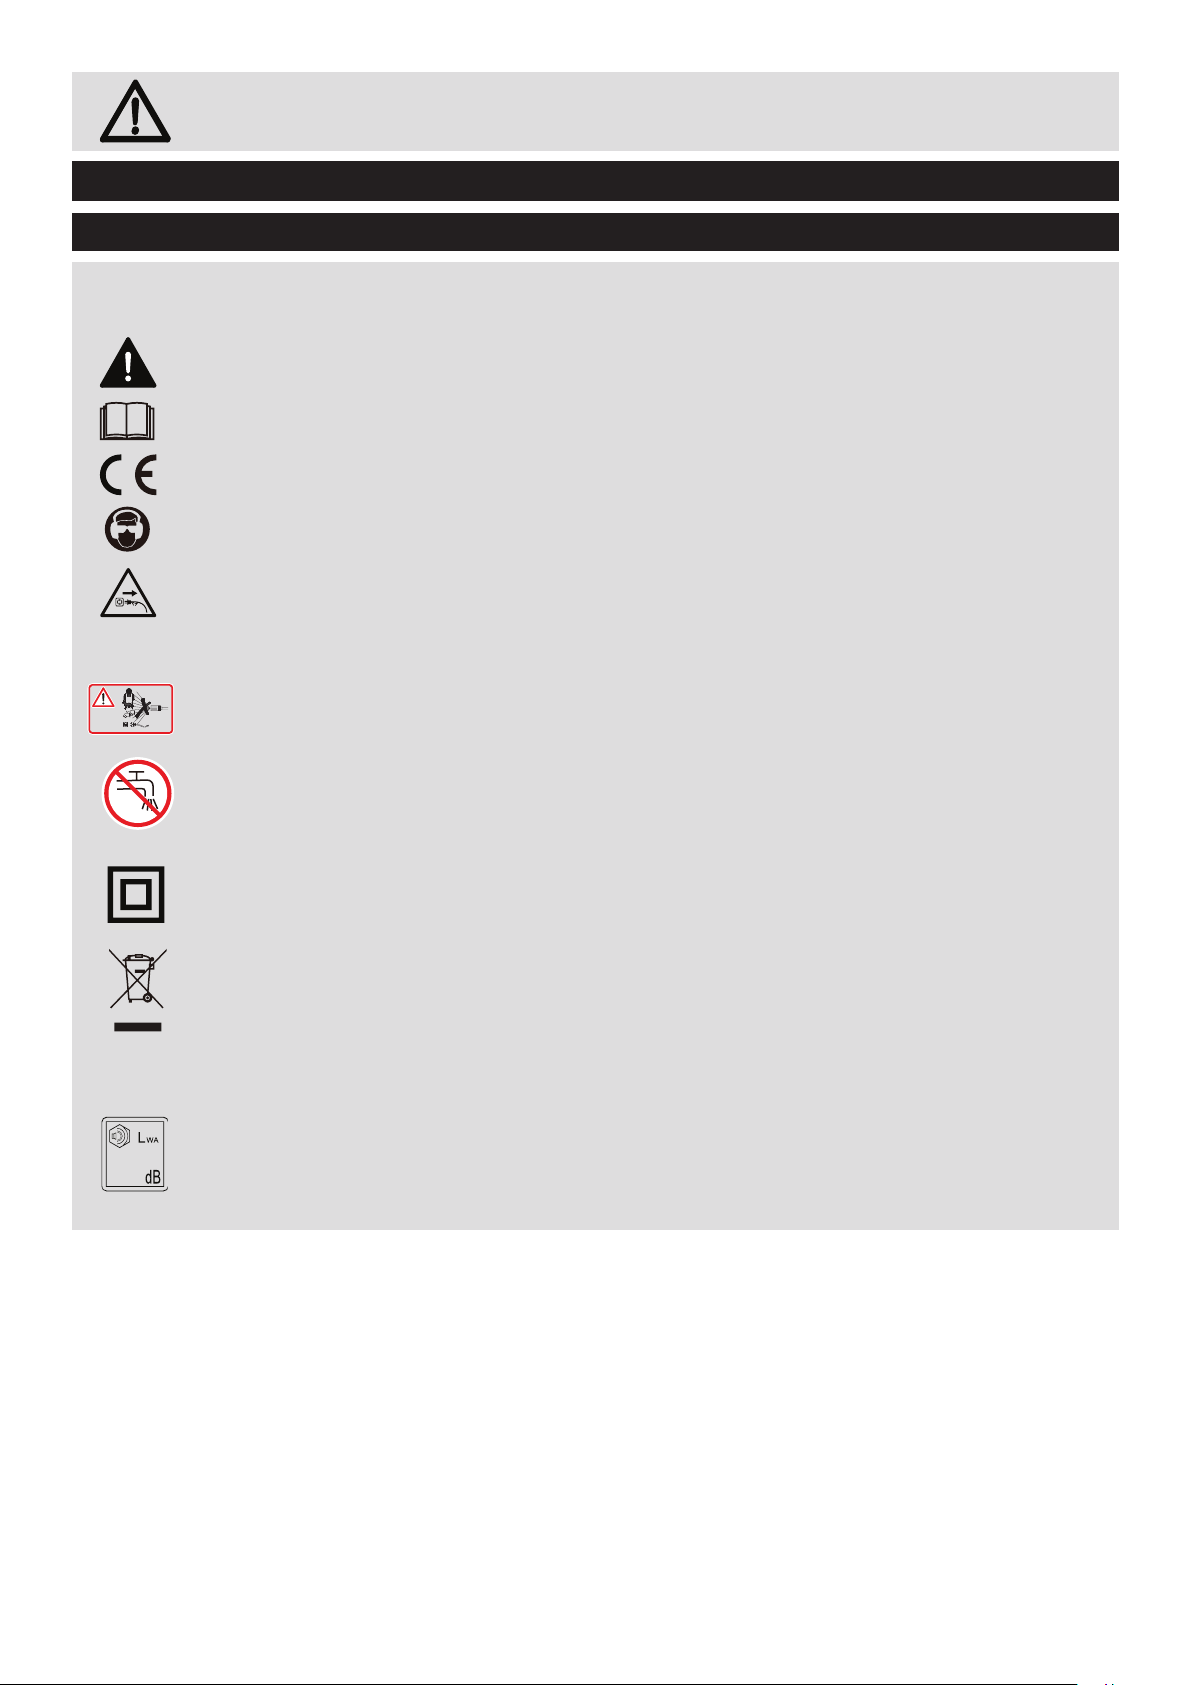
Warning Symbols
The following warning symbols appear through this manual and indicate the appropriate safety
measures you should take when operating and maintaining the pressure washer.
Warning
Read the instruction manual
Conforms to all relevant safety standards.
Wear eye and ear protections.
Disconnect the mains plug immediately if the cable is damaged, has been badly twisted or is
completely cut through and in the event that the device is left unattended for a short time.
WARNING: Never aim directly at persons, animals, the unit or electric
components.
94
Appliance not suitable for connection to the potable water mains.
Water that has own through backow preventers is considered to be non-potable.
The appliance is not intended to be connected to the potable water mains. If necessary, please
use only with a water backow preventer or inlet hose-set approved by IEC 61770.
Double insulations, Class II appliance
Waste Disposal and Environmental Protection!
Be environmentally friendly. Return the tool, accessories and packaging to a recycling centre
when you have nished with them.
Electrical machines do not belong in domestic waste.
Take the equipment to a waste disposal site. The plastic and metal parts that are used can be
separated out into pure grade, which allows recycling.
Guaranteed sound power level
Customer Helpline 01904 727500
www.gardenservicecentre.co.uk
Page 4

Safety Information
Important - Please read these instructions fully before operating or maintaining
General Safety
IMPORTANT!
- Keep this instruction manual in a safe place for future reference.
- Read the instructions carefully. Be familiar with the controls and the proper use of the
equipment.
- Never allow children or people unfamiliar with these instructions to use the pressure washer.
Local regulations can restrict the age of the operator.
- Never use the machine while people, especially children, or pets are nearby. Keep in mind
that the operator or user is responsible for accidents or hazards occurring to other people or
their property.
- This appliance is not intended for use by persons (including children) with reduced physical,
sensory or mental capabilities, or lack of experience and knowledge, unless they have been
given supervision or instruction concerning use of the appliance by a person responsible for
their safety.
- Don’t use the appliance without reading the instruction sheet.
- Children should be supervised to ensure that they do not play with the appliance.
Personal Safety
WARNING!
- Risk of fatal injury!
Use special care when cleaning tyres. Vehicle tyres/tyre valves may become damaged or burst
when handled improperly. First signs of damage include discolorations on the tyre. Damaged
vehicle tyres/tyre valves pose a life-threatening risk. Keep the jet at a distance of at least
30 cm!
- Never direct the jet against yourself or others in order to clean clothes or footwear.
- The appliance is not designed for connecting to tap water. If necessary, please use
only with a water backow preventer or inlet hose-set approved by IEC 61770.
- Risk of injection or injury, do not direct discharge stream at persons.
- Do not use the appliance when there are other people around, unless they are also wearing
safety equipment.
Customer Helpline 01904 727500
www.gardenservicecentre.co.uk
Page 5

Safety Information
Important - Please read these instructions fully before operating or maintaining
Personal Safety (continued)
- High-pressure jets can be dangerous if misused. The jet must not be directed at persons,
animals, electrical equipment or the appliance itself.
- Know how to stop the product and bleed pressure quickly, be thoroughly familiar with the
controls.
- Stay alert, watch what you are doing.
- Do not operate the product when fatigued or under the inuence of alcohol or drugs.
- Keep operating area clear of all persons.
- Do not overreach or stand on unstable support. Keep good footing and balance at all times.
- Always wear protective clothing and safety glasses. Loose particles and other debris may be
propelled at high speed by the water jet. Wear ear protectors.
- The operator or user is responsible for accidents or damages to other people or their property.
Operating Safety
WARNING!
- High-pressure hose ttings and couplings are important for the safety of the appliance.
Use only hose tting and couplings supplied by the manufacturer.
- Inadequate extension cables can be dangerous.
- The electrical supply connection shall be made by a qualied electrician can comply with
IEC60364-1
- The electric supply connection shall be made by a qualied electrician and comply with IEC
60364-1. It is recommended that the electric supply to this machine should include either a
residual current device that will interrupt the supply if the leakage current to earth exceeds
30 mA for 30 ms or a device that will prove the earth circuit.
- Disconnect from the electrical power supply before carrying out user maintenance.
- Don’t use the appliance if a supply cables or important parts of the appliance are damaged,
e.g. safety devices, high-pressure hoses, trigger gun.
- If extension cable is used, the plug and socket outlet must be of a watertight construction.
- If the supply cord is damaged, it must be replaced by the manufacturer or its service agent or
a similarly qualied person in order to avoid a hazard.
Customer Helpline 01904 727500
www.gardenservicecentre.co.uk
Page 6

Safety Information
Important - Please read these instructions fully before operating or maintaining
Operating Safety (continued)
- Water that run through backow preventers is considered to be non-potable.
- The PVC or polychloroprene sheathed power cord, or extension cables (H05VV-F) are
acceptable for use at temperatures at or above 0
- Always ensure that a machine which has been switched off and cannot be restarted
unintentionally.
- Only use hoses, ttings and couplings supplied and recommended by the manufacturer.
- Never carry the equipment by the cable or the hose. Do not carry the equipment with your
nger on the On/Off switch when it is connected to the mains.
- Remove the plug from the plug socket if you are not using the equipment, when transporting it
or when it is left unattended, when checking the equipment, cleaning it or removing blockages,
when undertaking maintenance work or changing accessories, if the power or extension cable
is damaged, after contact with foreign bodies, or in the event of abnormal vibration.
- Do not use the equipment near ammable liquids or gases. In case of non-observance, there
is a risk of re of explosion.
- Do not use the pressure washer if a supply cord, safety devices, hoses, switch or trigger gun
is damaged.
O
C.
- If an extension cord is used, the plug and socket must be of watertight construction.
Inadequate extension cords can be dangerous.
- Ensure that the mains voltage matches the information on the label.
- Before each use, check the equipment, power cable and plug for damage, avoiding an
electrical shock.
- Damaged cables, coupling and plugs or connecting leads that are not compliant with
specications are not to be used. Remove the plug from the plug socket immediately in case of
damage or cutting through of the mains cable.
- Do not use the equipment when the switching action of the On/Off switch is impaired. Have
damaged switches replaced at our Service Centre.
- Do not overload your equipment. Work only within the indicated range of performance. For
heavy work, do not use a machine with insufcient power. Do not use your equipment for
purposes other than those specied.
Customer Helpline 01904 727500
www.gardenservicecentre.co.uk
Page 7

Safety Information
Important - Please read these instructions fully before operating or maintaining
Maintenance and Storage Safety
WARNING!
- To ensure the appliance safety, use only original spare parts from the manufacturer or
approved by the manufacturer.
- Retrotting or making any unauthorized changes to the machine, as well as the use of
unapproved parts will invalidate your warranty.
- Do not attempt to repair the equipment yourself. All work not indicated in these instructions is
to be carried out only by service stations authorized by us.
- Store the equipment in a dry location and out of reach of children.
- Handle the equipment with care. Keep the equipment clean for save and more efcient
working. Follow the maintenance directions.
- Machine may be damaged by frost.
There is always residual water left inside the high-pressure washer and in the pump. Do not
store the machine at temperatures below freezing point in order to avoid frost damage.
Intended Use
This high-pressure cleaner is designed for domestic use only:
- to clean machines, vehicles, buildings, tools, facades, terraces, garden equipment etc. using
a high-pressure water jet (and detergents if required).
- to use with accessories, replacement parts and detergents approved by Qualcast.
Observe the instructions provided with these detergents.
Any use of the machine that deviates from its intended use and is not included in these
instructions is considered unauthorized use and relieves the manufacturer from his or her legal
liability.
Service
Have your tool repaired by an authorized service agent. This tool is manufactured in
accordance with the relevant safety regulations. To avoid danger, electrical appliances must
only be repaired by qualied technicians. Call our customer helpline at 01904 727500 for
advice.
Customer Helpline 01904 727500
www.gardenservicecentre.co.uk
Page 8

In the Box
Parts
high pressure washer
A
B
gun storage
C
reel handle
D
patio cleaner
E
extension lance for patio cleaner
F
xed brush
G
rotary brush
H
spiral spray lance
I
vario lance
J
trigger gun
K
screws 2pcs
L
Inlet adapter
M
nozzle pin (xed on the machine)
N
top handle
O
manual
P
hose clip
D
E
F
N
C
B
A
If there are any parts missing, please call the customer helpline on 01904 727500
G
H
I
J
K
L
M
O
P
Please keep original packaging for warranty purposes.
Customer Helpline 01904 727500
www.gardenservicecentre.co.uk
Page 9

Assemble the Pressure Washer
Preparing to assemble the pressure washer
IMPORTANT!
- Remove all parts of the pressure washer from the box and carefully remove all packaging.
Take care not to lose any instructions which may be afxed to the parts. These provide
important information which will be required while attached the pressure washer.
- Keep all packaging until the pressure washer is fully assembled and has been operated
successfully.
- Always recycle the packaging in accordance with local recycling schemes.
Step 1 - Assemble the tool
1. Remove package material from the box.
2. Fix the top handle onto the machine by inserting the handle on
top of the upper handle. Secure the handle in place with 2 screws.
Fix the gun storage on to the side of the machine.
Customer Helpline 01904 727500
www.gardenservicecentre.co.uk
Page 10

Preparing to Operate the Pressure Washer
Step 1 - Fit the high pressure hose to the washer
WARNING! Always wear safety gloves when doing any work on the pressure washer.
Remove the plastic cover and then connect the high pressure hose to the pressure washer.
Attach high pressure hose to the machine’s water outlet (hand tighten only).
Step 2 - Fit the trigger gun to the high pressure hose
Fully unwind and detach the pressure hose from the reel before connecting it to the trigger gun.
Screw the high pressure hose rmly onto the spray gun (hand tighten only).
Step 3 - Fit the lance to spray gun
2
Insert the spray lance into spray gun and twist 1/4 turn to lock in position.
Check that it is rmly securely located in place.
1
Customer Helpline 01904 727500
www.gardenservicecentre.co.uk
2
1
Page 11

Preparing to Operate the Pressure Washer
Step 4 - Assemble water inlet male connector
Attach the water inlet male connector to the machine’s water inlet. Hand tighten only.
Step 5 - Connect garden hose and water supply
Attach garden hose to water supply.
Step 6 - Connect garden hose and water inlet male connector
Before you attach your water hose (not included), run the water through to eliminate any air in
the hose to avoid air locking. Attach the hose with a quick connect coupling (not included) to
the high pressure washer. Now, turn the water on.
Customer Helpline 01904 727500
www.gardenservicecentre.co.uk
Page 12

Preparing to Operate the Pressure Washer
Step 7 - Connect socket
Make sure the ON(1)/OFF(0) switch is in the OFF(0) position and your hands and plug are
dry. Completely unwind power cord and plug the unit into an outlet.
Note! We Recommend the use of a RCD safety protection plug.
Operate the Pressure Washer
Step 1 - Starting
WARNING!
Wear suitable clothing, ears and eyes protecting when working with the equipment. Ensure that
the equipment is functional before each use. Check the safe condition of the machine:
– Check it for visual defects.
– Check that all parts of the machine have been securely tted.
– Check if the water connector and the high-pressure pipes are tight.
1. Place the high pressure washer on level ground. Stand in a secure and stable position.
2. Unlock the safety trigger on the spray gun and press the trigger until there is a steady stream
of water.
3. To switch the machine on, set the ON(1)/OFF(0) switch to ON(1).
Customer Helpline 01904 727500
www.gardenservicecentre.co.uk
Page 13

Operate the Pressure Washer
Step 2 - Stopping
1. Release the trigger, and replace the safety lock.
2. To switch the machine off, set the ON(1)/OFF(0) switch to OFF(0).
Step 3 – Use the high pressure lance
WARNING!
- Always turn off the machine when changing the high pressure lance.-The trigger gun is
subjected to a recoil force when the water jet is discharged. Make sure that you have a rm
footing and are also holding the trigger gun and spray lance with both hands.
1. Hold the hand-held spray lance and the jet tube rmly with both hands. Be aware of the
recoil when switching on the high-pressure jet.
2. Unlock the safety button and press the trigger on the handheld spray lance. It takes
approximately 5 seconds to release the high pressure.
NOTE!
- Clogging of the spray lance causes the pump pressure to be too high and cleaning is immediately required. You can clean it by carefully inserting the supplied cleaning pin into the tip of the
lance to remove deposits.
Customer Helpline 01904 727500
www.gardenservicecentre.co.uk
Page 14

Operate the Pressure Washer
Step 3 – Use the high pressure lance (continued)
CAUTION!
- Jet spray adjustment is very aggressive. Do not adjust while spraying.
Switch the machine off when interrupting your work for extended periods of time.
- The high-pressure pump starts running as soon as you operate the hand-held spray gun. The
high-pressure pump stops running as soon as you release the trigger on the hand-held spray
gun.
3. Use with adjustable spray lance, 180 degree rotation of the nozzle. It takes a couple of
seconds for the spray to adjust to the new setting.
The trigger gun safety lock prevents the trigger from being engaged accidentally and ensures
the trigger gun cannot be locked in the ON position.
Without turning the gun, adjust the spray to desired angle by turning the nozzle with 180°
marking as shown.
Customer Helpline 01904 727500
www.gardenservicecentre.co.uk
Page 15

Operate the Pressure Washer
Step 4 – Use the detergent bottle
WARNING!
In case of contact with detergents: rinse with an abundance of clean water
Always turn off the machine when changing the detergent bottle.
1. Unscrew the bottle cap of the detergent bottle. Fill the detergent tank with the relevant
suppliers diluted recommended mixture level.
2. Pull the spray lance head out to get low pressure, the machine won’t work with the lance in
high pressure position.
3. Turn on the pressure washer. Pull trigger to operate unit. The liquid detergent will
automatically mix with water, and be discharged through the nozzle. Apply detergent to a DRY
work surface, from bottom to top.
3. Rinse with clean water under high pressure (see top visual). On a vertical surface, rinse from
the bottom up, and then rinse from the top down to avoid streaking. Hold nozzle 6-8”
(15-20 cm) from the work surface at a 45
0
angle.
NOTE:
-The lance has to be set to low pressure for the machine to engage when using detergent.
- Allow detergent to remain on the surface for a short time before rinsing. Do not allow detergent to dry on surface
- Before you change the type of detergent for another job, ll detergent tank with clean water.
Pull the trigger on the lance at low pressure for one minute until all all detergent is ushed
through the system.
Step 5 - Use the x brush
WARNING! Always turn off the machine when changing the xed brush.
1. Fit the xed brush to the trigger gun.
2.Turn on the pressure washer. Pull trigger to operate unit.
Customer Helpline 01904 727500
www.gardenservicecentre.co.uk
Page 16

Operate the Pressure Washer
Step 6 - Use the patio cleaner
WARNING! Always turn off machine when changing the patio cleaner
D
E
1. Fit the patio cleaner (D) with the extended lance (E) to the trigger gun.
2. Turn on the pressure washer. Pull trigger to operate unit.
3. Move the patio cleaner in a side to side swinging movement, avoiding a front to back
brushing motion.
Step 7 - Use the spiral spray lance
Spiral spray lance can protect painted wood and UPVC surfaces as the water continuously
rotates resulting in a lower impact on the surface.
1. Fix the turbo lance to the trigger gun.
2.Turn on the pressure washer. Pull trigger to operate unit.
Step 8 - Use the rotary brush
1. Fit the rotary brush to the trigger gun.
2.Turn on the pressure washer. Pull trigger to operate unit.
Customer Helpline 01904 727500
www.gardenservicecentre.co.uk
Page 17

Maintenance and Repair
Maintenance and Repair
Maintenance and Repair
WARNING! Always switch the product off, unplug from the power socket and let the product
cool down before performing inspection, maintenance and cleaning work!
- After every use wipe the machine with a slight damp cloth. Do not clean the machine using a
high-pressure water jet.
- Clean the high-pressure jet nozzle.
The pressure washer is equipped with a water lter to protect the pump. If the lter is not kept
clean, the water ow to the machine will be restricted and the pump may be damaged. To clean
water lter, remove inlet adapter and get the lter out.
− Rinse lter until it is free of debris and blockage.
− Replace the lter and inlet adapter.
Storing and Transportation
Clearing of the Lime scale
From periods of time, water lime scale may build up on your lance outlet, use the nozzle cleaning pin to clean this away.
Storing
Always empty water from all hoses before storing.
Insert the high pressure hose threaded nut coupler into the relative slot in the drum.
Customer Helpline 01904 727500
www.gardenservicecentre.co.uk
Page 18

Storing and Transportation
Storing(continued)
Bend and pull the hose checking that the nut correctly ts inside the slot, Wind the same in the
direction indicated.
Secure the end of the hose with the hose clamp.
Accessories can be stored on the back of the machine where the specially designed SnapShut
mechanism will keep them in place, even when you are on the move.
Frost can damage your pressure washer that has not been completely emptied of water. The
machine should be stored in a frost free room. Do not kink high pressure hose.
Customer Helpline 01904 727500
www.gardenservicecentre.co.uk
Page 19

Troubleshooting
General Troubleshooting
WARNING!
- Only perform the steps described within these instructions!
All further inspection, maintenance and repair work must be performed by an authorised
service centre or a similarly qualied specialist if you cannot solve the problem yourself!
- Always turn off the machine and remove the plug before making any adjustment.
Problem Possible cause Solution
1. No power - Check the plug socket, cable, line
and plug.
- Any of the parts are defective,
such as On/Off switch / motor etc.
(please contact service agent).
- Connect to mains socket.
- Check by a specialist electrician
2. The high pressure
washer operates
intermittently.
3. No or only little
pressure is built up.
4. Pressure varieties - Check the high pressure jet nozzle
5. Machine is leaking. Machine is leaking Please contact the service agent.
6. Engine is running
but no pressure is build
up
7. Patio cleaner ips
over
- Power cable is damaged.
- Internal loose electrical
connection.
- On/Off switch defective (please
contact service agent).
- Check if there is any air in the
system.
- Check all inlet pipes leading to
the pump for leaks or the hose is
blocked or there is a kink in the pipe
- Check the setting on the
hand-held spray gun.
- Check the water inlet pressure.
You might have air locked in the
hose.
Used on uneven surfaces When using the patio cleaner on
- Check by a specialist electrician
- If so, please ventilate the machine!
Run the machine without the highpressure hose connected until water
starts leaking without bubbles. Reattach the high-pressure hose.
- Check by a specialist electrician
- Follow the Operation part again.
- If blocked, clean it with pin.
Turn off machine, disconnect hose, run
water through and connect again
If the problem continues --then please
contact the customer helpline
uneven ground avoid a brushing
motion (front to back) but use a
swinging movement from side to side
Customer Helpline 01904 727500
www.gardenservicecentre.co.uk
Page 20

Technical Data
Technical Data Table
Voltage/Frequency 230-240V~/ 50Hz
Input power 2000W
Max pressure 160bar
Rated pressure 110bar
Rated ow 5.5l/min
Max ow 7.5l/min
Max inlet pressure 6bar
Inlet T
Protection class II
Protection degree IPX5
Net weight 12.4 kg
Measured sound pressure level 81 dB (A), k=3 dB (A)
Measured sound power level 90.7 dB (A), k=3 dB (A)
Guaranteed sound power level 94dB (A)
Vibration 1.5m/s
The declared vibration value has been measured in accordance with a standard test method
and may be used for comparing one tool with another. The declared vibration value may also
be used in a preliminary assessment of exposure.
max
40OC
2
, k=1.5m/s
2
WARNING!
The vibration emission value during actual use of the tool can differ from the declared value
depending on the ways in which the tool is used. Identify safety measures to protect the operator that are based on an estimation of exposure in the actual conditions of use (taking account
of all parts of the operating cycle such as the times when the tool is switched off and when it is
running idle in addition to the trigger time).
The sound intensity level for the operator may exceed 85dB(A) and ear protection measures
are necessary.
Recycling and Disposal
Recycling and disposal
Recycle unwanted materials instead of disposing of them as waste. All tools, hoses and
packaging should be sorted, taken to the local recycling centre and disposed of in an
environmentally safe way.
Recycle rather than dispose of unwanted material in landll whenever possible. The machine
must be delivered in rigid packaging to avoid damage during transportation. The packaging
and the machine itself are manufactured from recyclable materials and should be disposed of
accordingly.
Only dispose of electrical/electronic/battery terms in separate collection schemes, which cater
for the recovery and recycling of materials contained within. Your cooperation is vital to ensure
the success of these schemes and for the protection of the environment.
Recycle packaging where facilities exist.
Customer Helpline 01904 727500
www.gardenservicecentre.co.uk
Page 21

Recycling and Disposal
Recycling and disposal (continued)
This symbol is known as the Crossed out Wheelie Bin Symbol. When this symbol is marked
on a product or battery, it means that it should not be disposed of with your general household
waste. Some chemicals contained within electrical/electronic products or batteries can be
harmful to health.
Plug Replacement
Plug Replacement
Your high pressure washer is tted with a moulded plug. However If you need to replace a
tted plug then follow the instructions below.
IMPORTANT
The wires in the mains lead are coloured in accordance with the following code:
Blue - Neutral Brown – Live
As the colours of the wires in the mains lead of this appliance may not correspond with the
coloured markings identifying the terminals in your plug, proceed as follows.
The wire which is coloured blue must be connected to the terminal which is marked with N
The wire which is coloured brown must be connected to the terminal which is marked with
the letter L
If a 13AMP (BS1363/A) plug is used, a 13A fuse must be tted, or if any other type of plug is
used a 13AMP fuse must be tted, either in the plug or adapter, or on the distribution board.
Note: If a moulded plug is tted and has to be removed take great care in disposing of the plug
and severed cable, it must be destroyed to prevent engaging into a socket. If the supply cord is
damaged it must be replaced by a service agent or a similarly qualied person in order to avoid
hazard.
Customer Helpline 01904 727500
www.gardenservicecentre.co.uk
Page 22

Plug Replacement
Plug Replacement (continued)
CABLES
IMPORTANT
• Use only 1.00mm
• YOUR HIGH PRESSURE WAHSER IS SUPPLIED WITH CABLE WIRED DIRECTLY INTO
THE PRODUCT.
1. Mains Cables and Extension Cables are available from your local Approved Service Centre.
2. Do not wire an extension cable directly to your product yourself. Please contact your local
Approved
Service Centre for further information on the connectors and kits available.
3. Only use extension cables specically designed for outdoor use.
CONNECTORS
IMPORTANT
• Connectors are suitable for use with 2 core cable only. Under no circumstances should these
connectors be used for earthed products.
• All connectors and cables are of splash proof construction. They are not waterproof and must
not be left outside permanently nor should they be submerged or immersed in water. Do not let
cable lay or trail through pools of water or splashed with water from hose pipes.
2
size cable up to 10 metres length maximum.
MAINS PLUG REPLACEMENT
IMPORTANT
• If the plug supplied is cut off it should be destroyed.
There is an electric shock hazard if a cut off plug is inserted into a 13 amp socket.
Getting Help
Customer Helpline 01904 727500
Our dedicated UK based customer helpline is open 7 days a week to assist you with assembly,
parts queries and technical support. We are open during ofce hours but you can always send an
email via support@gardenservicecentre.co.uk. Our experts are here to get you back enjoying
your garden in no time.
For useful assembly, starting and maintenance videos and ordering spares please visit
www.gardenservicecentre.co.uk.
Calling our service does not affect your statutory rights.
UK/Ireland 01904 727500
Monday to Friday 9am – 5pm Saturday & Sunday 11am – 4pm
www.gardenservicecentre.co.uk
email: support@gardenservicecentre.co.uk
Customer Helpline 01904 727500
www.gardenservicecentre.co.uk
Page 23

Guarantee
Dear Customer,
In the unlikely event that your device develops a fault, please contact our Customer service
department on the telephone number shown below.
1. These guarantee terms cover additional guarantee rights and do not affect your statutory
warranty rights. Claims must be accompanied by Proof of Purchase. This must be in the form
of a Sales receipt or Bank statement and must show that the product has been purchased
within 2 years prior to the claim, from the retailer that it was originally sold to.
2. Our guarantee covers problems caused by material or manufacturing defects, and will result
in the repair of these defects or replacement of the device with a like for like or similar article.
Please note that our devices have not been designed for commercial, trade or industrial applications. Consequently, the guarantee is invalidated if the equipment is used in
commercial, trade or industrial applications or for other equivalent activities.
3. The following are also excluded from our guarantee :
A. Faults due to accidents, customer misuse or unauthorized repairs
B. Consumable Parts such as detergent bottle, patio cleaner, jet lance, x brush
and nozzle pin
C. Failure due to lack of routine maintenance.
D. Failure as a result of not using the equipment in accordance with the manual and safety
instructions
E. The adjustment of cables, drives belts or recoil starters.
4. The guarantee is valid for a period of 2 years starting from the purchase date of the device. Guarantee claims should be submitted before the end of the guarantee period within two
weeks of the defect being noticed. No guarantee claims will be accepted after the end of the
guarantee period. The original guarantee period remains applicable to the device even if re-
pairs are carried out or parts are replaced. In such cases, the work performed or parts tted will
not result in an extension of the guarantee period, and no new guarantee will become active
for the work performed or parts tted.This also applies when an on-site service is used.
5. Please keep your sales receipt in a safe place. If is covered by our guarantee your device
will either be repaired under the terms of guarantee or we will send you a replacement device.
This device may be re-conditioned or like for like replacement .
Customer Helpline 01904 727500
www.gardenservicecentre.co.uk
 Loading...