

Page 1

QTS 4.5.x
User Guide
Document Version: 2
10/11/2020
Page 2

QTS 4.5.x User Guide
Contents
1. Preface
Audience..................................................................................................................................................... 11
Document Conventions...............................................................................................................................11
2. Overview
About QTS.................................................................................................................................................. 12
What's New in QTS.....................................................................................................................................12
Support and Other Resources.................................................................................................................... 12
NAS Access................................................................................................................................................13
Accessing the NAS Using a Browser..................................................................................................... 13
Accessing the NAS Using Qfinder Pro................................................................................................... 14
Accessing the NAS Using Qmanager.....................................................................................................14
2-step Verification...................................................................................................................................15
QTS Navigation.......................................................................................................................................... 17
Task Bar..................................................................................................................................................17
Main Menu..............................................................................................................................................25
Desktop.................................................................................................................................................. 27
Getting Started............................................................................................................................................31
3. System Settings
General Settings......................................................................................................................................... 33
Configuring System Administration Settings.......................................................................................... 33
Configuring Time Settings...................................................................................................................... 34
Configuring Daylight Saving Time.......................................................................................................... 35
Configuring Codepage Settings..............................................................................................................36
Configuring Region Settings...................................................................................................................36
Configuring the Login Screen.................................................................................................................36
Security.......................................................................................................................................................36
Configuring the Allow/Deny List..............................................................................................................37
Configuring IP Access Protection...........................................................................................................37
Configuring Account Access Protection................................................................................................. 38
Certificate & Private Key.........................................................................................................................38
Configuring the Password Policy............................................................................................................40
Hardware.................................................................................................................................................... 40
Configuring General Hardware Settings.................................................................................................40
Configuring Audio Alert Settings.............................................................................................................41
Configuring Smart Fan Settings............................................................................................................. 42
Backup Battery Unit (BBU).....................................................................................................................42
Configuring Expansion Cards Settings...................................................................................................43
Power..........................................................................................................................................................43
EuP Mode...............................................................................................................................................43
Wake-on-LAN (WOL)..............................................................................................................................44
Power Recovery..................................................................................................................................... 44
Power Schedule..................................................................................................................................... 44
Firmware Update........................................................................................................................................ 45
Firmware Update Requirements.............................................................................................................45
Checking for Live Updates..................................................................................................................... 46
Updating the Firmware Manually............................................................................................................47
Updating the Firmware Using Qfinder Pro..............................................................................................48
Backup/Restore.......................................................................................................................................... 49
Backing Up System Settings.................................................................................................................. 49
1
Page 3

Restoring System Settings..................................................................................................................... 50
System Reset and Restore to Factory Default....................................................................................... 50
External Device...........................................................................................................................................52
USB Printer.............................................................................................................................................52
Uninterruptible Power Supply (UPS)...................................................................................................... 54
System Status.............................................................................................................................................56
Resource Monitor....................................................................................................................................... 56
4. Privilege Settings
Users...........................................................................................................................................................58
Default Administrator Account................................................................................................................58
Creating a Local User.............................................................................................................................60
Creating Multiple Users.......................................................................................................................... 62
User Account Lists..................................................................................................................................63
Importing Users...................................................................................................................................... 65
Exporting Users......................................................................................................................................66
Modifying User Account Information.......................................................................................................66
Deleting Users........................................................................................................................................68
Home Folders.........................................................................................................................................68
User Groups................................................................................................................................................69
Default User Groups...............................................................................................................................69
Creating a User Group........................................................................................................................... 69
Modifying User Group Information..........................................................................................................70
Deleting User Groups.............................................................................................................................71
Shared Folders........................................................................................................................................... 71
Default Shared Folders...........................................................................................................................71
Creating a Shared Folder....................................................................................................................... 72
Editing Shared Folder Properties........................................................................................................... 74
Refreshing a Shared Folder................................................................................................................... 77
Removing Shared Folders......................................................................................................................77
Enabling Daily Updates for Shared Folders........................................................................................... 77
Snapshot Shared Folders.......................................................................................................................77
ISO Shared Folders................................................................................................................................80
Shared Folder Permissions.................................................................................................................... 82
Folder Aggregation.................................................................................................................................85
Shared Folder Encryption.......................................................................................................................88
Shared Folder Access............................................................................................................................ 90
Quota.......................................................................................................................................................... 95
Enabling Quotas.....................................................................................................................................96
Editing Quota Settings............................................................................................................................96
Exporting Quota Settings........................................................................................................................97
Quota Conflicts.......................................................................................................................................97
Domain Security......................................................................................................................................... 97
Active Directory (AD) Authentication...................................................................................................... 98
Azure Active Directory Single Sign-On (SSO)......................................................................................100
LDAP Authentication............................................................................................................................ 102
AD and LDAP Management................................................................................................................. 103
Domain Controller.....................................................................................................................................105
Enabling a Domain Controller...............................................................................................................105
Resetting a Domain Controller............................................................................................................. 106
Default Domain User Accounts............................................................................................................ 106
Creating a Domain User.......................................................................................................................107
Creating Multiple Domain Users...........................................................................................................108
Domain User Account Lists.................................................................................................................. 109
Modifying Domain User Account Information....................................................................................... 110
Deleting Domain Users......................................................................................................................... 111
Domain User Groups............................................................................................................................ 112
2
Page 4

QTS 4.5.x User Guide
Computers............................................................................................................................................ 113
DNS...................................................................................................................................................... 115
Back Up/Restore...................................................................................................................................118
5. File Station
Overview................................................................................................................................................... 119
About File Station................................................................................................................................. 119
System Requirements.......................................................................................................................... 119
Supported File Formats........................................................................................................................ 119
Parts of the User Interface....................................................................................................................120
Settings.................................................................................................................................................123
File Operations......................................................................................................................................... 126
Uploading a File....................................................................................................................................127
Downloading a File...............................................................................................................................128
Opening a File...................................................................................................................................... 128
Opening Microsoft Word, Excel, and PowerPoint Files Using the Chrome Extension......................... 129
Opening a Text File Using Text Editor.................................................................................................. 129
Viewing a File in Google Docs..............................................................................................................130
Viewing a File in Microsoft Office Online..............................................................................................130
Opening Image Files Using Image2PDF..............................................................................................131
Viewing File Properties.........................................................................................................................131
Modifying File Permissions...................................................................................................................132
Sorting Files..........................................................................................................................................133
Copying a File.......................................................................................................................................133
Moving a File........................................................................................................................................ 134
Renaming a File................................................................................................................................... 135
Deleting a File.......................................................................................................................................136
Restoring a Deleted File.......................................................................................................................136
Mounting an ISO File............................................................................................................................137
Unmounting an ISO File....................................................................................................................... 137
Compressing a File...............................................................................................................................137
Extracting Compressed Files or Folders.............................................................................................. 138
Sharing a File or Folder by Email......................................................................................................... 139
Sharing a File or Folder on a Social Network.......................................................................................141
Sharing a File or Folder Using Share Links..........................................................................................143
Sharing a File or Folder with a NAS User.............................................................................................145
Playing an Audio File............................................................................................................................147
Playing a Video File..............................................................................................................................147
Playing a Video File Using CAYIN MediaSign Player...........................................................................147
Opening a 360-degree Image or Video File......................................................................................... 148
Streaming to a Network Media Player..................................................................................................148
Adding a File to the Transcoding Folder...............................................................................................149
Canceling or Deleting Transcoding...................................................................................................... 150
Viewing Transcode Information............................................................................................................150
Folder Operations..................................................................................................................................... 151
Uploading a Folder............................................................................................................................... 152
Uploading a Folder Using Drag and Drop............................................................................................ 152
Viewing Folder Properties.................................................................................................................... 153
Viewing Storage Information................................................................................................................ 153
Modifying Folder Permissions.............................................................................................................. 154
Viewing Qsync Folders.........................................................................................................................155
Managing Share Links..........................................................................................................................155
Viewing Files and Folders Shared with Me.......................................................................................... 156
Creating a Folder..................................................................................................................................156
Copying a Folder.................................................................................................................................. 157
Creating a Desktop Shortcut................................................................................................................ 157
Adding a Folder to Favorites................................................................................................................ 158
3
Page 5

Removing a Folder from Favorites....................................................................................................... 158
Compressing a Folder.......................................................................................................................... 159
Deleting a Folder.................................................................................................................................. 159
Creating a Shared Folder..................................................................................................................... 160
Creating a Snapshot Shared Folder.....................................................................................................162
Sharing Space with a New User...........................................................................................................164
Adding a Folder to the Transcoding Folder.......................................................................................... 164
Canceling or Deleting Transcoding...................................................................................................... 165
Locking or Unlocking an Encrypted Shared Folder.............................................................................. 166
Keeping a Folder or a File in Reserved Cache.....................................................................................166
Removing a Folder from Reserved Cache........................................................................................... 167
6. Storage & Snapshots
QTS Flexible Volume Architecture............................................................................................................169
Global Settings......................................................................................................................................... 170
Storage Global Settings........................................................................................................................170
Disk / Device Global Settings............................................................................................................... 171
Snapshot Global Settings.....................................................................................................................172
Storage..................................................................................................................................................... 173
Disks.....................................................................................................................................................173
Volumes................................................................................................................................................179
Storage Pools.......................................................................................................................................195
RAID.....................................................................................................................................................202
Self-Encrypting Drives (SEDs)..............................................................................................................211
Expansion Units........................................................................................................................................217
Expansion Unit Actions.........................................................................................................................218
Expansion Unit Automatic Recovery.................................................................................................... 218
QNAP External RAID Devices..............................................................................................................219
QNAP JBOD Enclosures......................................................................................................................235
Qtier.......................................................................................................................................................... 236
Qtier Benefits........................................................................................................................................236
Qtier Requirements.............................................................................................................................. 238
Qtier Creation....................................................................................................................................... 239
Qtier Management................................................................................................................................242
Tiering On Demand.............................................................................................................................. 246
Snapshots.................................................................................................................................................246
Snapshot Storage Limitations...............................................................................................................246
Snapshot Creation................................................................................................................................247
Snapshot Management........................................................................................................................ 249
Snapshot Data Recovery......................................................................................................................251
Snapshot Clone....................................................................................................................................254
Snapshot Replica................................................................................................................................. 255
Cache Acceleration...................................................................................................................................266
Cache Acceleration Requirements.......................................................................................................266
Creating the SSD Cache...................................................................................................................... 267
Expanding the SSD Cache...................................................................................................................268
Configuring SSD Cache Settings......................................................................................................... 269
Cache Missing......................................................................................................................................270
Removing the SSD Cache....................................................................................................................270
External Storage....................................................................................................................................... 271
External Storage Device Actions..........................................................................................................271
External Storage Disk Actions..............................................................................................................271
External Storage Partition Actions........................................................................................................272
Formatting an External Storage Partition............................................................................................. 272
VJBOD (Virtual JBOD)..............................................................................................................................273
VJBOD Requirements.......................................................................................................................... 274
VJBOD Limitations............................................................................................................................... 274
4
Page 6

QTS 4.5.x User Guide
VJBOD Automatic Reconnection..........................................................................................................275
VJBOD Creation...................................................................................................................................275
VJBOD Management............................................................................................................................279
VJBOD Cloud........................................................................................................................................... 282
Installation............................................................................................................................................ 282
VJBOD Cloud Volume and LUN Creation............................................................................................ 282
Overview...............................................................................................................................................294
Transfer Resources..............................................................................................................................298
Event Logs............................................................................................................................................299
Licenses............................................................................................................................................... 300
7. iSCSI & Fibre Channel
Storage Limits...........................................................................................................................................302
iSCSI Storage Limits............................................................................................................................ 302
Fibre Channel Storage Limits...............................................................................................................302
iSCSI & Fibre Channel Global Settings.................................................................................................... 302
LUNs.........................................................................................................................................................302
QTS LUN Types................................................................................................................................... 303
Creating a Block-Based LUN................................................................................................................303
Creating a File-Based LUN...................................................................................................................305
iSCSI.........................................................................................................................................................306
Getting Started with iSCSI....................................................................................................................307
iSCSI Performance Optimization..........................................................................................................307
iSCSI Storage.......................................................................................................................................308
Remote Disk.........................................................................................................................................317
Fibre Channel........................................................................................................................................... 319
FC Ports............................................................................................................................................... 319
FC Storage........................................................................................................................................... 322
FC WWPN Aliases............................................................................................................................... 324
LUN Import/Export.................................................................................................................................... 326
Creating a LUN Export Job...................................................................................................................327
Importing a LUN from an Image File.................................................................................................... 328
LUN Import/Export Job Actions............................................................................................................ 330
LUN Import/Export Job Status..............................................................................................................330
8. SSD Profiling Tool
SSD Over-Provisioning.............................................................................................................................331
SSD Extra Over-Provisioning............................................................................................................... 331
SSD Over-Provisioning Tests................................................................................................................... 331
Creating an SSD Over-Provisioning Test............................................................................................. 331
Review...................................................................................................................................................... 332
Test Reports..............................................................................................................................................333
Test Report Actions.............................................................................................................................. 333
Test Report Information........................................................................................................................ 334
Settings.....................................................................................................................................................334
9. Hybrid Backup Sync
About Hybrid Backup Sync....................................................................................................................... 335
Configuring HBS 3 Settings...................................................................................................................... 335
Overview...................................................................................................................................................336
Jobs.......................................................................................................................................................... 337
Job Actions...........................................................................................................................................338
Job Creation......................................................................................................................................... 338
Running a Job...................................................................................................................................... 374
Stopping a Job......................................................................................................................................374
Viewing a Job Report........................................................................................................................... 374
5
Page 7

Editing a Job.........................................................................................................................................375
Deleting a Job.......................................................................................................................................375
Services.................................................................................................................................................... 375
Time Machine.......................................................................................................................................375
Rsync Server........................................................................................................................................377
RTRR Server........................................................................................................................................379
USB One Touch Copy.......................................................................................................................... 381
Storage Spaces........................................................................................................................................ 382
Storage Space Creation....................................................................................................................... 383
Editing a Storage Space.......................................................................................................................403
Deleting a Storage Space.....................................................................................................................403
10. Network & Virtual Switch
About Network & Virtual Switch................................................................................................................ 404
Basic and Advanced Mode...................................................................................................................404
Overview...................................................................................................................................................404
Interfaces.................................................................................................................................................. 405
IP Address............................................................................................................................................405
DNS......................................................................................................................................................407
Virtual LANs (VLANs)...........................................................................................................................408
Port Trunking........................................................................................................................................409
System Default Gateway......................................................................................................................410
USB QuickAccess.................................................................................................................................411
Wi-Fi..................................................................................................................................................... 413
Thunderbolt.......................................................................................................................................... 423
Virtual Switches........................................................................................................................................ 424
Creating a Virtual Switch in Basic Mode...............................................................................................425
Creating a Virtual Switch in Advanced Mode....................................................................................... 426
Creating a Virtual Switch in Software-defined Switch Mode.................................................................429
DHCP Server ........................................................................................................................................... 430
Creating a DHCP Server ..................................................................................................................... 430
DHCP Clients....................................................................................................................................... 433
RADVD.................................................................................................................................................434
Route........................................................................................................................................................ 437
Creating a Static Route........................................................................................................................ 437
DDNS........................................................................................................................................................438
Adding a DDNS Service....................................................................................................................... 438
11. Network & File Services
Network Access........................................................................................................................................ 440
Service Binding.....................................................................................................................................440
Proxy Server.........................................................................................................................................440
Service Ports............................................................................................................................................ 441
Win/Mac/NFS............................................................................................................................................442
Microsoft Networking............................................................................................................................442
Apple Networking................................................................................................................................. 444
NFS Service......................................................................................................................................... 445
Telnet/SSH................................................................................................................................................445
Configuring Telnet Connections............................................................................................................445
Configuring SSH Connections..............................................................................................................445
Editing SSH Access Permissions.........................................................................................................446
SNMP........................................................................................................................................................446
Configuring SNMP Settings..................................................................................................................446
SNMP Management Information Base (MIB)....................................................................................... 447
Service Discovery..................................................................................................................................... 448
UPnP Discovery Service...................................................................................................................... 448
6
Page 8

QTS 4.5.x User Guide
Bonjour................................................................................................................................................. 448
FTP........................................................................................................................................................... 448
Configuring FTP Settings..................................................................................................................... 448
Configuring Advanced FTP Settings.................................................................................................... 449
Network Recycle Bin.................................................................................................................................450
Configuring the Network Recycle Bin...................................................................................................450
Deleting All Files in the Network Recycle Bin.......................................................................................450
Restricting Access to the Network Recycle Bin....................................................................................450
12. myQNAPcloud
Getting Started..........................................................................................................................................452
Account Setup.......................................................................................................................................... 452
Creating a QNAP ID With Email or Phone Number..............................................................................452
Registering a Device to myQNAPcloud................................................................................................453
Installing myQNAPcloud Link............................................................................................................... 454
Overview...................................................................................................................................................454
Configuring Port Forwarding.....................................................................................................................455
Configuring DDNS Settings...................................................................................................................... 455
Restarting DDNS Service......................................................................................................................... 456
Configuring Published Services................................................................................................................456
Enabling myQNAPcloud Link....................................................................................................................457
Configuring Device Access Controls........................................................................................................ 457
Installing an SSL Certificate......................................................................................................................458
13. App Center
Overview...................................................................................................................................................460
Left Panel............................................................................................................................................. 460
Toolbar..................................................................................................................................................460
Main Area............................................................................................................................................. 461
App Operations.........................................................................................................................................462
Viewing App Information.......................................................................................................................462
Subscribe to an App License................................................................................................................462
Installing an App from App Center........................................................................................................463
Installing an App Manually....................................................................................................................463
Updating an App...................................................................................................................................464
Batch Updating Multiple Apps.............................................................................................................. 464
Enabling or Disabling an App............................................................................................................... 465
Migrating an App.................................................................................................................................. 465
Granting or Denying User Access to an App........................................................................................465
Uninstalling an App...............................................................................................................................466
App Center Settings..................................................................................................................................466
Adding an App Repository....................................................................................................................466
Configuring App Update Settings......................................................................................................... 467
Digital Signatures................................................................................................................................. 467
Enabling Installation of Apps without Digital Signatures.......................................................................467
14. Licenses
About QNAP Licenses.............................................................................................................................. 469
License Types and Plans......................................................................................................................469
Validity Period.......................................................................................................................................469
License Portals and Utility........................................................................................................................ 470
Software Store......................................................................................................................................470
License Center..................................................................................................................................... 470
License Manager..................................................................................................................................470
Buying a License Using QNAP ID............................................................................................................ 471
License Activation.....................................................................................................................................471
7
Page 9

Activating a License Using QNAP ID....................................................................................................472
Activating a License Using a Product or License Key.......................................................................... 473
Activating a License Using a PAK........................................................................................................ 474
Activating a License Offline.................................................................................................................. 475
License Deactivation.................................................................................................................................476
Deactivating a License Using QNAP ID............................................................................................... 476
Deactivating a License Offline..............................................................................................................477
License Extension.....................................................................................................................................478
Extending a License Using QNAP ID................................................................................................... 479
Extending a License Offline Using an Unused License........................................................................479
Extending a License Offline Using a Product Key................................................................................481
Upgrading a License.................................................................................................................................482
Viewing License Information.....................................................................................................................483
Recovering Licenses................................................................................................................................ 484
Transferring a License to the New QNAP License Server........................................................................484
Deleting a License.................................................................................................................................... 485
15. Multimedia
HybridDesk Station (HD Station).............................................................................................................. 486
Installing HD Station.............................................................................................................................487
Configuring HD Station.........................................................................................................................488
HD Station Applications........................................................................................................................489
Using HD Player in HD Station.............................................................................................................489
DLNA Media Server..................................................................................................................................489
Enabling DLNA Media Server...............................................................................................................489
Configuring DLNA Media Server.......................................................................................................... 490
Media Streaming Add-on.......................................................................................................................... 490
Configuring General Settings............................................................................................................... 491
Configuring Browsing Settings............................................................................................................. 492
Configuring Media Receivers............................................................................................................... 492
Multimedia Console.................................................................................................................................. 493
Overview...............................................................................................................................................493
Content Management...........................................................................................................................493
Indexing................................................................................................................................................494
Thumbnail Generation..........................................................................................................................495
Transcoding..........................................................................................................................................498
Multimedia App Suite............................................................................................................................503
16. QuLog Center
Overview...................................................................................................................................................507
System Event Log................................................................................................................................ 507
System Access Log..............................................................................................................................507
Local Device Logs.................................................................................................................................... 508
Local System Event Logs.....................................................................................................................508
Local System Access Logs...................................................................................................................511
Online Users.........................................................................................................................................514
Creating a Custom Filter Tab for Local Device Logs............................................................................ 514
Log Settings..........................................................................................................................................517
QuLog Service.......................................................................................................................................... 521
Log Sender...........................................................................................................................................521
Log Reciever........................................................................................................................................ 523
Sender Devices.................................................................................................................................... 526
Notification Settings.................................................................................................................................. 534
Configuring Notification Rule Settings..................................................................................................534
Adding a Log Filter............................................................................................................................... 535
Editing a Log Filter................................................................................................................................536
8
Page 10

QTS 4.5.x User Guide
Removing a Log Filter.......................................................................................................................... 536
17. Notification Center
Overview...................................................................................................................................................538
Notification Queue and History................................................................................................................. 538
Queue...................................................................................................................................................538
History.................................................................................................................................................. 538
Service Account and Device Pairing.........................................................................................................539
Email Notifications................................................................................................................................540
SMS Notifications................................................................................................................................. 542
Instant Messaging Notifications............................................................................................................544
Push Notifications.................................................................................................................................546
System Notification Rules.........................................................................................................................548
Event Notifications................................................................................................................................548
Alert Notifications..................................................................................................................................552
Settings.....................................................................................................................................................555
Enabling Send Notification Data to QNAP............................................................................................556
Disabling Send Notification Center Data to QNAP...............................................................................556
Global Notification Settings.......................................................................................................................557
System Logs............................................................................................................................................. 557
18. Malware Remover
About Malware Remover.......................................................................................................................... 559
Overview...................................................................................................................................................559
Running a Malware Scan..........................................................................................................................559
Running a Scheduled Scan...................................................................................................................... 560
Settings.....................................................................................................................................................560
Configuring Malware Remover.............................................................................................................560
19. Helpdesk
Overview...................................................................................................................................................562
Configuring Settings............................................................................................................................. 562
Help Request............................................................................................................................................ 562
Submitting a Ticket...............................................................................................................................563
Remote Support........................................................................................................................................564
Enabling Remote Support.................................................................................................................... 564
Extending Remote Support.................................................................................................................. 564
Disabling Remote Support....................................................................................................................564
Diagnostic Tool......................................................................................................................................... 565
Downloading Logs................................................................................................................................565
Performing an HDD Standby Test........................................................................................................ 565
Performing an HDD Stress Test........................................................................................................... 565
20. Console Management
Enabling Secure Shell (SSH)....................................................................................................................566
Enabling SSH on the NAS....................................................................................................................566
Enabling SSH on the NAS Using Qfinder Pro...................................................................................... 566
Accessing Console Management............................................................................................................. 566
Accessing Console Management For Windows...................................................................................566
Accessing Console Management for Mac............................................................................................567
Logging In to Console Management.........................................................................................................567
Managing Existing Applications................................................................................................................ 567
Activating or Deactivating a License.........................................................................................................569
Sorting System Logs.................................................................................................................................570
Showing Network Settings........................................................................................................................573
Restoring or Reinitializing the NAS...........................................................................................................573
9
Page 11

Rebooting the NAS................................................................................................................................... 574
Rebooting the NAS Into Rescue Mode.................................................................................................574
Rebooting the NAS Into Maintenance Mode........................................................................................ 574
10
Page 12
QTS 4.5.x User Guide
1. Preface
Audience
This document is intended for consumers and storage administrators. This guide assumes that the user has
a basic understanding of storage and backup concepts.
Document Conventions
Symbol Description
Notes provide default configuration settings and other supplementary
information.
Important notes provide information on required configuration settings and other
critical information.
Tips provide recommendations or alternative methods of performing tasks or
configuring settings.
Warnings provide information that, when ignored, may result in potential loss,
injury, or even death.
Preface 11
Page 13
QTS 4.5.x User Guide
2. Overview
About QTS
QTS is a Linux-based operating system that runs applications for file management, virtualization,
surveillance, multimedia, and other purposes. The optimized kernel and various services efficiently manage
system resources, support applications, and protect your data. QTS also has built-in utilities that extend the
functionality and improve the performance of the NAS.
The multi-window, multitasking user interface helps you to manage the NAS, user accounts, data, and apps.
Out of the box, QTS provides built-in features that allow you to easily store and share files. QTS also
contains App Center, which offers additional downloadable applications for customizing the NAS and
improving user workflows.
What's New in QTS
Version Major New Features
QTS 4.5.1 • QTS now supports QuLog Center, which replaces System Logs and allows
for centralized log management of system events, system access, and
online user status on your devices.
• Hybrid Backup Sync 3 (HBS 3) now replaces Backup Station as the built-in
backup application.
• QTS now provides Console Management, a command-line interface that
supports log viewing, app management, license activation, and other
operations via SSH.
• QTS now supports TL series SAS JBOD enclosures.
• QTS now indicates whether a device supports Intel QuickAssist Technology.
• Virtualization Station now supports live migration. Users can now migrate a
running virtual machine while ensuring the continuity of services.
• Storage & Snapshots now supports displaying disk health information for
Seagate IronWolf SSDs in Seagate IHM (IronWolf Health Management).
• Added support for joining the NAS (x86 models) to Azure Active Directory
Domain Service via site-to-site VPN.
For details on new features and enhancements, go to https://www.qnap.com/en/release-notes/.
Support and Other Resources
QNAP provides the following resources:
Resource URL
Documentation https://download.qnap.com
Compatibility List https://www.qnap.com/compatibility
NAS Migration Compatibility https://www.qnap.com/en/nas-migration
Expansion Unit Compatibility http://www.qnap.com/go/compatibility-expansion
Service Portal https://service.qnap.com
Overview 12
Page 14

Resource URL
Product Support Status https://www.qnap.com/product/eol.php
Downloads https://download.qnap.com
Community Forum https://forum.qnap.com
QNAP Accessories Store https://shop.qnap.com
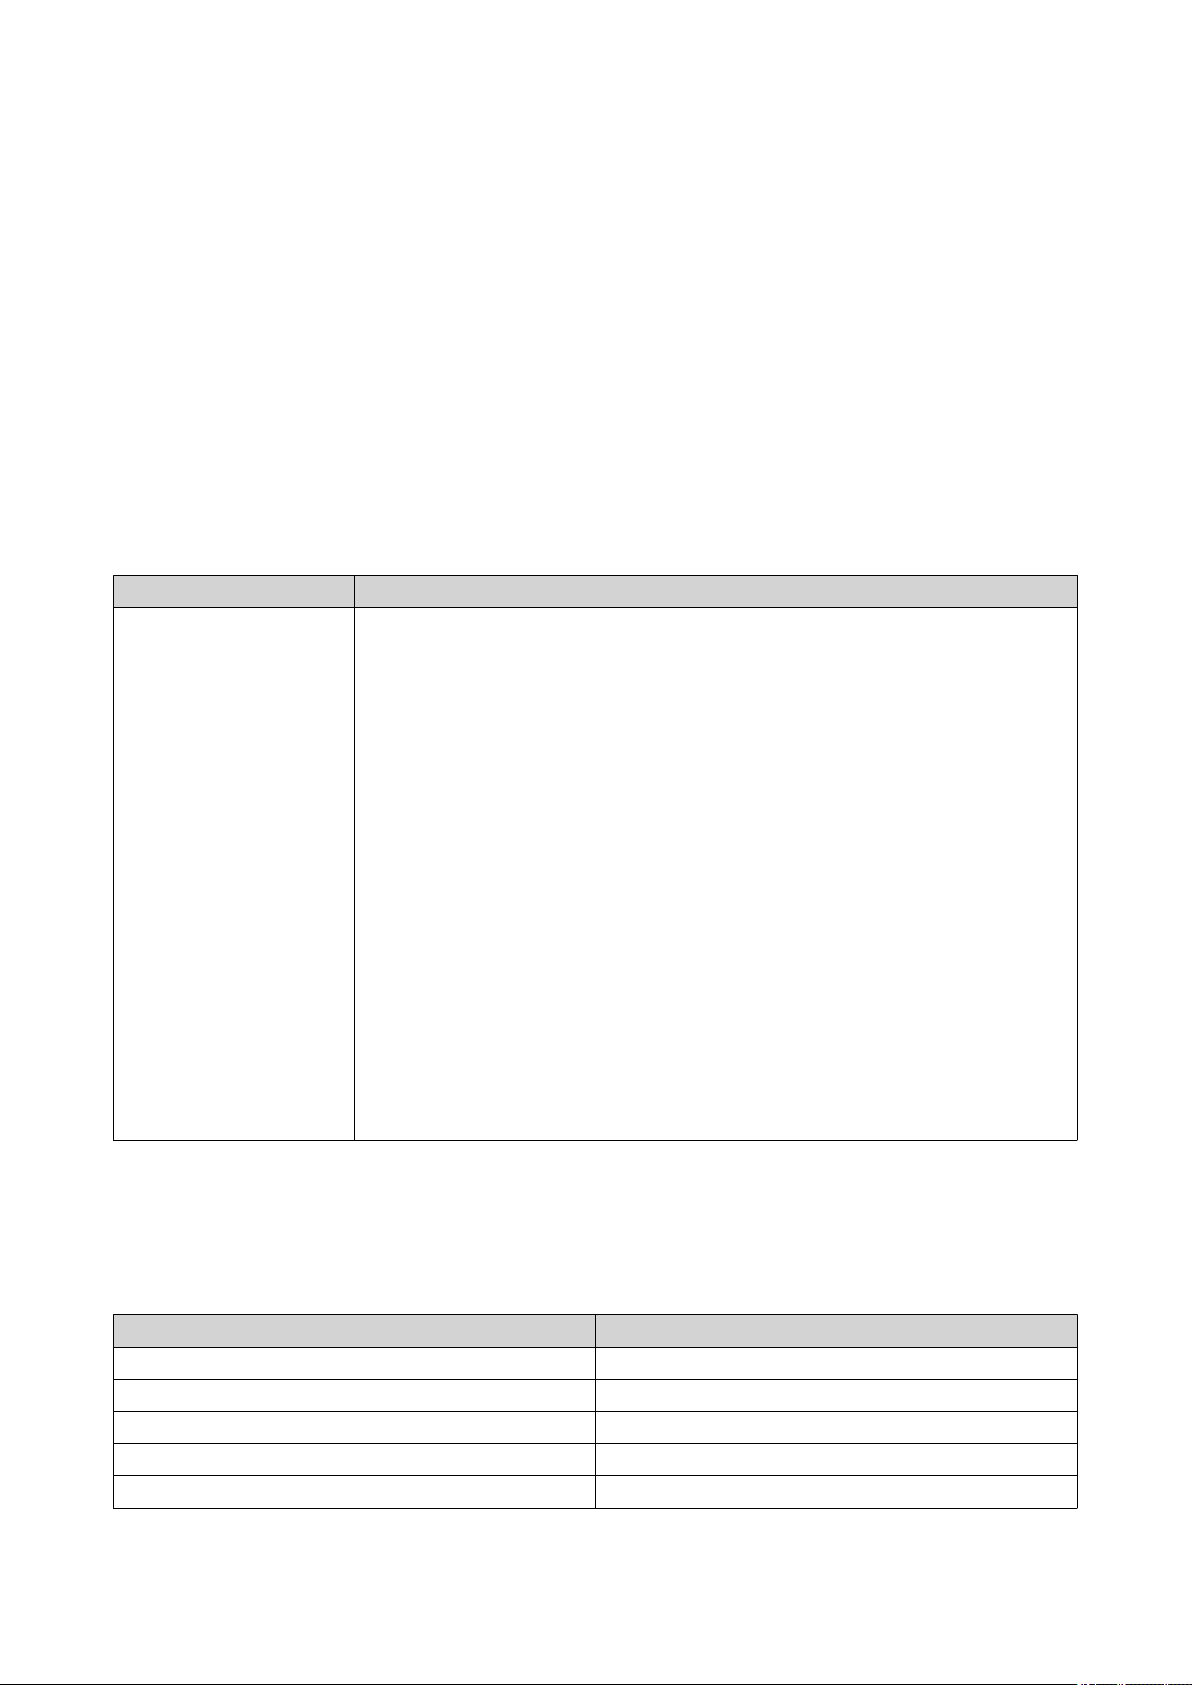
NAS Access
Method Description Requirements
Web browser You can access the NAS using any
computer on the same network if you
have the following information:
• NAS name (Example: http://
example123/) or IP address
• Logon credentials of a valid user
account
• Computer that is connected to the
same network as the NAS
• Web browser
QTS 4.5.x User Guide
For details, see Accessing the NAS Using
a Browser.
Qfinder Pro Qfinder Pro is a desktop utility that
enables you to locate and access QNAP
NAS devices on a specific network. The
utility supports Windows, macOS, Linux,
and Chrome OS.
For details, see Accessing the NAS Using
Qfinder Pro.
Qmanager Qmanager is a mobile application that
enables administrators to manage and
monitor NAS devices on the same
network.
You can download Qmanager from the
Apple App Store and the Google Play
Store.
For details, see Accessing the NAS Using
Qmanager.
Explorer (Windows) You can map a NAS shared folder as a
network drive to easily access files using
Explorer.
For details on mapping shared folders,
see Mapping a Shared Folder on a
Windows Computer.
Finder (macOS) You can mount a NAS shared folder as a
network drive to easily access files using
Finder.
For details on mounting shared folders,
see Mounting a Shared Folder on a Mac
Computer.
• Computer that is connected to the
same network as the NAS
• Web browser
• Qfinder Pro
• Mobile device that is connected to the
same network as the NAS
• Qmanager
• Windows computer that is connected
to the same network as the NAS
• Qfinder Pro
• Mac computer that is connected to
the same network as the NAS
• Qfinder Pro
Accessing the NAS Using a Browser
1. Verify that your computer is connected to the same network as the NAS.
Overview 13
Page 15

2. Open a web browser on your computer.
3. Type the IP address of the NAS in the address bar.
Tip
If you do not know the IP address of the NAS, you can locate it using Qfinder Pro.
For details, see Accessing the NAS Using Qfinder Pro.
The QTS login screen appears.
4. Optional: Log in QTS using HTTPS.
a. Select Secure login.
A confirmation message appears.
b. Click OK.
You will be redirected to the QTS HTTPS login page.
5. Specify your username and password.
6. Click Login.
The QTS desktop appears.
QTS 4.5.x User Guide
Accessing the NAS Using Qfinder Pro
1. Install Qfinder Pro on a computer that is connected to the same network as the NAS.
Tip
To download Qfinder Pro, go to https://www.qnap.com/en/utilities.
2. Open Qfinder Pro.
Qfinder Pro automatically searches for all QNAP NAS devices on the network.
3. Locate the NAS in the list, and then double-click the name or IP address.
The QTS login screen opens in the default web browser.
4. Specify your username and password.
5. Click Login.
The QTS desktop appears.
Accessing the NAS Using Qmanager
1. Install Qmanager on an Android or iOS device.
Tip
To download Qmanager, go to the Apple App Store or the Google Play Store.
2. Open Qmanager.
3. Tap Add NAS.
Qmanager automatically searches for all QNAP NAS devices on the network.
4. Locate the NAS in the list, and then tap the name or IP address.
5. Specify your username and password.
Overview 14
Page 16

QTS 4.5.x User Guide
6. Optional: If your mobile device and NAS are not connected to the same subnet, perform one of the
following actions.
Action Steps
Add NAS manually a. Tap Add NAS manually.
b. Specify the following information.
• Host name or IP address of the NAS
• Password of the admin account
c. Tap Save.
Sign in using QID a. Tap Sign in QID.
b. Specify the following information.
• Email address that you used to create your QNAP
account
• Password of your QNAP account
c. Tap Sign in.
d. Locate the NAS in the list, and then tap the name or IP
address.
2-step Verification
2-step verification enhances the security of user accounts. When the feature is enabled, users are required
to specify a six-digit security code in addition to the account credentials during the login process.
To use 2-step verification, you must install an authenticator application on your mobile device. The
application must implement verification services using the Time-based One-time Password Algorithm
(TOTP). QTS supports Google Authenticator (for Android, iOS, and BlackBerry) and Authenticator (for
Windows Phone).
Enabling 2-step Verification
1. Install an authenticator application on your mobile device.
QTS supports the following applications:
• Google Authenticator: Android, iOS, and BlackBerry
• Authenticator: Windows Phone
2. Verify that the system times of the NAS and mobile device are synchronized.
Tip
QNAP recommends connecting to an NTP server to ensure that your NAS follows the
Coordinated Universal Time (UTC) standard.
3. In QTS, go to Options > 2-step Verification .
4. Click Get Started.
The 2-step Verification window opens.
5. Open the authenticator application on your mobile phone.
Overview 15
Page 17
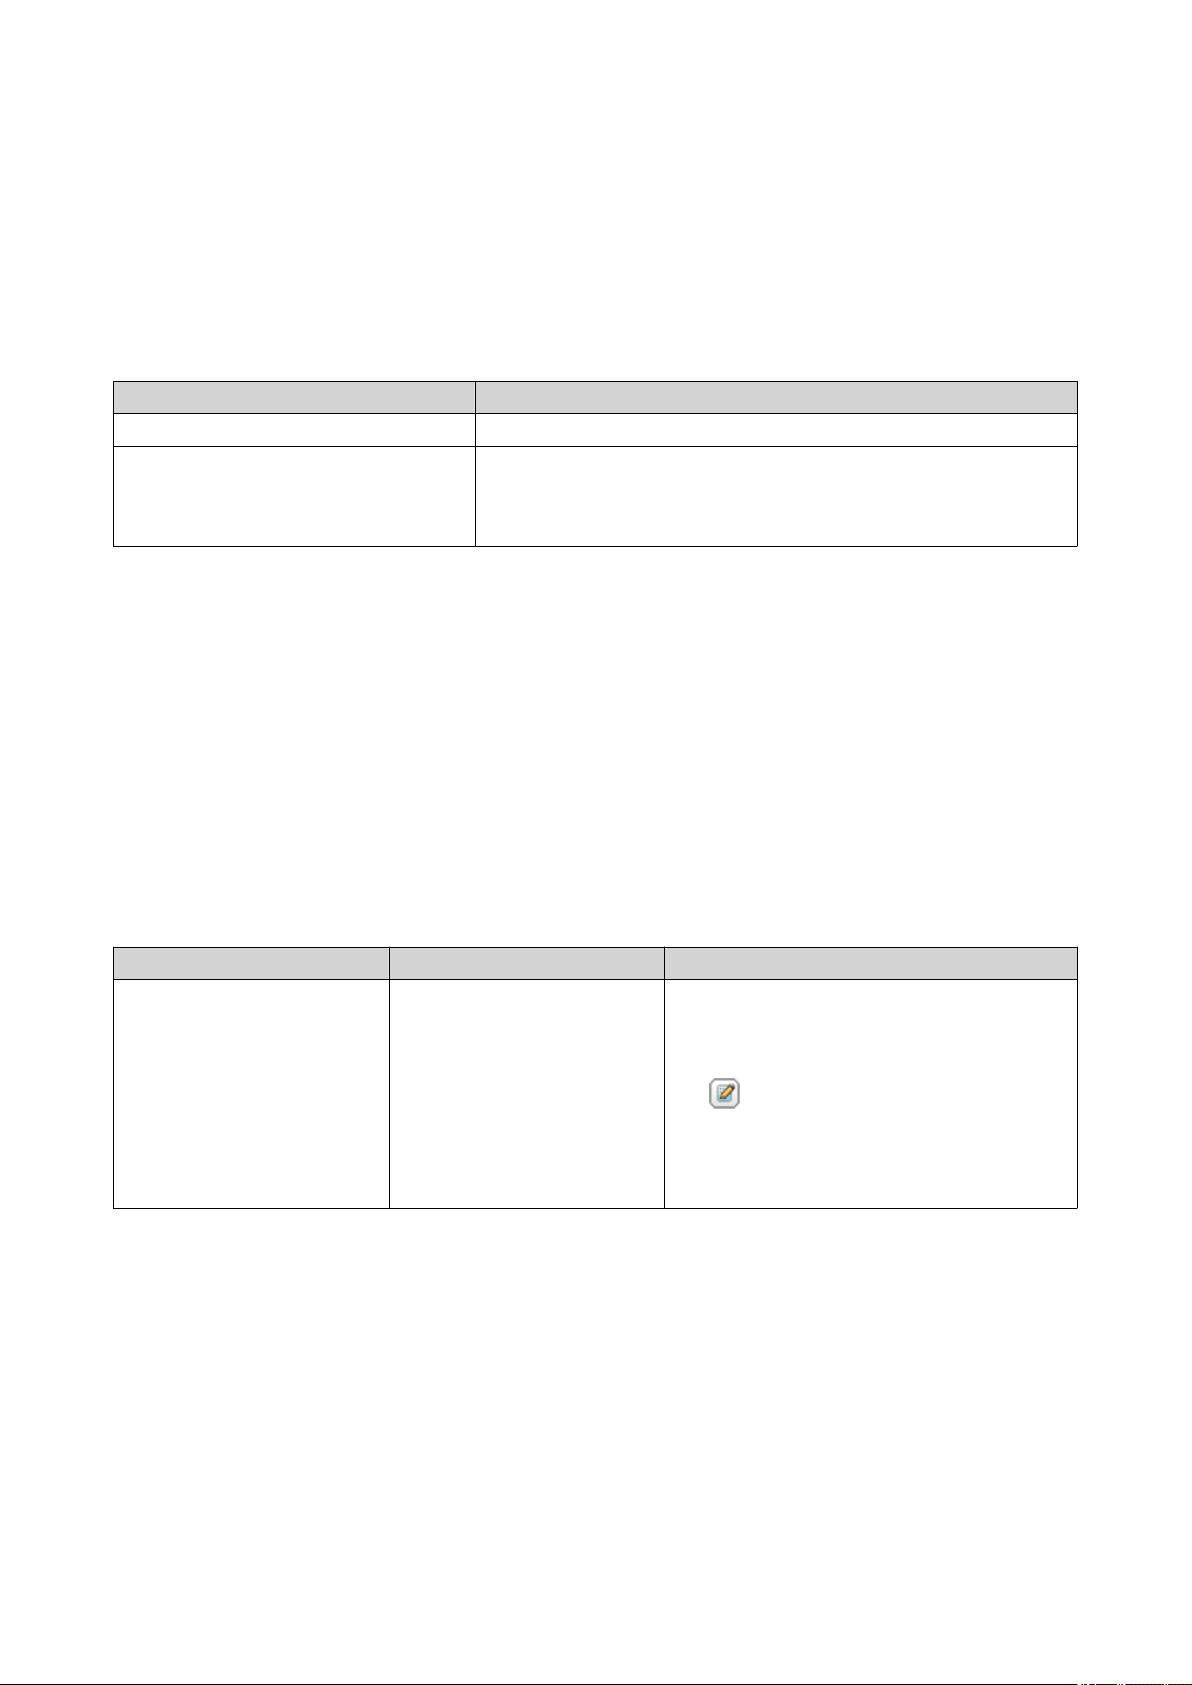
QTS 4.5.x User Guide
6. Configure the application by scanning the QR code or specifying the security key displayed in the 2step Verification window.
7. In the 2-step Verification window, click Next.
The Confirm your 2-step verification settings screen appears.
8. Specify the security code generated by the authenticator application.
9. Select an alternative verification method that will be used whenever your mobile device is inaccessible.
Method Steps
Answer a security question. Select one of the options or provide your own security question.
Email a security code. a. Go to Control Panel > Notification Center > Service
Account and Device Pairing > Email .
b. Verify that the SMTP server is correctly configured.
10. Click Finish.
Logging in to QTS Using 2-step Verification
1. Specify your username and password.
2. Specify the security code generated by the authenticator application installed on your mobile device.
3. Optional: If your mobile device is inaccessible, click Verify another way.
4. Specify the answer to the security question.
5. Click Login.
Disabling 2-step Verification
Situation User Action Steps
Users are locked out of their
accounts.
Administrators can disable 2step verification from the
Control Panel.
1. Go to Control Panel > Privilege >
Users .
2. Identify a locked out user, and then click
.
3. Deselect 2-step Verification.
4. Click OK.
Overview 16
Page 18
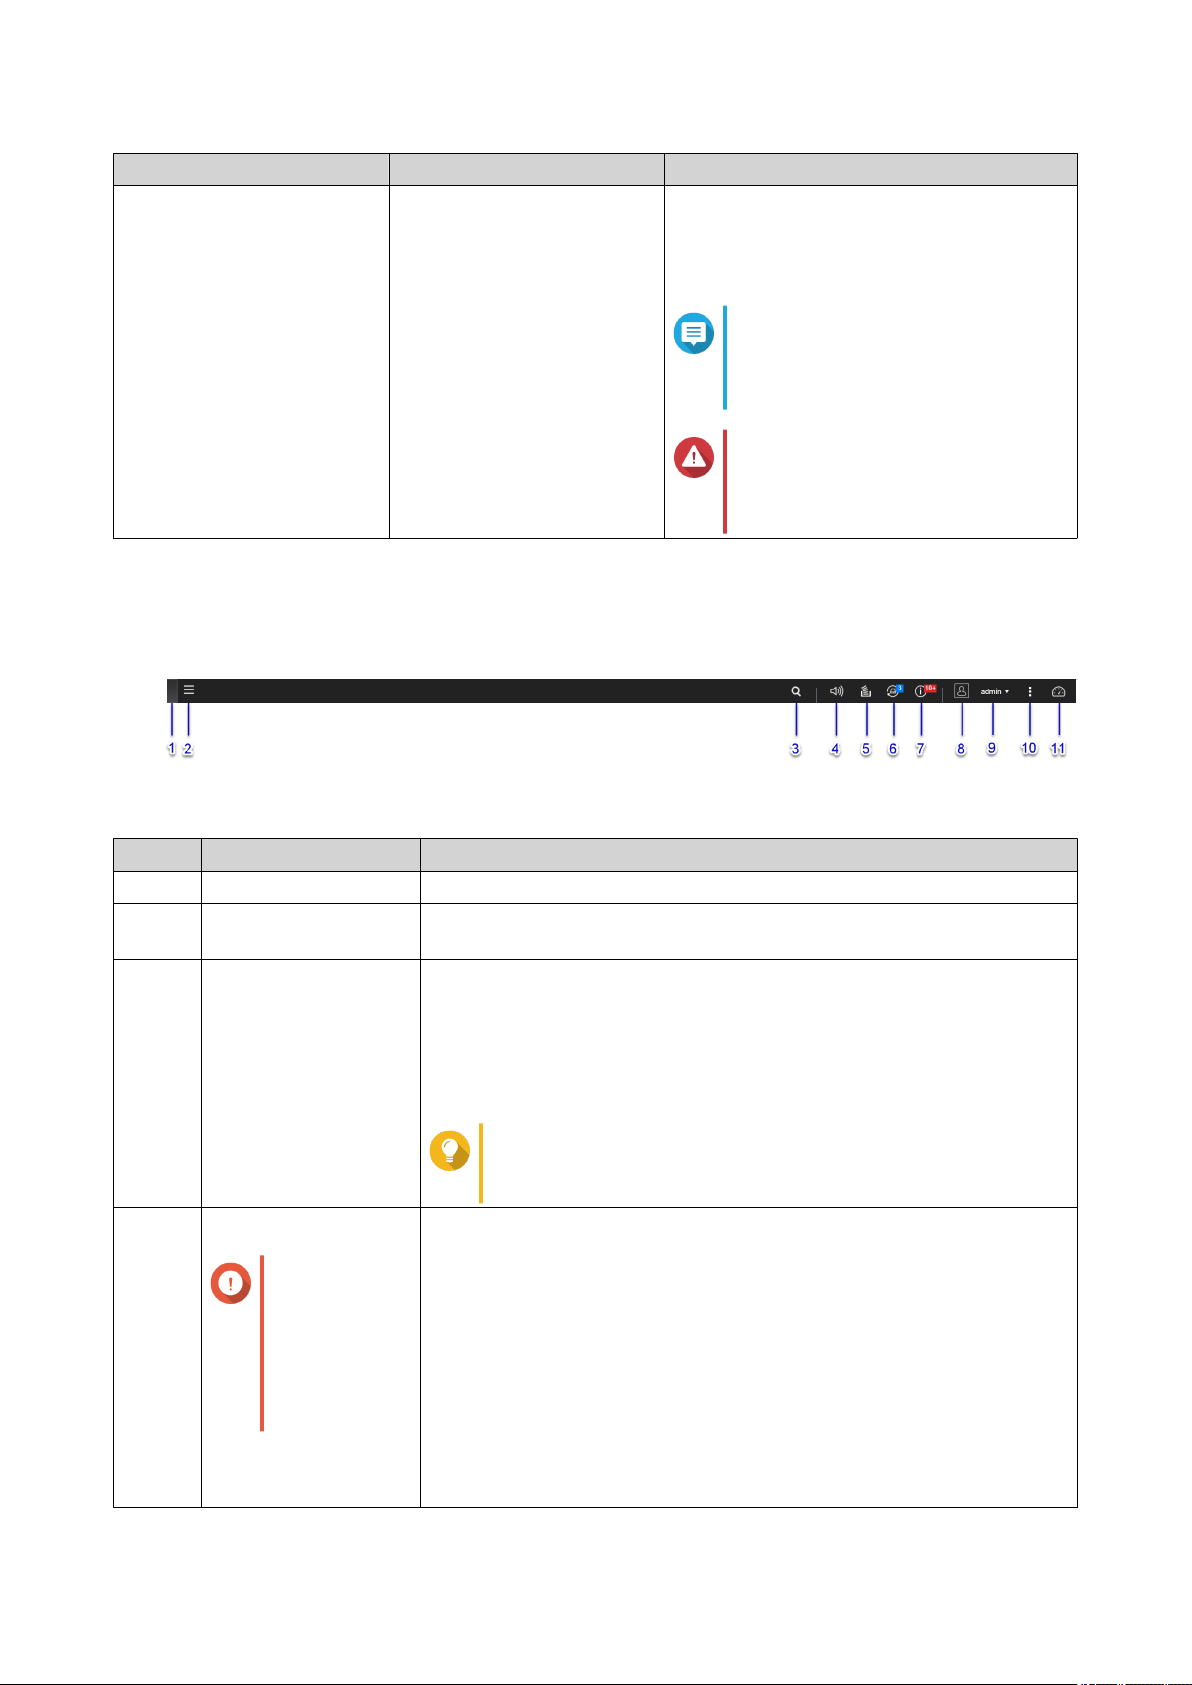
Situation User Action Steps
An administrator is locked out
and no other administrators
can access the account.
QTS Navigation
Task Bar
An administrator must restore
the factory settings.
QTS 4.5.x User Guide
Press the RESET button on the back of the
NAS for three seconds.
The NAS restores the default administrator
password and network settings.
Note
For information on the default
admin password, see Backup/
Restore.
Warning
Pressing the RESET button for 10
seconds resets all settings and
deletes all data on the NAS.
No. Element Possible User Actions
1 Show Desktop Click the button to minimize or restore all open windows.
2 Main Menu Click the button to open the Main Menu panel on the left side of the
desktop.
3 Search • Type key words to locate settings, applications, and help content.
• Click an entry in the search results to open the application, system
utility, or Help Center window.
If the application is not yet installed, QTS opens the corresponding
download screen in the App Center window.
Tip
App or utility search results are classified into Systems,
Application, and Help.
4 Volume Control
Important
This feature is
only available
on models with
certain
hardware
specifications.
Click the button to view the following:
• Media Volume: Click and drag the slider thumb to adjust the audio
volume for applications that use the built-in speaker or line-out jack.
• HD Station
• Music Station
• OceanKTV
• Audio Alert Volume: Click and drag the slider thumb to adjust the
volume of system audio alerts.
Overview 17
Page 19

QTS 4.5.x User Guide
No. Element Possible User Actions
5 Background Tasks • Position the mouse pointer over the button to see the number of
background tasks that are running. Examples of background tasks
are file backup and multimedia conversion.
• Click the button to see the following details for each background
task:
• Task name
• Task description
• Progress (percentage of completion)
• Click to stop a task.
6 External Devices • Position the mouse pointer over the button to view the number of
external storage devices and printers that are connected to the USB
and SATA ports on the NAS.
• Click the button to view the details for each connected device.
• Click a listed device to open File Station and view the contents of the
device.
7 Event Notifications • Position the mouse pointer over the button to see the number of
recent errors, warnings, and notices.
• Click the button to view the following details for each event:
• Event type
• Description
• Timestamp
• Number of instances
• Click a list entry to view the related utility or application screen.
Clicking a warning or error log entry opens the System Event Log
window.
• Click More>> to open the System Event Log window.
• Click Clear All to delete all list entries.
8 Options Click your profile picture to open the Options screen.
Overview 18
Page 20
QTS 4.5.x User Guide
No. Element Possible User Actions
9 [USER_NAME] Click the button to view the last login time and the following menu items:
• Options: Opens the Options window
• Sleep: Keeps the NAS powered on but significantly reduces power
consumption
Note
This feature is only available on models with certain
hardware specifications.
• Restart: Restarts the NAS
• Shutdown: Shuts down QTS and then powers off the NAS
Tip
You can also power off the NAS using one of the
following methods:
• Press and hold the power button for 1.5 seconds.
• Open Qfinder Pro, and then go to Tools > Shut down Device .
• Open Qmanager, and then go to Menu > System Tools >
System . Tap Shutdown.
• Logout: Logs the user out of the current session
Overview 19
Page 21

No. Element Possible User Actions
10 More Click the button to view the following menu items:
• What's New: Opens the What's New window, which displays
information on the new features and enhancements available in the
installed QTS version
• Help: Displays links to the Quick Start Guide, Virtualization Guide,
Help Center, and online tutorials page
• Language: Opens a list of supported languages and allows you to
change the language of the operating system
• Desktop Preferences: Opens a list of display modes and allows
you to select your preferred mode of displaying the QTS desktop
based on your device type
• Help Request: Opens the Helpdesk window
• Data & Privacy: Opens the QNAP Privacy Policy page
QTS 4.5.x User Guide
• About: Displays the following information:
• Operating system
• Hardware model
• Operating system version
• Number of installed drives
• Number of empty drive bays
• System volume name
11 Dashboard Click the button to display the dashboard.
Overview 20
Page 22

Options
QTS 4.5.x User Guide
No. Tab Possible User Actions
1 Profile • Specify the following optional information:
• Profile picture
• Email address
• Phone number
• Click View to display the System Access Log screen.
• Click Edit login screen to open the Login Screen configuration
screen in the Control Panel window.
• Click Apply to save all changes.
2 Wallpaper • Select a wallpaper from the built-in options or upload a photo.
• Click Apply to save all changes.
3 2-step Verification Click Get Started to open the configuration wizard. For details, see
Enabling 2-step Verification.
Overview 21
Page 23

QTS 4.5.x User Guide
No. Tab Possible User Actions
4 Change Password • Specify the following information to change your password.
• Old password
• New password: Specify a password with a maximum of 64
characters. QNAP recommends using passwords with at least 6
characters.
• Specify an email address to receive a notification email to recover
your password if you forgot the password.
You need to configure SMTP settings in Notification Center to use
this feature.
• Click Apply to save all changes.
5 E-mail Account • Add, edit, and delete email accounts to use when sharing files.
• Click Apply to save all changes.
6 Miscellaneous • Enable the following settings as necessary.
• Auto logout after an idle period: Specify the duration of
inactivity after which the user is automatically logged out.
• Warn me when leaving QTS: When enabled, QTS prompts
users for confirmation whenever they try to leave the desktop
(by clicking the Back button or closing the browser). QNAP
recommends enabling this setting.
• Reopen windows when logging back into NAS: When
enabled, the current desktop settings (including all open
windows) are retained until the next session.
• Show the desktop switching button: When enabled, QTS
displays the desktop switching buttons < > on the left and right
sides of the desktop.
• Show the link bar on the desktop: When enabled, QTS
displays the link bar on the bottom of the desktop.
• Show the Dashboard button: When enabled, QTS displays
the button to show the dashboard on the taskbar.
• Show the NAS time on the desktop: When enabled, QTS
displays the current NAS time, day, and date at the bottom-right
of the desktop.
• Keep Main Menu open after selection: When enabled, QTS
keeps the main menu pinned to the desktop after you open it.
• Show a list of actions when external storage devices are
detected: When enabled, QTS displays an Autoplay dialog box
whenever an external storage device is inserted into a USB or
SATA port.
• Click Apply to save all changes.
Overview 22
Page 24
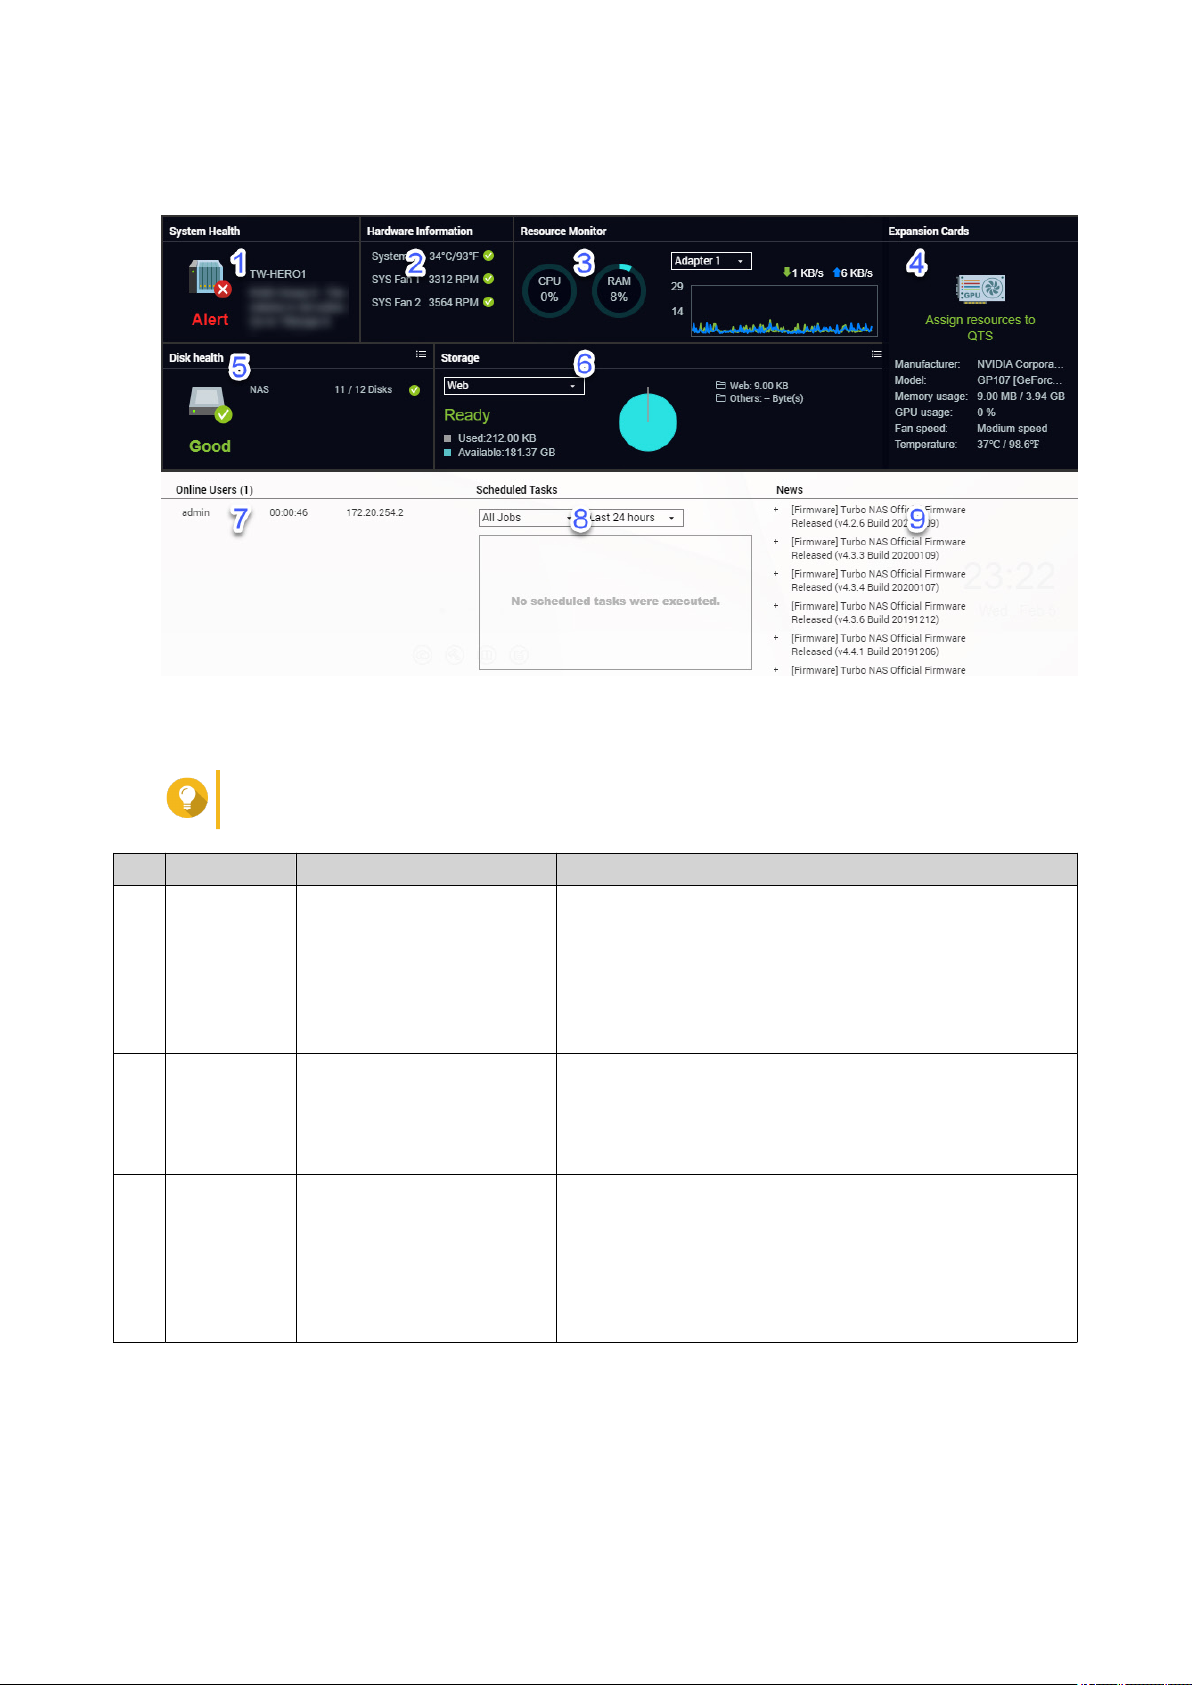
Dashboard
QTS 4.5.x User Guide
The dashboard opens in the lower right corner of the desktop.
Tip
You can click and drag a section onto any area of the desktop.
No. Section Displayed Information User Actions
1 System
Health
• NAS name
• Uptime (number of
days, hours, minutes
Click the heading to open Control Panel > System >
System Status > System Information .
If disk-related issues occur, click the heading to open
Storage & Snapshots.
and seconds)
• Health status
2 Hardware
Information
• System temperature
Click the heading to open Control Panel > System >
System Status > Hardware Information .
• CPU fan speed
• System fan speed
3 Resource
Monitor
• CPU usage in %
Click the heading to open Control Panel > System >
Resource Monitor > Overview .
• Memory usage in %
• Network upload and
download speeds for
each adapter.
Overview 23
Page 25
No. Section Displayed Information User Actions
4 Expansion
Cards
For each expansion card:
Click the heading to open Control Panel > System >
Hardware > Expansion Cards .
• Assignment (or "Ready"
if unassigned)
• Manufacturer
• Model
• Memory usage
• GPU usage
• Fan speed
• Temperature
5 Disk Health • Number of installed
disks
• Click the heading to open the Disk Health screen in
Storage & Snapshots.
QTS 4.5.x User Guide
• Health status of
installed disks
• Number of VJBOD
disks
• Health status of VJBOD
disks
6 Storage For each volume:
• Status
• Used space
• Available space
• Folder size
For each storage pool:
•
Click to switch between disk and NAS
information.
• Click a disk name to view the following information
for each installed disk:
• Capacity/size
• Temperature
• Health status
• Click Details to open Storage & Snapshots >
Overview > Storage .
• Click the heading to open the Storage Resource
screen in the Resource Monitor window.
•
Click to switch between volume and storage pool
information.
• Status
• Used space
• Available space
• Volume size
7 Online Users • Username
• Session duration
• IP address
Click the heading to open Control Panel > System >
QuLog Center > Online Users .
Overview 24
Page 26

QTS 4.5.x User Guide
No. Section Displayed Information User Actions
8 Scheduled
Tasks
• Task type
Use the filters to view tasks that were executed within a
specific period.
• Task summary
• Task name
• Timestamp
• Status
9 News Links to QNAP
announcements
Click the heading to open the relevant pages on the
QNAP website.
Main Menu
No. Section Description Possible User Actions
1 NAS
Information
Displays the NAS name and model
number.
N/A
Overview 25
Page 27

QTS 4.5.x User Guide
No. Section Description Possible User Actions
2 System Displays a list of system utilities and other
programs that enable you to manage the
• Open a system utility or application in
the QTS desktop
NAS.
The following are the default system
• Click a menu item.
utilities:
• Right-click a menu item and then
• Control Panel
select Open.
• Storage & Snapshots
• iSCSI & Fibre Channel
• Users
• Network & Virtual Switch
• myQNAPcloud
• Resource Monitor
• App Center
• Help Center
• Qboost
• HDMI Display Applications
Note
This menu item only appears on
models with certain hardware
specifications.
3 Applications Displays a list of applications developed
by QNAP or third-party developers.
When an app is installed, it is
automatically added to the applications
list.
The following are the default applications:
• Open an application in a new browser
tab (only for certain apps)
• Right-click a menu item and then
select Open in new browser tab.
• Create a shortcut on the desktop
• Right-click a menu item and then
select Create shortcut.
• Click and drag a menu item to the
desktop.
• Hybrid Backup Sync 3
• File Station
• Helpdesk
• License Center
• Multimedia Console
• Notification Center
• QTS SSL Certificate
Overview 26
Page 28

Desktop
QTS 4.5.x User Guide
# Element Description Possible User Actions
1 Wallpaper This is a digital image that is used as a
background for the QTS desktop.
Change the wallpaper in the Options
window.
Users can either select from one of the
provided wallpapers or upload an image
2 Shortcut icons This opens an app or a utility.
When you install an application, QTS
• Click an icon to open the application
window.
automatically creates a shortcut on the
desktop. The following are the default
shortcuts:
• Control Panel
• Right-click an icon and then select
one of the following:
• Open: Opens the application
window
• File Station
• Remove: Deletes the icon from
• Storage & Snapshots
• App Center
• Click and drag an icon to another
the desktop
desktop.
• Help Center
3 Desktop This area contains open system utilities
Click < or > to move to another desktop.
and applications. The desktop consists
of three separate screens.
4 Qboost This enables you to manage and
monitor memory consumption.
•
Click or to display the
memory status and open the
Qboost panel.
•
Click or to hide the memory
status and close the Qboost panel.
Overview 27
Page 29

QTS 4.5.x User Guide
# Element Description Possible User Actions
5 Recycle Bin This displays the list of files that the
currently active user moved to the
Recycle Bin.
The following applications provide users
a choice between permanently deleting
files and moving files to the Recycle Bin.
•
Click to open the Recycle Bin
screen in the File Station window.
•
Right-click and then select one
of the following:
• File Station
• Music Station
• Photo Station
• Video Station
6 Date and time This displays the date and time that the
user configured during installation of the
operating system.
7 Link bar This displays shortcut links to
myQNAPcloud, utility and app download
pages, feedback channels, and the
Helpdesk.
• Open: Opens the Recycle Bin
screen in the File Station
window
• Empty All: Permanently
deletes files in the Recycle Bin
• Settings: Opens the Network
Recycle Bin screen in the
Control Panel window
N/A
Click any of the following buttons:
•
: Opens the myQNAPcloud
website in another browser tab
•
: Opens the download page for
mobile applications and utilities
•
: Provides links to the QNAP
Wiki, QNAP Forum, and Customer
Service portal
8 Notifications This notifies the user about important
system events that may or may not
require user action. Notifications appear
in the lower right corner of the desktop.
•
: Opens the Helpdesk utility
Click the notification to open the
corresponding utility or app.
Overview 28
Page 30

QTS 4.5.x User Guide
Qboost
Qboost is a system utility that monitors and enables you to manage memory consumption. It provides the
following information:
# Section Description User Actions
1 Memory A graphic showing memory usage on the
NAS.
Click Optimize to clear the buffer memory
(block level) and cache memory (file
level).
• Blue: Available memory, expressed as
a percentage. Available memory is the
sum of free memory, buffer memory,
Hover the pointer over the memory widget
to see the amount of available memory
and free memory in MB, GB, or TB.
cache memory, and other reclaimable
memory.
• Green: Free memory, expressed as a
percentage. Free memory is memory
that is currently unused and
unallocated.
2 Junk Files Junk files are unnecessary system files
and files in the Recycle Bin, which
consume disk space and memory.
• Click Clear to permanently delete junk
files.
By default, clicking Clear only deletes
unnecessary system files, such as
files that the operating system and
applications create while performing
certain tasks.
•
Click to select other types of files
to delete.
Select Empty Recycle Bin to include
files that were moved to the Recycle
Bin by the currently active user.
3 Top 5
Applications
by Memory
Usage
Top five applications and services that
consume the most memory
Click to display all applications and
services that can be enabled and disabled
from either the Control Panel or the App
Center.
For details, see Application Management.
Overview 29
Page 31

QTS 4.5.x User Guide
# Section Description User Actions
4 Qboost
taskbar
Taskbar for the Qboost widget
Click to view the Qboost help.
Click to close the Qboost widget.
Application Management
Application Management displays the following information.
Item Description
Application Displays the application name
CPU Usage Displays the percentage of consumed processing power
Memory Displays the amount of memory consumed
CPU Time Displays the amount of time the CPU requires to process an
application request
Status Displays one of the following statuses:
• Always Enabled
• Always Disabled
• Scheduled
Action Displays icons for the possible actions
You can perform the following actions.
Objective Action
Enable or disable an application or
service.
•
Click to change the status to Always Enabled.
•
Click to change the status to Always Disabled.
Overview 30
Page 32

Objective Action
Create a schedule for enabling
and disabling an application or
service.
Warning
Setting a schedule may
force an application to
stop in the middle of a
task.
QTS 4.5.x User Guide
1.
Click to open the scheduling screen.
2. Select Enable Schedule.
The calendar is activated. All days and hours are enabled by
default.
3. Select the hours during which the application or service should be
enabled or disabled.
Hours are filled with one of the following colors or patterns.
• Blue: The application or service is enabled.
• Gray: The application or service is disabled.
• Striped: The NAS is scheduled to sleep or shut down.
4. Optional: If you want to enable the app at a certain time, specify
the number of minutes after the hour when the application is
enabled or disabled.
Example: To enable an application only after half an hour, type 30.
5. Perform one of the following actions.
• Click Apply: Applies the schedule to the selected application
or service
• Select Auto-apply: Applies the schedule to all applications
and services
Delete a schedule.
Remove an application.
Click to delete the schedule and disable an application or service.
Click .
This function applies only to applications that are available in App
Center.
Getting Started
1. Log in to the NAS as an administrator.
The default administrator account is admin.
For details, see NAS Access.
2. Plan how you want to combine or divide the available storage space.
For details, see Volume Configuration.
3. Optional: Create one or more storage pools.
You must create at least one storage pool in order to create multiple volumes.
For details, see Creating a Storage Pool.
4. Create one or more volumes.
You must create at least one volume in order to store files on the NAS.
For details, see Volume Creation.
5. Create user accounts.
QNAP recommends creating a user account for each person that requires access to the NAS.
For details, see Creating a Local User.
6. Optional: Create user groups.
Overview 31
Page 33

User groups help you to easily manage user accounts.
For details, see Creating a User Group.
7. Optional: Create shared folders.
QTS creates four default shared folders.
For details, see Shared Folders.
8. Edit shared folder permissions.
Permissions enable you to control who can view and modify files in a shared folder.
For details, see Shared Folder Permissions.
9. Map the shared folders as network drives on your computer.
For details, see Shared Folder Access.
10. Store and manage files.
For details, see File Station.
QTS 4.5.x User Guide
Overview 32
Page 34

QTS 4.5.x User Guide
3. System Settings
General Settings
Settings Description
System Administration This screen allows you to specify the server name and ports and
configure secure connection settings.
Time Time settings affect event logs and scheduled tasks. This screen
allows you to specify the time zone and format and configure the
system date and time.
Daylight Saving Time (DST) Daylight saving time (DST) settings apply only to regions that use
DST. This screen allows you to either automatically adjust the
system clock or manually configure the settings.
Codepage This screen allows you to select the language that the NAS uses
to display file and directory information.
Region This screen allows you to select a region for your NAS. System
and application content and services are localized according to the
selected region.
Login Screen This screen allows you to customize the NAS login screen.
Configuring System Administration Settings
1. Go to Control Panel > System > General Settings > System Administration .
2. Specify the following information.
Field User Action
Server name Specify a name containing up to 14 characters from any of the
following groups:
• Letters: A to Z, a to z
• Numbers: 0 to 9
• Dashes (-)
Important
• The server name must contain one or more
letters.
• The server name cannot consist of numbers
only.
• The server name cannot start with a dash.
System port Specify the port used to access the web interface.
The default port is 8080.
Enable HTTP compression Select this option to improve transfer speeds and bandwidth
utilization. This setting is disabled by default.
Warning
Enabling this option may lead to security risks.
System Settings 33
Page 35

Field User Action
Enable secure connection (HTTPS) Select this option to allow HTTPS connections.
a. Select Enable secure connection (HTTPS).
b. Select a TLS version.
Warning
Selecting the latest TLS version may decrease
compatibility for other clients in your system.
c. Specify a port number.
d. Optional: Select Force secure connection (HTTPS) only to
require all users to connect to the NAS using only HTTPS.
Do not allow QTS embedding in
IFrames
a. Select this option to prevent websites from embedding QTS
using IFrames.
b. Click Allowed Websites to allow a specific website to embed
QTS in IFrames.
QTS 4.5.x User Guide
3. Click Apply.
Configuring Time Settings
Important
You must configure the system time correctly to avoid the following issues.
• When using a web browser to connect to the NAS or save a file, the displayed time of
the action is incorrect.
c. The Allowed Websites window appears.
d. Optional: Click Add to add a website to the list.
The Add Host Name window appears.
e. Specify a host name.
f. Click Add.
The host name is added to the allowed websites list.
g. Optional: Select a website, and then click Delete to delete a
website from the list.
h. Click Apply.
• Event logs do not reflect the exact time that events occurred.
• Scheduled tasks run at the wrong time.
1. Go to Control Panel > System > General Settings > Time .
2. Select a time zone.
3. Specify the date and time format.
4. Select the time setting.
System Settings 34
Page 36

Option User Action
Manual setting Specify the date and time.
Synchronize with an Internet time server
automatically
Ensure that your NAS is connected to the Internet,
and then specify the following information:
• Server: Name of the Network Time Protocol
(NTP) server
Examples: time.nist.gov, time.windows.com
• Optional: Click Test Connection.
The system will test if a connection can be
established with the configured time server.
• Time interval: Number of hours or days
between each time synchronization task
Set the server time the same as your computer
Click Update.
time
5. Click Apply.
QTS 4.5.x User Guide
Configuring Daylight Saving Time
These settings are available for NAS users in regions that use Daylight Saving Time (DST). Users outside
these regions can disregard these settings.
1. Go to Control Panel > System > General Settings > Daylight Saving Time .
2. Select Adjust system clock automatically for daylight saving time.
3. Optional: Select Enable customized daylight saving time table.
4. Optional: Perform any of the following actions.
Action Steps
Add DST data a. Click Add Daylight Saving Time Data.
The Add Daylight Saving Time Data window appears.
b. Specify a time period and the number of minutes to offset.
c. Click Apply.
Edit DST data a. Select a DST schedule from the table.
b.
Click .
c. Specify a time period and the number of minutes to offset.
d. Click Apply.
Delete DST data a. Select a DST schedule from the table.
b. Click Delete.
c. Click OK.
5. Optional: Select a DST schedule from the table.
6. Click Apply.
System Settings 35
Page 37

QTS 4.5.x User Guide
Configuring Codepage Settings
All files and directories on the NAS use Unicode encoding. If your operating system or FTP client does not
support Unicode, you must configure the following settings to properly view files and directories on the NAS.
1. Go to Control Panel > System > General Settings > Codepage .
2. Select the language of your operating system.
3. Click Apply.
Configuring Region Settings
Important
The NAS region settings affect device connectivity and the functionality, content, and
validity of some applications, utilities, licenses, and certificates. Ensure that you select the
correct region to avoid errors.
1. Go to Control Panel > System > General Settings > Region .
2. Select a region.
Region Description
Global Select this region if the NAS is located outside of China.
China Select this region if the NAS is located in China.
3. Click Apply.
Configuring the Login Screen
1. Go to Control Panel > System > General Settings > Login Screen .
2. Configure the following settings.
Field User Action
Login screen template Select a template for the login screen.
Show firmware version Select this option to display the QTS firmware version.
Show the link bar Select this option to display links to myQNAPCloud, QNAP
Utilities, and Feedback.
Background Select a background image or fill color.
Logo Select a logo.
Message Specify a message that will appear on the login screen. You can
enter a maximum of 120 ASCII characters.
You can also select the font color and size.
3. Click Preview to view the changes.
4. Click Apply.
Security
System Settings 36
Page 38

Configuring the Allow/Deny List
Important
If you have installed QuFirewall on your device, go to QuFirewall to configure the allow or
deny list.
1. Go to Control Panel > System > Security > Allow/Deny List .
2. Select an option.
Option Description User Action
Allow all connections The NAS can connect to all IP
addresses and network domains.
Use IP deny list The NAS cannot connect to any IP
address or network domains included in
the IP deny list.
QTS 4.5.x User Guide
Select Allow all connections.
a. Select Deny connections from the
list.
b. Click Add.
The IP configuration window
appears.
Use IP allow list The NAS can only connect to the IP
addresses or network domains included
in the IP allow list.
c. Specify an IP address, netmask, or
IP range.
d. Click Create.
Tip
To remove an IP address,
netmask, or IP range, select
an entry from the table, and
then click Remove.
a. Select Allow connections from
the list only.
b. Click Add.
The IP configuration window
appears.
c. Specify an IP address, netmask, or
IP range.
d. Click Create.
Tip
To remove an IP address,
netmask, or IP range, select
an entry from the table, and
then click Remove.
3. Click Apply.
Configuring IP Access Protection
1. Go to Control Panel > System > Security > IP Access Protection .
2. Select the connection methods you want to protect.
System Settings 37
Page 39

Note
SSH, Telnet, and HTTP(S) are enabled by default.
3. Optional: Specify the following information.
• Time period
• Maximum number of unsuccessful login attempts within the time period
• Amount of time the IP will be blocked
4. Click Apply.
Configuring Account Access Protection
1. Go to Control Panel > System > Security > Account Access Protection .
2. Specify the user type.
3. Select the connection methods you want to protect.
QTS 4.5.x User Guide
4. Optional: Specify the following information.
• Time period
• Maximum number of unsuccessful login attempts within the time period
5. Click Apply.
Certificate & Private Key
Secure Sockets Layer (SSL) is a protocol used for secure data transfers and encrypted communication
between web servers and browsers. To avoid receiving alerts or error messages when accessing the web
interface, upload an SSL certificate from a trusted provider.
Replacing the SSL Certificate and Private Key
Warning
The NAS supports only X.509 PEM certificates and private keys. Uploading an invalid
security certificate may prevent you from logging in to the NAS through SSL. To resolve
the issue, you must restore the default security certificate and private key.
1. Go to Control Panel > System > Security > Certificate & Private Key .
2. Click Replace Certificate.
The Replace Certificate window appears.
3. Select an option.
Option Description
Import certificate This option allows you to import an SSL certificate and private key
from your computer.
Get from Let's Encrypt This option uses the Let's Encrypt service to validate and issue a
certificate for your specified domain.
Create self-signed certificate This option allows you to create a self-signed certificate.
System Settings 38
Page 40

QTS 4.5.x User Guide
4. Click Next.
A configuration window appears.
5. Perform any of the following actions.
Option User Action
Import certificate a. Click Browse to upload a valid certificate and private key.
b. Optional: Click Browse to upload an intermediate certificate.
Get from Let's Encrypt a. Specify a domain name containing a maximum of 63 ASCII
characters, without spaces.
b. Specify a valid email address.
c. Optional: Specify an alternative name.
Tip
Use "," to separate multiple aliases.
Example: 123.web.com,789.web.com
Create self-signed certificate Configure the following information.
• Private key length
• Common name
• Email
• Country
• State/Province/Region
• City
• Organization
• Department
6. Click Apply.
Downloading the SSL Certificate and Private Key
1. Go to Control Panel > System > Security > Certificate & Private Key .
2. Click Download Certificate.
A dialog box appears.
3. Select Certificate, Private Key, or both.
4. Click OK.
QTS downloads the selected files to your computer.
Restoring the Default SSL Certificate and Private Key
1. Go to Control Panel > System > Security > Certificate & Private Key .
2. Click Restore to Default.
A confirmation message appears.
System Settings 39
Page 41

QTS 4.5.x User Guide
3. Click OK.
Configuring the Password Policy
Important
The following password policy is configured by default:
• English letters: No restrictions
• Digits: Enabled
• Minimum length: 8
1. Go to Control Panel > System > Security > Password Policy .
2. Optional: Under Password Strength, configure any of the following password criteria.
Criteria Description
English letters Passwords must contain at least one letter.
Select At least 1 uppercase and 1 lowercase to
require at least one uppercase and one lowercase
letter.
Digits Passwords must contain at least one number.
Special characters Passwords must contain at least one special
character.
Must not include characters repeated three or more
times consecutively
Must not be the same as the associated username,
or the username reversed.
Minimum length The password length must be greater than or equal
Repeating characters are not allowed. For example,
AAA.
The password must not be the same as the
username or the reversed username. For example,
username: user1 and password: 1resu.
to the specified number. The maximum length of a
password is 64 characters.
3. Optional: Require NAS users to periodically change their passwords.
Important
Enabling this option disables Disallow the user to change password under user account
settings.
a. Select Require users to change passwords periodically.
b. Specify the maximum number of days that each user password is valid.
c. Optional: Select Send a notification email to users a week in advance of their password
expiring.
4. Click Apply.
Hardware
Configuring General Hardware Settings
1. Go to Control Panel > System > Hardware > General .
System Settings 40
Page 42

QTS 4.5.x User Guide
2. Configure the following settings.
Settings User Action
Enable configuration reset switch Select this option to enable the reset button.
For details, see System Reset and Restore to Factory Default.
Enable disk standby mode Select this option to allow the NAS drives to enter standby
mode if there is no disk access within the specified period. Disk
status LED remains on during standby mode.
Important
The TS-h2490FU NAS does not support disk
standby mode.
Enable light signal alert Select this option to allow the status LED to flash when free
space on the NAS is less than the set value.
Enable write cache (EXT4 delay
allocation)
If the NAS disk volume uses EXT4, select this option for higher
write performance.
If the NAS is set as a shared storage in a virtualized or
clustered envrionment, disable this option.
Note
When this option is enabled, an unexpected
system shutdown may lead to data loss.
Run user-defined processes during
Select this option to run user-defined processes during startup.
startup
Turn on LED Select this option to turn on the LED, set its brightness level,
and set a schedule for brightness setting.
Note
This function is only applicable for some models.
3. Click Apply.
Configuring Audio Alert Settings
1. Go to Control Panel > System > Hardware > Audio Alert .
2. Configure any of the following settings.
Setting Description
System operations Select this option to trigger an audio alert every time the NAS
starts, shuts down, or upgrades firmware.
System events Select this option to trigger an audio alert when errors or
warnings occur.
Enable speech notification Select this option to replace some audio alerts with speech. You
can select a language and modify the volume.
3. Click Apply.
Tip
Click Test to check the modified speech settings.
If there is no sound, another app may be using
the speaker.
System Settings 41
Page 43

Configuring Smart Fan Settings
1. Go to Control Panel > System > Hardware > Smart Fan .
2. Select fan rotation speed settings.
Setting User Action
Automatically adjust fan speed
(recommended)
Select from the two automatic fan speed adjustment options.
a. QTS monitors the temperatures of the system, disks, and CPU
and automatically adjusts the fan speed.
b. QTS adjusts the fan speed according to user-specified
temperatures.
Note
Modes are only available for system fans.
• Quiet mode: Fans run on low speed to decrease noise.
QTS 4.5.x User Guide
• Normal mode: Fans run on normal speed. This is the default
setting.
• Performance mode: Fans run on high speed to lower the
system temperature. This mode is suitable for high loading
systems.
Manually set fan speed Move the slider to set the fan speed.
3. Click Apply.
Backup Battery Unit (BBU)
You can schedule a learning cycle for the backup battery units (BBUs). A learning cycle is when a controller
performs a battery calibration operation to determine the battery's condition. During this cycle, the system
switches to write-through mode to protect data integrity.
In write-through mode, the NAS writes data directly to HDDs/SSDs instead of writing to the RAM first. This
prevents data loss if a power outage occurs before the NAS finishes writing data.
This function is only available for models with redundant power supply units.
Configuring the Backup Battery Unit (BBU) Settings
Important
QNAP strongly recommends scheduling the learning cycle during off-peak hours.
1. Go to Control Panel > System > Hardware > BBU .
2. Select Enable BBU learning schedule.
3. Specify a learning cycle schedule.
4. Click Apply All.
System Settings 42
Page 44

QTS 4.5.x User Guide
Configuring Expansion Cards Settings
1. Go to Control Panel > System > Hardware > Expansion Cards .
QTS lists the available expansion cards.
2. Identify the expansion cards you want to configure.
3. Under Resource Use, select an OS or an application.
Note
Some functions are only applicable for certain models and expansion cards.
OS or Application Description
QTS QTS applications share expansion card resources
for transcoding.
• Select Hardware Transcoding to allow QTS
software to use expansion card resources to
speed up transcoding tasks. Only one card can
be assigned to hardware transcoding.
• Select Output to use expansion card resources
for video output of HD Station or Linux Station.
Only one card can be assigned to output.
Virtualization Station Virtualization Station has exclusive use of all
expansion card resources.
Container Station Container Station has exclusive use of all expansion
card resources.
4. Click Apply.
Power
You can configure Wake-on-LAN (WOL), select a NAS behavior after power outage, and specify power
schedules.
EuP Mode
Energy-using Products (EuP) is a directive designed to improve energy efficiency of electrical devices,
reduce use of hazardous substances, and improve environment-friendliness of the product.
Configuring EuP Mode
1. Go to Control Panel > System > Power > EuP Mode Configuration .
2. Select a mode.
Mode Description
Enable When enabled, Wake-on-LAN, power recovery, and power
schedule settings are disabled. The NAS keeps power
consumption below 1W when powered off.
Disable When disabled, power consumption of the NAS is slightly higher
than 1W when powered off. EuP mode is disabled by default.
System Settings 43
Page 45

QTS 4.5.x User Guide
3. Click Apply.
Wake-on-LAN (WOL)
You can power on the NAS remotely using the Wake-on-LAN (WOL) protocol in Qfinder. This feature is
enabled by default.
Important
If the power cable is disconnected when the NAS is powered off, WOL will not work until
the NAS has been manually powered on.
Enabling or Disabling Wake-on-LAN (WOL)
1. Go to Control Panel > System > Power > Wake-on-LAN (WOL) .
2. Select Enable or Disable.
3. Click Apply.
Power Recovery
This feature allows you to configure the power on and off status of the NAS after a power outage.
Configuring the Power Recovery Settings
1. Go to Control Panel > System > Power > Power Recovery .
2. Select a power recovery setting.
• Restore the previous NAS power state.
• Turn on the NAS automatically.
• Keep the NAS turned off.
3. Click Apply.
Power Schedule
This feature allows you to schedule automatic system power on, power off, and restarts at specified times.
Configuring the Power Schedule
1. Go to Control Panel > System > Power > Power Schedule .
2. Select Enable schedule.
3. Perform any of the following tasks.
System Settings 44
Page 46

Task User Action
Add a scheduled action.
Remove a scheduled action. Click Remove.
Note
One schedule is shown by default.
a. Click Add.
b. Select the following.
• Action: Select whether you want to shut down, restart, or
turn on the NAS.
• Schedule Type: Select the frequency of the action.
• Hour and Minute: Select the time of day to perform the
action.
Note
Schedules are removed starting from the bottom.
QTS 4.5.x User Guide
4. Optional: Select Postpone scheduled restart/shutdown when a replication job is in progress.
5. Click Apply.
Firmware Update
QNAP recommends keeping your NAS firmware up to date. This ensures that your NAS can benefit from
new QTS software features, security updates, enhancements, and bug fixes.
You can update NAS firmware using one of the following methods:
Update Method Description
Using Live Update Firmware updates are automatically detected by
QTS and installed onto your device.
For details, see Checking for Live Updates.
Using Manual Update You can check for latest device firmware updates on
the QNAP website, download the firmware update to
a computer, and manually install the firmware update
onto your device.
For details, see Updating the Firmware Manually.
Using QFinder Pro If your device is connected to the local area network,
you can use QFinder Pro to check and install the
latest firmware updates.
For details, see Updating the Firmware Using
Qfinder Pro.
Firmware Update Requirements
Your device must meet the following requirements to perform a firmware update:
System Settings 45
Page 47

QTS 4.5.x User Guide
Settings Requirements
Hardware settings • A computer
Important
A computer is required for updating the firmware
manually or through Qfinder Pro.
• Ethernet cables
Important
QNAP recommends updating the firmware using wired
Ethernet connections to ensure your network
connection is reliable during firmware updates.
System reboot QNAP recommends rebooting the NAS system before the firmware
backup.
Administrator privileges You must be a NAS administrator or have admin priveleges to update
firmware.
Stop NAS operations QNAP recommends stopping all other NAS operations before the
firmware update.The NAS must be restarted for the firmware update to
take effect and may disrupt ongoing NAS services or operations.
Device model name Ensure you have the correct NAS model name. You can find the NAS
model name using the following methods:
• Locate the model name on a sticker on the bottom or rear of your
device.
• Log on to your device to find the model name.
Firmware version If you are updating the firmware using Manual Update or Qfinder Pro,
ensure the selected firmware version is correct for your device model.
Checking for Live Updates
Warning
• To prevent data loss, QNAP recommends backing up all data on your device before
updating the firmware. For details about data backup, see Backup/Restore.
• Do not power off your device during the firmware update process.
Important
• Make sure you read through the Firmware Update Requirements before updating the
firmware.
• The update may require several minutes or longer, depending on your hardware
configuration and network connection.
1. Go to Control Panel > System > Firmware Update > Live Update .
2. Click Check for Update.
QTS checks for available firmware updates. You can choose to update QTS if there is an available
update.
3. Optional: Select Auto Update.
The Auto Update Settings window appears.
System Settings 46
Page 48

4. Enable Auto Update.
5. Specify the auto update frequency.
6. Click Apply.
7. Optional: Select one or more of the following options.
• Automatically check if a newer version is available when logging into the NAS web administration
interface.
• Join the QTS Beta program to receive beta update notifications.
Note
Joining the QTS Beta program allows you to use the latest QTS features and applications
before they are officially released.
8. Click Apply.
Updating the Firmware Manually
QTS 4.5.x User Guide
Warning
• To prevent data loss, QNAP recommends backing up all data on your device before
updating the firmware. For details about data backup, see Backup/Restore.
• Do not power off your device during the firmware update process.
Important
• Make sure you read through the Firmware Update Requirements before updating the
firmware.
• The update may require several minutes or longer, depending on your hardware
configuration and network connection.
1. Download the NAS firmware.
a. Go to http://www.qnap.com/download.
b. Select the number of drive bays on your NAS model.
c. Select your NAS model.
d. Read the release notes and confirm the following:
• The NAS model matches the firmware version.
• Updating the firmware is necessary.
• Check for any additional firmware update setup instructions.
e. Ensure that the product model and firmware are correct.
f. Select the download server based on your location.
g. Download the firmware package.
h. Click Browse.
System Settings 47
Page 49

i. Select a folder.
j. Save the downloaded firmware package.
k. Extract the firmware image file.
2. Go to Control Panel > System > Firmware Update > Firmware Update .
3. Click Update System.
A confirmation message window appears.
4. Click OK.
The device is immediately restarted.
Note
You can go to Control Panel > QuLog Center > Local Device > System Event Logs to check
if the firmware installation was successful.
Updating the Firmware Using Qfinder Pro
Warning
QTS 4.5.x User Guide
• To prevent data loss, QNAP recommends backing up all data on your device before
updating the firmware. For details about data backup, see Backup/Restore.
• Do not power off your device during the firmware update process.
Important
• Make sure you read through the Firmware Update Requirements before updating QTS.
• The update may require several minutes or longer, depending on your hardware
configuration and network connection. Do not power off the NAS during the update.
1. Download the NAS firmware.
a. Go to http://www.qnap.com/download.
b. Select the number of drive bays on your NAS model.
c. Select your NAS model.
d. Read the release notes and confirm the following:
• The NAS model matches the firmware version.
• Updating the firmware is necessary.
• Check for any additional firmware update setup instructions.
e. Ensure that the product model and firmware version are correct.
f. Download the firmware package.
g. Extract the firmware image file.
2. Open Qfinder Pro.
Qfinder Pro displays a list of NAS devices on your network.
3. Select a NAS model from the device list.
System Settings 48
Page 50

QTS 4.5.x User Guide
4. Go to Tools > Update Firmware .
Tip
You can also right-click the NAS model on the list and then select Update Firmware.
The Firmware Update window appears.
5. Specify your QTS username and password.
Qfinder Pro displays the Update Firmware screen.
6. Select one of the following firmware update methods:
Methods Steps
Update firmware manually a. Click Path of system firmware image file.
b. Click Browse.
c. Locate the downloaded firmware update image
file.
d. Click OK.
Update firmware automatically a. Click Automatically update the firmware to
the latest version.
b. Qfinder Pro searches for the latest firmware
update.
c. Click Update.
The firmware update image file is listed in the table below.
7. Perform one of the following actions:
Action Steps
Update a single NAS device Select the NAS that you want to update.
Update multiple NAS devices of the same
model
8. Click Start.
a. Select a NAS model from the list.
b. Select Update all the devices with the same model
number within the network.
c. Select the NAS devices that you want to update.
Backup/Restore
QTS provides system backup and restore features to help protect your data in the event of data loss or
system failure.
Backing Up System Settings
1. Go to Control Panel > System > Backup/Restore > Backup/Restore Settings .
2. Click Backup.
QTS exports the system settings as a BIN file and downloads the file to your computer.
System Settings 49
Page 51

Restoring System Settings
Warning
If the selected backup file contains user or user group information that already exists on
the NAS, QTS will overwrite the duplicate information.
1. Go to Control Panel > System > Backup/Restore > Backup/Restore Settings .
2. Click Browse.
3. Select a valid BIN file that contains the QTS system settings.
4. Click Restore.
System Reset and Restore to Factory Default
QTS provides several options for resetting or restoring the NAS to its default state.
Important
QNAP recommends backing up your data before performing this task.
QTS 4.5.x User Guide
System Settings 50
Page 52

Option Description Steps
Basic system reset This resets the following settings to
the default values without deleting the
user data stored on the disks.
• System administrator password:
MAC address of adapter 1 without
special characters (all letters must
be uppercase). For example, if the
MAC address of adapter 1 is
11:22:33:AA:BB:CC, then the
default admin password will be
112233AABBCC.
Tip
You can find the MAC
address of adapter 1 using
Qfinder Pro. It is also printed
on a sticker on the device as
"MAC1".
QTS 4.5.x User Guide
1. Power on the NAS.
2. Press and hold the reset button
for 3 seconds.
• TCP/IP configuration:
• Obtain IP address settings
automatically via DHCP
• Disable jumbo frames
• System port: 8080 (system
service port)
• Security level: Low (Allow all
connections)
• LCD panel password: (blank)
• VLAN: Disabled
• Service binding: All NAS services
can run on all available network
interfaces.
System Settings 51
Page 53

Option Description Steps
Advanced system reset This performs a basic system reset
and then restores the QTS default
settings, deleting all users, user
groups, and shared folders previously
created. The user data stored on the
disks is retained.
Note
To retrieve old data after an
advanced system reset, recreate the previous folder
structure on the NAS.
QTS 4.5.x User Guide
Perform an advanced system reset
using one of the following methods.
• Using QTS:
a. Go to Control Panel >
System > Backup/Restore >
Restore to Factory Default .
b. Click Reset Settings.
c. Choose to restart or shut
down the NAS after the
system is reset.
d. Click OK.
• Using the reset button:
a. Power on the NAS.
Restore factory default
settings and format all
volumes
Reinitialize the NAS This deletes all data on the disks and
This restores the default system
settings and formats all disk volumes.
reinstalls QTS.
b. Press and hold the reset
button for 10 seconds.
1. Go to Control Panel > System >
Backup/Restore > Restore to
Factory Default .
2. Click Restore Factory Defaults
& Format All Volumes.
3. Choose to restart or shut down
the NAS after the system is reset.
4. Click OK.
1. Go to Control Panel > System >
Backup/Restore > Restore to
Factory Default .
2. Click Reinitialize NAS.
3. Choose to restart or shut down
the NAS after the NAS is
reinitialized.
4. Click OK.
External Device
USB Printer
The NAS supports using and sharing up to three network printers on your network in Windows, macOS, and
Linux (Ubuntu) environments.
Configuring USB Printer Settings
Ensure that the printers are connected to the NAS via USB before performing this task.
System Settings 52
Page 54

Warning
Restarting the NAS or updating QTS while print jobs are still in progress cancels all the
queued print jobs.
1. Go to Control Panel > System > External Device > USB Printer .
QTS displays the detected USB printers on your network.
2. Select a USB printer and then perform one or more of the following tasks.
Task Action
View printer information Click Printer Info.
This displays the details of the selected printer.
View printer log Click Printer Log.
This displays the current and completed print jobs
on the selected printer.
Tip
You can stop, resume, or cancel ongoing
or pending print jobs. You can also delete
completed or pending print jobs. Click
Clear to clear the history.
QTS 4.5.x User Guide
Clean up spool space Click Clean Up Spool Space.
This deletes the data stored in the printer spool.
Configure printer settings Click Settings.
This enables you to configure the following
settings:
• Stop printer sharing and clear print
spool: Select this option to disable printing
and delete all stored data on the selected
printer.
• Bonjour printer support: Select this option
to introduce the printing service to the
macOS users on your network.
3. Optional: Specify the maximum number of print jobs allowed on each printer.
One printer can support processing up to 1000 print jobs. The oldest print jobs are automatically
overwritten if the printer reaches the maximum number of print jobs.
4. Click Apply.
Creating a USB Printer Access List
You can create an access list to allow or deny user access to USB printers.
1. Go to Control Panel > System > External Device > USB Printer .
QTS displays the detected USB printers on your network.
2. Specify access rights.
a. Beside Access right, select Allow printing or Deny printing.
b. Specify the IP addresses or domain names that you want to allow or deny.
System Settings 53
Page 55

QTS 4.5.x User Guide
Tip
You can specify multiple IP addresses or domain names and separate them using commas.
You can also use wildcard characters (such as an asterisk or a question mark) in an IP address
or a domain name.
3. Click Apply.
Uninterruptible Power Supply (UPS)
The NAS supports connecting to uninterruptible power supply (UPS) devices to protect the NAS from
abnormal system shutdowns caused by power disruptions.
NAS Behavior During a Power Outage
The following table describes the possible scenarios during a power outage and the corresponding NAS
behavior.
Phase Scenario NAS Behavior
Phase 1: From the start of the
power outage until the end of the
specified waiting time
Phase 2: From the end of the
specified waiting time until the
UPS runs out of power
Phase 3: From the moment the
UPS runs out power until the
power is restored
The power outage occurs. The NAS detects the remaining
UPS power.
The UPS power is greater than
15%.
The UPS power is less than 15%. After 30 seconds, the NAS
The power is restored. The NAS remains functional.
The power is not restored, and the
NAS is in auto-protection mode.
The power is not restored, and the
NAS is powered off.
The power is restored, and the
NAS is in auto-protection mode.
The power is restored, and the
NAS is powered off.
The power is not restored, and the
NAS is in auto-protection mode.
The power is not restored, and the
NAS is powered off.
The power is restored. The NAS applies the specified
Depending on your UPS settings,
the NAS powers off or switches to
auto-protection mode after the
specified waiting time elapses.
automatically powers off or
switches to auto-protection mode
regardless of the specified waiting
time.
The NAS stops all running
services. All shared folders and
iSCSI LUNs become inaccessible.
The NAS remains powered off.
The NAS restarts and resumes its
previous state.
The NAS remains powered off.
The NAS powers off.
The NAS remains powered off.
power recovery settings.
Configuring the UPS Settings
1. Go to Control Panel > System > External Device > UPS .
2. Select one of the following options and configure the settings.
System Settings 54
Page 56

QTS 4.5.x User Guide
Mode Steps
USB connection a. Connect the UPS to the NAS using a USB
cable.
b. Select USB connection.
c. Choose one of the following options.
• Power off the server after the power
fails for a specified time period
• Allow the NAS to enter auto-protection
mode after the power fails for a
specified time period
Note
In auto-protection mode, the NAS stops all
services and unmounts all volumes to
protect your data. After the power is
restored, the NAS restarts and resumes
normal operation.
d. (Optional) Select Enable network UPS
master and then specify the IP addresses to
which QTS sends notifications in the event
of power failure.
Note
This option can only be selected when the
UPS is connected to the NAS via USB.
SNMP connection a. Connect the UPS to the same network as
the NAS.
b. Select SNMP connection.
c. Specify the IP address of the UPS.
d. Choose one of the following options.
• Power off the server after the power
fails for a specified time period
• Allow the NAS to enter auto-protection
mode after the power fails for a
specified time period
Network UPS slave a. Connect the UPS to the same network as
the NAS.
b. Select Network UPS slave.
c. Specify the IP address of the UPS server.
d. Choose one of the following options.
• Power off the server after the power
fails for a specified time period
System Settings 55
Page 57

QTS 4.5.x User Guide
• Allow the NAS to enter auto-protection
mode after the power fails for a
specified time period
3. Click Apply.
System Status
You can check the status of your NAS in Control Panel > System > System Status .
Section Description
System Information This screen displays basic system information
including, server name, model name, CPU, Intel
QuickAssist Technology (Intel QAT) support, serial
number, BIOS version, memory, firmware version,
system up time, time zone, and filename encoding.
Note
Intel QuickAssist Technology support
only appears when it is detected by
QTS.
Network Status This screen displays the current network settings of
each network interface.
System Service This screen displays the current status of system
services, such as antivirus, networking services,
DDNS services, domain controllers, multimedia
management, data backup management,
surveillance management, remote servers, and VPN
servers.
Hardware Information This screen displays NAS hardware information,
such as CPU usage, memory, disk temperature,
power supply unit (PSU) status, and system fan
speed.
Resource Monitor
You can monitor the status of your NAS in Control Panel > System > Resource Monitor .
Resource Monitor displays information and statistics about hardware usage and system resources.
Section Description
Overview This screen provides a general summary of CPU
usage, memory usage, network usage, and ongoing
processes on the NAS.
System Settings 56
Page 58

QTS 4.5.x User Guide
Section Description
System Resource This screen uses line charts to display CPU usage,
memory usage, network usage, and graphics card
usage (if supported and installed) over time.
You can hover the mouse pointer over a line chart to
view the hardware usage at a specific point in time.
Tip
You can click More ( ) and then
select Settings to specify the time
interval on the line charts.
Storage Resource This screen uses line charts to display the activities
of volumes, LUNs, storage pools, RAID groups, and
disks on the NAS over time. This screen also
summarizes the storage usage of each volume.
You can hover the mouse pointer over a line chart to
view the storage activity at a specific point in time.
Processes This screen displays all ongoing background
processes and provides information about each
process, such as its current status, CPU usage, and
memory usage.
Tip
You can enable Group by Applications
to group related processes together (for
example, all the processes related to an
application or a system feature).
System Settings 57
Page 59

QTS 4.5.x User Guide
4. Privilege Settings
Go to Control Panel > Privilege to configure privilege settings, disk quotas, and domain security on the
NAS.
Users
Default Administrator Account
The admin user account is the default administrator account. It can configure settings, create users, and
install applications. You cannot delete this account. To prevent malicious actors from compromising your
system due to easy passwords, QNAP strongly recommends changing the default admin password or
creating another administrator account and disabling the default admin account. A new administrator account
can perform the same actions as the default administrator account. There are two reasons for not disabling
the default admin account. If you want to access the QNAP turbo NAS via Secure Shell (SSH) or Telnet, do
not disable the default admin account. Also, if you're going to access Console Management, do not disable
the default admin account.
Creating an Administrator Account
Note
Create another administrator account before disabling the default admin account.
1. Log in as admin.
2. Go to Control Panel > Privilege > Users .
3. Click Create > Create a User .
The Create a User window appears.
4. Specify the following information.
Field Description
Profile photo Optional: Upload a profile photo for the user.
User Description (optional) Specify a user description that contains a maximum
of 50 characters.
Username Specify a username that contains 1 to 32 characters
from any of the following groups:
• Letters: A to Z, a to z
• Numbers: 0 to 9
• Multi-byte characters: Chinese, Japanese,
Korean, and Russian
• Special characters: . - _ ~ ! @ # $ % ^ & ( ) { }
Password Specify a password that contains a maximum of 64
ASCII characters.
Privilege Settings 58
Page 60

QTS 4.5.x User Guide
Field Description
Phone number (optional) Specify a phone number that will receive SMS
notifications from QTS.
Note
Other NAS users might be able to see
this information. If you do not want to
share this information, leave the field
blank.
Email (optional) Specify an email address that will receive
notifications from QTS.
For details, see Email Notifications.
Note
Other NAS users might be able to see
this information. If you do not want to
share this information, leave the field
blank.
Send a notification mail to the newly created
user (optional)
When selected, QTS sends a message that contains
the following information to the specified email
address:
5. Add the user to one or more user groups.
a. Under User Group, click Edit.
b. Select administrators.
6. Optional: Specify shared folder permissions for the user.
a. Under Shared Folder Permission, click Edit.
b. Select the shared folder permissions for the user.
c. Optional: Select Apply changes to subfolders.
7. Optional: Specify application privileges for the user.
a. Under Edit Application Privilege, click Edit.
• URLs for connecting to the NAS
Tip
You can edit the notification message.
b. Select application permissions for the user.
By default, administrator accounts can access to all applications.
Tip
QNAP recommends denying access to applications and network services that the user does not
require. Users without privileges to specific applications will not see it on their main menu.
8. Optional: Set a quota for the user.
Note
This option is only available when quotas are enabled.
Privilege Settings 59
Page 61

a. Under Quota, click Edit.
b. Set the quota.
• No Limit: Quota settings do not apply to the user.
• Limit disk space to: Specify a quota for the user.
• Use group quotas: Group quota settings apply to the user.
Important
Individual quotas may override group quotas. For details, see Quota Conflicts.
9. Click Create.
Disabling a Default Administrator Account
1. Log in as a local user.
2. Go to Control Panel > Privilege > Users .
QTS 4.5.x User Guide
3.
Click .
The Edit Account Profile window opens.
4. Select Disable this account.
5. Optional: Select one of the following options.
Option Description
Now Disables the account immediately.
Expiry date Disables the account on the specified date.
6. Click OK.
Creating a Local User
1. Go to Control Panel > Privilege > Users .
2. Click Create > Create a User .
The Create a User window appears.
3. Specify the following information.
Field Description
Profile photo Optional: Upload a profile photo for the user.
User Description (optional) Specify a user description that contains a maximum of 50
characters.
Privilege Settings 60
Page 62

QTS 4.5.x User Guide
Field Description
Username Specify a username that contains 1 to 32 characters from any of
the following groups:
• Letters: A to Z, a to z
• Numbers: 0 to 9
• Multi-byte characters: Chinese, Japanese, Korean, and
Russian
• Special characters: . - _ ~ ! @ # $ % ^ & ( ) { }
Password Specify a password that contains a maximum of 64 ASCII
characters.
Phone number (optional) Specify a phone number that will receive SMS notifications from
QTS.
Note
Other NAS users might be able to see this
information. If you do not want to share this
information, leave the field blank.
Email (optional) Specify an email address that will receive notifications from QTS.
For details, see Email Notifications.
Note
Other NAS users might be able to see this
information. If you do not want to share this
information, leave the field blank.
Send a notification mail to the newly
created user (optional)
When selected, QTS sends a message that contains the following
information to the specified email address:
• URLs for connecting to the NAS
Tip
You can edit the notification message.
4. Optional: Add the user to one or more user groups.
a. Under User Group, click Edit.
b. Select one or more user groups.
5. Optional: Specify shared folder permissions for the user.
a. Under Shared Folder Permission, click Edit.
b. Select the shared folder permissions for the user.
c. Optional: Select Apply changes to subfolders.
6. Optional: Specify application privileges for the user.
a. Under Edit Application Privilege, click Edit.
b. Select application permissions for the user.
Privilege Settings 61
Page 63

Tip
QNAP recommends denying access to applications and network services that the user does not
require. Users without privileges to specific applications will not see it on their main menu.
7. Optional: Set a quota for the user.
Note
This option is only available when quotas are enabled.
a. Under Quota, click Edit.
b. Set the quota.
• No Limit: Quota settings do not apply to the user.
• Limit disk space to: Specify a quota for the user.
• Use group quotas: Group quota settings apply to the user.
Note
Individual quotas may override group quotas. For details, see Quota Conflicts.
QTS 4.5.x User Guide
8. Click Create.
Creating Multiple Users
1. Go to Control Panel > Privilege > Users .
2. Click Create > Create Multiple Users .
The Multiple Users Creation Wizard appears.
3. Click Next.
4. Specify the following information.
Field Description
User Name Prefix Specify a username that contains a maximum of 23 ASCII
characters and that does not:
• Contain a space
• Begin with the following characters: - # @
• Contain the following characters: @ " + = / \ : | * ? < > ; [ ] % ` '
This prefix will be included before all usernames.
Example: test
User Name Start No Specify a start number with a maximum of 8 digits.
Example: 1
Note
QTS removes leading zeros in starting numbers.
For example, 001 becomes 1.
Number of Users Specify the number of users (1–4095).
Example: 5
Privilege Settings 62
Page 64

QTS 4.5.x User Guide
Field Description
Password Specify a password that contains a maximum of 64 ASCII
characters.
Note
The username format is [username prefix][user number]. The specified start number
and number of users determine the user number.
Using the examples, the users created will have the following usernames: test1, test2,
test3, test4, and test5.
5. Click Next.
The Create Private Network Share screen appears.
6. Optional: Create a private network share for each user.
a. Select Yes.
b. Click Next.
c. Specify the following information.
Field Description
Hide network drive Selecting this option hides the folder in Windows networks. Users who know the
specific path can still access the folder.
Lock File (Oplocks) Opportunistic lock (Oplocks) is a Windows file locking mechanism that facilitates
caching and access control to improve performance. This feature is enabled by
default and should only be disabled in networks where multiple users
simultaneously access the same files.
Disk Volume Select the data volume where the private network share will be created.
To continue without creating a private network share, select No.
7. Click Next.
QTS creates the user accounts and adds them to the displayed user list.
8. Click Finish.
User Account Lists
The NAS supports importing user accounts from TXT, CSV, and BIN files. The files contain user account
information including usernames, passwords, user groups, and quota settings.
File Format Description
TXT Create user account lists using a text editor. For details, see Creating a TXT
User File.
CSV Create user account lists using a spreadsheet editor. For details, see Creating a
CSV User File.
BIN QNAP NAS devices can export user account information, including quota
settings, to BIN files. For details, see Exporting Users.
Creating a TXT User File
1. Create a new file in a text editor.
Privilege Settings 63
Page 65

2. Specify user information in the following format.
Username,Password,Quota (MB),Group Name
Important
• Separate values using commas.
• Specify a quota between 100 MB and 2048 GB (2048000 MB).
Note
The system only accepts quotas in MB. GB values must be expressed in MB.
• Specify information for only one user on each line.
Example:
John,s8fk4b,100,Sales
Jane,9fjwbx,150,Marketing
Mary,f9xn3ns,390,RD
3. Save the list as a TXT file.
Important
If the list contains multi-byte characters, save the file with UTF-8 encoding.
QTS 4.5.x User Guide
Creating a CSV User File
1. Create a new workbook in a spreadsheet editor.
2. Specify user information in the following format.
• column A: Username
• column B: Password
• column C: Quota (MB)
• column D: Group name
Important
• Specify a quota between 100 MB and 2048 GB (2048000 MB).
Note
The system only accepts quotas in MB. GB values must be expressed in MB.
• Specify information for only one user in each row.
Example:
3. Save the workbook as a CSV file.
Privilege Settings 64
Page 66

Important
If the list contains multi-byte characters, open the file using a text editor and then save with
UTF-8 encoding.
Importing Users
1. Go to Control Panel > Privilege > Users .
2. Click Create > Import/Export Users .
The Import/Export Users window appears.
3. Select Import user and user group settings.
4. Optional: Select any of the following options.
Field Description
Send a notification mail to
the newly created user
When selected, QTS sends a message that contains the following
information to the specified email address of the user.
• Username and password
QTS 4.5.x User Guide
• URLs for connecting to the NAS
Important
To send email notifications, ensure that you have
configured an SMTP server. For details, see Configuring
an Email Notification Server.
Overwrite duplicate users When selected, QTS overwrites existing user accounts that have duplicates
on the imported user account list.
5. Click Browse, and then select the file that contains the user account list.
Important
Ensure that you are importing a valid QTS user account list file to avoid parsing errors.
For details, see User Account Lists.
6. Click Next.
File Type User Action
TXT or CSV The Import User Preview screen appears.
Check the status of the user account list.
Important
The Status indicates whether any information is invalid. If
any information is invalid, the user account list will not be
imported successfully.
BIN The following screen describes the Overwrite duplicate users feature.
7. Click Next.
QTS imports the user account list.
8. Click Finish.
Privilege Settings 65
Page 67

Exporting Users
1. Go to Control Panel > Privilege > Users .
2. Click Create > Import/Export Users .
The Import/Export Users window appears.
3. Select Export user and user group settings.
4. Click Next.
QTS exports the user account list to your computer as a BIN file.
Tip
You can use this file to import users to another NAS running QTS.
Modifying User Account Information
1. Go to Control Panel > Privilege > Users .
2. Locate a user.
QTS 4.5.x User Guide
3. Perform any of the following tasks.
Task User Action
Change password a.
Under Action, click .
The Change Password window appears.
b. Specify a password that contains a maximum of 64 ASCII characters.
c. Verify the password.
d. Click Apply.
Privilege Settings 66
Page 68

Task User Action
Edit account profile a.
b. Edit the settings.
c. Modify the quota for the user.
QTS 4.5.x User Guide
Under Action, click .
The Edit Account Profile window appears.
The Edit Account Profile window provides the following settings not
included in the Create a User window:
• Description (optional): Specify a user description that contains a
maximum of 50 characters.
• Disallow the user to change password: When selected, QTS
prevents the user from changing the password.
• Disable this account: Select this option to disable the user
account. You can either select to disable the account Now or
specify an Expiry Date.
d. Click OK.
Edit user group membership a.
b. Select or deselect user groups.
c. Click Apply.
Edit shared folder
a.
permissions
b. Edit the user's permissions for each shared folder.
Note
This option is only available when quotas are enabled.
• No Limit: Quota settings do not apply to the user.
• Limit disk space to: Specify a quota for the user.
• Use group quotas: Group quota settings apply to the user.
Important
Individual quotas may override group quotas.
Under Action, click .
The Edit User's Groups window appears.
Under Action, click
.
The Edit Shared Folder Permission window appears.
c. Optional: Select Apply changes to subfolders.
d. Click Apply.
Privilege Settings 67
Page 69

Task User Action
Edit application privileges a.
Under Action, click .
The Edit Application Privileges window appears.
b. Select the applications that the user is allowed to access.
c. Click Apply.
Tip
QNAP recommends denying access to applications and
network services that the user does not require.
By default, administrator accounts have access to all
applications.
Deleting Users
1. Go to Control Panel > Privilege > Users .
2. Select the users to delete.
QTS 4.5.x User Guide
Note
Default user accounts cannot be deleted.
3. Click Delete.
A warning message appears.
4. Optional: Select Also delete the selected user(s)' home folders and data.
5. Click Yes.
Home Folders
Enabling home folders creates a personal folder for each local and domain user on the NAS. When a home
folder is created, the user's home folder appears as a shared folder called home. Users can access their
home folder through Microsoft networking, FTP, and File Station.
All user home folders are located in the homes shared folder. By default, only the administrator can access
this folder. If home folders are disabled, home folders become inaccessible to users. However, the folders
and files they contain are not deleted from the NAS. The administrator can still access the homes folder and
each user's home folder.
Enabling Home Folders
1. Go to Control Panel > Privilege > Users .
2. Click Home Folder.
The Home Folder window appears.
3. Select Enable home folder for all users.
4. Select a volume.
Home folders are stored on the selected volume.
5. Click Apply.
Privilege Settings 68
Page 70

QTS 4.5.x User Guide
User Groups
A user group is a collection of users with the same access rights to files or folders. Administrators can create
user groups to manage folder permissions for multiple users.
Default User Groups
User Group Description
administrators Users in this group can configure settings, create users, and install applications.
You cannot delete this group.
everyone Users in this group can only view and modify files. This group contains all local
user accounts and can be used to grant shared folder permissions to all local
user accounts. You cannot delete this group.
Creating a User Group
1. Go to Control Panel > Privilege > User Groups .
2. Click Create.
The Create a User Group window appears.
3. Specify the User group name.
The user group name can contain 1 to 128 characters from any of the following groups:
• Letters: A to Z, a to z
• Numbers: 0 to 9
• Multi-byte characters: Chinese, Japanese, Korean, and Russian
• Dashes (-)
4. Optional: Specify a description that contains a maxiumum of 128 characters.
5. Optional: Add users to the user group.
a. Under Assign users to this group, click Edit.
b. Select one or more users.
6. Optional: Specify shared folder permissions for the user group.
a. Under Edit shared folder permissions, click Edit.
b. Select the permissions for each shared folder.
For details, see Conflicts in Shared Folder Permissions.
7. Optional: Set a quota for the user group.
Note
This option is only available when quotas are enabled.
For details, see Enabling Quotas.
a. Under Quota, click Edit.
b. Set the quota.
Privilege Settings 69
Page 71

• No Limit: Quota settings do not apply to the user group.
• Limit disk space to: Specify a quota for the user group.
Important
Individual quotas may override group quotas.
For details, see Quota Conflicts.
8. Click Create.
A dialog box appears.
9. Choose whether group quotas will be applied to users in the group.
Option Description
Yes Applies group quota settings to each user in the group.
No Retains individual quota settings for users in the group.
For details on group quota settings, see Quota Conflicts.
Modifying User Group Information
QTS 4.5.x User Guide
1. Go to Control Panel > Privilege > User Groups .
2. Locate a user group.
3. Perform any of the following tasks.
Task User Action
Edit user group details a.
Under Action, click .
The View Group Details window appears.
b. Modify the description.
c. Modify the quota.
Note
• You cannot modify the quota in the default user group.
• This option is only available when quotas are enabled.
For details, see Enabling Quotas.
• No Limit: Quota settings do not apply to the user group.
• Limit disk space to: Specify a quota for the user group.
Important
Individual quotas may override group quotas.
For details, see Quota Conflicts.
d. Click OK.
Privilege Settings 70
Page 72

Task User Action
Edit user group members a.
b. Select or deselect users.
c. Click Apply.
Edit shared folder
permissions
a.
b. Edit the user group's permissions for each shared folder.
c. Click Apply.
Under Action, click .
The Edit User Group window appears.
Under Action, click
The Edit Shared Folder Permissions window appears.
For details, see Shared Folder Permissions.
Important
Group-level permissions may override user-level
permissions. For details, see Conflicts in Shared Folder
Permissions.
.
QTS 4.5.x User Guide
Deleting User Groups
1. Go to Control Panel > Privilege > User Groups .
2. Select the user groups to delete.
Note
Default user groups cannot be deleted.
3. Click Delete.
A warning message appears.
4. Click OK.
Shared Folders
Go to Control Panel > Privilege > Shared Folders to configure settings and permissions for shared folders.
Default Shared Folders
QTS automatically creates the following shared folders to help you organize data on your NAS.
Important
You cannot delete or modify certain properties of default shared folders.
Folder Description
Download This is the default folder for Download Station. The folder stores
content downloaded in QTS. You can assign a different path for
downloads in Download Station.
Multimedia This is the default folder for multimedia apps. The folder stores
multimedia content such as photos, videos, and music. You can
manage this folder in the Multimedia Console utility in Control Panel >
Applications .
Privilege Settings 71
Page 73

QTS 4.5.x User Guide
Folder Description
Public This folder can be used by any user account. The default permission of
this folder is Read Only. For details, see Shared Folder Permissions.
Web This folder stores content from the Web Server utility, which you can
manage in Control Panel > Applications .
Restoring Default Shared Folders
You can restore default shared folders that were deleted.
1. Go to Control Panel > Privilege > Shared Folders > Shared Folder > Others .
2. Click Restore Default Shared Folders.
A warning message appears.
3. Click OK.
QTS restores the default shared folders.
Creating a Shared Folder
1. Go to Control Panel > Privilege > Shared Folders > Shared Folder .
2. Click Create, and then select Shared Folder.
The Create A Shared Folder window opens.
3. Specify the following information:
Field Description
Folder Name Specify a folder name that contains 1 to 64 characters and that does
not:
• Begin or end with a space
• Contain consecutive spaces
• End with "."
• Begin with "_sn_" or "_sn_bk"
• Contain the following characters: " + = / \ : | * ? < > ; [ ] % ` '.
Comment (optional) Specify a comment that contains 1 to 128 ASCII characters.
The information is for your reference and is not used by QTS.
Disk Volume Specify the volume on which the shared folder will be created.
Qtier Auto Tiering When enabled, Qtier performs auto-tiering on data in the folder.
For details, see Qtier.
This setting is only available if you select a Qtier-enabled storage pool.
Tip
You can also enable auto-tiering from the Shared
Folders screen.
Path • Specify path automatically: Creates a new root folder on the
selected volume using the specified shared folder name.
• Enter path manually: Select an existing folder as the root folder.
Privilege Settings 72
Page 74

QTS 4.5.x User Guide
4. Optional: Configure user access permissions.
a. Under Configure access privileges for users, click Edit.
b. Specify the access permissions for users.
For details, see Shared Folder Permissions.
5. Optional: Enable folder encryption.
a. Under Folder Encryption, click Edit.
b. Select Encryption.
Folder encryption protects folder content against unauthorized data access when the drives are
physically stolen.
c. Specify the following information.
Field/Option Description
Input Password Specify a password that contains 8 to 32 characters except the
following: " $ : = \
This field does not support multibyte characters.
Verify Password The password must match the previously specified password.
Save encryption key When enabled, QTS automatically unlocks the shared folder after the
NAS restarts.
When disabled, the administrator must unlock the folder after the NAS
restarts.
For details, see Unlocking a Shared Folder.
Warning
• Saving the encryption key on the NAS can result in
unauthorized data access if unauthorized
personnel are able to physically access the NAS.
• If you forget the encryption password, all data will
become inaccessible.
6. Optional: Configure advanced settings.
Option Description
Guest Access Right Select the permission level assigned to users without a NAS
account.
Hide network drive Selecting this option hides the folder in Windows networks. Users
who know the specific path can still access the folder.
Lock File (Oplocks) Opportunistic lock (Oplocks) is a Windows file locking mechanism
that facilitates caching and access control to improve
performance. This feature is enabled by default and should only
be disabled in networks where multiple users simultaneously
access the same files.
SMB Encryption This option is available only when SMB3 is enabled. Selecting
this option encrypts all Microsoft network communication using
the SMB3 protocol.
Enable Windows Previous Versions When enabled, the Previous Versions feature in Windows can be
used with the shared folder.
Privilege Settings 73
Page 75

QTS 4.5.x User Guide
Option Description
Enable Network Recycle Bin Selecting this option creates a Recycle Bin for this shared folder.
Restrict the access of Recycle Bin to
administrators only for now
Selecting this option prevents non-administrator users from
recovering or deleting files in the Recycle Bin.
Note
This option is available only when Enable
Network Recycle Bin is selected.
Enable sync on this shared folder Selecting this option allows this shared folder to be used with
Qsync. This option is only available if Qsync Central is installed
on the NAS.
Enable access-based share
enumeration (ABSE)
When enabled, users can only see the shared folders that they
have permission to mount and access. Guest account users must
enter a username and password to view shared folders.
Enable access-based enumeration
(ABE)
Set this folder as the Time Machine
backup folder (macOS)
When enabled, users can only see the files and folders that they
have permission to access.
When enabled, the shared folder becomes the destination folder
for Time Machine in macOS.
Important
• If space in the folder is insufficient when
starting a new Time Machine backup, QTS
automatically deletes the oldest Time Machine
backup in the folder to free up space.
• You should disable Enable Network Recycle
Bin when Set this folder as the Time
Machine backup folder (macOS) is selected
to prevent automatically deleted Time Machine
backups from filling the recycle bin.
7. Click Create.
Tip
Hovering your mouse underneath the columns Size, Folders, and Files displays the shared
folder's size, number of folders, number of files, and last update time.
Editing Shared Folder Properties
1. Go to Control Panel > Privilege > Shared Folders > Shared Folder .
2. Locate a shared folder.
3.
Under Action, click .
The Edit Properties window appears.
4. Modify any of the following settings.
Privilege Settings 74
Page 76

QTS 4.5.x User Guide
Setting Description
Folder Name Specify a folder name that contains 1 to 64 characters and that does
not:
• Begin or end with a space
• Contain consecutive spaces
• End with "."
• Begin with "_sn_" or "_sn_bk"
• Contain the following characters: " + = / \ : | * ? < > ; [ ] % ` '.
Comment (optional) Specify a comment that contains 1 to 128 ASCII characters.
The information is for your reference and is not used by QTS.
Disk Volume Specify the volume on which the shared folder will be created.
Qtier Auto Tiering When enabled, Qtier performs auto-tiering on data in the folder.
For details, see Qtier.
This setting is only available if you select a Qtier-enabled storage pool.
Tip
You can also enable auto-tiering from the Shared
Folders screen.
Path Modify the folder path.
Hide network drive Selecting this option hides the folder in Windows networks. Users who
know the specific path can still access the folder.
Lock File (Oplocks) Opportunistic lock (Oplocks) is a Windows file locking mechanism that
facilitates caching and access control to improve performance. This
feature is enabled by default and should only be disabled in networks
where multiple users simultaneously access the same files.
SMB Encryption This option is available only when SMB3 is enabled. Selecting this
option encrypts all Microsoft network communication using the SMB3
protocol.
Enable Windows Previous
Versions
When enabled, the Previous Versions feature in Windows can be used
with the shared folder.
Enable Network Recycle Bin Selecting this option creates a Recycle Bin for this shared folder.
Restrict the access of Recycle
Bin to administrators only for
Selecting this option prevents non-administrator users from recovering
or deleting files in the Recycle Bin.
now
Note
This option is available only when Enable Network
Recycle Bin is selected.
Enable write-only access on
FTP connection
Only allows applications to
access files using the long file
name format
When enabled, only the admin has read and write access to the
shared folder. Other users will only be able to write to the folder.
When selected, applications can only use the long file name (LFN)
format to access files in the shared folder.
Privilege Settings 75
Page 77

QTS 4.5.x User Guide
Setting Description
Encrypt this folder Folder encryption protects folder content against unauthorized data
access when the drives are physically stolen.
Specify the following information.
a. Input Password
Specify a password that contains 8 to 32 characters except the
following: " $ : = \
This field does not support multibyte characters.
b. Verify Password
The password must match the previously specified password.
c. Save encryption key
When enabled, QTS automatically unlocks the shared folder after
the NAS restarts.
When disabled, the administrator must unlock the folder after the
NAS restarts.
For details, see Unlocking a Shared Folder.
Warning
Enable sync on this shared
folder
Enable access-based share
enumeration (ABSE)
Enable access-based
enumeration (ABE)
Set this folder as the Time
Machine backup folder (macOS)
• Saving the encryption key on the NAS can result in
unauthorized data access if unauthorized
personnel are able to physically access the NAS.
• If you forget the encryption password, all data will
become inaccessible.
Selecting this option allows this shared folder to be used with Qsync.
This option is only available if Qsync Central is installed on the NAS.
When enabled, users can only see the shared folders that they have
permission to mount and access. Guest account users must enter a
username and password to view shared folders.
When enabled, users can only see the files and folders that they have
permission to access.
When enabled, the shared folder becomes the destination folder for
Time Machine in macOS.
Important
• If space in the folder is insufficient when starting a
new Time Machine backup, QTS automatically
deletes the oldest Time Machine backup in the
folder to free up space.
• You should disable Enable Network Recycle Bin
when Set this folder as the Time Machine
backup folder (macOS) is selected to prevent
automatically deleted Time Machine backups from
filling the recycle bin.
Migrate to Snapshot Shared
Folder
5. Click OK.
Migrate the shared folder to a snapshot shared folder.
For details, see Migrating to a Snapshot Shared Folder.
Privilege Settings 76
Page 78

Refreshing a Shared Folder
1. Go to Control Panel > Privilege > Shared Folders > Shared Folder .
2. Locate a shared folder.
3.
Under Action, click .
Removing Shared Folders
1. Go to Control Panel > Privilege > Shared Folders > Shared Folder .
2. Select the shared folders to remove.
Note
Default shared folders cannot be removed.
3. Click Remove.
A confirmation message appears.
QTS 4.5.x User Guide
4. Optional: Select Also delete the data (mounted ISO image files will not be deleted).
5. Click Yes.
Enabling Daily Updates for Shared Folders
You can set a time for QTS to check the size and the number of folders and files for all of your shared
folders.
1. Go to Control Panel > Privilege > Shared Folders > Shared Folder > Others .
2. Click Settings.
The Settings window opens.
3. Select Enable daily updates for shared folder size and the number of folders and files.
4. Select a time.
5. Click Apply.
Snapshot Shared Folders
A snapshot shared folder is a shared folder created on a dedicated volume and allows users to quickly
recover data by restoring a folder or reverting a volume from a snapshot. Users can also set folder quotas for
snapshot shared folders.
For details on snapshots, see Storage & Snapshots.
The snapshot shared folder feature requires a NAS that supports snapshots and contains at least 1 GB of
memory. For details on compatible models, see www.qnap.com/solution/snapshots.
Creating a Snapshot Shared Folder
1. Go to Control Panel > Privilege > Shared Folders > Shared Folder .
2. Click Create, and then select Snapshot shared folder.
The Create a Snapshot Shared Folder window opens.
Privilege Settings 77
Page 79

QTS 4.5.x User Guide
3. Specify the following information:
Field Description
Folder Name Specify a folder name that contains 1 to 64 characters and that does
not:
• Begin or end with a space
• Contain consecutive spaces
• End with "."
• Begin with "_sn_" or "_sn_bk"
• Contain the following characters: " + = / \ : | * ? < > ; [ ] % ` '.
Comment (optional) Specify a comment that contains 1 to 128 ASCII characters.
Storage Pool Specify the storage pool where the shared folder will be created.
Space Allocation Select one of the following space allocation options:
• Thick provisioning
• Thin provisioning
Qtier Auto Tiering When enabled, Qtier performs auto-tiering on data in the folder.
This setting is only available if you select a Qtier-enabled storage pool.
Tip
You can also enable auto-tiering from the Shared
Folders screen.
Allocate folder quota You can allocate a folder quota for the snapshot shared folder.
4. Optional: Configure user access permissions.
a. Under Configure access privileges for users, click Edit.
b. Specify the access permissions for users.
For details, see Shared Folder Permissions.
5. Optional: Configure advanced settings.
For details, see Creating a Shared Folder.
6. Click Create.
Migrating to a Snapshot Shared Folder
1. Go to Control Panel > Privilege > Shared Folders > Shared Folder .
2. Select the folder you want to migrate to a snapshot shared folder.
3. Click Migrate to Snapshot Shared Folder.
The Migrating shared folder to a snapshot shared folder wizard appears.
4. Select the location for the snapshot shared folder.
5. Click Next.
6. Optional: Free up storage pool space on the volume.
Privilege Settings 78
Page 80

Note
If there is not enough storage space in the storage pool for the snapshot shared folder, the Free
Storage Pool Space screen appears.
Option User Action
Release unused guaranteed snapshot
space
Run a space reclaim to release used
space on thin volumes
QTS 4.5.x User Guide
Note
This option is only available if guaranteed
snapshot space has been allocated to the
storage pool.
a. Click Set up now.
The Snapshot Settings window appears.
b. Configure the snapshot settings to release space.
For details, see Storage & Snapshots.
c. Click OK.
Note
This option is only available if the storage pool
contains a thin volume with reclaimable space.
Convert a thick volume to a thin volume
to release unallocated space
7. Configure the snapshot shared folder.
a. Click Run now.
A dialog box appears.
b. Click OK to reclaim the available storage space.
QTS reclaims the used space.
A dialog box appears.
c. Click OK.
Note
This option is only available if the storage pool
contains a thick volume.
a. Select a volume to convert.
b. Click Run now.
The Convert to Thin Volume window appears.
Warning
Converting a volume deletes all existing
snapshots on the volume.
c. Click Apply.
QTS converts the volume.
Field Description
Qtier Auto Tiering When enabled, Qtier performs auto-tiering on data in the folder.
This setting is only available if you select a Qtier-enabled storage
pool.
Tip
You can also enable auto-tiering from the Shared
Folders screen.
Privilege Settings 79
Page 81

Field Description
Space Allocation Select one of the following space allocation options:
• Thick provisioning
• Thin provisioning
Allocated space quota Specify a quota for the snapshot shared folder.
Tip
Click Set to Max to allocate all remaining storage
pool space to the volume.
8. Click Next.
9. Review the settings.
10. Click OK.
ISO Shared Folders
QTS 4.5.x User Guide
Users can mount ISO image files on the NAS as ISO shared folders and access them without having to burn
discs. By default, most NAS models support up to 256 ISO shared folders.
ISO Shared Folder Requirements
By default, most NAS models can support up to 256 ISO shared folders. However, some NAS models
support fewer than 256 ISO image files, depending on the number of Network Recycle Bin folders: Number
of supported ISO image files = 256 − 6 (default shared folders) − (number of Network Recycle Bin folders).
The following NAS models support fewer than 256 ISO image files.
NAS Model
TS-1x:
• TS-110
• TS-112
• TS-119
• TS-119P+
• TS-120
• TS-121
TS-2x:
• TS-210
• TS-212
• TS-219
• TS-219P
• TS-219P+
• TS-220
Other models:
• TS-410
• TS-221
Mounting an ISO File as a Shared Folder
1. Go to Control Panel > Privilege > Shared Folders > Shared Folder .
2. Click Create, and then select Create an ISO Share.
The Create an ISO Share window opens.
3. Select the source ISO image file to be mounted.
4. Click Next.
Privilege Settings 80
Page 82

QTS 4.5.x User Guide
5. Specify the following information.
Field Description
Folder Name Specify a folder name that contains 1 to 64 characters and that does
not:
• End with a space
• Contain consecutive spaces
• End with "."
• Begin with "_sn_" or "_sn_bk"
• Contain the following characters: " + = / \ : | * ? < > ; [ ] % ` '
Note
For ARM-based NAS models, ISO shared subfolder
names do not support Cyrillic characters. If a subfolder
name includes Cyrillic characters, it will not be
displayed correctly on the NAS.
Shared folders on macOS that include the character
"#" in their names cannot be mounted.
Hidden Folder Selecting Yes hides the folder in Windows networks. Users who know
the specific path can still access the folder.
Description Specify a description that contains a maximum of 128 ASCII
characters.
6. Click Next.
7. Configure user access permissions and guest access rights to the ISO shared folder.
Type Option Description User Action
User access
permissions
Grant read-only
access right for
administrators only
Selecting this option
grants administrator
accounts read-only
a. Click Next.
b. Review the settings.
access to the ISO
shared folder.
By User Selecting this option
a. Click Next.
allows you to
configure access
permissions to the
b. Configure the user account access
rights for the ISO shared folder.
ISO shared folder at
the user level.
c. Click Next.
d. Review the settings.
By User Group Selecting this option
a. Click Next.
allows you to
configure access
permissions to the
b. Configure the user group access
rights for the ISO shared folder.
ISO shared folder at
the user group
level.
c. Click Next.
d. Review the settings.
Privilege Settings 81
Page 83

QTS 4.5.x User Guide
Type Option Description User Action
Guest access
rights
Deny Access Selecting this option
denies access to
N/A
guest accounts.
Read only Selecting this option
grants read-only
access to guest
accounts.
For details, see Shared Folder Permissions.
8. Click Next.
QTS mounts the ISO file as a shared folder and then adds it to the Shared Folder screen.
9. Click Finish.
Shared Folder Permissions
Permission Description
Read Only (RO) The user or user group can read files in the shared folder, but not
write them.
Read/Write (RW) The user or user group can read and write files in the shared
folder.
Deny The user or user group cannot read or write files in the shared
folder.
Editing Shared Folder Permissions
1. Go to Control Panel > Privilege > Shared Folders > Shared Folder .
2. Locate a shared folder.
3.
Under Action, click
The Edit Shared Folder Permission window appears.
4. Under Select permission type, select a permission type to edit.
5. Perform any of the following tasks.
.
Privilege Settings 82
Page 84

Permission Type Description User Action
Users and groups
permission
Edit user and user group
permissions for shared
folders that can be
accessed through
a. Specify permissions for each user and user group.
b. Optional: Add a user to the list of users with
permissions for the shared folder.
Windows, macOS, FTP,
and File Station.
1. Click Add.
The Select users and groups window
appears.
2. Select the type of user or user group from the
drop-down menu in the upper left.
3. Specify the permissions for the users you want
to add.
4. Click Add.
QTS adds the users and their corresponding
permissions to the list.
c. Optional: Remove a user from the list of users with
permissions for the shared folder.
QTS 4.5.x User Guide
NFS host access Edit NFS host access
rights for shared folders.
1. Click the user you want to remove.
2. Click Remove.
QTS removes the user from the list.
d. Optional: Modify guest access rights.
Under Guest Access Right, select the permission
type for guest accounts.
a. Select Access right to enable NFS access rights.
Note
You can't select this for folders mounted
by HybridMount using SMB file protocol.
These folders do not support NFS host
access. However, you can still access the
NFS host access page.
b. Under Host / IP / Network, enter an IP address or
domain name.
c. Optional: Add an NFS host.
Under Allowed IP Address or Domain Name,
click Add.
QTS adds an entry to the list.
d. Optional: Delete an NFS host.
1. Select an NFS host from the list.
2. Click Delete.
Privilege Settings 83
Page 85

Permission Type Description User Action
Microsoft
Networking host
access
Specify which computers
can access shared folders
through Microsoft
Networking.
a. Add a Microsoft Networking host.
1. Click Add.
QTS adds an entry to the list.
2. Under Host / IP / Network, enter an IP
address or domain name.
b. Optional: Delete a Microsoft Networking host.
1. Select a Microsoft Networking host from the
list.
2. Click Delete.
6. Click Apply.
Configuring Advanced Folder Permissions
1. Go to Control Panel > Privilege > Shared Folders > Advanced Permissions .
QTS 4.5.x User Guide
2. Select any of the following options.
Option Description
Enable Advanced Folder
Permissions
When enabled, users can assign folder and subfolder permissions
to individual users and user groups.
Note
SMB/NFS mounted shared folders do not support
advanced folder permissions.
Enable Windows ACL support When enabled, users can only configure folder and subfolder
permissions from Windows File Explorer.
3. Click Apply.
Conflicts in Shared Folder Permissions
When a user is assigned different permissions for a shared folder, QTS uses the following hierarchy to
resolve conflicts.
1. No Access/Deny
2. Read/Write (RW)
3. Read Only (RO)
User Permission User Group Permission Actual Permission
No Access No Access No Access
Read Only No Access
Read/Write No Access
Not Specified No Access
Privilege Settings 84
Page 86

User Permission User Group Permission Actual Permission
No Access Read Only No Access
Read Only Read Only
Read/Write Read/Write
Not Specified Read Only
No Access Read/Write No Access
Read Only Read/Write
Read/Write Read/Write
• Shared folders through
Samba/AFP: Read/Write
• Shared folders through NFS:
Read Only
Not Specified Read/Write
No Access Not Specified No Access
Read Only Read Only
Read/Write Read/Write
Not Specified No Access
QTS 4.5.x User Guide
Folder Aggregation
Users can aggregate shared folders on a Windows network and link them to a portal folder accessible on the
NAS. You can link up to 10 folders to a single portal folder.
Go to Control Panel > Privilege > Shared Folders > Folder Aggregation to enable folder aggregation.
Note
• Folder aggregation is supported in Samba networks only. QNAP recommends folder
aggregation for a Windows Active Directory (AD) environment.
• If access permissions are assigned to portal folders, the NAS and remote servers must
be joined to the same AD domain.
Creating a Portal Folder
Note
Ensure that folder aggregation is enabled before performing the following steps. For
details, see Folder Aggregation.
1. Go to Control Panel > Privilege > Shared Folders > Folder Aggregation .
2. Under Folder Aggregation List, click Create a Portal Folder.
The Create a Portal Folder window appears.
3. Specify the following information.
Privilege Settings 85
Page 87

QTS 4.5.x User Guide
Field Description
Folder Name Specify a folder name that contains 1 to 64 characters and that does
not:
• Begin or end with a space
• Contain consecutive spaces
• End with "."
• Begin with "_sn_" or "_sn_bk"
• Contain the following characters: " + = / \ : | * ? < > ; [ ] % ` '
Hidden Folder Selecting Yes hides the folder in Windows networks. Users who know
the specific path can still access the folder.
Comment Specify a comment between 1 and 128 ASCII characters.
Users must login before
accessing the portal folder.
When selected, users must log in to the NAS with their username and
password before accessing the portal folder.
This prevents guest accounts from accessing the portal folder and
other user permission issues.
4. Click Apply.
Modifying Portal Folder Information
Note
Ensure that folder aggregation is enabled before performing the following steps. For
details, see Folder Aggregation.
1. Go to Control Panel > Privilege > Shared Folders > Folder Aggregation .
2. Locate a portal folder.
3. Perform any of the following tasks.
Task User Action
Edit portal folder properties a.
Configure the remote folder
link
Under Action, click .
The Edit Portal Folder window appears.
b. Edit the folder properties.
For details, see Creating a Portal Folder.
a.
Under Action, click
.
The Remote Folder Link window appears.
4. Click Apply.
Deleting Portal Folders
Note
Ensure that folder aggregation is enabled before performing the following steps. For
details, see Folder Aggregation.
b. Specify the Name, Host Name, and Remote Shared Folder for any
remote folder link.
Privilege Settings 86
Page 88

1. Go to Control Panel > Privilege > Shared Folders > Folder Aggregation .
2. Select the portal folders that you want to delete.
3. Click Delete.
A warning message appears.
4. Click Yes.
Importing Folder Trees
Note
Ensure that folder aggregation is enabled before performing the following steps. For
details, see Folder Aggregation.
1. Go to Control Panel > Privilege > Shared Folders > Folder Aggregation .
2. Click Import/Export Folder Tree.
The Import/Export Folder Tree window appears.
3. Under Import Folder Tree, click Browse.
QTS 4.5.x User Guide
4. Select the file that contains the folder tree.
Important
Ensure that you are importing a valid QTS folder tree file to avoid parsing errors.
5. Click Import.
A warning message appears.
6. Click OK.
QTS imports the folder tree.
7. Click OK.
8. Click Finish.
Exporting Folder Trees
Note
Ensure that folder aggregation is enabled before performing the following steps. For
details, see Folder Aggregation.
1. Go to Control Panel > Privilege > Shared Folders > Folder Aggregation .
2. Click Import/Export Folder Tree.
The Import/Export Folder Tree window appears.
3. Under Export Folder Tree, click Export.
QTS exports the folder tree to your computer as a BIN file.
Tip
You can use this file to import folder trees to another NAS running QTS.
4. Click Finish.
Privilege Settings 87
Page 89

QTS 4.5.x User Guide
Shared Folder Encryption
Shared folders on the NAS can be encrypted with 256-bit AES encryption to protect data. Encrypted shared
folders can be mounted with normal read/write permissions but can only be accessed using the authorized
password. Encrypting shared folders protects sensitive data from unauthorized access if the drives are
physically stolen.
Encrypting a Shared Folder
Note
• Default shared folders cannot be encrypted.
• The volume or path of an encrypted folder cannot be changed.
• Encrypted folders cannot be accessed through NFS.
1. Go to Control Panel > Privilege > Shared Folders > Shared Folder .
2. Locate a shared folder.
3.
Under Action, click .
The Edit Properties window appears.
4. Select Encrypt this folder.
5. Specify the following information.
Field/Option Description
Input Password Specify a password that contains 8 to 32 characters except the
following: " $ : = \
This field does not support multibyte characters.
Verify Password The password must match the previously specified password.
Save encryption key When enabled, QTS automatically unlocks the shared folder after the
NAS restarts.
When disabled, users must unlock the folder after restarting the NAS.
For details, see Unlocking a Shared Folder.
Note
QNAP strongly recommends exporting and saving the
encryption key. For details, see Configuring Encryption
Settings.
The Folder Encryption window appears.
6. Review the information.
7. Click Yes.
Configuring Encryption Settings
1. Go to Control Panel > Privilege > Shared Folders > Shared Folder .
2. Locate an encrypted shared folder.
Privilege Settings 88
Page 90

3.
Under Action, click .
The Encryption Management window appears.
Note
If the encrypted folder is locked, you must unlock it before configuring encryption settings. For
details, see Unlocking a Shared Folder.
4. Perform any of the following tasks.
Task User Action
Download the encryption key
a. Go to Download.
file
b. Enter the encryption password.
c. Click OK.
QTS exports the encryption key file to your computer as a TXT.
Save the encryption key a. Go to Save.
b. Select Mount automatically on start up.
When enabled, QTS automatically unlocks the shared folder after the
NAS restarts.
QTS 4.5.x User Guide
c. Enter the encryption password.
d. Click OK.
QTS saves the encryption key.
Lock the shared folder a. Go to Lock.
b. Optional: Select Forget the saved key.
Note
When selected, users must unlock the folder after
restarting the NAS.
This setting is only available if Save encryption key was
enabled when the folder was encrypted or Mount
automatically on start up was enabled after the folder
was encrypted.
c. Click OK.
QTS locks the folder.
Note
• Locked folders do not appear in File Station. A folder
will only reappear after it is unlocked.
• Users cannot edit the properties or permissions of a
locked shared folder.
Unlocking a Shared Folder
1. Go to Control Panel > Privilege > Shared Folders > Shared Folder .
2. Locate a locked shared folder.
Privilege Settings 89
Page 91

3.
Under Action, click .
The Unlock Folder window appears.
4. Select one of the following options.
Option User Action
Input Encryption Password a. Enter the encryption password.
b. Optional: Select Save encryption key.
When enabled, QTS automatically unlocks the shared folder after the
NAS restarts.
Note
This option is selected by default.
Upload Encryption Key File a. Click Browse.
b. Select the encryption key file.
5. Click OK.
QTS 4.5.x User Guide
Shared Folder Access
You can map or mount a NAS shared folder as a network drive, allowing you to easily access and manage
files from your Windows, Mac, or Linux computer.
For Windows and Mac, you can use Qfinder Pro to map or mount your NAS shared folders. Qfinder Pro is a
desktop utility that enables you to locate and access the QNAP NAS devices in your local area network.
To download Qfinder Pro, go to https://www.qnap.com/utilities.
Mapping a Shared Folder on a Windows Computer
Before mapping a shared folder, ensure that you have Qfinder Pro installed on your Windows computer.
1. Power on the NAS.
2. Connect the NAS to your local area network.
3. Open Qfinder Pro.
Qfinder Pro displays all QNAP NAS devices in your local area network.
Privilege Settings 90
Page 92

QTS 4.5.x User Guide
4. Select the NAS where the shared folder is located.
5. Click Tools > Map Network Drive .
6. Select a shared folder.
7. Click Map Network Drive.
8. Specify your QTS username and password.
Privilege Settings 91
Page 93

9. Click OK.
10. Specify the following information.
QTS 4.5.x User Guide
Field Description
Drive Specify the drive letter for the shared folder.
Folder This field is uneditable because you have already selected the shared
folder. This is for your reference.
Reconnect at sign-in When selected, the shared folder will automatically be connected the
next time the user signs in.
Connect using different
credentials
Connect to a Web site that you
can use to store your
documents and pictures.
When selected, the user will have the option to sign into the NAS with a
different account after mapping the shared folder.
When clicked, the Add Network Location Wizard appears.
You can use this wizard to create a shortcut to your mapped shared
folder.
11. Click Finish.
Privilege Settings 92
Page 94

QTS 4.5.x User Guide
The shared folder is mapped as a network drive and can be accessed using Windows Explorer.
Mounting a Shared Folder on a Mac Computer
Before mounting a shared folder, ensure that you have Qfinder Pro installed on your Mac computer.
1. Power on the NAS.
2. Connect the NAS to your local area network.
3. Open Qfinder Pro.
Qfinder Pro displays all QNAP NAS devices in your local area network.
4. Select the NAS where the shared folder is located.
5. Click Network Drives.
6. Specify your QTS username and password.
7. Click OK.
The Mount Network Drives window opens.
8. Select Add mounted folders to "Favorites" in Finder.
9. Click OK.
Privilege Settings 93
Page 95

A confirmation message appears.
10. Click Yes.
QTS 4.5.x User Guide
11. Specify your Mac username and password.
12. Click OK.
13. Select the shared folder.
14. Click OK.
Privilege Settings 94
Page 96

The shared folder is mounted as a network drive and can be accessed using Qfinder Pro.
Mounting a Shared Folder on a Linux Computer
1. Open a terminal with root privileges.
QTS 4.5.x User Guide
2. Run the following command:
mount <NAS Ethernet Interface IP>:/share/<Shared Folder Name> <Directory to Mount>
Tip
If the NAS ethernet interface IP address is 192.168.0.42 and you want to connect to a shared
folder "public" under the /mnt/pub directory, run the following command:
mount -t nfs 192.168.0.42:/share/public/mnt/pub
3. Specify your NAS username and password.
You can connect to the shared folder using the mounted directory.
Quota
You can enable quotas (in MB or GB) for users and user groups to help manage storage space. When
quotas are enabled, QTS prevents users from saving data to the NAS after the quota is reached. By default,
quotas are not enabled for users.
QTS provides three types of quota settings.
Type Description
Individual Set quotas for individual users.
Go to Control Panel > Privilege > Users to edit user quotas.
For details, see Modifying User Account Information.
Group Set quotas at the group level. Setting a group quota applies
the quota to each user in the group.
Go to Control Panel > Privilege > User Groups to edit group
quotas.
For details, see Modifying User Group Information.
All users When enabled, the quota is applied to both new and existing
users.
Go to Control Panel > Privilege > Quota to enable quotas.
For details, see Enabling Quotas.
Privilege Settings 95
Page 97

Note
Quotas are applied per volume and are not shared across volumes.
Important
Individual quotas may override group quotas.
For details, see Quota Conflicts.
Tip
You can export quota settings to a CSV file to use as a reference.
For details, see Exporting Quota Settings.
Enabling Quotas
1. Go to Control Panel > Privilege > Quota .
2. Select Enable quota for all users.
3. Specify the all users quota.
Note
The all users quota must be between 100 MB and 2048 GB (2048000 MB).
QTS 4.5.x User Guide
4. Click Apply.
QTS displays the quota settings for Local Users.
Editing Quota Settings
1. Go to Control Panel > Privilege > Quota .
2. Select the type of user or group.
• Local Users
• Domain Users
• Local Groups
• Domain Groups
Tip
By default, the Quota screen displays Local Users.
3. Select a user or group.
4. Click Edit.
The Quota window appears.
5. Set a quota for the user or group.
• No Limit: Quota settings do not apply to the user or group.
• Limit disk space to: Specify a quota for the user or group.
• Use group quotas: Group quota settings apply to the user.
Important
Individual quotas may override group quotas.
Privilege Settings 96
Page 98

For details, see Quota Conflicts.
6. Click OK.
Exporting Quota Settings
1. Go to Control Panel > Privilege > Quota .
2. Click Generate.
3. Click Download.
QTS exports the quota settings as a CSV file.
Quota Conflicts
QTS uses the following hierarchy to resolve quota conflicts.
1. Individual quota
2. Group quota
QTS 4.5.x User Guide
3. All users quota
The following table describes the possible scenarios for different combinations of user quotas and group
quotas.
• The User Quota column shows the quota setting that is applied to the user individually.
• The Group Quota column shows whether the user belongs to any groups.
• The Actual Quota column shows the actual quota setting that is applied to the user.
User Quota Group Quota Actual Quota
No limit Yes No limit
No No limit
Individual Yes Individual quota
No Individual quota
Use group quotas Yes Group quota
No All users quota
Note
If a user belongs to multiple groups with group quotas, the highest group quota applies to
the user.
Domain Security
The NAS supports user authentication through local access rights management, the Microsoft Active
Directory (AD), and the Lightweight Directory Access Protocol (LDAP) directory.
Joining the NAS to an AD domain or an LDAP directory allows AD or LDAP users to access the NAS using
their own accounts without having to configure user accounts on the NAS.
Note
QTS supports AD running on Windows Server 2003, 2008, 2008 R2, 2012, 2012 R2, and 2016.
Privilege Settings 97
Page 99

QTS 4.5.x User Guide
Go to Control Panel > Privilege > Domain Security to configure domain security settings.
Option Description
No domain security (Local users
Only local users can access the NAS.
only)
Active Directory authentication
(Domain member)
Users can join the NAS to an AD, allowing domain users to be
authenticated by the NAS. Local and AD users can access the
NAS using Samba, AFP, FTP, and File Station. For details, see
Active Directory (AD) Authentication.
LDAP authentication Users can connect the NAS to an LDAP directory, allowing LDAP
users to be authenticated by the NAS. Local and LDAP users can
access the NAS using Samba, AFP, FTP, and File Station. For
details, see LDAP Authentication.
Set this NAS as a domain controller Clicking this directs the user to the Domain Controller screen.
For details, see Domain Controller.
Active Directory (AD) Authentication
Active Directory (AD) is a Microsoft directory service that stores information for users, user groups, and
computers for authenticating and managing domain access. Windows environments use AD to store, share,
and manage a network's information and resources.
When a NAS is joined to an AD domain, the NAS automatically imports all of the user accounts on the AD
server. AD users can then use the same login details to access the NAS.
Configuring AD Authentication Using the Quick Configuration Wizard
1. Go to Control Panel > Privilege > Domain Security .
2. Select Active Directory authentication (Domain member).
3. Click Quick Configuration Wizard.
The Active Directory Wizard appears.
4. Click Next.
5. Specify the fully qualified domain name (FQDN) of the AD DNS server.
QTS automatically generates the NetBIOS domain name.
6. Specify the IP address of the AD DNS server.
7. Optional: Select Obtain DNS server address automatically by DHCP server.
8. Click Next.
9. Select a domain controller.
10. Select the server signature rule for the domain.
Option Description
Auto SMB signing is offered but not enforced. Clients can choose whether
to use SMB signing or not.
Mandatory SMB signing is required.
Disabled SMB signing is disabled for SMB 1. For SMB 2 and above, this option
behaves the same as Auto.
Privilege Settings 98
Page 100

QTS 4.5.x User Guide
11. Specify the domain administrator username and password.
12. Click Join.
The NAS joins the domain.
13. Click Finish.
Configuring AD Authentication Manually
Verify the following before starting this task:
• The time settings of the NAS and the AD server are identical. The maximum time disparity tolerated is
5 minutes.
• The AD server is configured as the primary DNS server. If you use an external DNS server, you will not
be able to join the domain.
• You have specified the IP address of the WINS server that you use for name resolution.
1. Go to Control Panel > Privilege > Domain Security .
2. Select Active Directory authentication (Domain member).
3. Click Manual Configuration.
The Active Directory window appears.
4. Specify the following information.
• Domain NetBIOS Name
• AD Server Name
• Domain
• Domain Administrator Username
Note
The specified user must have administrator access rights to the AD domain.
• Domain Administrator Password
• Organizational Unit (Optional)
• Server description (Optional)
Note
The NAS Samba service replicates this in the server's Comment field. This description appears
when connecting to a NAS Samba shared folder using the command line interface.
5. Select the server signature rule for the domain.
Option Description
Auto SMB signing is offered but not enforced. Clients can choose whether
to use SMB signing or not.
Mandatory SMB signing is required.
Disabled SMB signing is disabled for SMB 1. For SMB 2 and above, this option
behaves the same as Auto.
Privilege Settings 99
 Loading...