

Page 1

NAC-200
User Manual
Page 2

Network Camera Server
NAC-200
User Manual (Version: 1.1.0)
©Copyright 2005. QNAP Systems, Inc. All Rights Reserved.
May 1, 2005
2
Page 3

LIMITED WARRANTY
In no event shall the liability of QNAP Systems, Inc. (QNAP) exceed the price paid for
the product from direct, indirect, special, incidental, or consequential software, or
its documentation. QNAP offers no refunds for its products. QNAP makes no
warranty or representation, expressed, implied, or statutory, with respect to its
products or the contents or use of this documentation and all accompanying
software, and specifically disclaims its quality, performance, merchantability, or
fitness for any particular purpose. QNAP reserves the right to revise or update its
products, software, or documentation without obligation to notify any individual or
entity.
CAUTION
1. Back up your system periodically to avoid any potential data loss.
2. Should you return any components of NAC-200 package for refund or
maintenance, make sure they are carefully packed for shipping. Any form of
damages due to improper packaging will not be compensated.
VCCI AUTHENTICATION
NAC-200 has passed Class A of VCCI regulation.
3
Page 4

Table of Contents
Chapter 1
Product Overview .................................................................6
1.1 Introduction ...................................................................................6
1.2 Package Contents............................................................................6
1.3 System Overview ............................................................................7
Chapter 2 Installation of NAC-200 ........................................................8
2.1 Default Network Configuration ..........................................................8
2.2 Installing NAC-200 ..........................................................................9
Chapter 3 Using NAC-200....................................................................12
3.1 Entering Configuration Page............................................................ 12
3.2 Settings....................................................................................... 14
3.2.1 Video Settings......................................................................... 15
3.2.2 Image Settings........................................................................ 17
3.2.3 System Settings ...................................................................... 19
3.2.4 Network Settings..................................................................... 20
3.2.5 Auto Recording........................................................................ 22
3.2.6 Schedule Settings.................................................................... 23
3.2.7 Storage Settings...................................................................... 31
3.2.8 Event Settings......................................................................... 34
3.2.9 Tools .....................................................................................38
Chapter 4 NAC-200 Operation.............................................................39
4.1 Login NAC-200 .............................................................................39
4.2 Snapshot Function......................................................................... 40
4.3 Select Manual Snapshot Mode.........................................................42
4.4 Adjust Screen Display Size ............................................................. 43
4.4.1 Full Screen .............................................................................43
4.4.2 Simple View............................................................................ 44
4.5 Video Recording............................................................................46
4.5.1 Manual Recording .................................................................... 46
4.5.2 Auto Recording........................................................................ 48
4.6 Playback ...................................................................................... 52
4.7 Clear Alarms ................................................................................ 54
4.8 Logout NAC-200 ...........................................................................56
Chapter 5 Maintenance ....................................................................... 57
5.1 Shut down/ Restart Server ............................................................. 57
5.2 Reset Administrator Password & Network Settings .............................58
4
Page 5

5.3
GPIO Connection........................................................................... 59
5.4 System Update ............................................................................. 60
5.5 Troubleshooting― Event Logs ......................................................... 62
Appendix A File Size of NAC-200 Recorded Data.................................64
5
Page 6

Chapter 1 Product Overview
1.1 Introduction
NAC-200 is a digital and networked surveillance device that provides instant
monitoring, recording, snapshot taking and file playing functions for security
management. The resolution of image is up to 1.3 mega pixels, specifically fits the
usage need of family or individuals.
1.2 Package Contents
• NAC-200 network camera server
• Camera stand (screws inclusive)
• Power cord
• Ethernet cable
• Companion CD (user manual inclusive)
• Quick installation guide
6
Page 7

1.3 System Overview
• Front View
Len
• Side View
• Rear View
Power Connector
Network Connector
GPIO Connector
Reset Button
7
Page 8

Chapter 2 Installation of NAC-200
Recommended system requirements:
9 Pentium III 800Mhz or above processor
9 128MB CPU
2.1 Default Network Configuration
By default, NAC-200 will obtain its IP address and other TCP/IP network protocol
settings from a DHCP server. If no DHCP server is found, NAC-200 will use the
following default settings:
IP address: 192.168.0.1
Subnet mask: 255.255.255.0
Login to NAC-200 with the following default user name and password:
User name: admin
User password: admin
To restore network configuration and administrator password to default, please
refer to Chapter 5.2.
8
Page 9

2.2 Installing NAC-200
1. Connect the server to LAN with an Ethernet cable.
2. Connect the power supply.
3. Run NAC-200 Finder in the companion CD.
4. Click “Refresh”. If there are several NAC-200 servers in your LAN, select the
correct device and double-click the device entry.
5. Install ActiveX control the first time you login NAC-200.
9
Page 10

6. When the login screen appears, enter the default user name and password:
User name: admin
Password: admin
10
Page 11

Note:
1. NAC-200 supports only Microsoft Internet Explorer 5.0 or later version. It is
suggested to use IE 5.5 for browsing.
2. If the window does not appear, go to Control Panel. Select Internet Options,
then choose Security― Internet and click Custom Level. Choose Enable or
Prompt for the option Download signed ActiveX controls.
11
Page 12

Chapter 3 Using NAC-200
3.1 Entering Configuration Page
1. Run NAC-200 Finder, select the appropriate network camera and click
“Configure”.
2. Enter the user name and password.
12
Page 13

3. You can then configure the settings of NAC-200. Click OK to confirm the
changes or Cancel to quit. Note that the system time cannot be changed by
Finder. To change the settings, please login the administration page.
13
Page 14

3.2 Settings
Click
to enter the Settings page. You can configure Video Settings, Image
Settings, System Settings, Network Settings, Auto Recording, Schedule Settings,
Storage Settings, Event Settings and Tools. Note that this section will be displayed
only for administrator.
14
Page 15

3.2.1 Video Settings
Field Description
Monitoring Resolution Three resolutions are supported for monitor: 320x240,
640x480, and 1280x1024.
Frame Rate Select the frame rate of the video screen. The higher
the frame rate, the more number of frames are played
per second. The selections are fastest, fast, normal,
slow, and slowest.
To save the settings, click
15
Page 16

Frame rate of each resolution combination:
Resolution Frame Rate FPS
320x240 Fastest 30
320x240 Fast 9
320x240 Normal 4
320x240 Slow 2
320x240 Slowest 1
640x480 Fastest 20
640x480 Fast 8
640x480 Normal 4
640x480 Slow 2
640x480 Slowest 1
1280x1024 Fastest 3 sec per 1 frame
1280x1024 Fast 3 sec per 1 frame
1280x1024 Normal 3 sec per 1 frame
1280x1024 Slow 3 sec per 1 frame
1280x1024 Slowest 3 sec per 1 frame
16
Page 17

3.2.2 Image Settings
You can adjust the brightness, saturation, contrast, and hue of image in this section.
Field Description
Brightness Brightness is the amount of light in an image. Enter a number
(0~255) to define the brightness of your image.
Saturation Saturation is the degree of color difference from a gray of equal
brightness. Enter a number (0~255) to adjust the saturation
level of the image.
Contrast Contrast is the difference between the light and dark colors in an
image. Enter a number (0~255) to define the contrast of the
image.
Hue Hue is the perceptual attribute associated with elementary color
names – red, orange, yellow, green, blue and purple. Enter a
number (0~255) to define the hue of the image.
Default Value Click this button to set the image setting value to default.
Brightness: 134
Saturation: 36
17
Page 18

Contrast: 32
Hue: 0
To save the settings, click
18
Page 19

3.2.3 System Settings
You can configure the camera name, administrator and user accounts, and time
settings of NAC-200.
Field Description
Camera Name Enter the name of NAC-200.
Administrator Account Enter the name and password of the administrator,
and verify the password.
User Account Enter the user name and password, and verify the
password.
Date & Time To change the time settings of NAC-200, check the box
Modify Date & Time. Select the time zone and
enter the date and time of NAC-200.
To save the settings, click
19
Page 20

3.2.4 Network Settings
Select the appropriate network configuration for NAC-200. For information of
external connection, internal TCP/IP connection, and other network connection
queries, please contact your ISP or network administrator.
Field Description
DHCP This protocol is commonly used for
connection using cable modem. The
system will obtain an IP address
automatically for network connection.
Connection
Static IP Static IP is often used for static ADSL
or LAN-to-LAN connection
environment. Enter the fixed IP
address, subnet mask, and gateway IP
provided by your ISP or connect the
network administrator for information.
20
Page 21

Port Enter the port NAC-200 uses for
network connection.
PPPoE For dynamic ADSL connection, enter
the user name and password provided
by ISP.
Dynamic DNS Server To access NAC-200 via a domain name, enable
dynamic DNS service. You should first apply for
DDNS service from a service provider. Upon
successful registration, you can use DDNS service
for NAC-200. Check the box Enabled to enable
dynamic DNS server.
• DDNS providers
Select a DDNS provider from the drop-down
menu: DynDNS, ODS, DHS, or DyNS.
• User name, password, host name
Enter the user name, password and the host
name of the DDNS service. Check the box
Dynamic IP if you are using a dynamic IP service.
Specified DNS Server To specify a DNS server for connection, check the
box Enabled and enter the IP address of the DNS
server.
Multicast This function enables broadcasting a message to
multiple specified recipients. To use the multicast
function of NAC-200, check the box Enabled. Then
enter the IP address and the port. Note that
multicast function can only be applied within the
same network domain.
21
Page 22

3.2.5 Auto Recording
You can schedule to record images automatically via NAC-200 and specify a storage
location for the files in this section. The storage set here will be used for auto
recording, event-driven recording and event-driven snapshot. For details about
event-driven recording and snapshot, please refer to Chapter 3.2.8.
Field Description
Recording schedule Select a recording schedule: Always, Every Night, While
Sleeping, While Working, Rush Hour, or Weekend. You
can also disable the schedule. Please refer to Chapter
3.2.6 for further details.
Select storage Select the location where the recording files will be saved.
To save the settings, click
Note: When the recording function is enabled, speed of image display will be slower.
22
Page 23

3.2.6 Schedule Settings
There are 6 default recording schedules for NAC-200. You can modify the schedule
name or create a new schedule.
Field Description
Schedule Name Select a default schedule or define a new schedule for
recording. You can enter a schedule name in the
drop-down menu directly when defining a new schedule.
You can also select an existing schedule and modify the
settings. Click
to add or to remove a
schedule. Then click
to save the settings.
Default Schedule Recording Time
Always Continuous recording
Every Night 19:00~23:00, every day
While Sleeping 23:00~07:00, every day
While Working 09:00~18:00, Monday to
Friday
23
Page 24

Rush Hour 07:00~09:00 & 17:00~19:00,
Monday to Friday
Weekend Saturday and Sunday
Schedule Item Setting When defining a new schedule or modifying any default
schedule other than Always, select the day of the week,
and the time for recording a video.
Start: Enter the start time for the recording schedule.
The value of time should be in 24-hour basis.
End: Enter the end time for the recording schedule. The
value of time should be in 24-hour basis.
Continue: Check this box and enable continuous
recording.
Click this button to add a schedule to the schedule list.
Click this button to remove a schedule from the schedule
list.
Click this button to save the settings made to the
schedule on the user’s computer temporarily.
24
Page 25

Creating a New Schedule
To create a new schedule, follow the steps below:
1. Select <Define New> from the drop-down menu of Schedule Name.
25
Page 26
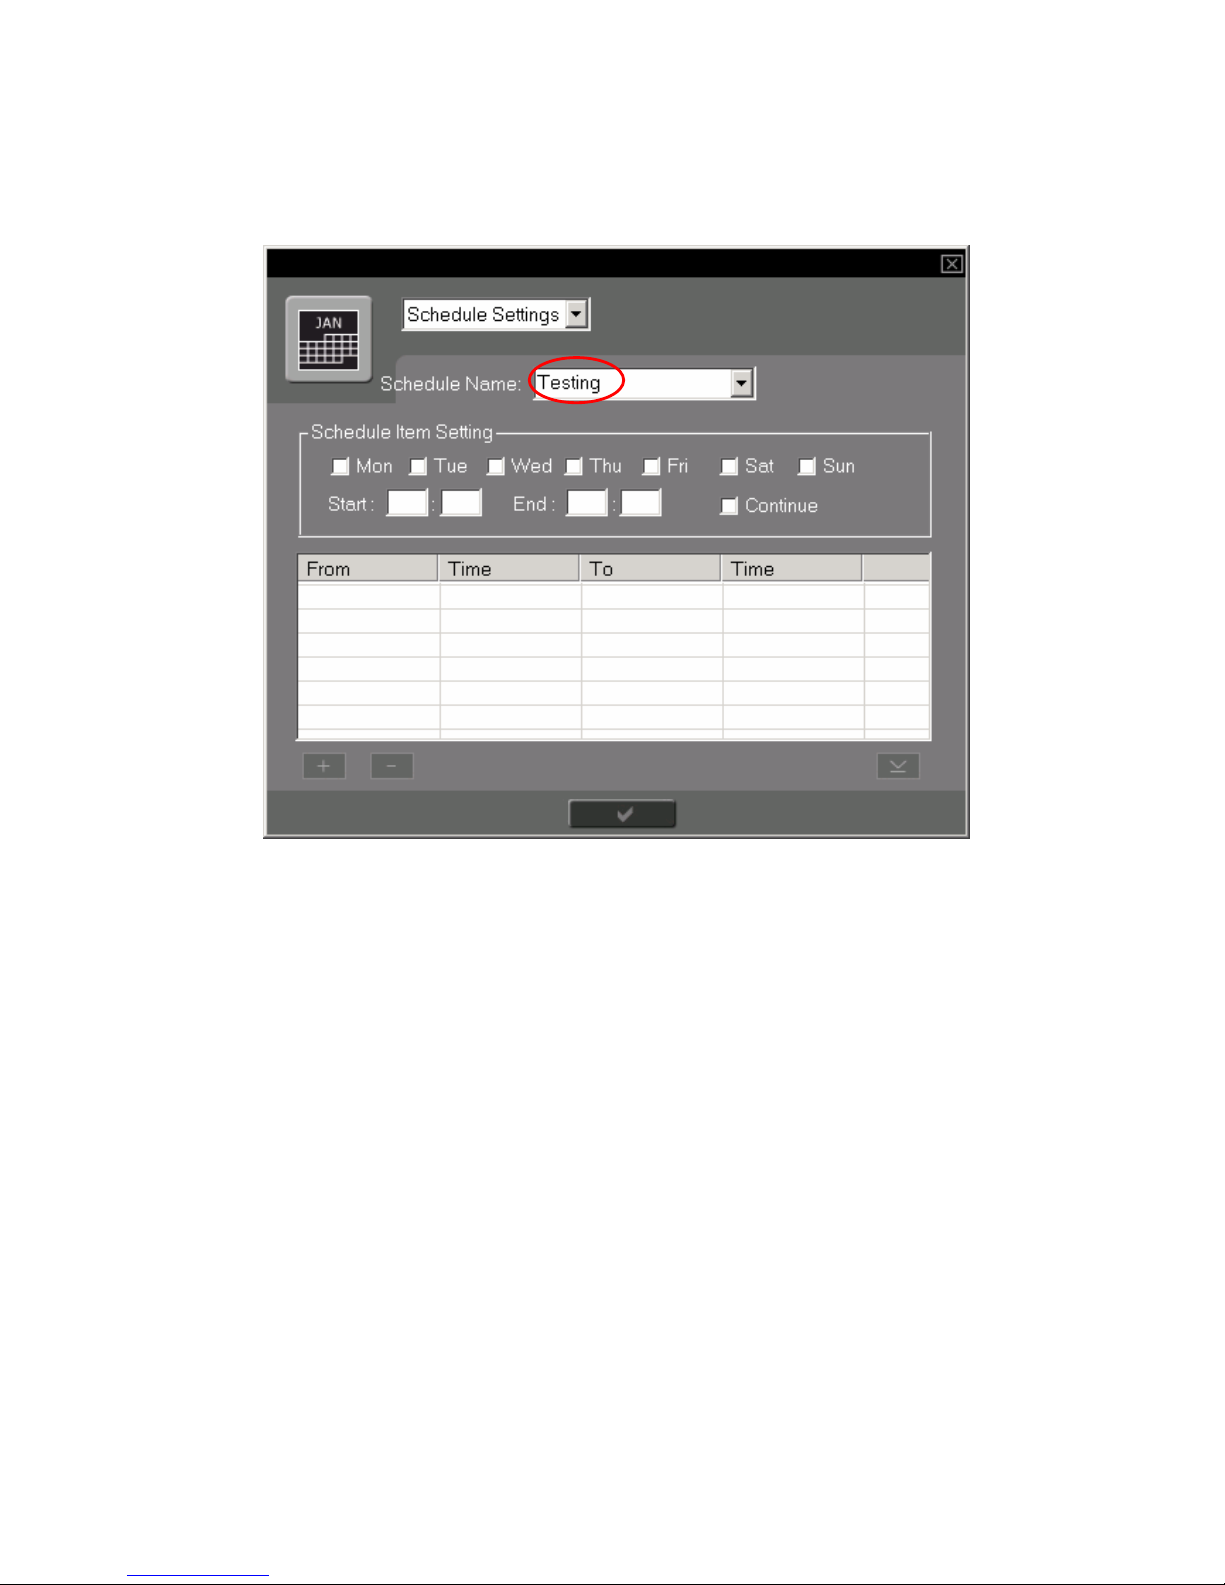
2. Enter the schedule name, e.g. Testing.
26
Page 27

3. In Schedule Item Setting, select the day(s) of week, and enter the start and end
time for recording. Note that the time entered should be in 24-hour basis.
When the start time and end time of a scheduled recording lie within 24 hours
of two days, e.g. 18:00 on Monday to 18:00 on Tuesday, you can enter the start
time and end time directly and do not have to separate the schedule into two,
i.e. 18:00~23:59 on Monday, 00:00~18:00 on Tuesday.
27
Page 28
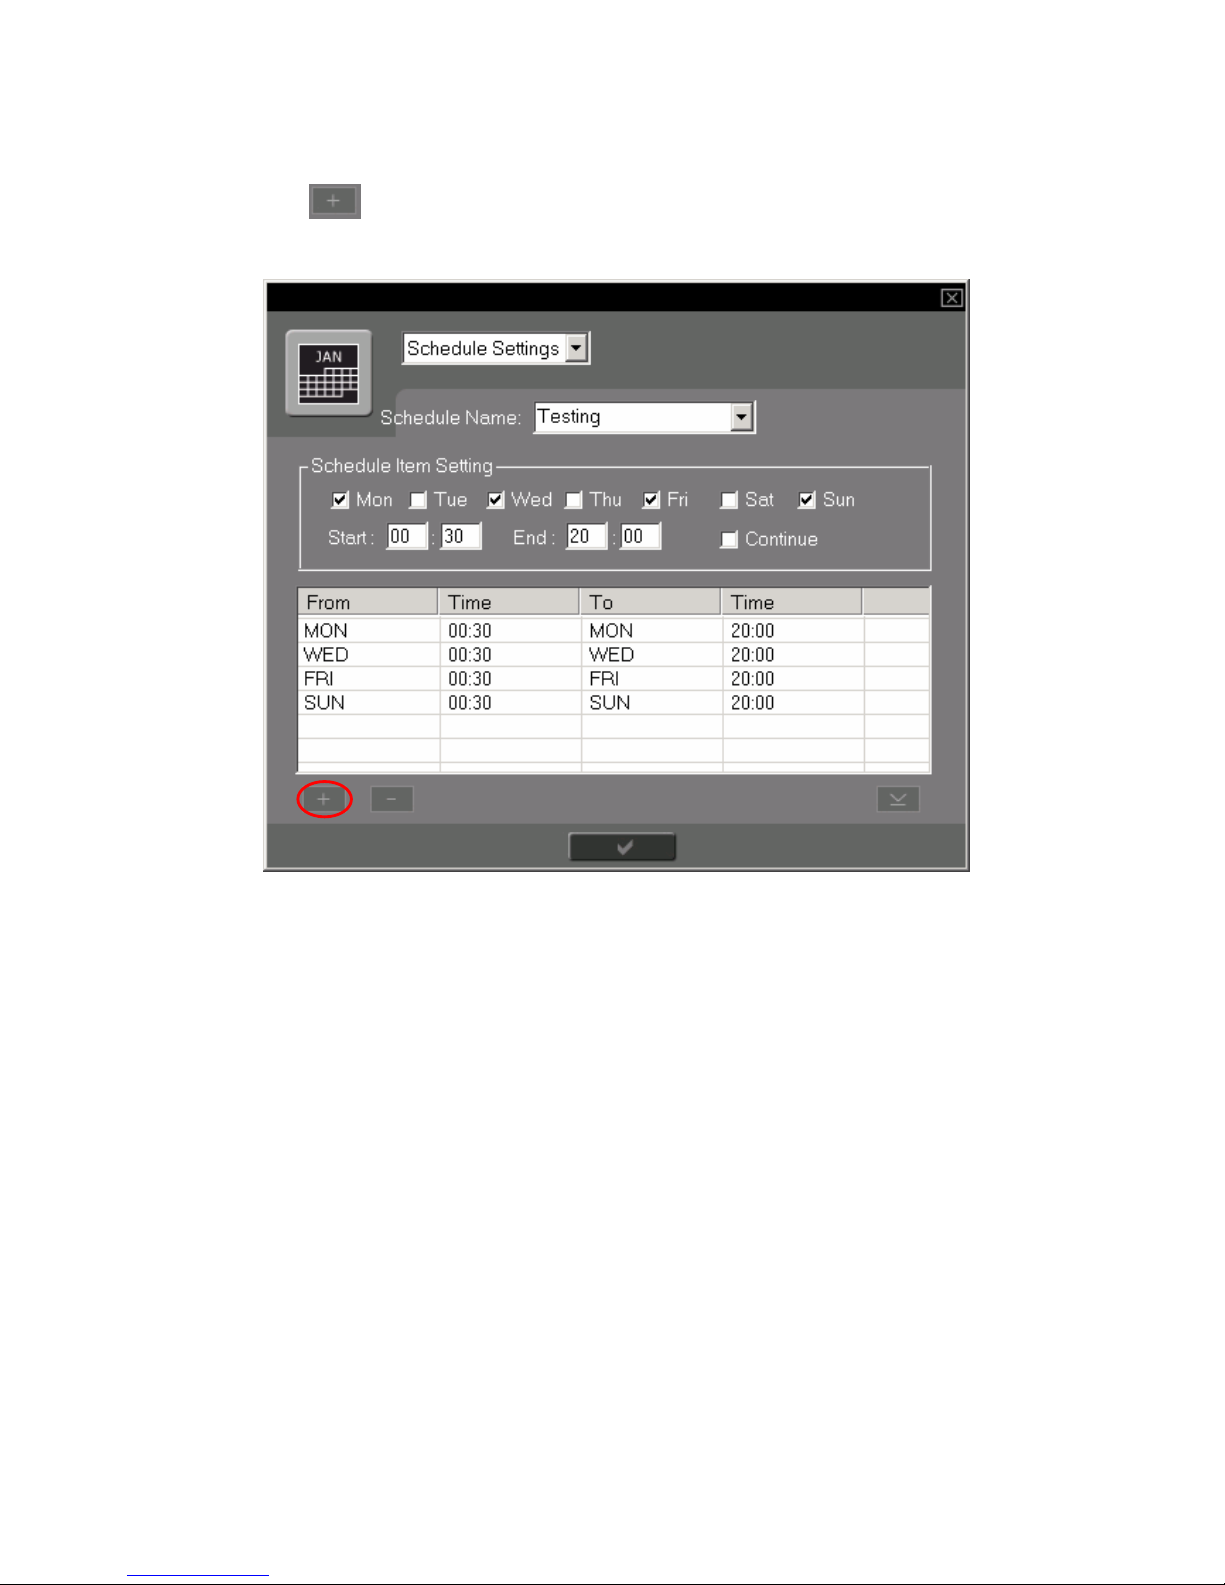
4. Click
to add the schedule.
28
Page 29

5. To record 24x7 continuously, check the box Continue and click
.
29
Page 30

6. After setting the schedule, click
to save and then to apply.
The new schedule will then be added to the schedule list.
Note: Deletion of existing schedules is not supported currently. You can edit
an existing schedule to delete and create a new schedule.
30
Page 31

3.2.7 Storage Settings
You can save recording files to a particular storage device. Select the appropriate
storage type and complete all the fields.
Field Description
Storage Name Enter the name of the storage device for saving
recording files.
Storage Type Select storage type for saving the recording files.
Select NAS (Disk On-line Server) to save files to a
network storage device.
IP/Host name Enter the IP address or host name of the storage
location.
Share Folder Enter the name of the share folder where recording files
will be saved.
Recording Path Enter the name of a folder which will be created
automatically in the share folder for saving recording
files.
31
Page 32

Activate when storage
space has reached
(10%~90%)<>%
Enter the number of percentage (10%~90%) that an
action should be taken when the storage space has
reached the level.
Overwrite the oldest
recorded files
Overwrite the oldest files when storage space has
reached a particular level.
Stop saving the newly
recorded files
Stop saving new files when storage space has reached
a particular level.
When all the settings are completed, click
to add the storage profile to the list
“Current Storage”. You can also remove an existing storage profile by highlighting
the appropriate item on the list and click
. To save the settings, click
32
Page 33

Note:
1. The share folder name can only be alphabetic and numeric. The following
characters cannot be used:
\ ~ $ / : , ' ; * ? " < > | ` [ ] = + . @ ( ) # % ^
2. Make sure the disk space available on storage is larger than checked value of
storage settings for recording to run properly.
3. There are different restrictions on the user name and password of different
storage devices. Please refer to the user manual of the devices for details.
4. If the storage device is NAS and Linux is selected as the storage type, you have
to enable NFS service of NAS to start recording.
To use the Quota Settings of NAS, please go to “Quota” of User Management in NAS
administration page. Enable and configure the quota settings of all users on NAS.
For further details, please refer to NAS user manual.
*NAC-200 must partner with NAS (NASWARE 3.12 or later versions) for quota
settings to run properly.
33
Page 34

3.2.8 Event Settings
Event Handling
When digital input is triggered, you can select to record or take a snapshot, and
select to trigger digital output at the same time.
In addition to triggering digital output via digital input, NAC-200 can also trigger
digital output when the following events take place:
1. Network connection fails
2. Storage device is disconnected
3. Storage capacity is full on storage device
34
Page 35

Event-driven Recording Settings
NAC-200 supports pre-recording function before events take place. You can enter
the number of seconds for pre-recording. The time for pre-recording varies to
resolution in use and the frame rate. Please refer to the following table as
reference.
Resolution
Maximum
no. of frame
recorded
File size of
each frame
Recording
frame rate
Maximum time
for pre-cording
(sec)
30 fps 5
320x240 160 10KB
1 fps 160
20 fps 2
640x480 40 40KB
1 fps 40
1280x1024 2 156KB 1 frame/ 3 sec 6
You can set the time for recording when an event happens, or select to stop
recording when the event stops.
The resolution and frame rate of event-driven recording are the same as that in
Video Settings. The recorded file is saved to same directory on the storage device
as Auto Recording settings.
When a few events take place continuously, and the recording for the previous event
has not finished, NAC-200 will record continuously starting from the first event and
will stop according to your settings for the last event.
Note: When the system is recording, there is at least a second’s lap between the
end time of previous event recording and the start time of the following recording.
It is recommended to set no less than 1 second for pre-recording when enabling
event recording settings to avoid missing record.
35
Page 36

Event-driven Snapshot Settings
NAC-200 supports pre-snapshot taking function before an event takes place. The
number of snapshots taken is calculated in the same way as pre-recording settings.
Please refer to the previous page for the details.
The resolution and frame rate of event-driven snapshot are the same as that in
Video Settings. The snapshots are saved to same directory on the storage device
as Auto Recording settings.
The resolution of snapshots taken by NAC-200 can be the same as that of
monitoring screen or 1.3 mega pixels. You can configure the snapshot speed and
number of frames.
The naming of snapshot file is: AAAAYYYYMMDDhhmmssxxx.jpeg
The file is mainly named by the time when the snapshot is taken. AAAA stands for
the four initials of the system name, e.g. ABCD or two Chinese characters. The rest
refers to the time.
YYYY: Year of system time, e.g. 2005
MM: Month of system time, e.g. 05
DD: Date of system time, e.g. 31
Hhmmss: Hour, minute, and second of system time
Xxx: 1/1000 second of the system time
Note:
1. When the resolution set for snapshot taking is different from monitoring settings,
event-driven snapshot cannot be executed. The system can only record the
snapshot taken after an event happens.
2. If the frame rate of snapshot taking is set faster than the frame rate set in Video
Settings, the system will take snapshots according to the frame rate of the latter
one.
36
Page 37

GP Output Interval
There are three ways to stop digital output:
1. Set the alert interval for digital output
2. Select to stop digital output when an event stops
3. Allow digital output alerts continuously and stop the alert manually by clicking
Clear Alarm on Event Settings page, or clicking Clear Alarm button
on the
monitoring screen.
37
Page 38

3.2.9 Tools
The Tools section enables you to manage and back up NAC-200 settings and
upgrade the firmware version etc.
Field Description
Default Setting Click this button to restore NAC-200 to default settings.
Backup Click this button to back up current system configuration.
Enter the name of NAC configuration file when the window
pops up and save it on the local computer.
Restore Click this button and select an appropriate configuration file
to restore NAC-200.
Upgrade Firmware To upgrade the firmware version of NAC-200, click this
button and browse and select an appropriate image file for
system upgrade.
Reboot To restart NAC-200, click this button.
Clear To clear all event logs.
Reload To refresh the log page.
38
Page 39

Chapter 4 NAC-200 Operation
4.1 Login NAC-200
There are two ways to connect to the administration page of NAC-200 server:
1. Enter the IP address of NAC-200 in the web browser. NAC-200 supports
Microsoft Internet Explorer 5.0 or later versions. It is recommended to use IE
5.5 for web administration.
2. Run Finder in the companion CD, and double click an appropriate server entry.
Upon successful login to the server, the monitoring page will be shown.
39
Page 40
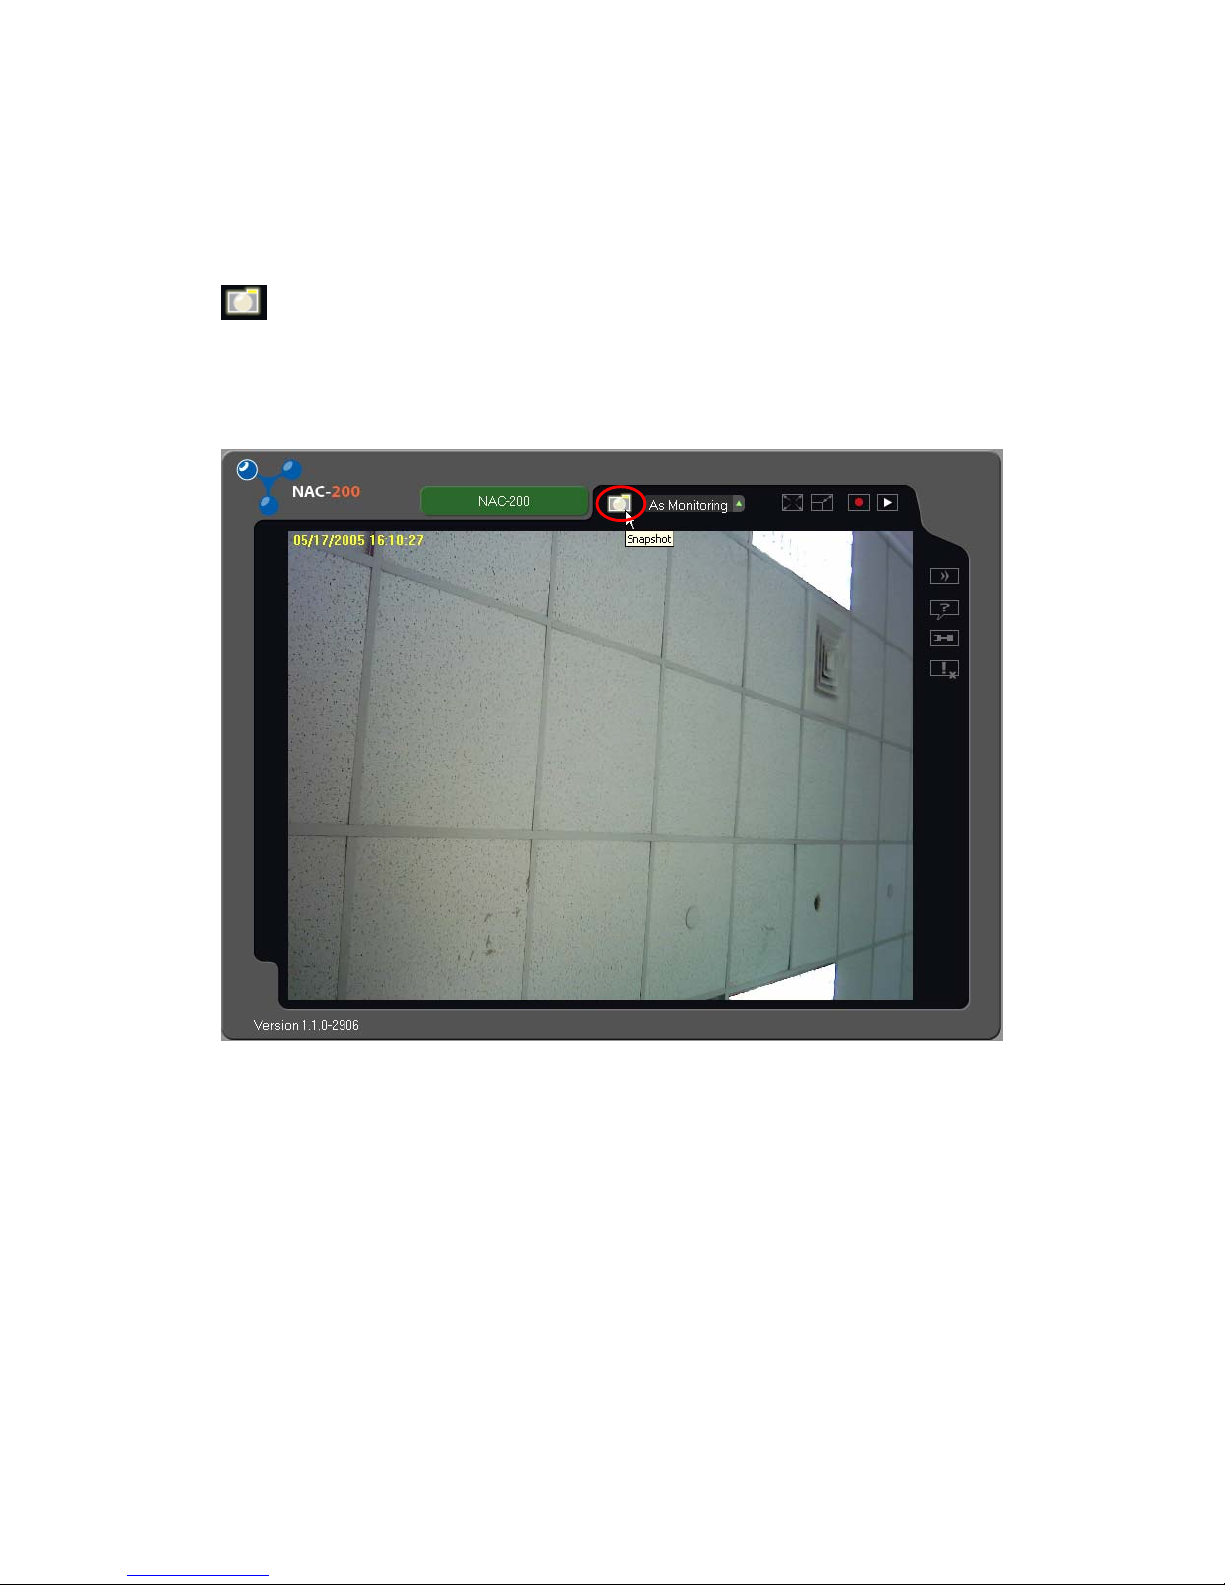
4.2 Snapshot Function
When viewing live image, you can use snapshot function to capture a frame. Click
, this frame will be shown and saved in a folder created automatically.
Rename the file and you may choose to relocate the file. Note that if you do not
rename the file, it will be overwritten by a new snapshot of the same file name.
40
Page 41

41
Page 42
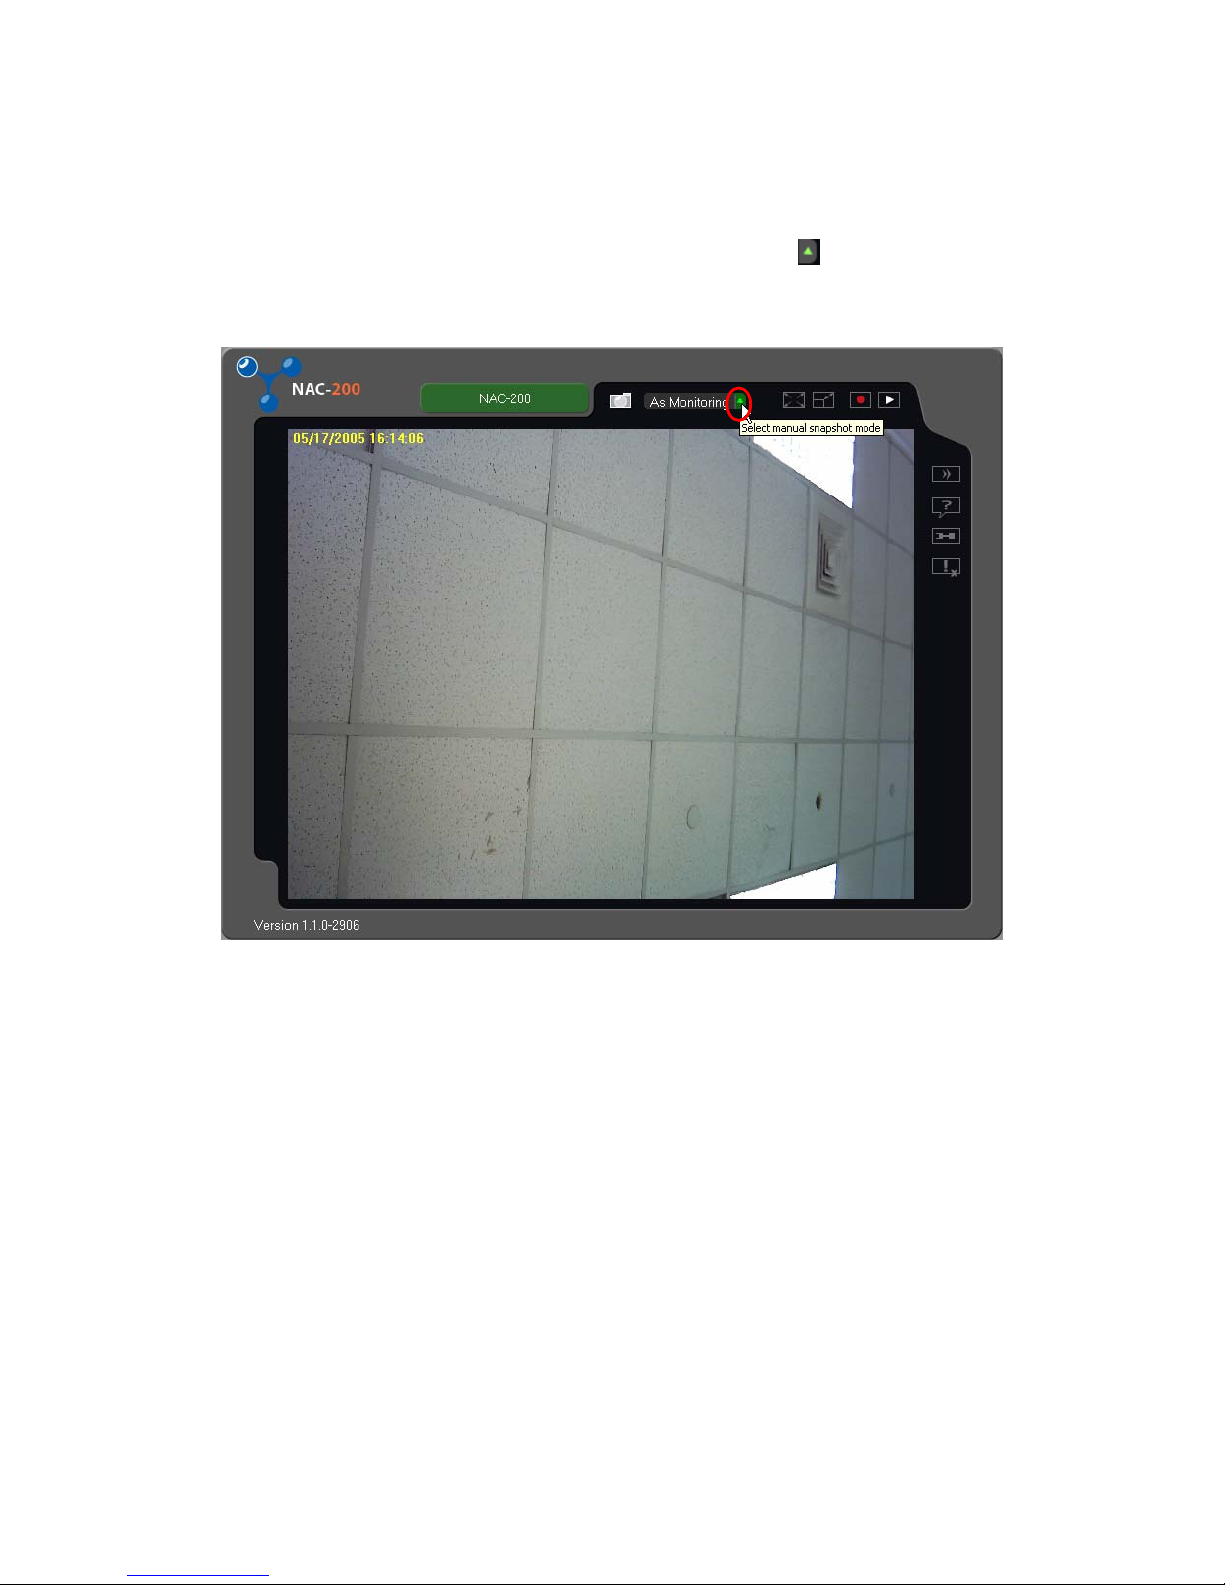
4.3 Select Manual Snapshot Mode
You can select the image resolution for the snapshot. Click
to select manual
snapshot mode, and choose As Monitoring (default resolution) or 1280 x 1024.
42
Page 43

4.4 Adjust Screen Display Size
4.4.1 Full Screen
To switch the viewing screen to full screen, click
. To resume the viewing
screen to normal, double click the screen or press ESC on your keyboard.
43
Page 44
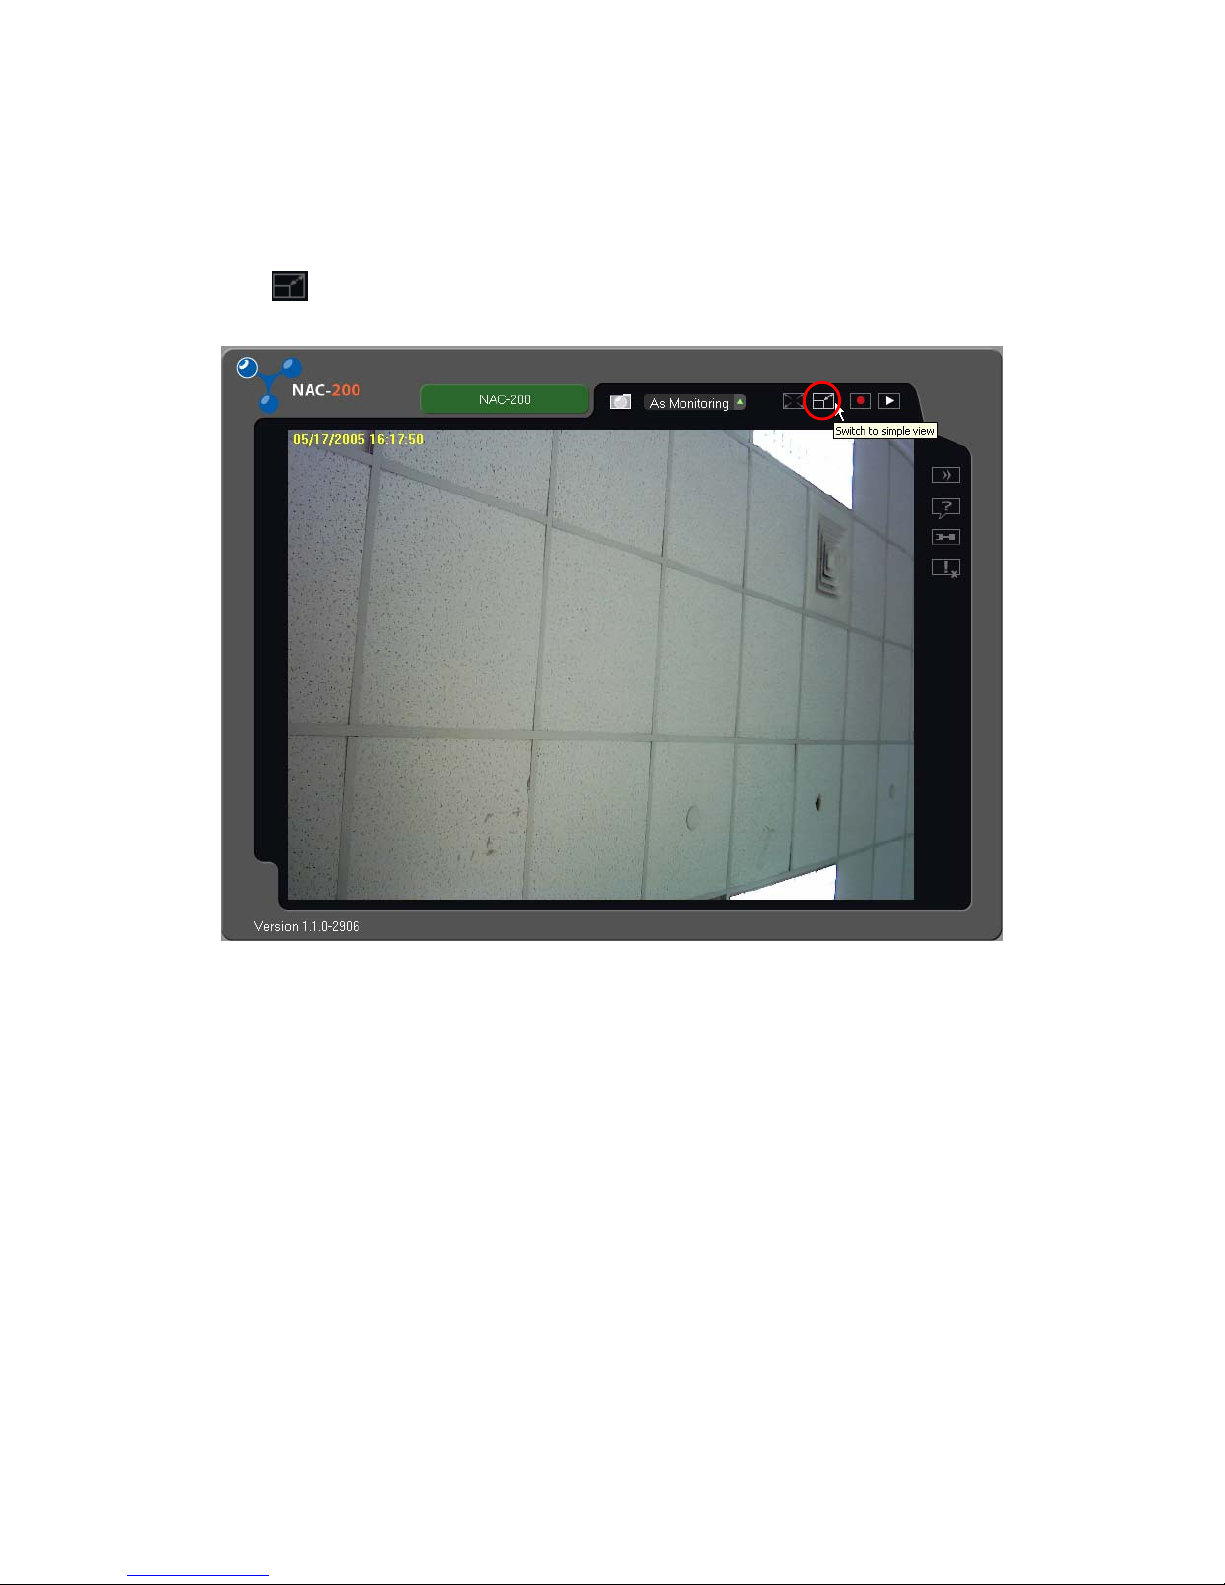
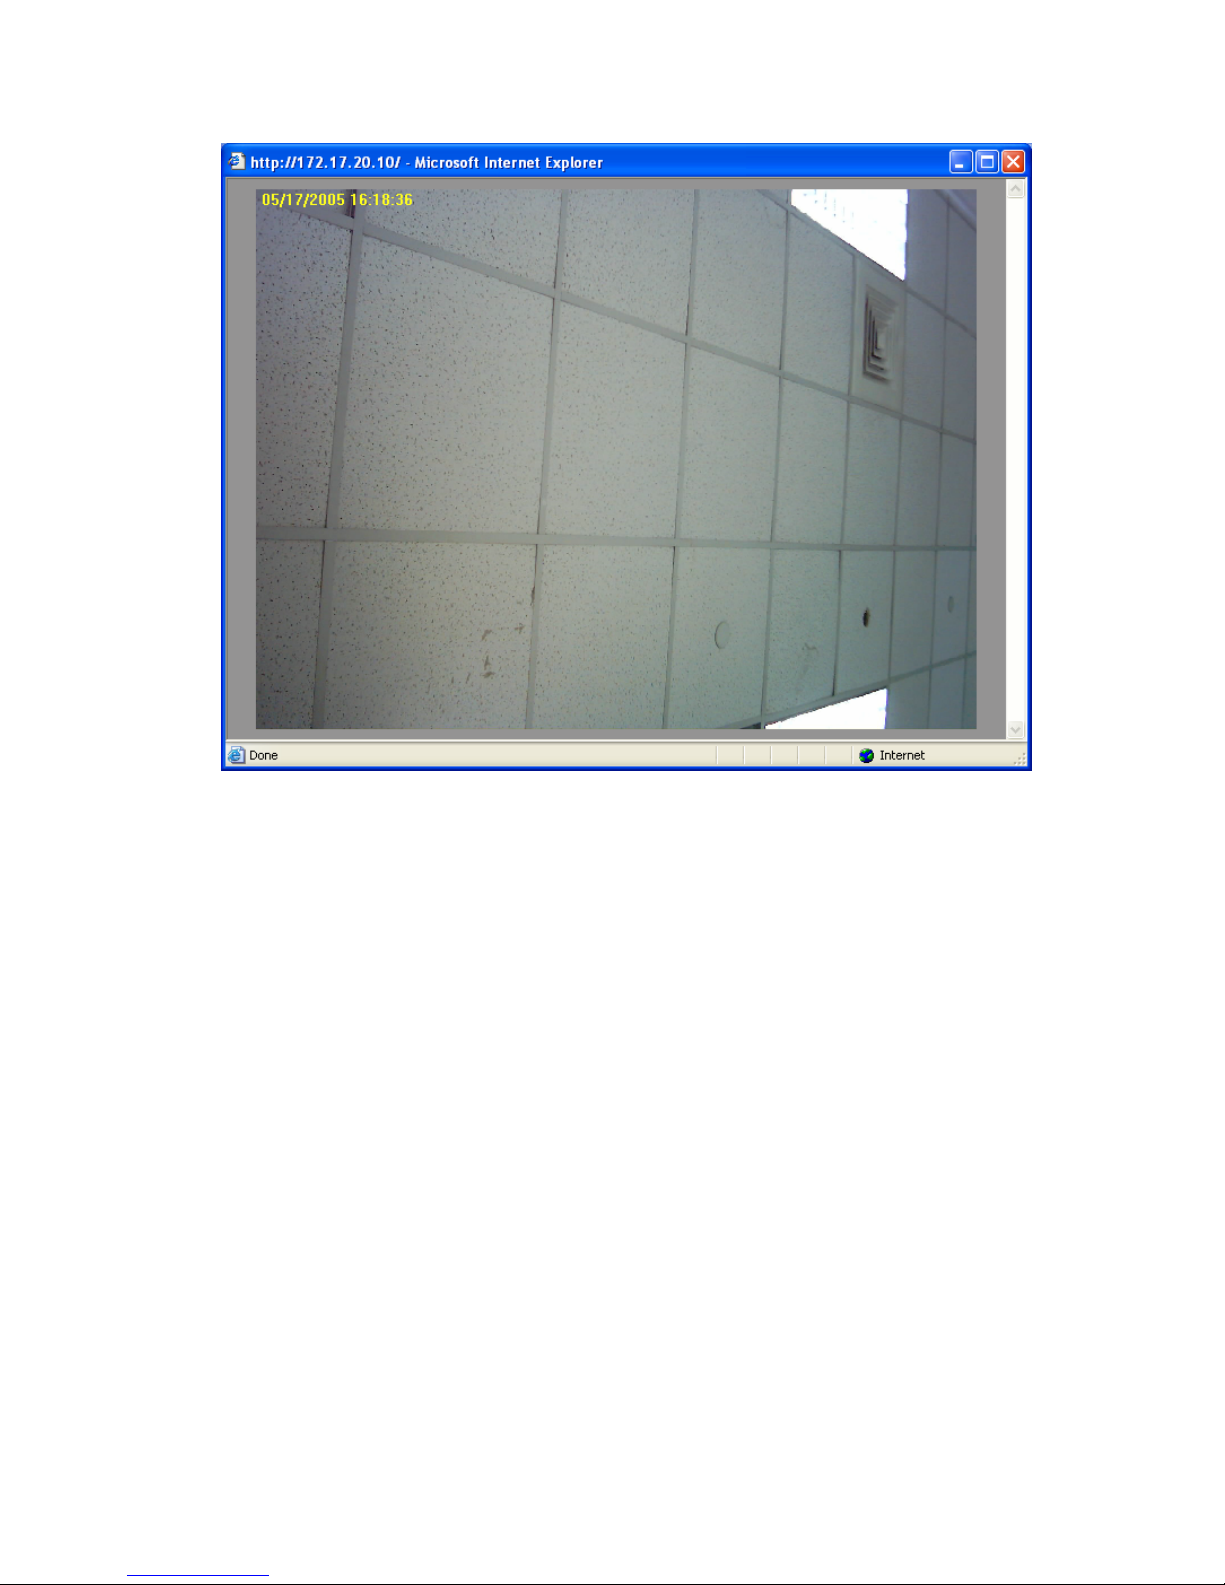
4.4.2 Simple View
To switch the screen to simple view, i.e. hide all buttons and show the screen only,
click
. To resume the viewing screen to normal, double click the screen.
44
Page 45
45
Page 46

4.5 Video Recording
4.5.1 Manual Recording
To record an image manually, click
on the Monitoring page. The button will
become
(stop button). When recording is in process, the time displayed on
the screen will change from yellow font to red font.
46
Page 47

When you click the stop button, a dialog box will pop up. Enter the name of the
recording and select the location. Then save the file.
Note: The files recorded by NAC-200 can by played by the program Viewer of QNAP
VioGate series.
47
Page 48

4.5.2 Auto Recording
NAC-200 also supports automatic recording and saving files to particular storage
location by Auto Recording. To enable this function, follow the steps below:
1. Configure Storage Settings
Add a storage profile in this section and specify the directory and folder where the
auto-recording file will be save to. For details about storage settings configuration,
please refer to Chapter 3.2.7.
48
Page 49

2. Select Recording Schedule
Select a default recording schedule for auto recording. You can also create your
own schedule in Schedule Settings (refer to Chapter 3.2.6).
49
Page 50

3. Select Storage
Select a storage profile to indicate where the recording files will be saved. Then
click
to save the settings. The recording file will be saved in the
particular folder automatically.
50
Page 51

When auto recording is in process, an icon will be shown on the screen.
The files will be saved in particular folder.
51
Page 52

4.6 Playback
To play back recording files, follow the steps below:
1. Click
on the Monitoring page. The playback window will be shown.
2. Click
to add video files on the playlist. Select the file to play on the list.
3. Click
to play.
4. To take a snapshot during playback, click
.
5. To switch screen resolution to 320x240 or 640x480, click
.
6. To adjust playing speed of the video, click on the value on the bar.
7. Click
to specify the date, time, and path of video files recorded. The
system will play video files recorded within the specified time and in that
location.
Note: If no particular file is specified to play, the system will play the first file on the
list until the last one when clicking
.
52
Page 53

Playlist
Full screen
Play
video
Stop
playing
Playback
by time
Add files to
the list
Remove files
from the list
Adjust playback speed
Adjust
resolution as
320x240 or
640x480
Take snapshot
Close
window
53
Page 54

4.7 Clear Alarms
There are two ways to clear the alarms of digital output.
1. Click the Clear Alarm button
on the monitoring screen.
54
Page 55

2. On the Event Settings page, click Clear Alarm.
55
Page 56

4.8 Logout NAC-200
To logout NAC-200, click
on the screen.
To login again, click
, then enter the user name and password.
56
Page 57

Chapter 5 Maintenance
5.1 Shut down/ Restart Server
To shut down the system, unplug the power supply. Note that to avoid losing the
user settings you have changed, restart the camera at least once before unplugging
the power cord.
To restart the system,
1. Click
in the Monitoring page. Select Tools from the drop-down menu.
2. Click Reboot to restart the system. Wait for 10~15 seconds for system restart
and reconnection to the network.
57
Page 58

5.2 Reset Administrator Password & Network Settings
Follow the steps below to reset administrator password and network settings of
NAC-200.
1. Connect the power supply of NAC-200.
2. Wait for 10~15 seconds for system startup.
3. Use the tip of a ball pen to press the reset button of NAC-200 for at least one
second. The administrator password and network settings will then be reset to
default.
Note: When pressing the reset button of NAC-200, all configurations will be
restored to default, including the password and network settings. It is the same as
restoring NAC-200 to factory default by using the restoring function in Default
Settings of the Tools section.
58
Page 59

5.3 GPIO Connection
NAC-200 provides a digital input and a digital output for receiving external device
signals, e.g. infrared sensor, enabling recording and snapshot functions by the
device, and controlling external device like alarms by digital output.
To resume digital output to normal status, click the clear alarm button on the
monitoring screen or Event Settings page. All alarms will be cleared and auto
recording will continue.
Note:
1. Verify the reason that causes an event before using the Clear Alarm function.
You may disable Auto Recording function first before confirming to clear the
alarm.
2. Pin assignment, from left to right:
1
4
3
2
PIN Description
1 Digital output
2 Digital input
3 Not used
4 Ground
59
Page 60

5.4 System Update
To upgrade the firmware version of NAC-200, follow the steps below:
1. Click
to go to the Settings page. Go to Tools and click Upgrade
Firmware.
2. Browse and select the appropriate file. Then click OK.
3. Close the browser and login again. The new version number of NAC-200 will be
shown on the login page.
60
Page 61

61
Page 62

5.5 Troubleshooting― Event Logs
When NAC-200 fails to save recording files to remote storage location, a message
will be shown in Event Log in Tools section to show the possible reason for that
failure. After solving the problems, click Clear Alarm in Event Settings to
re-activate auto recording. In addition, when the system starts up and shuts down,
or when recording starts and stops, the actions will also be recorded in Event Log.
Event Log Description
1. Cannot connect to the
remote storage
The settings of the remote storage may be invalid,
e.g. incorrect user name and password of the
share folder, or the network is abnormal. Please
verify storage settings again.
2. Cannot create the
recording file
The current user of the remote storage does not
have permission to write the recording file.
Please change a user who has permission, or
change the remote storage.
3. Cannot write the recording
file
The network is abnormal. Please verify again.
62
Page 63

4. Cannot remove the
expired recording files
The current user of the remote storage does not
have permission to remove the expired recording
files. Please change a user who has permission,
or change the remote storage location.
5. The remote storage is full Please increase the limit for percentage of storage
usage, or use another remote storage for saving
recording files.
6. System booted up The system has started up.
7. System shut down The system has shut down.
8. Recording started Recording has begun.
9. Recording stopped Recording has ended.
10. Cannot communicate with
client
Network connection fails.
11. Digital input started Digital input is enabled.
12. Digital input stopped Digital input is disabled.
13. Snapshot started Snapshot taking starts.
14. Snapshot stopped Snapshot taking stops.
63
Page 64

Appendix A File Size of NAC-200 Recorded Data
*The approximate recording capacity is calculated by the following formula:
Size (KB) x Frame rate (fps) x Recording time (sec)
E.g. One-hour recording of 640x480 resolution images at a frame rate of 20 fps:
40 KB x 20 fps x 3,600 sec (1 hour) = 2,880,000 KB= 2.75GB
File size reference: 40KB for each 640x480 picture
640x480
1 fps 8 fps 20 fps
1 min 2.34 MB 18.75 MB 46.88 MB
1 hr 140.63 MB 1125.00 MB 2.75 GB
1 day 3.30 GB 26.37 GB 65.92 GB
1 month 98.88 GB 791.02 GB 1977.54 GB
File size reference: 10KB for each 320x240 picture
320x240 1280x1024
1 fps 9 fps 30 fps 1 frame/3 sec
1 min 0.59 MB 5.27 MB 8.79 MB 3.05 MB
1 hr 35.16 MB 316.41 MB 527.34 GB 182.81 MB
1 day 843.75 GB 7.42 GB 12.36 GB 4.28 GB
1 month 24.72 GB 222.47 GB 370.79 GB 132.82 GB
64
 Loading...