


MIN
OFF MAX
TEMPERATURE CONTROL
User Guide
WMTS 105
Certicate No.23291
Australian Certication
Services
MAY2019
Sparq H2
Instant Hot and Ambient Filtered Water Appliance
For correct operation & installation it is essential to observe these instructions.

What's Inside
What's Inside
Puretec Customer Service .........................................................................................................................3
Installation Record
Before Installation
Parts Included....................................................................................................................................................4
Specications
Dimensions
Important Information
Important Safety Instructions
Electrical Requirements
Pressure Free Hot Water Dispenser Concept
Overview
..............................................................................................................................................................7
Typical Installation
Before You Begin
Installation Instructions
Important Information
Faucet Operation
Cleaning and Maintenance
Cartridge Replacement
Troubleshooting
Warranty
............................................................................................................................................................14
........................................................................................................................................3
..........................................................................................................................................4
.....................................................................................................................................................5
.........................................................................................................................................................5
................................................................................................................................6
.................................................................................................................6
...............................................................................................................................7
...................................................................................7
.........................................................................................................................................8
.............................................................................................................................................9
..............................................................................................................................9
...............................................................................................................................11
..........................................................................................................................................11
......................................................................................................................11
..............................................................................................................................12
.............................................................................................................................................12
AUSTRALIA
Customer Service: 1300 140 140
Email: sales@puretec.com.au
Web: www.puretec.com.au
NEW ZEALAND
Customer Service: 0800 130 140
Email: sales@puretec.co.nz
Web: www.puretec.co.nz
2 Installation & Operation Manual Copyright © Puretec Pty Ltd 2019

Introduction
Puretec Customer Service
Thank you for purchasing a Puretec Drinking Water Appliance. Your system is a proven
performer, manufactured from only quality materials and components. It will give years
of reliability and trouble‑free operation if maintained properly.
The system is designed for metropolitan supply water only.
Puretec Drinking Water Appliances are designed to run economically for many years,
dependent on the initial installation and periodic maintenance.
Flush system for 5 minutes or more, aer any period of non-use of more than 2 weeks.
For cartridge replacements, contact your nearest stockist.
Installation Record
For future reference, ll in the following data:
PRODUCT INFORMATION
Model Number:
Replacement Cartridge:
Serial / Batch Number:
(Refer to label on the rear of the unit)
Purchased From:
Date of Installation:
Installer / Plumber Details:
All installation and service work should be completed by qualied tradespeople. Faulty
operation due to unqualied persons will result in voided warranty coverage.
All plumbing must comply with AS 3500.1. All electrical must comply with AS/NZS3000.
SPARQ-H2
Z1-R
Sparq H2 User Guide
3
Pre-installation
Before Installation
Read this user guide completely and check if there is adequate space where you want
to install the unit, to mount all of the components. Refer to page 5.
Caution: Do not use with water that is microbiologically unsafe or without
adequate disinfection before or aer the system.
Note: Where maximum line pressure exceeds 500 kPa, a multivalve (as supplied)
must be installed.
Check the mains water pressure is between 172 ‑ 500kPa.
NOTE: This product must be connected to MAINS WATER ONLY.
Check the appliance rating plate and ensure correct power (see specications, pg.5) is
available for the appliance.
Check the surface supporting the appliance is adequate for a total weight of 6kg.
Ensure there is adequate ventilation available through the cupboard. If there is
inadequate ventilation, and the cupboard temperature rises to above 40°C, the system
may become damaged and malfunction which will void the product warranty. To ensure
there is sucient cross-ow ventilation suitable holes or vents will need to be cut into
the cupboard and door.
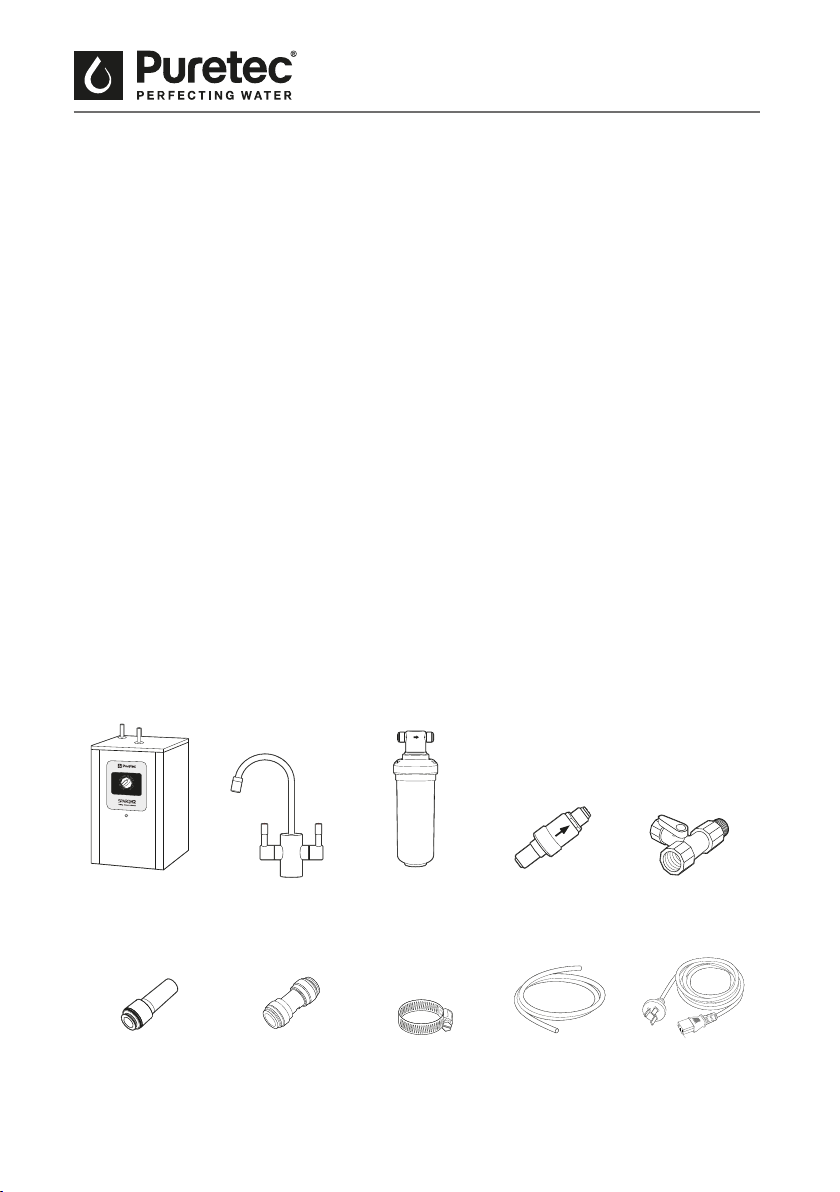
Parts Included
MIN
OFF MAX
TEMPERATURE CONTROL
Sparq Unit Faucet Z1 Ultra Z Filtration
Reducer
3/8" Stem x 1/4" Tube
(2 pcs)
Straight Connector Hose Clamp 1/4" Tubing
System
MultiValve SmartTee
(2 meters)
4 Installation & Operation Manual Copyright © Puretec Pty Ltd 2019
TM
Power Cord

Specications
Model: SPARQ-H2
Operating Water Pressure: 172 - 500 kPa
Hot Water Temperature: 60°C - 98°C (temperature inside of tank)
Power Requirements: 10 amp
Rated Power: 780W
Tap Dimensions: 127H x 260W
Appliance Dimensions: 200W x 220D x 310H
Warranty: 2 years (see pg. 14 for details)
Specications
Dimensions
Pressure Regulator
CO2 Tube
Note: Ensure there is adequate ventilation available
through the cupboard. If there is inadequate ventilation,
and the cupboard temperature rises to above 40°C,
the system may become damaged and malfunction
which will void the product warranty. To ensure there is
sucient cross-ow ventilation suitable holes or vents
will need to be cut into the cupboard and door.
Adapter
CO2 Bottle
A Ø35mm hole required for faucet.
Note: All dimensions are expressed in millimetres.
Sparq H2 User Guide
5

Safety Instructions & Requirements
Important Information
IMPORTANT! This hot water dispenser produces instant hot water of 60oC - 98oC
(temperature inside of tank) as dispensed from the faucet.
• This product is not intended to produce a continuous ow of hot water. The SPARQ H2
will produce up to 60 cups of water per hour at 60
tank). Due to high water temperature, for safety reasons, the tank is not under pressure.
Consequently, there is a slight delay of water ow aer the faucet has been turned on.
This is normal and indicates that the priming chamber is functioning properly.
Important Safety Instructions
When using all electrical appliances, basic safety precautions should always be followed
including the following:
• Read all instructions within this user guide.
• Do not operate any appliance with a damaged cord, plug, or aer the appliance
malfunctions.
• Do not use outdoors or in damp area.
• Do not expose cord to hot surfaces.
• Do not use appliance for any use other than the intended household use.
• When using the appliance, provide 100 mm minimum air space around the entire unit
for air circulation.
• Do not attempt to service this product. Repairs and servicing should be done by
authorized service personnel.
• Do not let children operate. The hot water can cause severe burns.
o
C ‑ 98oC (temperature inside of
SAVE THESE INSTRUCTIONS. THIS PRODUCT IS FOR HOUSEHOLD USE ONLY.
The alert symbols displayed below point to important safety information to make you
aware of potential hazards that can cause serious injury or death. These symbols can
be found on a label attached to the unit. Please pay special attention to the information
following these alerts and warning. Failure to comply with these instructions can result
in property damage, serious injury or death.
6 Installation & Operation Manual Copyright © Puretec Pty Ltd 2019
Requirements & Overview
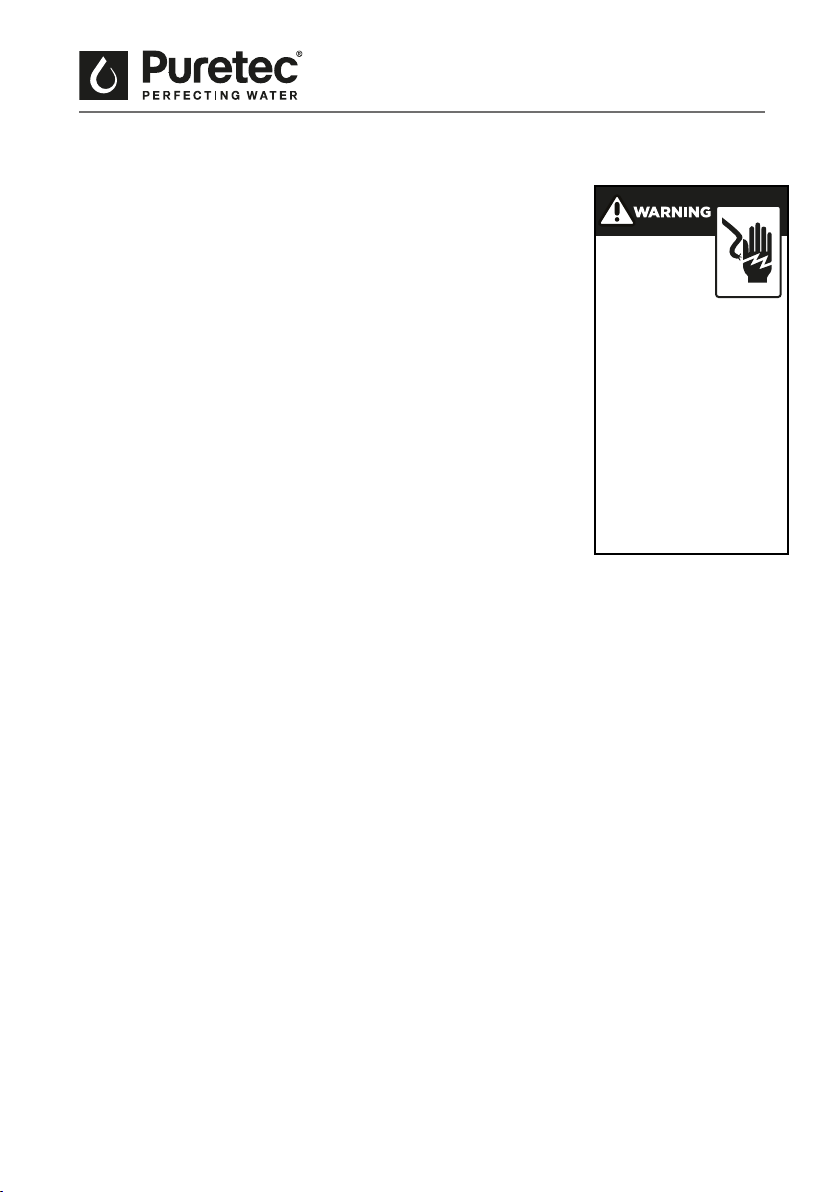
Electrical Requirements
• For your personal safety, the hot water dispenser is equipped
with a power supply cord having a 3‑prong ground plug. To
minimise possible shock hazard, the cord must be plugged into
a mating 3‑prong, ground type outlet, grounded in accordance
with all local codes and ordinances.
• If a suitable electrical socket is not available, contact a
qualied electrician to install one.
• A 10 amp grounded electrical supply is required. It is
recommended that a separate circuit service to your hot water
dispenser be provided.
Pressure Free Hot Water Dispenser Concept
Unlike other household water dispensers, this dispenser tank
is not pressurized for safety reasons. For a conventional
household water heater, the faucet valve is placed aer the
heater tank resulting in a pressurized tank. For a hot water
dispenser, the faucet valve is placed before the tank, creating
an "open vent" style faucet and consequently, no pressure is built up inside the tank.
Overview
1. Determine a convenient location to mount your faucet. Location of the hole should also
provide easy access for tank connections.
2. The thickness of the mounting position must be less than 70mm thick.
3. Before connecting to the power source, the dispenser must be lled with water and the
thermostat turned to the OFF position.
4. Do not use an extension cord with this appliance. Appliance must be within 914 mm of
the power source.
5. Plumbing connections must comply with all local codes and ordinances.
6. Do not use any pipe sealing compounds as they may get inside the dispenser causing
an objectionable taste and odour.
ELECTRIC
SHOCK
HAZARD
Plug into a ground ed 3
prong outlet.
Do not remove ground
prong.
Do not use an ada pter.
Do not use an ex tension
cord.
Failure t o folow t hese
instruc tions can result
in death, fire or electr ic
shock.
Important: Observe all governing code and ordinances.
Faucet may be installed in spray hose opening in sink or drilled hole. If drilling another
hole is needed, the 35mm max. dia. hole is required.
Tank must be mounted vertically
Quick-connector ttings connects to cold water supply line.
See step 4 (pg.9) of installation for optional connections and instructions.
Sparq H2 User Guide
7

Typical Installation
3
4
To Kitchen Tap
Typical Installation
13
8
7
55
12
9
2
1
1
(COLD) Water Inlet Connection
2
Smart Tee (KSAV47)
3
1/4" White Tube (KTU4W‑2)
4
MultiValve
5
Reducer KRR64
6
Z1 Ultra Z Filtration System
7
1/4" Tube (Blue Filtered Water Line)
3
6
10 11
8
1/4" Tube (White Tank Inlet Line)
9
Straight Connector
10
Sparq H2 Unit
11
Unit Power Supply
12
3/8" Tube (Beige Silicone Hot Water Line)
13
Faucet
8 Installation & Operation Manual Copyright © Puretec Pty Ltd 2019

Installation
Before You Begin
• Determine where you will install your hot water dispenser. The faucet can be mounted
in an existing hole in the sink, or drill a 35 mm hole in your sink or bench top.
• Stainless Steel: You need a 35 mm screw punch available at most hardware stores
or drill a hole with an expandable drill. Proper tools are required to drill through a
porcelain, granite or cast iron sink. If you are not familiar with this process you should
consider having this done by a professional plumber.
Do not attempt to drill without these special tools as you may severely damage your
sink or bench top.
Installation Instructions
1. Select Faucet Location: Choose a suitable location that is close to where the hot and
ltered water will be delivered (e.g. sink).
2. Connect the Smart TeeTM: Isolate water supply. Uninstall the connections on the cold
water line and connect the Smart TeeTM. Reinstall the previous connections to the tee
valve.
3. Connect the Multivalve: Connect the pressure limiting multivalve to the Smart TeeTM
with a piece of 1/4" Tube (White Tank Inlet Line) provided.
4. Select location for the Z1 Ultra Z Filtration System: Select suitable location that is
close to the existing tap. Remember to allow access room for changing lter and a
suitable place where water spillage will not cause damage. Location should not be in
direct sunlight.
5. Install the Z1 Ultra Z Filtration System: Install Z1-R cartridge to the head assembly.
Please note arrow on cartridge. Install system assembly by positioning it in the desired
location, marking the position of xing holes and xing with mounting screws (Z1 can
be mounted horizontally and vertically). Allow room for the connecting tubes and for
removing the cartridge (70mm).
6. Connect the Z1 Ultra Z Filtration System: Connect the Multivalve to the KRR64
attached on the Z1‑R inlet with the 1/4" Tube (White Tank Inlet Line) provided.
7. Prepare Faucet Location: Choose the best position for the faucet, taking into
consideration height of jugs etc. and also the draining of any spills. Then drill a suitable
35 mm hole to install the faucet.
WARNING: Special tools may be required to drill the hole in some sinks or
benchtops. To avoid damage, consult a qualied plumber or installer for the proper
method of drilling holes in porcelain, granite or stainless steel.
Sparq H2 User Guide
9

Installation
8. Install Faucet: To install faucet, place the small rubber washer, dress ring (chrome
washer) and large rubber washer onto the threaded end of the faucet. Insert the faucet
into the hole in the sink or bench. Slip the large plastic washer and lock washer onto
the threaded end of the faucet, screw on the nut and tighten, making sure the faucet is
correctly positioned on top.
9. Mounting Tank: Position tank vertically beneath faucet so exible tube from the faucet
reaches the centre faucet supply tube on the tank. Keep the tank 10 mm away from the
wall. Be sure dial is in OFF position during installation.
Note: The tank must be positioned so the hose to the faucet does not twist or kink.
10. Connect Faucet to Tank: Connect the White Tank Inlet Line hose to the rear top corner
of the tank with the quick-connect tting supplied. Connect the Beige Silicone Hot Water
Line tube to the centre outlet tube on top of the tank, using the hose cla
Note: DO NOT lengthen the hose - dispenser performance will be impaired and
warranty will be void.
11. Connect Cold Water Supply: Connect the 1/4" Tube (Blue Filtered Water Line) from the
faucet, to the reducer attached on the outlet of the Z1 Ultra Filtration System.
Note: Connection to a hot water supply is not recommended. If the water lter is used,
water pressure to the tank should not drop below 240kPa.
12. Install Filter Assembly: Position the lter assembly in the desired location, marking the
position of xing holes and xing with mounting screws supplied. Allow room for the
connecting tubes and for future lter changes.
13. Check for Leaks: Turn on the water supply and check for leaks.
14. Run the System: Pull the cold faucet lever down and run the system for at least 5
minutes, to remove carbon nes. Tiny air bubbles in the water may cause the water to
appear milky, but will clear aer a short period.
15. Prepare the Power: Double check the thermostat control dial, on the front of the unit,
is in the OFF position. The thermostat control dial controls the water temperature, not
the water ow or delivery.
16. Test Installation: Plug electrical cord into a ground 3-prong outlet. Turn thermostat
control dial clockwise to the highest position. Maximum temperature will be reached in
about 15 minutes and dispenser will be ready to use. Lower the temperature setting by
turning thermostat control dial counterclockwise if you notice vapour coming from the
faucet or a boiling noise. To raise or lower the water temperature, rotate the thermostat
dial. At the LOW setting of thermostat dial, water temperature will be approximately
60°C and at the HIGH setting of the thermostat dial, water temperature will be
approximately 98°C.
mps supplied.
10 Installation & Operation Manual Copyright © Puretec Pty Ltd 2019
Operation, Cleaning & Maintenance
Important Information
This dispenser is equipped with a self re‑setting thermal fuse. Turn the thermostat
to OFF position and ll tank with water before plugging the power cord from the tank
into an electrical outlet. If tank is empty and the thermostat set in the ON position
when the power cord is connected, the self re‑setting fuse in the heater control will
disconnect the current to the heater aer approximately one minute, thus protecting
the heater from a "dry start" failure. The fuse in the heater control will self reset aer
approximately 30 minutes. Turn on the water supply to the tank and continue the
installation. Continued misuse will cause damage to the appliance and is detectable
thus, voiding the warranty.
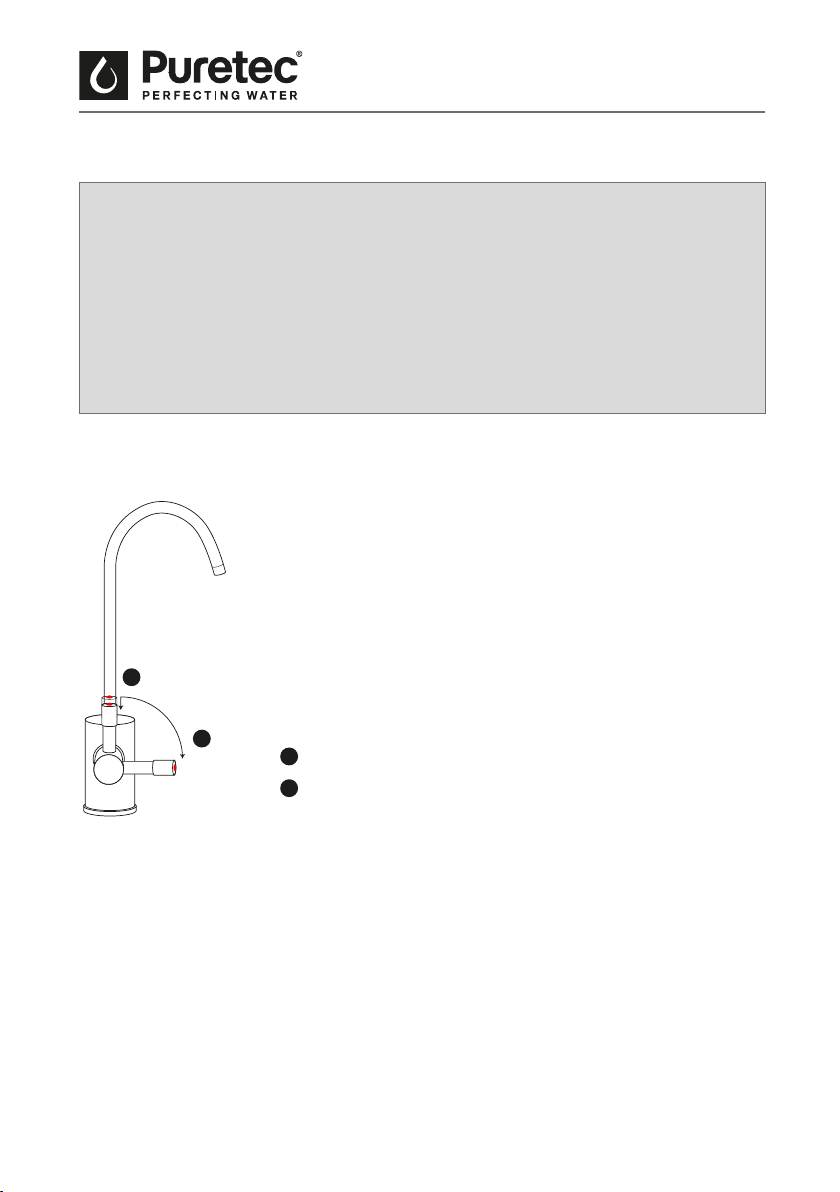
Faucet Operation
Child-Proof Safety Lock
Unique safety lock design is loaded to prevent children
1
from burns by hot water.
2
Press down the safety locker to release safety lock.
1
2
Pull handle down and use the hot water.
Cleaning and Maintenance
To prevent damage when dispenser is exposed to freezing temperatures, water must be
drained. Follow the instructions below:
1. Unplug dispenser tank to power supply.
2. Turn thermostat control dial to OFF position (fully counterclockwise).
3. Turn faucet hot water handle on and run water until water is cold.
Sparq H2 User Guide
How to Use Hot Water
11
Maintenance & Troubleshooting
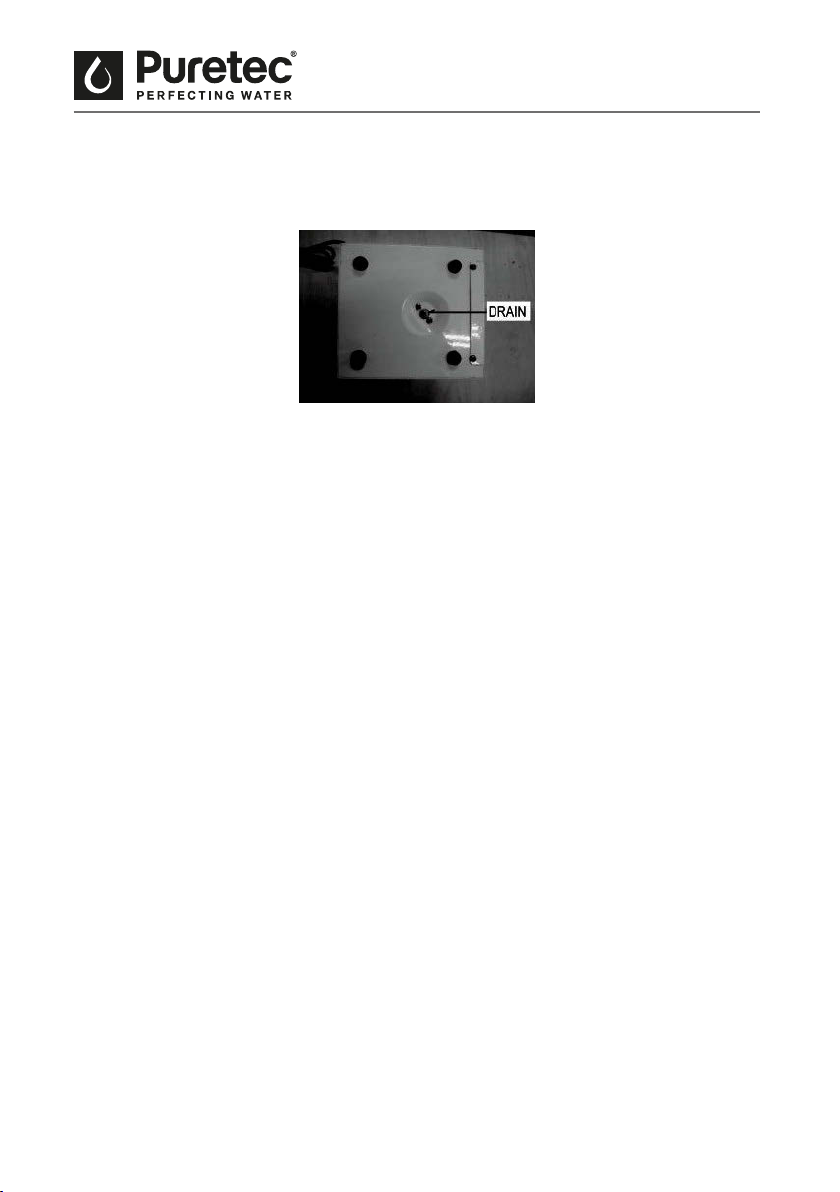
4. Place a 3 L container under the drain plug at bottom of the tank. Use a screwdriver
to remove the screw and 0‑ring in the drain tube opening. When tank is fully drained
replace 0‑ring and screw. Tighten to reseal the drain.
Bottom view of heater tank
Note: Do not plug appliance into power supply if tank is empty.
Cartridge Replacement
1. Place container under lter in case of drips.
2. Isolate water supply and release water pressure by operating faucet lever.
3. Disconnect tubing from the cartridge. Discard old cartridge.
4. Remove packaging from the new cartridge. Connect tubing to either end of the
cartridge. Ensure ow arrow on cartridge is in direction of water ow.
5. Replacement cartridge code: Puretec Z1-R
6. Restore water supply.
7. Check for leaks, if any, rectify them before leaving the unit.
8. Aer installing cartridges ush unit for 5 - 10 minutes.
Troubleshooting
1. Water is not hot (assuming cold water supply is connected properly and valve is open):
This tank is capable of supplying 60 cups of hot water over an hour (approximately
2.4L), however, the volume of water that can be drawn o immediately is
approximately 1.6L.
• Check if dispenser is plugged in.
• Turn thermostat control dial fully clockwise. This may produce boiling water in
approximately 15 minutes and possibly be accompanied by a gurgling sound in the tank
and/or water "sputtering" from the faucet.
12 Installation & Operation Manual Copyright © Puretec Pty Ltd 2019
Maintenance & Troubleshooting
• If the water boils, turn thermostat control dial slightly counterclockwise until the
gurgling and/or "sputtering" stops. This should take place within 20 seconds. Turn
control dial an additional 3mm counterclockwise at the tip of the dial. Wait 15 minutes
and check the temperature of the water.
• Check for blown fuse or circuit breaker is tripped (also see IMPORTANT NOTE explaining
the self re‑setting thermal fuse in step 12 of installation, pg. 10).
NOTE: The thermostat activates the heater aer water temperature in the tank drops
approximately 8°C from the maximum setting. The dispenser does not produce a
continuous ow of hot water.
2. Hot water drips or sputters from faucet:
• Turn thermostat control dial counterclockwise.
• Check that the hose connecting the faucet to the dispenser tank is not clogged, twisted
or kinked.
• Check for proper installation of tubing from faucet to dispenser tank and faucet to
water line. If cross‑connected, valve may be damaged.
3. Water does not ow right away or at all:
• Due to high temperature and for safety reasons, the tank is not under pressure causing
a slight delay in water ow.
• Make sure all valves on water supply are open.
• Check hose from faucet for twisting or tight bending.
4. Water boils or vapour appears:
• Lower temperature setting by turning thermostat control dial counterclockwise.
Note: If lowering the thermostat setting does not stop the boiling, unplug the
power supply cord and contact customer service.
Sparq H2 User Guide
13

Warranty
WARRANTY
Any claim under this warranty must be made within 2 years of the date of purchase of
the product. 2 year warranty is 1 year parts and labour, plus 1 year parts only. Excludes
cartridges. To make a claim under the warranty, take the product and proof of purchase
to place where you purchased the product, and they will lodge a Warranty Request with
Puretec.
Puretec will pay your reasonable, direct expenses of claiming under this warranty.
You may submit details and proof of your expense claim to place of purchase for
consideration.
The warranty only applies if the product was used and/or installed in accordance with
the user guide and/or installation instructions. This warranty is given in lieu of all other
express or implied warranties and manufacturer shall in no circumstance be held liable
for damages consequential (or otherwise) or delays caused or faulty manufacturing
except as excluded by law.
Applicable to all above, is that the warranties need to be approved by Puretec to ensure
product was not incorrectly used, installed or claimed. False and incorrect claims will
be pursued at Puretec’s discretion, including chargeable inspection and labour costs
incurred.
14 Installation & Operation Manual Copyright © Puretec Pty Ltd 2019

Warranty
WARRANTY / AUSTRALIA
This warranty is given by Puretec Pty Ltd, ABN 44 164 806 688, 37‑43 Brodie Road,
Lonsdale, SA 5160, telephone no. 1300 140 140 and email at sales@puretec.com.au.
This warranty is provided in addition to other rights and remedies you have under
law: Our goods come with guarantees which cannot be excluded under the Australian
Consumer Law. You are entitled to replacement or refund for a major failure and to
compensation for other reasonably foreseeable loss or damage. You are also entitled
to have the goods repaired or replaced if the goods fail to be of acceptable quality and
the failure does not amount to a major failure.
WARRANTY / NEW ZEALAND
This warranty is given by Puretec Ltd, Reg. No 4464398, PO Box 875 Cambridge 3450
NZ, telephone no. 0800 130 140 and email at sales@puretec.co.nz.
This warranty is provided in addition to other rights and remedies you have under
law: Our goods come with guarantees which cannot be excluded under the Consumer
Guarantees Act. You are entitled to replacement or refund for a major failure and to
compensation for other reasonably foreseeable loss or damage. You are also entitled
to have the goods repaired or replaced if the goods fail to be of acceptable quality and
the failure does not amount to a major failure.
Sparq H2 User Guide
15

Puretec water care products are designed, manufactured and supported by Puretec Ltd the name you can trust for viable and proven water
solutions. The complete range of Puretec products are developed, rened, made to meet and exceed stringent specications for the worldwide
market. All pictures and information are supplied as a guide only.
Important Note: Sales of products are subject to our Terms and Conditions which are available upon request. All specications, information and
photos are a guide only and are subject to change without notice. Please ring to conrm details. Warning: For correct operation of this appliance it
is essential to observe manufacturer’s instructions. Caution: Do not use with microbiologically unsafe water or water of unknown quality without
adequate disinfection before or aer the system. Under normal circumstances a pressure limiting valve is not required. However, if incoming
water pressure exceeds 500 kPa, a pressure limiting valve must be tted prior to inlet. Copyright © Puretec Ltd 2018
 Loading...