


LED TV
PLED1960A
INSTRUCTION MANUAL
Contents
1-2
3-4
11
12
14
15-17
16
17
18-21
19
19
20
21
22-26
23
Getting Started
Front View
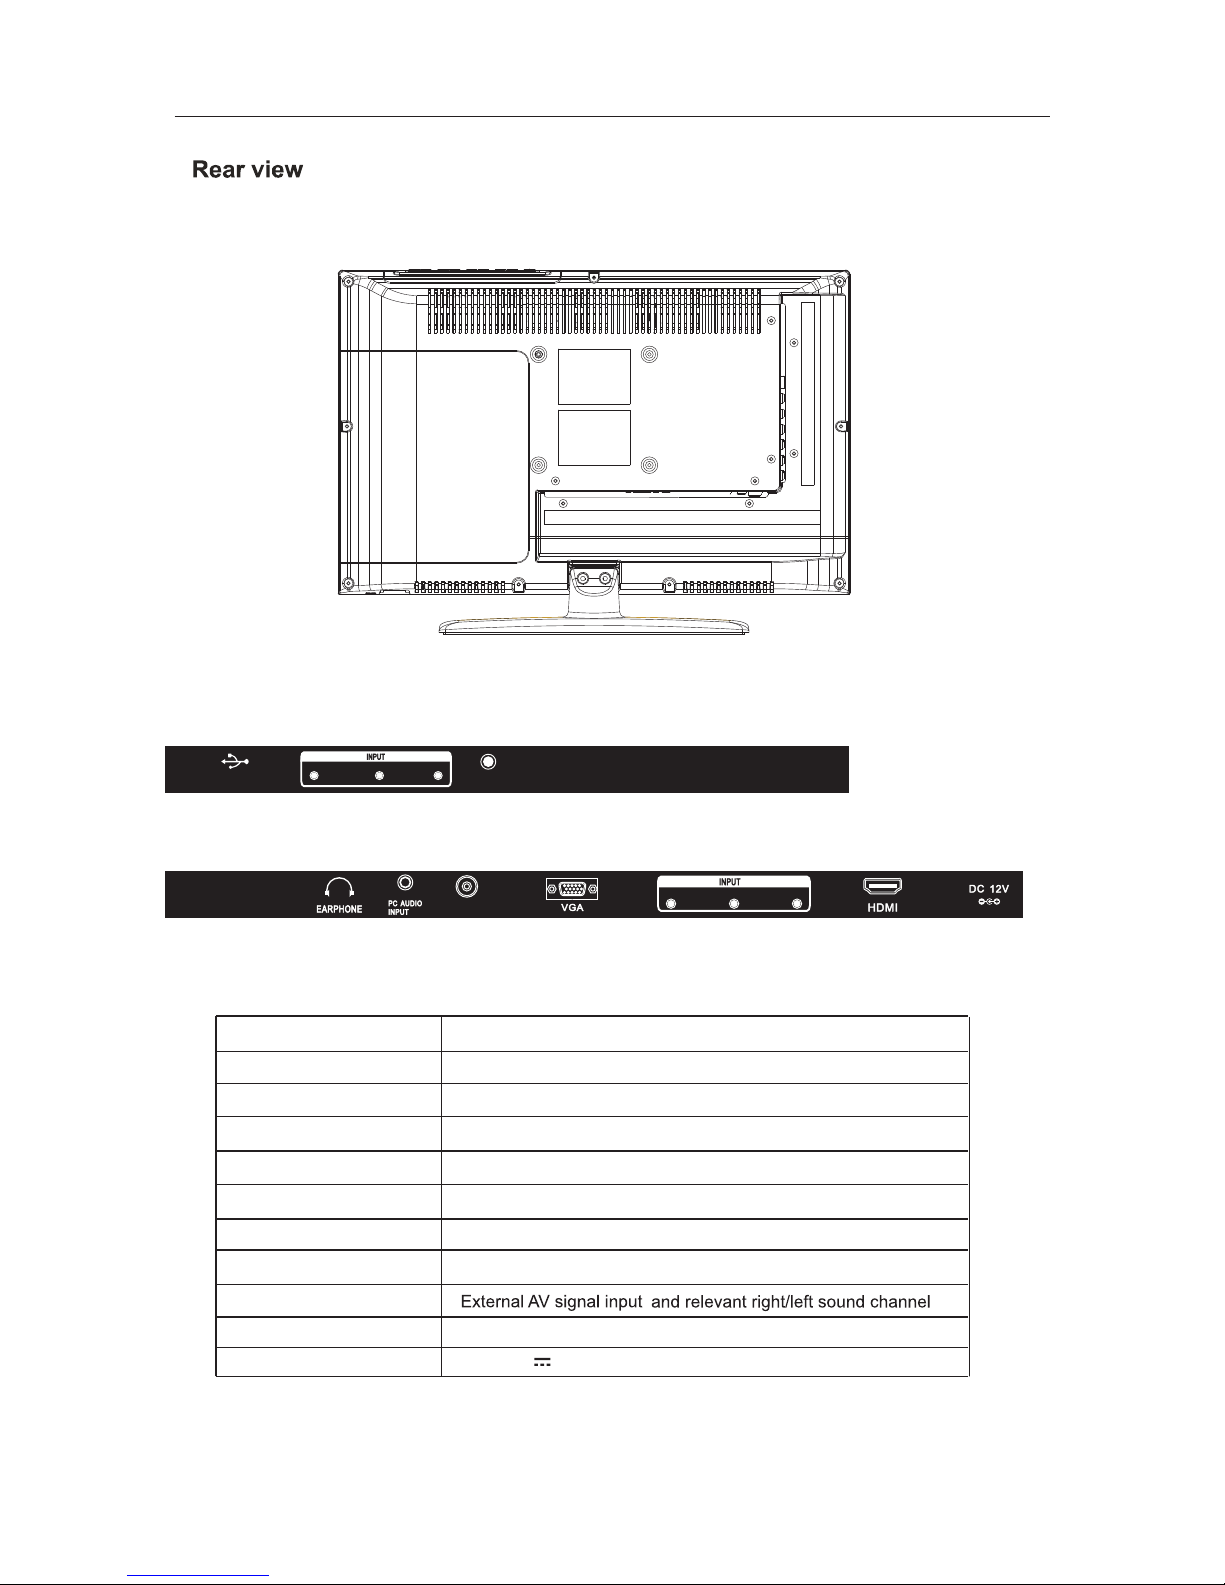
Rear View
Remote Control Key Functions
5
5
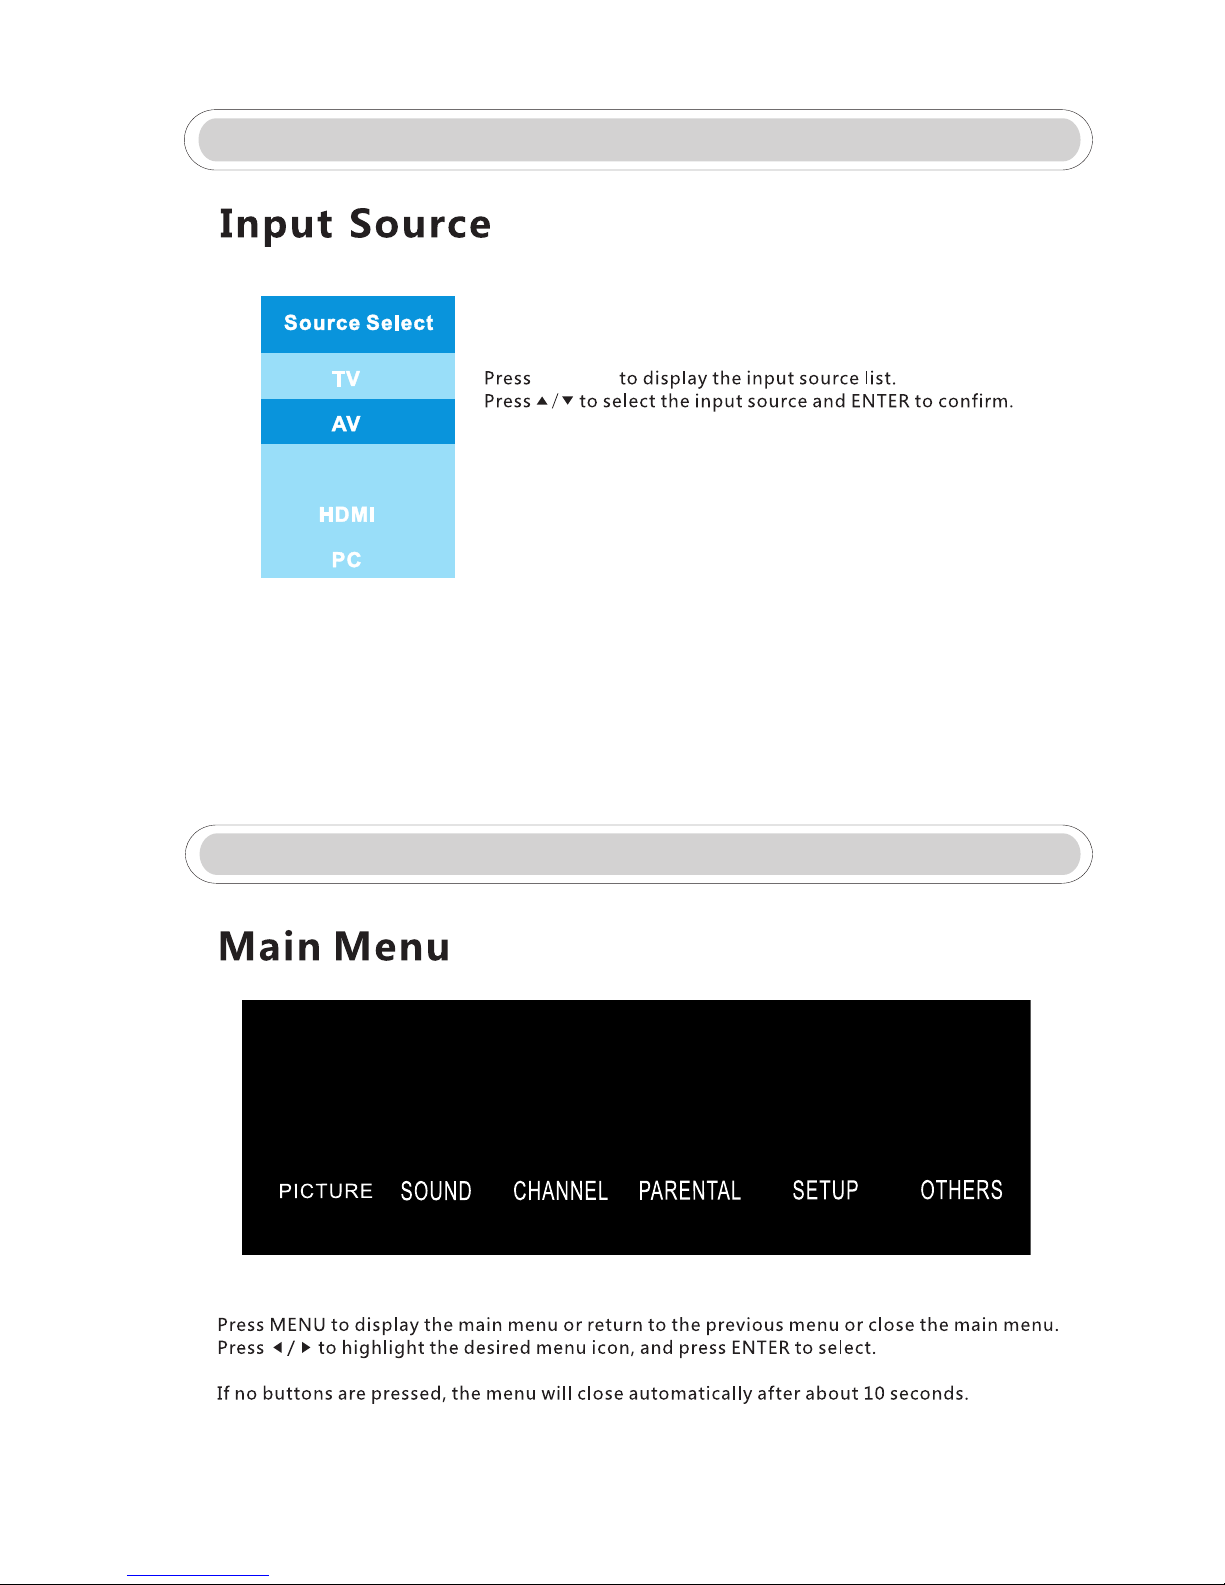
Select input source
8
Picture menu
Picture Settings
Advanced Picture Settings
SOUND MENU
Sound Settings
Equalizer Settings
CHANNEL MENU
Channel List
Favorite List
Channel Setting
Auto Channel Search
PARENTAL CONTROL
V-CHIP
Caution & Important Safety Precautions
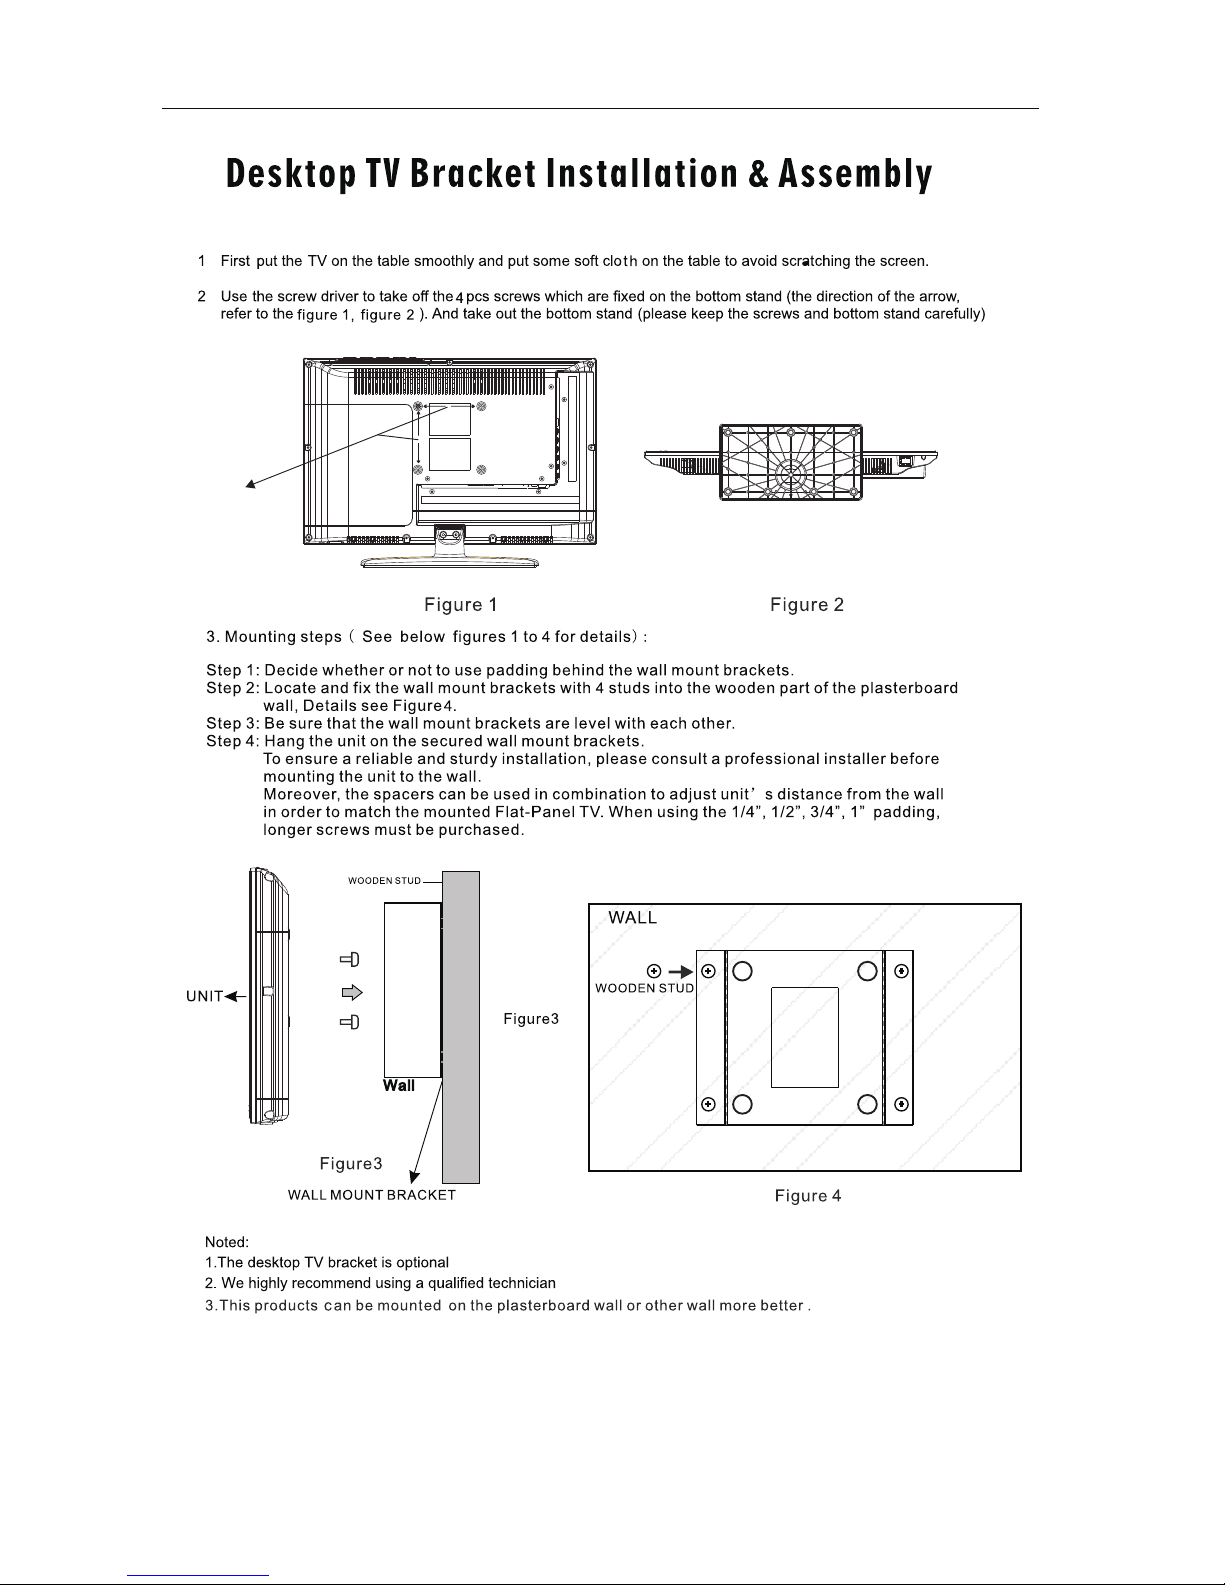
Desktop TV Bracket Installation & Assembly
6
7
Main Menu Description
9-10
13
PC Settings
24
25
26
CHANGE PASSWORD
Canada V-CHIP
TV Rating
Contents
27
27
27
28
30
30
30
30
30
Setup Menu
Closed Caption
Menu Language
Digital CC Style
OTHERS MENU
B
lue Ba
ck
No Signal Power Off
A
ll Rese
t
Audi
o Only
29
Clock
Help
Specifications
31
32
1
Caution
Caution
The ligh te ni ng flash with arrowhead s ym bo l, within an equilatera l tr ia ngle is
intend ed t o al ert the user to the presenc e of u n- insulated "dangerou s vo lt age"
within t he p ro ducts enclosure that ma y be o f sufficient magnitude to c on st itute a
risk of el ec tr ic s hock to the persons.
The excl am at ion point within an equil at er al triangle is intend t o al er t th e user to
the pres en ce o f important operating a nd m ai ntenance (servicing ) in st ru ctions in
the lite ra tu re accompanying the app li an ce.
Co r rec t dis posal o f thi s P rod uct
W ast e El ec tr ical & Electronic Equ ip me nt ( WEEE)
Your product is designed a nd m an ufactured with high qua li ty m aterials and
compon en ts w hich can be recycled and re us ed .
This sym bo l me an s that electrical and e le ct ro nic equipment, at their e nd -o f-life,
shou ld b e di sp osed of separately from y ou r ho usehold waste.
Plea se d is po se of this equipment at you r lo ca l co mmunity waste
coll ec ti on /recycling centre.
In the Eur op ea n Union there are separat e co ll ection systems for used e le ct ri cal
and el ec tr on ic products. Please hel p us t o co ns erve the environmen t we l iv e in !
2
Important Safety Precautions
To reduc e the risk of fir e or e lectric sho ck, do not expo se this appar at us to rain or moi sture.2
Caution:
Thes e servicing i ns tructions a re for use by qua lified serv ic e personnel o nly. To reduc e the risk of
elec tric shock do n ot p erform any se rvicing oth er t han that cont ained in the op erating ins tr uctions.
unless you ar e qualified to do so .
19) Do n ot place any so ur ces of danger o n the apparat us (e.g. liquid f illed objec ts, lighted c an dles).
20) Wall or Ceilin g Mounting - The appl iance shoul d be mounted to a w al l or ceiling on ly as
reco mmended by th e ma nufacture r.
3
Desktop TV Bracket Installation & Assembly
,wall mount is not in cl ud ed i n this package.
100MM
4xM4
Desktop TV Bracket Installation & Assembly
4
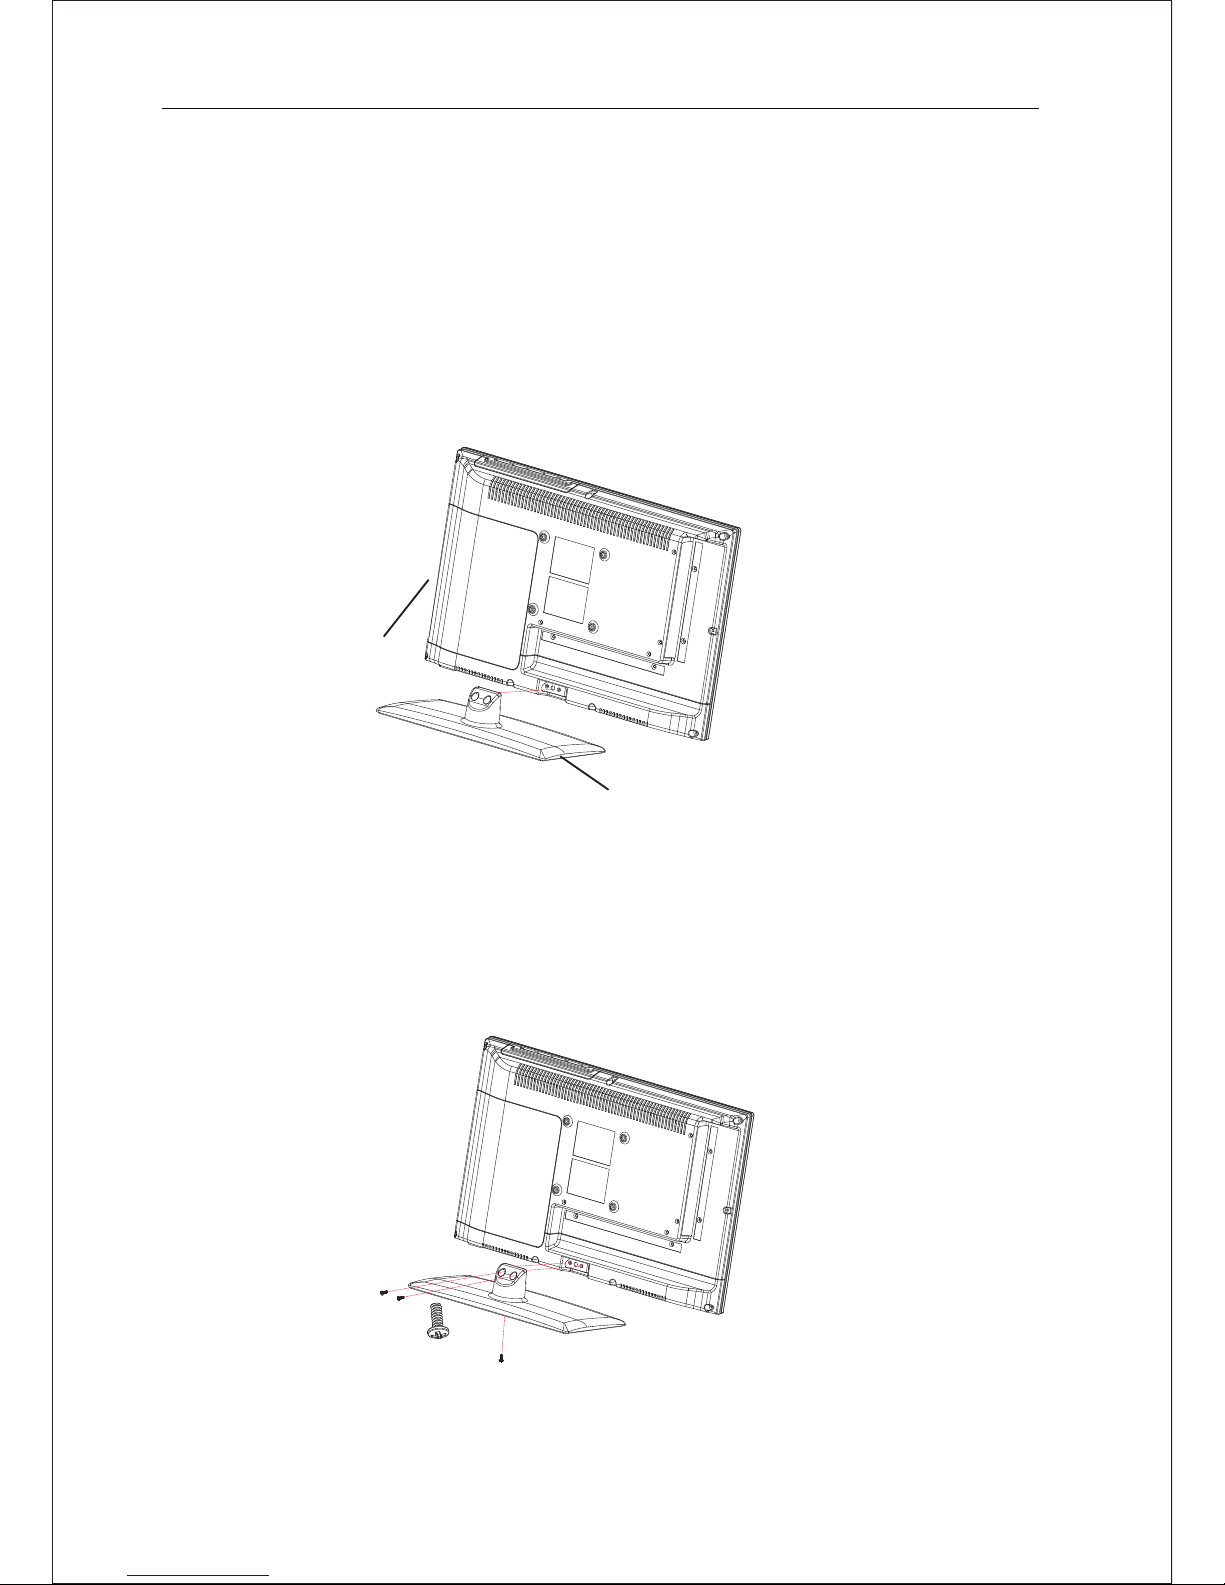
Note:Instruction manual for the TV stand assembly.
1.Match the position hole in the middle of the stand poles
to the position hols undter the bottom to the TV unit and
connect the stand base with the TV unit, the position hols
locates between the 2 screws of the stand poles.
TV
stand base
2. Fix the stand and the stand poles with 3 pieces of
BM4*10 screws
screws
BM4 *10 (3 PCS )
Getting Started
5
Getting started
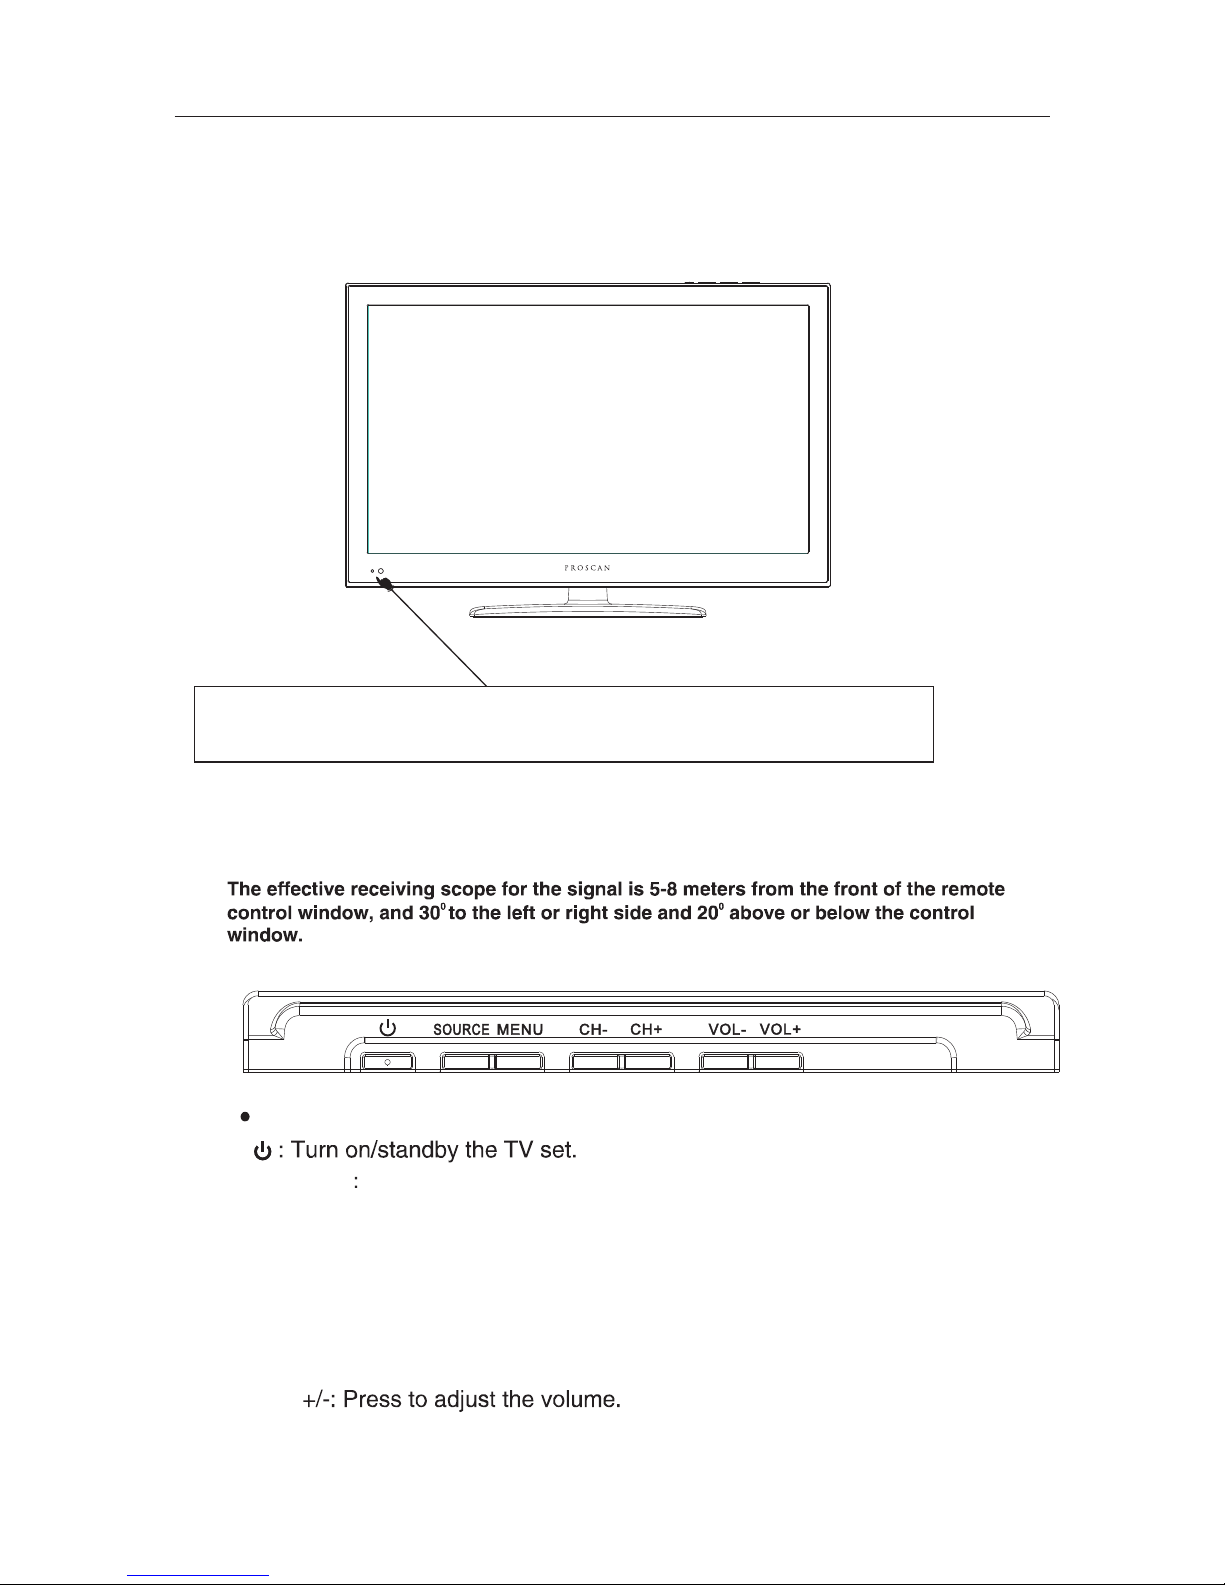
Front view
Indicator on(Red) Standby mode
Indicator on(Green) Power on mode
(IR) Infrared Receiver: Receives IR signals from the remote control.
(Power on/Standby) LED Indicator: Press
to turn on and off
VOL
SOURCE External signal input selection
item selected.
and confirm the
The functions of the buttons on the are as follows:TV
CH+/-:When watching TV: select channels.
MENU:
1.Press M enu.
2.Press S OURCE to ent er.
3.Use CH+ /- to shift UP /DOWN.
4.Press S OURCE to con firm,then press VOL+/-to adjust.
5.Press S OURCE to con firm
Getting Started
6
R
L
VID EO
R F
Pb
Y
Pr
COA XIAL
Conn ect to ANT or cable sourc e
POWER SOCKET
HDMI IN
Connect to HDMI of DVD or other equipment
PC AUDIO IN
PC audio input
VGA IN
VGA signal from computer output
YPBPR
Connect to the composite terminal of your DVD/VCR
ANT 75 Ω
EARP HO NE
For Upgr ad e Us e.
AV INPUT
Earp ho ne o utput
DC 12V 4A
COAXIA L
Digi ta l Aud io Output
(Left Side)
(Back Side)
Name
Function Description
Ser vice Po rt
Service P ort
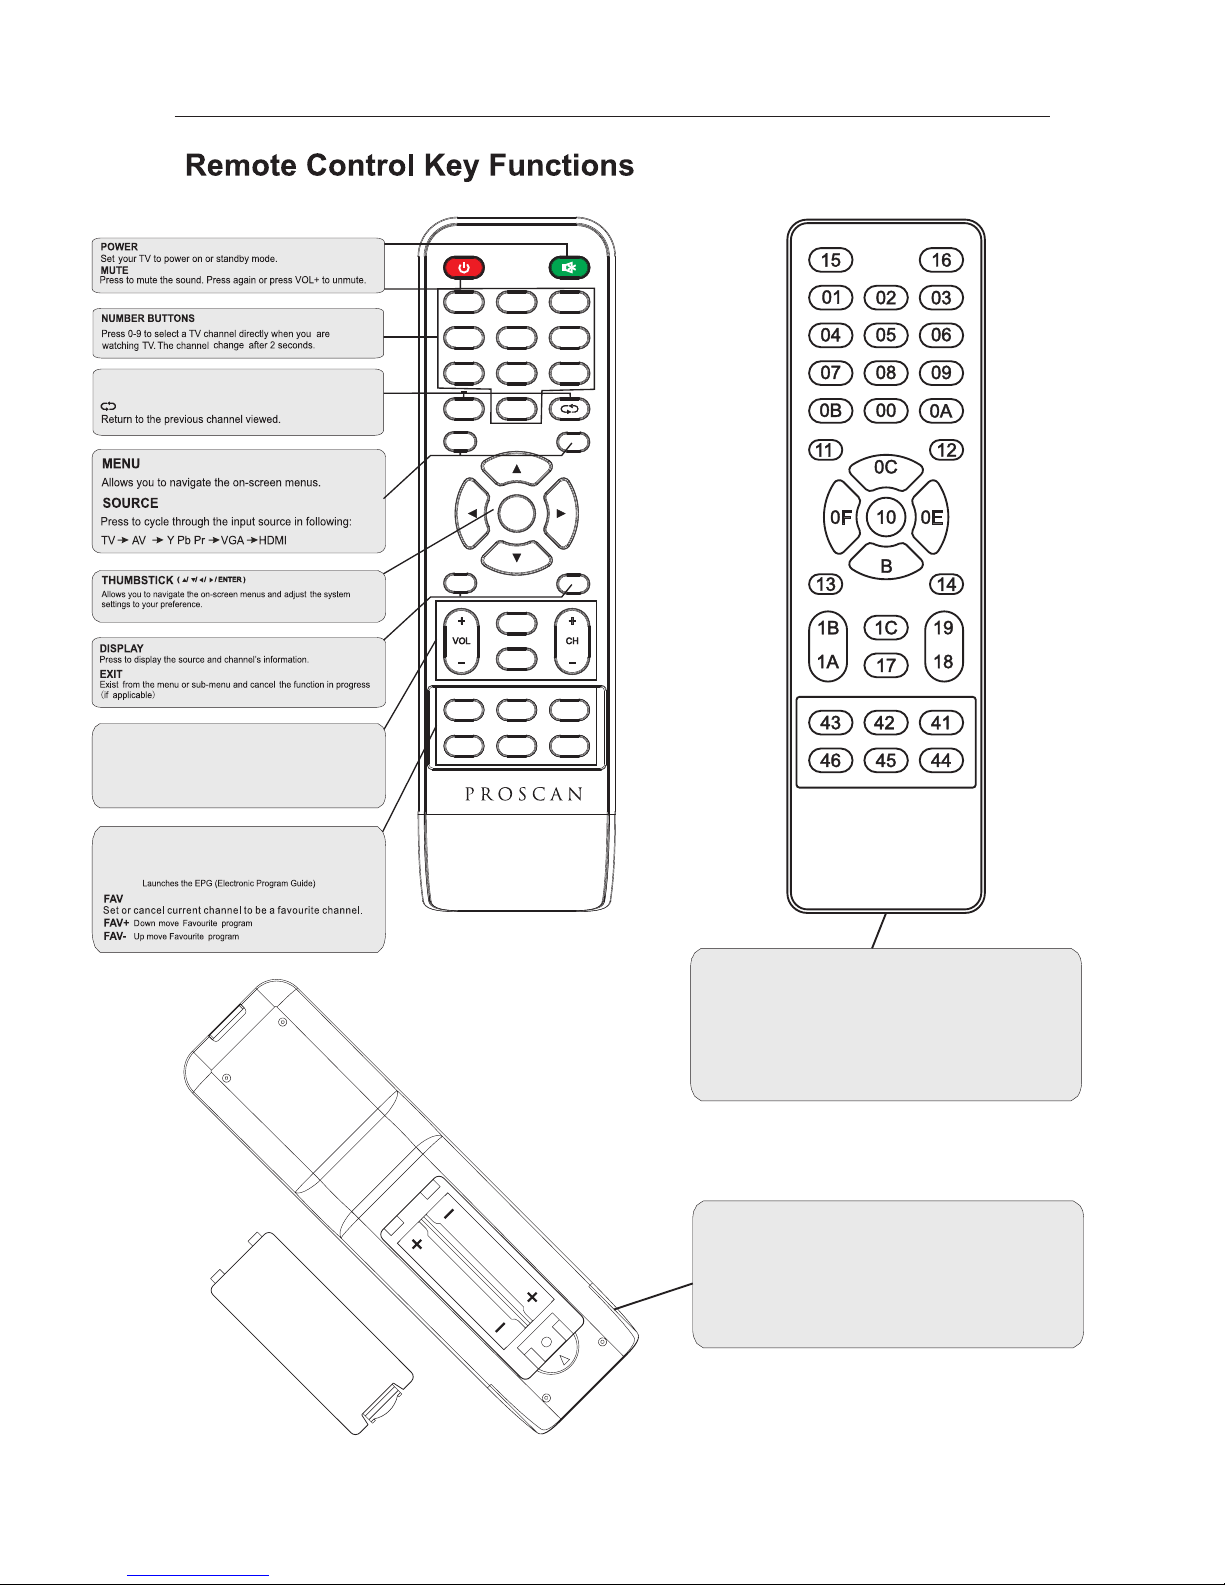
Remote Control Key Functions
7
S.MODE: Press to cycle through the different sound settings
P.MODE: Press to cycle through the different picture settings
CH +/ - : Press t o scan thr ough or to selec t a chann el.
V +/- : Press t o increa se / dec rease t he sound level .
Pres s "-" to ent er a pr ogram numb er f or mult iple pr ogram
cha nnel, s uch as 2- 1 etc.
SLEEP: Select amount of time before TV turn
off
automatically.
MTS:
Pres s to sel ect the au dio mod e,you can sel ect ster eo,
Mon o,or SAP (sec ond audi o prog ram).
GUIDE:
1
5
9
2
6
0
3
7
4
8
ENTER
MENU
SOURCE
EXIT DISPLAY
P.
MODE
S.
MODE
SLEEP MTS GUIDE
FAV FAV- FAV+
Univ er sal remote co de
This i s th e code for remo te c ontrol of
PLED 1960A,if you wa nt to change to a
univ ersal remote co ntrol,you can e dit
this c od e into your uni versal remote c ontrol.
(1)Ope n th e ba ttery compartment c ov er
on the bac k si de
(2)Ins er t tw o 1.5V batteries of AAA typ e
with cor re ct p olarity
(3)C lo se t he b attery compartmen t co ve r
on the bac k si de
Universal Remote Control code:007F
(Universal Remote control is not included)
8
SELECT INPUT SOURCE
BASIC OPERATION
SOUR CE
YPbPr
 Loading...