

Page 1
1
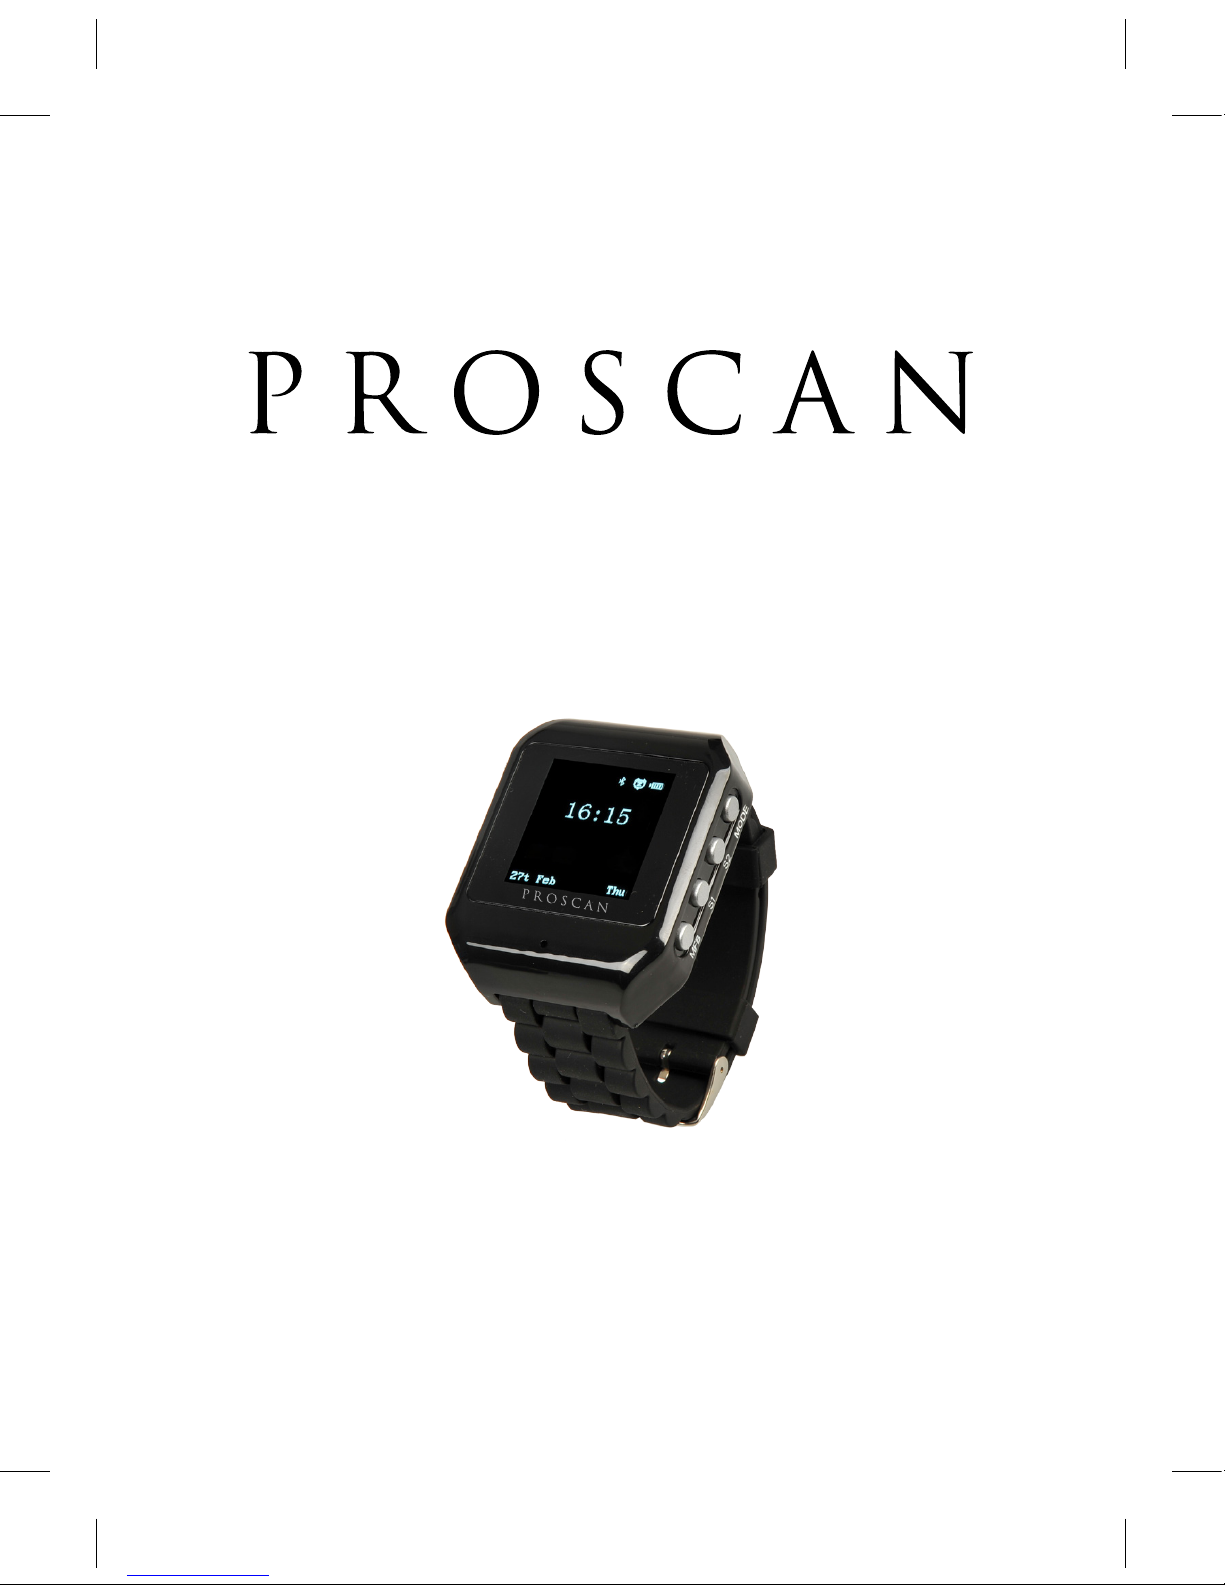
Bluetooth Digital Watch
PBTW213
Page 2
2
Specications
RECEIVE NOTIFICATIONS ON YOUR WRIST AND STAY IN
TOUCH BY KEEPING YOUR PHONE OUT OF SIGHT, WITHOUT
MISSING IMPORTANT CALLS
ANSWER INCOMING CALLS ON YOUR WATCH, SHOW
INCOMING CALL NUMBER
BUILT IN MICROPHONE FOR HANDS FREE CALLING
LISTEN AND PLAY YOUR MUSIC ON THE GO.
AUDIO PLAY TIME: 2HRS
PAIRS WITH BLUETOOTH ENABLED DEVICES
OLED SCREEN SIZE: 1.5 INCH
CHARGING TIME: 2HRS
STANDBY TIME: 120HRS
TALKING TIME: 5HRS
WATCH SIZE: 4.5*4.1CM, WRISTBAND: 25CM
TRANSMIT RANGE: 10M
BLUETOOTH V3.0 EDR;
BLUETOOTH PROFILES: A2DP + HFP1.5 + HSP1.2;
BUILT-IN 250MAH LITHIUM BATTERY
SPEAKER: 0.5W, 8Ω
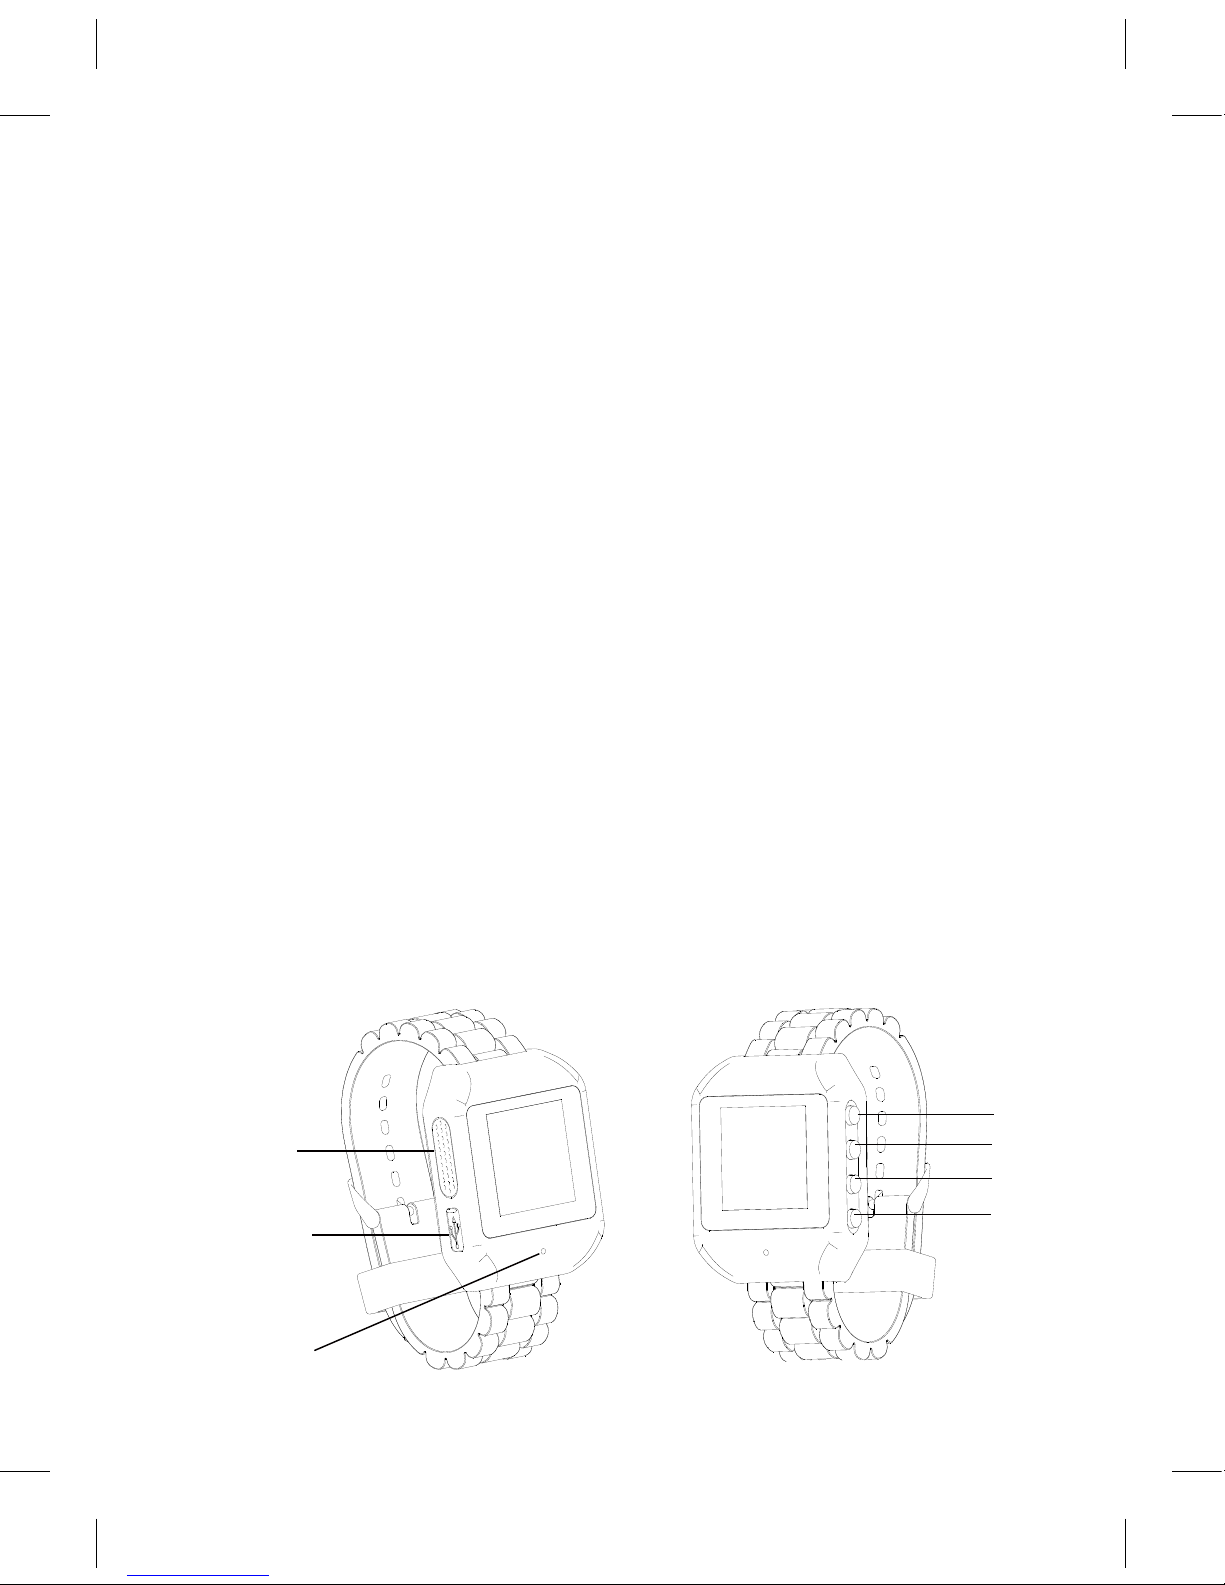
Description Of Parts
MODE
S2
S1
MFB
MIC
Micro USB
Port
Speaker
Page 3

3
1.Turing the Bluetooth ON
Press and hold “MFB” button for 3 seconds, the screen will display
Bluetooth icon and ashing, with a beep sound, it is indicating that
the device has been switched ON, and ready to pairing.
2.Turing the Bluetooth OFF
Press and hold “MFB” button for 3 seconds, the Bluetooth icon will
disappear on the screen with a beep sound, the device would turn
OFF.
3.Pairing the Bluetooth watch with a Bluetooth enabled
device.
Long press “MFB” button for 3 seconds, the Bluetooth icon will
display and ashing, the device is now in pairing mode. Activate
the Bluetooth function on your Bluetooth device (Mobile phone or
Tablet). Please refer to manufacturer’s instructions for instructions
on enabling Bluetooth on your device.
Once you have activated Bluetooth on your device, select the
device name “Proscan” from the list of available Bluetooth devices.
If required, enter the password “0000” to conrm to nalize pairing.
The Bluetooth icon would light up on the screen and don’t ashing,
it is indicating successful connection.
When you connect this Bluetooth watch with your smart phone, the
screen will display “Sync Phonebook”, press “MFB” means NO,
press “MODE” means YES.
If you sync your phonebook on the Bluetooth watch, when you
check your call logs on the Bluetooth watch, you can see the
Caller-ID is the same with your phonebook in your smart phone.
4.Play Music wirelessly on Bluetooth Watch
Once your Bluetooth enabled device (For example iPhone or
Android Smart phone) is paired with this Bluetooth watch, play
music from your phone and it would stream music wirelessly
Page 4

4
through the Bluetooth watch speakers. Press “S1” once to volume
up, long press to the Next Track; Press “S2” once to volume down,
long press to the Previous Track..
5.Answering a call
OLED screen would show Caller-ID when you get incoming phone
call. Press the “MODE” button once to answer the call, and the
screen will display “Calling” indicating that you are now on a Call.
During the phone conversation, press “MODE” button to switch
between Phone or Bluetooth watch to talk. Press “S1” once to
volume up, Press “S2” once to volume down.
Remark: The Bluetooth watch will show Caller-ID which phone
books store in your phone, but it will only show incoming call
number without caller-ID if you store it in your SIM card, not
on your phone.
6.Ending a call
Press the “MFB” button once when you finish your phone
conversation, and you have now ended your phone call.
7.Rejecting a call
When you get an incoming phone call, press the “MFB” button
once to reject the incoming phone call.
8.Check the call logs
Press “MODE” button, you can see all the call records, Press “S1”
is the next phone call record, Press “S2” for the previous phone
call record. Choose the phone number you want to redial, and
press “MODE” to dial the CALL, Press “MFB” to Back to the Time
display.
9.Setting Mode
Press the “MODE” button and hold for 3 seconds, the screen will
display setting list as below:
Page 5

5
Set Timer
Set Alarm
Language
Press “S1” or “S2” to choose the above 3 menus which one you
want to setting.
(1) Set Timer
Choose “Set Timer” and press “MODE” to input the Year-MonthDate- Hour-Minute, and press “MFB” to exit the time setting mode.
(2) Set Alarm
Choose “Set Alarm” and press “MODE” to input the Hour-Minute,
choose “Alarm on”, the Alarm icon will on the display. Choose
“Alarm off”, the Alarm icon will disappear on the display.
When the time is up, you can hear “DUDUDU” alarm ringing, and
press any button to stop the ringing.
(3) Language
Choose “Language” to switch between “Simplified Chinese” and
“English”.
10.Charging the watch
The USB charging port is on the left side of the Bluetooth watch,
insert the Micro USB plug here and other end of the USB port to
any USB charging port (Computer or USB AC charging socket/DC
5V). It may take up to 2 or 3 hours for a full charge.
Page 6
6
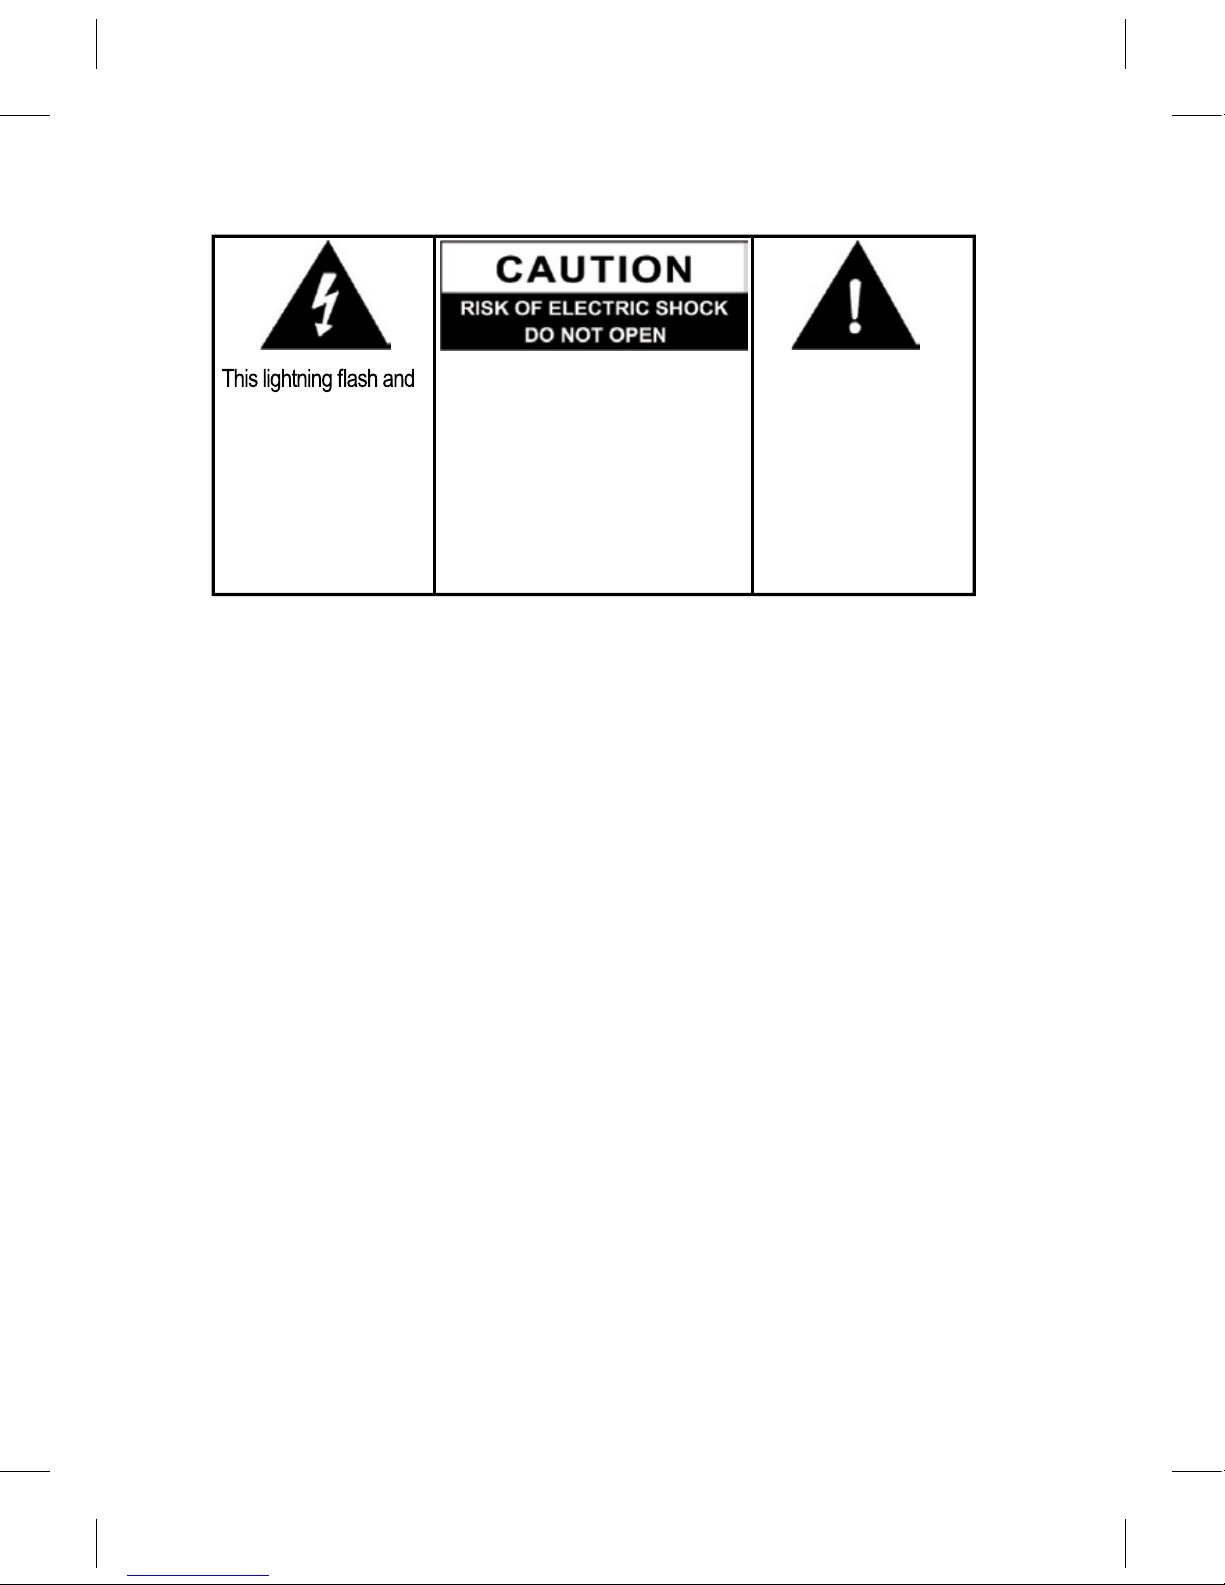
The exclamation point
within the triangle is a
warning sign alerting
you o f importan t
instructions.
arrowhead within the
triangle is a w arning
sign a lerting you of
"dangerous voltage"
inside the product.
CAUTION: TO REDUCE THE RISK
OF E LECTRIC SHOCK, D O NO T
REMOVE COVER (ON BACK). NO
USER SERVICEABLE PARTS INSIDE.
REFER SERVICING TO QUALIFIED
SERVICE PERSONNEL.
IMPORTANT SAFET Y INSTRUCTIONS
INSTRUCTION MANUAL
WARNING: TO REDUCE THE RISK OF FIRE OR ELECTRIC SHOCK, DO
NOT EXPOSE THIS APPLIANCE TO RAIN OR MOISTURE.
1. READ INSTRUCTIONS - All the safety and operating Instructions
should be read before the product Is operated.
2. RETAIN INSTRUCTIONS - The safety and operating Instructions
should be retained for future reference.
3. HEED WARNINGS - All warnings on the product and In the operating
Instructions should be adhered to.
4. FOLLOW INSTRUCTIONS - All operating and use Instructions
should be followed.
5. CLEANING - Unplug this product from the wall outlet before cleaning,
Do not use liquid cleaners or aerosol cleaners. Use a damp cloth for
cleaning.
6. ATTACHMENTS - Do not use attachments not recommended by the
product manufacturer as they may cause hazards.
7. WATER AND MOISTURE - Do not use this product near water - for
example, near a bath tub, wash bowl, kitchen sink, or laundry tub; In a wet
basement, or near a swimming pool, and the like.
8. ACCESSORIES - Do not place this product on an unstable cart,
stand tripod, bracket, or table. The product may fall, causing serious Injury
to a child or adult, and serious damage to the product. Use only with a
cart, stand, tripod, bracket, or table recommended by the manufacturer,
or sold with the p roduct. Any mounting of t he product should follow
the manufacturer's Instructions, and should use a mounting accessory
recommended by the manufacture
9. A product and cart combination should be moved with care. Quick stops,
excessive force, and uneven surfaces may cause the appliance and ca
combination to overturn.
10.VENTILATION - Slots and openings In the cabinet are provided for
ventilation and to ensure reliable operation of the product and to protect
It from overheating, and these openings must not be blocked or covered.
The openings should never be blocked by placing the product on a bed,
sofa, rug, or other similar surface. This product should not be placed In a
built-in Installation such as a bookcase or rack unless proper ventilation Is
provided or the manufacturer's Instructions have been adhered to.
11. POWER SOURCES - This product should be operated only from the
type of power source Indicated on the marking label. If you are not sure of
the type of power supply to you home, consult your product dealer or local
power company. For products Intended to operate from battery power, or
other sources, refer to operating Instruction.
12.GROUNDING OR POLARIZ ATION - This product may be
equipped with a polarized alternating current line plug (a plug having one
way. This is a safety feature. If you are unable to insert the plug fully into
your electrician to replace your obsolete outlet. Do not defeat the safety
purpose of the polarized plug.
ALTERNATE WARNINGS - This product is equipped with a three-
wire grounding-type plug, a plug having a third (grounding) pin. This plug
Page 7

7
ENEN
to a child or adult, and serious damage to the product. Use only with a
cart, stand, tripod, bracket, or table recommended by the manufacturer,
or sold with the p roduct. Any mounting of t he product should follow
the manufacturer's Instructions, and should use a mounting accessory
recommended by the manufacture
9. A product and cart combination should be moved with care. Quick stops,
excessive force, and uneven surfaces may cause the appliance and ca
combination to overturn.
10.VENTILATION - Slots and openings In the cabinet are provided for
ventilation and to ensure reliable operation of the product and to protect
It from overheating, and these openings must not be blocked or covered.
The openings should never be blocked by placing the product on a bed,
sofa, rug, or other similar surface. This product should not be placed In a
built-in Installation such as a bookcase or rack unless proper ventilation Is
provided or the manufacturer's Instructions have been adhered to.
11. POWER SOURCES - This product should be operated only from the
type of power source Indicated on the marking label. If you are not sure of
the type of power supply to you home, consult your product dealer or local
power company. For products Intended to operate from battery power, or
other sources, refer to operating Instruction.
12.GROUNDING OR POLARIZ ATION - This product may be
equipped with a polarized alternating current line plug (a plug having one
way. This is a safety feature. If you are unable to insert the plug fully into
your electrician to replace your obsolete outlet. Do not defeat the safety
purpose of the polarized plug.
ALTERNATE WARNINGS - This product is equipped with a three-
wire grounding-type plug, a plug having a third (grounding) pin. This plug
rt
Page 8

8
you are unable to insert the plug into the outlet, contact your electrician
to replace your obsolete outlet, Do not defeat the safety purpose of the
grounding-type plug.
13.POWER - CORD PROTECTION - Power supply cords should
be routed so that they are not likely to be walked on or pinched by items
placed upon or against them, paying particular attention to cords at plugs,
convenience receptacles, and point where they exit from the product.
14.PROTECTIVE ATTACHMENT PLUG - The product is equipped
with an attachment plug having overload protection. This is a safety
feature. See Instruction Manual for replacement or resetting of protective
device. I f replacement o f the plug i s required, be sure the service
technician has used a replacement plug specified by the manufacturer
that has the same overload protection as the original plug.
15.OUTDOOR ANTENNA GROUNDING - If an outside antenna
is connected to the receiver, be sure the antenna system is grounded
so as to provide some protection against voltage surges and built-up
static charges. Article 810 of the National Electrical Code, ANSI/NFPA
70, provides information with regard to proper grounding of the mast and
supporting structure, grounding of the lead-in wire to an antenna-discharge
unit, size of grounding conductors, location of antenna-discharge unit,
connection to grounding electrodes, and requirements for the grounding
electrode.
16.LIGHTNING - For added protection for this product during a lightning
storm, or when It Is left unattended and unused for long periods of time,
unplug It from the wall outlet and disconnect the antenna or cable system.
This will prevent damage to the product due to lightning and power-line
surges.
17.POWER LINES - An outside antenna system should not be located In
the vicinity of overhead power lines or other electric light or power circuits,
or where It can fall Into such power lines or circuits. When Installing an
outside antenna system, extreme care should be taken to keep from
touching such power lines or circuits as contact with them might be fatal.
18.OVERLOADING - Do not overload wall outlets, extension cords,
electric shock.
19.OBJECT AND LIQUID ENTRY - Never push objects of any kind
Into this product through openings as they may touch dangerous voltage
spill liquid of any kind on the product.
20.SERVICING - Do not attempt to service this product y ourself as
opening or removing covers may expose you to dangerous voltage or
21.DAMAGE REQUIRING SERVICE - Unplug this product from
following conditions:
a) When the power-supply cord or plug Is damaged.
b) If liquid has been spilled, or objects have fallen Into the product.
c) If the product has been exposed to rain or water.
d) If the product does not operate normally by following t he operating
Instructions, adjust only those controls that are covered by the operating
Instructions as an Improper adjustment of other controls may result In
restore the product to Its normal operation.
e) If the product has been dropped or damaged In any way.
f) When the product exhibits a distinct change In p
a need for service.
Page 9

9
ENEN
16.LIGHTNING - For added protection for this product during a lightning
storm, or when It Is left unattended and unused for long periods of time,
unplug It from the wall outlet and disconnect the antenna or cable system.
This will prevent damage to the product due to lightning and power-line
surges.
17.POWER LINES - An outside antenna system should not be located In
the vicinity of overhead power lines or other electric light or power circuits,
or where It can fall Into such power lines or circuits. When Installing an
outside antenna system, extreme care should be taken to keep from
touching such power lines or circuits as contact with them might be fatal.
18.OVERLOADING - Do not overload wall outlets, extension cords,
electric shock.
19.OBJECT AND LIQUID ENTRY - Never push objects of any kind
Into this product through openings as they may touch dangerous voltage
spill liquid of any kind on the product.
20.SERVICING - Do not attempt to service this product y ourself as
opening or removing covers may expose you to dangerous voltage or
l.
21.DAMAGE REQUIRING SERVICE - Unplug this product from
following conditions:
a) When the power-supply cord or plug Is damaged.
b) If liquid has been spilled, or objects have fallen Into the product.
c) If the product has been exposed to rain or water.
d) If the product does not operate normally by following t he operating
Instructions, adjust only those controls that are covered by the operating
Instructions as an Improper adjustment of other controls may result In
restore the product to Its normal operation.
e) If the product has been dropped or damaged In any way.
f) When the product exhibits a distinct change In p
er
formance - this Indicates
a need for service.
Page 10

10
22.
REPLACEMENT PARTS -
When replacement parts are required,
the manufacturer or have the same characteristics as the original part.
Unauthorized substitutions may result in fire, electric shock, or other
hazards.
23.
SAFETY CHECK -
Upon completion of any service or repairs to this
product, ask the service technician to perform safety checks to determine
that the product is in proper operating condition.
24.
WALL O R CEILING MOUNTING -
The product should be
mounted to a wall or ceiling only as recommended by the manufacturer.
25.
HEAT -
The product should be situated away from heat sources such
that produce heat.
Warning:
the party responsible for compliance could void the users' authority to operate
the equipment.
Généralités
1 : Cordelette ajustable
2 : Bouton « < » : chanson précédente
3 : Bouton « > » : chanson suivante
4 : Voyant DEL
a) Chargement
Voyant DEL État du casque
Le voyant rouge est allumé Chargement
Le voyant rouge est éteint Chargement complet
b) En cours d’utilisation
Voyant DEL État du casque
Les voyants rouge et bleu clignotent alternativement Appariement
Le voyant bleu clignote toutes les 3 secondes Non-conversation
Le voyant bleu s'allume et s'éteint progressivement Conversation
5 : Bouton multifonction « » (MFB) : répondre, terminer, rejeter l'appel, pause et
lecture
6 : Bouton « - », appuyer brièvement ou longuement pour diminuer le volume
7 : Bouton « - », appuyer brièvement ou longuement pour augmenter le volume
8 : Port de charge
9 : Microphone intégré
Page 11

11
Montre numérique Bluetooth
PBTW213
Page 12

12
Spécications
RECEVOIR DES NOTIFICATIONS SUR VOTRE POIGNET ET
RESTER EN CONTACT EN GARDANT VOTRE TÉLÉPHONE
HORS DE VUE, SANS MANQUANTS VOS APPELS;
RÉPONDRE AUX APPELS ENTRANTS SUR VOTRE MONTRE.
MONTRE NUMÉRO D'APPEL ENTRANT;
MICROPHONE POUR LES APPELS MAINS LIBRE;
ÉCOUTER ET JOUER VOTRE MUSIQUE. TEMPS DE LECTURE
AUDIO: 2 H;
PAIRES AVEC PÉRIPHÉRIQUES BLUETOOTH™
COMPATIBLES;
TAILLE DE L'ÉCRAN OLED: 1.5 POUCES;
TEMPS DE CHARGE: 2 HEURES;
AUTONOMIE EN VEILLE: 120HRS;
TEMPS DE PAROLE: 5 H
MONTRE TAILLE: 4.5 * 4.1 CM, BRACELET: 25 CM;
GAMME DE TRANSMISSION: 10M;
BLUETOOTH V3.0 EDR;
LES PROFILS BLUETOOTH: A2DP + HFP1.5 + HSP1.2;
BATTERIE AU LITHIUM INTÉGRÉE 250MAH;
CONFÉRENCIER: 0.5W, 8Ω
Description des pièces
MODE
S2
S1
MFB
Microphone
Port micro-
USB
Haut-parleur
Page 13

13
1.Activation du Bluetooth
Appuyez et maintenez le bouton « MFB » pendant 3 secondes
; l'écran affiche l'icône Bluetooth clignotante et un bip sonore
indiquera que le Bluetooth a été activé et que l'appareil est prêt
pour l'appariement.
2.Désactivation du Bluetooth
Appuyez et maintenez le bouton « MFB » pendant 3 secondes ;
l'icône Bluetooth disparaîtra de l'écran et un bip sonore indiquera
que le Bluetooth a été désactivé.
3.Appariement de la montre Bluetooth avec un appareil
compatible Bluetooth
Appuyez longuement sur le bouton « MFB » pendant 3 secondes
; l'icône Bluetooth s'afche et clignote indiquant que l'appareil est
maintenant en mode d'appariement. Activez la fonction Bluetooth
sur votre appareil Bluetooth (téléphone mobile ou tablette). Veuillez
consulter les instructions du fabricant pour obtenir des instructions
sur l'activation du Bluetooth sur votre appareil.
Une fois que vous avez activé le Bluetooth sur votre appareil,
sélectionnez le nom de l'appareil « Proscan » dans la liste des
appareils Bluetooth disponibles.
Si nécessaire, entrez le mot de passe « 0000 » pour conrmer et
naliser l'appariement.
L'icône Bluetooth s'allume sur l'écran et ne clignote pas, ce qui
indique une connexion réussie.
Lorsque vous vous connectez cette montre Bluetooth avec votre
téléphone intelligent, l'écran afchera « Synchronisation répertoire
». Appuyer sur « MFB » signie NON et appuyer sur « MODE »
signie OUI.
Si vous synchronisez votre répertoire sur la montre Bluetooth,
quand vous consultez vos journaux d'appels sur la montre
Bluetooth, vous pouvez voir que le numéro de l'appelant est le
Page 14

14
même avec celui du répertoire de votre téléphone intelligent.
4.Écouter de la musique sans l sur la montre Bluetooth
Une fois que votre appareil Bluetooth (par exemple un téléphone
intelligent iPhone ou Android) est apparié avec cette montre
Bluetooth, jouez de la musique depuis votre téléphone, et elle sera
diffusée sans l à travers les haut-parleurs de la montre Bluetooth.
Appuyez une fois sur « S1 » pour augmenter le volume ; appuyez
longuement pour la Piste suivante. Appuyez une fois sur « S2
» pour diminuer le volume ; appuyez longuement pour la Piste
précédente.
5.Répondre à un appel
L'écran OLED afchera l'ID appelant lorsque vous avez un appel
entrant. Appuyez une fois sur le bouton « MODE » pour répondre
à l'appel. L'écran affichera « Appel », indiquant que vous avez
un appel. Pendant la conversation téléphonique, appuyez sur «
MODE » pour basculer entre le téléphone et la montre Bluetooth
pour parler. Appuyez une fois sur « S1 » pour augmenter le
volume. Appuyez une fois sur « S2 » pour diminuer le volume.
Remarque : La montre Bluetooth affichera l'ID appelant
répertorié dans votre téléphone, mais elle n'affichera que le
nombre d'appels entrants sans identication de l'appelant si
stocké sur votre carte SIM, pas sur votre téléphone.
6.Mettre n à un appel
Appuyez une fois sur le bouton « MFB » quand vous avez ni votre
conversation téléphonique. Vous avez maintenant terminé votre
appel téléphonique.
7.Rejeter un appel
Quand vous recevez un appel, appuyez une fois sur le bouton «
MFB » pour le rejeter.
Page 15

15
8.Consulter les journaux d'appels
Appuyez sur le bouton « MODE » pour voir tous les appels.
Appuyez sur « S1 » pour voir l'appel suivant et sur « S2 » pour
l'appel précédent. Choisissez le numéro de téléphone que vous
souhaitez rappeler et appuyez sur « MODE » pour composer le
numéro. Appuyez sur « MFB » pour revenir à l'afchage de l'heure.
9.Réglage du mode
Appuyez et maintenez le bouton « MODE » pendant 3 secondes.
L'écran afchera la liste de réglages comme ci-dessous :
Régler minuterie
Régler alarme
Langue
Presse « S1 » ou « S2 » pour choisir parmi les 3 menus ci-dessus
pour régler.
(1) Régler minuterie
Sélectionnez « Régler minuterie », puis appuyez sur « MODE »
pour entrer l'année-mois-date-heure-minute, puis appuyez sur «
MFB » pour quitter le mode de réglage de l'heure.
(2) Régler alarme
Sélectionnez « Régler alarme », puis appuyez sur « MODE » pour
entrer l'heure-minute. Sélectionnez « Activer alarme ». L'icône de
l'alarme s'afchera à l'écran. Sélectionnez « Désactiver alarme ».
L'icône de l'alarme disparaîtra de l'écran.
Lorsque le temps est écoulé, vous pouvez entendre la sonnerie
d'alarme « DUDUDU ». Appuyez sur n'importe quel bouton pour
arrêter la sonnerie.
(3) Langue
Sélectionnez « Langue » pour basculer entre les « Chinois
simplié » et « Anglais ».
10.Recharge de la montre
Le port de charge USB se trouve sur le côté gauche de la montre
Page 16

16
FRFR
-42dB (0dB=1V/Pa, 1KHz)
Bluetooth. Insérez la che micro-USB ici et l'autre extrémité à un
port de charge USB (ordinateur ou prise de charge USB CA/CC 5
V). Une recharge complète peut prendre jusqu'à 2 ou 3 heures.
Page 17

17
Page 18

18
FRFR
Page 19

19
 Loading...