

Promaster 2016, 2017 Installation Manual

2016 & 2017 PROMASTER REAR SPEAKER
INSTALLATION
Speaker Installation
Rear speakers can be added to the ProMaster. There are different requirements for
adding rear speakers depending on the radio that the vehicle is equipped with. Sales
code BC3 (up fitter interface connector) is required regardless of the radio. It provides
a way to connect the speakers to the electrical system. The up fitter connectors can be
found at the base of the passenger side B pillar behind a trim panel. See ProMaster
BBG “UPFITTERS RADIO CONNECTOR” document under the
“ELECTRICAL/WIRING INFORMATION” heading for more detail regarding the
connections. To add rear speakers to a vehicle with UA1 (2017 only) or RA2 radios,
the vehicle must have been built with sales code RED. (Rear speaker wiring prep)
RED will ensure proper configuration of the vehicle electronics that will allow the
speaker outputs to be enabled. RED is packaged with BC3. BC3 is included when
RED is ordered.
Standard AM, FM, MP3 Radio - RH3
ProMaster vans equipped with the RH3 radio are shipped from the factory with the
fader control set to full front as the vehicle does not come equipped with rear speakers.
If the fade is set to the rea r with no rear speakers c onnected, little to no sound would be
heard. To add rear speakers to vehicles with this radio option, connect the speakers to
the vehicle’s electrical system and shift the fade setting more towards the rear until the
desired front /re ar bias is achieved.
Optional AM, FM, UConnect 3.0 - UA1
(2017 Only)
ProMaster vans equipped with the UA1 radio are shipped from the factory with the
rear speakers turned off as the vehicle does not come equipped with rear speakers. If
the speakers were turned on with no speakers connected, diagnostic routines in the
radio would set rear speaker faults. If rear speakers are added, they must be enabled by
accessing the Loudspeaker Setting screen in Engineering Mode menu in the radio.
Page 1 of 14
2016 & 2017 PROMASTER REAR SPEAKER
INSTALLATION
NOTE: To eliminate the setting of fault codes, rear speakers should
only be enabled AFTER the rear speakers have been properly
connected to the vehicle elec trical system.
NOTE: Do not attempt to make any other changes to radio
configurat ions while in the Engineering Mode menu.
After the speakers are properly connected, perform the steps outlined on the following
pages to enable the speakers. Once the steps are correctly performed, the speaker fade
control will now be visible in the audio control menu of the radio and the rear speakers
will functi on.
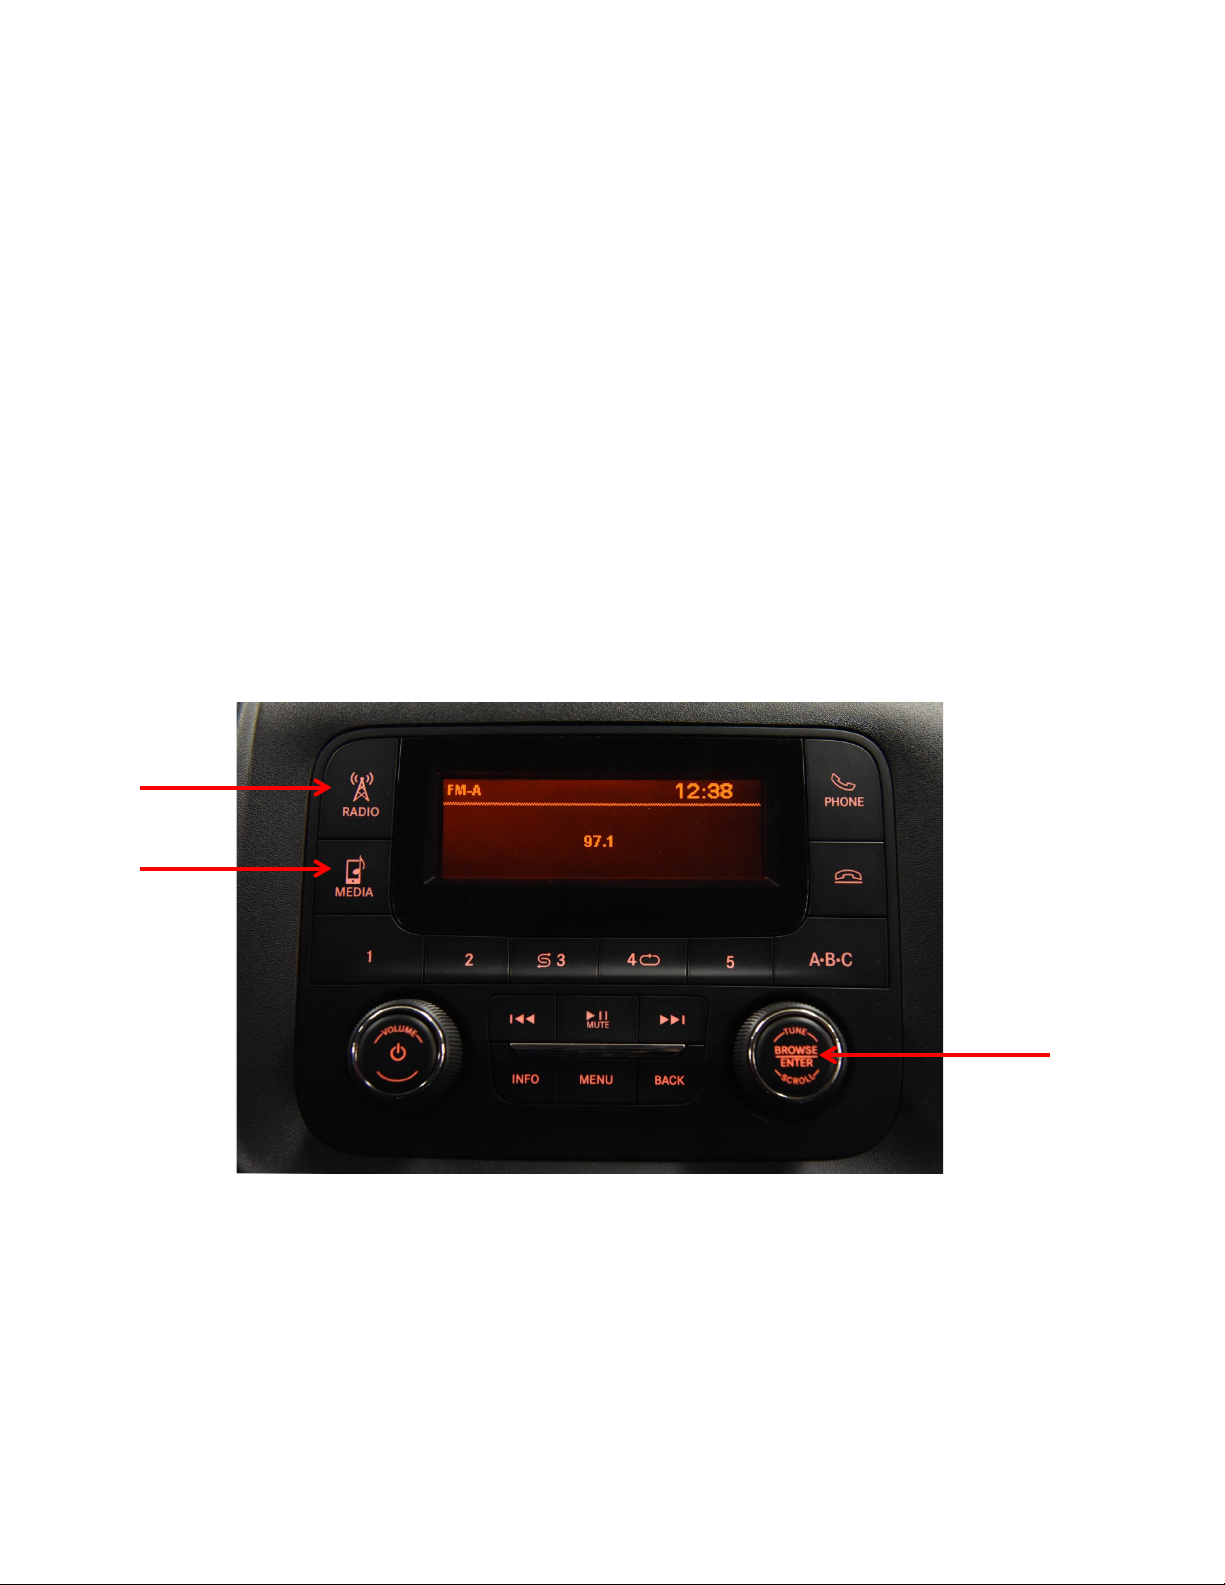
1. Simultaneously press and hold the RADIO, MEDIA and BROWSE/ENTER
buttons.
Page 2 of 14
2016 & 2017 PROMASTER REAR SPEAKER
INSTALLATION
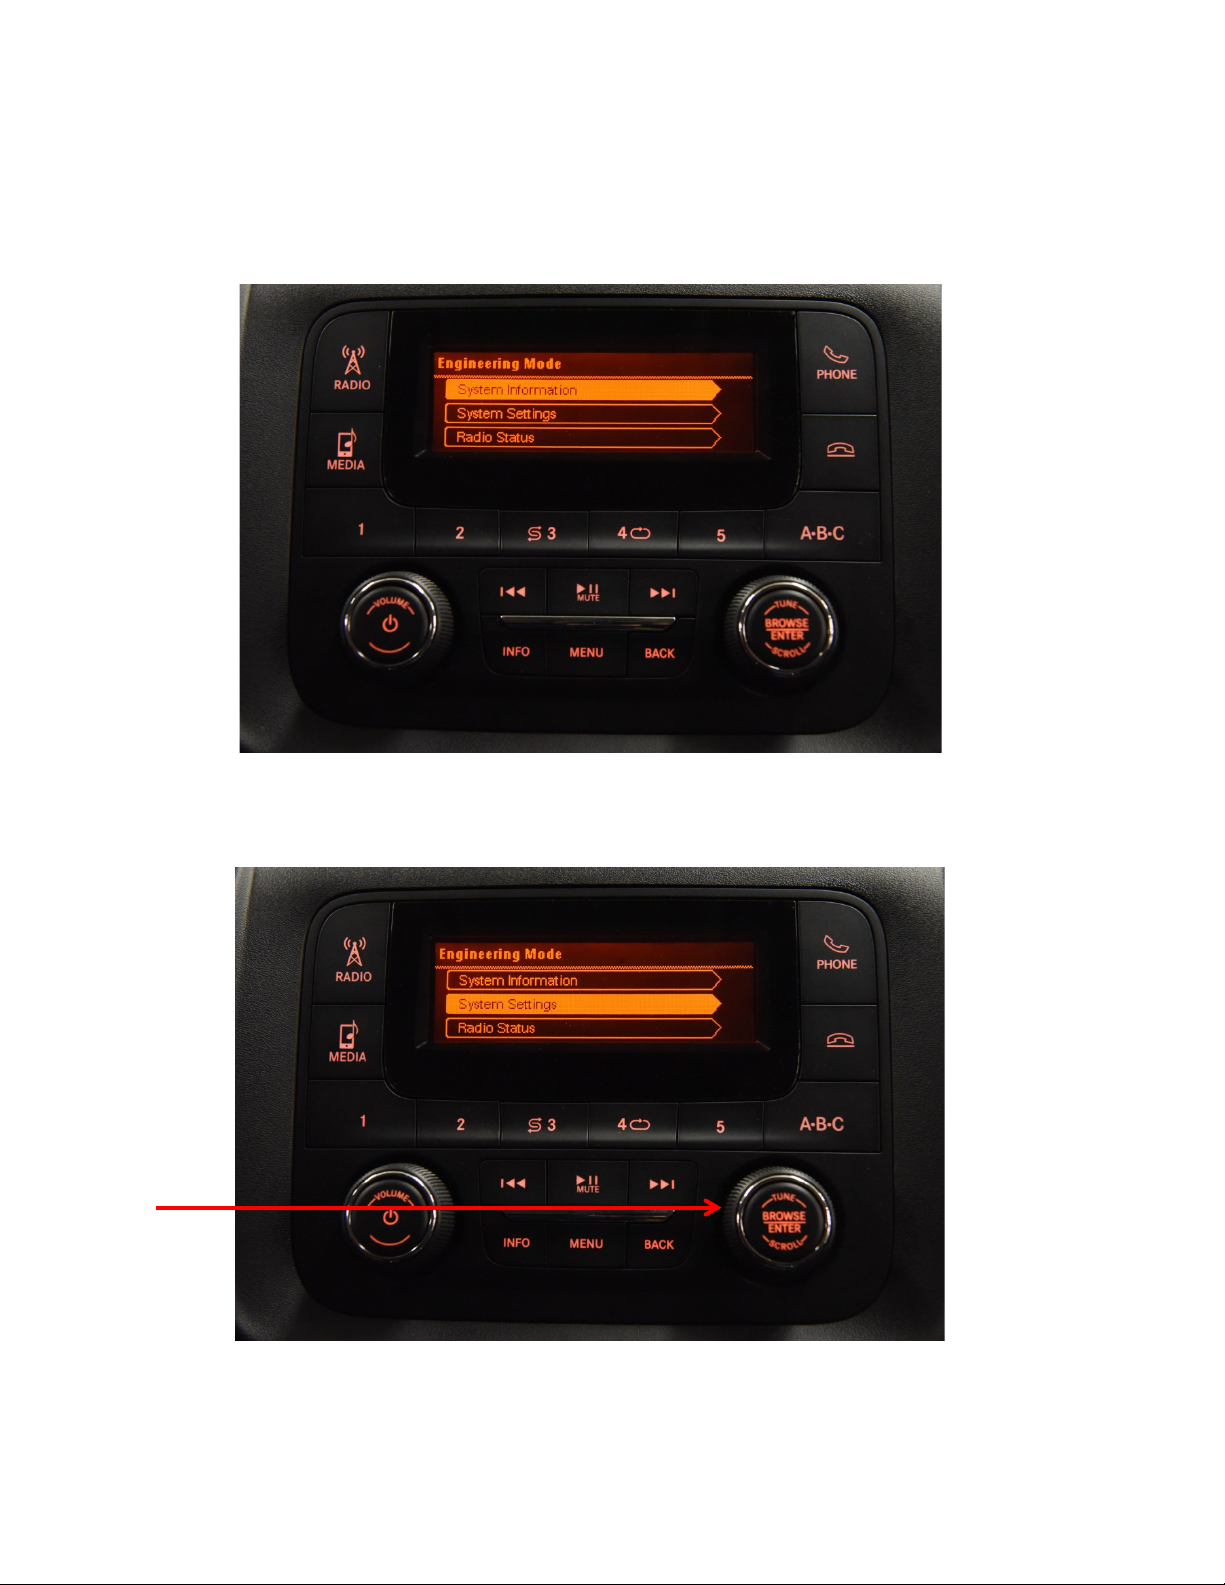
2. After approximately 6 seconds, the ENGINEERING MODE screen will
appear.
3. Use the “Tuning Dial” to scroll down an d highlight SYSTEM SETTINGS.
Page 3 of 14
2016 & 2017 PROMASTER REAR SPEAKER
INSTALLATION
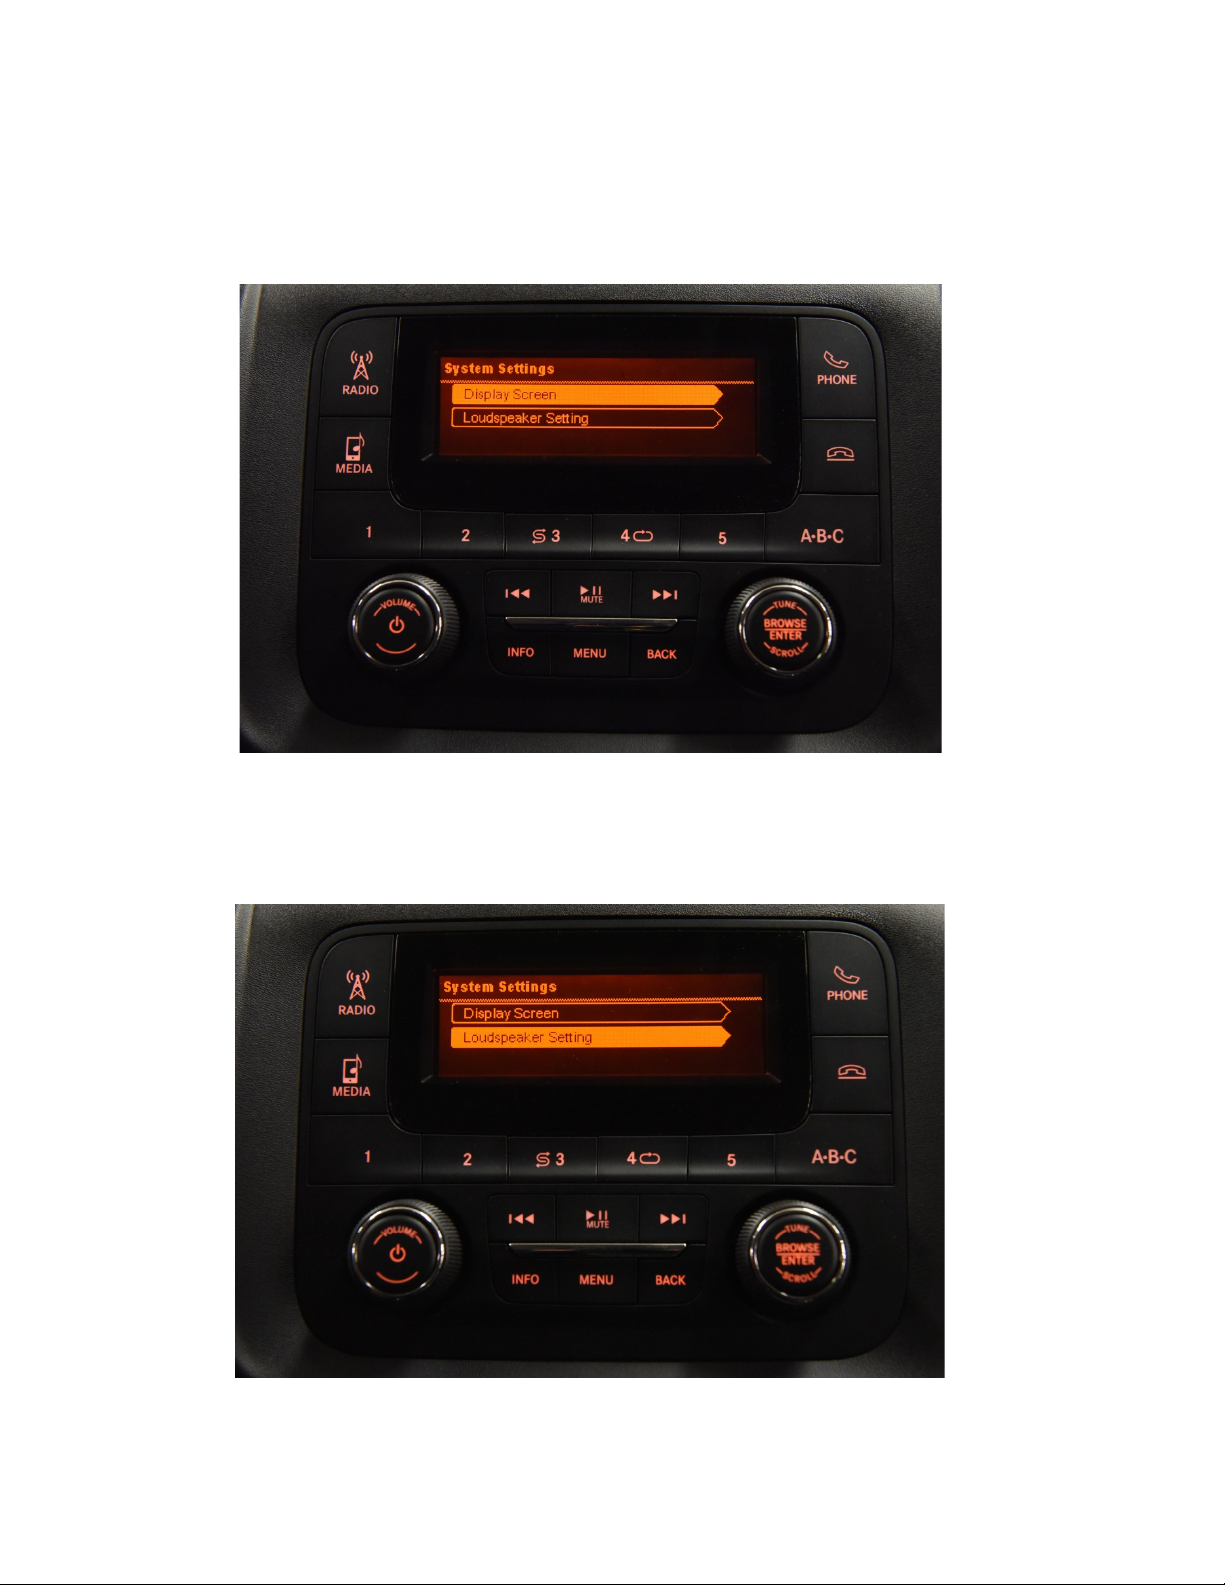
4. Press the BROWSE/ENTER button. The SYSTEM SETTINGS menu will
appear.
5. Use the “Tuning Dial” to scroll down and highlight LOUDSPEAKER
SETTINGS.
Page 4 of 14
2016 & 2017 PROMASTER REAR SPEAKER
INSTALLATION
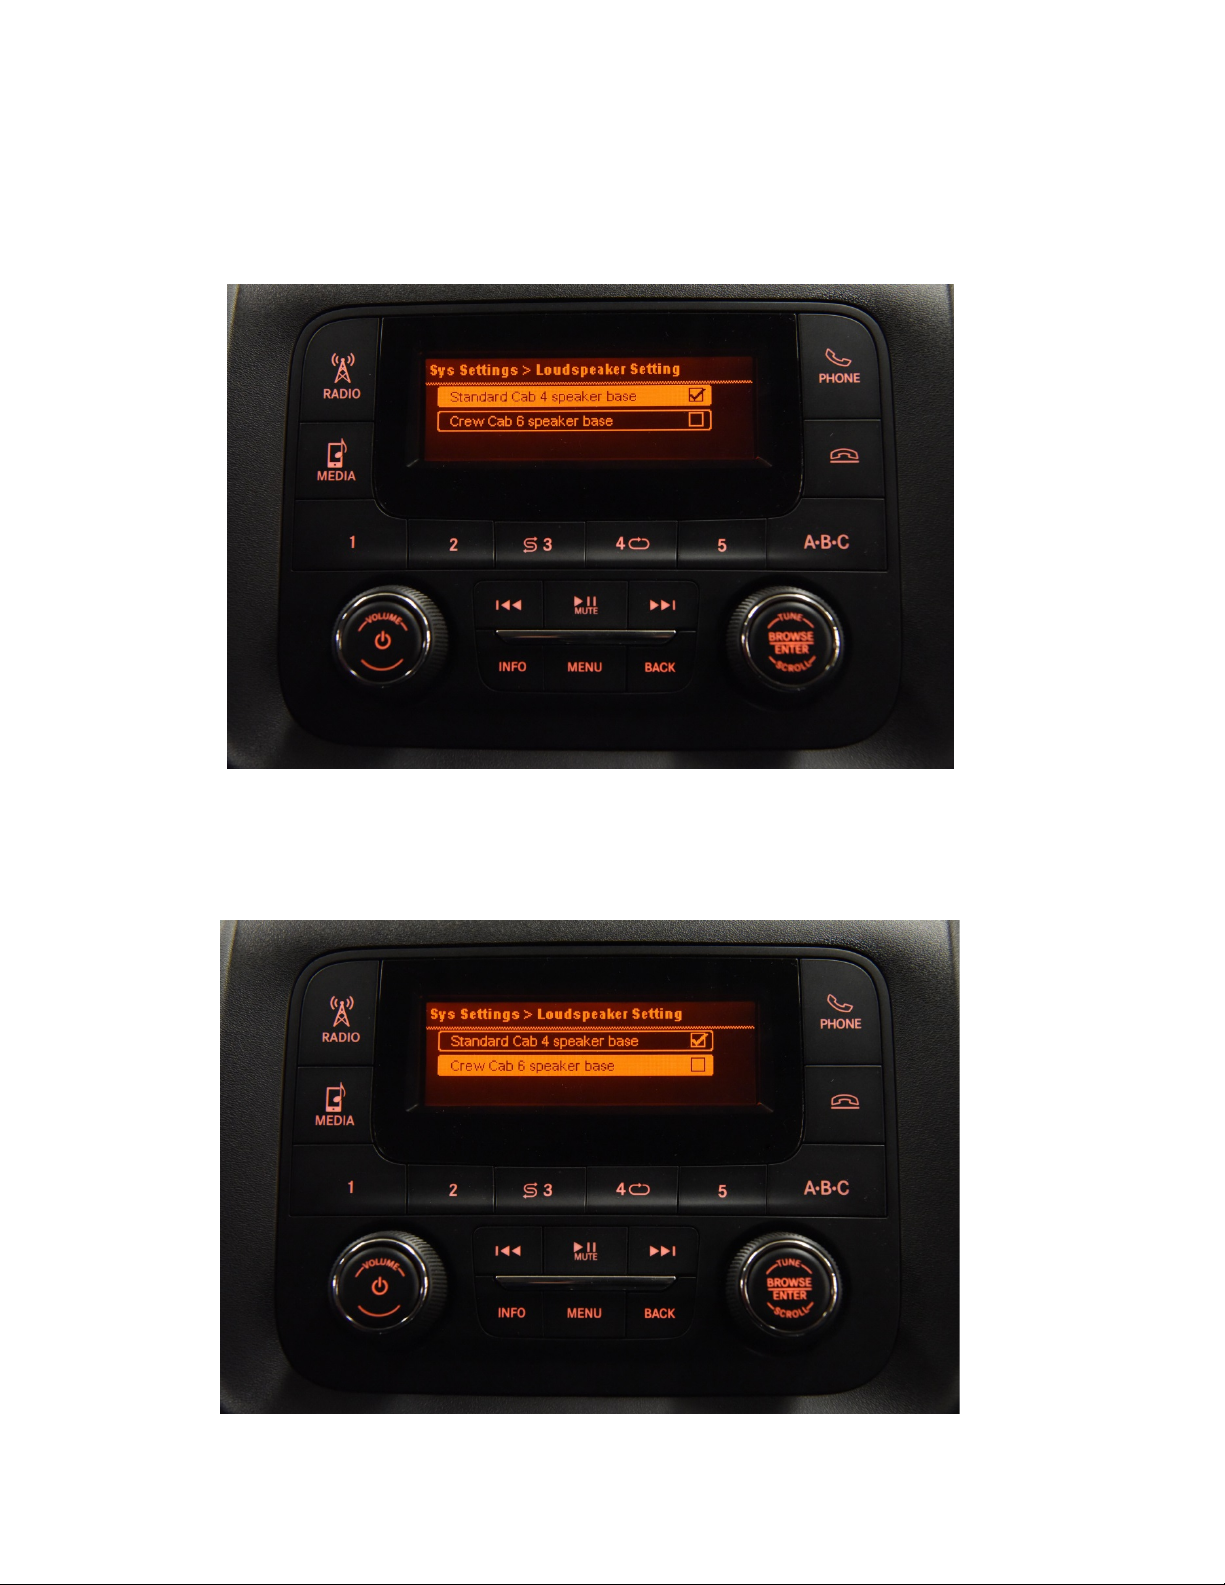
6. Press the BROWSE/ENTER button. The LOUDSPEAKER SETTING menu
will appear.
7. Use th e “Tuning Dial” to scroll down and highlight CREW CAB 6 SPEAKER
BASE.
Page 5 of 14
 Loading...