

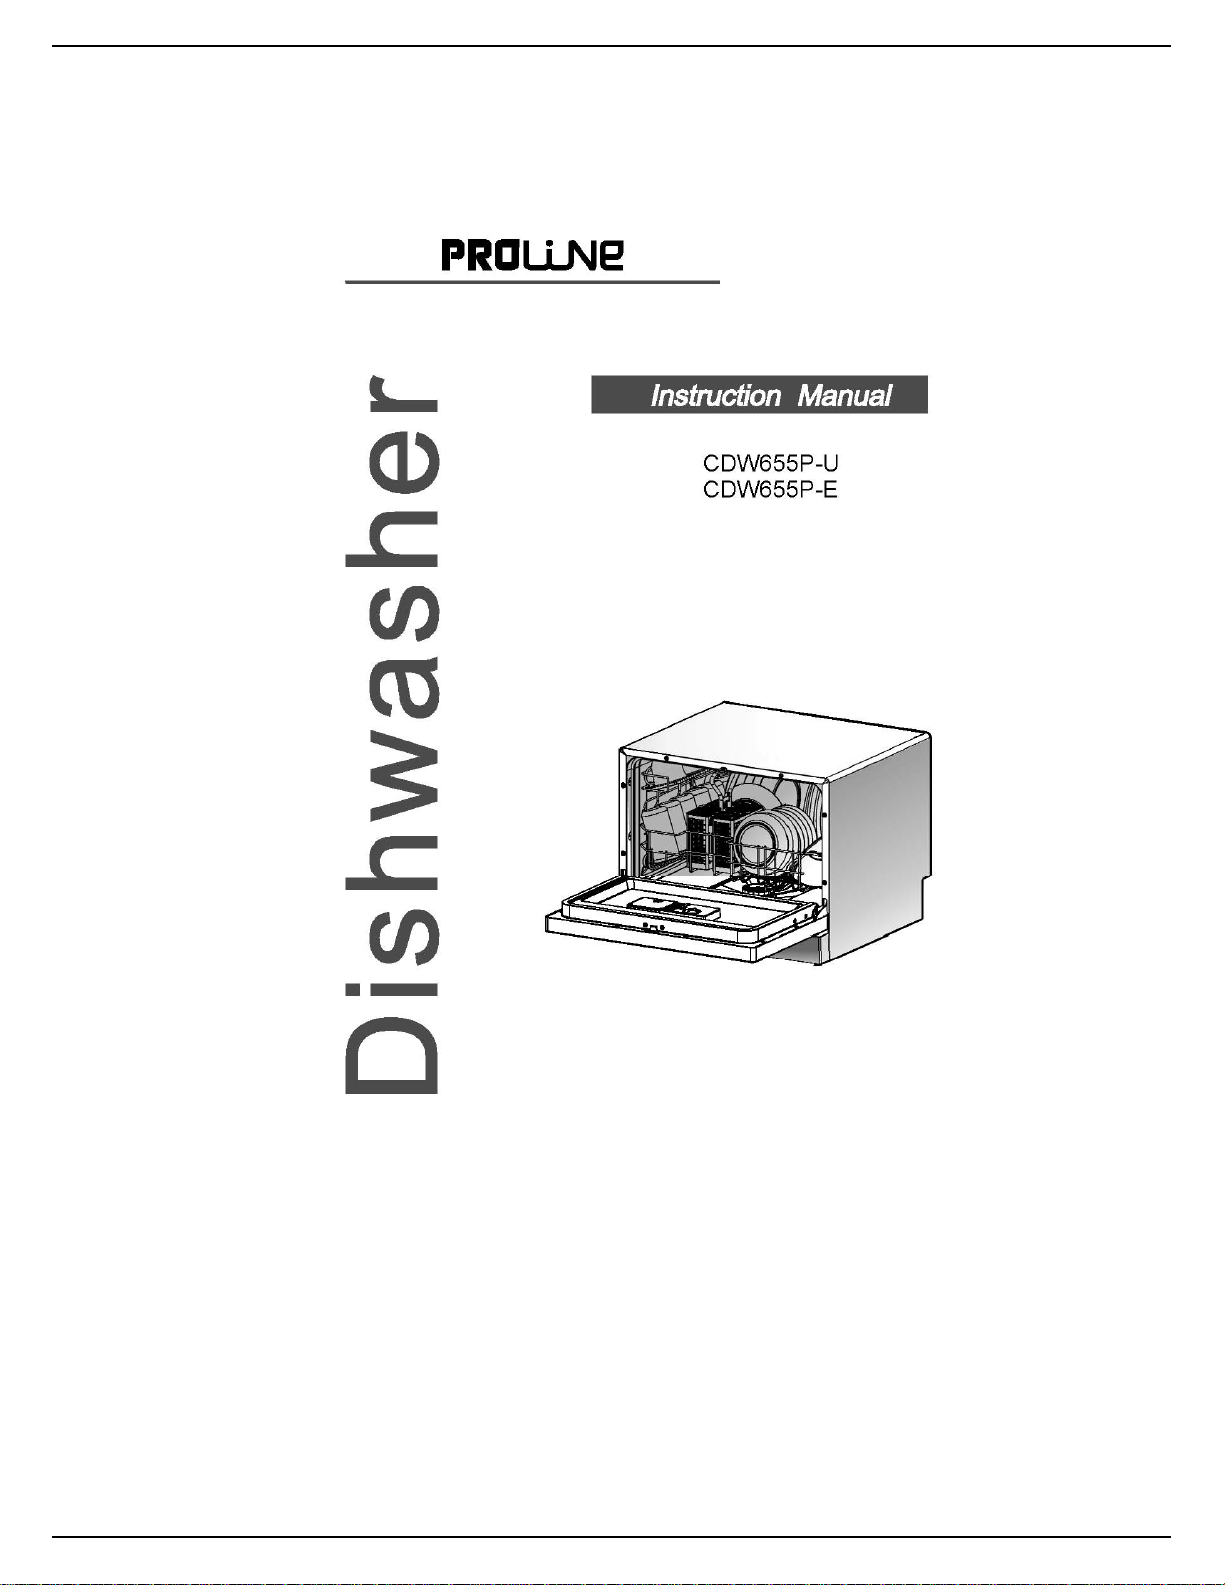
Page 1
Page 2

CONTENTS
ELECTRICAL CONNECTION (UK ONLY) .................................................................................... 2
IMPORTANT SAFETY INSTRUCTIONS ...................................................................................... 3
DESCRIPTION ........................................................................................................................ 4
INSTALLATION INSTRUCTIONS ............................................................................................... 5
Levelling ............................................................................................................................ 5
Water Pressure .................................................................................................................. 5
Connecting Your Dishwasher ............................................................................................. 5
Disconnecting Your Dishwasher ......................................................................................... 6
OPERATION ........................................................................................................................... 6
General Warnings and Recommendations ......................................................................... 6
Loading the Basket ............................................................................................................ 7
Using the Water Softener ................................................................................................... 9
Using the Rinsing Aid and Detergent Dispensers ............................................................... 9
Washing Programmes ..................................................................................................... 12
Operating Sequence ........................................................................................................ 12
MAINTENANCE AND CLEANING ........................................................................................... 14
Cleaning the Filter Unit .................................................................................................... 14
Cleaning the Door ............................................................................................................ 14
Cleaning the Spray Arm ................................................................................................... 15
Frost Precautions ............................................................................................................. 15
TROUBLESHOOTING ............................................................................................................ 15
SPECIFICATIONS .................................................................................................................. 17
1
Page 3
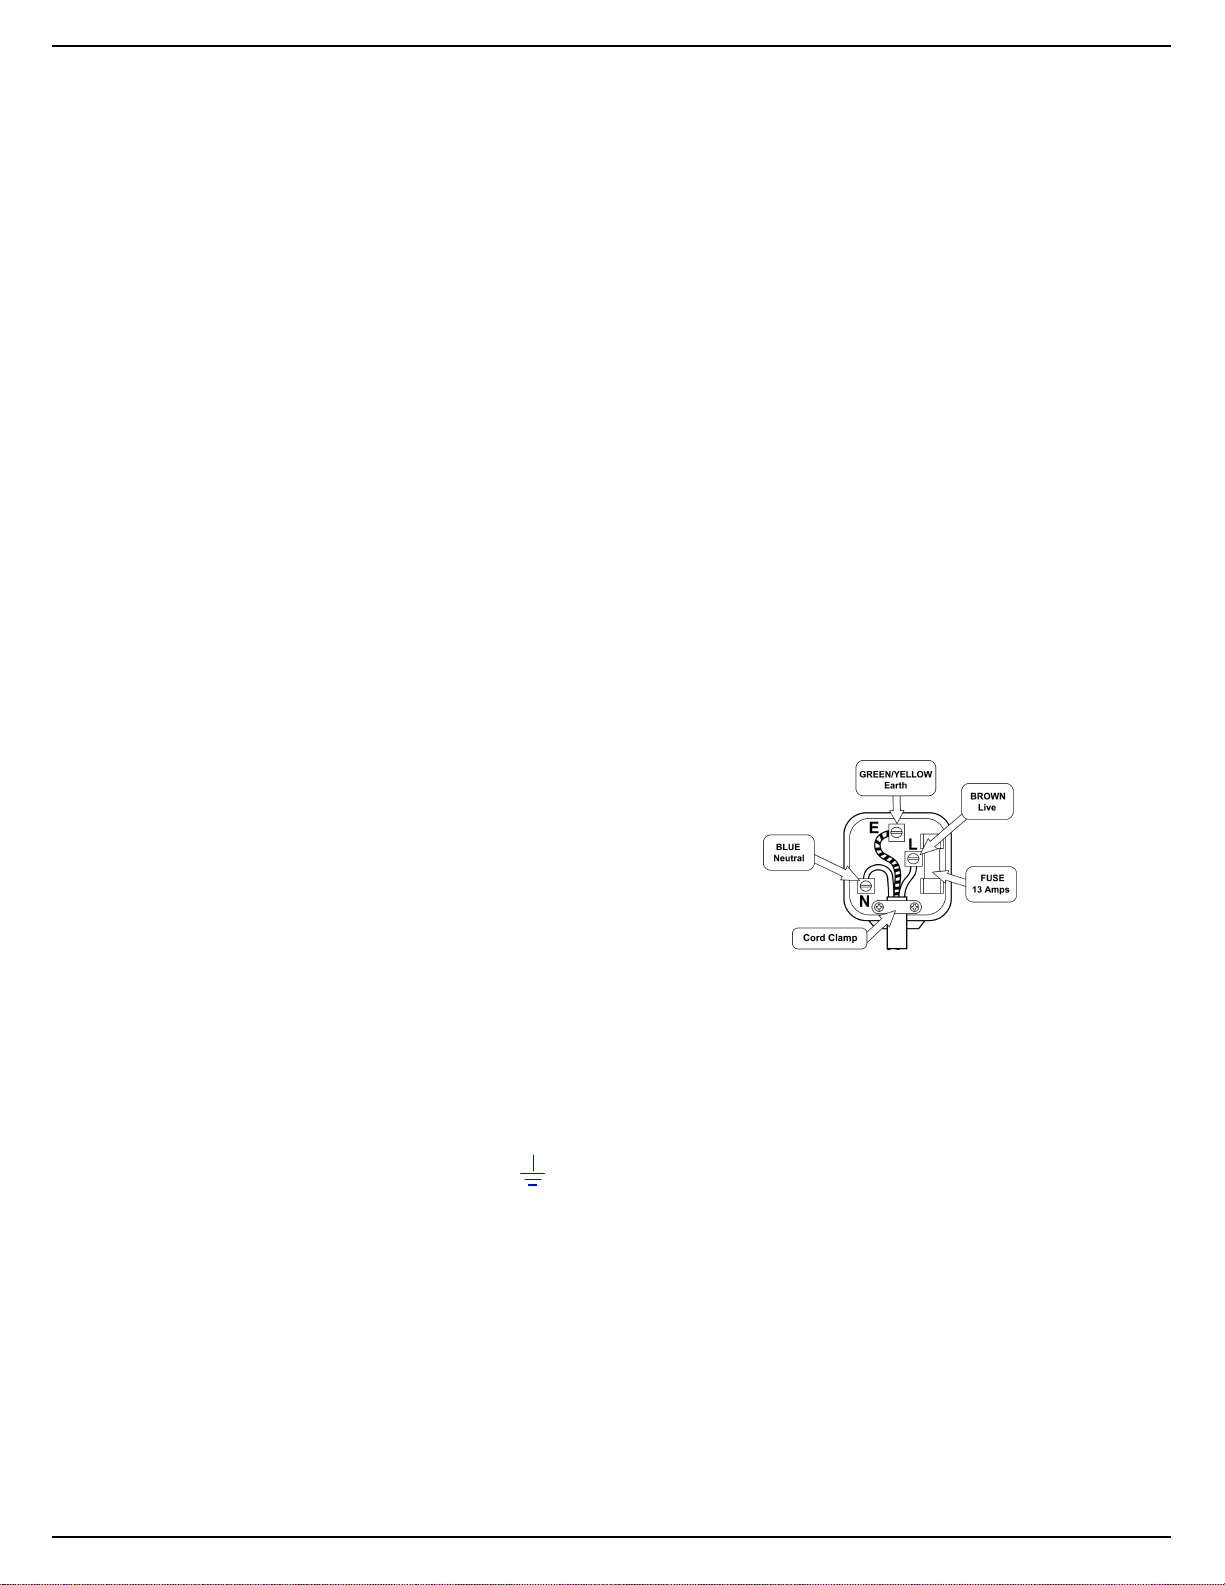
ELECTRICAL CONNECTION (UK ONLY)
For your safety please read the following information.
Warning: This appliance must be earthed.
The appliance must be connected to a 220-240 volts 50 cycle AC supply by means of a three
pin socket, suitably earthed.
The appliance is supplied with a rewireable 13 amp 3 pin mains plug fitted with a 13 amp fuse.
Should the fuse require replacement, it must be replaced with a fuse rated at 13-amp and
approved to BS1362.
If the mains plug is unsuitable for the socket outlet in your home or is removed for any other
reason, then the cut off plug should be disposed of safely to prevent the hazard of electric
shock.
There is a danger of electric shock if the cut off plug is inserted into any 13 amp socket outlet.
How to wire a 13 amp plug
Important
The wires in the mains lead on this appliance are coloured
in accordance with the following code:
Green and Yellow - Earth
Blue – Neutral
Brown – Live
As the colours may not correspond with the markings identifying the terminals in your plug
proceed as follows.
The blue wire must be connected to the terminal marked N or coloured black.
The brown wire must be connected to the terminal marked L or coloured red.
The green and yellow wire must be connected to the terminal in the plug which is marked with
the letter E or with the earth symbol or coloured green and yellow.
The mains lead MUST be secured under the cord clamp.
2
Page 4

IMPORTANT SAFETY INSTRUCTIONS
This appliance must be earthed.
Improper connection of the grounding conductor can result in the risk of an electric shock.
Do not modify the plug provided with the appliance if it does not fit the outlet.
Have a proper outlet installed by a qualified electrician.
This dishwasher must be plugged into a separate mains socket that is earthed and
remains accessible at all times, even after installation.
The dishwasher must only be used for the washing of household dishes and cooking
utensils.
If the supply cord is damaged, it must be replaced by the manufacturer, its service agent
or similarly qualified persons in order to avoid a hazard.
Never disconnect the appliance from the mains socket by pulling on the mains cord,
always grasp the plug.
Never touch the dishwasher when barefoot or with wet hands or feet.
Do not open the door during a wash cycle as hot steam and water may be ejected.
Only touch the heating elements when the mains plug is pulled from the outlet and the unit
has not been operated for 30 minutes.
The openings must not be obstructed by a carpet.
Do not overload the dishwasher; the maximum number of place settings is 6.
The door should not be left in the open position since this could present a tripping hazard.
The inlet water pressure must be no lower than 0.04 MPa and no higher than 1 MPa.
Connect to the water mains using new hose sets only; do not re-use old hose sets.
Check plastic items are dishwasher safe. You must prevent them coming into contact with
the heating elements during a washing cycle.
This appliance is intended for domestic / household use only, and should not be used for
any other purpose. Any other use may invalidate the warranty and might be dangerous.
Dishwasher detergent is strongly alkaline! Take care to keep it out of reach of children.
If you are discarding an old appliance with a lock / latch fitted to the door, ensure that it is
in a disabled condition to avoid the entrapment of children when playing.
This appliance is intended to be used in household and similar applications such as:
-Staff kitchen areas in shops, offices and other working environments;
-Farm houses;
-By clients in hotels, motels and other residential type environments;
-Bed and breakfast type environments.
WARNING: Knives and other utensils with sharp points must be loaded in the basket with their
points down or placed in a horizontal position.
3
Page 5
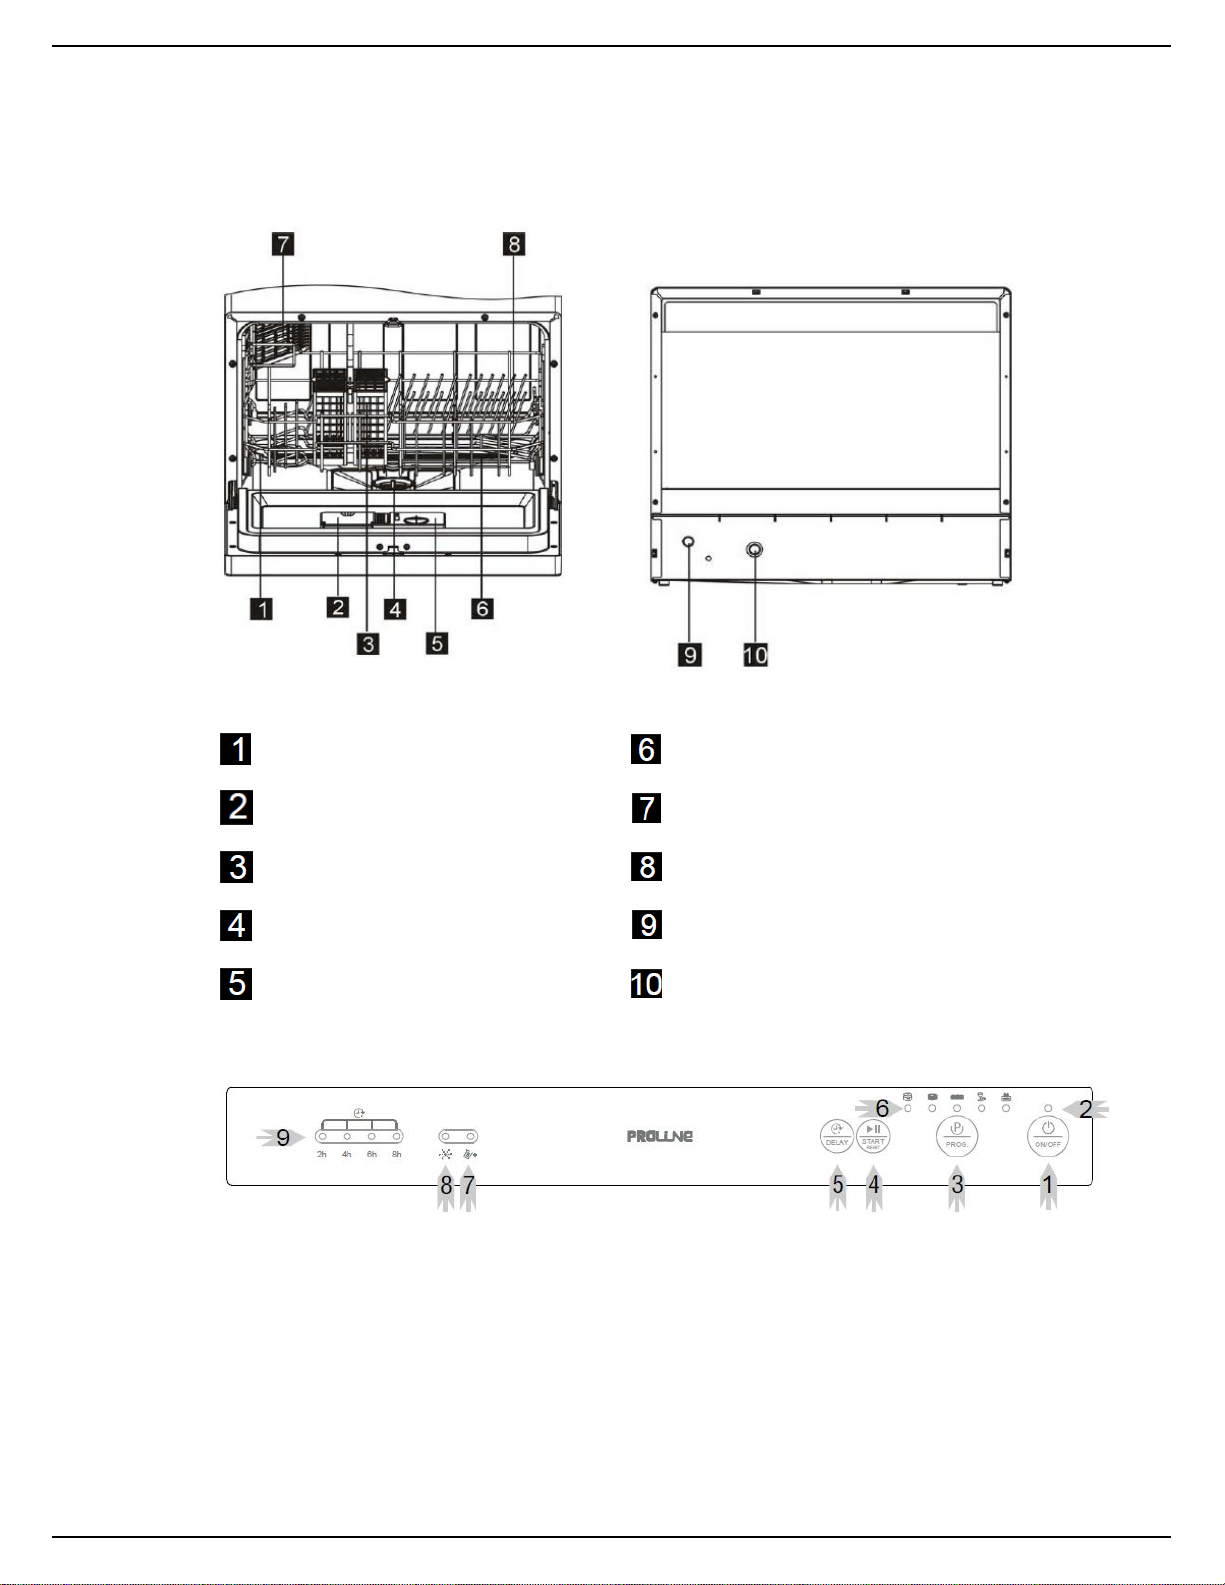
DESCRIPTION
Front View Rear View
Salt container
Detergent dispenser
Cutlery basket
Filter assembly
Rinse aid dispenser
Control Panel
1 ON/OFF button
2 Power indicator light
3 Programme button
4 Start/Reset button
5 Delay button
Spray arm
Cup shelf
Basket
Drain connector
Water inlet valve
6 Programme indicator light
7 Salt indicator light
8 Rinse aid indicator light
9 Delay time indicator light
4
Page 6

INSTALLATION INSTRUCTIONS
Your dishwasher can be installed in various locations in your kitchen as long as there is space and
accessibility to connect your dishwasher to the water/drainage and electrical supply.
NOTE: The plug must be accessible at all times.
Levelling
Place the dishwasher on an even, stable surface.
It is very important that the dishwasher is perfectly levelled in order to avoid the dishwasher to
malfunction. You can level the dishwasher by adjusting the base feet.
Water Pressure
For best operating results, incoming water pressure should be between 0.04 MPa and 1MPa.
Incoming water supply for the dishwasher is controlled by a ‘pressure switch’, so if the household
water pressure is low, dishwasher fill time will increase or may not operate.
Connecting Your Dishwasher
Inlet hose Drain hose
Connect the other end (bent connector) to the water inlet valve at the back of the dishwasher cabinet.
Do not over-tighten to avoid damage to threads.
Attach the drain hose to the wall using the plastic U-bend
fitting provided for this purpose. This end of the hose
should be dropped into a drainage standpipe, the
maximum height of which should be no more than 750mm
above the base of the dishwasher. To allow for an air gap
around the end of the drain hose, the diameter of the
standpipe should be at least 40 mm.
The water inlet hose from the machine terminates in a 3/4" female connector. The
water supply should therefore terminate in a similar male connector and should
have a stopcock close by in the pipe. It is recommended to connect the machine
to the cold water supply.
Connect the straight connector of the inlet hose to the water supply securely
ensuring that the washers are securely in place at both ends of the hose.
5
Page 7

Connect the other end of the drain hose (L-shaped) to the drain connector at the back of dishwasher
cabinet. Tighten the drain hose end on to the drain connector using the metal clip included in the
package.
If you so wish, you may connect the water inlet hose on to the kitchen sink tap. You must obtain
correct fittings/adapters to match the inlet hose connectors to ensure secure connection. However,
permanent plumbing is recommended.
If leaks are located, immediately shut the water supply and check the hose connections fully.
Re-tighten the connections if necessary.
If for any reason you are unable to stop the leak yourself please seek advice from a qualified plumber.
Disconnecting Your Dishwasher
If you need to disconnect your dishwasher, follow the procedure below.
Turn off the dishwasher by pressing ON/OFF.
Close the water supply at the stopcock.
Disconnect the power cord.
Disconnect the inlet hose assembly from the water supply.
Appliances that are to be discarded must be made unusable. Remove the plug, remove cable and
make the door lock and latch unusable.
Once you open the water supply line, (even if it is closed immediately thereafter) the water
inlet hose will be pressurised.
OPERATION
Your dishwasher cleans by spraying a mixture of clean water and detergent (under pressure) against
the soiled surface of dishes. The water is pumped through a rotating spray arm, drained through a
filter removing food and soiled particles and pumped back through the spray arm.
Soiled water is pumped out and replaced with clean water at the end of each cycle (the number of
times depends on the cycle being used).
NOTE:
Hard Water conditions will adversely affect wash ability performance of your dishwasher. Hard water
conditions will also contribute to “Lime” (white film substance) deposits and/or “Scaling” on the
stainless steel surface of the dishwasher tub and heater element located in the sump underneath the
removable filter screen.
To assist in minimising these conditions, it is recommended to periodically operate/rinse the inside of
the dishwasher (empty) using 1 cup of white vinegar (at least once a week).
General Warnings and Recommendations
Before using the dishwasher for the first time, it is advisable to read the following recommendations
concerning dish types to be washed and their loading.
6
Page 8

Before loading the dishes into the baskets it is necessary to:
Remove coarse food remains, e.g. bones, which may clog the filter or damage the wash pump.
Soak any pots or pans with burnt-on food remains on the bottom then load them into the basket.
There is no need to pre-wash the dishes under running water before loading them into the basket.
WARNING:
Make sure that the dishes are securely in place so that they cannot tip over or obstruct the rotation
of the spray arm during the washing cycle.
Containers such as cups, bowls, glasses and pots should always be loaded with the opening facing
downwards and with any cavities at an angle, to allow the water to drain out.
Do not stack dishes.
Do not place glasses too close together because they may knock against each other and break.
Make sure that the items being washed are dishwasher-safe.
Items which are not dishwasher-safe:
Wooden dishes, pots or pans
Handcrafted items
Plastic dishes (except when marked dishwasher-safe)
Dishes and objects in copper, tin, zinc or brass
Aluminium dishes
Silverware
Glass and crystal
Decorated items
Loading the Basket
The dishwasher is designed to receive a standard “6 piece” plate setting consisting of the following:
7
Page 9

To make full use of the space in the basket when large dishes are loaded, the basket has tilting plate
supports which can be stowed horizontally.
Cutlery basket
The cutlery should be arranged in an order inside the basket, with the handles pointing downwards.
Knives and forks should be placed with handles up for safety.
Take care during loading to avoid injury from the knife blades.
Make sure that the sharp utensils do not protrude from the basket.
8
Page 10

Using the Water Softener
The hardness of the water varies from place to place. If hard water is used in the dishwasher,
deposits will be formed on the utensils. This appliance is equipped with a water softener which uses a
salt specifically designed to eliminate the minerals from the water.
CAUTION:
Only use salt specially formulated for domestic dishwashers.
Do not use table salt as it contains insoluble substances which may damage the water softening
system.
Fill the salt container before starting the washing program. In this way, the excess saline
solution will be immediately removed by the water; the prolonged presence of salt water inside the
tank may lead to corrosion.
If you plan to use dishwasher tablets for your washing needs, then you do not require to use salt or
rinse agent but please note that the salt indicator light will remain illuminated on the control panel
continuously this is quite normal and will not affect the operation of your dishwasher.
Filling with salt
Unscrew the cap from the salt container by turning it anticlockwise.
Before first wash, fill the salt container with 1 litre of water.
Place the supplied funnel so the end fits into the opening of the salt container. Load
about 1kg of salt into the salt container.
Screw the cap back clockwise.
Using the Rinsing Aid and Detergent Dispensers
The rinse aid helps the dishes dry faster and prevents the formation of scale deposits and staining. It
is automatically added to the water during the final rinse cycle.
The detergent and rinse aid dispensers are located on the inner
part of the door: the detergent dispenser is on the left, and the
rinse aid dispenser is on the right.
9
Page 11

Adding the rinse aid
Rotate the dispenser cap anticlockwise and remove it.
Add the rinse aid until the container is full (approximately 110ml). The optical level
indicator on the side of the cap should be completely obscured.
Replace the cap and turn it clockwise.
NOTE: Refill the rinse aid when the optical level indicator becomes clear again, or when the
rinse aid warning light comes on.
Adjusting the rinse aid dispenser setting
The factory setting for the dishwasher is 4 and there are 6 settings for your choice.
The amount of rinse aid dispensed is proportional to the selector position.
1. To adjust the rinse aid setting, rotate the dispenser cap
anticlockwise and remove it.
2. Use a screwdriver to rotate the rinse aid selector to the
desired position.
3. Replace the cap by turning it clockwise.
NOTE: The amount of rinse aid must be increased if the washed dishes appear dull or feature
circular stains. If the dishes are sticky or have white streaks, it is necessary to reduce the
rinse aid setting.
10
Page 12

Adding the detergent
To open the detergent dispenser cap, gently press the release button.
Add the detergent and close the cap carefully.
A detergent for main wash cycle
B detergent for pre-wash cycle
NOTE: Use only detergent specifically formulated for dishwashers. For optimal washing
results it is important to sue a good quality detergent.
11
Page 13

Washing Programmes
Degree of soil
0.94
11
Normal soil
8.4
170
8.4
**Quick wash
30
later in the day
14
Programme
Heavy soil Pre-wash (50℃)
Intensive
Normal
Light soil Pre-wash
* Eco
Light soil Wash (40℃)
To rinse dishes
Soak
Cycle Description Recommended
quantity of detergent
pre-wash / main wash
3 g / 15 g
Wash (70℃)
Rinse
Rinse
Rinse(70℃)
Drying
Pre-wash
Wash (60℃)
Rinse
Rinse (70℃)
Drying
Wash (55℃)
Rinse
Rinse (70℃)
Drying
Rinse
Rinse
Pre-wash /
(or 3 in 1)
3 g / 15 g
(or 3 in 1)
3 g / 15 g
(or 3 in 1)
15 g
Washing
time
(min.)
145
125 0.7
Energy
(Kwh)
0.63
0.3
0.01 2.1
* Testing programme for EN 50242
** This is a special programme for quick washing a full load of lightly soiled dishes,
glasses and crockery (except pots) so that you may re-use them promptly.
NOTE: The washing time may vary according to the incoming water temperature and the
environmental temperature.
Operating Sequence
1. Check the filters.
Ensure they are clean and properly positioned. See “Maintenance and cleaning” section.
2. Check that there is rinse aid and salt.
3. Load the dishes.
Ensure that the spray arm can rotate freely.
4. Add the required amount of detergent into the dispenser according to the “Washing Programmes”
chart.
Water
(L)
6.0 No
Rinse
Aid
needed?
Yes
Yes
Yes
12
Page 14

5. Close the dishwasher door securely.
6. Press the ON/OFF button to switch the dishwasher on.
The power indicator light will come on.
7. Repeatedly press the PROG. button to select the desired programme.
The corresponding programme indicator light will come on.
8. Press the START/RESET button to start the programme.
The corresponding programme indicator light will flash.
To interrupt the washing programme, press the button again. The corresponding programme
indicator light will stop flashing.
9. At the end of the washing programme, the dishwasher will buzz and automatically stop.
10. Switch the dishwasher off by pressing the ON/OFF button.
11. Wait around 15 minutes before you open the dishwasher’s door; in this way you will avoid burning
yourself.
12. Unload the dishes.
The washing cycle will not start if the dishwasher door is left open or not
properly closed.
Do not open the door when the dishwasher is working since hot water may be ejected
which could cause scalding.
To change a programme
1. Press the START/RESET button for some seconds until the programme indicator light goes out.
2. Repeatedly press the PROG. button to select a new programme.
3. Press the START/RESET button to start the new programme.
To delay a programme
1. After the washing programme is selected, press the DELAY button repeatedly to select the
desired delay time.
Available delay time: 2hr, 4hr, 6hr and 8hr.
The selected delay time indicator light will come on.
2. Press the START/RESET button to confirm.
The selected delay time indicator light will flash.
3. The dishwasher will start operation after the selected delay time has elapsed.
13
Page 15

MAINTENANCE AND CLEANING
Always unplug the unit from the mains before cleaning.
Do not use chemical solvents or strong detergents as these may damage the cosmetic finish.
Clean the outer surfaces and the tank of the dishwasher with a damp cloth.
Cleaning the Filter Unit
The filter unit consists of a main filter (1), micro filter (2) and central filter (3).
To disassemble the filters
Rotate the central filter and micro filter cartridge anticlockwise.
Remove them by lifting the cartridge.
Remove the main filter by lifting it.
Separate the central filter and micro filter by pulling them apart.
Rinse the filters under running water using a soft brush.
CAUTION: Never operate the dishwasher without the filters.
Cleaning the Door
Use a damp cloth to clean the edge around the door.
To avoid penetration of water into the door lock and electrical components, do not use a spray
cleaner.
14
Page 16

Cleaning the Spray Arm
The spray arm can be easily removed for periodic cleaning of the nozzles, to prevent possible
clogging.
To remove the spray arm, hold and raise it to release it from the tank.
Wash it under running water and carefully replace it in the seat, checking that the rotary movement
is in on way impeded.
Frost Precautions
Avoid placing the dishwasher in a location where the temperature is below 0℃. If this is unavoidable,
empty the dishwasher, close the door, disconnect the water inlet pipe and empty it.
TROUBLESHOOTING
Problem Possible Causes Solutions
Dishwasher will
not start.
Water not pumped
from dishwasher
Fuse blown, or the
circuit breaker
tripped
Power supply is not
turned on.
The door has not
been properly
closed.
Kink in drain hose Check drain hose.
Filter clogged Check the filter (see “Cleaning the Filter
Kitchen sink clogged Check kitchen sink to make sure it is draining
Replace fuse or reset circuit breaker.
Remove any other appliances sharing the
same circuit with the dishwasher.
Make sure the dishwasher is turned on and
the door is closed securely.
Make sure the power cord is properly plugged
into the wall socket.
Close the door securely.
Unit”).
well. If kitchen sink is not draining, you may
ask for a plumber.
15
Page 17

Suds in the tub Improper detergent Use only the detergent special for dishwasher
to avoid suds. If this occurs, open the door
and let the suds evaporate. Close the door
securely then start the soak wash cycle to
drain the water out. Repeat if necessary.
Spilled rinse aid Always wipe up rinse aid spills immediately.
Stained tub interior Detergent with
colourant is used.
White film over the
inside surface
There are rust
stains on the
cutlery.
The dishwasher is
noisy.
The dishes are not
clean.
Streaking and
staining on the
dishes
Hard water minerals To clean the interior, use a damp sponge with
The cutlery is not
corrosion resistant.
A programme is not
run after dishwasher
salt is added.
Traces of salt have
got into the wash
cycle.
Dishes are rattling
against each other.
The spray arm is
knocking against the
dishes.
The dishes have not
been arranged
properly.
The washing
programme selected
is too gentle.
Not enough
detergent has been
used or it is
unsuitable.
The spray arms are
clogged.
The filters are not
clean or not in the
correct position.
The rinse aid
dispenser setting is
not too high.
Make sure the detergent is the one without
colourant.
dishwasher detergent and wear rubber
gloves.
Never use any other cleaner than dishwasher
detergent for the risk of foaming or suds.
Always run the quick wash programme.
Add dishwasher salt with no crockery in the
dishwasher.
Refer to “Loading the Basket” to rearrange
the dishes.
Refer to “Loading the Basket”.
Select a more intensive programme. Refer to
“Washing Programmes”.
Use more detergent or change the detergent.
Rearrange the items so that the spray arm
can rotate freely.
Clean and/or position the filters correctly.
Adjust the rinse aid dispenser setting.
16
Page 18

The dishes are not
quite dry.
Improper loading Refer to “Loading the Basket”.
The rinse aid has run
out or too little is
being used.
Wrong programme
selection
Increase or refill the amount of rinse aid.
Choose a programme with long washing
time.
SPECIFICATIONS
Ratings: 220-240V~ 50Hz
1280W
Water pressure: 0.04 – 1 MPa
Max number of
place settings: 6
We apologise for any inconvenience caused by minor inconsistencies in these instructions, which
may occur as a result of product improvement and development.
Kesa Electricals © UK, HU1 3AU 05/ 01/ 2011
17
 Loading...