

Page 1
English ........................................................................................ 2
USA: 1-800-851-8900
Visit proctorsilex.com for delicious recipes and to register your product online!
Français ...................................................................................... 8
Canada : 1-800-267-2826
Consulter proctorsilex.ca pour les recettes délicieuses et pour
enregistrer votre produit !!
Español ...................................................................................... 14
En México: 01-800-71-16-100
Visite proctorsilex.com para recetas deliciosas y para
registro de su producto en línea.
Insert Pans
Plats amovibles
Cacerolas para buffet
840161001
READ BEFORE USE
À LIRE AVANT UTILISATION
LEA ANTES DE USAR
Le invitamos a leer cuidadosamente este
instructivo antes de usar su aparato.
Page 2
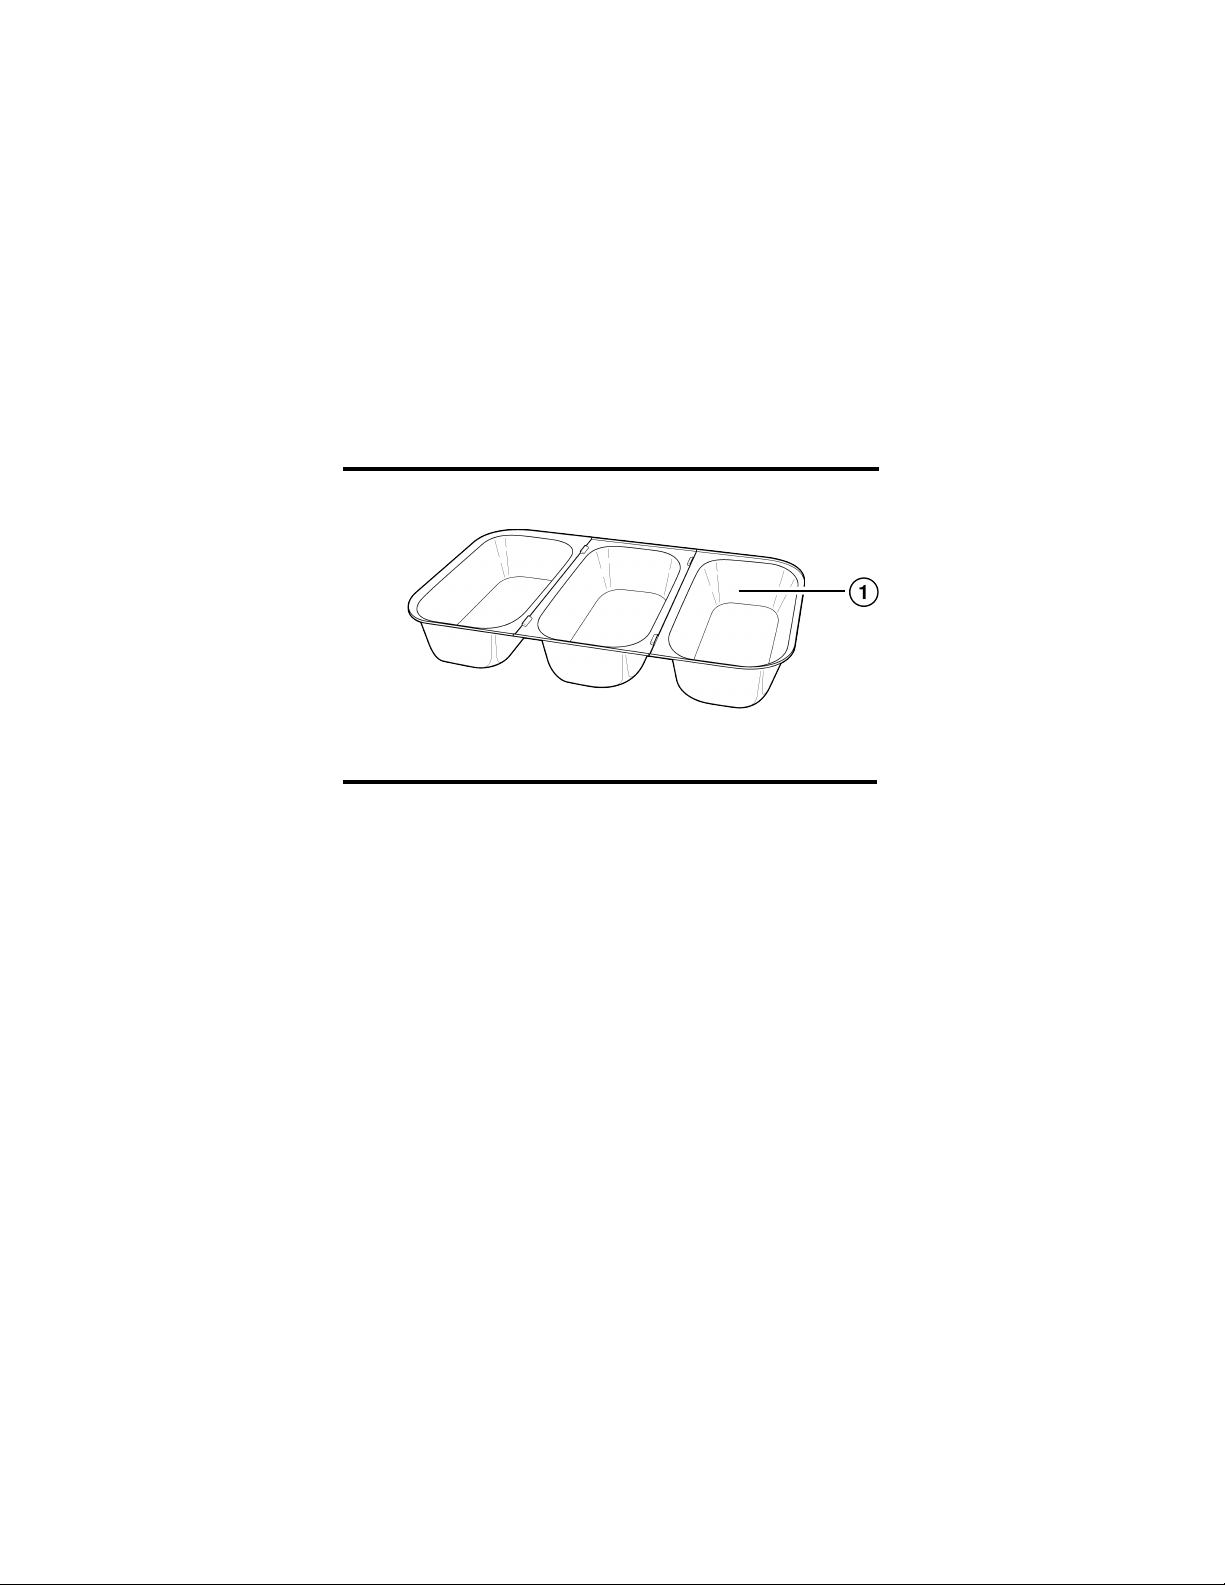
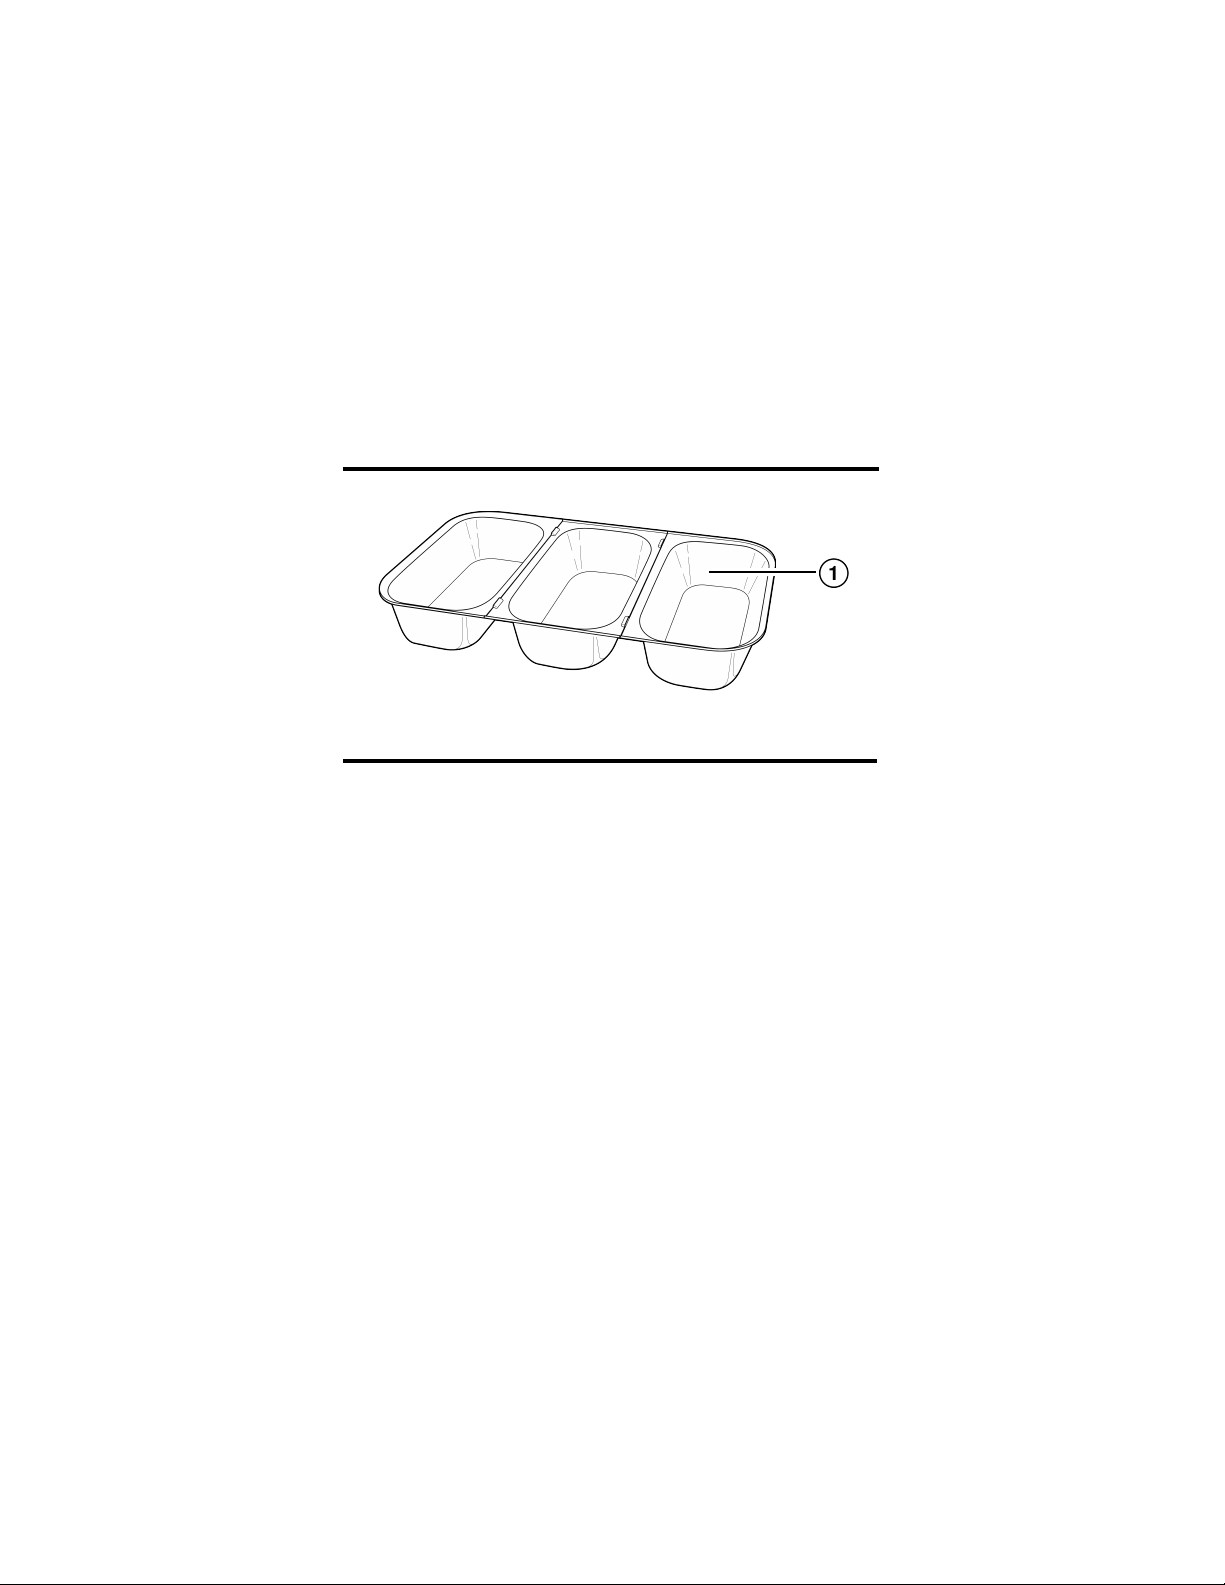
Parts and Features
1. Insert Pans (3)
2
Using Your Roaster Oven Insert Pans
1. Wash all pans with warm, soapy water.
2. Remove the roaster oven’s insert pan from the oven well
(if present). Fill the roaster oven well with 2 gallons (8 L) of
water.
3. Spray the insert pans with a non-stick cooking spray before
each use. Place the empty insert pans on well edge.
Ensure that pans are secure. The pans should not float.
4. Cover with roaster oven lid and plug roaster oven into outlet.
Preheat on 350ºF (180ºC) for 30 minutes or until water is
very hot.
5. Uncover and carefully place hot, cooked food in insert pans.
6. Cover and reduce heat setting to 200ºF (93ºC) to keep
foods warm. Adjust temperature as needed.
7. Stir food occasionally and keep food covered to maintain
temperature.
Page 3
3
Using Your Roaster Oven Insert Pans (cont.)
8. Carefully add more hot water if necessary.
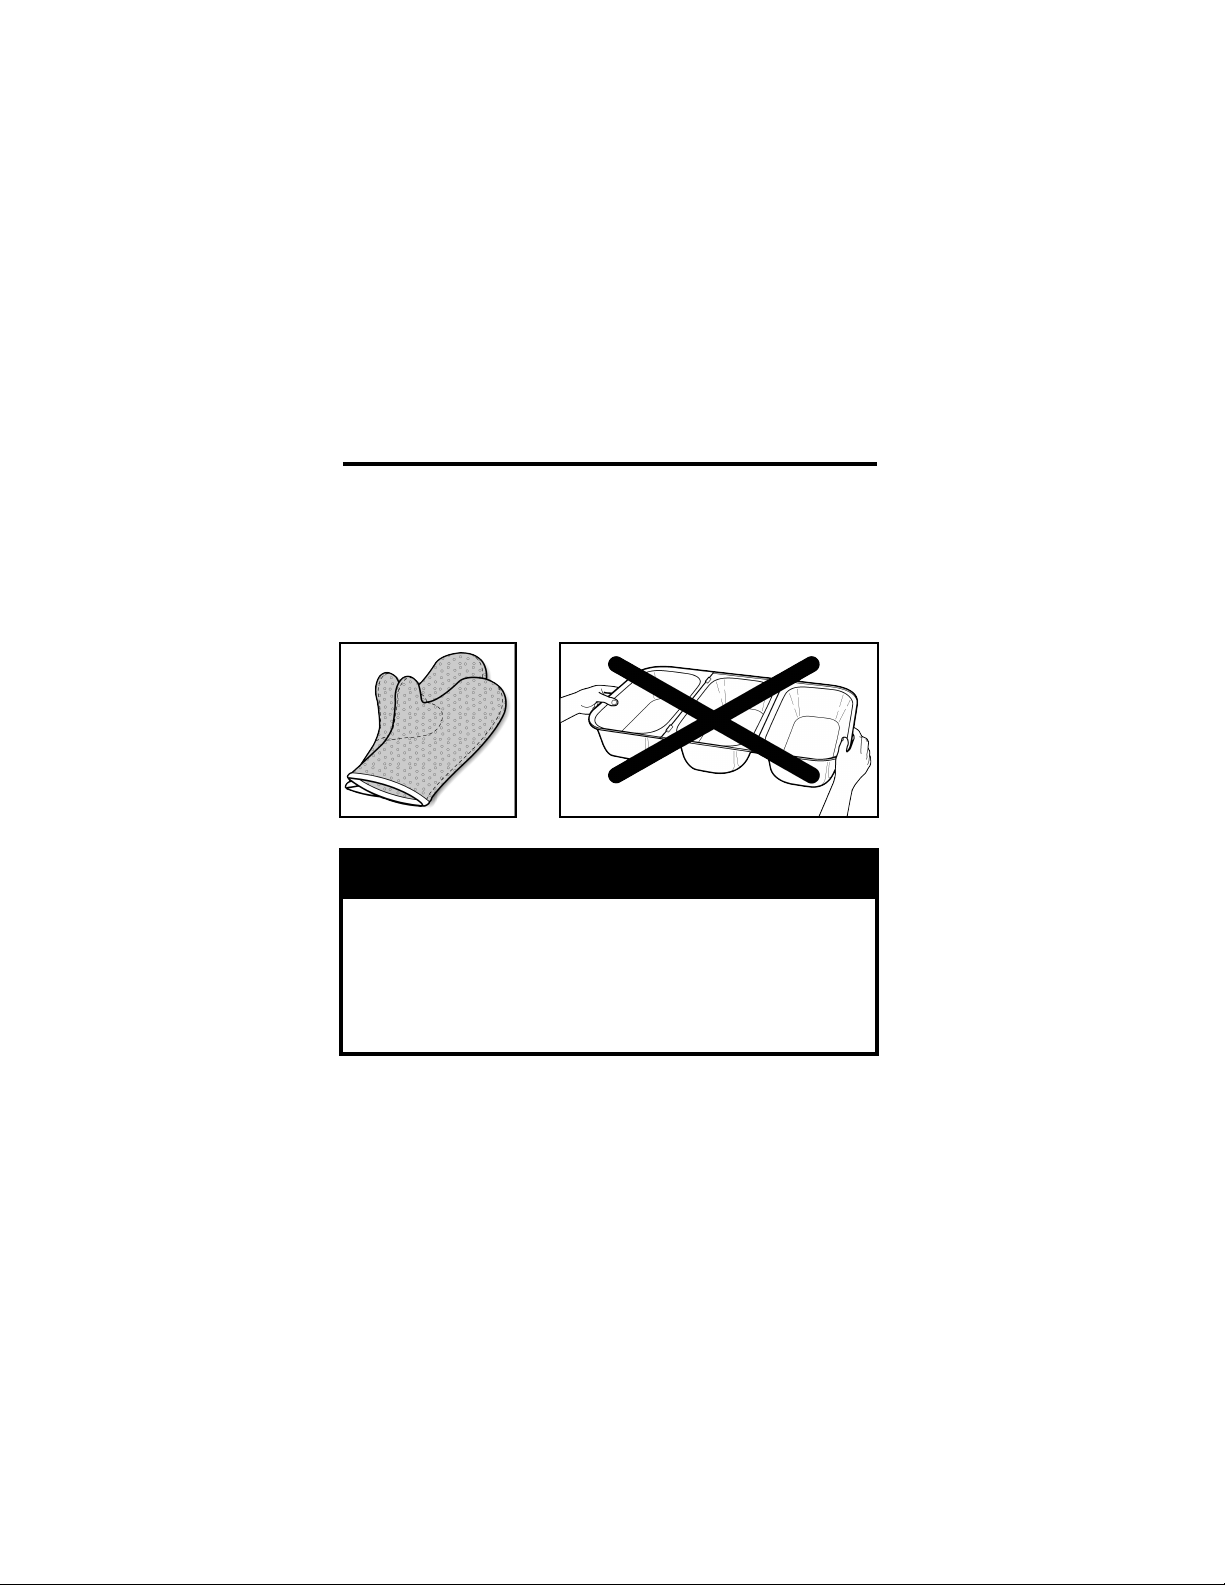
NOTES:
• Do not attempt to carry the three roaster oven insert pans
while they are interlocked.
• Do not carry the roaster oven insert pans without oven
mitts.
wCAUTION
Burn Hazard
• Escaping steam may cause burns.
• Use hot mitt to protect hand when opening hot
roaster oven.
• Insert pans are hot. Handle carefully.
Page 4
4
For Best Results
CAUTION: Internal food temperature should be kept at or
above 150ºF (66ºC).
• All insert pans must be in place when using the roaster
oven insert pans.
• Only use insert pans to keep cooked foods warm.
• Insert pans must not be used on a cooktop or in
a microwave oven. Insert pans may be used in a
conventional oven.
• When filling insert pans with foods that may stick, spray
the inside of the insert pans with non-stick cooking spray.
• If food is too dry, add broth or juice to help keep food
moist while warming.
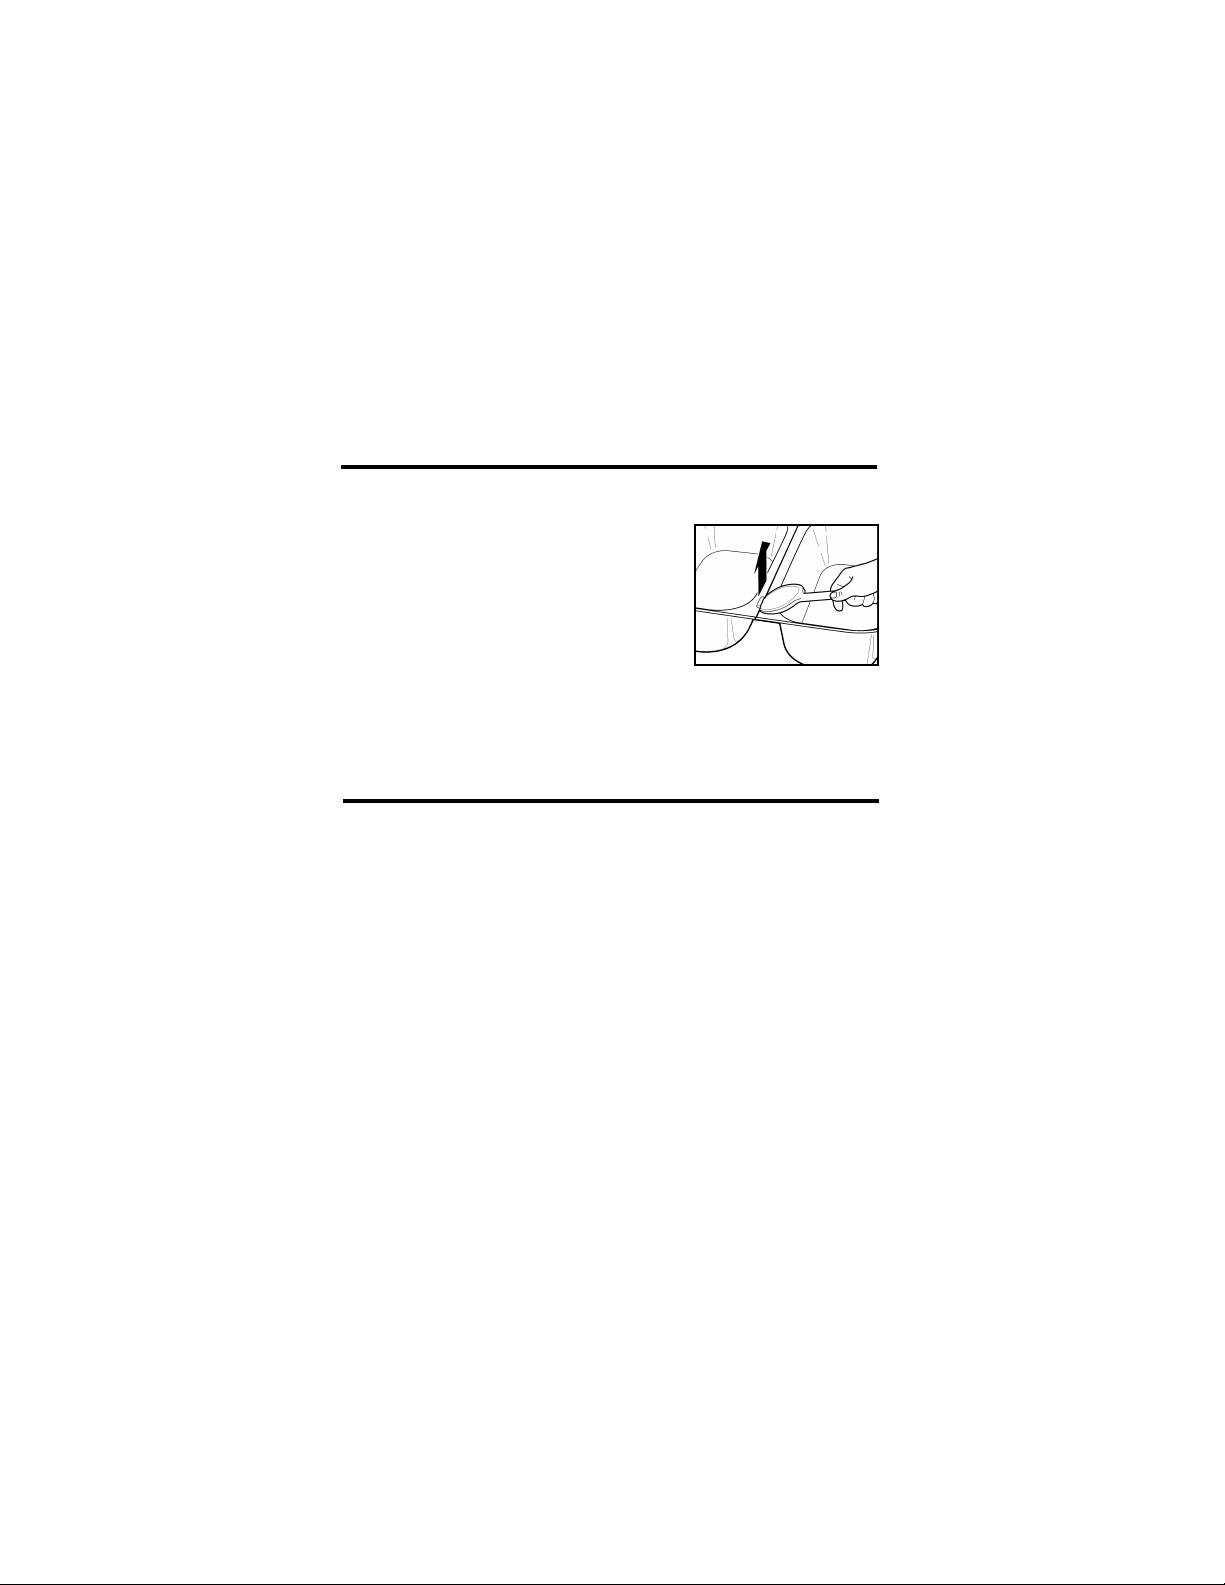
1. Allow the roaster oven insert pans to cool completely
before cleaning.
2. To aid removal of insert pans from
well, insert a wooden spoon under
the raised lip of either end of the pan.
3. Wash the insert pans in hot, soapy
water. Rinse and dry completely.
Insert pans may also be washed in
a dishwasher.
NOTE: Non-abrasive cleaners and nylon plastic scrub
pads may be used if needed.
Cleaning Your Roaster Oven Insert Pans
Page 5

5
Recipes
NOTE: All recipes are to be cooked in a conventional
oven or roaster oven and then placed in the insert pans
to keep warm and serve.
Party Meatballs
5-pound (2.25 kg) bag pre-cooked frozen meatballs
12-ounce (350 g) jar grape jelly
12-ounce (350 g) jar currant jelly
12-ounce (350 g) bottle chili sauce
12-ounce (350 g) bottle cocktail sauce
Let meatballs thaw overnight in refrigerator. Place meatballs
in insert pan. In a large mixing bowl beat together jellies and
sauces. Pour over meatballs. Bake at 250ºF (120ºC) for 2
hours or until heated through.
Baked Potatoes
10 pounds (4.5 kg) baking potatoes
Wash and scrub the potatoes. Pierce all the potatoes, several
times. Stack in the roaster oven so that they are not touching
the sides of the insert pan. Bake at 400ºF (200ºC) for 1 hour,
or until done. Check for doneness by piercing with a fork.
Page 6

6
Chili
2 tablespoons (30 ml) oil
2 pounds (900 g) beef chuck, cut into small pieces
1 pound (450 g) hot Italian sausage, removed from casings
1 pound (450 g) sweet Italian sausage, removed from casings
2 large onions, chopped
1 large green pepper, seeded and chopped
1 tablespoon (15 ml) minced garlic
4 tablespoons (60 ml) canned, sliced jalapeno peppers (half of
4-ounce [115 g] can)
4 tablespoons (60 ml) chili powder
2 tablespoons (30 ml) ground cumin
1 teaspoon (5 ml) black pepper
2 (16-ounce [450 g]) can kidney beans
28-ounce (787 g) can diced tomatoes, undrained
12-ounce (350 g) can tomato paste
2 (15-ounce [425 g]) cans chicken broth
Set temperature dial to 400ºF (200ºC). In insert pan, heat the
oil. Add the beef and sausage and cook about 20 minutes.
Add the onions, pepper, garlic, and jalapeno and cook 5 minutes. Stir in remaining ingredients. Reduce temperature to
275ºF (130ºC). Cover and bake for 2 hours, stirring halfway
though. Makes 5 quarts (5 L).
Page 7
7
Limited Warranty
This warranty applies to products purchased in the U.S. and Canada.
This is the only express warranty for this product and is in lieu of any other
warranty or condition.
This product is warranted to be free from defects in material and
workmanship for a period of one (1) year from the date of original
purchase. During this period, your exclusive remedy is repair or
replacement of this product or any component found to be defective, at
our option; however, you are responsible for all costs associated with
returning the product to us and our returning a product or component
under this warranty to you. If the product or component is no longer
available, we will replace with a similar one of equal or greater value.
This warranty does not cover glass, filters, wear from normal use, use not
in conformity with the printed directions, or damage to the product
resulting from accident, alteration, abuse, or misuse. This warranty extends
only to the original consumer purchaser or gift recipient. Keep the original
sales receipt, as proof of purchase is required to make a warranty claim.
This warranty is void if the product is used for other than single-family
household use.
We exclude all claims for special, incidental, and consequential damages
caused by breach of express or implied warranty. All liability is limited to
the amount of the purchase price. Every implied warranty, including any
statutory warranty or condition of merchantability or fitness for a
particular purpose, is disclaimed except to the extent prohibited by
law, in which case such warranty or condition is limited to the
duration of this written warranty. This warranty gives you specific legal
rights. You may have other legal rights that vary depending on where you
live. Some states or provinces do not allow limitations on implied
warranties or special, incidental, or consequential damages, so the
foregoing limitations may not apply to you.
To make a warranty claim, do not return this appliance to the store. Please
call 1.800.851.8900 in the U.S. or 1.800.267.2826 in Canada or visit
proctorsilex.com in the U.S. or proctorsilex.ca in Canada. For faster
service, locate the model, type, and series numbers on your appliance.
Page 8
8
Pièces et caractéristiques
1. Plats amovibles (quantité : 3)
Utilisation de vos plats amovibles
pour rôtissoire
1. Laver tous les plats à l’eau chaude savonneuse.
2. Retirer le plat amovible pour rôtissoire de la cavité du four
(le cas échéant). Remplir la cavité du four de 2 gallons
(8 L) d’eau.
3. Utiliser un vaporisateur de cuisson non adhésif sur les plats
amovibles avant chaque utilisation. Placer les plats amovibles
vides sur le bord de la cavité. S’assurer que les plats sont
bien en place. Les plats ne devraient pas flotter.
4. Couvrir avec le couvercle de la rôtissoire et brancher la
rôtissoire dans une prise de courant. Préchauffer à 350°F
(180ºC) pendant 30 minutes ou jusqu’à ce que l’eau soit très
chaude.
5. Découvrir et placer délicatement les aliments cuits chauds
dans les plats amovibles.
6. Couvrir et réduire le réglage de chaleur à 200ºF (93ºC) pour
garder les aliments au chaud. Ajuster la température au
besoin.
Page 9

9
Utilisation (suite)
7. Remuer les aliments de temps en temps et laisser les
aliments sous couvercle pour maintenir la température.
8. Ajouter délicatement plus d’eau chaude si nécessaire.
REMARQUES :
• Ne pas essayer de transporter les trois plats amovibles de
rôtissoire lorsqu’ils sont bloqués ensemble.
• Ne pas transporter les plats amovibles de rôtissoire sans
mitaines de four.
w MISE EN GARDE
Risque de brûlures
• La vapeur qui s’échappe peut causer des brûlures.
• Utiliser des mitaines de four pour se protéger les
mains lors de l’ouverture de la rôtissoire chaude.
• Les plats insérés sont chauds. Les prendre
prudemment.
Page 10

10
Pour obtenir les meilleurs résultats
MISE EN GARDE : La température interne des aliments devrait
être maintenue à 150ºF (66ºC) ou plus.
• Tous les plats amovibles doivent être en place lorsqu’on
les utilise.
• Utiliser les plats amovibles seulement pour garder les
aliments cuits au chaud.
• Les plats amovibles ne doivent pas être utilisés sur une table
de cuisson ou au four à micro-ondes. Les plats amovibles
peuvent être utilisés dans un four
conventionnel.
• Lorsqu’on remplit les plats amovibles avec des aliments
qui peuvent coller, vaporiser l’intérieur des plats avec un
vaporisateur de cuisson non-adhésif.
• Si les aliments sont trop secs, ajouter du bouillon ou du jus
pour que les aliments restent humides lors du réchauffage.
1. Laisser les plats amovibles pour rôtissoire refroidir
complètement avant de les nettoyer.
2. Pour retirer plus facilement les plats
amovibles de la cavité, insérer une cuillère
en bois sous la lèvre de l’un des
encadrements latéraux.
3. Nettoyer les plats amovibles à l’eau
chaude savonneuse. Rincer et sécher
complètement. Les plats amovibles peuvent également passer au lave-vaisselle.
REMARQUE : On peut utiliser des nettoyants non abrasifs et des
tampons à récurer en nylon plastique au besoin.
Nettoyage de vos plats amovibles pour rôtissoire
Page 11

11
Recettes
REMARQUE : Toutes les recettes doivent être cuites dans un
four conventionnel ou une rôtissoire puis placées dans les
plats amovibles pour les garder au chaud et servir.
Boulettes de viande
5 lb (2.25 kg) de boulettes de viande précuites surgelées
Bocal de 12 oz (350 g) de gelée de raisin
Bocal de 12 oz (350 g) de gelée de groseilles
Bouteille de 12 oz (350 g) de sauce chili
Bouteille de 12 oz (350 g) de sauce cocktail
Laisser les boulettes de viande décongeler pendant la nuit au
réfrigérateur. Placer les boulettes dans la rôtissoire. Dans un grand
bol à mélanger, battre ensemble les gelées et sauces. Les verser sur
les boulettes. Cuire à
250ºF (120ºC)
pendant 2 heures ou jusqu’à ce
qu’elles soient bien chauffées.
Pommes de terre au four
10 lb (4.5 kg) de pommes de terre au four
Laver les pommes de terre et les nettoyer à la brosse. Percer toutes
les pommes de terre plusieurs fois. Les empiler dans la rôtissoire de
manière à ce qu’elles ne touchent pas les côtés du plat amovible.
Cuire à 400ºF (200ºC) pendant 1 heure, ou jusqu’à ce qu’elles soient
bien cuites. Vérifier la cuisson en perçant avec une fourchette.
Page 12

12
Chili
2 c. à soupe (30 ml) d’huile
2 lb (900 g) de bas de palette de boeuf, coupée en petits
morceaux
1 lb (450 g) de saucisses italiennes épicées, sorties des boyaux
1 lb (450 g) de saucisses italiennes douces, sorties des boyaux
2 gros oignons, hachés
1 gros poivron vert, épépiné et haché
1 c. à soupe (15 ml) d’ail émincé
4 c. à soupe (60 ml) de piment jalapeno en boîte, tranché
(environ la moitié d’une bte de 4 oz [115 g])
4 c. à soupe (60 ml) de poudre de chili
2 c. à soupe (30 ml) de cumin moulu
1 c. à thé (5 ml) de poivre noir
2 btes (16 oz [450 g]) de haricots rouges
1 bte de 28 oz (787 g) de tomates en dés, non égouttées
1 bte de 12 oz (350 g)de purée de tomate
2 btes de 15 oz (425 g) de bouillon de poulet
Régler le cadran de la température à 400ºF (200ºC). Faire chauffer
l’huile dans le plat amovible. Ajouter le boeuf et la saucisse et
cuire environ 20 minutes. Ajouter les oignons, le poivron, le piment
et l’ail, et cuire 5 minutes. Ajouter le reste des ingrédients en
remuant. Réduire la température à 275ºF (130ºC). Couvrir et cuire
pendant 2 heures, en remuant au bout d’une heure. Donne 5
pintes (5 L).
Page 13

13
GARANTIE LIMITÉE
Cette garantie s’applique aux produits achetés aux É.-U. et au Canada.
C’est
la seule garantie expresse pour ce produit et est en lieu et place de tout autre
garantie ou condition.
Ce produit est garanti contre tout défaut de matériaux et de main-d’oeuvre
pour une période
de un (1) an
à compter de la date d’achat d’origine. Au cours
de cette période, votre seul recours est la réparation ou le remplacementde ce
produit ou tout composant s’avérant défectueux, à notre gré, mais vous êtes
responsable de tous les coûts liés à l’expédition du produit et le retour d’un
produit ou d’un composant dans le cadre de cette garantie. Si le produit ou
un composant n’est plus offert, nous le remplacerons par un produit similaire
de valeur égale ou supérieure.
Cette garantie ne couvre pas le verre, les filtres, l’usure d’un usage normal,
l’utilisation non conforme aux directives imprimées, ou des dommages au
produit résultant d’un accident, modification, utilisation abusive ou incorrecte.
Cette garantie s’applique seulement à l’acheteur original ou à la personne
l’ayant reçu en cadeau. La présentation du reçu de vente d’origine comme
preuve d’achat est nécessaire pour faire une réclamation au titre de cette
garantie. Cette garantie ne s’applique pas si le produit est utilisé à d’autres
fins qu’une utilisation domiciliaire familiale.
Nous excluons toutes les réclamations au titre de cette garantie pour les
dommages spéciaux, consécutifs et indirects causés par la violation de
garantie expresse ou implicite. Toute responsabilité est limitée au prix d’achat.
Chaque garantie implicite, y compris toute garantie ou condition de qualité
marchande ou d’adéquation à un usage particulier, est exonérée, sauf
dans la mesure interdite par la loi, auquel cas la garantie ou condition est
limitée à la durée de cette garantie écrite. Cette garantie vous donne des
droits légaux précis. Vous pouvez avoir d’autres droits qui varient selon l’endroit
où vous habitez. Certaines provinces ne permettent pas les limitations sur les
garanties implicites ou les dommages spéciaux ou indirects de telle sorte que
les limitations ci-dessus ne s’appliquent peut-être pas à votre cas.
Ne pas retourner cet appareil au magasin lors d’une réclamation au titre de
cette garantie. Téléphoner au 1.800.851.8900 aux É.-U. ou au 1.800.267.2826
au Canada ou visiter le site internet www.proctorsilex.com aux É.-U. ou
www.proctorsilex.ca au Canada. Pour un service plus rapide, trouvez le numéro
de modèle, le type d’appareil et les numéros de série sur votre appareil.
Page 14

14
Piezas y características
1. Cacerolas para buffet
14
Para usar las cacerolas para buffet del
horno asador
1. Lave todas las cacerolas con agua caliente y jabonosa.
2. Quite la asadera de inserción del horno asador del interior
del horno (si está ahí). Llene el interior del horno asador
con 2 galones (8 L) de agua.
3. Rocíe el interior de las cacerolas para buffet con un aceite de
cocina en aerosol antiadherente antes de cada uso. Coloque
las cacerolas para buffet vacías en el borde de la fuente.
Verifique que las asaderas estén firmes y que no queden
flotando.
4. Cubra con la tapa del horno asador y conecte en el
tomacorriente. Precaliente a 350º F (180º C) por 30 minutos
o hasta que el agua esté bien caliente.
5. Destape y con cuidado coloque los alimentos calientes
cocinados en las cacerolas para buffet.
Page 15

15
6. Tape y reduzca la graduación de temperatura a 200º F
(93º C) para mantener los alimentos calientes. Ajuste la
temperatura según sea necesario.
7. Revuelva los alimentos ocasionalmente y mantenga los
alimentos tapados para preservar la temperatura.
8. Con cuidado agregue más agua caliente si es necesario.
NOTAS:
• No intente cargar las tres cacerolas para buffet del horno
asador mientras están unidas.
• No cargue las cacerolas para buffet del horno asador sin
guantes de cocina.
wPRECAUCIÓN
Peligro de quemaduras
• El vapor que se escapa puede causar quemaduras.
• Use un guante de cocina para protegerse la mano al
abrir el horno asador caliente.
• Las cacerolas para buffet están calientes. Manipule con
cuidado.
Page 16

16
Consejos para mejores resultados
PRECAUCIÓN: La temperatura interna de los alimentos
debe mantenerse en 150º F (66º C) o más.
• Todas las cacerolas para buffet deben estar en su lugar al
usar las cacerolas para buffet del horno asador.
• Use únicamente las cacerolas para buffet para mantener
los alimentos cocinados calientes.
• Las cacerolas para buffet no se deben usar en la estufa u
horno microondas. Las cacerolas para buffet se pueden
usar en un horno convencional.
• Al llenar las cacerolas para buffet con alimentos que se
pueden pegar, rocíe el interior de las cacerolas para buffet
con aceite de cocina en aerosol antiadherente.
• Si los alimentos están muy secos, agregue caldo o jugo
para mantener los alimentos húmedos mientras calienta.
1. Deje que las cacerolas para buffet del horno asador se
enfríen por completo antes de limpiar.
2. Para ayudar a retirar las cacerolas
para buffet del interior, inserte el
borde de una cuchara de madera
por debajo del borde levantado de
cualquier extremo de la cacerola.
3. Lave las cacerolas para buffet en
agua caliente y jabonosa. Enjuague
y seque por completo. Las cacerolas para buffet también
se pueden lavar en el lavavajillas.
NOTA: Se pueden usar limpiadores no abrasivos y almohadillas plásticas de nailon si es necesario.
Cómo limpiar las cacerolas para buffet
Page 17

17
Recetas
NOTA: Todas las recetas se deben preparar en el horno
asador, y luego colocarse en las cacerolas para buffet
para mantener caliente y servir.
Albóndigas para fiesta
Una bolsa de 5 libras (2,25 kg) de albóndigas congeladas
pre-cocidas
Una jarra de jalea de uvas de 12 onzas (350 g)
Una jarra de jalea de pasas de Corinto de 12 onzas (350 g)
Una botella de salsa chile de 12 onzas (350 g)
Una botella de salsa cóctel de 12 onzas (350 g)
Deje que las albóndigas de descongelen en el refrigerador
durante la noche. Coloque las albóndigas en la asadera de
inserción. En un tazón grande mezcle las jaleas y las salsas
juntas. Vierta sobre las albóndigas. Hornee a 250ºF (120ºC)
por 2 horas o hasta que estén bien calentadas.
Papas al horno
10 libras (4,5 kg) de papas para hornear
Lave y frote las papas. Perfore todas las papas varias veces.
Apílelas en el horno asador de manera que no toquen los
lados de la asadera de inserción. Cocine a 400ºF (205ºC) por
1 hora o hasta que estén listas. Verifique que estén listas
pinchando con un tenedor.
Page 18

18
Chile
2 cucharadas (30 ml) de aceite
2 libras (900 g) de cuarto delantero de vaca, cortado en
trozos pequeños
1 libra (450 g) de salchicha italiana picante sin la piel
1 libra (450 g) de salchicha italiana dulce sin la piel
2 cebollas grandes, picadas
1 pimiento verde grande, sin semillas y picado
4 cucharadas (60 ml) de pimientos jalapeños en lata, cortados
en tajadas (más o menos la mitad de una lata de
4 onzas [115 g])
1 cucharada (15 ml) de ajo picado
4 cucharadas (60 ml) de polvo de chile
2 cucharadas (30 ml) de comino molido
1 cucharadita (5 ml) de pimienta negra
2 latas de frijoles en forma de riñón de 16 onzas (450 g)
1 lata de tomates cortados en cubitos de 28 onzas (787 g),
con el líquido
1 lata de pasta de tomate de 12 onzas (350 g)
2 latas de caldo de gallina de 15 onzas (425 g)
Coloque el cuadrante de temperatura a 400°F (205ºC). Caliente
el aceite en la asadera de inserción. Agregue la carne y la
salchicha y cocine unos 20 minutos. Agregue las cebollas, los
pimientos, jalapeños, y el ajo y cocine 5 minutos. Mezcle los
ingredientes restantes. Reduzca la temperatura a 275°F
(130ºC). Cubra y cocine por 2 horas, agitando después de la
mitad del tiempo. Se obtienen 5 cuartos de galón (5 L).
Page 19

19
Grupo HB PS, S.A. de C.V.
Monte Elbruz No. 124 Int. 601
Col. Palmitas Polanco
México, D.F. C.P. 11560
Tel. 01-800-71-16-100
PRODUCTO:
MARCA: MODELO:
Grupo HB PS, S.A. de C.V. cuenta con una Red de Centros de Servicio Autorizada,
por favor consulte en la lista anexa el nombre y dirección de los establecimientos
en la República Mexicana en donde usted podrá hacer efectiva la garantía, obtener
partes, componentes, consumibles y accesorios; así como también obtener servicio para productos fuera de garantía. Para mayor información llame sin costo:
Centro de Atención al consumidor: 01 800 71 16 100
Grupo HB PS, S.A. de C.V. le otorga a partir de la fecha de compra:
GARANTÍA DE 1 AÑO.
• Esta garantía ampara, todas las piezas y componentes del producto que resulten con
defecto de fabricación incluyendo la mano de obra.
• Grupo HB PS, S.A. de C.V. se obliga a reemplazar, reparar o reponer, cualquier pieza o
componente defectuoso; proporcionar la mano de obra necesaria para su diagnóstico y
reparación, todo lo anterior sin costo adicional para el consumidor.
• Esta garantía incluye los gastos de transportación del producto que deriven de su
cumplimiento dentro de su red de servicio.
LIMITACIONES
• Esta garantía no ampara el reemplazo de piezas deterioradas por uso o por desgaste
normal, como son: cuchillas, vasos, jarras, filtros, etc.
• Grupo HB PS, S.A. de C.V. no se hace responsable por los accidentes producidos a
consecuencia de una instalación eléctrica defectuosa, ausencia de toma de tierra, clavija
de enchufe en mal estado, etc.
COBERTURA
EXCEPCIONES
Esta garantía no será efectiva en los siguientes casos:
a) Cuando el producto se hubiese utlizado en condiciones distintas a las normales.
(Uso industrial, semi-industrial o comercial.)
PÓLIZA DE GARANTÍA
Page 20

20
b) Cuando el producto no hubiese sido operado de acuerdo con el instructivo de uso.
c) Cuando el producto hubiese sido alterado o reparado por personas no autorizadas
por Grupo HB PS, S.A. de C.V. el fabricante nacional, importador o comercializador
responsable respectivo.
El consumidor puede solicitar que se haga efectiva la garantía ante la propia casa
comercial donde adquirió su producto, siempre y cuando Grupo HB PS, S.A. de C.V. no
cuente con talleres de servicio.
EXCEPCIONES (continuación)
PROCEDIMIENTO PARA HACER EFECTIVA LA GARANTÍA
• Para hacer efectiva la garantía no deben exigirse mayores requisitos que la presentación
del producto y la póliza correspondiente, debidamente sellada por el establecimiento que
lo vendió.
• Para hacer efectiva la garantía, lleve su aparato al Centro de Servicio Autorizado más
cercano a su domicilio (consulte la lista anexa).
• Si no existe Centro de Servicio Autorizado en su localidad llame a nuestro Centro de
Atención al Consumidor para recibir instrucciones de como hacer efectiva su garantía.
• El tiempo de reparación, en ningún caso será mayor de 30 días naturales contados a partir
de la fecha de recepción del producto en nuestros Centros de Servicio Autorizados.
• En caso de que el producto haya sido reparado o sometido a mantenimiento y el mismo
presente deficiencias imputables al autor de la reparación o del mantenimiento dentro de
los treinta días naturales posteriores a la entrega del producto al consumidor, éste tendrá
derecho a que sea reparado o mantenido de nuevo sin costo alguno. Si el plazo de la
garantía es superior a los treinta días naturales, se estará a dicho plazo.
• El tiempo que duren las reparaciones efectuadas al amparo de la garantía no es com-
putable dentro del plazo de la misma. Cuando el bien haya sido reparado se iniciará la
garantía respecto de las piezas repuestas y continuará con relación al resto. En el caso
de reposición del bien deberá renovarse el plazo de la garantía.
FECHA DE
ENTREGA
SELLO DEL
VENDEDOR
QUEJAS Y SUGERENCIAS
DÍA___
MES___
AÑO___
Si desea hacer comentarios o sugerencias
con respecto a nuestro servicio o tiene alguna
queja derivada de la atención recibida en alguno
de nuestros Centros de Servicio Autorizados, por
favor dirigirse a:
GERENCIA INTERNACIONAL DE SERVICIO
01 800 71 16 100
Email: mexico.service@hamiltonbeach.com.mx
Page 21

21
RED DE CENTROS DE SERVICIO AUTORIZADA
GRUPO HB PS, S.A. DE C.V.
Distrito Federal
ELECTRODOMÉSTICOS
Av. Plutarco Elias Cailes No. 1499
Zacahuitzco MEXICO 09490 D.F.
Tel: 01 55 5235 2323
Fax: 01 55 5243 1397
CASA GARCIA
Av. Patriotismo No. 875-B
Mixcoac MEXICO 03910 D.F.
Tel: 01 55 5563 8723
Fax: 01 55 5615 1856
Jalisco
SERVICIOS DE MANTENIMIENTO
CASTILLO
Garibaldi No. 1450
Ladrón de Guevara
GUADALAJARA 44660 Jal.
Tel: 01 33 3825 3480
Fax: 01 33 3826 1914
Chihuahua
DISTRIBUIDORA TURMIX
Av. Paseo Triunfo de la Rep. No. 5289
Local 2 A., Int. Hipermart
Alamos de San Lorenzo
CD. JUAREZ 32340 Chih.
Tel: 01 656 617 8030
Fax: 01 656 617 8030
Nuevo Leon
FERNANDO SEPULVEDA REFACCIONES
Ruperto Martínez No. 238 Ote.
Centro MONTERREY, 64000 N.L.
Tel: 01 81 8343 6700
Fax: 01 81 8344 0486
Page 22

222324
Page 23

Page 24

2/10
840161001
 Loading...