

Page 1
Page 2

Page 3

210 mm 145 mm
180 mm145 mm
ENGLISH Installation Page 6 Instructions for use Page 8
DEUTSCH Installation Seite 13 Bedienungsanleitung Seite 14
1
Page 4
A
54 mm
580 mm
483 mm
510 mm
553 mm
0
+1
30 mm
560 mm
0
+2
490 mm
0
+2
513 mm
0
+2
0
+2
583 mm
0
+2
560 mm
R = 11,5 mm
R = Min. 6,5 mm
Max. 8 mm
R = 11,5 mm
490 mm
Min. 50 mm
0
+2
R = Min. 6,5 mm
Max. 8 mm
6 mm
2
Page 5
X 4
1
3
4 5
2
Min. 40 cm
Min. 5 cm
Min. 10 cm
3
Page 6

IMPORTANT SAFETY INSTRUCTIONS
YOUR SAFETY AND THAT OF OTHERS IS VERY IMPORTANT
This manual and the appliance itself provide important safety messages, to be read and always observed.
This is the danger symbol, regarding safety, warning of potential risks to users and others.
All safety messages will be preceded by the danger symbol and the following words:
DANGER
WARNING
Indicates a hazardous situation which, if not avoided, will result in serious injury.
Indicates a hazardous situation which, if not avoided, could cause serious injury.
All messages relevant to safety specify the potential risk to which they refer and indicate how to reduce the risk of injury,
damage and electric shocks due to incorrect use of the appliance. Make sure to comply with the following:
- Use protective gloves to perform all unpacking and installation operations.
- The appliance must be disconnected from the power supply before carrying out any installation operation.
- Installation and maintenance must be carried out by a specialised technician, in compliance with the manufacturer’s
instructions and the local safety regulations in force. Do not repair or replace any part of the appliance unless
specifically stated in the user manual.
- The appliance must be earthed.
- The power cable must be long enough for connecting the appliance, fitted in the cabinet, to the power supply.
- For installation to comply with the current safety regulations, an omnipolar switch with minimum contact gap of
3mm is required.
- Do not use multi-sockets or extension cords.
- Do not pull the appliance’s power cable.
- The electrical parts must not be accessible to the user after installation.
- The appliance is designed solely for domestic use for cooking food. No other use is permitted (e.g. heating rooms).
The Manufacturer declines any liability for inappropriate use or incorrect setting of the controls.
- The appliance and its accessible parts become hot during use. Care should be taken to avoid touching heating
elements. Very young (0-3 years) and young children (3-8 years) shall be kept away unless continuously supervised.
- Children from 8 years and above and persons with reduced physical, sensory or mental capabilities or lack of
experience and knowledge can use this appliance only if they are supervised or have been given instructions on safe
appliance use and if they understand the hazards involved. Children shall not play with the appliance. Cleaning and
user maintenance shall not be made by children without supervision.
- Do not touch the appliance heating elements during and after use. Do not allow the appliance to come into contact
with cloths or other flammable materials until all the components have cooled down completely.
- Do not place flammable materials on or near the appliance.
- Overheated oils and fats catch fire easily. Pay attention when cooking food products rich in fat and oil.
- A separator panel (not supplied) must be installed in the compartment under the appliance.
- If the surface is cracked, switch off the appliance to avoid the possibility of electric shock (only for appliances with
glass surface).
- The appliance is not intended to be operated by means of an external timer or separate remote control system.
- Unattended cooking on a hob with fat or oil can be dangerous and may result in fire. NEVER try to extinguish a fire
with water, but switch off the appliance and then cover flame e.g. with a lid or a fire blanket.
Danger of fire: do not store items on the cooking surfaces.
- Do not use steam cleaners.
- Metallic objects such as knives, forks, spoons and lids should not be placed on the hob surface since they can get hot.
EN4
Page 7
- After use, switch off the hob element by its control and do not rely on the pan detector (only for induction
NOOK
Ø
28 cm
XL
Ø
17 cm min. 28 cm max.
Ø
21 cm
L
Ø
15 cm min. 21 cm max.
Ø
18 cm
M
Ø
14.5 cm
S
Ø
12 cm min. 18 cm max.
Ø
10 cm min. 14.5 cm max
appliances).
SAFEGUARDING THE ENVIRONMENT
Disposal of packing
The packing material is 100% recyclable and marked with the recycling symbol ( ). The various parts of the packing must not be dispersed in the environment, but
disposed of in compliance with local regulations.
Disposal
This appliance is marked in conformity with European Directive 2002/96/EC on Waste Electrical and Electronic Equipment (WEEE).
By ensuring that this appliance is correctly disposed of, the user can help prevent potentially negative consequences for the environment and the health of people.
The symbol on the appliance or the accompanying documentation indicates that this product should not be treated as domestic waste but must be taken to an
appropriate collection point for recycling WEEE.
Energy saving
For optimum results, it is advisable to:
• Use pots and pans with bottom width equal to that of the cooking zone.
• Only use flat-bottomed pots and pans.
• When possible, keep pot lids on during cooking.
• Use a pressure cooker to to save even more energy and time.
• Place the pot in the middle of the cooking zone marked on the hob.
DECLARATION OF CONFORMITY
- This appliance, intended to come into contact with food products, complies with Regulation ( ) no. 1935/2004, and has been designed, manufactured and
marketed in conformity with the safety requirements of “Low Voltage” Directive 2006/95/EC (replacing 73/23/EEC as amended) and protection requirements of
“EMC” Directive 2004/108/EC.
BEFORE USE
IMPORTANT: The cooking zones will not switch on if pots are not the right size. Only use pots bearing the symbol “INDUCTION SYSTEM” (Figure
opposite). Place the pot on the required cooking zone before switching the hob on.
Using suitable pots, the cooking zones cannot be used at temperatures below 10°C.
EXISTING POTS AND PANS
Use a magnet to check if the bottom of the pot is suitable for the induction hob: bottom of the pots and pans are unsuitable if not magnetically detectable.
- Make sure pots have a smooth bottom, otherwise they could scratch the hob. Check dishes.
- Never place hot pots or pans on the surface of the hob’s control panel. This could result in damage.
RECOMMENDED POT BOTTOM WIDTHS
RECOMMENDED POT POSITION
For best performance, when you use two pots simultaneously, put them according to the pictures below:
EN5
Page 8

POWER LEVEL TABLE
Power level Type of cooking Level use
(indicating cooking experience and habits)
Max. power 8-9 Frying - boiling
Browning - sautéing - boiling -
High power
Medium power
Low power
OFF
7-8
6-7
4-5
3-4
2-3
1-2
1
Zero
power
Browning - cooking - stewing -
grilling
sautéing - grilling
Cooking - stewing - sautéing -
grilling
Cooking - simmering thickening - creaming
Melting - defrosting - keeping
food warm - creaming
Support surface
Ideal for browning, starting to cook, frying deep frozen products, fast boiling
Ideal for sautéing, maintaining a lively boil, cooking and grilling (for a short period of time, 5-10
minutes)
Ideal for sautéing, maintaining a light boil, cooking and grilling (for a medium period of time, 10-20
minutes), preheating accessories
Ideal for stewing, maintaining a gentle boil, cooking (for a long period of time). Creaming pasta
Ideal for long-cooking recipes (rice, sauces, roasts, fish) with liquids (e.g. water, wines, broth, milk),
creaming pasta
Ideal for long-cooking recipes (less than a litre in volume: rice, sauces, roasts, fish) with liquids (e.g.
water, wines, broth, milk)
Ideal for softening butter, gently melting chocolate, thawing small products and keeping just-cooked
food warm (e.g. sauces, soups, minestrone)
Ideal for keeping just-cooked food warm, for creaming risottos and for keeping ser ving dishes warm
(with induction-suitable accessory)
Hob in stand-by or off mode (possible end-of-cooking residual heat, indicated by an “H”)
NOTE:
When making quick- cook foods that require perfect heat distribution (e.g. pancakes) on the 28 cm double cooking zone (where present), use pans no greater than
24 cm in diameter. For delicate cooking (for example, melting chocolate or butter) use the smaller diameter single zones.
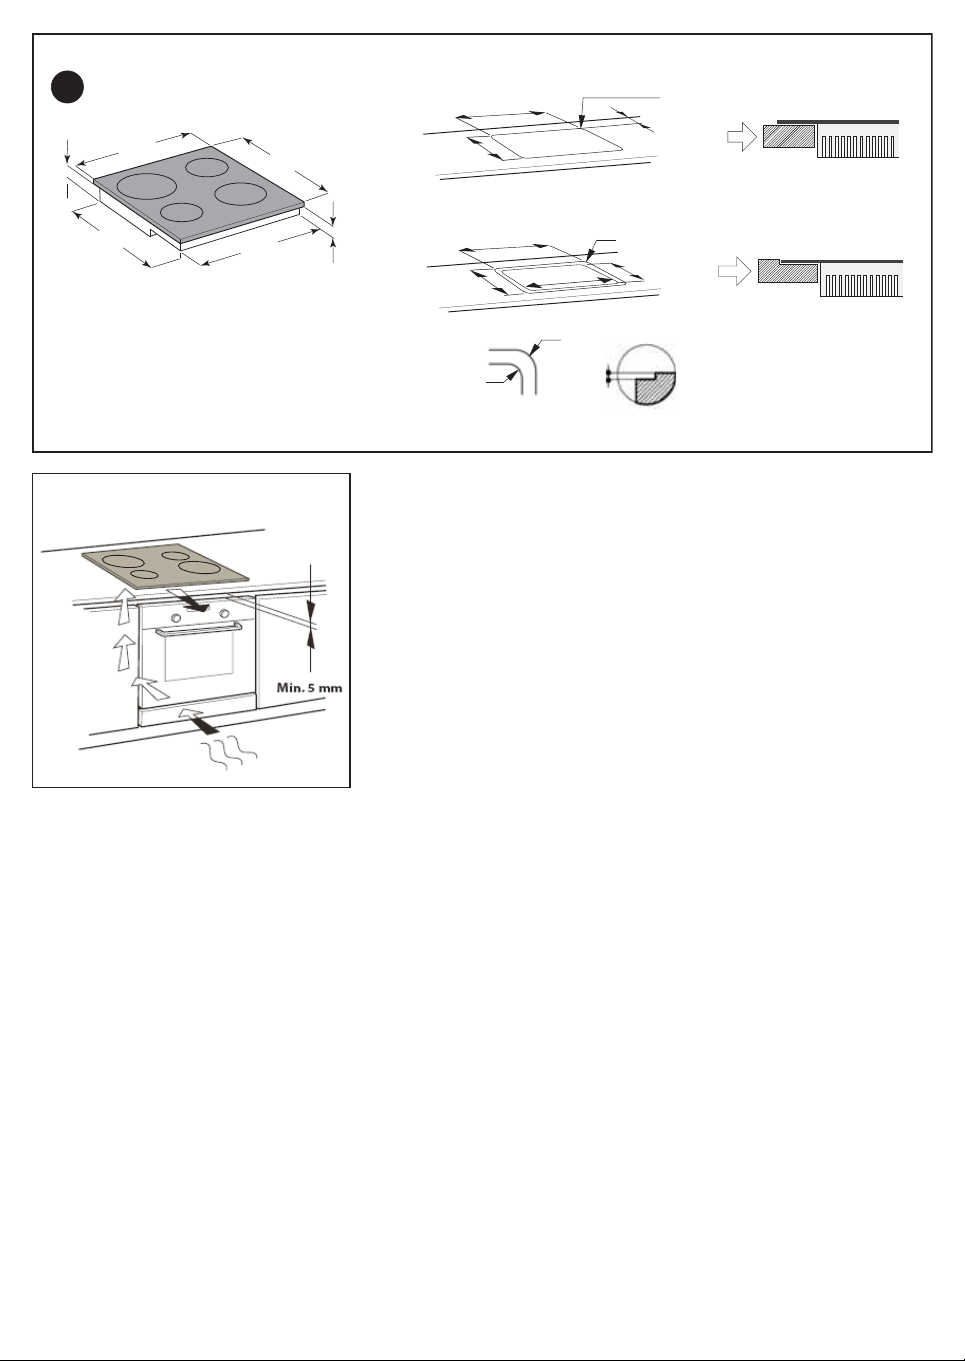
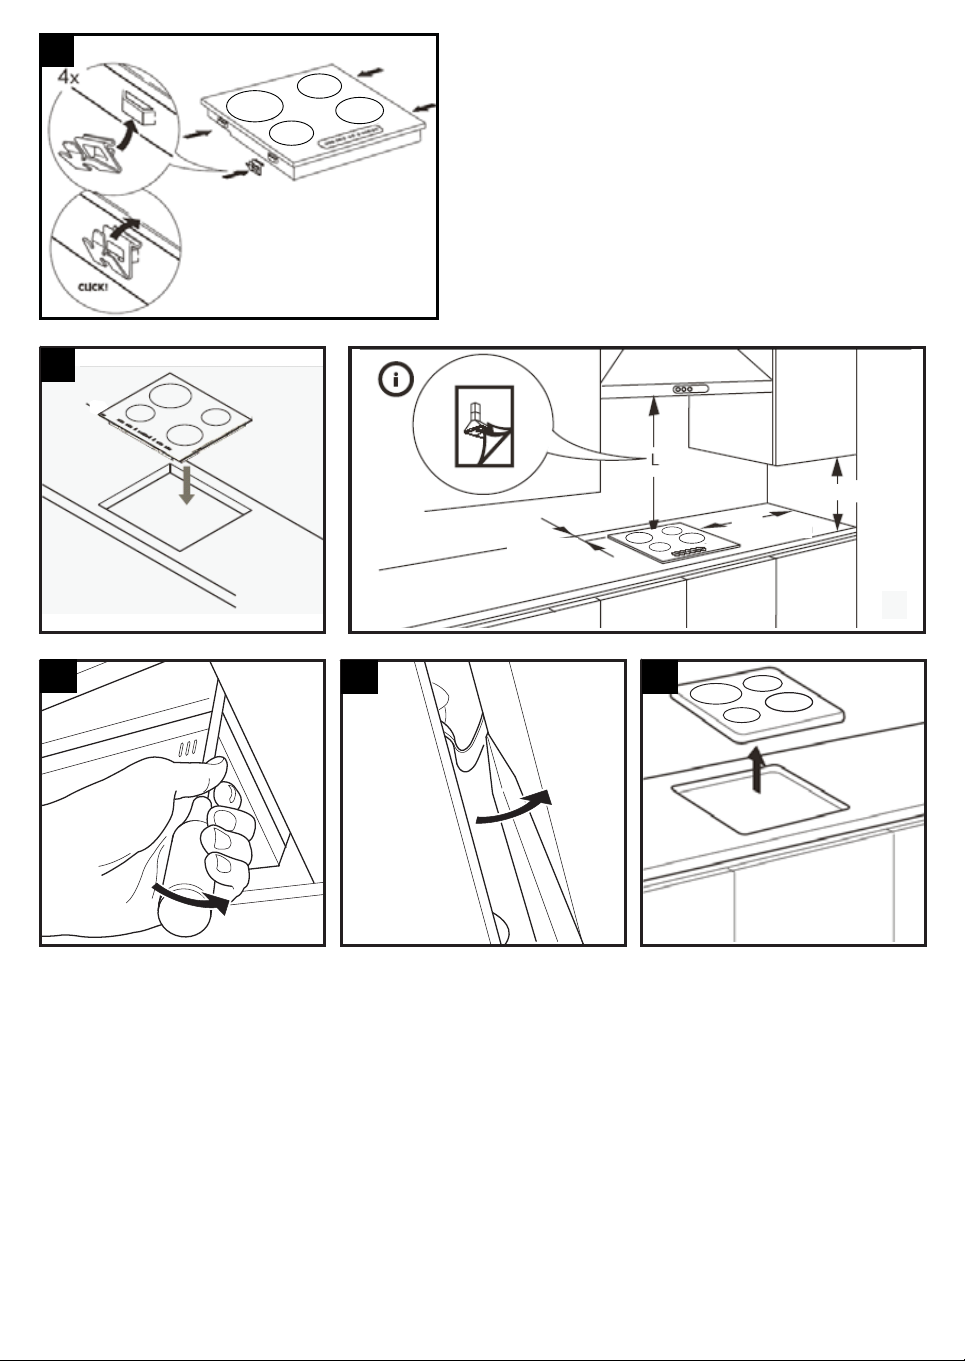
INSTALLATION
After unpacking the product, check for any damage during transport. In case of problems, contact the dealer or the After-Sales Service.
PREPARING THE CABINET FOR FITTING
WARNING
- The lower part of the produc t must not be accessible after installation.
- In case of installation of an undertop oven, do not interpose the separator panel.
• In order to ensure the correct operation of the product, do not obstruct the minimum required clearance between the hob and the top of the unit (min. 5 mm).
• If an oven is installed beneath the hob, make sure the oven is equipped with a cooling system.
• To remove the hob from the worktop use a screw driver (not supplied) unlocking the springs from the bottom side of the appliance.
ELECTRICAL CONNECTION
WARNING
- The manufac turer declines all liability for injury to persons or animals and for damage to property resulting from failure to observe the regulations
provided in this chapter.
- The power cable must be long enough to allow the hob to be removed from the worktop.
- Make sure the voltage speci fied on the dataplate located on the bottom of the appliance is the same as that of the home.
Connection to the terminal block
For the electrical connection of the power cord is present in the supply. Follow the instructions below.
Connect the ground cable yellow / green to terminal symbol .
1. Remove the terminal cover (A) by unscrewing the screw and insert the cover into the hinge (B) of the terminal.
2. Plug the power cord into the clamp and connect the wires to the terminal block as shown in the wiring diagram located near the terminal.
3. Secure the power cable with the cable clamp.
4. Close the cover (C) and screw on the terminal with the screw removed.
- Disconnect the appliance from the power supply.
- Installation must be carried out by qualified personnel who know the current safety and
installation regulations.
EN6
Page 9

For each connection to the network, the hob automatically checks for a few seconds.
Colour Grey
Colour Blue
Colours Brown
Colour Black
Colour Yellow-Green
L1
L2
N2
N1
N
N1 N2L1 L2E N1 N2L1 L2E
N1 N2L1 L2E N1 N2L1 L2E
Connection to the oven
WARNING
Do not connect the oven to the power supply before you have finished connecting the cooktop.
CBA
•Before connecting the oven to the power supply, make sure that the cooktop is among the ones listed in the cooktop/oven pairing product sheet provided.
• Connect the hob connectors (E) to the oven connectors (D), matching the colours and the alignment of the housing guides visible on the top of the connectors.
• Then make the connection by pushing the connectors all the way in, making sure that the tongue clicks into place.
• Unscrew the nut of the earth screw (K) on the top cover of the oven and insert the yellow/green earth wire, leaving the washer in place. Screw the nut back
onto the screw and tighten it as far as it will go.
• Cover the connected cables (H) with the metal cover (F), taking care that the cables are not trapped under the cover.
• Tighten the two screws (G) to secure the metal cover provided with the oven.
EN7
Page 10

INSTRUCTIONS FOR USE
4 6 75 1 23
DISPLAY
DISPALY
Power levels No function
Cooking zone positioning
Level selector
CONTROL PANEL DESCRIPTION - OVEN
4. CONTROL KNOB FOR FRONT LEFT HOTPLATE 0 1 2…9
5. CONTROL KNOB FOR REAR LEFT HOTPLATE 0 1 2…9
6. CONTROL KNOB FOR REAR RIGHT HOTPLATE 0 1 2…9
7. CONTROL KNOB FOR FRONT RIGHT HOTPLATE 0 1 2…9
Control panel
Switching on and adjusting cooking zones
After positioning the pot on the chosen cooking zone, select the required power level by turning the knob clockwise. Each cooking zone has different heat settings,
ranging from “1” (minimum power) to “9” (maximum power).
When a knob is set to a power setting between 1 and 9 the hob indicator light switches on.
Important! At the position indicated by a “______” on the cooktop knobs there is no function: the heating element is switched off.
Important! If no pot is placed on the hob or if the pot used is not suitable for an induction hob, the cooking zone selected will switch off after 1 minute. To reactivate
it: place a pot that is suitable for the induction hob (see secti on “Before use”) on the desired cooking zone, turn the knob to “0” and then select the desired heat setting.
Switching off cooking zones
Turn the knob to “0”.
TROUBLESHOOTING GUIDE
• Read and follow the instructions given in the section “Instructions for use”.
• Make sure there is not a power outage.
• Dry the hob thoroughly after cleaning it.
EN8
Page 11
NOISES MADE BY THE HOB
The induction cooktops can generate a set of noise and vibration during normal operation, depending on the type of material and the processing of the food, such as
those described below:
• Noise contact: this type of vibration is due to the use of pots made of different materials superimposed.
• Sounds click at mid-lower power: this noise is produced in order to achieve the low-mid power required.
• Sounds like rhythmic click: this noise is produced when operating several areas of cooking and / or high performance.
• Hissing weak: this noise is due to the type of container used and the quantity of food contained.
• Background noise: the induction cooker is equip ped with a fan aimed at cooling the electronic components and for this reason during operation and also for a
few minutes after switching off the hob you hear the noise of the fan. Increase / decrease the cooking zones activated, the background noise of the fan may
increase or decrease.
These conditions are normal and essential for the proper functioning of the induction system, they are not indication of failure or damage.
AFTER-SALES SERVICE
Before contacting the After-sales Service:
1. See if you can solve the problem yourself with the help of the “Troubleshooting guide”.
2. Switch the appliance off and then on again it to see if the problem has been eliminated.
If the problem persists after the above checks, contact the nearest After-Sales Service.
Always specify:
• a brief description of the fault;
• the product type and exact model;
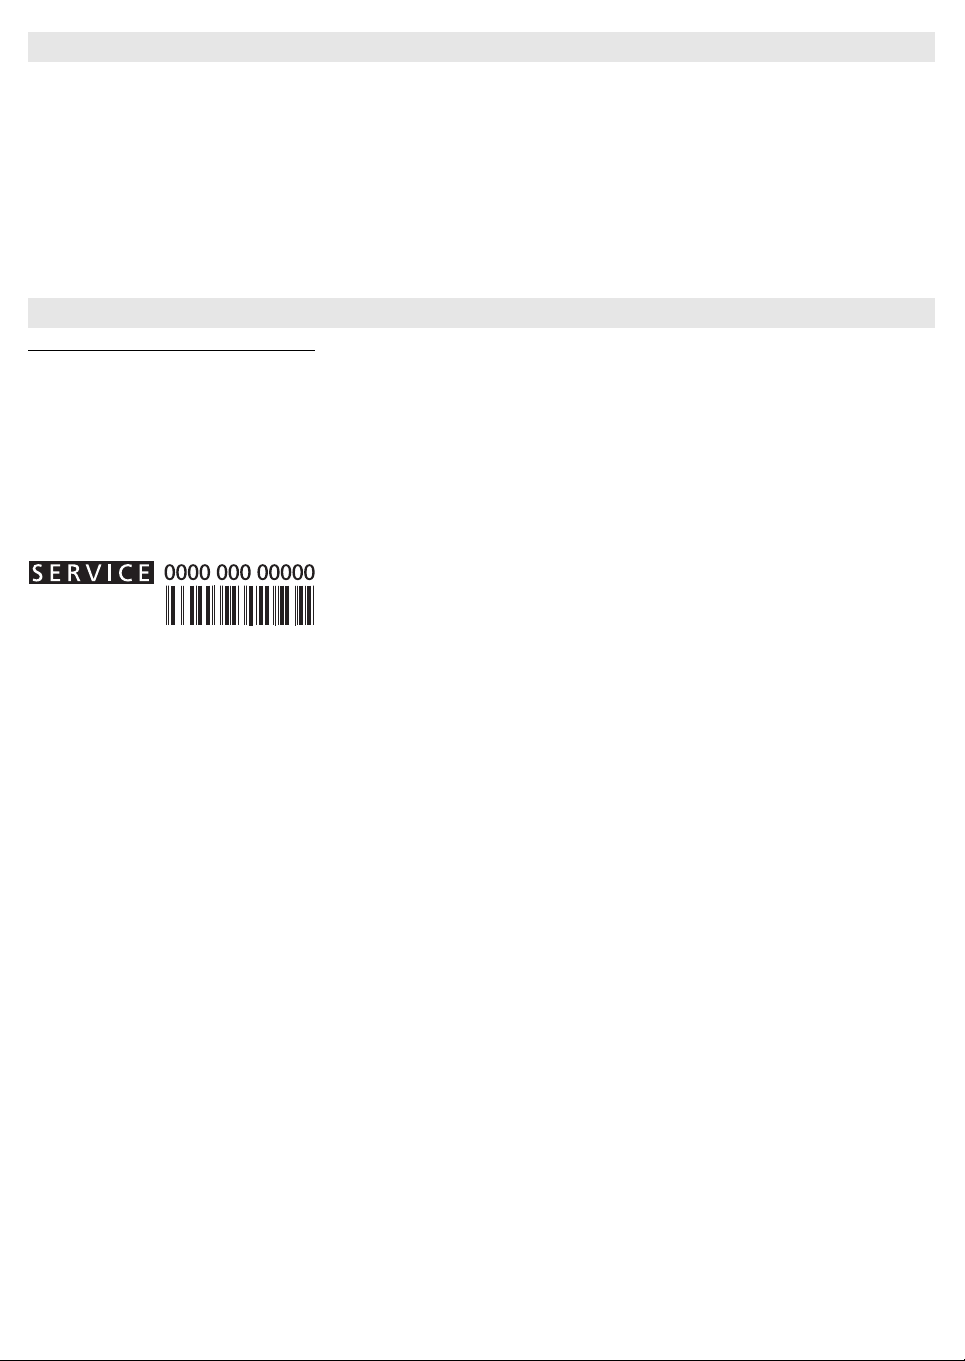
• the Service number (the number after the word Service on the rating plate), located under the appliance (on the metal plate).
• your full address;
• your telephone number.
If any repairs are required, contact an authorised After-Sales Service Centre (to ensure the use of original spare parts and correct repairs). Spare parts are available
for 10 years.
EN9
Page 12

Page 13

5019 600 00780
DEGB
06/12
Whirlpool is a registered trademark/TM Trademark of Whirlpool group of companies
 Loading...