

Prince Castle 755-HM12GWB, 755-HM16GWB, 755-HM8GWB Service Manual
Operating Grill Timer
Instructions 755 Series
755-HM16GWB
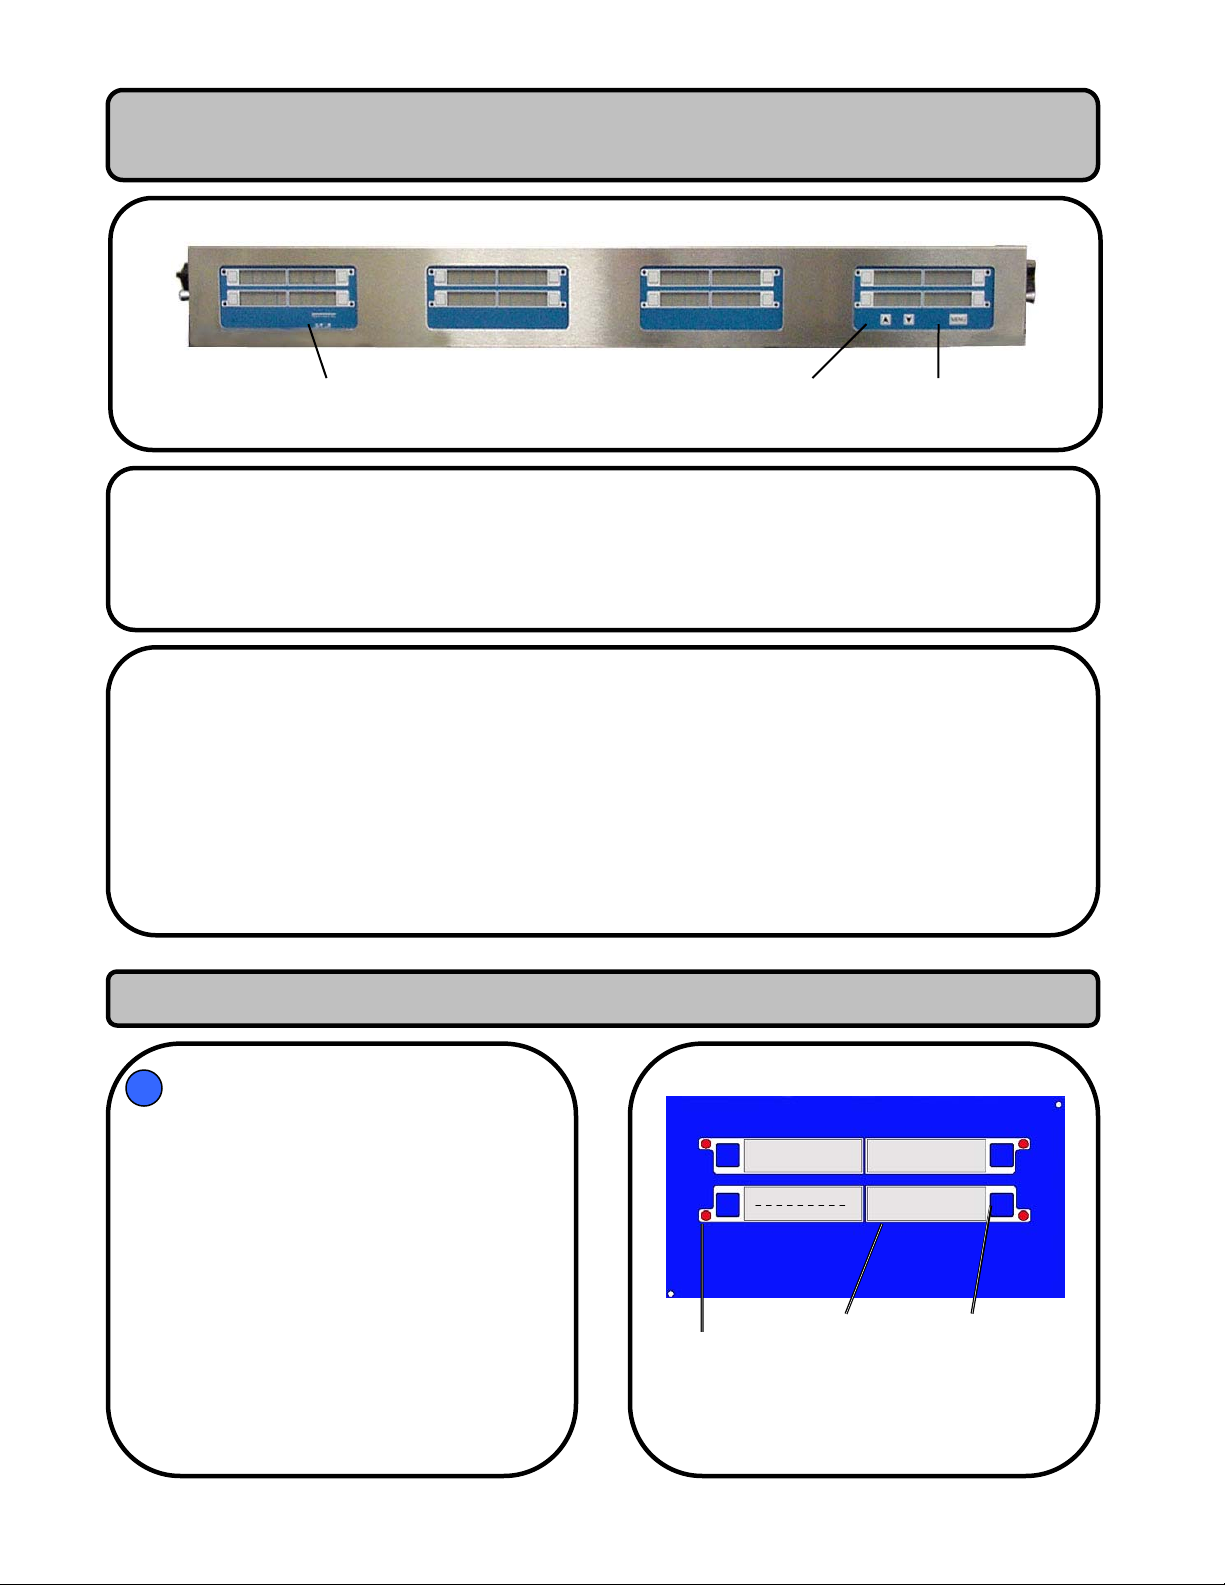
Prince Castle Up & Down Menu
Logo Button Arrows Button
Specifications
Model VAC Watt HZ
755-HM8GWB 100-240 25 50/60
755-HM12GWB 100-240 25 50/60
755-HM16GWB 100-240 25 50/60
Warranty
This product is warranted to be free from defects in material and/or workmanship for a period of one (1) year from the date of
original installation, not to exceed 18 months from the date of shipment. Any component which proves to be faulty in material
and/or workmanship will be replaced or repaired (at the option of Prince Castle) without cost for parts or labor. This warranty is
subject to the following exceptions/conditions:
• This equipment is portable, charges for on location service (e.g. trip charge or mileage) are not covered under the
provisions of this warranty.
• Use of any non-genuine Prince Castle parts voids this warranty.
• All labor shall be performed during regular work hours. Overtime premiums will be charged to the buyer.
• Damage caused by carelessness, neglect, and/or abuse (e.g. dropping, tampering, or altering parts) equipment damaged
in shipment, by fire, flood, or an act of God is not covered under this warranty.
Operation
Start a timer.
a. Timers that are not currently running
will have their assigned product names
displayed continuously and their LEDs
will glow red. See Figure A.
b. Press a timer button to start a timer.
If the timer has a product assigned to it,
a higher pitched “beep” will sound and
the timer will begin to count down.
If the timer does not have a product
assigned to it, a lower pitched “boop”
will sound and the timer will not count
down.
Figure A.
BACN SAUS
EGGS
Product Timer
LED Name Button
755-506 Printed 5/2005
1
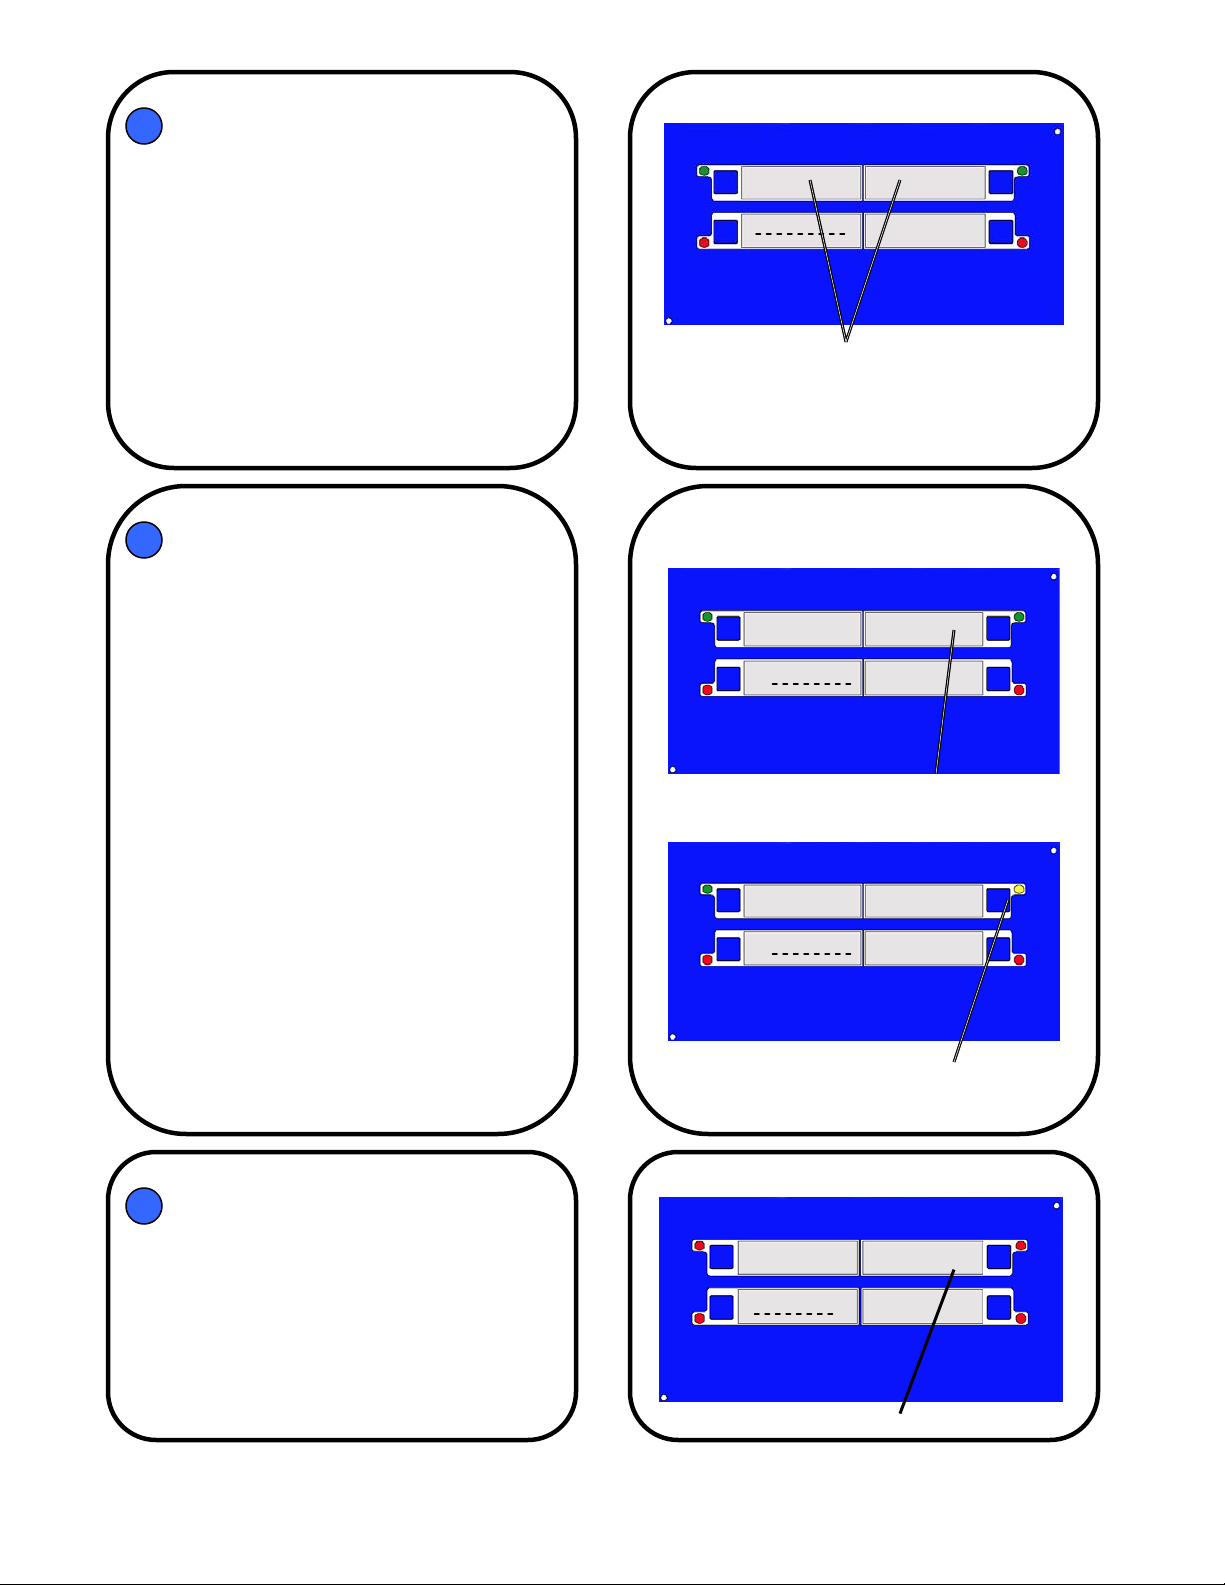
Every 5 seconds, the display will alternate
between the product name assigned to the
timer and the remaining time.
See Figure B.
The timer LED will change color to indicate
the timer’s progress. The display will show
Duty messages and alarms.
Note: Timers that are not running will
display the product name constantly and
their LEDs will be red.
Figure B.
BACN 1:25
EGGS
Displays of active timers alternate between
Product Name and Remaining Time.
A timer’s LED is green during the first
cooking stage.
When a timer reaches the end of its first
stage, an Alert alarm will sound, its LED
will flash and one of the following two
things will occur:
1. If there is a second stage of cooking,
the timer will continue to count down
while the Alert alarm sounds, the
display will flash its Duty 1 message
and its LED will flash yellow for 5
seconds. Then, the timer’s display will
resume and its LED will glow yellow,
indicating that the timer is in its second
stage. See Figure C
2. If the timer is not programmed for a
second stage, its display will flash the
Duty 1 message and the LED will flash
red while a Done alarm will sound until
its timer button is pushed to cancel it.
Figure C.
BACN TURN
BACN SAUS
Message Flashes
LED will turn yellow
EGGS
Duty 1
EGGS
to indicate Duty 2.
At the end of the second stage, a Duty
message will flash and its Done alarm will
sound. The timer’s LED will flash red until its
timer is cancelled manually. See Figure D.
Note: To cancel a timer at any time, press
and hold its timer button for 3 seconds.
Figure D
BACN DONE
EGGS
Duty Message appears and LED turns
755-506 Printed 5/2005
2
Programming
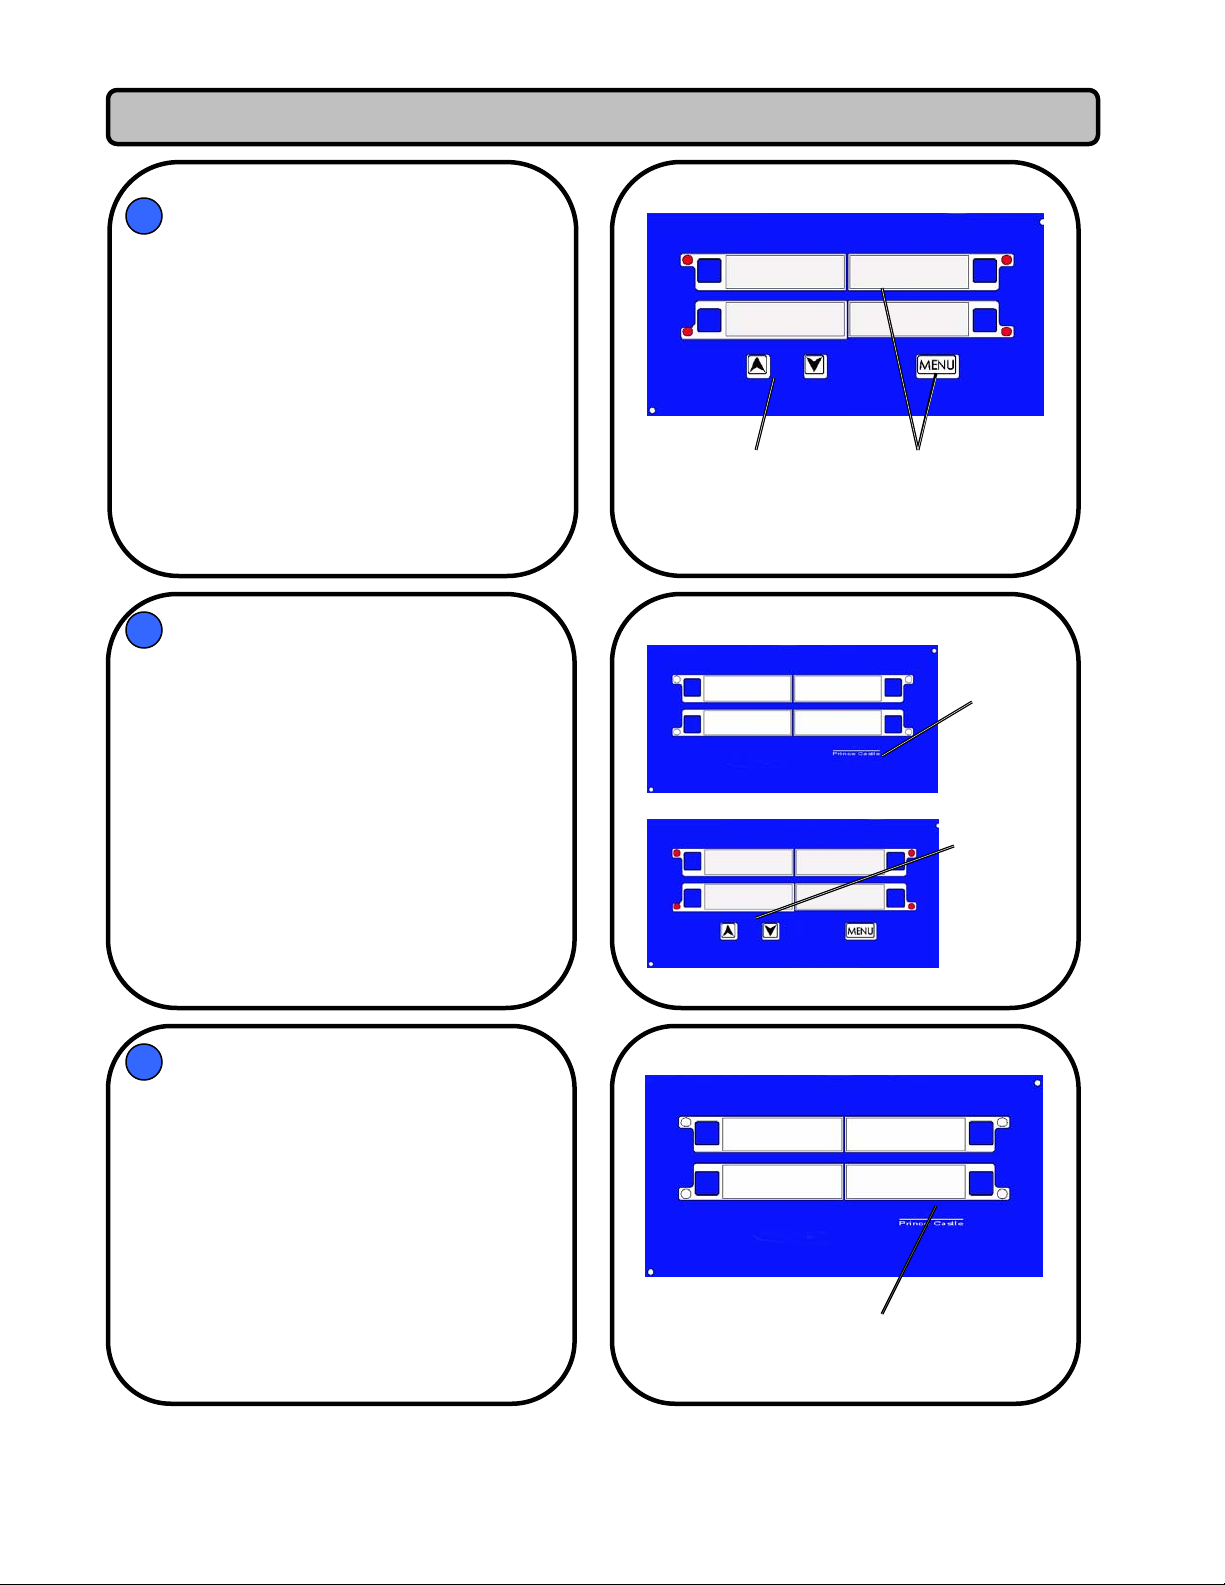
To change the Current Menu Number
A. Press and hold the Menu button and the
press and release the Up or Down
Arrow to raise or lower the Menu
number.
B. The Menu Number will be displayed as
long as the Menu button is pressed.
Released the button to save the change.
See Figure E.
Note: If any timer is already running
when the Menu number is changed, it will
continue to run under its original Menu
number until it is canceled.
Figure E
Press the Up or
Down Arrow to
change the Menu
MENU1
Press and Hold the
Menu button and the
current Menu will
appear in the display.
To adjust the Volume level
Note: The volume can be adjusted only
when no timers are running.
A. Press and Hold the Logo button and
press the Up or Down Arrows to adjust
the volume. See Figure F.
B. Each time the Up or Down Arrows are
pressed, a tone will sound to indicate
the volume level and the volume level
will be show on the display (1-4)
C. When finished, release all buttons. The
new volume level will be saved and the
display will return to the timing mode.
Figure F.
Press
and hold
the
Prince
Castle
Logo
Press the
Up or
Down
arrows
adjust the
volume.
to
Timer Product Channel Assignment
Note: Products may be assigned to timers
only when no timers are running.
A. Press and hold the Logo button for 6
seconds until all displays read “PROG”.
See Figure G.
B. Press a timer button and its currently
assigned product will be displayed. The
other displays will be blank. See Figure
H.
Figure G
PROG
PROG
Press and hold the Prince Castle
until all displays read “PROG”
PROG
PROG
755-506 Printed 5/2005
3
 Loading...