

Page 1
Installation
®
Thermodose
Für Ziegel T7, T8, T9, Ytong und jedes Mauerwerk
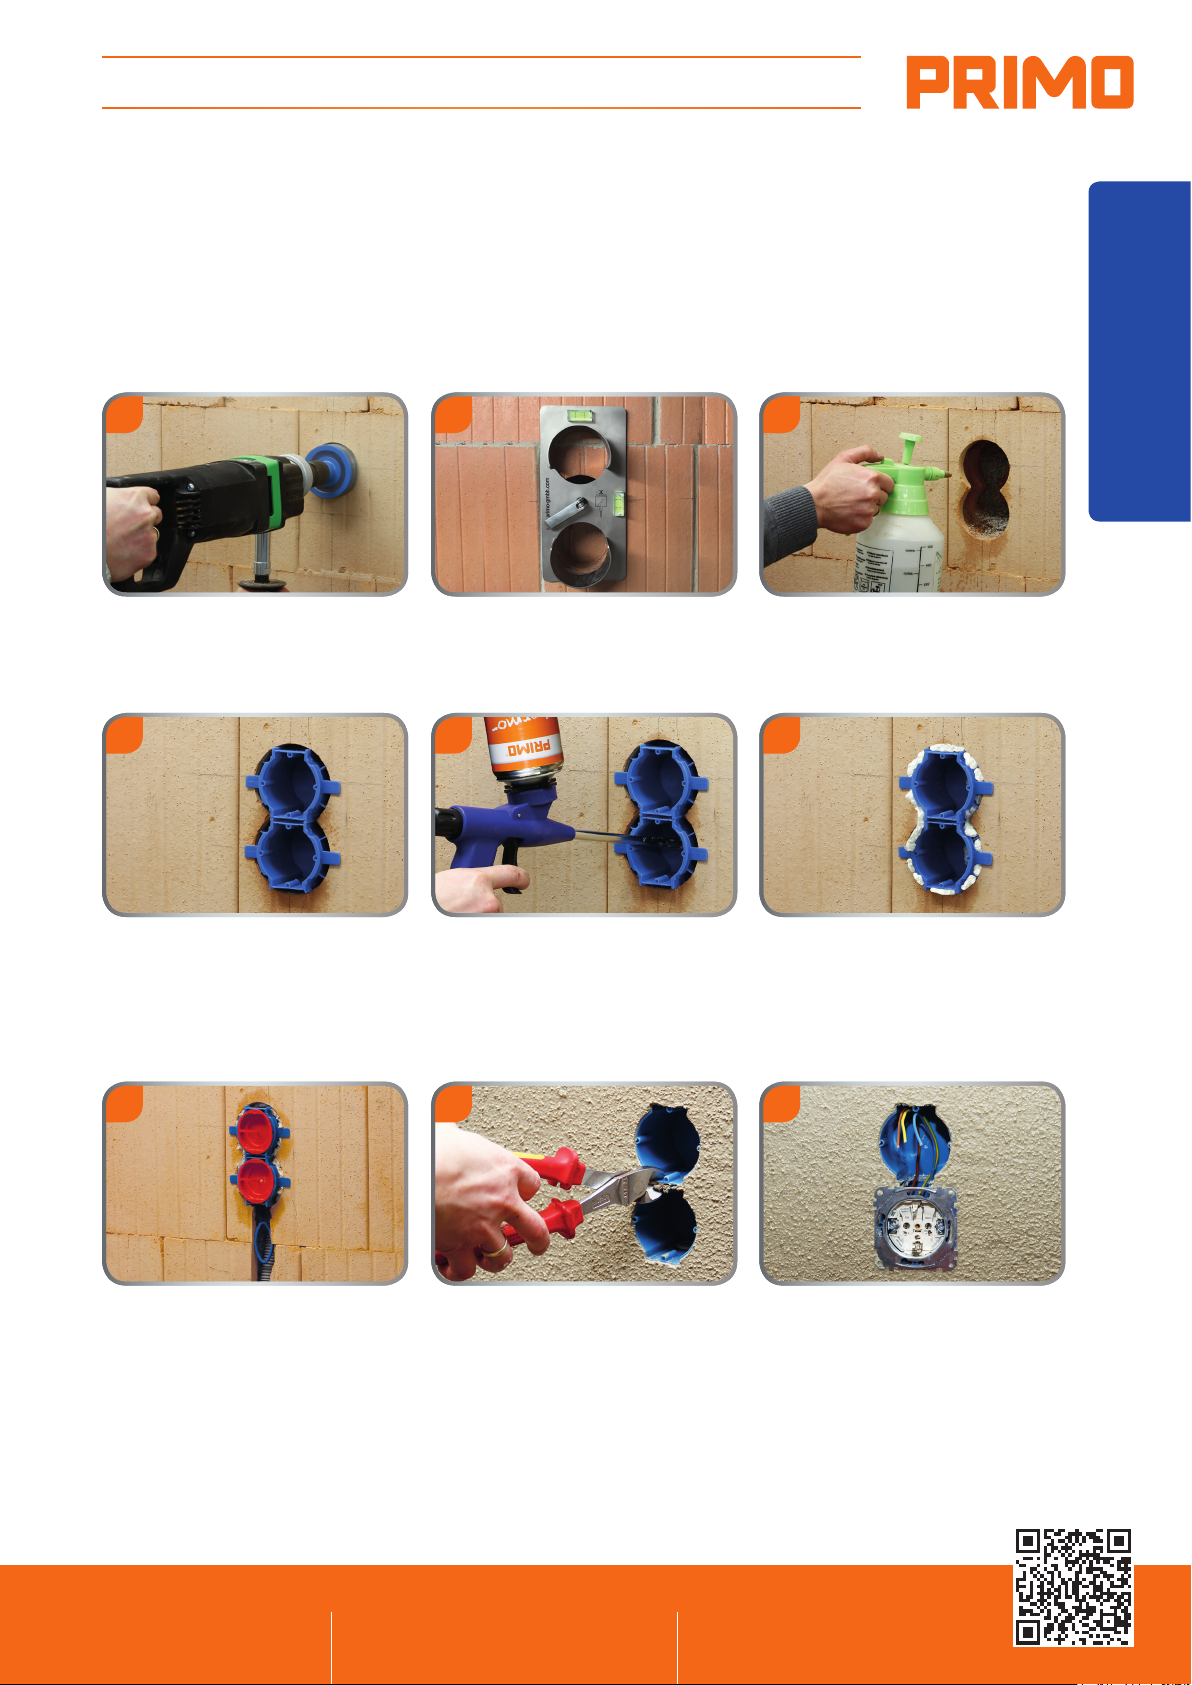
Schnellmontage im Mauerwerk
1
Erste Dose anzeichnen und mit
Ø 82 mm Bohrkrone ausbohren.
2
Bohrschablone einsetzen, ausrichten und
weitere Löcher bohren.
5
Wärmebrückenfrei laut DIN-Norm 18015-5
3
Montageanleitung
Bohrung anfeuchten.
6
Kombinationen, Normabstand 71 mm.4Dose einschäumen, durch die seitlichen
Laschen ist die Putzstärke vorgegeben.
7
Rohr, Kabel einführen, Putzdeckel
aufdrücken.
8
Nach dem Verputzen wird der
SCS-Verbindungssteg ausgebrochen.
Schaum verteilt sich gleichmäßig,
durch die seitlichen Laschen.
Bei Außenwänden bitte ganz
umschäumen (wärmebrückenfrei).
9
Zeitsparende Verdrahtung durch
ausgebrochenen SCS-Steg.
Stand 07/2018
Primo GmbH
Gebrüder-Dickow-Str. 2
84478 Waldkraiburg
Telefon
Telefax
+49 8638 / 88 55 92 00
+49 8638 / 88 55 92 99
info@primo-gmbh.com
www.primo-gmbh.com
Page 2
Installation
®
Thermodose
Für Ziegel T7, T8, T9, Ytong und jedes Mauerwerk
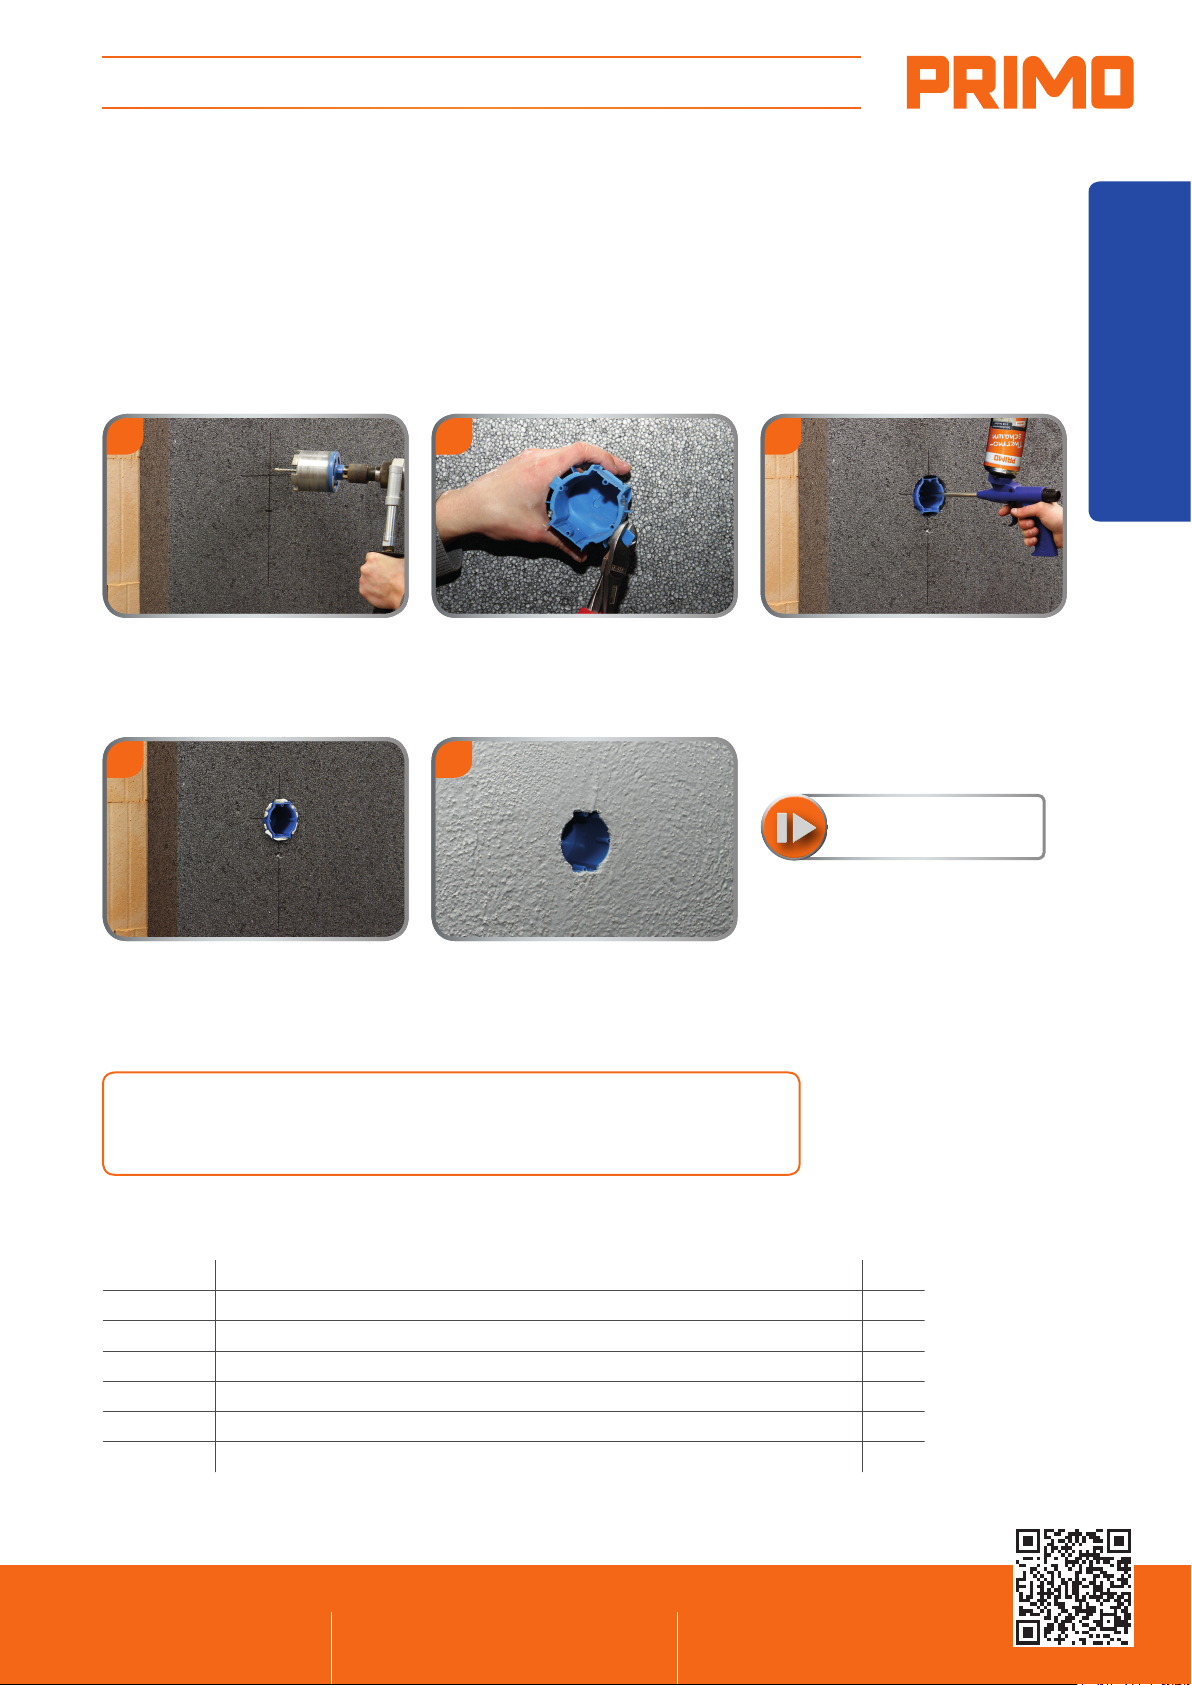
Schnellmontage im Vollwärmeschutz (WDVS)
1
Erste Dose anzeichnen und mit
Ø 82 mm Bohrkrone ausbohren.
4
Schaum verteilt sich gleichmäßig.
2
Seitliche Laschen entfernen.
5
Wärmedämmung wird mit Gewebe
verspachtelt und fertig verputzt.
3
Montageanleitung
Dose einschäumen.
Produktfilm unter:
www.primo-gmbh.com
Stand 07/2018
Primo GmbH
Gebrüder-Dickow-Str. 2
84478 Waldkraiburg
Seit Einführung von Teil 5 der DIN 18015-5 ist der Elektroinstalla-
teur ausdrücklich in der Pflicht eine wärmebrückenfreie Installation
auszuführen.
Art.-Nr. Bezeichnung VPE
P721 Thermodose UP / Schnellmontage / Schallschutz / ECO / Winddicht 25
P717 Thermoschaum 750 ml 1
P718 Unterputzbohrschablone 82 mm 1
P719 Pistole für Primo Thermoschaum 1
P723 Diamantbohrkrone 82 mm, 6 Segmente 1
P724 Bohrkronenadapter M16 SDS 1
Telefon
Telefax
+49 8638 / 88 55 92 00
+49 8638 / 88 55 92 99
info@primo-gmbh.com
www.primo-gmbh.com
Page 3

Installation
®
Thermo switch box
For brick T7, T8, T9, Ytong and every brickwork
Thermal bridge free according to
Quick assembly in the masonry
DIN standard 18015-5
1
Mark the first box and drill a
Ø 82 mm hole.
4
Combinations, standard distance
71 mm.
2
Insert and adjust the drilling template
and drill another holes.
5
Lathering the box, the side clips set
the plaster thickness.
3
Assembly instruction
Wet the bore.
6
Foam spreads evenly, through the side
tabs.
For exterior walls, please completely
foam (free of thermal bridges).
Lead the pipe and the cable in. Press on
the plaster cover.
Stand 07/2018
Primo GmbH
Gebrüder-Dickow-Str. 2
84478 Waldkraiburg
7
8
Remove the SCS connection after
plastering.
Telefon
Telefax
+49 8638 / 88 55 92 00
+49 8638 / 88 55 92 99
9
Time saving wiring based on removing
the SCS connection.
info@primo-gmbh.com
www.primo-gmbh.com
Page 4

Installation
®
Thermo switch box
For brick T7, T8, T9, Ytong and every brickwork
Quick installation in full thermal insulation (ETICS)
1
Mark the first box and drill a
Ø 82 mm hole.
4
The lather distributed evenly.
2
Remove the side clips.
5
Now you can fill the thermal insulation
and plaster.
3
Assembly instruction
Lathering the box.
Product clip at:
www.primo-gmbh.com
Stand 07/2018
Primo GmbH
Gebrüder-Dickow-Str. 2
84478 Waldkraiburg
Since the introduction of Part 5 of DIN 18015-5 is the electrician
expressly in the duty of a thermal bridge-free installation
perform.
Order-No. Name VPE
P721 Thermo switch box / Quick installation / soundproofing / ECO / windproof 25
P717 Thermo foam 750 ml 1
P718 Flush-mounted template 82 mm 1
P719 Thermo foam pistol 1
P723 Diamand drill bit 82 mm 1
P724 Drill bit adapter M16 SDS 1
Telefon
Telefax
+49 8638 / 88 55 92 00
+49 8638 / 88 55 92 99
info@primo-gmbh.com
www.primo-gmbh.com
 Loading...