

Page 1

Operating instructions
MGA21324 / GB / K05
DefiMonitor XD
Page 2

Masthead
Publisher
METRAX GmbH
Phone: 0741/257-0
Email: info@primedic.com
Web: www.primedic.com
Address: Rheinwaldstr. 22
D-78628 Rottweil
Germany
Release date: 11.04.2012
Proprietary note
METRAX GmbH reserves all rights to these operating instructions. Without approval from
METRAX GmbH, these operating instructions may not be duplicated or made accessible to
third parties. The same applies to individual parts or excerpts of these operating
instructions.
Non-compliance with this gives rise to a right to claim damages and can have
consequences under criminal law (refer to DIN 34).
Page 3

Table of contents
Table of contents
1 Introduction 6
1.1 Foreword 6
1.2 Validity 6
1.3 Warranty 6
1.4 Disclaimers 7
1.5 Symbols used in these operating instructions 8
1.6 Pictograms on the device 9
1.7 Pictograms on SavePads 10
1.8 Image mark on the encompassing packaging 10
2 Intended use 11
2.1 Indication/Contraindication for Defibrillation 13
2.2 Possible complications 13
2.3 Users 14
3 Safety information 15
3.1 General information 15
3.2 General safety instructions 16
3.3 Safety notes for you, the user 17
3.4 Safety notes for protection of the patient 17
3.5 Safety notes for the protection of third parties 19
3.6 Safety notes for protection of the device 19
4 Description of device 20
4.1 General description 20
4.2 Description of device details 22
4.3 Capacity display 33
4.4 Data management 34
4.5 Description of the accessories 35
4.5.1 Paddles 35
4.5.2 PRIMEDICTM SavePads Connect cable 36
4.5.3 PRIMEDICTM SavePads 36
4.5.4 ECG patient cable, 3-pin 37
4.5.5 SpO2-Sensor (only for PRIMEDIC™ DefiMonitor
XD3/XD30/XD300/XD330) 38
5 Preparatory measures before (initial) start-up 39
5.1 Unpacking 39
5.2 Inserting / Changing the SaveCard 39
5.3 Power supply 40
5.3.1 Inserting PRIMEDIC™ AkuPak 41
5.3.2 Removing PRIMEDIC™ AkuPak 42
5.4 Loading the PRIMEDIC™ AkuPak 43
5.4.1 Charging the AkuPak in the optional PRIMEDIC™ Charger Basis /
Charger Comfort 44
5.5 Connecting the mains cable 44
5.6 Inserting paper in the printer 45
6 Device self-test 46
6.1 Self-test when the PRIMEDIC™ DefiMonitor XD is switched on 46
6.2 Automatic, periodic self-tests 46
7 Operating the PRIMEDIC™ DefiMonitor XD 47
Page 4

Table of contents
7.1 Switching on / off 47
7.1.1 Switching the PRIMEDIC™ DefiMonitor XD on 47
7.1.2 Switching the PRIMEDIC™ DefiMonitor XD off 47
7.2 Selecting the operating mode 47
7.2.1 Operating modes 47
7.2.2 Auto mode (AED mode) 47
7.2.3 Manual mode (MAN Mode) 48
7.3 Changing the configuration/setup 48
7.4 Parameter list menu 49
7.4.1 Changing the configuration – Example: time 51
7.4.2 MMI Test (Man-Machine Interaction) 51
7.5 Alarms 51
7.5.1 ECG Alarm 52
7.5.2 VF Alarm 52
7.5.3 SPO2 Alarm 53
7.6 Event button 53
7.7 Operating the printer 54
7.7.1 Log of the ECG signal 54
7.8 Automatic printout after each shock (Autoprint) 55
7.9 Printing out the Event Memory 56
8 Applying the electrodes 57
8.1 Undressing the patient 57
8.2 Positioning 57
8.2.1 Positioning self-adhesive electrodes and paddles 57
8.2.2 Positioning the ECG self-adhesive electrodes 58
8.2.3 Positioning the PRIMEDIC™SavePads Connect for pacing 58
8.3 Removing hair growth from chest 60
8.4 Drying the skin 60
8.5 Placing the electrodes 60
8.6 Checking the electrodes 61
8.7 Changeover of ECG source 62
9 Auto mode (AED mode) 63
9.1 Voice output by the device / Preliminary examination of the patient 63
9.2 Carrying out ECG analysis in Auto mode 64
9.3 Defibrillation required 64
9.4 Defibrillation not required 66
9.5 Keeping the defibrillator ready for use 66
10 Manual mode (MAN Mode) 67
10.1 Carrying out defibrillation 67
10.1.1 Power selection 67
10.1.2 Charging 68
10.1.3 Triggering defibrillation 68
10.2 SYNC and ASYNC mode 69
10.3 Keeping the defibrillator ready for use 71
11 Attaching the SpO2 sensor 72
12 Operating the pacer 73
12.1 General information on operating the Pacer XD 73
12.2 Setting the Pacer operating modes 74
12.3 Setting the stimulation rate 75
12.4 Setting the stimulation intensity 76
12.5 Starting and stopping pacing 76
Page 5

Table of contents
12.6 Defibrillation during pacing / Defibrillation via self-adhesive electrodes 78
13 Cleaning, maintenance and dispatch 79
13.1 Cleaning 79
13.2 Servicing 79
13.2.1 Servicing check list 79
13.3 Dispatching the PRIMEDIC™ DefiMonitor XD 80
14 List of error codes 81
15 Disposal 87
16 Technical Data 88
17 Accessories 92
18 Warranty conditions 93
19 Depiction of the current time function 94
20 Rhythm detection system in AED mode 101
21 General information on the use of pulse oximeters 104
22 Guidelines and manufacturer's declaration – Electromagnetic emissions 106
23 General instructions and rules for using PRIMEDIC™ AkuPaks 111
24 Safety checks 113
25 Index of diagrams 114
Contact details 115
Page 6

Introduction
6 / 116
DefiMonitor XD 21324 / GB / K05
METRAX GmbH
1 Introduction
1.1 Foreword
Dear User,
You are faced with the task of using the PRIMEDIC™ DefiMonitor XD in a medical emergency
on human beings.
To ensure that you can react quickly and correctly in this special situation and can optimally
use the options given with the device, it is necessary for you to read through these operating
instructions in your own time beforehand to familiarise yourself with the device, its functions
and the areas of application.
Keep these operating instructions near the device so that you consult any queries which may
arise.
If you should have any questions regarding the device or other PRIMEDIC™ products, we are
at your entire disposal.
You will find our contact address on the masthead at the start of these operating instructions.
1.2 Validity
The information given in these operating instructions applies to all models in the defibrillator
range
PRIMEDIC™ DefiMonitor XD
made by METRAX GmbH.
Please note that, depending on its specific configuration, your device may not correspond in all
details to the information given in these operating instructions. See the start dialogue of your
PRIMEDIC™ DefiMonitor XD for the exact configuration of your device.
1.3 Warranty
The warranty period is 24 months, beginning on the date of purchase. Please keep the invoice
as proof of purchase.
The general guarantee and warranty provisions of METRAX GmbH are applicable.
Any repairs or changes to the device may only be carried out by the manufacturer or by a
person or company authorised by the manufacturer.
Page 7

Introduction
METRAX GmbH
DefiMonitor XD 21324 / GB / K05
7 / 116
1.4 Disclaimers
Liability claims in the event of damages to people or property are excluded if they are based
on one or more of the following reasons:
• Using the device in a manner for which it was not intended.
• Improper use and maintenance of the device.
• Operating the device with the protective covers removed or when there is obvious
damage to cables and/or electrodes.
• Non-compliance with the instructions in these operating instructions with regard to
operation, maintenance and repair of the equipment.
• Using accessories and spare parts made by other manufacturers.
• Autonomous intervention, repairs or constructional changes to the device.
• Autonomous overrunning of the performance limits.
• Lack of monitoring parts that are subject to wear and tear.
• Treatment of patients without prior indication.
Page 8

Introduction
8 / 116
DefiMonitor XD 21324 / GB / K05
METRAX GmbH
1.5 Symbols used in these operating instructions
DANGER
Texts marked DANGER indicate an extraordinarily serious, actual danger
which will definitely lead to serious injury or even death if no preventative
measures are adopted.
It is imperative that you follow these instructions!
WARNING
Texts marked WARNING indicate extraordinarily serious, possible dangers
which, should no preventative measures be taken, may lead to serious
injury or even death.
It is imperative that you follow these instructions!
CAUTION
Texts marked with CAUTION indicate a possible dangerous situation
which could lead to minor injuries or damage to property.
It is imperative that you pay attention to these texts.
Note
This symbol indicates text which contains important advice / comments or tips.
This point identifies the first step of a sequence of actions you should take.
Second step of an action you should take. etc.
• This line marks lists
(3) Numbers in brackets refer to items in diagrams.
< ... > The text in pointed brackets are acoustic instructions / arrangements of the
equipment which are simultaneously shown on the monitor, depending on
the equipment variant.
Page 9

Introduction
METRAX GmbH
DefiMonitor XD 21324 / GB / K05
9 / 116
1.6 Pictograms on the device
IP33
Protection against foreign bodies > 2.5 mm
Protection against spray water (60° to the vertical)
Please observe the operating instructions.
Do not dispose of device in domestic refuse.
Dangerous electric voltage (high voltage)
Degree of protection CF in connection with ECG patient
cable:
10µA patient leakage current (NC – normal condition)
50µA patient leakage current (SFC – single fault condition)
100µA patient leakage current (SFC – defibrillation outputs)
according to IEC60601-1 and IEC60601-2-4
Fig. 1: Brief instructions on use of devices
with AED mode
Fig. 2: Brief instructions on use of devices
without AED mode
Page 10
Introduction
10 / 116
DefiMonitor XD 21324 / GB / K05
METRAX GmbH
1.7 Pictograms on SavePads
Not to be reused
Expiry date
Batch ID
Only for adults
Order number
Storage temperature in Celsius and Fahrenheit
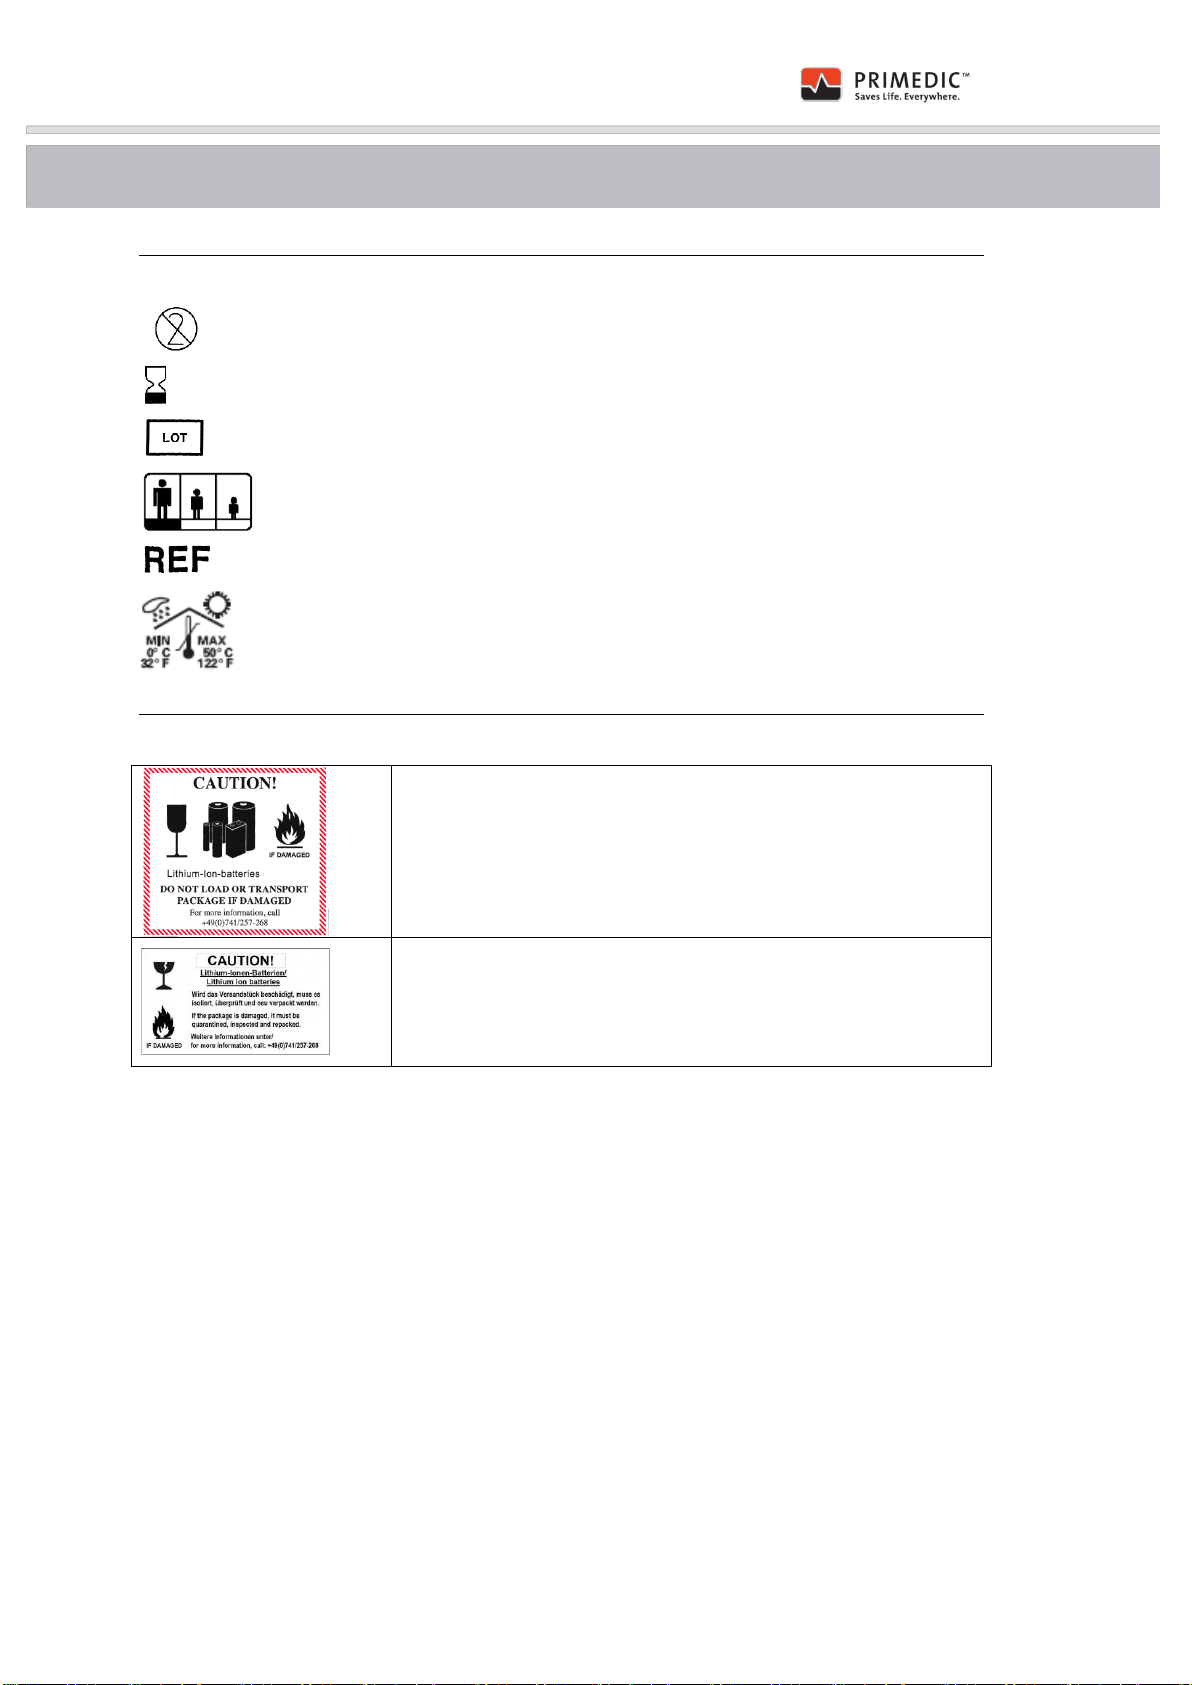
1.8 Image mark on the encompassing packaging
Sticker on the encompassing packaging for the PRIMEDIC™
AkuPak LITE for airfreight despatch
Sticker on the encompassing packaging for the PRIMEDIC™
AkuPak LITE for road/rail/marine despatch
Page 11

Intended use
METRAX GmbH
DefiMonitor XD 21324 / GB / K05
11 / 116
2 Intended use
This device is intended for use by appropriately trained medical personnel and doctors, both in
emergency medical services and in everyday clinical applications, in compliance with
applicable national legislation.
The device is frequently used in brief applications in the course of emergency medical
treatment (typically up to 2 hours).
It can be powered either by a rechargeable internal power source (battery) or from the mains.
The device is used for transthoracic defibrillation. The main application is defibrillation in
asynchronous manual mode, while a further possible application is the cardioversion of atrial
fibrillation in synchronous manual mode after sedation of the patient. In manual mode, the user
decides whether it is necessary to administer a shock, while in AED mode, the device
automatically recommends defibrillation.
In automatic mode, the energy levels for the first, second and third shocks are predetermined
by the set current values 20A, 25A and 30A and the capacitor voltage which depends on the
patient impedance, while in manual mode, the energy levels 5J, 10J 20J, 30 J, 50J, 100J,
200J, 300J, 360 J can be selected in order to allow the doctor to define the defibrillation
charge according to the weight of the patient. This means that in manual mode, defibrillation
can also be carried out on children if suitable pads are used.
The device can also be used to record and display electrocardiograms. When the electrodes
are used as intended, the derivation from the defibrillation electrodes is in the Einthoven II
derivation. If an ECG cable and standard ECG electrodes are used instead of the defibrillation
pads, dual channel monitoring is possible. A random (appropriate) selection of 2 signals from
the Einthoven I, II, III or Goldberger aVR, aVL, aVF – analogue derivations can be displayed.
This requires correct positioning of the electrodes as described in the operating instructions.
A further configuration of the device is to equip it with an SPO2 module and an SPO2 sensor to
allow the oxygen saturation graph to be displayed in addition to the ECG function.
A printer allows documentation of the current ECG graphs before and where necessary, after
defibrillation for comparison and evaluation in emergency medical treatment. The quality of the
ECG printout corresponds to that shown on the display, as this was the only basis for deciding
on the appropriate treatment in the specific emergency situation. Graphic evaluation of the
ECG printout is possible by displaying a 1 mV calibration.
In a further configuration of the device, a pacer module with adjustable modes Fix (analogous
to the S00 Mode), Demand (inhibiting, corresponds to SSI Mode) or Overdrive can be added in
manual mode, allowing transthoracic stimulation via self-adhesive electrodes.
The transthoracic pacer can only be used Ii the event of bradycardia after sedating the patient.
A further area of application is transthoracic stimulation when the heart first begins to beat
bradycardially after defibrillation, in order to allow the necessary oxygen saturation of the
bloodstream to develop.
The device is designed for use anywhere, inside buildings and in the open and special
mounting fixtures are available allowing it to be carried in emergency rescue vehicles, rescue
helicopters or planes. It is designed to be able to accompany the patient from the site of an
accident or emergency to the hospital without changing the electrodes.
Page 12

Intended use
12 / 116
DefiMonitor XD 21324 / GB / K05
METRAX GmbH
The device must not be used in locations where there is potential danger of an explosion (e.g.
explosive anaesthetic gas mixes).
NMR equipment or the radio equipment used by emergency services personnel can cause
interference as a result of the increased electromagnetic emission. In this case, the limitations
described in the operating instructions apply or where possible, shut off or screen the sources
of the interference.
WARNING
Any use above or beyond this is not considered as intended use and
can lead to personal injury or damage to property.
The PRIMEDIC™ DefiMonitor XD may only be used as described
and under the conditions detailed in these operating instructions.
Page 13

Intended use
METRAX GmbH
DefiMonitor XD 21324 / GB / K05
13 / 116
2.1 Indication/Contraindication for Defibrillation
WARNING
The defibrillator unit of the PRIMEDIC™ DefiMonitor XD may only be
used when dysrhythmia, such as ventricular fibrillation/flutter or
certain types of arterial and ventricular tachycardia occur,
accompanied by the following symptoms (indication):
• patient is unconscious
• patient is not breathing normally
WARNING
The defibrillator unit of the PRIMEDIC™ DefiMonitor XD must not be
used if
• the patient is conscious or
• the patient is breathing normally or
• a normal pulse can be felt or
• asystolia or
• electrical activity without a pulse is detected
• For automatic mode: is a child under the age of 8 or
weighing less than 25 kg respectively.
2.2 Possible complications
WARNING
• Irritation of the skin or even burns if, for example,
insufficient defibrillation gel is used.
• Possible damage to the myocardium as a result of the
defibrillation charge
• Cardiac arrhythmia (e.g. atrial fibrillation or flutter) may
occur after successful defibrillation or cardioversion.
Page 14

Intended use
14 / 116
DefiMonitor XD 21324 / GB / K05
METRAX GmbH
2.3 Users
In manual mode, the PRIMEDIC™ DefiMonitor XD is to be used exclusively by specially
trained medical personnel.
In automatic mode, the PRIMEDIC™ DefiMonitor XD can be used by trained medical
personnel. Use of the equipment must be ordered by a doctor.
Improper use of the defibrillator can lead to ventricular fibrillation, asystolia or other dangerous
dysrhythmia.
The operator of the PRIMEDIC™ DefiMonitor XDs is responsible for ensuring that the
PRIMEDIC™ DefiMonitor XD is only used by authorised and trained specialist personnel.
Note
The guidelines governing the application of emergency treatment in the event of
cardiac arrest may change. The device described in this operating manual complies
with the guidelines of the European Resuscitation Council with Guidelines 2010
Resuscitation.
Page 15

Safety information
METRAX GmbH
DefiMonitor XD 21324 / GB / K05
15 / 116
3 Safety information
3.1 General information
Both in conjunction with its accessories and the optional accessories, and also individually, the
PRIMEDIC™ DefiMonitor XD fulfils the currently applicable safety standards and complies with
the provisions of the medical products regulations 93/42/EC.
The device and its accessories are safe when used as intended and taking into account the
descriptions and information detailed in these operating instructions.
Despite this, if used incorrectly, the device and its accessories can be dangerous to the user,
the patient or third parties.
DANGER
For this reason, we emphatically advise that before using for the first
time, all those who are supposed to use this device or want to use it
• must be instructed in a training session about the medical
background of defibrillation and the indications or
contraindications and thus need to be authorised.
• need to read and take note of these operating
instructions and in particular the safety tips and warnings
detailed in them.
WARNING
The PRIMEDIC™ DefiMonitor XD is not licensed for use in explosive
areas.
DANGER
Not using the device as intended or using it improperly, exposes the
user, the patient or third parties to the danger
• of an electric shock from the high voltage generated by
the device,
• of influencing active implants,
• of burns from incorrectly applied electrodes.
Apart from that, the device can be damaged or destroyed through
improper use.
Page 16

Safety information
16 / 116
DefiMonitor XD 21324 / GB / K05
METRAX GmbH
Note
Observe the information and rules in the appendix on using the
PRIMEDIC™ DefiMonitor XD.
When carrying the DefiMonitor XD in a vehicle, the paddles must be
secured in the attachment provided and the device must be secured stored
in a wall bracket.
Applicable for Europe:
• The device complies with the Medical Device Directive (MDD).
Additionally, following apply to Federal Republic of Germany:
• The device complies with the Medical Devices Law (MPG) and is subject to the
Ordinance on the Operation and Use of Medical Devices (MPBetreibV).
• According to the Ordinance on the Operation and Use of Medical Devices
(MPBetreibV), the device is to be subjected to the regular checks explained in the
appendix.
• According to the Ordinance on the Operation and Use of Medical Devices
(MPBetreibV), a medical devices log needs to be kept for the device. Regular
checks of the device are to be documented in it.
For the other states in the European Community, national regulations for operating medical
devices apply.
3.2 General safety instructions
DANGER
The device may not be used in the vicinity of flammable materials
(e.g. cleaning solvents or similar) or in an atmosphere enriched with
oxygen or flammable gases/vapours.
Monitor the use of the device at all times.
Page 17

Safety information
METRAX GmbH
DefiMonitor XD 21324 / GB / K05
17 / 116
3.3 Safety notes for you, the user
WARNING
Only use the device on a patient if
• You have ensured its operational safety before using it
and that it is in good condition.
• the state of the patient requires or allows an application.
Before using the device, ensure that the temperature is within the
operating temperature range. This applies for example, if the
defibrillator is stored in a rescue vehicle.
Do not apply the device if it has been damaged or is defective (e.g. if
the defibrillator cable is damaged or the housing has been damaged)
Do not touch the patient during defibrillation. Avoid any contact
between
• parts of the patient's body (such as bare skin on head or
legs), as well as
• conductible liquids (such as gel, blood or salt solutions)
and
• metal objects around the patient (such as the bedframe
or traction devices)
which present unintended paths for the defibrillation current!
Although the DefiMonitor XD and its original accessories are
defibrillation-protected, we recommend that you do not touch them
while defibrillation is being carried out with another device.
3.4 Safety notes for protection of the patient
DANGER
Do not use the device on a patient unless you have ensured its
operational safety before using it and that it is in good condition!
Observe the patient during the entire period of treatment and
regularly monitor display on equipment so as to recognise changes in
patient's condition in a timely manner and to take appropriate
counter-measures.
Before using the device, ensure that the temperature is within the
operating temperature range. This is important, for example, when
the device is stored in an emergency services vehicle in winter.
Do not use the device if it is defective (e. g. if the defibrillation cable is
damaged).
Only use the device with accessories, wearing parts and disposable
items which have proven to be completely safe to use by being tested
Page 18

Safety information
18 / 116
DefiMonitor XD 21324 / GB / K05
METRAX GmbH
by a testing authority licensed to test the device when equipped ready
for use.
Use new, undamaged and unexpired defibrillation electrodes for
every patient to avoid any possible burns to the skin!
Only connect the self-adhesive electrodes with the PRIMEDIC™
DefiMonitor XD. Use of the electrode system with other devices can
lead to dangerous impedance currents for the patient!
Do not use the device in the immediate vicinity of other sensitive
equipment (e.g. measuring equipment that is sensitive to magnetic
fields) or strong sources of interference which could affect the way
the PRIMEDIC™ DefiMonitor XD works. Keep a sufficient distance
away from other therapeutic and diagnostic energy sources (e.g.
diathermy, high frequency surgery, magnetic resonance tomography).
These devices can affect the PRIMEDIC™ DefiMonitor XD and
disrupt the way it operates. For this reason, disconnect all other
devices from the patient before carrying out defibrillation.
Prior to defibrillation, disconnect all other electrically-operated
medical devices that are not defibrillation-proof and are used on the
patient.
Keep the defibrillation electrodes and the ECG electrodes away from
other electrodes, metal objects and earthed objects!
Do not use the device in AED mode on children under the age of 8 or
children with an estimated body weight of less than 25 kg!
Position the electrodes precisely according to the description.
Dry the chest and carefully remove any large amount of hair on the
patient before applying the defibrillation electrodes.
Do not place the defibrillation electrodes directly over an implanted
pacemaker to avoid a possible misinterpretation by the device and to
avoid any damage to the pacemaker from the defibrillation impulse.
Do not touch the patient during the ECG analysis and avoid any
vibrations.
If the ECG analysis is being carried out in a vehicle, the vehicle has
to stop and switch off the engine to guarantee a correct analysis.
Stop any reanimation while the PRIMEDIC™ DefiMonitor XD is
analysing the ECG.
In case of extreme fluctuations in the power supply, the device should
be disconnected from the mains by pulling the mains plug out from its
socket, and the device should be operated using the integrated
PRIMEDIC™ AkuPak battery.
Strong sunlight may make it difficult to read the display.
The use of several medical devices simultaneously may present a
Page 19

Safety information
METRAX GmbH
DefiMonitor XD 21324 / GB / K05
19 / 116
danger to the patient as a result of the cumulation of patient currents.
3.5 Safety notes for the protection of third parties
DANGER
Warn people in the vicinity loudly and clearly before the defibrillation
so that they step back from the patient and are no longer in contact
with him.
3.6 Safety notes for protection of the device
CAUTION Damage to property
• Repairs, changes, extensions and installations of the
PRIMEDIC™ DefiMonitor XD may only be carried out by
personnel authorised and trained by METRAX
• The PRIMEDIC™ DefiMonitor XD does not have any
parts that can be repaired by the user.
• Use only accessories which meet the requirements of the
relevant laws, EU directives and other standards. This
applies in particular to the SPO2 sensor, self-adhesive
electrodes and replacement batteries. These conditions
are fulfilled by all original PRIMEDIC™ accessories and
wearing parts.
• Clean the device in the prescribed manner, i.e., only in its
power-off state and with the electrodes disconnected.
Page 20

Description of device
20 / 116
DefiMonitor XD 21324 / GB / K05
METRAX GmbH
4 Description of device
4.1 General description
The PRIMEDIC™ DefiMonitor XD is an external defibrillator with integrated 6-channel ECG.
The ECG can be recorded either via the PRIMEDIC™ SavePads, the defibrillation paddles or
the three-pin patient cable with self-adhesive ECG electrodes. The PRIMEDIC™ DefiMonitor
XD is available in various configurations. The respective model is displayed in the start
dialogue on the monitor.
In automatic mode (Auto mode), the ECG is analysed via the implemented algorithm. If
potentially fatal arrhythmia is detected, the device recommends defibrillation and generates the
necessary electric shock for reanimation when enabled by the user. No electric shock is
generated if the device does not detect an abnormal rhythm requiring defibrillation.
In manual mode, the doctor or trained user decides whether defibrillation is necessary.
The following models are available:
A. completely manual defibrillators:
• DefiMonitor XD1 Model with Monitor and 6-channel ECG
• DefiMonitor XD3 Model with monitor and 6 channel ECG and pulse oximeter
• DefiMonitor XD10 Model with monitor and 6 channel ECG and pacer
• DefiMonitor XD30 Model with monitor and 6 channel ECG, pulse oximeter and
pacer
B. Manual defibrillators with AED mode:
• DefiMonitor XD100 Model with monitor and 6 channel ECG and automatic mode
• DefiMonitor XD300 Model with monitor and 6 channel ECG, pulse oximeter and
automatic mode
• DefiMonitor XD110 Model with monitor and 6 channel ECG, pacer and automatic
mode
• DefiMonitor XD330 Model with monitor and 6 channel ECG, pacer, pulse oximeter
and automatic mode
Page 21

Description of device
METRAX GmbH
DefiMonitor XD 21324 / GB / K05
21 / 116
The PRIMEDIC™ DefiMonitor XD - Generation has been designed to be safe and quick to use
in an emergency. All functional units are operating elements subject to the following principles:
• Clear organisation of functional units
• Reduction of functions to what is necessary
• Intuitive and logical operator guidance
• Clear, self-explanatory operating elements
• Ergonomic layout.
The ECG monitor has a high-resolution graphics display which offers high image contrast even
in difficult lighting conditions.
The display on the PRIMEDIC™ DefiMonitor XD is only intended for the purpose of identifying
ECG rhythms in the course of emergency medical treatment.
The defibrillator unit has been optimised to be safe and quickly ready to use.
PRIMEDIC™ DefiMonitor XD is powered by rechargeable batteries with nickel-cadmium cells
or via a power supply unit, independent of the respective model. The charging electronics
incorporate state-of-the-art technology, ensuring maximum service life of the batteries used.
The PRIMEDIC™ DefiMonitor XD can be stored on an optional wall bracket which can be
affixed to a wall or in the ambulance. PRIMEDIC(TM) Basic / Comfort charger serves as a
power supply for charging the batteries.
A wide range of accessories are available.
The wall bracket and accessories are described in separate operating instructions.
Page 22

Description of device
22 / 116
DefiMonitor XD 21324 / GB / K05
METRAX GmbH
4.2 Description of device details
A. completely manual defibrillators:
Fig. 3: PRIMEDIC™ DefiMonitor XD 1 / 3 – Front view
(1) Carrying handle
(2) Paddle
(3) Paddle cable, detachable
(4) Operating membrane
(5) Monitor
(6) Microphone
(7) Status display
Page 23

Description of device
METRAX GmbH
DefiMonitor XD 21324 / GB / K05
23 / 116
Fig. 4: PRIMEDIC™ DefiMonitor XD 10 / 30 – Front view
(1) Carrying handle
(2) Paddle
(3) Paddle cable, detachable
(4) Operating membrane
(5) Monitor
(6) Microphone
(7) Status display
Page 24

Description of device
24 / 116
DefiMonitor XD 21324 / GB / K05
METRAX GmbH
B. Manual defibrillators with AED mode:
Fig. 5: PRIMEDIC™ DefiMonitor XD 100 / 300 – Front view
(1) Carrying handle
(2) Paddle
(3) Paddle cable, detachable
(4) Operating membrane
(5) Monitor
(6) Microphone
(7) Status display
Page 25

Description of device
METRAX GmbH
DefiMonitor XD 21324 / GB / K05
25 / 116
Fig. 6: PRIMEDIC™ DefiMonitor XD 110 / 330 – Front view
(1) Carrying handle
(2) Paddle
(3) Paddle cable, detachable
(4) Operating membrane
(5) Monitor
(6) Microphone
(7) Status display
Page 26

Description of device
26 / 116
DefiMonitor XD 21324 / GB / K05
METRAX GmbH
Fig. 7: PRIMEDIC™ DefiMonitor XD – rear view
(1) Opening for hook of the one-hand quick release.
(2) Specification plate
(3) Quality seal
Fig. 8: PRIMEDIC™ DefiMonitor XD – view from below
(1) SaveCard cover
(2) Release button (to remove the power module)
Page 27

Description of device
METRAX GmbH
DefiMonitor XD 21324 / GB / K05
27 / 116
(3) Power module
Fig. 9: PRIMEDIC™ DefiMonitor XD – side view
(1) Loudspeaker
(2) Jack for electrode connectors
(3) Jack for SpO2 sensor (optional)
(4) Jack for paddle cable
Page 28

Description of device
28 / 116
DefiMonitor XD 21324 / GB / K05
METRAX GmbH
Fig. 10: PRIMEDIC™ DefiMonitor XD – side view
(1) Unlocking lever for printer cover
(2) Printer cover
(3) Mains connection jack
(4) Attachment device for bag (optional)
Fig. 11: PRIMEDIC™ DefiMonitor XD – status display
Page 29

Description of device
METRAX GmbH
DefiMonitor XD 21324 / GB / K05
29 / 116
Display.
Meaning
Action to be taken
PRIMEDIC™ AkuPak
sufficient capacity
Device ready to use.
Battery low
You can use the device, but
the PRIMEDIC™ AkuPak may
need to be charged or
replaced.
Symbol also appears if no
power module is inserted!
Insert power module.
Symbol also appears event
hough use-by-date of power
module has passed.
Check use-by-date,
if necessary replace power
pack.
Battery symbol flashes during operation
Internal buffer battery empty
(The device is still
operational!)
Send the device to the dealer
for the replacement of the
internal buffer battery
PRIMEDIC™ AkuPak
sufficient capacity
Carry out extensive self-test
by reinserting PRIMEDIC™
AkuPak or switching the
device on again
Device defective
Have the device repaired by a
dealer.
Battery fully discharged
Charge battery
Device defective
Carry out extensive self-test
by reinserting PRIMEDIC™
AkuPak or switching the
device on again
Have device repaired by
authorised dealer
Page 30

Description of device
30 / 116
DefiMonitor XD 21324 / GB / K05
METRAX GmbH
Fig. 12: Panel foil PRIMEDIC™ DefiMonitor XD 1/10/3/30 (completely manual defibrillators)
Fig. 13: Panel foil PRIMEDIC™ DefiMonitor XD 100 / 110 / 300 / 330
Page 31

Description of device
METRAX GmbH
DefiMonitor XD 21324 / GB / K05
31 / 116
1
Device On / Off button
2
Mode changeover switch AED/Manual with LED
3
SYNC button
4
Charging button for use with SavePads, can only be operated in manual mode
5
Energy level in joules (at 50 Ohm)
6
Menu keys
Select / confirm key
Selector switch to scroll upwards in the monitor menu alternatively to increase
the parameter alternatively to select the lead upper ECG curve
Selector switch to scroll downwards in the monitor menu alternatively to
decrease the parameter alternatively to select the lead lower ECG curve
7 Mains connection LED display
8
LED display Charge battery
9
Trigger button for defibrillation,
Shock button
10
Printer On/Off (online print)
11
Paper feed
12
Event button
13
ECG source changeover switch
14
Alarm acknowledgement button, heart rate
15
Alarm acknowledgement button SpO2
16
Pacer XD On / Off button
17
Pacer mode changeover button DEMAND/FIX/OVERDRIVE
18
Stimulation rate +/-
19
Stimulation intensity +/-
20
Stimulation Start/Stop button with LED
Page 32

Description of device
32 / 116
DefiMonitor XD 21324 / GB / K05
METRAX GmbH
Fig. 14: Monitor display
(1) Indicator Swtich-on time/ Energy level / Pacer
(2) Mode AUTO/Manual
(3) ECG channel display
(4) Indicator heart rate and alarm limits
(5) Indicator Pulsoximeter and alarm limits
(6) Status line for indicating patient impedance, time, microphone, battery charge, pacer
status, CF card capacity, printer status, paper status
(7) Indicator ECG-channels (max.2 )
(8) SpO2 curve, messages, information
(9) Calibration peak, height corresponds to 1mV (display size depends upon the
sensitivity of the ECG)
Page 33

Description of device
METRAX GmbH
DefiMonitor XD 21324 / GB / K05
33 / 116
4.3 Capacity display
The charging status of the PRIMEDIC™ DefiMonitor XD is shown on the display. The different
possible images displayed have the following meaning:
The charging status of PRIMEDIC™ AkuPak battery is monitored electronically to ensure
optimum display of the capacity.
In addition to this display, the PRIMEDIC™ DefiMonitor XD issues a warning when the battery
charge is running very low.
If the
PRIMEDI
C™
AkuPak
battery is damaged (e.g. as a result of the memory effect), this is shown in the screened area
on the left side of the capacity display.
If the device is being used, the corresponding audible warning will be repeated once a minute
in the selected language.
Note
In order to ensure that the device is always ready for immediate operation,
we recommend that you have a charged replacement battery with you at all
times. Depending on the situation in which this voice message is issued,
you should consider replacing the battery.
Image on display
Meaning
100 % charged
50 % discharged
partly discharged or with reduced capacity
0 % (device runs on until charge is exhausted)
PRIMEDIC™ AkuPak communication interrupted or operating
life reached.
Voice message
Display on monitor
PRIMEDIC™
AkuPak
< Charging status battery
low, please recharge >
Charging status battery low,
please recharge
Page 34

Description of device
34 / 116
DefiMonitor XD 21324 / GB / K05
METRAX GmbH
4.4 Data management
Note
The device records all the data on a removable SaveCard and also records
all noises in the surroundings via a microphone.
The saved data can be viewed with the help of a PC / laptop and the PRIMEDICTM ECG
Viewer software, but must not be used for diagnosis or therapy of the patient! This data is only
intended for administrative or legal purposes. In the software there is a deployment protocol
into which further patient data can be entered.
Wherever possible, the data saved on the SaveCard should be downloaded and filed
externally after each deployment. Once the storage capacity of the SaveCard is exhausted, no
further data will be saved. The device remains ready for operation even if the memory is
exhausted and even without a SaveCard.
The SaveCard supplied with the device is already formatted and can be used straight away. in
case of problems with the present SaveCard, as well as in case of a new CF-card, it must be
formatted using FAT16 or FAT32 file system. To attain the greatest possible degree of safety
here, please proceed as follows:
For Windows 2000, Windows XP, Windows Vista, Windows 7
Start a command line window using "Start->Run" and in the entry field, enter
"cmd.exe". The command line window will then open.
There you enter the following:
for SaveCards up to 2GB= format f: /U /FS:FAT /X /V:savecard
for SaveCards up to 2GB= format f: /U /FS:FAT32 /X /V:savecard
(where f: stands for the drive letter of the of the CF card reading device which you may
have to adjust).
Page 35

Description of device
METRAX GmbH
DefiMonitor XD 21324 / GB / K05
35 / 116
4.5 Description of the accessories
The accessories need to be secured appropriately before being transported.
4.5.1 Paddles
The PRIMEDIC™ DefiMonitor XD features ergonomically shaped defibrillation paddles with
integrated child paddles for the defibrillation of children.
To access the child paddles, unscrew the large electrodes on both paddles by turning them
anticlockwise. You now have a reduced electrode surface suitable for children.
The adult paddles are screwed on in clockwise direction over the child paddles.
Clean the child paddles after use and before screwing on the adult paddles again.
Make sure that the adult paddles engage securely over the child paddles to ensure good
contact
Fig. 15: Locking the adult paddles in place over the electrodes for children
Note
Do not use the child-sized electrodes on adults, as they will not provide adequate
defibrillation.
Page 36

Description of device
36 / 116
DefiMonitor XD 21324 / GB / K05
METRAX GmbH
4.5.2 PRIMEDIC
TM
SavePads Connect cable
Fig. 16: PRIMEDIC™ SavePadsConnect cable, 2-pin
(1) Connector
(2) Connecting clips for SavePads Connect
4.5.3 PRIMEDIC
TM
SavePads
Fig. 17: PRIMEDICTM SavePads Connect
Defibrillation electrodes with protective film
Page 37

Description of device
METRAX GmbH
DefiMonitor XD 21324 / GB / K05
37 / 116
4.5.4 ECG patient cable, 3-pin
Fig. 18: ECG patient cable, 3-pin
(1) 3-pin ECG electrode cable with connector
(2) Electrode clips (red, green, yellow)
(3) ECG electrodes (Ag/AgCl)
Page 38

Description of device
38 / 116
DefiMonitor XD 21324 / GB / K05
METRAX GmbH
4.5.5 SpO
2
-Sensor (only for PRIMEDIC™ DefiMonitor
XD3/XD30/XD300/XD330)
Fig. 19: SpO2 sensor and adapter cable
(1) Cable for SpO2 sensor
(2) Reusable SpO2 sensor
(3) Plug (for connecting the sensor cable to the adapter cable)
(4) Jack (with locking device)
(5) Plug (for connecting the adapter cable to the device)
(6) Adapter cable
Page 39

Preparatory measures before (initial) start-up
METRAX GmbH
DefiMonitor XD 21324 / GB / K05
39 / 116
5 Preparatory measures before (initial) start-up
5.1 Unpacking
After delivery, first of all check the packaging and the device for transport damage.
If you notice any damage to the device, immediately contact your transport company, dealer or
directly contact technical services at METRAX GmbH, stating the device number and
describing the damage to the device.
DANGER
Definitely do not use the device if you know of any damage.
Endangering health cannot be ruled out.
Satisfy yourself that the scope of delivery is complete in accordance with the enclosed delivery
note.
5.2 Inserting / Changing the SaveCard
Fig. 20: PRIMEDIC™ DefiMonitor XD – SaveCard
(1) SaveCard slot
(2) SaveCard removal button
(3) Cover
Page 40

Preparatory measures before (initial) start-up
40 / 116
DefiMonitor XD 21324 / GB / K05
METRAX GmbH
Procedure:
Lay the device on its back and remove the power module
Open the SaveCard slot by sliding the cover towards the power module slot (3)
Push the SaveCard into the slot (1) provided. Press the SaveCard in carefully until
button (2) protrudes from the opening. To remove the SaveCard, press button (2) in
fully – the SaveCard now protrudes from the holder. The SaveCard can now be
removed.
Then close the cover.
Replace the power module in the device. The device now boots and performs a self-
test.
Note
Wherever possible, the data saved on the SaveCard should be downloaded
and filed externally after each deployment. Once the storage capacity of the
SaveCard is exhausted, no further data will be saved. The device remains
ready for operation even if the memory is exhausted and even without a
SaveCard.
5.3 Power supply
PRIMEDIC™ DefiMonitor XD has two possibilities of power supply:
• Rechargeable power module “PRIMEDIC™ AkuPak“
• with power cable plugged into the mains.
Note
If you operate the PRIMEDIC™ DefiMonitor XD exclusively via power from the
mains, then you must ensure that the PRIMEDIC™ AkuPak is inserted in the power
module slot. Without this, the PRIMEDIC™ DefiMonitor XD is not operational.
WARNING
Whenever the device has been used, check the power level. If
necessary, PRIMEDIC™ AkuPak should be recharged. If this is
not possible, make sure you always have a second, fully charged
PRIMEDIC™ AkuPak at hand.
Page 41

Preparatory measures before (initial) start-up
METRAX GmbH
DefiMonitor XD 21324 / GB / K05
41 / 116
5.3.1 Inserting PRIMEDIC™ AkuPak
Fig. 21: PRIMEDIC™ DefiMonitor XD – Inserting PRIMEDIC™ AkuPak
Procedure:
Lay the device on its back.
Push the (new) power module into the device in the direction shown by the arrow (1)
until it rests against the left-hand stop.
Press the front of the power module into the slot in the direction shown by the arrow (2)
until you hear a "click" as the unlocking device engages securely with the tongue on
the power module.
The power module should now be in fully inserted position, flush with the front housing of the
device. It should not fall out when the device is moved. If it does, it is not securely engaged.
Note
The device switches on automatically when the PRIMEDIC™ AkuPaks battery is
inserted and performs an automatic self-test.
Monitor the Status Display. If the display is showing "OK", the device is ready to
use.
Switch it off (if required) by pressing the On / Off button.
CAUTION
If the display does not read "OK" or if a fault message appears on
the monitor, remedy the cause or contact your nearest service
station. The device will switch itself off.
Page 42

Preparatory measures before (initial) start-up
42 / 116
DefiMonitor XD 21324 / GB / K05
METRAX GmbH
5.3.2 Removing PRIMEDIC™ AkuPak
Fig. 22: PRIMEDIC™ DefiMonitor XD – Removing the power module
Note
Only change the power module when the device is switched off and
electrode plug is disconnected.
Procedure:
Lay the device on its back and press the release button in the direction shown by the
arrow (1.) until the tongue on the power module is released and the power module
snaps out of the slot.
Turn the power module in the direction of arrow 2 and then pull it out of the device.
Page 43

Preparatory measures before (initial) start-up
METRAX GmbH
DefiMonitor XD 21324 / GB / K05
43 / 116
5.4 Loading the PRIMEDIC™ AkuPak
PRIMEDIC™ AkuPak can be charged in two different ways:
• in DefiMonitor XD when connected to the mains
• in PRIMEDIC™ ChargerBasis / ChargerComfort (optional).
The integrated detection of charge endpoint detection protects the battery from harmful deep
discharge. If the battery charge is too low, both a visual and an acoustic signal are issued.
In case an AkuPak is stored outside the equipment, its charge status can be checked by
pressing button (2).
Fig. 23: PRIMEDIC™ AkuPak Battery charge indicator
(1) Battery charge indicator
(2) push button to activate battery charge indicator
Battery charge indicator (1) means:
81 % - 100 % charged
41 % - 60 % charged
1 % - 20 % charged
Note
Of the two charging possibilities mentioned above, PRIMEDIC™ AkuPak, will be
automatically recharged in case the charge should fall below 80 % of its charging
capacity.
This 80 %-limit can temporarily be made inoperative by pressing 3 seconds on push
button (2), i.e., the PRIMEDIC™AkuPak can be recharged even before reaching
this limit. This, for example, is practical if you wish to fully recharge
PRIMEDIC™AkuPak prior to next use, independent of its current charge status.
After recharging, the programmed 80 %-limit is operative for the next automatic full
recharge.
Page 44

Preparatory measures before (initial) start-up
44 / 116
DefiMonitor XD 21324 / GB / K05
METRAX GmbH
Note
A completely discharged PRIMEDIC™ AkuPak battery must be charged for at least
2.5 hours. Too short a charge duration can lead to misinterpretation of charge by
the equipment. Trouble-free functioning of the equipment cannot be assured.
Ensure that the ambient temperature is between 0 - 45°C during charging.
Note
Charging PRIMEDIC™ AkuPak battery pack at operating temperatures outside the
prescribed range can damage the battery. Allow the battery to reach the ambient
temperature before charging it, or charging may be interrupted prematurely.
Charging of PRIMEDIC™ AkuPaks is interrupted in case the equipment senses a higher
temperature. It resumes once the temperature is within the valid range. This prevents harmful
overcharging of the PRIMEDIC™ AkuPaks battery. If the PRIMEDIC™ AkuPak battery is not
charged, the PRIMEDIC™ DefiMonitor XD can be operated using the integrated mains power
pack. The PRIMEDIC™ AkuPaks are charged automatically during operation of the
PRIMEDIC™ DefiMonitor XD.
For further information on NiCd batteries and how to charge them, see chapter 22.
5.4.1 Charging the AkuPak in the optional PRIMEDIC™ Charger Basis /
Charger Comfort
Please refer to the separate operating instructions for the charger Basic / Comfort.
5.5 Connecting the mains cable
Procedure:
Plug the cable into the jack on the device.
Plug the mains plug into a properly earthed safety socket with the correct voltage.
Note
Ensure that the PRIMEDIC™ AkuPak battery is inserted in the power
module slot. This is vital to ensure fault-free operation of the PRIMEDIC™
DefiMonitor XD via the mains. The 3-pin cable provided must be used.
Page 45

Preparatory measures before (initial) start-up
METRAX GmbH
DefiMonitor XD 21324 / GB / K05
45 / 116
5.6 Inserting paper in the printer
Procedure:
Press the release button above the paper compartment. The printer cover can now be
folded forward.
Prepare the roll of paper provided (remove adhesive strip, unroll approx. 5cm of paper)
Insert the roll of paper into the printer so that the side with the check pattern faces
upwards.
Close the cover.
Note
The cover is designed to spring out of its position without damage if great
pressure is exerted from the outside.
Page 46

Device self-test
46 / 116
DefiMonitor XD 21324 / GB / K05
METRAX GmbH
6 Device self-test
6.1 Self-test when the PRIMEDIC™ DefiMonitor XD is switched on
The self-test is triggered by switching on the PRIMEDIC™ DefiMonitor XD or by inserting the
PRIMEDIC™ AkuPak battery in the device. The self-test checks all important functions and
signalling devices. Automatically full self-test is initiated in case an internal error is found by
the equipment. Please proceed to follow the device instructions.
6.2 Automatic, periodic self-tests
The device carries out automatic self-tests to ensure that it is always ready for operation. Self-
testing is only possible if the PRIMEDIC™ DefiMonitor XD is either connected to the mains or
if a charged PRIMEDIC™ AkuPak has been inserted.
Frequency
Scope of test
SHORT
Daily
Software, operating membrane, ECG calibration,
clock, internal voltage supply and HV part at 0 V
MEDIUM
First day of the month
Software, operating membrane, ECG calibration,
clock, internal voltage supply and HV part at 300
V
LONG
On the 1st. July and on
the 1st. January each
year
Software, operating membrane, ECG calibration,
clock, internal voltage supply and HV part at 1600
V
FULL
After identifying an
internal error
Software, operating membrane, ECG calibration,
clock, internal voltage supply and HV part at 1600
V, microphone test
Page 47

Operating the PRIMEDIC™ DefiMonitor XD
METRAX GmbH
DefiMonitor XD 21324 / GB / K05
47 / 116
7 Operating the PRIMEDIC™ DefiMonitor XD
7.1 Switching on / off
7.1.1 Switching the PRIMEDIC™ DefiMonitor XD on
The device is switched on by pressing the On / Off button. Directly after switching it on, an
internal self-test is carried out to check important functions and signal devices. If the self-test is
successful, the device is immediately ready for operation in the corresponding mode (manual
for the DefiMonitor XD1, XD3, XD10, XD30 or automatic for the PRIMEDIC™ DefiMonitor
XD100, XD110, XD300, XD330).
Standby is confirmed by a beep.
7.1.2 Switching the PRIMEDIC™ DefiMonitor XD off
The device can be switched off in different ways:
• By pressing the On / Off button for approximately 2 seconds. A continuous
warning beep will sound simultaneously.
• The device switches off automatically, if it does not detect any signal source for 10
minutes or no button is pressed.
• If the device detects a fault it will automatically switch off to avoid possible injuries.
7.2 Selecting the operating mode
7.2.1 Operating modes
Depending on the specific model, it is possible to select one of two operating modes:
• the AUTO mode (AED-Mode) and
• manual mode (MAN Mode)
7.2.2 Auto mode (AED mode)
In this operating mode, the device automatically analyses the cardiac rhythm.
If potentially fatal arrhythmia is detected, the device recommends defibrillation and generates
the necessary electric shock for reanimation when enabled by the user. No electric shock is
generated if the device does not detect an abnormal rhythm requiring defibrillation. The device
recommends cardio pulmonary resuscitation. For further information, see Chapter 9.
Page 48

Operating the PRIMEDIC™ DefiMonitor XD
48 / 116
DefiMonitor XD 21324 / GB / K05
METRAX GmbH
7.2.3 Manual mode (MAN Mode)
Pressing the MAN/AUTO button switches the PRIMEDIC™ DefiMonitor XD to manual
operating mode. Manual mode is now activated. Illuminated LED is the identification of this
state. For further information, see chapter 10.
Note
The device switches over to Auto mode:
• when it is switched off and back on again or
• when the MAN button is pressed
7.3 Changing the configuration/setup
The device is configured at the factory.
Certain parameters can be changed in the setup menu. The new configuration remains stored
until it is changed again, irrespective of whether the device is switched off or the power module
replaced.
Press the selection / confirmation key during operation to open the setup menu .
Press the key (up) or the key (down) to navigate within the menu and to increase or
reduce a selected parameter value and press the key to select a parameter and confirm the
new entry.
Page 49

Operating the PRIMEDIC™ DefiMonitor XD
METRAX GmbH
DefiMonitor XD 21324 / GB / K05
49 / 116
7.4 Parameter list menu
Page 1:
Alarm SpO2:
Lower limit, upper limit of SPO2 alarm
Alarm SpO2:
[0 % / 25 % / 50 % / 75 % / 100 %]
Alarm ECG:
Lower limit, upper limit of ECG alarm
Alarm ECG:
[0 % / 25 % / 50 % / 75 % / 100 %]
Print form:
[ 1-channel / 3-channel / 6-channel]
Sensitivity
[5 mm/mV, 10mm/mV, optimal, 15mm/mV]
Derivation:
I II III aVL aVR aVF
Page 2:
Contrast:
from 60 to 180
Microphone:
[On / Off]
BLS information:
[On / Off]
HLW cycles:
Number can be selected 1-15
HLW sounds:
[0 % / 25 % / 50 % / 75 % / 100 %]
Volume:
[0 % / 25 % / 50 % / 75 % / 100 %]
Systole sound:
[0 % / 25 % / 50 % / 75 % / 100 %]
Page 3:
Auto print:
[On / Off]
Memo print-out:
Printing from printer memory, see chapter 7.9
Printing speed:
[25 mm/s / 50 mm/s]
Language:
(depends on installed language packages)
Time:
00:00 in 24 h format
Date:
in format DD/MM/YYYY
MMI-Test:
Interactive testing of operating membrane, see chapter 7.4.2
Page 4:
ARM SW:
Version number – Check sum Date (e.g. Jul. 11 2005)
DSP SW:
Version number – Check sum Date (e.g. Jul. 11 2005)
MSP SW:
Version number - check sum Date (e.g. Jul. 11 2005)
ULF:
Check sum 8-digit
Serial No.:
xxxxxxx
Page 50

Operating the PRIMEDIC™ DefiMonitor XD
50 / 116
DefiMonitor XD 21324 / GB / K05
METRAX GmbH
Page 5:
BQ SW Version:
x.x
BQ serial number:
xxxxxxx
Ext. MSP SW:
Version number - check sum
Ext. MSP HW:
Version number
SpO2 Version:
xxxx
Pacer Version SW:
xxxx
Pacer Version HW:
xxxx
Page 51

Operating the PRIMEDIC™ DefiMonitor XD
METRAX GmbH
DefiMonitor XD 21324 / GB / K05
51 / 116
7.4.1 Changing the configuration – Example: time
If, for example, you want to update the time, move the highlighted section upward by pressing
the button repeatedly until the menu item Time is highlighted.
Select the highlighted menu item Time by pressing the key. The hour is then highlighted.
Change the hour by pressing the or key.
Confirm the correct value with the key. The minute is now highlighted.
Change this entry as described above. When this value is confirmed by pressing , the
menu item Time is highlighted again.
If required, you can now make other changes in the same way.
To exit the setup menu, use the key or to move the highlighted section to the menu item
END and confirm with
.
The device is now ready for operation again.
7.4.2 MMI Test (Man-Machine Interaction)
In the MMI Test, the buttons, the display and the acoustic system of the DefiMonitor are tested
for correct functioning. This function is mainly used for safety inspections and servicing
purposes.
7.5 Alarms
Depending on the equipment, the PRIMEDIC™ DefiMonitor XD monitors the heart rate from
the ECG signal and the oxygen saturation of the patient from the data of SPO2 sensor. If the
SPO2 sensor only is connected to the patient, the heart rate displayed is that determined from
the SPO2 signal. Accordingly the equipment ECG, VF Alarm and SPO2 Alarm differ.
The alarms are always activated when the PRIMEDIC™ DefiMonitor XD is switched on. The
alarm limits can be specifically configured by the user in the Setup menu and are retained after
the monitor has been switched off. Generally the alarm is both acoustic and visual, but
departures from this may occur, depending on the operating situation, and these are explained
in the following sections.
Page 52

Operating the PRIMEDIC™ DefiMonitor XD
52 / 116
DefiMonitor XD 21324 / GB / K05
METRAX GmbH
7.5.1 ECG Alarm
The range of adjustment of the ECG Alarm is from 30 – 300 beats per minute [bpm]. The lower
alarm limit can be selected in the range 30 – 99 beats per minute. The upper alarm limit cannot
be lower than the lower limit and the value selected can be up to 300 beats per minute. The
lower and upper alarm limits are displayed on the monitor. Changes can only be made in the
Setup menu. When one of the set limits is attained an ECG Alarm is initiated. If no valid heart
rate can be obtained (e.g. on the occurrence of an asystole (cardiac arrest) an alarm is
likewise initiated. In this case the heart rate is indicated in the form of dashes.
The Alarm in the event of an asystole (cardiac arrest) and on exceeding the set ECG limits
takes the form of a loud tone, alternating quickly between 2 pitch levels of approx. 5 seconds
duration. This alarm is repeated every 20 seconds. At the same time a bell symbol and the
heart rate flash on the display.
The ECG Alarm button is used to acknowledge the ECG Alarm. The acoustic Alarm is
suppressed for the duration of one minute. During this period of time the bell symbol on the
display is crossed out. Pressing the button again during this period reactivates the Alarm. The
alarm limits are retained.
The ECG Alarm can be deactivated in the Setup menu. When the ECG Alarm (= 0 %) is
deactivated the bell symbol is permanently crossed out. If in this case the alarm limits are
exceeded no acoustic alarm is initiated, but the bell symbol and heart rate flash, in order to
inform the user.
Note: If the equipment is operated with PRIMEDIC™ SavePads Connect-Electrodes on the
patient, in auto mode the bell symbol for the ECG Alarm is always crossed out, in order to
indicate that in this condition no ECG Alarm occurs. By this means interfering messages are
avoided during the repetition of the HLW request.
7.5.2 VF Alarm
The VF Alarm only occurs during ECG monitoring with ECG electrodes / ECG cable, by means
of which shocks cannot be applied. With the VF Alarm eight "gong-type" muffled tones are
heard over a period of approx. 5 seconds, which are repeated every 20 seconds and
accompanied by the verbal message
< Analysis recommended, use SavePads >.
If the ECG Alarm is activated, the acoustic Alarm takes place with the ECG Alarm tone. The
speech output is always provided.
The VF Alarm requires, that the ECG cable and the ECG electrodes are replaced by the
PRIMEDIC™ SavePads Connect-Cable with SavePads Connect defibrillation electrodes, or
otherwise no defibrillation can take place. Whilst defibrillation can take place via the paddles
parallel to the ECG electrodes in the manual mode, in the Auto mode defibrillation is only
possible via SavePads Connect-Electrodes.
The VF Alarm cannot be suppressed by the Mute button.
Page 53

Operating the PRIMEDIC™ DefiMonitor XD
METRAX GmbH
DefiMonitor XD 21324 / GB / K05
53 / 116
WARNING
Warning: Defibrillation cannot take place via an ECG monitoring cable.
If shock-driven rhythms (e.g. VF) occur during the ECG monitoring, the
use of the SavePad Connect-Cable with defibrillation electrodes is
necessary.
7.5.3 SPO
2
Alarm
The SPO2 Alarm is only available for equipment with SPO2 functionality. The adjustment range
for the SpO2 alarm is 70-100 %. The lower and upper alarm limits of the SpO2 value are
displayed on the monitor. Changes can only be made in the Setup menu. When one of the set
limits is exceeded the SpO2 Alarm is initiated.
The Alarm on exceeding the set SPO2 limits takes place in the form of a deep interval tone,
quickly alternating between 2 pitch levels of approx. 5 seconds duration. This alarm is
repeated every 20 seconds. At the same time the bell symbol and the SpO2 value flash on the
display.
The SpO2 Alarm button is used to acknowledge the SpO2 Alarm. The acoustic Alarm is
suppressed for the duration of one minute. During this period of time the bell symbol on the
display is crossed out. Pressing the button again during this period reactivates the Alarm. The
alarm limits are retained.
The SpO2 Alarm can be deactivated in the Setup menu. When the SpO2 Alarm (= 0 %) is
deactivated the bell symbol is permanently crossed out. If in this case the alarm limits are
exceeded no acoustic alarm is initiated, but the bell symbol and heart rate flash, in order to
inform the user.
DANGER
There is no acoustic warnings if the alarms are turned off in case
one of the monitored parameters is beyond the permissible
range. Hence, regularly check the patients and the equipment
indicators so as to react rapidly to changes.
7.6 Event button
Pressing the event button puts a mark on the ECG which triggers storage of the ECG for 5
seconds before and 5 seconds after the event. This ECG sequence can then be printed out
later from the event memory and/or viewed on the computer monitor in the stored patient file
via the ECG Viewer.
Note
The printing format for the Memo print is always 3-channel print. The signal
graphs displayed on the monitor at the time of the event are printed out.
Page 54

Operating the PRIMEDIC™ DefiMonitor XD
54 / 116
DefiMonitor XD 21324 / GB / K05
METRAX GmbH
7.7 Operating the printer
Note
The printer can only be operated or used in manual mode.
7.7.1 Log of the ECG signal
The PRIMEDIC™ DefiMonitor XD is equipped with a high-resolution printer. ECG printout of 3
to 6 channels simultaneously is possible. Printing speeds of 25 and 50 mm/s can be selected.
The online print function for logging the ECG graph during monitoring is activated by pressing
the printer On/Off button.
Pressing the printer On/Off button again stops the log printout. ECG printout is made with the
parameters selected in the setup menu. The following settings can be selected:
Printing parameter
Meaning
1 channel print
prints the upper ECG channel displayed on the monitor. If SpO
2
measurement is active, the SpO2 pulse graph is also displayed.
3 channel print
Prints 2 ECG channels + 1 channel SpO2 simultaneously,
depending on which monitoring is displayed.
6 channel print
Prints the maximum possible number of derivations I, II, III, aVR,
aVL, aVF simultaneously, depending on the electrodes
attached, with a maximum of 3 derivations, each 5 seconds
before and 5 seconds after pressing the button.
25 mm/s - printer speed
Printout is produced at 25 mm/s.
50 mm/s - printer speed
Printout is produced at 50 mm/s.
The following relevant parameters are printed out in a header:
• Date, time
• Speed
• Scale
• Heart rate
• Energy (Joule)
• Mode
• SpO
2
value (only on models XD3, XD30, XD300 and XD330)
There is a time lag of 7 seconds between the monitor display and the printout, i.e. events
which occurred before activation of the printout function can be displayed. If the printout is
stopped, printout also ends with data recorded 7 seconds previously.
Page 55

Operating the PRIMEDIC™ DefiMonitor XD
METRAX GmbH
DefiMonitor XD 21324 / GB / K05
55 / 116
On models with SpO2 measurement, it is possible to show the SpO2 pulse graph in the log
printout.
Use the integrated cutting edge on the printer cover to tear off the ECG log printout. Tear off
the strip upwards and to the side.
Note
Careful selection of data to be printed out and keeping printing time to a minimum
saves energy and paper and means that the device can be operated for a longer
not on the mains. This applies especially to printing at a speed of 50 mm/s.
Note
Charging interrupts all print modes.
If the ECG monitoring is changed during online printing, the printer is stopped immediately, the
header is reprinted and the printout is then continued. Data still stored at the time of the
changeover are discarded, the new printout starts at the time of the changeover.
7.8 Automatic printout after each shock (Autoprint)
The PRIMEDIC™ DefiMonitor XD allows you to record the event automatically each time
defibrillation or cardioversion is performed. Data from 5 seconds before and 5 seconds after
the shock was administered are recorded.
The Autoprint function can be switched on and off in the setup menu. When the device is
delivered, the function is switched off.
If the Autoprint function is activated in the setup menu, it remains active even if the defibrillator
is switched off or the battery replaced.
Page 56

Operating the PRIMEDIC™ DefiMonitor XD
56 / 116
DefiMonitor XD 21324 / GB / K05
METRAX GmbH
7.9 Printing out the Event Memory
The PRIMEDIC™ DefiMonitor XD automatically stores the last 30 defibrillations /
cardioversions / events in an Event Memory. It stores the ECG (5 seconds before and 5
seconds after each shock) and the pulse graph (only on XD 3, XD30, XD300 or XD330 if SpO2
active) as well as all relevant parameters.
A new event will then "push" the oldest event out of the memory.
The memory content, starting with the last recorded event, is printed out in the setup menu.
Procedure:
Open the setup menu and select the menu item "Memo Print" with the cursor keys.
Press Enter.
The Memo Print function is activated. To stop the printout, press the printer On/Off button.
Printout is produced at 25 mm/s.
Note
Data in the Event Memory remains stored even after printout. It can be
printed out as often as required.
Fault messages on the display:
Symbol on the display
Cause
No paper
Printer error
Page 57

Applying the electrodes
METRAX GmbH
DefiMonitor XD 21324 / GB / K05
57 / 116
8 Applying the electrodes
8.1 Undressing the patient
If during your preliminary examination, you have ascertained that the patient needs
defibrillation, undress his upper body to be able to place the electrodes.
8.2 Positioning
8.2.1 Positioning self-adhesive electrodes and paddles
Fig. 24: Positions of defibrillation electrodes (SavePads Connect) on the patient
The defibrillation electrodes are positioned
• On the right chest area, below the collar bone (1) and
• On the left chest area above the apex of the heart on the axillary line (2).
Incorrectly positioned electrodes can lead to faulty readings.
CAUTION
Medicinal plasters must be removed before attaching the defibrillation
electrodes.
Note
The PRIMEDIC™ DefiMonitor XD carries out automatic impedance measurement.
Defibrillation can only be carried out if the patient is within the permissible
impedance range. See Chapter "Technical Data“. Ensure that the electrodes have
good contact.
Page 58

Applying the electrodes
58 / 116
DefiMonitor XD 21324 / GB / K05
METRAX GmbH
8.2.2 Positioning the ECG self-adhesive electrodes
Fig. 25: Positions of ECG electrodes on the patient
The correct positions for the ECG self-adhesive electrodes are:
1 Red (R) directly under the middle of collar bone (midclavicular)
2 Green (F) directly under the left pectoral muscle on the midclavicular line
3 Yellow (L) directly under the middle of left collar bone (midiclavicular)
Note
Incorrect positioning of the electrodes, defective or dry electrodes can lead
to faulty readings. For this reason, always use ECG self-adhesive
electrodes approved by Metrax.
8.2.3 Positioning the PRIMEDIC™SavePads Connect for pacing
Two different electrode positions have proved effective for cardiac stimulation:
• anterior - posterior position.
• anterior - anterior position,
The positioning and the polarity of the electrodes has a significant influence on the intensity of
the stimulation required.
The preferred position is the anterior - posterior position.
Position
Anterior
Green (F) ( - )
front left of chest, between
sternum and left nipple and
(roughly V2/V3 position)
Posterior
Red (R) ( + )
back left of chest, between tip of
shoulder blade and spine
Page 59

Applying the electrodes
METRAX GmbH
DefiMonitor XD 21324 / GB / K05
59 / 116
The anterior-posterior position offers the advantage that the intensity of the stimulation
required is often lower, which means that the chest muscles are subjected to less stimulation.
If the anterior-posterior position is contraindicated (e.g. if ventricular fibrillation is expected to
occur), the anterior - anterior position can be used as an alternative.
The positions correspond to those of the self-adhesive electrodes for defibrillation.
Position
Anterior
Green (F) ( - )
corresponding apex position, left side of chest,
above the apex of the heart on the axillary line
Anterior
Red (R) ( + )
corresponding sternum position, right side of chest
below the clavicle
Note
Pacing is only advisable and possible in manual mode with self-adhesive electrodes
DANGER
It is important to attach the self-adhesive electrodes in the following
order to avoid danger to the user as a result of the stimulation pulse:
1. First, connect the SavePads Connect cable with the electrode clip
to the self-adhesive electrodes placed on the patient. To do this,
open the locking lever on the clip and insert the metal-plated
connection tab into the slit in the electrode clip
2. Snap the upper part of the clip back in place to fix the connection.
3. Observe the colour marking showing the polarity of the electrode
chips when attaching them to the respective electrodes
4. Connect the cable with the PRIMEDIC™ DefiMonitor XD.
Note
If it should become necessary during pacing to defibrillate the patient, defibrillation
can be carried out via the self-adhesive electrodes. Make sure the electrodes are
correctly positioned for defibrillation.
DANGER
Adults must only be paced with the appropriate self-adhesive electrodes
for adults, children only with smaller, child-sized self-adhesive electrodes.
Always use original PRIMEDIC™ SavePads (Connect).
Page 60

Applying the electrodes
60 / 116
DefiMonitor XD 21324 / GB / K05
METRAX GmbH
8.3 Removing hair growth from chest
Hair at the point of attachment of the electrodes increases the transition resistance and impairs
the adhesion of the electrodes. If the patient has a lot of hair growing where the electrodes
need to be positioned, you must remove it.
Use a razor to remove the hair from the electrode positions.
8.4 Drying the skin
In certain situations (e.g. after an acute myocardial infarction), it may be necessary to dry the
skin in the respective positions. A dry surface is essential for the adhesive electrodes to
adhere.
8.5 Placing the electrodes
Fig. 26: Removing the protective film from the electrodes
(1) Protective film
(2) Electrode coated with electrolyte gel
In automatic mode, the PRIMEDIC™ DefiMonitor XD gives voice commands instructing you to
attach the defibrillation electrodes to the patient.
Please proceed as follows:
Open the SavePads packaging by tearing open the protective cover along the tear
strip.
First, remove the protective film (1) from one electrode (2) and them immediately place
the electrode on the position you had ascertained previously.
Proceed to remove the protective film from the second electrode and place it in its
position.
Smooth the electrodes onto the patient ensuring there are no air bubbles under the
electrodes!
Page 61

Applying the electrodes
METRAX GmbH
DefiMonitor XD 21324 / GB / K05
61 / 116
Connect the self-adhesive electrodes to the SavePadsConnect cable using electrode
clips. See also chapter 8.2.3
Plug the connector of the SavePads Connect cable into the socket of the device, which
is switched on. Make sure that the locking pin locks into place.
The message < Check electrodes > should no longer be displayed.
Note
To be able to unplug the electrode plug, you have to push on the top part of the
locking pin while at the same time pulling the plug out.
Note
Do not touch the floor, other objects, clothing or other parts of the body with the
exposed electrodes – this could remove the conducting layer of gel from the
electrodes.
WARNING
A reduced layer of gel could cause irritation or burns to the skin under the
electrodes during defibrillation!
Observe the brief instructions for use on the packaging of the self-adhesive
electrodes.
8.6 Checking the electrodes
CAUTION
The message <Check electrodes> can be issued by the device for several
reasons:
• There is contact between the defibrillation electrodes or a
conductive gel connection.
• Patient's body hair if, not properly removed, leads to poor
contact resistance.
• Air pockets between skin and defibrillation electrodes cause a
bad contact.
• Dried out electrodes.
• Electrode plugs not plugged in
Remedy the cause of the fault.
Note
With the model SpO2, message < check electrodes > is supressed in the display.
Page 62

Applying the electrodes
62 / 116
DefiMonitor XD 21324 / GB / K05
METRAX GmbH
8.7 Changeover of ECG source
The ECG can be recorded via the defibrillation paddles or via the self-adhesive electrodes.
Press the ECG source changeover button to switch to paddles or self-adhesive electrodes.
Page 63

Auto mode (AED mode)
METRAX GmbH
DefiMonitor XD 21324 / GB / K05
63 / 116
9 Auto mode (AED mode)
Equipment fitted with AED mode starts after powering it on in AUTO mode. This enables lay
person and skilled emergency medical technician to provide care.
The sequence of the reanimation should be in according to the guidelines of European
Resuscitation Council (ERC) or of the American Heart Association (AHA).
Note
In case of PRIMEDIC
TM
DefiMonitor XD, the ERC-guidelines for the sequence have
been preconfigured in the factory.
When the device is switched on and has successfully completed self-testing, it is ready for
operation.
Note
In automatic mode, defibrillation is exclusively enabled by the PRIMEDIC™
DefiMonitor XD after it has detected ventricular fibrillation (VF). The paddles, energy
level selection buttons, source selection buttons, pacer buttons, the printer and
charging buttons are disabled in AUTO mode. An acoustic warning signal is
sounded if these buttons are pressed while the device is in automatic mode.
9.1 Voice output by the device / Preliminary examination of the
patient
During the course of the voice output, you will be asked to examine the patient.
After the self-test has been successfully performed by the device, the following instructions are
given:
< Call emergency services >
< Apply electrodes one after the other to patient's bare chest >
< Plug in electrode cables >
The last two spoken instructions are repeated for a period of one minute. If the device cannot
recognise a patient impedance at that time, the device will give instructions for one cycle of
cardio pulmonary resuscitation:
< Give 30 chest compressions >
< Give 2 rescue breaths >
Afterwards the device will give instructions to attach the electrodes for maximum one minute.
This procedure will go on until the device recognises a valid patient impedance and starts with
the rhythm analysis.
The initial instruction (< Call emergency services >) can also be suppressed in the setup menu
through "BLS information off“. In this case, the first instruction issued by the device is
< Check electrodes >.
Page 64

Auto mode (AED mode)
64 / 116
DefiMonitor XD 21324 / GB / K05
METRAX GmbH
9.2 Carrying out ECG analysis in Auto mode
If the defibrillation electrodes have been applied, the device will automatically start the
analysis. Automatic analysis can only be carried out via the self-adhesive defibrillation
electrodes (SavePads).
Now the patient has to be put in an immobile position and may no longer be touched.
The device issues the instruction:
< Do not touch the patient, analysing rhythm >
The algorithm of the device programming now checks the ECG for a shockable rhythm. This
process can take up to 12 seconds. If the device detects ventricular fibrillation (VF), it
recommends defibrillation.
DANGER
Take care that during the analysis phase, the Auto switch is not continuously
pressed as otherwise safety shutdown of the equipment is effected.
DANGER
Observe the patient during the entire reanimation.
It is possible at any time that the patient may regain consciousness and
does not need to be defibrillated.
If that is the case, do not carry out the defibrillation under any
circumstances.
The rhythm identification detector continuously analyses the ECG in the background, even
after a rhythm in need of defibrillation has been identified. If a rhythm which does not require
defibrillation is detected while the capacitor is charging or when the required charge is already
pending, internal safety discharge is triggered.
9.3 Defibrillation required
If the device has detected VF, it recommends defibrillation and automatically makes the
necessary preparations.
The device issues the instruction:
< Shock advised >
< Device is charging >
< Do not touch the patient >
< Device is charging >
< Do not touch the patient >
Page 65

Auto mode (AED mode)
METRAX GmbH
DefiMonitor XD 21324 / GB / K05
65 / 116
Once the capacitor is charged, power for the defibrillation pulse is available for 15 seconds.
This is signalled by a continuous acoustic warning, the voice message
< Stand clear of patient. Deliver shock now >,
signalled by a continuous beep and the trigger button lighting up green. If you do not
defibrillate within this period, an internal safety discharge will follow and the ECG will be
analysed again.
Turn on green lit trigger key to give shock.
Hold the button pressed until the shock has been administered. Avoid contact with the jacks on
the device during defibrillation.
Note
Pressing the trigger key during power charging (before it turns green) does not
result in release of shock, rather it leads to internal safety discharge.
DANGER
Before pressing the trigger button, disconnect all equipment which is not
defibrillation-proof from the patient!
Before and during energy discharge, all persons involved in reanimation
must step clear of the patient and avoid touching the patient or
conductive objects (e. g. parts of the stretcher)!
After defibrillation, the device once again undertakes cardio pulmonary resuscitation (CPR)
cycle, before carrying out renewed analysis. The CPR time is shown on the PRIMEDIC™
DefiMonitor in the form of a display bar.
The charge time of the capacitor for defibrillation depends on the available battery capacity.
Charging may take longer if the power module is partly discharged.
Note
If a fault occurs during capacitor charging, an intermittent warning signal is sounded
and the device automatically carries out internal discharge of the capacitor.
CAUTION
When the message < Charge battery >, the device still has enough
energy for at least 3 discharges at maximum power. The power module
should be replaced immediately once this message appears.
Note
If, when the device is switched on, for 10 minutes no ECG is done, no SpO2 signal
is recorded or no button is pressed, the device automatically switches off. Approx.
30 seconds before the switch-off this is signalised by an interrupted warning tone.
Pressing any button will abort the switching off process.
Page 66

Auto mode (AED mode)
66 / 116
DefiMonitor XD 21324 / GB / K05
METRAX GmbH
In basic state, a dashed line appears on the display and the acoustic message < Check
electrodes > is issued if the electrodes are not connected up. As soon as a reading is activated
via the electrodes, the ECG signal appears on the monitor.
9.4 Defibrillation not required
If the device cannot find a shockable rhythm, then it recommends two minutes of cardio
pulmonary resuscitation (CPR).
< No shock advised >
< Cardiopulmonary resuscitation >
< Give 30 chest compressions >
< Give 2 rescue breaths >
etc.
When the CPR time (defined by the set number of CPR cycles) has elapsed, the device
resumes ECG analysis.
9.5 Keeping the defibrillator ready for use
After a reanimation, clean the device, replace the SavePads, check and if necessary replace
the power supply unit to ensure that the device is ready for operation again as quickly as
possible. Charge the PRIMEDIC™ AkuPak to ensure that sufficient energy is available for the
device to be used again.
If any malfunctions or noticeable problems occur, please contact your nearest service station.
Page 67

Manual mode (MAN Mode)
METRAX GmbH
DefiMonitor XD 21324 / GB / K05
67 / 116
10 Manual mode (MAN Mode)
All variants of PRIMEDIC™ DefiMonitor XD have manual mode.
The manual mode presupposes medical knowledge is therefore not suitable for lay helpers.
Only doctors and trained medical personnel should operate the defibrillator in manual mode.
In case of the equipment with Auto mode, MAN/AUTO switch must be pressed once in order to
activate the manual mode. The monitor confirms the "MAN" mode. All keys which are disabled
in automatic mode are now enabled. The LED above the MAN/AUTO button lights up to
indicate that the device is in manual mode.
Equipment that can be operated only manually can be recognised by the continuously lit LED
above MAN switch. It cannot be toggled. Acoustic alarm to signal error sounds when MAN
switch is pushed.
Note
When the device is switched on and has successfully carried out a self-test, it is in
Auto mode. If your device is only equipped with manual mode (XD1, XD3. XD10,
XD30), you will not need to change mode.
10.1 Carrying out defibrillation
Unlike automatic mode, where the device programming algorithm analyses the ECG and
recommends defibrillation, in manual mode, the user must examine the ECG to determine
whether it displays a shockable rhythm. There are two ways of triggering the defibrillation
pulse.
• Via the SavePads Connect
• Via the paddles
10.1.1 Power selection
First, select a suitable energy level of 5, 10, 20, 30, 50, 100, 200, 300 or 360 joules for
defibrillation.
The selected energy level is displayed on the monitor to confirm your selection.
CAUTION
Check that the energy level you have selected is shown on the display.
Note
The energy level required for defibrillation / cardioversion depends on the size,
weight and condition of the patient.
Page 68

Manual mode (MAN Mode)
68 / 116
DefiMonitor XD 21324 / GB / K05
METRAX GmbH
10.1.2 Charging
Note
The way in which the shock is administered depends on where you initiate charging.
If you load a charge by pressing a paddle button, the shock can only be
administered via the paddles. If you press the charge button on the membrane
keyboard, the shock is administered via the SavePads Connect.
Press the charge button for your chosen method (see above) (paddle button or charge
button). A shock of the preset energy level is charged by pressing the power charging
button, and shortly afterwards, the device is ready to perform defibrillation.
If the shock is to be administered via the SavePads Connect, and the charging operation has
ended, the green trigger button lights up and a warning signal is sounded.
If the shock is to be administered via the paddles, a warning signal is sounded.
In both cases, the following voice message is also issued:
< Deliver shock now >
The selected charge is available for 15 seconds. If defibrillation is not carried out within this
space of time, internal safety discharge is performed. The energy can also be discharged
internally by pressing the energy charging button again during the 15 seconds.
DANGER
Before pressing the trigger button, disconnect all equipment which is not
defibrillation-proof from the patient!
Before and during energy discharge, all persons involved in reanimation
must step clear of the patient and avoid touching the patient or
conductive objects (e. g. parts of the stretcher)!
Capacitor charging time for defibrillation depends on the available battery capacity. Charging
may take longer if the power module is partly discharged.
If an error occurs during charging, an intermittent warning signal is sounded, followed by the
voice message "Internal error". The capacitor is discharged internally and the devices switches
off automatically. The Service symbol appears on the display.
10.1.3 Triggering defibrillation
Press the trigger button or the two paddle buttons simultaneously to enable
defibrillation, which is carried out immediately after the button is pressed. Hold the
button pressed until the shock has been administered. Avoid contact with the jacks on
the device during defibrillation.
If the charge is loaded via the charge button on the device, the shock can only be administered
via the SavePads Connect. If the charge is loaded via the paddle buttons, the shock can only
be administered via the paddles.
Page 69

Manual mode (MAN Mode)
METRAX GmbH
DefiMonitor XD 21324 / GB / K05
69 / 116
CAUTION
Before defibrillation, the contact surfaces of the paddles must be coated
with sufficient defibrillation gel to prevent skin burns.
After performing defibrillation, you must examine the ECG again for shockable heart rhythms
and if necessary, trigger further defibrillation(s) (or carry out further reanimation procedures).
Note
If the wrong energy level has been selected and the shock already charged, the
fault can be corrected by pressing the new energy level. The device automatically
adjusts the charge to the level selected.
Alternatively, you can trigger internal discharge by pressing the charge button on the
membrane keyboard again. An internal safety discharge is performed. Then select the correct
energy level and press the charge button again.
CAUTION
When the message < Charge battery > appears for the first time, the
device still has enough energy for at least 3 discharges at maximum
power. The power module should be replaced immediately once this
message appears.
10.2 SYNC and ASYNC mode
If the medical emergency requires cardioversion (operation of the defibrillator in synchronous
mode), this mode must be consciously selected by pressing the SYNC button. The defibrillator
must be returned to manual mode before you can switch to SYNC mode. Then, SYNC mode
can be activated by pressing the SYNC button. Synchronous operation mode is indicated on
the ECG monitor with "SYNC".
Note
Synchronous mode is possible in manual mode only.
It is recommended to carry out the operation via defibrillation self-adhesive electrodes so as to
ensure synchronisation in R-wave synchronised shock (synchronisation). This largely excludes
movement artefacts. However, synchronisation is also possible via the paddles. To do this, the
ECG must be recorded via the paddles, as far as possible without movement artefacts, in
order to ensure undistorted synchronisation. It is vital to ensure that the energy is applied
using the same method used to record the ECG.
After synchronised energy transfer (cardioversion), the equipment switches back to
asynchronous mode.
Page 70

Manual mode (MAN Mode)
70 / 116
DefiMonitor XD 21324 / GB / K05
METRAX GmbH
Note
In synchronous mode, ECG markings are displayed on the monitor. To ensure safe
synchronous operation, these cardioversion markers must appear directly next to an
R-wave in each QRS complex. Precondition for this is a clear, artefact-free ECG
signal.
Synchronisation is performed exclusively via derivation II.
The delay time between detection of a QRS complex (synchronous pulse) and energy transfer
is less than 60 ms.
DANGER
Before initiating cardioversion, observe the monitor display to check that
the cardioversion markers are clearly assigned to the R waves and not,
for example, reacting to pacemaker pulses or artefacts.
In synchronous mode, the trigger button must be held pressed until the cardioversion time is
reached. An acoustic signal sounds during this time. If the trigger button is released during this
time, cardioversion is not performed. If the button is held pressed and synchronisation is not
performed within 3 seconds, internal discharge is effected. If the trigger button is pressed only
briefly or no synchromarker has emerged while the button is pressed, the energy is retained in
the capacitor for 15 seconds and is then automatically discharged within the equipment.
The energy levels used for cardioversion are usually lower than for asynchronous defibrillation,
as it is not necessary to depolarise all heart muscle cells.
The energy required depends roughly on the weight of the patient. However, the indications
remain the decisive factor. The following rules of thumb apply:
Ventricular tachycardia with instable pulse:50 Joule, for each further cardioversion, select the
next highest energy level (100 J, 200 J, 300J,...) supraventricular tachycardia:
50 - 100 Joule
Atrial flutter: 50 Joule
Atrial fibrillation: 100 Joule
The values given above are merely recommendations for possible procedure in the event of
the corresponding indications.
Note
If the cardioversion markers do not appear on the screen or appear in the wrong
position, this may be the result of extreme fluctuations in the mains supply. In this
case, the device should be disconnected from the mains, i.e. the mains plug should
be pulled out of the socket and the device operated via the integrated PRIMEDIC™
AkuPak battery.
Page 71

Manual mode (MAN Mode)
METRAX GmbH
DefiMonitor XD 21324 / GB / K05
71 / 116
10.3 Keeping the defibrillator ready for use
After a reanimation, clean the device, replace the SavePads, check and if necessary replace
the power supply unit to ensure that the device is ready for operation again as quickly as
possible. Charge the PRIMEDIC™ AkuPak to ensure that sufficient energy is available for the
device to be used again.
In the event of faults or doubts, contact your nearest service station as soon as possible.
Page 72

Attaching the SpO2 sensor
72 / 116
DefiMonitor XD 21324 / GB / K05
METRAX GmbH
11 Attaching the SpO
2
sensor
Fig. 27: Attaching the SpO2 sensor
(1) Bend protection sleeve
(2) SpO2 sensor
(3) Surfaces for opening the sensor
Procedure:
Insert the plug of the SpO2 sensor into the device so that the arrow on the plug is in
line with the arrow on the device jack. Ensure that the connector is fully inserted.
Press the two surfaces (3) on the SpO2 sensor together and slide the opened sensor
over any of the patient's fingers with the cable / jack side of the sensor on the fingernail
side of the finger.
The sensor can remain in one measuring point for a maximum of 4 hours, provided that the
skin characteristics and the correct seating of the sensor are checked regularly. As on some
patients, the sensor may cause skin irritation at the measuring point after a while, it may be
necessary to move the sensor more frequently.
Note
To disconnect from the device, first lift the sleeve with the arrow slightly and then
pull the connector out of the jack.
Page 73

Operating the pacer
METRAX GmbH
DefiMonitor XD 21324 / GB / K05
73 / 116
12 Operating the pacer
12.1 General information on operating the Pacer XD
The following operating sequence must be observed when using the PRIMEDIC™ Pacer XD:
Switch the PRIMEDIC™ DefiMonitor XD on. The pacer can only be used in manual
mode. Set the mode accordingly.
Apply self-adhesive electrodes (SavePads Connect) on the patient.
Connect the self-adhesive electrodes to the SavePadsConnect cable using electrode
clips. See Chap. 8.2.3
Insert SavePads Connect cable in the PRIMEDIC™ DefiMonitor XD jack.
Activate the Pacer XD unit by briefly pressing the Pacer On / Off button
(At this point, Pacer XD is not yet emitting stimulation pulses).
Set parameters:
- Operating mode
- Stimulation rate
- Stimulation intensity
Activate Pacer by pressing the START/STOP button
The Pacer XD is switched off by pressing the Pacer On /Off button. At the same time, a
warning signal is sounded.
When the Pacer unit is switched on, "Pacemaker Init" may appear on the top left of the Pacer
display, together with a progress bar. This indicates that the Pacer is currently performing an
internal self-test routine. After a few seconds, the Pacer is ready for configuration.
Note
If you try to activate the Pacer XD when the SavePads Connect cable is not yet
plugged into the socket on the Pacer, a warning signal is sounded and the message
"Check electrodes" appears on the screen (only on devices without SpO2 module).
Note
If the device detects a deviation of ± 30 % from the set intensity, it automatically
interrupts the pacing process. One possible cause is that patient resistance is too
high.
Page 74

Operating the pacer
74 / 116
DefiMonitor XD 21324 / GB / K05
METRAX GmbH
DANGER
If, for example, the QRS-markers do not appear on the screen or appear
in the wrong position, this may be the result of extreme fluctuation in the
mains supply. In this case, the device should be disconnected from the
mains, i.e. the mains plug should be pulled out of the socket and the
device operated via the integrated PRIMEDIC™ AkuPak battery. Keep
an eye on the capacity reading on the display during pacing.
If the message < Charge battery > appears, the battery must be
recharged or replaced before stimulation can continue. If this is not
done, there may be danger to the patient as a result of the device failing.
Note
If more than 3 minutes elapse without the PRIMEDIC™ Pacer being operated, it
switches off automatically.
12.2 Setting the Pacer operating modes
The Pacer can be operated in three different modes:
• DEMAND (default setting)
• FIX
• OVERDRIVE
Operating mode
Meaning
DEMAND (Default)
Stimulation is only carried out “as required”. i.e. only if the
spontaneous heart rate falls below the set DEMAND rate.
FIX
Fixed-rate stimulation. Independent of the spontaneous heart
rate, a fixed heart rate is imposed.
OVERDRIVE
Overstimulation of the heart with high-frequency fixed-rate
stimulation (max. 250 1/min) to stop, for example, ventricular
tachycardia.
The operating mode DEMAND is automatically activated when the Pacer is switched on. The
operating mode is displayed in clear text on the monitor.
To select a different operating mode, press the operating mode button once or repeatedly until
the desired operating mode appears on the monitor.
No stimulation pulses are emitted while the operating modes are being set.
Page 75

Operating the pacer
METRAX GmbH
DefiMonitor XD 21324 / GB / K05
75 / 116
Note
The operating mode cannot be changed during pacing. For example, in order to
change from FIX to DEMAND mode, the Pacer must be stopped first.
If the Pacer is started up again without the operating mode having been changed, the last set
stimulation values are applied. If the Pacer operating mode is changed or if the Pacer is
switched off and then back on, the basic setting is activated again.
WARNING
If for some reason, DEMAND pacing is not possible, the FIX mode can be
used. Thereby, it is necessary to synchronise the stimulation frequency to the
present status. This should be carried out by a doctor.
Note
Too slow and not effective stimulation in FIX mode can lead to ventricular fibrillation
if the pacemaker impulse is released during heart's vulnerable phase.
12.3 Setting the stimulation rate
Depending on the Pacer operating mode, various stimulation rates (number of Pacer pulses
per minute) are available:
FIX, DEMAND 30 ... 180 1/min (beats power minute)
OVERDRIVE 30 ... 250 1/min
The following values are preset when the respective modes are activated:
FIX, DEMAND 70 1/min
OVERDRIVE 200 1/min
To select a different stimulation rate, this value can be changed by pressing the Rate
Pulse/min button.
Each time the button is pressed, the value is increased or decreased in steps of 5 (each of 5
1/min). The stimulation rate can also be changed during pacing.
The stimulation rate should only be changed if this is absolutely necessary.
WARNING
The ECG should be monitored closely when the stimulation rate is
changed to observe possible reactions of the patient to the new
stimulation parameters.
Page 76

Operating the pacer
76 / 116
DefiMonitor XD 21324 / GB / K05
METRAX GmbH
12.4 Setting the stimulation intensity
When the Pacer is switched on, a current of 10 mA (peak value) is preset, independent of the
selected operating mode or stimulation rate.
The stimulation intensity can be changed within a range of (+) 10 mA to 180 mA using the
buttons stimulation intensity + and stimulation intensity (-). (also see chapter 15) The
intensity can be raised or lowered by 5ma with every key stroke. The stimulation intensity can
also be changed during pacing.
The selected stimulation intensity depends on the patient's physical constitution. The current
selected should result in the effect of the stimulation being clearly visible on the monitor.
The stimulation intensity is a compromise between good and effective stimulation of the heart
and the possible necessity of sedating the patient. Once the effect of the stimulation is clearly
recognisable on the ECG, the intensity can carefully be reduced to find the "optimum"
intensity.
Pacing results in a contraction of the skeletal muscles. This is not a sign of effective heart
stimulation. Watch the ECG on the monitor to determine when the intensity is sufficient.
12.5 Starting and stopping pacing
Note
The Pacer operating mode must be selected before pacing is started. The operating
mode cannot be changed once pacing has started. The operating mode is
displayed on the monitor.
Procedure:
Press the Start/Stop button. Stimulation with the preset values. A signal tone is issued
to confirm this.
The operating mode display text on the monitor starts to flash. When stimulation pulses
are emitted, the LED next to the Start/Stop button lights up.
To enable better ECG monitoring, the display of the first ECG channel automatically jumps to
derivation II.
To stop stimulation, briefly press the Start/Stop button. This is confirmed by a short acoustic
signal. The display text stops flashing.
Note
Limited duration of stimulation in OVERDRIVE mode:
To prevent dangerous, overlong stimulation in OVERDRIVE mode, stimulation time
without intervention by the operator is limited to 15 seconds.
After starting stimulation using Start/Stop switch, stimulation is effected with the preset values
Stimulation ends after 15 seconds if neither the pacer intensity nor the pacer rate are changed.
If one of these buttons is pressed, the 15 seconds are counted again.
Stimulation can be stopped before the 15 seconds have elapsed by pressing the Stimulation
Start/Stop button.
Page 77

Operating the pacer
METRAX GmbH
DefiMonitor XD 21324 / GB / K05
77 / 116
Note
Both, the frequency as well as the intensity can be changed during pacing by
pressing the buttons.
During pacing, the ECG alarm is effective provided it was not earlier deactivated in the setup
menu. However, it is not possible to make changes in the setup menu during pacing.
DANGER
To prevent danger to the user as a result of the stimulation pulse, do not
touch the conductive surfaces of the electrodes or the patient during pacing.
After completing the treatment, remove the self-adhesive electrodes from
the patient or ensure that the Pacer / defibrillation cable (SavePadsConnect
cable) is no longer connected to the device.
If the SavePads Connect cable is unplugged from self-adhesive electrodes
or pulled out from the device during pacing, stimulation is immediately
stopped. A warning signal sounds, the cause of the fault is displayed on the
monitor and a voice message is issued:
< Check electrodes>
When the fault has been remedied and the device restarted, the Pacer is
reactivated.
If an energy button is pressed during pacing, pacing is interrupted and a
warning signal sounds to indicate that the process has been interrupted.
The selected energy can thereafter be immediately be loaded.
The patient's ECG must be monitored continually during pacing to ensure
that the stimulation is effective.
The patient must not be left unattended during pacing.
The actual active patient current is monitored. If it falls below 70 % of the set
current, the pulse emission is stopped and a fault message issued.
Page 78

Operating the pacer
78 / 116
DefiMonitor XD 21324 / GB / K05
METRAX GmbH
12.6 Defibrillation during pacing / Defibrillation via self-adhesive
electrodes
If ventricular fibrillation occurs during pacing, it must be stopped immediately through
defibrillation. Defibrillation can also be done through the applied self-adhesive electrodes
(PRIMEDIC™ SavePads Connect).
Press the required energy button. A warning signal sounds, as pressing the energy selection
button stops stimulation.
Press the Charge button on the control panel to prepare the defibrillation charge. Trigger
defibrillation via the self-adhesive electrodes by pressing the green-lit trigger button on the
control panel.
To reactivate the Pacer after defibrillation, it must be switched on again.
Note
Defibrillation can also be carried out via the paddles, even though the adhesive
electrodes are attached. Load the selected energy charge by briefly pressing one of
the paddle trigger buttons and trigger defibrillation by pressing the buttons
simultaneously.
Page 79

Cleaning, maintenance and dispatch
METRAX GmbH
DefiMonitor XD 21324 / GB / K05
79 / 116
13 Cleaning, maintenance and dispatch
13.1 Cleaning
WARNING
Only clean the device when it is switched off and with the electrodes
unplugged. Before cleaning, remove the power module from the device
or unplug the mains plug!
Do not use any dripping wet cloths to clean it. Never pour liquids over
the device and do not immerse it in any liquids!
Clean the device and all its accessories, such as the wall bracket, with commercially available
household cleaners.
Use a slightly damp, clean cloth.
Use normal disinfectant to disinfect it (e.g. Gigasept FF, Bacillol or Spitacid).
WARNING
Clean the paddles after every use. Soiling as a result of gel residue can
result in danger to the user and patients. Always remove all traces of gel
from the paddles.
13.2 Servicing
Independently of the use of the device, we recommend regular visual inspection / servicing of
the PRIMEDIC™ DefiMonitor XD and the accessories by the user / service technician at least
once a year.
Make sure that the housing, cable, SavePads and all the other accessories are undamaged.
13.2.1 Servicing check list
Check the expiry date
o the SavePads Connect
o the PRIMEDIC™ AkuPaks, and
o if necessary replace the parts.
Check whether
o the status display "OK" is showing.
o you can switch on the device.
o the device automatically carries out the self-test after being switched on.
o the slot for the power supply is clean.
o the device is fully equipped.
Page 80

Cleaning, maintenance and dispatch
80 / 116
DefiMonitor XD 21324 / GB / K05
METRAX GmbH
When doing so, pay attention to the following:
DANGER
• If parts of the housing or insulation are damaged, they must be
repaired or exchanged immediately.
• If parts of the housing or insulation are damaged, do not use the
device or switch it off immediately.
• Have the device repaired as soon as possible by the
manufacturer.
Note
For more detailed information on the regular safety and metrological checks in
accordance with the Ordinance on the Operation and Use of Medical Devices
(MPBetreibV), refer to Chapter 24
13.3 Dispatching the PRIMEDIC™ DefiMonitor XD
Note
If the equipment is to be sent out for upgrading or servicing, in that case the power
module must always be removed from the device and must be sent in with the
device, but packaged separately.
Where possible, use the original box.
Page 81

List of error codes
METRAX GmbH
DefiMonitor XD 21324 / GB / K05
81 / 116
14 List of error codes
The following table lists all messages that the unit emits when it switches off because of a
severe error. This switch-off is carried out with the spoken message "Internal Error"; the cause
of the error is displayed with the error code number from the first column and the text from the
second column. The other columns list the possible causes of the error and the remedial
measures that can be carried out by the user themselves
Error
code
Error text
Cause(s)
User action
50
HV, Internal FSM error
Error during the shock appliance
- return the device for servicing
51
HV, CPLD error
Error during the shock appliance
- return the device for servicing
52
HV, +5V voltage failed
Error in the voltage supply,
possibly due to an empty
accumulator/battery
- charge and/or replace the
power module
- if the error persists: Return the
device for servicing
53
HV, +5VSW voltage failed
Error in the voltage supply,
possibly due to an empty
accumulator/battery
- charge and/or replace the
power module
- if the error persists: Return the
device for servicing
54
HV, +24V voltage failed
Error in the voltage supply,
possibly due to an empty
accumulator/battery
- charge and/or replace the
power module
- if the error persists: Return the
device for servicing
55
HV, VREF voltage failed
Error in voltage reference
- return the device for servicing
56
HV, HVPWR voltage
failed
Error in the voltage supply,
possibly due to an empty
accumulator/battery
- charge and/or replace the
power module
- if the error persists: Return the
device for servicing
57
HV, RLPWR voltage failed
Error in the voltage supply,
possibly due to an empty
accumulator/battery
- charge and/or replace the
power module
- if the error persists: Return the
device for servicing
58
HV, Current setup DAC
failed
Error when setting the current
specifications - Failure in the
high voltage section
- return the device for servicing
59
HV, RTCCLK error was
detected
Error in generation of system
cycle
- restart the device
- if the error persists: Return the
device for servicing
60
HV, MCLK error was
detected
Dropout in system cycle
- restart the device
- if the error persists: Return the
device for servicing
61
HV, HVHALT event was
detected
Emergency shutdown during the
shock application
- return the device for servicing
62
HV, HVHALT net error
was detected
Error during the test of the
emergency shutdown
- return the device for servicing
63
HV, Disarm cannot be
performed
Error during the internal
discharge, impossible to
- return the device for servicing
Page 82

List of error codes
82 / 116
DefiMonitor XD 21324 / GB / K05
METRAX GmbH
discharge the condenser
64
HV, HV capacitor
overvoltage was detected
Error during the high voltage
load, voltage on condenser too
high
- return the device for servicing
65
HV, HV charger error was
detected
Error during the high voltage
load, impossible to load the high
voltage
- return the device for servicing
66
HV, Error of HV
measurement circuit
Error during measurements in
high voltage section
- return the device for servicing
67
HV, HV charge time is too
big
Error during the high voltage
load, impossible to load the high
voltage
- return the device for servicing
68
HV, Too big current was
detected
Current too high during shock
application
- return the device for servicing
69
HV, Too low current at
shock was detected
Current too low during shock
application, possibly due to
failure in final stage
- return the device for servicing
70
HV, Current sensor error
Error in the current regulation
- return the device for servicing
71
HV, SHKEN net error
Error during the safety test
before the shock application
- return the device for servicing
72
HV, START net error
Error during shock release
- restart the device
- if the error persists: Return the
device for servicing
75
HV, HV hardware
protection error
Error during shock release
- restart the device
- if the error persists: Return the
device for servicing
76
HV, Residual voltage after
disarm error
Residual current to high on the
condensator after the discharge
- restart the device
- if the error persists: Return the
device for servicing
77
HV, Capacitor voltage
does not match energy
level
Wrong condensator voltage with
respect to current/energy
requirements
- return the device for servicing
78
HV, Capacitor voltage is
not constantly increasing
Error during the high voltage
charge, voltage on the
condensator does not increase
in a continuous manner
- return the device for servicing
79
HV, error in calculation of
charge voltage
Error during the high voltage
charge, defective voltage values
for the condensator
- return the device for servicing
80
HV, Shock mode error
Defective switching between
synchronous and asynchronous
shock modality
- restart the device
- if the error persists: Return the
device for servicing
84
PRWIN fail > 100 ms
Error in the voltage supply,
possibly due to an empty
accumulator/battery
- charge and/or replace the
power module
- if the error persists: Return the
device for servicing
Page 83

List of error codes
METRAX GmbH
DefiMonitor XD 21324 / GB / K05
83 / 116
87
Program update error
Error during program update, the
update will be interrupted
- return the device for servicing
90
Tasks start/run error
Error during internal processing
- restart the device
- if the error persists: Return the
device for servicing
91
Menu init error
Defective display in the Setup
menu
- return the device for servicing
92
Critical key error
Error during the check of input
elements (e.g. shock button)
- restart the device
- if the error persists: Return the
device for servicing
93
Charge time-out error
The high voltage charge lasts
too long, possibly due to a
failure in the final stage
- return the device for servicing
94
Disarm time-out error
Impossible to discharge the
residual energy in the
condensator, possibly due to a
failure in the final stage
- return the device for servicing
96
AVDD exceed
Error in the voltage supply,
possibly due to an empty
accumulator/battery
- charge and/or replace the
power module
- if the error persists: Return the
device for servicing
97
AVDD drop
Error in the voltage supply,
possibly due to an empty
accumulator/battery
- charge and/or replace the
power module
- if the error persists: Return the
device for servicing
98
CVDD exceed
Error in the voltage supply,
possibly due to an empty
accumulator/battery
- charge and/or replace the
power module
- if the error persists: Return the
device for servicing
99
CVDD drop
Error in the voltage supply,
possibly due to an empty
accumulator/battery
- charge and/or replace the
power module
- if the error persists: Return the
device for servicing
100
DVDD exceed
Error in the voltage supply,
possibly due to an empty
accumulator/battery
- charge and/or replace the
power module
- if the error persists: Return the
device for servicing
101
DVDD low
Error in the voltage supply,
possibly due to an empty
accumulator/battery
- charge and/or replace the
power module
- if the error persists: Return the
device for servicing
102
5V exceed
Error in the voltage supply,
possibly due to an empty
accumulator/battery
- charge and/or replace the
power module
- if the error persists: Return the
device for servicing
103
5V drop
Error in the voltage supply,
possibly due to an empty
accumulator/battery
- charge and/or replace the
power module
- if the error persists: Return the
Page 84

List of error codes
84 / 116
DefiMonitor XD 21324 / GB / K05
METRAX GmbH
device for servicing
104
24V exceed
Error in the voltage supply,
possibly due to an empty
accumulator/battery
- charge and/or replace the
power module
- if the error persists: Return the
device for servicing
105
24V drop
Error in the voltage supply,
possibly due to an empty
accumulator/battery
- charge and/or replace the
power module
- if the error persists: Return the
device for servicing
106
PWRIN exceed
Error in the voltage supply,
possibly due to an empty
accumulator/battery
- charge and/or replace the
power module
- if the error persists: Return the
device for servicing
107
PWRIN drop
Error in the voltage supply,
possibly due to an empty
accumulator/battery
- charge and/or replace the
power module
- if the error persists: Return the
device for servicing
108
Battery exceed
Internal battery voltage too high
- restart the device
- if the error persists: Return the
device for servicing
110
Temperature exceed
Operating temperature too high
- operate the device in a cooler
environment
111
Temperature drop
Operating temperature too low
- operate the device in a warmer
environment
116
HDQ interface fail
Error communicating with power
module
- restart the device
- if the error persists: Return the
device for servicing
117
CYCLE time error
Error during the shock appliance
- return the device for servicing
118
VREF exceed
Error in the voltage supply,
possibly due to an empty
accumulator/battery
- charge and/or replace the
power module
- if the error persists: Return the
device for servicing
119
VREF drop
Error in the voltage supply,
possibly due to an empty
accumulator/battery
- charge and/or replace the
power module
- if the error persists: Return the
device for servicing
120
Battery/accumulator fail
Power module voltage too low
- charge and/or replace the
power module
121
DSP timeout error
Internal communication error
- restart the device
- if the error persists: Return the
device for servicing
122
Previous error detected need full test
General description of error
detected during auto-diagnosis
- restart the device
- if the error persists: Return the
device for servicing
123
Program code area
corrupt
Error in the program memory
- return the device for servicing
Page 85

List of error codes
METRAX GmbH
DefiMonitor XD 21324 / GB / K05
85 / 116
124
Keyboard error
Error in the membrane keyboard
- restart the device
- if the error persists: Return the
device for servicing
125
ECG calibration error
Error during the ECG calibration
- restart the device
- if the error persists: Return the
device for servicing
127
Clocks (32 kHz or
3.6864 MHz) error
Error in system clock generation
- restart the device
- if the error persists: Return the
device for servicing
129
Wrong hardware platform
Error during the hardware
detection
- return the device for servicing
130
SPI communication error
Internal communication error
- restart the device
- if the error persists: Return the
device for servicing
133
Switch ECG source error
Error when switching the
paddles
- detach completely the device
from the current supply:
Disconnect the power plug,
remove the power module from
the device; Restart the device
after an average time of 30
seconds
- if the error persists: Return the
device for servicing
134
XtBoard err - power
source
Error during the current supply
of the expansion board
- charge and/or replace the
power module
- if the error persists: Return the
device for servicing
135
XtBoard err - paddle logic
Error during the test of the
paddles
- do not press any paddle
buttons when starting the device
- remove and reinsert the
paddles
- restart the device
- if the error persists: Return the
device for servicing
136
XtBoard err - key logic
Error during the test of the
paddle buttons
- restart the device
- do not press any paddle
buttons when starting the device
- if the error persists: Return the
device for servicing
137
XtBoard err - unknown
General fault message
expansion board
- restart the device
- if the error persists: Return the
device for servicing
138
Protected variable error
Defective storage of important
variables
- return the device for servicing
139
XtBoard err - runtime error
Error during the expansion
board runtime check
- restart the device
- if the error persists: Return the
device for servicing
140
Impedance measurement
Error during the impedance
- return the device for servicing
Page 86

List of error codes
86 / 116
DefiMonitor XD 21324 / GB / K05
METRAX GmbH
error
measurement
141
XtBoard err - platform
Error during the hardware
detection
- return the device for servicing
Page 87

Disposal
METRAX GmbH
DefiMonitor XD 21324 / GB / K05
87 / 116
15 Disposal
Fig. 28: Disposal
In accordance with the founding principles of the company Metrax GmbH, your product has
been developed and made using high quality materials and components which are recyclable.
At the end of its serviceable life, recycle the device through disposal companies registered
under public law (council recycling facilities). Proper disposal of this product helps with
environmental protection.
Through registration of Metrax GmbH with the responsible authorities, we ensure that the
disposal and utilisation of electronics devices introduced onto the market by us is secure in
accordance with the EU directive on the disposal of electronic and electrical equipment
(WEEE-directive).
In Germany, in accordance with legislation on the sale, return and environmentally friendly
disposal of electrical and electronic devices (Elektro- und Elektronikgerätegesetz – ElektroG),
(Electrical and Electronic Equipment Act– ElektroG) Metrax is registered with EAR (register of
old electronic equipment) under the number: 73450404.
CAUTION
Improper disposal of the device or its individual parts can lead to injury.
For business customers in the European Union
Please contact your dealer or supplier if you want to dispose of electrical and electronic
equipment. He will have further information on this for you.
Information for disposal in countries outside the European Union
This symbol is only applicable within the European Union.
Page 88

Technical Data
88 / 116
DefiMonitor XD 21324 / GB / K05
METRAX GmbH
16 Technical Data
Defibrillation
Operating modes
asynchronous, external in Auto/Manual mode
Patient impedance:
23 – 200 Ohm
Synchronisation:
SYNC only in manual mode
Impulse shape:
Biphasic, current regulated (CCD)
Output power in AUTO
mode at:
Patient
impedance
Tolerance
1. stage
2. stage
3. stage
25 Ohm
± 15 %
143 J
201 J
277 J
50 Ohm
± 15 %
281 J
350 J
360 J
75 Ohm
± 15 %
348 J
360 J
360 J
100 Ohm
± 15 %
344 J
343 J
343 J
125 Ohm
± 15 %
314 J
316 J
317 J
150 Ohm
± 15 %
290 J
293 J
293 J
175 Ohm
± 15 %
269 J
272 J
272 J
Output energy in MAN
mode depending upon
the patient impedance:
Energy
to:
Tolerance
25Ω
50Ω
75Ω
100Ω
125Ω
150Ω
175Ω
5 J
± 3 J
5 J
5 J
5 J
5 J
5 J
5 J
5 J
10 J
± 3 J
10 J 10 J 10
J
10 J
10 J
10 J
10 J
20 J
± 3 J
20 J 20 J 20
J
20 J
19 J
16 J
15J
30 J
± 15 %
30 J 30 J 30
J
30 J
28 J
24 J
23 J
50 J
± 15 %
50 J 50 J 50
J
50 J
41 J
38 J
34 J
100 J
± 15 %
98 J 100 J 100 J 100
J
83 J
75 J
68 J
200 J
± 15 %
195 J 200 J 200 J 200 J 170 J 154 J 141
J
300 J
± 15 %
290 J 300 J 300 J 300 J 262 J 236 J 214
J
360 J
± 15 %
340 J 360 J 360 J 360 J 314 J 287 J 242
J
Page 89

Technical Data
METRAX GmbH
DefiMonitor XD 21324 / GB / K05
89 / 116
Impulse length:
Positive phase 11.25 ms, negative phase 3.75 ms
Discharges:
70 discharges at 20 °C with new, fully charged battery with energy
level of 200J.
40 discharges at 20 °C with new, fully charged battery with energy
level of 360J.
Charge time:
12 +/-3 seconds in operating mode with rated voltage in mains
12 +/-3 seconds in operating mode with fully charged, new AkuPak
12 +/-3 seconds in operating mode with 90 % rated voltage
12 +/-3 seconds in operating mode with an AkuPak after energy
removals for 15 shocks
≤ 25 seconds from switching on the unit up to charging the
maximum energy in manual mode
≤ 33 seconds from switching on the unit up to charging the
maximum energy in automatic mode
Pacemaker (Pacer)
Operating modes
Fix, Demand, Overdrive
- Stimulation rate
30-180 pulses/min, in Fix and Demand mode
30-250 pulses/min, in OverDrive mode
Tolerance: ± 0.5 %
- Stimulation intensity
10mA-180mA, tolerance: ± 10 % or +3/-1 mA
Pulse width:
20ms, tolerance: ± 100 µs
Refractory period:
340ms for stimulation rate < 100 beats/min
240ms for stimulation rate >= 100 beats/min
Tolerance: ± 10ms
ECG
Derivation:
2 derivations from I, II, III, aVL, aVR, aVF
Heart frequency:
30 – 270 min-1
Input:
Class CF, defibrillation-proof
Input resistance:
> 5 MOhm @ 10 Hz
CMRR:
> 85 dB
Input d.c. voltage:
± 0.5 V
Bandwidth:
0.5 – 40 Hz (- 3 dB) SR = 101 samples/s
Page 90

Technical Data
90 / 116
DefiMonitor XD 21324 / GB / K05
METRAX GmbH
SpO2 NELLCOR®
Pulse oximetry module
Indication range:
100 %
Calibration range:
100 ... 50 %
Accuracy:
SpO2
Adults 100 ... 70 % +/- 3 digits
New-born babies 95 ... 70 % +/- 3 digits
Contact the manufacturer for further details on test procedures.
Wavelength:
Red: 660 nm, Infrared: 890 nm
Light intensity:
0.5 lumen/cm2
Operating mode:
continuous
Refreshing time:
< 2 sec.
Impedance
measurement
Defibrillation/Pacing:
23 ... 200 Ohm
Monitoring:
500 – 2500 Ohm
Measurement
frequency:
30 kHz
Measuring precision:
±15 %
Alarms
System:
EKG, SpO2,, defibrillator, power supply, data memory
Physiological:
schockable rhythm
Analysis duration: one
battery
approx. 7 sec to identify schockable rhythm for a battery with 90 %
of the nominal capacity
Monitor
Monitor type:
high-resolution LCD monitor
Monitor size:
115 x 86 mm (diagonal 144 mm, 5.7")
Resolution:
320 x 240 pixels (pixel size 0.36 x 0.36 mm)
Displays:
Heart rate, number of defibrillations, number of detected VF,
reanimation duration, date, time, battery capacity
Defibrillation / pacing
electrodes
SavePads, SavePads
Connect
Pacing: 1h pacing, operation at 120 pulses/min at 140 mA
8h pacing, operation at 60 pulses/min at 70 mA
10 minutes, operation OverDrive pacing at 200
pulses/min at 180 mA
Page 91

Technical Data
METRAX GmbH
DefiMonitor XD 21324 / GB / K05
91 / 116
Defibrillation: Up to 50 defibrillations and/or 24h monitoring
Monitoring: Up to 24 h
Power supply
PRIMEDIC™ AkuPak:
NiCd, 12 V / 1.4 Ah
Integrated mains power
pack:
100 ... 240 Volt, 50 / 60 Hz
Power consumption:
129W
Data storage
Memory type:
CompactFlashCard 32MB – 4GB possible
Safety
Classification:
Medical product of class IIb, protection class I, Type CF, defi-proof,
Identification:
0123
The device is a medical product and complies with the
EC Directive 93 / 42 / EEC
Other
operating conditions:
0 ... 50 °C, 30 ... 95 % rel. humidity, but without condensation
700 hPa ... 1060 hPa continuous mode
Storage conditions:
- 20 ... 70 °C, 20 ... 95 % rel. humidity, but without condensation
500 hPa ... 1060 hPa continuous mode
Dimensions:
33 x 16 x 29 cm (W x D x H)
Weight:
5.3 kg (without power module)
Standards applied
Standards (for licensing in the EU the corresponding harmonised
European standards EN were used instead of the IEC standards):
IEC 60601-1:1988 + A1:1991 + A2:1995
IEC 60601-1-2:2001
IEC 60601-1-4:1996 + A1:1999
IEC 60601-2-4:2002
CEN EN ISO 9919:2005 (only for XD3,XD30,XD300,XD330)
EN1789:2003
Subject to change without notice.
Page 92

Accessories
92 / 116
DefiMonitor XD 21324 / GB / K05
METRAX GmbH
17 Accessories
The PRIMEDIC™ DefiMonitor XD is supplied with the following accessories fitted at the
factory:
• Paddle set
• PRIMEDIC™ SavePads Connect
• Power module: PRIMEDIC™ AkuPak
For details of further accessories, see separate list of accessories / price list.
Page 93

Warranty conditions
METRAX GmbH
DefiMonitor XD 21324 / GB / K05
93 / 116
18 Warranty conditions
The warranty period is 24 months, beginning on the date of purchase. Please keep the invoice
as proof of purchase.
Within this time period, METRAX will remedy any defects in the device free of charge if they
are based on material or manufacturing errors. The device can be reinstated to its original
condition as selected by METRAX either by repair or replacement.
A claim under warranty does not extend the original warranty period.
Warranty claims and also legally entitled warranty claims are not applicable if the usefulness of
the device is only negligibly affected, or in the case of normal wear and tear (e.g. consumables
such as PRIMEDIC™ AkuPak) or damages caused after transfer of risk as a result of incorrect
or negligent handling, excessive wear or caused by special external influences which are not
provided for according to the contract. The same applies if inappropriate changes or incorrect
repair work is carried out by the buyer or by a third party.
All other claims against METRAX are excluded out unless such claims are based on intent or
gross negligence or compulsory legal liability standards.
Warranty claims made by the buyer against the seller (dealer) are not affected by this
guarantee.
In the case of a warranty claim, please return the device with proof of purchase (e.g. invoice)
stating your name and address to your dealer or to METRAX.
METRAX After-Sales Service is glad to be at your disposal, even after the warranty period has
expired.
Page 94

Depiction of the current time function
94 / 116
DefiMonitor XD 21324 / GB / K05
METRAX GmbH
19 Depiction of the current time function
The following diagrams show the graphs for the defibrillation pulse in manual mode, depending
on the load resistance.
Time / ms
Time / ms
Time / ms
I / A
5 Joule @ 25 Ohm
5 Joule @ 50 Ohm
5 Joule @ 75 Ohm
I / A
5 Joule @ 100 Ohm
5 Joule @ 125 Ohm
5 Joule @ 150 Ohm
I / A
5 Joule @ 175 Ohm
10 Joule @ 25 Ohm
10 Joule @ 50 Ohm
I / A
10 Joule @ 75 Ohm
10 Joule @ 100 Ohm
10 Joule @ 125 Ohm
Page 95

Depiction of the current time function
METRAX GmbH
DefiMonitor XD 21324 / GB / K05
95 / 116
I / A
10 Joule @ 150 Ohm
10 Joule @ 175 Ohm
20 Joule @ 25 Ohm
I / A
20 Joule @ 50 Ohm
20 Joule @ 75 Ohm
20 Joule @ 100 Ohm
I / A
20 Joule @ 125 Ohm
20 Joule @ 150 Ohm
20 Joule @ 175 Ohm
I / A
30 Joule @ 25 Ohm
30 Joule @ 50 Ohm
30 Joule @ 75 Ohm
I / A
30 Joule @ 100Ohm
30 Joule @ 125 Ohm
30 Joule @ 150 Ohm
Page 96

Depiction of the current time function
96 / 116
DefiMonitor XD 21324 / GB / K05
METRAX GmbH
I / A
30 Joule @ 175 Ohm
50 Joule @ 25 Ohm
50 Joule @ 50 Ohm
I / A
50 Joule @ 75 Ohm
50 Joule @ 100 Ohm
50 Joule @ 125 Ohm
I / A
50 Joule @ 150 Ohm
50 Joule @ 175 Ohm
100 Joule @ 25 Ohm
I / A
100 Joule @ 50 Ohm
100 Joule @ 75 Ohm
100 Joule @ 100 Ohm
I / A
100 Joule @ 125 Ohm
100 Joule @ 150 Ohm
100 Joule @ 175 Ohm
Page 97

Depiction of the current time function
METRAX GmbH
DefiMonitor XD 21324 / GB / K05
97 / 116
I / A
200 Joule @ 25 Ohm
200 Joule @ 50 Ohm
200 Joule @ 75 Ohm
I / A
200 Joule @ 100 Ohm
200 Joule @ 125 Ohm
200 Joule @ 150 Ohm
I / A
200 Joule @ 175 Ohm
300 Joule @ 25 Ohm
300 Joule @ 50 Ohm
I / A
300 Joule @ 75 Ohm
300 Joule @ 100 Ohm
300 Joule @ 125 Ohm
I / A
300 Joule @ 150 Ohm
300 Joule @ 175 Ohm
360 Joule @ 25 Ohm
Page 98

Depiction of the current time function
98 / 116
DefiMonitor XD 21324 / GB / K05
METRAX GmbH
I / A
360 Joule @ 50 Ohm
360 Joule @ 75 Ohm
360 Joule @ 100 Ohm
I / A
360 Joule @ 125 Ohm
360 Joule @ 150 Ohm
360 Joule @ 175 Ohm
Page 99

Depiction of the current time function
METRAX GmbH
DefiMonitor XD 21324 / GB / K05
99 / 116
The following diagrams show the graphs for the defibrillation pulse in AUTO mode, displayed
depending on the load resistance.
Time / ms
Time / ms
Time / ms
25 Ohm I / A
1. Shock
2. Shock
3. Shock
50 Ohm I / A
1. Shock
2. Shock
3. Shock
75 Ohm I / A
1. Shock
2. Shock
3. Shock
100 Ohm I / A
1. Shock
2. Shock
3. Shock
125 Ohm I / A
1. Shock
2. Shock
3. Shock
Page 100

Depiction of the current time function
100 / 116
DefiMonitor XD 21324 / GB / K05
METRAX GmbH
150 Ohm I / A
1. Shock
2. Shock
3. Shock
175 Ohm
1. Shock
2. Shock
3. Shock
 Loading...