

Page 1
Feature List
PRSO202
PRSO203
Page 2

Page 3

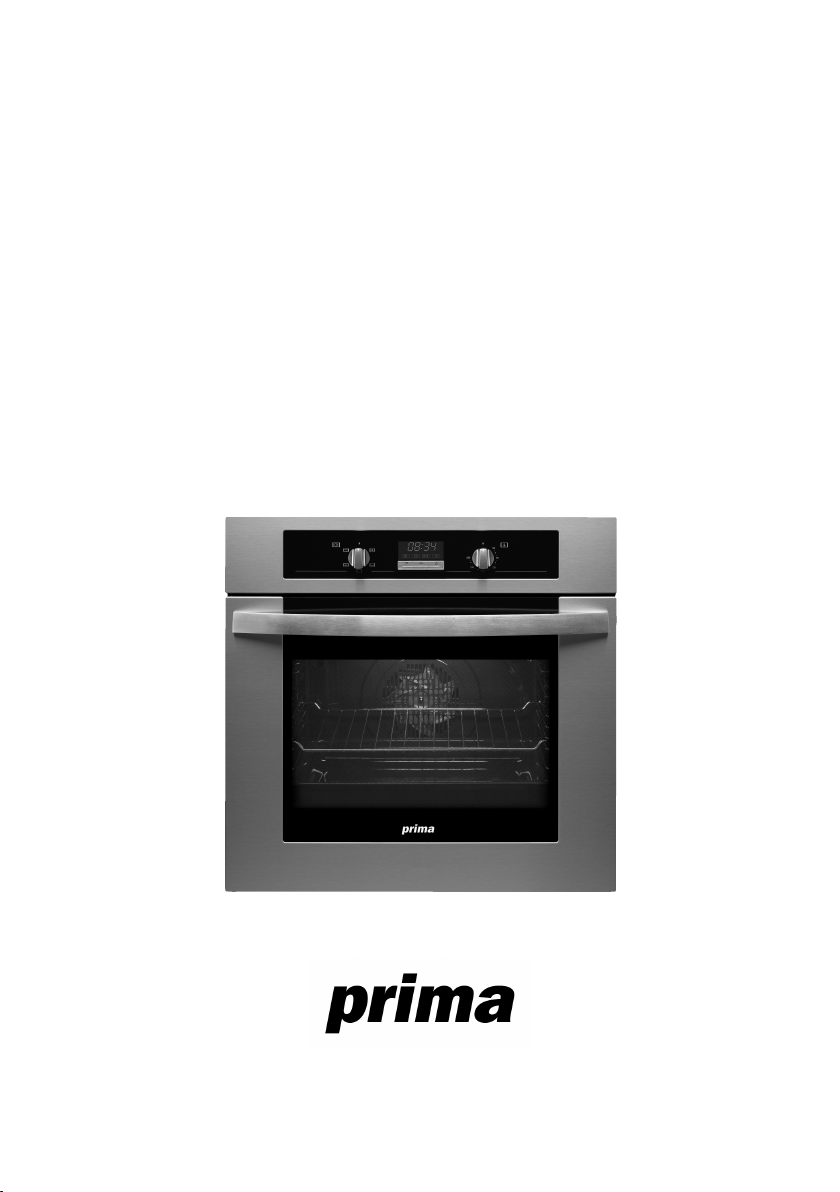
Model PRSO202 / PRSO203
Control Panel
13 4
ENGLISH
1 Electronic clock.
2 Cooker indicator light. It indicates that one
or more of the electric hotplates are on.
Oven Functions
Switch off oven
Grill
For preparing dishes with superficial roasting.
It allows the outer layer to be browned without
affecting the inside of the food. Ideal for flat
food, such as steaks, ribs, fish, toast.
Grill with fan
Allows uniform roasting at the same time as
surface browning. Ideal for grills. Special for
large volume pieces, such as poultry, game
etc. It is recommended to put the item on a
rack with a tray beneath to collect the stock
and juices.
Caution
While using the Grill the door must be kept
closed.
3 Function selector.
4 Temperature selector.
5 Control knobs for the hob.
Lower element
Heats only from beneath. Suitable for heating
dishes and raising pastry and similar.
Turbo
The fan distributes the heat produced by an
element located at the rear of the oven. Due to
the uniform heat distribution, it allows roasting
and baking to take place at two heights at the
same time.
Defrosting
This cooking mode is suitable for gently
defrosting of food. In special food to be
consumed unwarmed, e.g.: cream, custard,
pastry, tarts, cakes, fruit,...
Note
The pilot light remains on in any cooking
function.
3
Page 4

Use of the Oven
Setting the time on the Electronic Clock
When the oven is connected to the power supply,
the indication 00:00 flash on the display. Press
or to set the time on the clock. The clock
beeps twice to confirm the selected time.
If you wish to modify the time, press or
until the current time flash on the screen.
Press . Then press or to modify
the time. The clock beeps twice to confirm the
modification.
Manual Operation
The oven is ready to be used when the clock
has been set. Select a cooking function and a
temperature.
When you begin cooking, symbol lights
up to indicate that the oven is heating the contents; the symbol goes out when the
selected temperature is reached.
Set the controls to to turn the oven off.
Functions of the Electronic Clock
Alarm: Creates an alarm signal when the peri-
od of time finishes; the oven does not need to
be in use in order to use this function.
Cooking Time: To cook for a selected length of
time; the oven turns itself off automatically
when the time finishes.
End Cooking Time: To cook until a set time;
the oven turns itself off automatically when
the time finishes.
Cooking time and End Cooking Time: To cook
for a selected length of time and end at a set
time. When this function is set, the oven
comes on automatically at the time required in
order to cook for the set length of time
(Cooking time) and end automatically at the
indicated time (End Cooking Time)
Programming the Alarm
1 Press until symbol lights up. Press
.
2 Set the period of time after which you wish
the alarm to sound by pressing or .
3 The clock beeps twice, the current time is
displayed and symbol lights up permanently to indicate that the alarm has been
set.
4 When the set period of time comes to an
end, the alarm sounds and symbol
starts to flash.
5 Press any button to stop the alarm; symbol
goes out.
You can consult the remaining time at any
moment by pressing or until symbol
flashes and then pressing . You can
also modify the set time at this point by pressing or . The clock beeps twice to confirm the change.
If you wish the remaining time to be displayed
until the end of the set period of time, press
or until symbol flashes and then
press and keep it pressed in. Symbol
flashes. Keep pressed in again to
return to the real time.
Setting the Cooking Time
1 Press or until symbol lights up.
Press .
2 Select the period of time you wish to cook
for by pressing or .
3 The clock beeps twice, the current time is
displayed and symbol lights up permanently to indicate that the oven will turn
itself off automatically.
4 Select a cooking function and temperature.
5 When the cooking time comes to an end, the
oven turns itself off, the alarm sounds and
symbol flashes.
6 Press any button to stop the alarm and turn
the oven back on again.
4
Page 5

7 Set the controls to to turn the oven off.
You can consult the remaining cooking time at
any moment by pressing or until symbol flashes and then pressing . You
can also modify the set time at this point by
pressing or . The clock beeps twice to
confirm the change.
If you wish the remaining time to be displayed
until the end of the set period of time, press
or until symbol flashes and then
press OK and keep it pressed in. Symbol
flashes. Keep pressed in again to return
to the real time.
Setting the End Cooking Time
1 Press or until symbol lights up.
Press .
2 Select the time you wish the cooking
process to finish at by pressing or .
3 The clock beeps twice, the current time is
displayed and symbol lights up permanently to indicate that the oven will turn
itself off automatically.
4 Select a cooking function and temperature.
5 When the set time is reached, the oven
turns itself off, the alarm sounds and symbol flashes.
6 Press any button to stop the alarm and turn
the oven back on again.
7 Set the controls to to turn the oven off.
You can consult the end cooking time at any
moment by pressing or until symbol
flashes and then pressing . You can
also modify the end cooking time at this point
by pressing or . The clock beeps twice
to confirm the change.
This function can be used even when you are
already using the oven. To do this, follow the
instructions indicated above except point
number 4.
Setting the Cooking Time and the End
Cooking Time
1 Press or until symbol lights
up. Press .
2 Select the period of time you wish to cook
for by pressing or .
3 The clock beeps twice, the current time is
displayed and symbol lights up permanently.
4 Press or until symbol lights
up. Press .
5 Select the time you wish the cooking
process to finish at by pressing or .
6 The clock beeps twice, the current time is
displayed and symbol lights up permanently.
7 Select a cooking function and temperature.
8 The oven remains off with symbols
and lit up. Your oven is set.
9 When the time to start cooking is reached,
the oven starts up and cooks for the set
period of time.
10 When the set end cooking time is reached,
the oven turns itself off, the alarm sounds
and symbols and flash.
11 Press any button to stop the alarm and
turn the oven back on again.
12 Set the controls to to turn the oven off.
You can modify the end cooking time by pressing or until symbol lights up and
then pressing . You can now modify the
end cooking time by pressing or . The
clock beeps twice to confirm the change.
ENGLISH
5
Page 6

Important
In the event of a power cut, all the electronic
clock settings are deleted and the indication
00:00 flashes on the display. It is necessary
to set the time and programme the clock
again.
6
Page 7

Page 8

BROCHURE
Manufacturer PRIMA
Model
Energy
efficiency
class on a
scale of A
(more efficient)
to G (less
efficient).
Heating
function.
Conventional.
Forced air
convection.
Energy
consumption.
Conventional.
PRSO202
PRSO203
A
Forced air
convection.
Usable volume
(litres).
Size:
Small
Medium
Large
Time to cook
standard load.
Conventional.
Forced air
convection.
Baking area.
Noise (dB (A)
re 1 pW).
0,79
Kwh
59
47 min.
1300
- - -
cm
2
Our contribution to enviromental protection: we use recycled paper.
Cod.: 83172611/3172611-001
 Loading...