

Page 1
12-cup stainless steel Coffee Maker
• Brews great coffee—hot and rich.
• Beautiful traditional design provides elegant coffee service anytime.
• Keeps coffee piping hot automatically.
INSTRUCTIONS
Estas instrucciones también están disponibles en español.Para obtener una copia impresa:
• Descargue en formato PDF en www.GoPresto.com/espanol.
• Envíe un correo electrónico a contact@GoPresto.com.
• Llame al 1-800-877-0441, oprima 2 y deje un mensaje.
Visit us on the web at www.GoPresto.com
This is a Listed appliance. The following important safeguards are recommended by most portable appliance manufacturers.
2017 National Presto Industries, Inc.
IMPORTANT SAFEGUARDS
To reduce the risk of personal injury or property damage, when using electrical appliances, basic safety precautions should always be
followed, including the following.
1. Read all instructions.
2. To protect against electrical shock, do not immerse cord, plugs, or coffee maker in water or other liquid.
3. Close supervision is necessary when any appliance is used by or near children.
4. Do not let cord hang over edge of table or counter, or touch hot surfaces.
5. Be sure that the lid is securely in place before brewing and serving coffee.
6. Do not operate any appliance with a damaged cord or plug or after the appliance malfunctions, or has been damaged in any manner.
Return the appliance to the Presto Factory Service Department for examination, repair, or adjustment.
7. The use of accessory attachments not recommended by the appliance manufacturer may cause injuries.
8. Do not touch hot surfaces. Use handles or knobs.
9. Do not place on or near a hot gas or electric burner or in a heated oven.
10. Always attach plug to appliance first, then plug cord into the wall outlet. To disconnect, remove plug from wall outlet, then from
appliance.
11. Remove and replace lid carefully.
12. Scalding may occur if lid is removed during brewing cycle.
13. Extreme caution must be used when moving coffee maker containing hot liquids.
14. Unplug from outlet when not in use and before cleaning. Allow to cool before putting on or taking off parts, and before cleaning
the appliance.
15. Do not use outdoors.
16. Do not use appliance for other than intended use.
SAVE THESE INSTRUCTIONS
THIS PRODUCT IS FOR HOUSEHOLD USE ONLY.
1
Page 2
Important Cord Information
A short power supply cord (or cord set) is provided to reduce the risk resulting from becoming entangled in or tripping over a longer
cord. An extension cord may be used if care is properly exercised in its use. If an extension cord is used, the marked electrical rating of
the extension cord should be at least as great as the electrical rating of the appliance. The extension cord should be arranged so that it
will not drape over the countertop or tabletop where it can be pulled on by children or tripped over unintentionally. Connect the power
supply cord to a 120VAC electrical outlet only.
How to Use
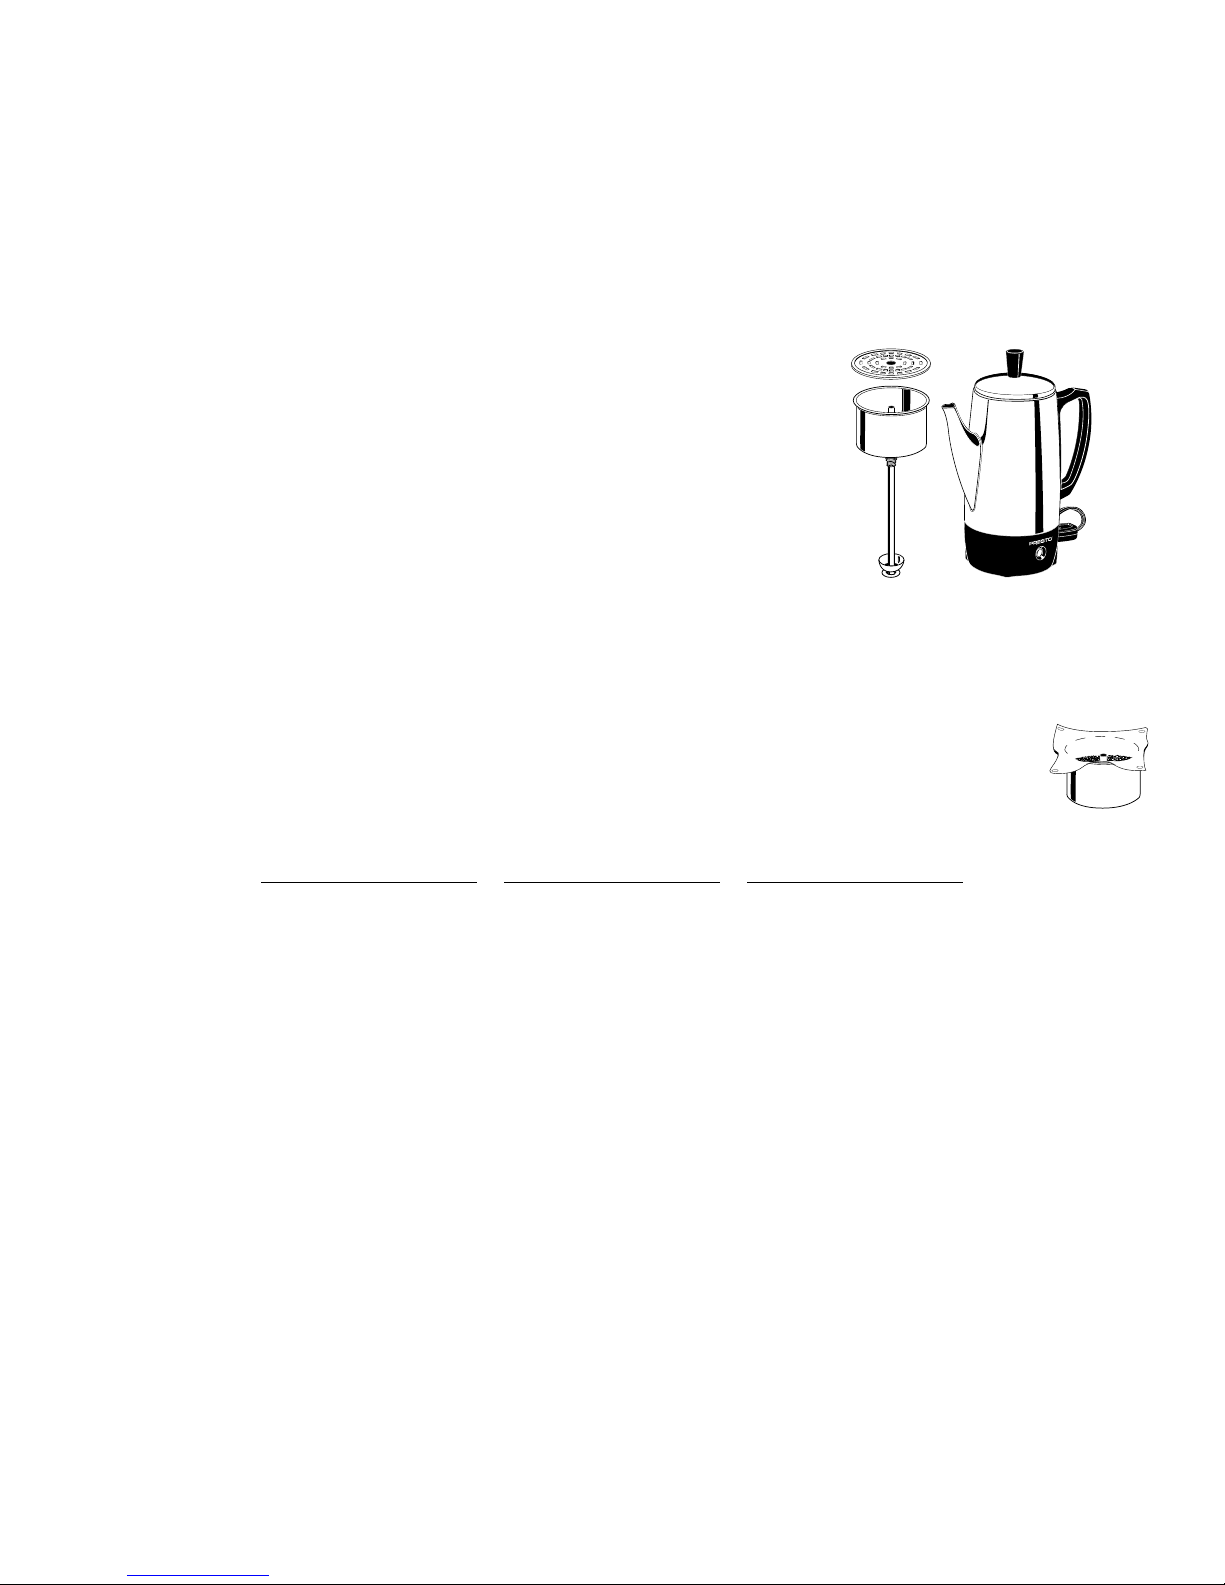
To assure proper operation, read and follow instructions carefully. Before using for
the first time, wash the inside of the coffee maker, cover, and basket assembly (Fig.
A) with warm, soapy water; take care not to get the base or plug receptacle wet.
Rinse thoroughly.
CAUTION! To prevent electrical shock and damage to the coffee maker, do not
immerse coffee maker in water or other liquid. In addition, keep the plug receptacle
area dry. If you notice any moisture, dry thoroughly before use.
1. For perfect coffee every time, always fill your coffee maker with fresh, COLD
water. Fill to desired level (see fill level indicator inside the body on the handle
side of the unit). The numbers indicate the quantity of cups brewed.* Make at least
2 cups at a time to assure best flavor. IMPORTANT: When making consecutive
pots of coffee, always rinse out coffee maker with COLD water. Making coffee
in a warm unit may result in weak coffee.
2. For best clarity and flavor, use one of the disposable wraparound filters included. These filters can be found in the top filler of the
carton. Additional filters are available at grocery stores and online. Look for brands such as Brew Rite** wraparound-style coffee
filters and Melitta** wrap coffee filters.
3. Place the center hole of the filter over the basket stem (Fig. B).
4. Add coffee, either regular or percolator grind, to the basket. When adding coffee to the basket, place a finger over
the basket stem to prevent grounds from falling through. Then, fold corner holes of filter onto the basket stem to
cover the coffee. Tuck excess paper into the basket. The following suggested amounts of coffee can be adjusted
according to personal preference:
Fig. A
Basket Lid
Basket
Perk Tube
Assembly
Washer
Basket
Cover Knob
Handle
Cord
Signal Light
Fig. B
Cups of
Brew
Tablespoons
of Coffee
Cups of
Brew
Tablespoons
of Coffee
Cups of
Brew
Tablespoons
of Coffee
2 2 6 5–6 10 8–10
4 4–5 8 6–8 12 8–12
5. Cover the basket with the basket lid. Place the perk tube in the coffee maker perk well. (The perk well is the indented portion in the
center of the coffee maker base.) While holding the tube in place, slip the filled basket onto the perk tube. IMPORTANT: If the
perk tube is not seated properly in the perk well, the coffee maker will not make coffee or coffee will be weak.
6. Place the cover on the coffee maker and push it down firmly.
7. Connect the cord to the coffee maker and then to a standard 120VAC wall outlet. Never plug coffee maker in without water or liquid
coffee in it.
8. The signal light comes on automatically when coffee is ready. CAUTION! Use proper precautions to prevent the risk of burns. Do
not touch the coffee maker’s hot surfaces. While in use, coffee maker parts, coffee grounds, and coffee may be hot and scalding may
occur. Coffee stays hot as long as coffee maker is plugged in.
9. Disconnect the cord from the electrical outlet first and then from the coffee maker. CAUTION! Coffee maker parts, coffee grounds,
and remaining coffee may still be hot. To prevent burns, allow to cool before washing the unit.
If you think your perked coffee is weak (appears light in color and lacks flavor), check the following:
1. Use at least the minimum amount of coffee, as indicated in the table above, and make sure that an actual measuring tablespoon is
used to determine the correct amount.
2. The coffee maker needs to be cleaned (see detailed cleaning instructions on page 3, step 5). Accumulated sediment in the perk well
of a coffee maker will negatively affect the perking action.
*One cup is approximately 5 ounces brewed coffee.
**Brew Rite is a registered trademark of Rockline Industries Inc. Melitta is a registered trademark of Melitta Europa Gmbh Co Kg. Presto is not affiliated with these
companies.
2
Page 3

3. Be sure that the washer on the bottom of the perk tube moves freely. If the washer is stuck, clean it with a brush.
4. Make sure the washer on the perk tube is positioned on top of the perk well in the bottom of the pot.
5. Before making consecutive pots of coffee, always rinse out the coffee maker with COLD water.
Care and Cleaning
1. Unplug cord from electrical outlet and then remove from coffee maker. Allow the coffee maker to cool before cleaning.
2. Hold onto the coffee maker handle with one hand. Position your other hand so that the heel is resting on the cover on the spout side
of the coffee maker and your fingers are grasping the cover knob. Pressing down with the heel of your hand, tilt the cover towards
the spout side of the coffee maker. Pull the cover off. Discard coffee grounds and filter.
3. Wash and rinse inside of coffee maker, cover, and basket assembly with warm, soapy water after each use. The perk tube, including
the washer, and spout can be cleaned with a brush. CAUTION! To prevent electrical shock and damage to the coffee maker, do not
immerse coffee maker in water or other liquid or allow the plug receptacle or base to get wet.
4. Wipe outside surface with a damp cloth. Thoroughly dry with a towel. IMPORTANT: Keep the plug receptacle area dry. If you
notice any moisture, dry thoroughly before use.
5. To keep the coffee maker functioning properly, periodically remove oil, stains, and any sediment from inside the coffee maker. To
clean, add water up to the 12 mark. Then prepare the coffee maker as you would for making a full pot of coffee, except add 3 tablespoons of automatic dishwashing detergent to the basket in place of the coffee and do not use a disposable filter.
Once the signal light illuminates, allow the coffee maker to remain plugged in for 15 to 20 minutes. Unplug the coffee maker, pour
out the cleaning solution, and then rinse the inside of the coffee maker and the parts with running water. Fill the coffee maker with
fresh water up to the 12 mark and perk again. Pour out the water and thoroughly rinse the inside of the coffee maker and the parts.
Depending on the severity of the staining, it may be necessary to repeat this cleaning procedure.
Consumer Service Information
If you have any questions regarding the operation of your Presto appliance or need parts for your appliance, contact us by any of these
methods:
• Call 1-800-877-0441 weekdays 8:00 AM to 4:00 PM (Central Time)
• Email us through our website at www.GoPresto.com/contact
• Write: National Presto Ind., Inc., Consumer Service Dept., 3925 North Hastings Way, Eau Claire, WI 54703-3703
Inquiries will be answered promptly by telephone, email, or letter. When emailing or writing, please include a phone number and a time
when you can be reached during weekdays if possible. When contacting the Consumer Service Department, please indicate the model
and series numbers located on the bottom of the coffee maker. Please record this information:
Model _____________ Series _____________ Date Purchased ________
The Presto Factory Service Department is equipped to service Presto appliances and supply genuine Presto parts. Genuine Presto
replacement parts are manufactured to the same exacting quality standards as Presto appliances and are engineered specifically to function properly with its appliances. Presto can only guarantee the quality and performance of genuine Presto parts. “Look-alikes” might
not be of the same quality or function in the same manner. To ensure that you are buying genuine Presto replacement parts, look for
the Presto trademark.
Canton Sales and Storage Company, Presto Factory Service Department, 555 Matthews Drive, Canton, MS 39046-3251
Presto Limited Warranty
(Applies only in the United States)
This quality Presto
original owner that should there be any defects in material or workmanship during the first year after purchase, we will repair or replace it at our option. Our
pledge does not apply to damage caused by shipping. Outside the United States, this limited warranty does not apply.
To obtain service under the warranty, please call our Consumer Service Department at 1-800-877-0441. If unable to resolve the problem, you will be instructed
to send your Presto
an appliance, please include your name, address, phone number, and the date you purchased the appliance as well as a description of the problem you are
encountering with the appliance.
We want you to obtain maximum enjoyment from using this Presto
instructions, damage caused by improper replacement parts, abuse, misuse, disassembly, alterations, or neglect will void this pledge. This warranty gives you
specific legal rights, and you may also have other rights which vary from state to state. This is Presto’s personal pledge to you and is being made in place of
all other express warranties.
appliance is designed and built to provide many years of satisfactory performance under normal household use. Presto pledges to the
appliance to the Presto Factory Service Department for a quality inspection; shipping costs will be your responsibility. When returning
appliance and ask that you read and follow the instructions enclosed. Failure to follow
NATIONAL PRESTO INDUSTRIES, INC., EAU CLAIRE, WI 54703-3703
2017 National Presto Industries, Inc. Form 49-218N
3
 Loading...