

Page 1
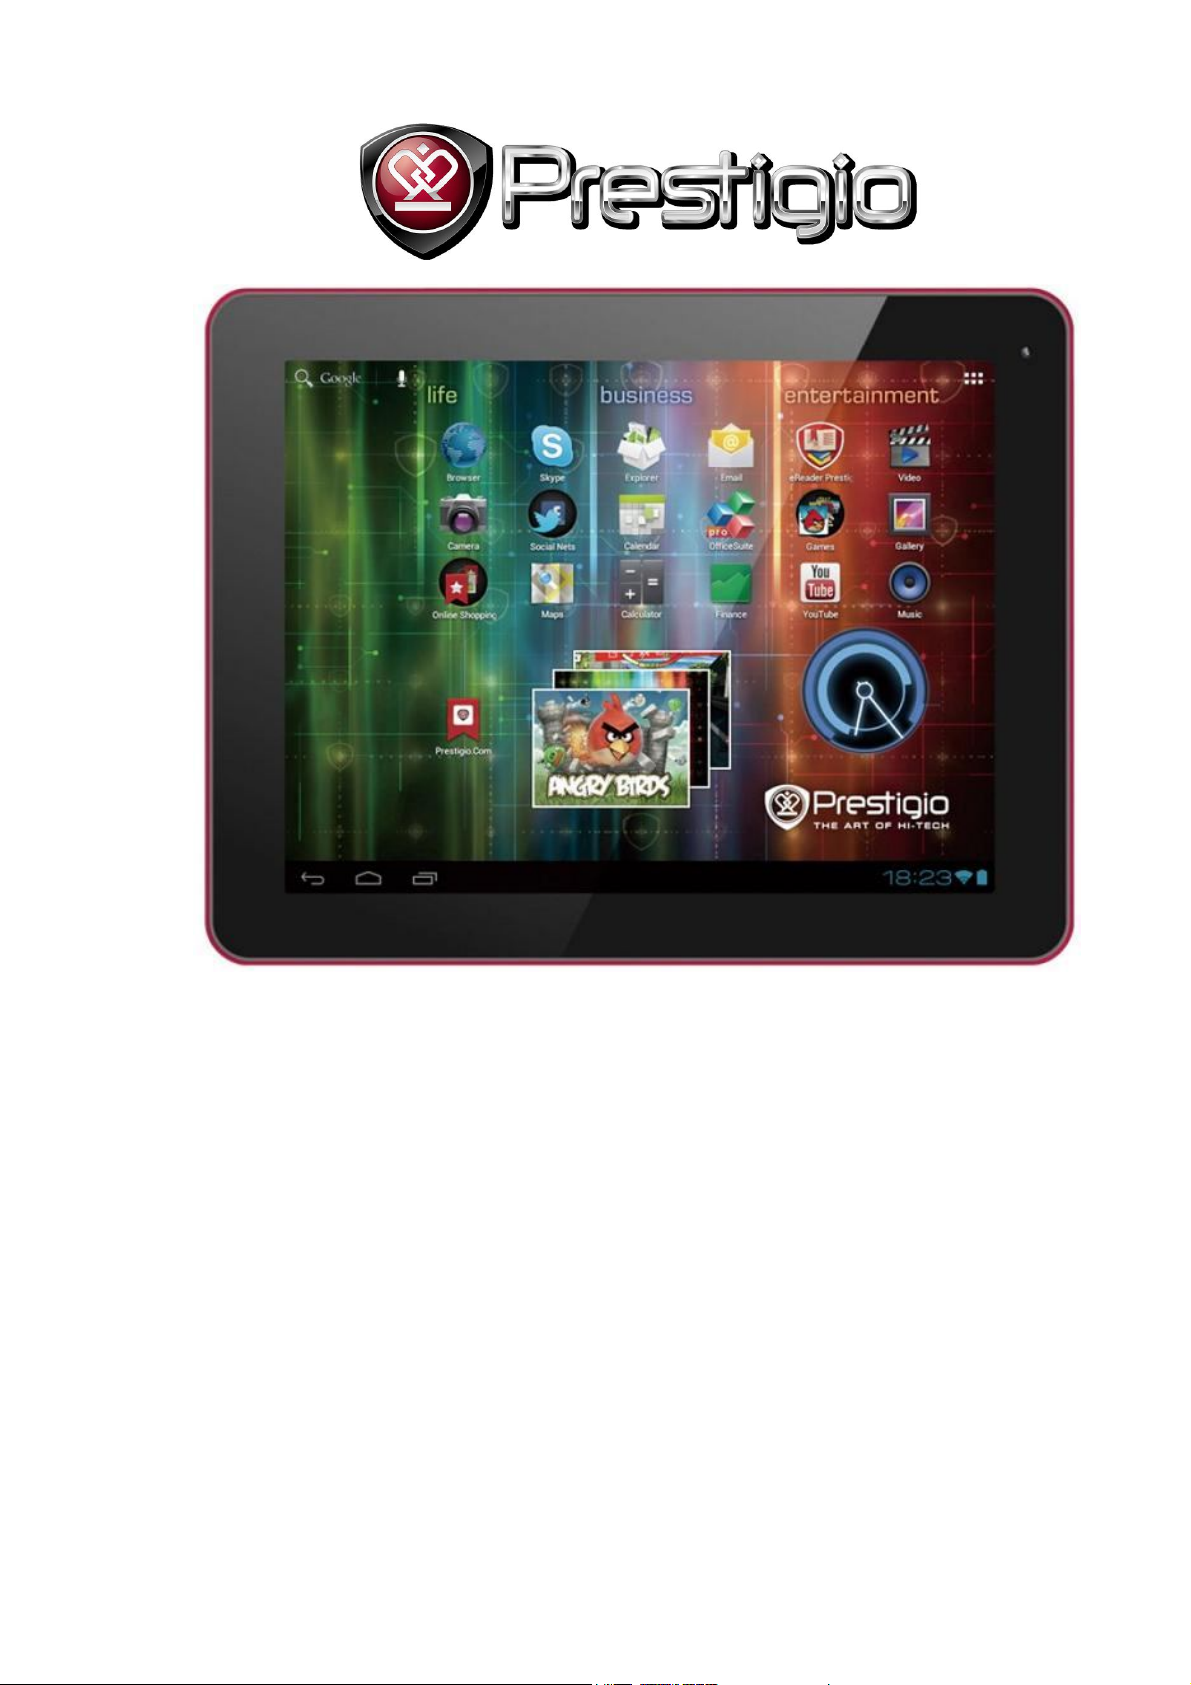
Prestigio MultiPad 9.7
ULTRA Tablet PC
User Manual
www.prestigio.com
1
Page 2

Common information
Dear Customer. Thank you for choosing Prestigio MultiPad 9.7 ULTRA Tablet PC. Before
starting to use the tablet, please read this manual carefully to discover all its features. Please save
this manual and refer to it in the future if you have questions concerning your device.
This manual contains safety information, technical specifications of Prestigio MultiPad 9.7
ULTRA Tablet PC, preinstalled software basic features and other useful information, which will
help you to improve your use of the device, Android operating system and applications.
For information about meaning of the terms used in this manual, please refer to the
"Glossary" section at the end of this manual, as well as to other open information sources or
Prestigio customer support line.
Disclaimer.
As the Prestigio products are constantly updated and improved, your device’s software may
have a slightly different appearance or modified functionality than presented in this User Manual.
We make every effort to ensure that the information and procedures in this user manual are
accurate and complete. No liability can and will be accepted for any errors or omissions.
Prestigio reserves the right to make any changes without further notice to any products herein.
2
Page 3

Important Safety Instructions
Your Prestigio MultiPad 9.7 ULTRA Tablet PC is manufactured and designed for mobile using.
Please, read the following instructions carefully. It helps you to proper use your device without
risk for someone's safety and keep your Tablet PC in good working condition as long as it
possible.
General instructions
1. Do not place objects on top of the MultiPad as objects may scratch the screen.
2. MultiPad should be kept away from extreme changes of temperature.
3. Protect it from direct sunlight or heat sources.
4. Protect the device from moisture and from dusty or smoky environment as it can harm the
tablet.
5. Keep your MultiPad away from contact with active chemicals.
6. Do not place the MultiPad on an uneven or unstable surface. Fall of the device can cause
damage to the LCD screen which is not covered with warranty.
7. Do not expose the MultiPad to strong magnetic or electrical field.
8. Protect your MultiPad from hits and extreme pressure.
9. Operation Temperature: This MultiPad should only be used in environments
with ambient temperatures between 0°C (32°F) and 50°C(122°F).
10. Do not insert into MultiPad devices or items not matching to standard sockets on it.
11. Do not use MultiPad in the rain. It is NOT a waterproof device.
12. Do not use Your MultiPad during driving.
13. Use only manufacturer approved chargers. Using non-original chargers may cause damage of
the device and be harmful to your health.
14. The MultiPad and the adapter may produce some heat during normal operation or charging.
Do not leave the MultiPad on your lap to prevent discomfort or injury from heat exposure.
15. Disconnect the MultiPad from an electrical outlet after it is charged.
16. Do not use a pen or any sharp object to tap the screen. Clean the touch screen with a soft
cloth. If needed, dampen the cloth slightly before cleaning. Never use abrasives or cleaning
solutions.
17. DO NOT disassemble the MultiPad, only a Prestigio certified service technician should
perform repair.
18. Always power off the MultiPad to install or remove external devices that does not
support hot-plug.
29. Your MultiPad must be switched off during airplane take-off and landing.
+
Warranty Information
Warranty information could be found at www.prestigio.com/service.
Prestigio MultiPad 9.7 ULTRA Tablet PC life cycle is 2 years.
3
Page 4

Contents
1. Product Overview ..................................................................................................................... 1
2. Getting Started .......................................................................................................................... 2
2.1 Charge the battery ................................................................................................................................... 2
2.2 Use the storage card ................................................................................................................................ 2
2.3 Hot plug of storage card .......................................................................................................................... 3
2.4 Memory space ......................................................................................................................................... 3
2.5 Power on/off ............................................................................................................................................ 3
2.6 Connect to wireless networks (Wi-Fi) .................................................................................................... 3
3. Home Screen ................................................................................................................................. 5
3.1 Status and notifications ........................................................................................................................... 5
3.2 Shortcuts to Add widgets ........................................................................................................................ 7
3.3 Finger gestures ........................................................................................................................................ 8
3.4 Coping files to and from the storage card ............................................................................................... 8
3.5 Searching the device and the web ........................................................................................................... 9
4. Personalizing ............................................................................................................................... 10
4.1 Change the Notification ringtone .......................................................................................................... 10
4.2 Change your wallpaper ......................................................................................................................... 10
4.3 Personalize your Home screen with folders .......................................................................................... 11
4.4 Rearrange widgets and shortcuts on your Home screen ....................................................................... 11
5. Web browsing ............................................................................................................................. 12
6. Manage Applications .................................................................................................................. 13
7. Typical applications introduction ................................................................................................ 14
7.1 Music Player ......................................................................................................................................... 14
7.2 Video Player .......................................................................................................................................... 15
7.3 Gallery .................................................................................................................................................. 16
7.4 File Manager ......................................................................................................................................... 19
7.5 Instant Messaging tools ......................................................................................................................... 20
7.6 Emails ................................................................................................................................................... 20
8. Prestigio preinstalled applications .......................................................................................... 21
9. Settings........................................................................................................................................ 22
9.1 Wireless & networks ............................................................................................................................. 22
9.2 Sound .................................................................................................................................................... 22
9.3 Display .................................................................................................................................................. 23
9.4 HDMI Settings ...................................................................................................................................... 24
9.5 Storage .................................................................................................................................................. 24
9.6 Apps ...................................................................................................................................................... 25
9.7 Accounts & Sync................................................................................................................................... 25
9.8 Location service .................................................................................................................................... 26
9.9 Security settings .................................................................................................................................... 26
9.10 Language & input settings .................................................................................................................. 27
9.11 Backup & reset .................................................................................................................................... 27
9.12 Date & Time setting ............................................................................................................................ 27
9.13 Accessibility ........................................................................................................................................ 28
9.14 Developer options ............................................................................................................................... 28
4
Page 5

9.15 About tablet ......................................................................................................................................... 29
10. Troubleshooting ........................................................................................................................ 30
10.1 Force shutdown ................................................................................................................................... 30
10.2 Restore default settings ....................................................................................................................... 30
10.3 System updating .................................................................................................................................. 30
10.4 Reset.................................................................................................................................................... 30
11. Glossary .................................................................................................................................... 30
5
Page 6
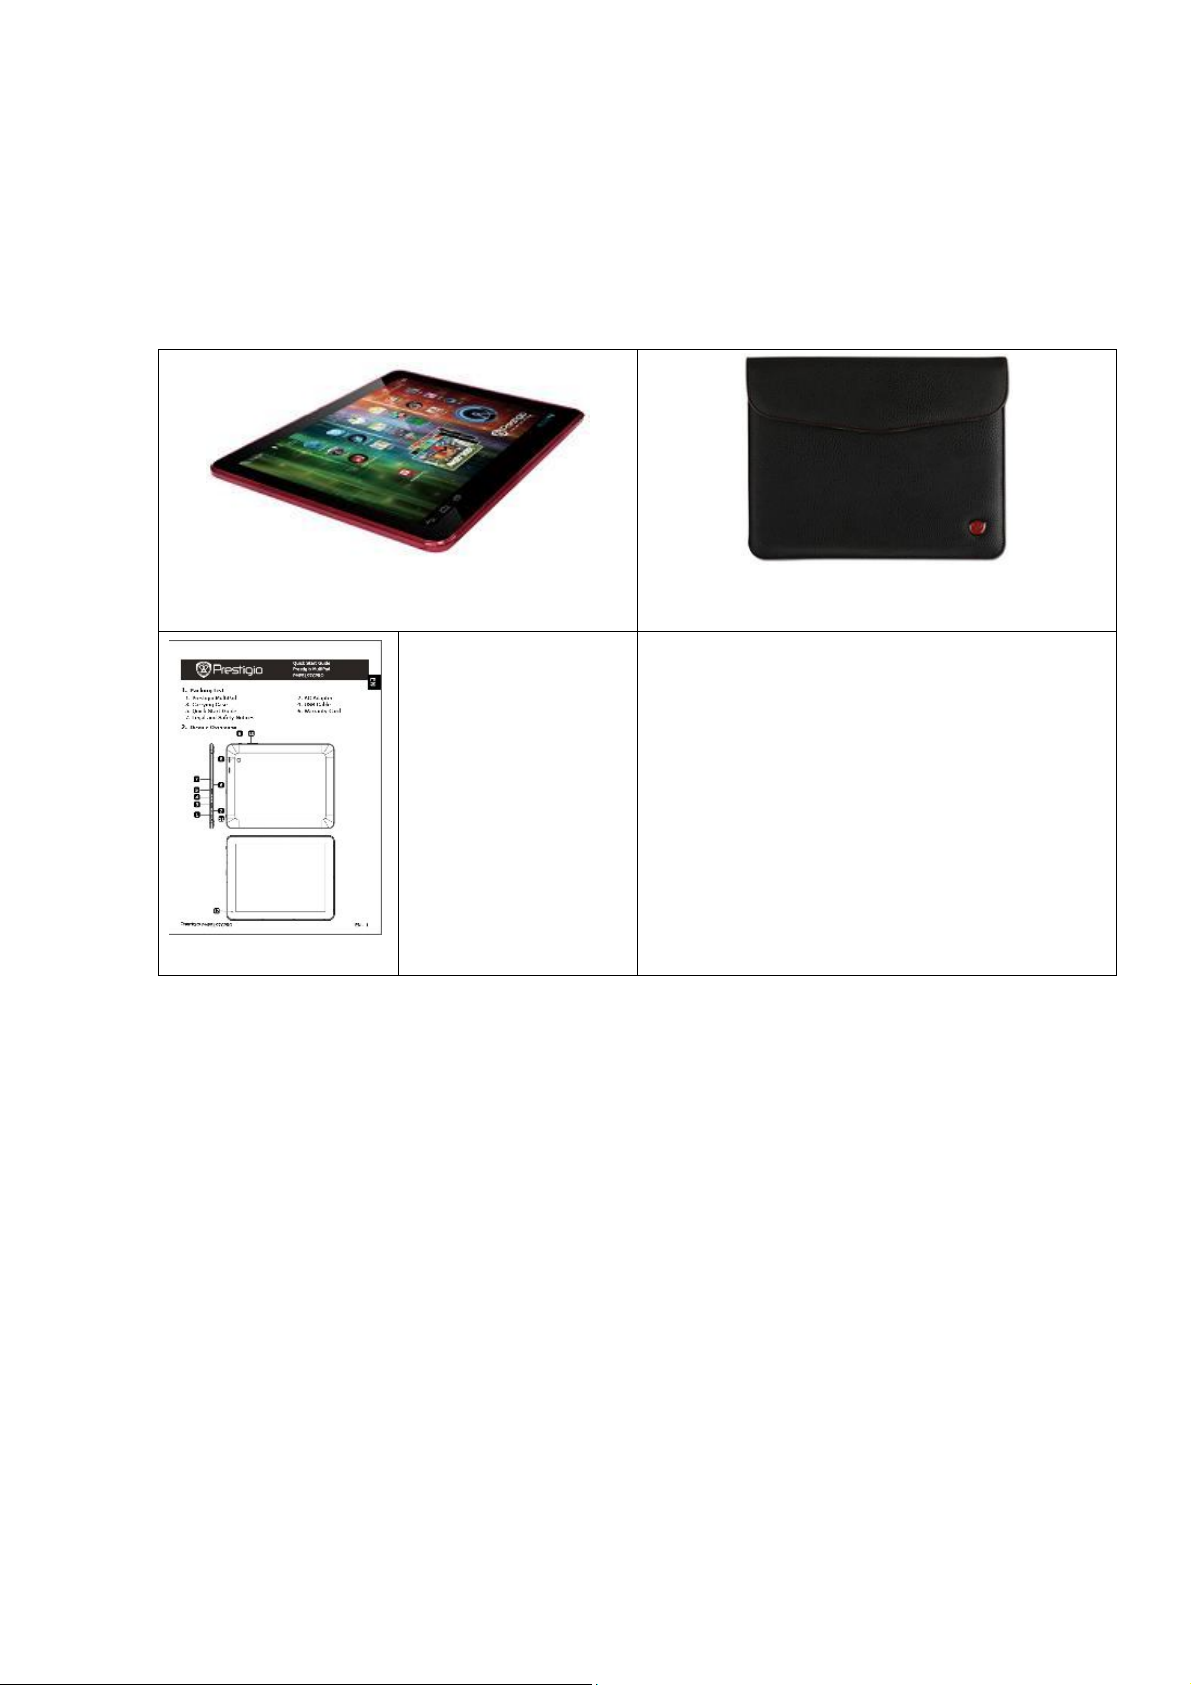
1. Product Overview
1.1 Package Contents:
1x
Prestigio MultiPad 9.7 ULTRA Tablet PC
1x
Quick Start Guide
Carrying Case
Legal and Safety Notices – 1x
AC Adapter – 1x
USB Cable – 1x
Warranty Card – 1x
OTG cable – 1x
1x
1
Page 7
1.2 Device Overview
Technical Specifications:
Processor
CPU ARM Cortex A8 (Allwinner A10)
CPU Internal Clock Rate 1.00 GHz
Display
Display Size 9.7"
Display Resolution 1024x768
Display Technology In-plane Switching (IPS)
Display Features IPS
Screen rotation G-Sensor
Memory
Internal Memory Size 16 GB
Installed RAM Storage Capacity 1 GB DDR3
Flash Card External Micro SDHC up to 32GB
Interface
Interfaces Micro SD, USB 2.0, Wi-Fi, Mini HDMI
Interface Wi-Fi IEEE 802.11b/g/n
Interface Bluetooth N/A
Interface USB 2 x Micro USB
Interface HDMI 1 x Mini HDMI
Interface Audio 1 x 3.5 mm mini jack
Interface VGA N/A
Multimedia
Digital Camera Back : 2 Mpixel, Front : 2 Mpixel
Supported eBook Formats PDF
Supported Audio Formats FLAC, MP3, WMA, OGG, WAV, APE
Supported Picture Formats PNG, BMP, GIF, JPG
Supported Video Formats AVI, RMVB, VOB, WMV, H.264 HD, MKV, MP4, MPEG-4, MPEG-2
Video Features FullHD Playback
Sound Features Stereo Audio Playback
Software
Operating System Android 4.0.3
Battery
Battery Technology Lithium Polymer
Battery Current Capacity 7000 mAh
Battery Video playback Time Up to 7hr
Battery Audio playback Time Up to 36hr
Battery Standby Time Up to 120hr
Miscellaneous
Built-in Devices Card Reader, Microphone, Speaker
Included Accessories USB Cable, OTG-cable, Pouch, Power Adapter
2
Page 8
System Requirements
Applications Installed Adobe Flash, Office Suite, eReader Prestigio, Skype, Google Play
Warranty Term (month) 24 month
Storage Temperature -10C (14F) ~ +60C (140F)
Operation Temperature 0C (32F) ~ +50C (122F)
Storage Relative Humidity 0% ~ 90%, Non-Condensed
Operating Relative Humidity 0% ~ 90%, Non-Condensed
Microsoft Windows 7, Microsoft Windows Vista, Microsoft Windows XP, Apple
Mac OS 10.6 or Later, Linux 2.6
Warranty
Temperature and Humidity
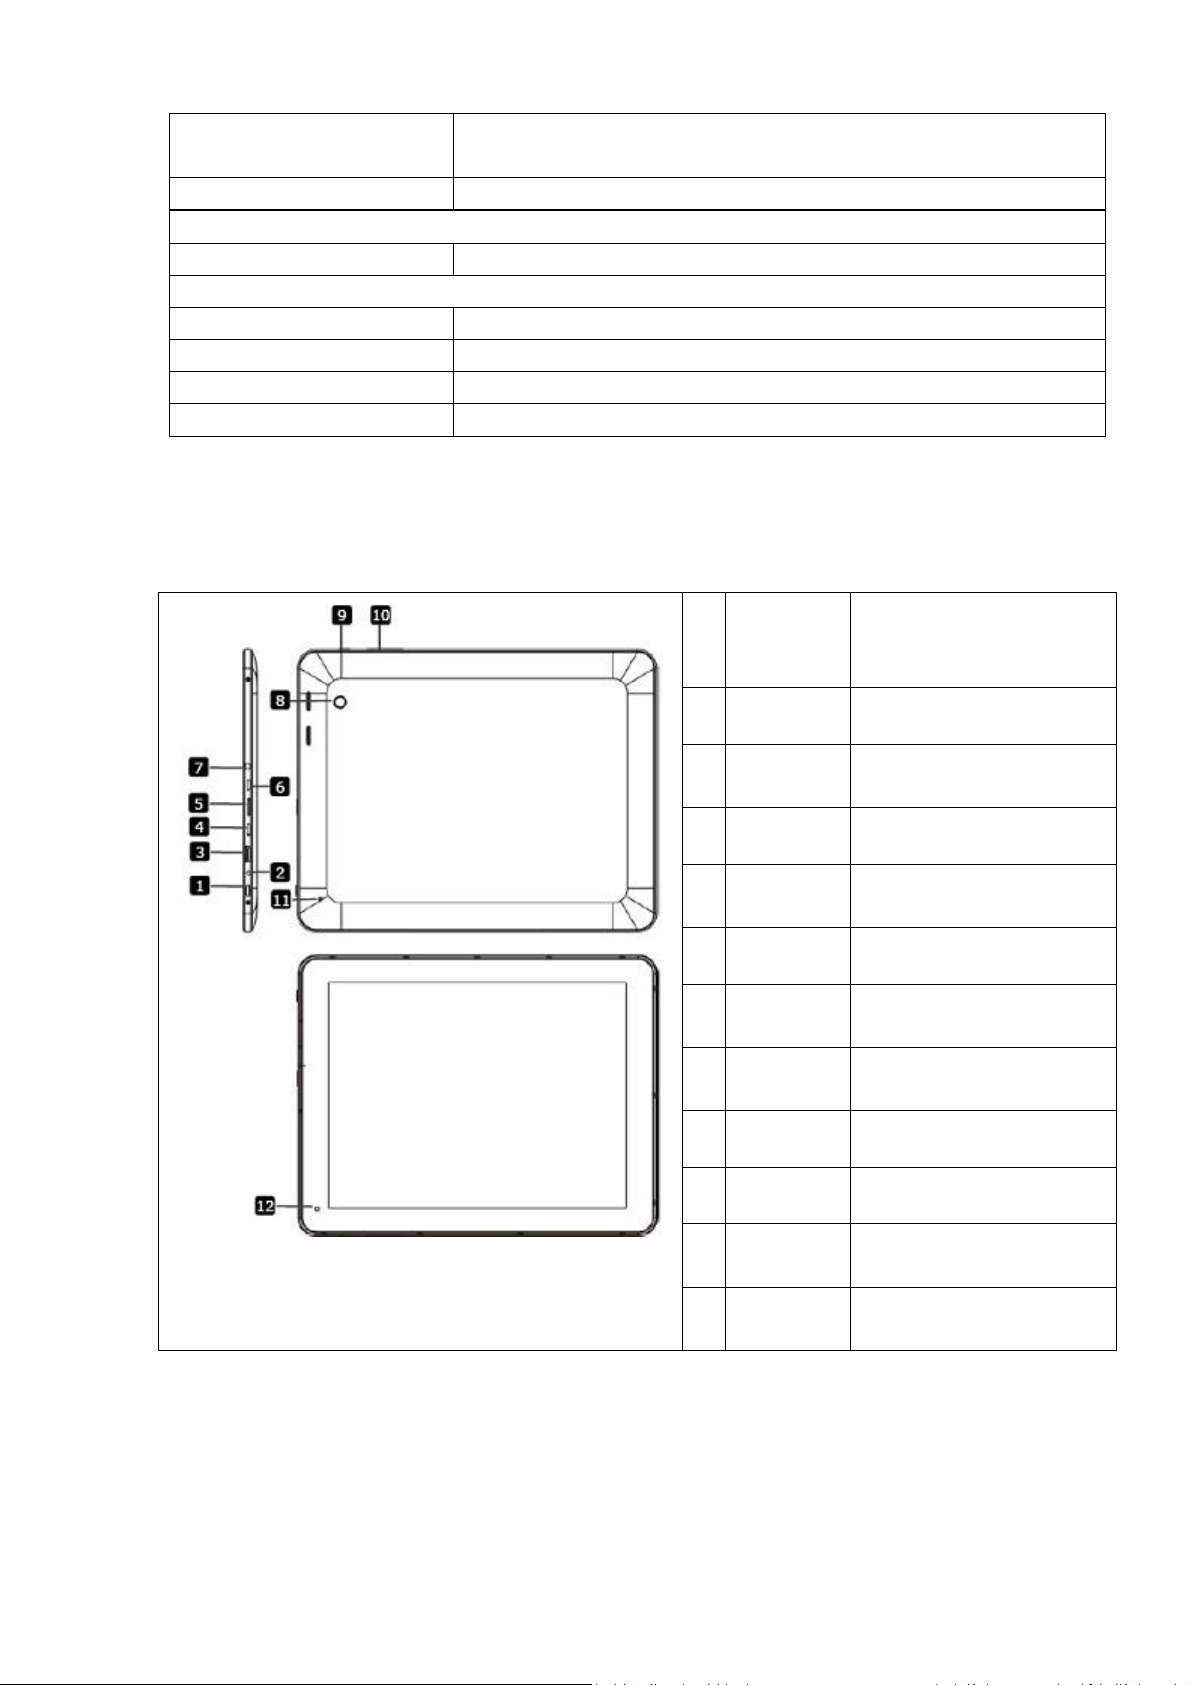
Control Buttons and Connectivity:
Turn on/off the device;
Power
1
2
Button
DC port
Suspend/Activate the
device
AC adapter connection
3
HDMI
HDMI cable connection
port
4
USB port
Micro SD
5
USB connection
Insert the Micro SD card
card slot
6
USB port
Earphone
7
USB connection
Earphones connection
Jack
8
Rear
Take photos
Camera
9
Home
10
Vol+\Vol-
11
Reset
Front
12
Camera
Back to Home screen
Adjust the volume level
Reset the device if it
fails to operate correctly
Take photos or video
chat
3
Page 9

2. Getting Started
2.1 Charge the battery
Prestigio MultiPad comes with a built-in polymer rechargeable battery and is designed to
use only manufacture-specified original batteries and accessories. You can see battery status on
status bar of MultiPad in the lower right corner of the home screen. Android OS has battery
charge detection system and notify user if battery charge is low and device need to be connected
to AC adapter. If you will see such message, or your device couldn’t power on, connect original
AC power adapter to charge your device. Plug one end of the adapter into the power jack of the
device, and the other to the power socket. To extend the battery operation life, wait for finish of
charge process.
Please, fully charge your new device after unpacking.
2.2 Use the storage card
Your new Prestigio MultiPad 9.7 ULTRA Tablet PC is equipped with Micro SD card slot to
extend available device memory. It is compatible with Micro SD/ Micro SDHC/ TF-Flash card
formats up to 32Gb. Proper functioning of larger capacity cards is not guaranteed.
Insert the storage card
The storage card slot is on the right panel of device. To insert a card, place the card
connector towards the rear side of the device and the printing side of the card towards the front
side of the device and press it in card slot until click. Card must be inserted effortlessly. DO NOT
push the card too strong, it could damage the card slot or storage card.
Browse files in the storage card
To browser the files in the storage card, do one of the following:
● Select “File” icon to view files in the storage card;
● You can also install and run any other third party file browser applications.
Remove the storage card
To remove the storage card, gently press the edge of the card to release the safety lock and
pull the card out of the slot.
To avoid data loss or damage, please stop using files/programs in the storage card, and then
tap Settings> Storage> Unmount SD card to remove it safely.
[Note]:
1. Make sure the location and direction of the storage card is correct when inserting.
2. To avoid incompatibility of the storage card, major brands of storage card are
recommended.
2
Page 10
2.3 Hot plug of storage card
Please do not hot plug the storage card when using or browsing its files.
For example, when you are running the Music/Video Player/ Gallery, the storage card may
damage if you take out the storage card directly and the running program will stop automatically
to protect the device. As for details of inserting/removing storage card, see 2.2 Use the storage
card.
2.4 Memory space
The device contains 2 memory spaces: local storage & extended storage card. The capacity
of built-in flash is 16GB. The space it partitioned to store apps and setting and store user data.
Small part of storage wouldn’t be available for user. The exact size of available memory may
vary depending on Firmware version. MultiPad supports extended storage card of 32GB
maximum capacity.
2.5 Power on/off
1. Power on: press down the Power Button and hold it for a while to turn on the device when
the battery is full enough.
2. Power off: press down the Power Button and hold it for about 3 seconds and then select
Power Off in popup menu to turn off the device.
3. Screen Lock:short-press down the Power Button once to shutdown the screen to save
battery life. Short-press down the Power Button again to activate the lock screen. After
unlocking, the device will resume the screen before locking.
2.6 Connect to wireless networks (Wi-Fi)
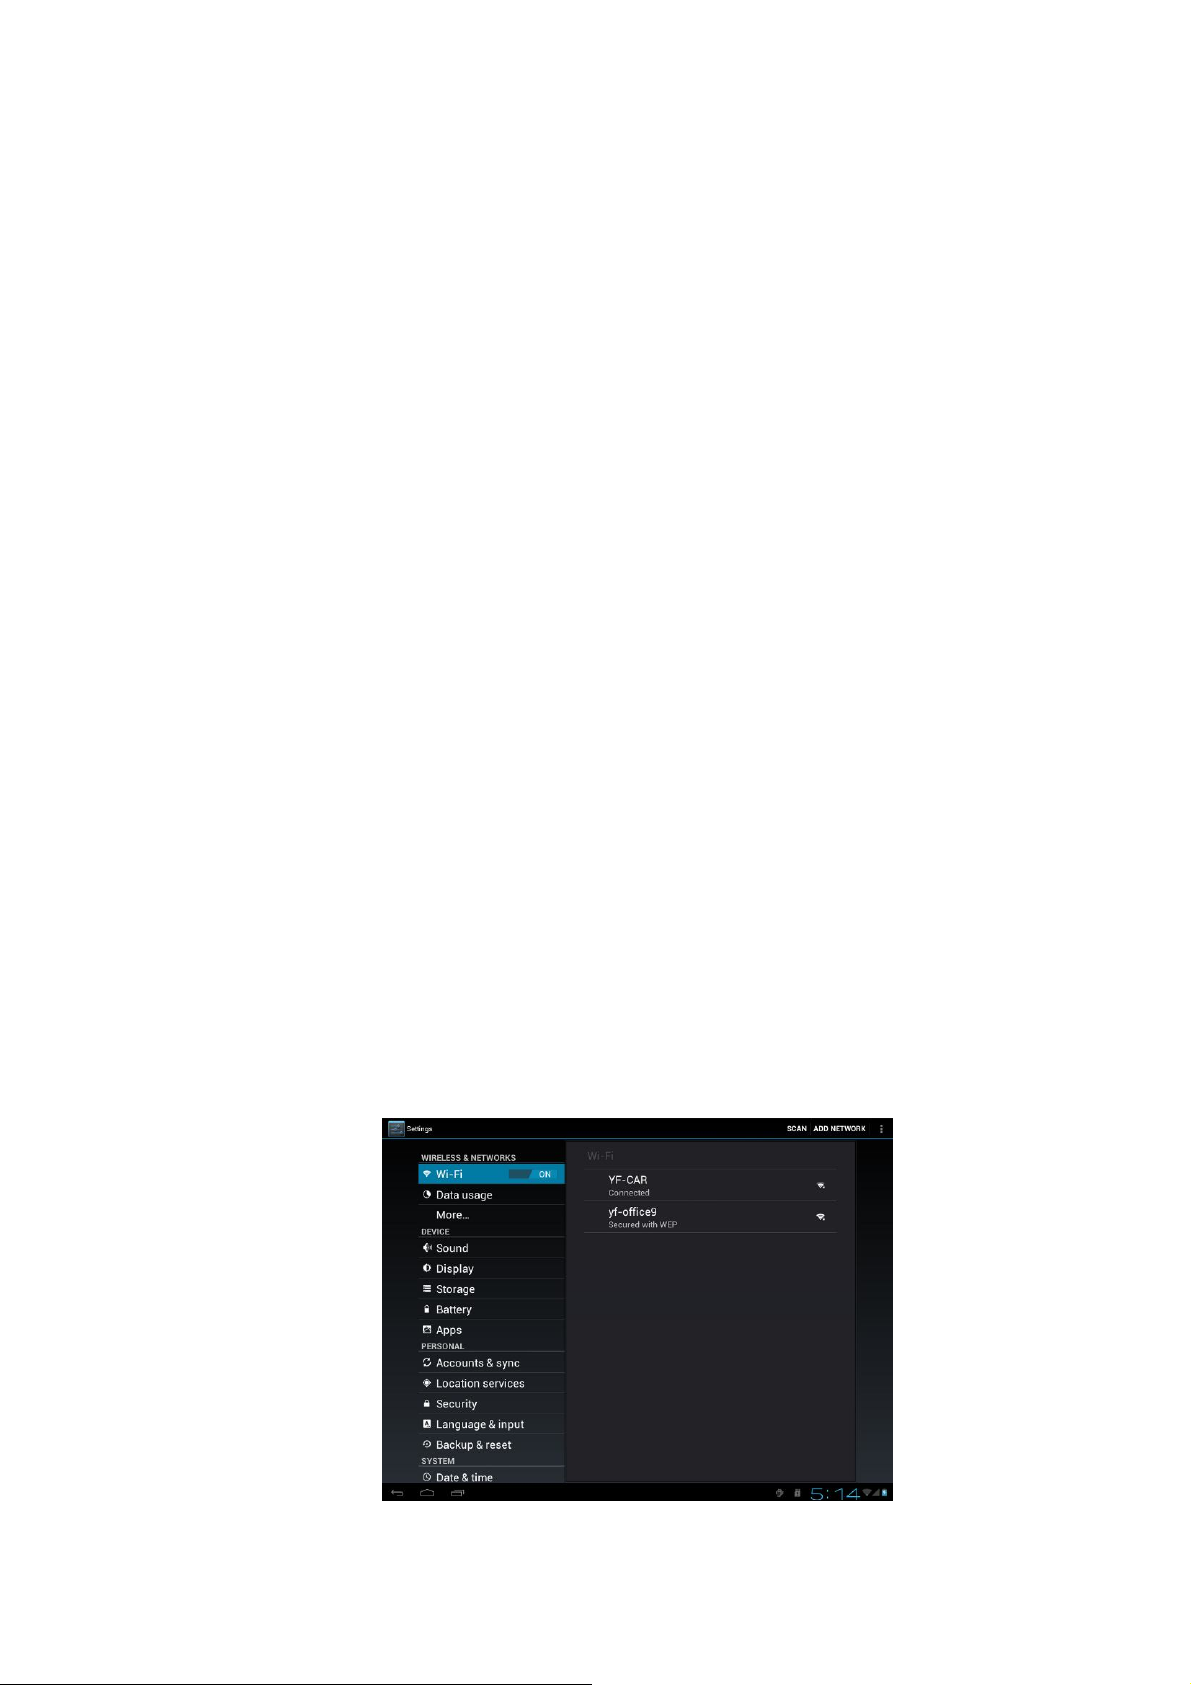
To connect to a Wi-Fi wireless network, you should follow:
3
Page 11

1. Tap Settings on the Home screen or go to the Settings in other way (via Notification bar
or Application list);
2. Turn Wi-Fi switch on in Wireless & Networks section;
3. The network names and security settings of detected Wi-Fi networks are displayed in
the Wi-Fi networks section;
4. Tap a Wi-Fi network to connect. If you select an open network, you will be
automatically connected to the network. If you select a secure protected network, enter the
Password and then tap Connect.
Depending on the network type and its security settings, you may also need to enter more
information or choose a security certificate.
5. After successful connection, the Wi-Fi connected icon will appear on the status bar.
4
Page 12
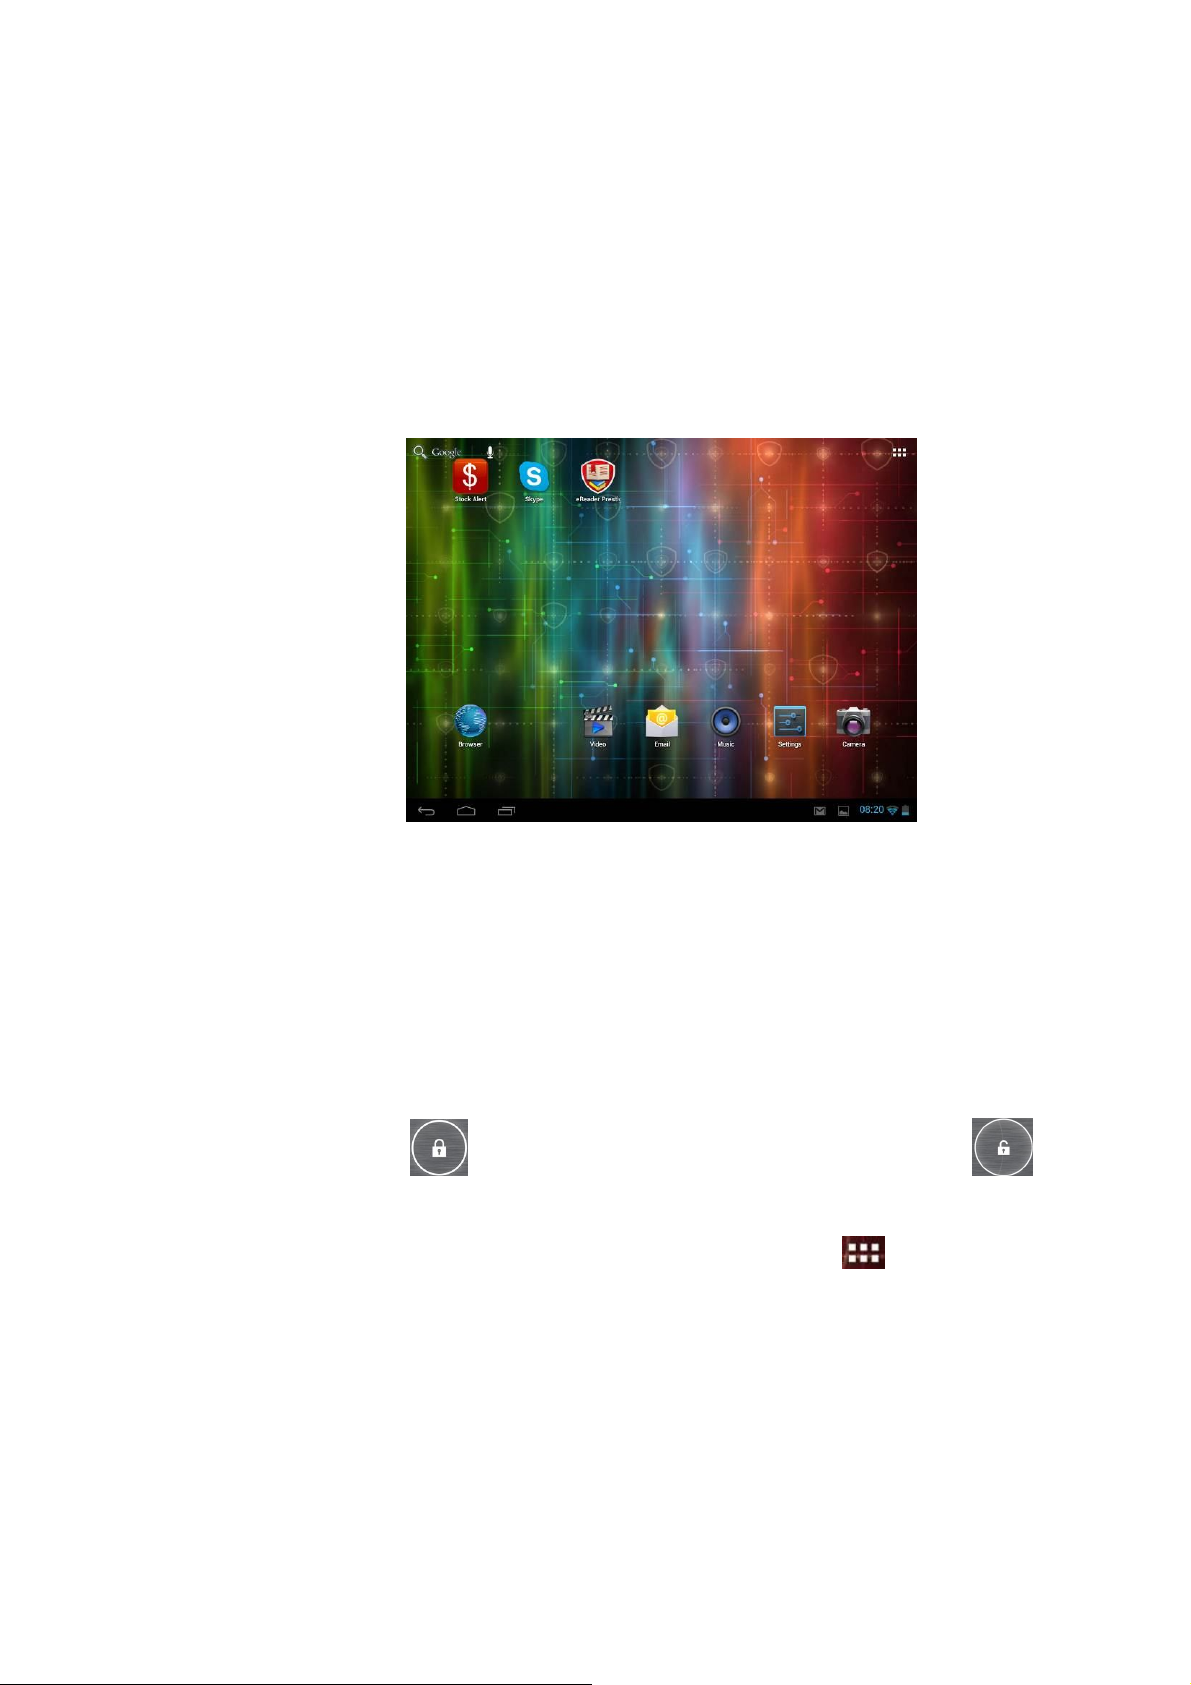
3. Home Screen
The Home screen is your starting point to access all the features on you device. It displays
application icons, widgets, shortcuts, and other features. You can customize the Home screen
with different wallpaper & widgets and display items you want. See the Personalizing section in
this manual.
When you start, the Home screen appears.
Sleep mode
Sleep mode suspends your device to a low power state while the display is off in order to
save battery power. You will still be able to receive messages while the device is in Sleep mode.
[Note]: If the device in sleep mode more than 30 minutes, the device will automatically turn
off to save electricity.
Wake up from sleep mode
To wake up your device manually, press the Power Button. You will then see that the device
has locked the screen.
Unlocking the screen
Press the lock icon , hold it and slide towards unlock icon on the screen.
Browse Home Screen
You can go to the extended Home screen by sliding your finger horizontally across the
screen to go to the left or right side of the Home screen. Tap the icon to view all
applications on your device.
3.1 Status and notifications
Status and Notification Icons may appear.
The status bar contains different information like time and date, battery status, wireless networks
status, active notifications from Android OS or installed applications and so on. When an
application is running, corresponding notification icon will appear in the notification area. Icons
5
Page 13

you may often see are listed as follows:
Status icons and its meanings Notification icons its meanings
New Gmail (Google Mail)
Tap to go to the Home screen
message
Back
Recently applications view
Menu icon
New Email message
Music player is ongoing
SD card is mounted
Android debug bridge
enabled
USB Connected
Connected to a Wi-Fi
network and display the
Airplane mode
signal strength
Battery status
Settings
Open notification panel
When a new notification icon displays in the status bar, press and hold the status bar, then
slide your finger upwards to open the Notifications panel as follows:
If you have several notifications, you can scroll down the screen to view more notifications.
In the dropdown notification panel, there are toggles for turning on/off Auto-rotate screen
option and Notifications, and shortcuts for quick access to Settings and Wi-Fi tabs.
Close the Notifications panel
Simply press the Back button on the device panel.
6
Page 14
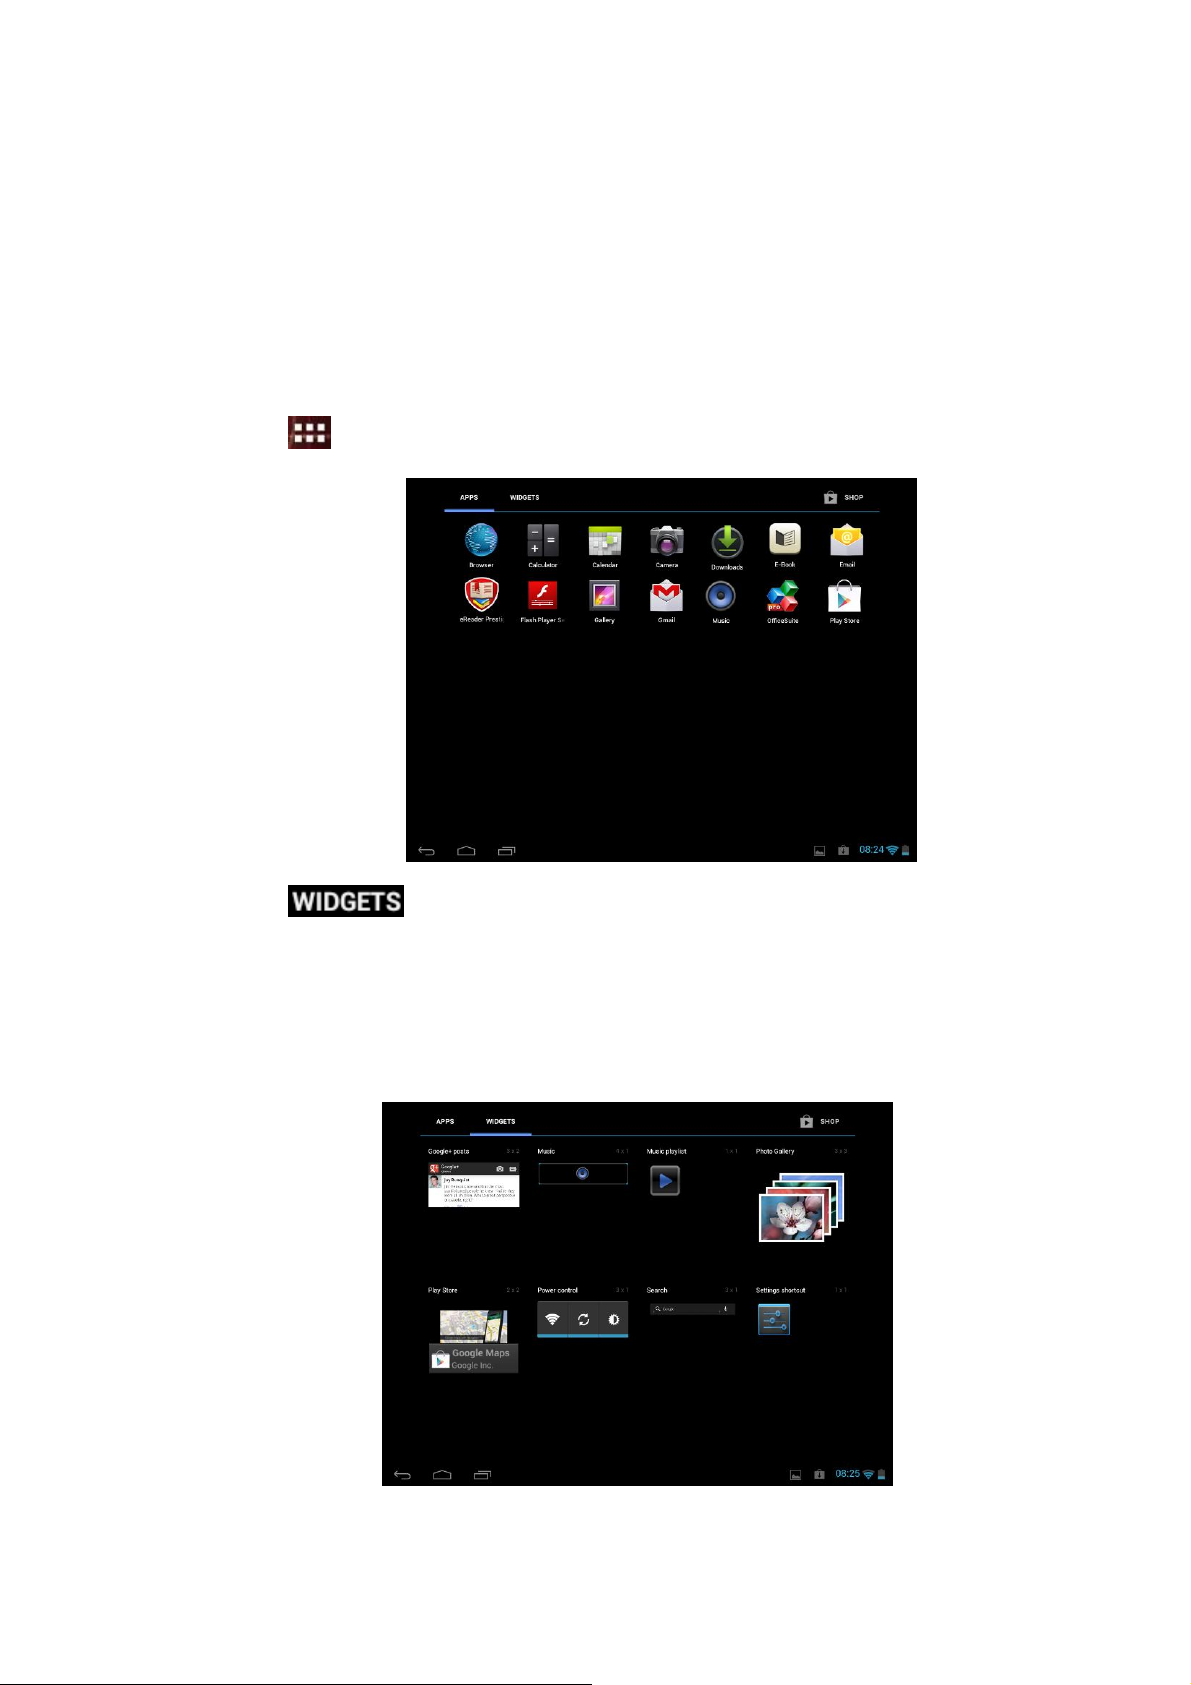
3.2 Shortcuts to Add widgets
Widgets put at-a-glance important information and media content up front on your Home
screen. Some widgets are already added to your Home screen for your convenience. You can add
more from the available selection of widgets, or download more widgets.
1. Adding a widget to your Home screen
To add widgets to Home screen, you can:
1. Tap on the home screen to enter into all apps interface as follows
2. Tap
3. Select one item. Touch and hold your finger on widget. Choose desired place for widget
on the home screen.
[Note]: When choosing place for widget you can switch home screen tabs by sliding finger
with holding widget to the left or right side of the home screen.
Examples of Widgets are as follows:
7
Page 15

2. Removing widget from your Home screen
To remove a widget, press and hold the widget until the icon “X Remove” or “X” appears at
the top of the screen, drag the widget onto it, so the widget you want to remove has become red
and release your finger.
3.3 Finger gestures
Tap: When you want to type using the keyboard, select items onscreen such as application and
settings icons, or press onscreen buttons, simply tap them with your finger.
Press and hold: To open the available option for an item (e.g. contact or link in a web page),
simply press and hold the item.
Swipe or slide: To swipe or slide means to drag your finger vertically or horizontally across the
screen.
Drag: Press and hold your finger with some pressure before you start to drag. While dragging,
do not release your finger until you have reached the target position.
Rotate: For most screens, you can automatically change the screen orientation from portrait to
landscape by turning the device sideways. When entering text, you can turn the device sideways
to bring up a bigger keyboard. Refer to Settings chapter for more details.
3.4 Coping files to and from the storage card
You can copy music, photos/pictures and others to your device to personalize your device.
1. Use the USB cable that came with your device to connect it to a USB port on your computer.
2. When the icon appears in the notification area, open the notification panel and tap USB
Connected to popup the following screen:
8
Page 16

3. Tap , read popup notice, tap “OK” and when the notification icon
turns yellow, the computer will recognize your device as a removable disk;
4. Find the removable disk and open it. Do one of the followings:
Copy the files from the computer to the storage card’s root folder.
Copy the files from the storage card to a folder in your computer or computer desktop.
4. After copying the files, unmount the removable disk (that is, your device) as required by your
computer’s operating system to safely remove your device.
5. Disconnect your device from the computer.
6. If your want your device remain connected to the computer and enable reading its storage
card from Android, you can open the Notifications panel and tap
..
7. [Note]: You can also realize communication between the device and the computer by tapping
Settings> Developer options>USB Debugging.
3.5 Searching the device and the web
You can search for information on your device and on the Web by using the Quick Search Box.
1. Press on the home screen to enter into all apps interface;
2. Tap Search and then enter the search item in the Quick Search Box
As you type, matching items on your device and suggestions from Google web search are shown
as a list. The suggested items that appear will depend on the options that you have selected in the
search settings.
3. Do one of the following:
If what you’re searching for is in the list of suggestions, tap it in the list. The item opens
in the appropriate application.
If what you’re searching for is not in the list, tap to open the search settings menu.
Tap Web and then tap Back and Enter to search the Web. The web browser opens,
displaying results of a Google search on the Web.
9
Page 17

4. Personalizing
4.1 Change the Notification ringtone
Choose from the available selections of notification ringtones on your device. You can also
download or copy notification ringtones or songs to your device's storage card and choose one to
use as your notification ringtone. To find out how you can copy files to your storage card, see
“Copying files to and from the storage card”.
1. In the Home screen, tap Settings > Sound > Default notification.
2. Tap the notification ringtone you want to use. The notification ringtone briefly plays when
selected.
3. Tap OK.
4.2 Change your wallpaper
Personalizing your Home screen wallpaper with your favorite photo is a quick and easy way to
change the feel of your device and give it a fresh look. Browse the collection of wallpapers
included in your device or choose from photos that you have taken with the camera.
To change your Home screen or lock screen wallpaper:
1. On the Home screen press and hold your finger at the free area. Choose wallpaper from
menu will appears.
[Note]: You can also tap >Settings>Display>Wallpaper to reach Choose wallpaper from
menu.
2. Choose source and wallpaper you would like to use.
You can do one of the following:
Tap Gallery to select a photo/picture that you have taken using the camera or copied to
your storage card. Tap Crop to crop the photo/picture and set the cropped picture as
wallpaper.
Tap Wallpaper gallery to choose from preset wallpapers and then tap Set wallpaper.
Tap Live Wallpaper gallery to choose from preset live wallpapers and then tap Set
10
Page 18

wallpaper
.
4.3 Personalize your Home screen with folders
Use folders to group related applications and other shortcuts to keep your Home screen tidy and
organized.
4.3.1. Adding folders on your Home screen
Press and hold the application shortcut and drag it onto another shortcut to create a folder for the
applications you want to file together, and then release your finger to finish creating a folder. You
can drag any other application shortcut into the new folder.
To rename a folder:
1. Tap the folder to open it.
2. Tap Unnamed Folder to prompt the keyboard.
3. Enter a new folder name and then tap Enter key.
4.3.2. Removing folders from Your Home screen
Tap the folder you want to remove to open it. One by one press and hold application shortcut
inside folder and drag it out of the folder. When only one application shortcut will stay inside the
folder, folder will be automatically deleted.
[Note]: During operations with folders your application shortcuts are not removed.
4.4 Rearrange widgets and shortcuts on your Home screen
Rearrange widgets and shortcuts on your Home screen to give space for adding more items to the
Home screen.
4.4.1. Moving a widget or shortcut
1. Press and hold the widget or shortcut you want to move.
You’ll see a blue edging around the widget or shortcut. Don’t release your finger.
2. Drag the widget or shortcut to a new location on the screen.
Pause at the left or right edge of the screen to drag the widget or shortcut onto another Home
screen panel.
3. When the widget or shortcut is where you want it, release your finger.
11
Page 19

If you’ve released your finger but a message shows that there’s no space to place the widget
or shortcut, drag it right or left again to another Home screen panel.
4.4.2. Removing shortcuts
To remove a shortcut, press and hold the shortcut until the icon “X Remove” or “X” appears at
the top of the screen, drag the shortcut onto it so the shortcut you want to remove has become red
and release your finger.
5. Web browsing
User can connect to the network via the browser.
Tap the browser icon on the Home screen to open it as follows:
Use keyboard to type URL (web-site address) or search phrase at the address bar.
To close browser application just tap Back button .
12
Page 20

6. Manage Applications
You can personalize and enrich your MultiPad by installing a wide variety of free and paid
apps ranging from productivity apps, entertainment, to games. When you find a program you
want, you can easily download and install it on your MultiPad with just a few steps as follows:
How to install Android programs
1. Tap at the Home screen to enter into all apps interface. Run Play Store
application.
2. Find program you want to install. It can be free or paid program.
3. Use Play Store interface to install program to your device.
How to uninstall Android programs
To uninstall the program
1. Go to Settings > Apps> Downloaded menu
2. Tap on program you want to uninstall
3. Tap Uninstall and OK in popup menu.
13
Page 21
7. Typical applications introduction
7.1 Music Player
Enjoy listening to songs and music on your MultiPad using the Music application. You need to
copy music files to your storage card first to use the Music application to play music. To find out
how to copy files, see “Copying files to and from the storage card”. Supported audio formats
see in MultiPad technical specifications above.
Tap the icon on the Home screen to enter the following screen:
Your music is organized into different categories such as Artists, Songs and Albums. Tap one of
the category tabs to view a category.
Select a song in the playlist and tap on it to start playing as follows:
Tap to go to the previous song.
Tap to play, pause, or resume playing the song
14
Page 22

songs,
Tap to go to the next song
When you are playing music and the screen turns off, you can control the music playback
volume with hardware buttons Vol+\Vol-.
Tap to go to the now playing list
Tap to switch the following repeat modes: repeat all
repeat current song, do not repeat
Tap to shuffle the current playlist.
7.2 Video Player
Tap the launcher icon on the Home screen and the tap the Super-HD player icon to
go to the following interface:
When there are multiple video files in the player, tap to display all video files in thumbnail
mode or in details display mode. Double tap on a video file to start playing it.
On the video playing screen, tap on the screen to popup the control bar as follows:
15
Page 23

volume down
volume up
Tap to play the previous video file in the video list
Tap to play/pause the Now playing video file
Tap to play the next video file in the video list
Tap to unfold the control bar for personalizing the play mode, such as video
track, zoom mode and so on
Tap this icon to go back to the video file list interface
Drag the slider to adjust playing progress
To quit the video playing screen, press the Back icon in the status bar directly.
7.3 Gallery
You use Gallery to view pictures and play videos that you’ve taken with Camera, downloaded, or
copied onto your SD card. You can perform basic editing tasks on pictures and set them as your
wallpaper or contact picture. You can also share your pictures and videos with friends.
On the Home screen tap the launcher icon and Gallery icon after. Photos and videos are
classified automatically for easy view. The gallery application will run and the interface is as
follows:
16
Page 24

Browse & edit pictures/photos
Tap an album to open it and view its contents;
Tap on upper right corner of the screen to browse all photos/pictures in slideshow mode.
Select a picture to view it in full screen mode; drag left or right to view the next or previous
picture in the album; move you fingers inward/outward to zoom out/zoom in the selected
photo/picture. Tap to share it with friends via email, Twitter, Facebook, tap to pop up
the following control bar:
17
Page 25

Tap to slide show all pictures in the album;
Tap to edit it. When the picture is zoomed in, drag the picture to view parts that are not in
view. When the picture is zoomed to fit the window, drag left or right to view the next or
previous picture in the album.
Tap or to rotate the picture/photo 90° anticlockwise or
clockwise;
Tap and then the following cropping rectangle will appear on top of the picture/photo:
Drag from the inside of the cropping tool to move it; drag an edge of the cropping tool to resize
it to any proportion; drag a corner of the cropping tool to resize it with a fixed proportions.
Tap to save a copy of the picture as you cropped it. The original uncropped version
remains on your SD card.
Tap to set the current picture/photo as wallpaper;
18
Page 26

Tap to see more details about the current picture/photo;
When browsing files in the gallery, you can tap to share files with your friends; tap to
delete the selected files; tap to get more details about file.
7.4 File Manager
Introduction to File Manager
On the Home screen, tap the File Manager icon to open it as follows:
Tap to back to the previous interface
Tap to display files in local storage card
Tap to display files in Micro SD card
Tap to display files in other external storage device
Tap to display all pictures/photos
Tap to display all video files
Tap to open the tool box for process info and application backup
Tap to open/shutdown multiple choice of items
File Management
In the above screen, you can search a wanted file quickly and you can also manage your files in
the local disk and your storage card. In addition, you can create/rename file folder(s) and
uninstall a third party application.
19
Page 27

Paste: press to select an item/multiple items in the list and tap Copy/Move, and then go
to the file folder where you want to copy/move the item(s) in, then press and hold the folder until
the Folder operation menu popup, select Paste into Folder.
Delete: press to select an item/multiple items and tap Delete to delete the item(s)
directly.
Folder operation
Press and hold any folder in the local disk or your storage card until the Folder operation menu
pop up as follows:
You can select an option to execute corresponding operations.
Search: when you do not know the definite location of an item or there are many items in the list,
to find it quickly, you can tap the Menu icon and then tap to open the keyboard to
search it.
7.5 Instant Messaging tools
You can download and install chat tools on your device such as Fring, MSN Messenger and so
on.
7.6 Emails
Tap the launcher icon on the Home screen to display all icons, tap the Email/Gmail icon to
run it. You can:
1. Setup mail accounts
20
Page 28

2. Create new mails
3. Receive and send mails
4. Download or open the attached files
[Note]: Press the menu icon to see the shortcut popup menu.
8. Prestigio preinstalled applications
Your new MultiPad contains several applications preinstalled by Prestigio to make using MultiPad more
comfortable right from the box.
Following applications you can find in all apps list by pressing icon on the Home screen:
Application Description
Prestigio branded bookstore. You can download and
read Your favorite books here.
eReader Prestigio
Facebook
Twitter
OfficeSuite
Stay always connected with Your friends and family
with Facebook social network
Your favorite Twitter app. now always with You.
Create and send Your messages from anywhere.
Increase Your productivity with mobile office
application.
And games, of course. Angry Birds – favorite game of
millions! Classic Chess – game of all times.
Sugar Synch Let Your important files be in touch from everywhere!
It is a client for online storage service.
File Manager Manage Your files with this application.
21
Page 29

9. Settings
Control and customize your device settings on the Settings screen.
To open the Settings screen, simply tap the Settings icon on the Home screen.
You can scroll on the screen upwards/downwards to check the rest setting items.
9.1 Wireless & networks
Configure your device’s wireless connections, e.g., Wi-Fi, Virtual Private Networks, or set the
options for Portable hotspot.
Wi-Fi
To turn on/off Wi-Fi, simply slide your finger rightward/leftward on the control bar.
9.2 Sound
Set the device and notification ring tones, volume adjust, system sounds.
22
Page 30

Volume
To adjust the volume for media, ringtone, notification and alarms:
1. Tap Settings > Sound > Volumes;
2. Drag the control bar leftwards/rightwards to turn down/up the volume for
media and notification;
3. Tap OK.
Notification ringtone
To set a notification ringtone:
4. Tap Settings > Sound > Default notification
5. Tap a ringtone to listen it
6. Enable a ringtone as notification ringtone by tapping OK.
Audible selection
To enable playing sound when making screen selection, simply check it.
9.3 Display
Set the screen brightness, auto-rotate option, wallpaper, screen timeout and font size.
23
Page 31

Brightness
Use the slider to set a brightness level you want at all times when using MultiPad. For the best
battery performance, use the dimmest comfortable brightness.
Wallpaper
Tap to select source of wallpaper and set wallpaper for the device.
Auto-rotate screen
Check to enable/disable automatic switch of the orientation of the screen when you turn the
device.
Sleep
Opens a dialog where you can set how long to wait after you tap the screen or press a button
before the screen darkens. For the best battery performance, use the shortest convenient timeout.
Font size
Opens a dialog where you can set font size.
9.4 HDMI Settings
In this menu you can turn on/off mini HDMI output, choose HDMI Resolution for your output
device, adjust screen zoom on the output device by slider.
9.5 Storage
Check the usage condition of the storage space on the internal & external storage card. You can
erase all data on the SD card and unmount the external SD card for safety removal.
Unmount the SD card: Tap Settings > Storage > Unmount SD card > OK.
24
Page 32

9.6 Apps
Manage applications and installation of new programs.
Apps
Opens a list of all the applications and other software installed on your MultiPad, along with
their sizes. By default, only downloaded applications are shown, and they are sorted in
alphabetical order. Press and tap Sort by size to display applications in order by size. Tap an
application to open its Application Info screen.
To manage and /or remove uploaded applications, tap Settings > Apps > Downloaded.
Running services
To check and control running service, tap Settings > Apps > Running.
9.7 Accounts & Sync
Log in or out from your social network accounts, Google Account, and Exchange ActiveSync
account. You can also manage synchronization and other settings for your accounts.
25
Page 33

Tap to turn on\off account sync . Tap in the above screen to add
new accounts by following onscreen instructions. Tap the icon to prompt the following
screen to manage your accounts:
Check to turn on/off data synchronization, press the menu icon and then tap
to remove the selected account from your device.
9.8 Location service
Enable applications using data from sources such as Wi-Fi and mobile networks to orientate your
location and improve Google search results via check the options.
9.9 Security settings
Set the screen lock mode and owner information, encrypt your device, manage password and
26
Page 34

administrate your device.
To personalize the screen lock mode of your device, tap Settings > Security> Screen lock
Unknown sources
Check to permit installation of applications that you obtain from web sites, email, or other
locations other than Google Play Store.
9.10 Language & input settings
Set the operating system language and region. You can also set onscreen keyboard options.
9.11 Backup & reset
You can enable or disable the automatic backup feature of the device and reset the device.
[Note]: after factory data reset, you personalizing settings and the installed third-party
applications will be removed from your device. Before restoring default settings, it is suggested
to backup data/applications you want and remove your storage card safely in case of data loss or
damage during restoring factory default settings.
9.12 Date & Time setting
Set the date and time, time zone, and date or time format. To turn off auto time synchronization
simple unmark it and you will be able to manually change time settings.
27
Page 35

9.13 Accessibility
Speak passwords: check to enable speak password
Touch & hold delay: 3 levels of delay when touch and hold widget or icon are available – Short,
Medium, Long. It regulates the duration of object hold till further actions.
9.14 Developer options
You can set the USB debugging mode, select screen stay awake while charging and so on. And
you can also manage user interface and apps.
28
Page 36

USB debugging: Check to permit debugging tools on a computer to communicate with your
MultiPad via a USB connection.
Stay awake: Check to prevent the screen from dimming and locking when the MultiPad is
connected to a charger or to a USB device that provides power. Don’t use this setting with a
static image on the MultiPad for long periods of time, or the screen may be marked with that
image.
Allow mock locations: Check to permit a development tool on a computer to control where the
MultiPad believes it is located, rather than using the internal methods for this purpose.
9.15 About tablet
View the device status such as the network type, battery power level, and network name. You can
also check the battery use of individual applications or view the legal information and software
version of your MultiPad.
29
Page 37

10. Troubleshooting
10.1 Force shutdown
Press the Power Button for about 5 seconds and the device will be forced shutdown
10.2 Restore default settings
To restore the factory default settings, you can tap Settings > Backup & reset> Factory data reset.
Warning: data of your Google account, your personalized settings, and installed applications
will be removed from your device once you execute factory default settings, so please make a
careful decision whether to restore default settings. Before restoring default settings, it is
suggested to backup data/applications you want.
10.3 System updating
After system update/upgrade, it may occur that the installed third-party applications cannot run
or there is data loss or damage to the apps. This is normal phenomena rather than system fault.
You just need to download and install the third-party applications again into the device. It is
recommended to backup data of the third-party applications before system update/upgrade.
10.4 Reset
When the system halts accidentally or does not response, please press the Reset key to restart the
system.
[Note]: it is normal for the device feels hot during charging, you can use it as usual.
11. Glossary
Android 4.0 (Ice Cream Sandwich) - operating system for Tablet PCs and smartphones based on Linux
kernel;
Google Play Store – online store with software for Android OS;
Google Account - pre registered user account for having access to the Google branded services and
registration of MultiPad;
MultiPad – Prestigio trademark for Tablet PC devices;
Gmail – Google branded e-mail client;
Widgets – simple programs on the Tablet PC desktop for showing different information or
shortcuts to connected installed software.
30
 Loading...