

Page 1

EasiMeeting
Application Software
User Manual
Version 2..1.2
www.prestigio.com
Page 2

Contents
1.Introduction to the software ............................................................. 1
2.Installation instructions ..................................................................... 2
2.1 Operating Environment ............................................................................. 2
2.2 To install EasiMeeting ............................................................................... 2
3.Use description ................................................................................. 8
3.1 Common Function .................................................................................... 8
3.1.1 Menu ....................................................................................................... 8
3.1.1.1 File ................................................................................................................. 9
3.1.1.2 Import.......................................................................................................... 10
3.1.1.3 Export .......................................................................................................... 11
3.1.1.4 Print ............................................................................................................. 12
3.1.1.5 Settings ........................................................................................................ 13
3.1.1.6 Help ............................................................................................................. 16
3.1.1.7 Exit ............................................................................................................... 23
3.1.2 Switch to Desktop ................................................................................. 24
3.1.3 Pen type ................................................................................................ 24
3.1.4 Eraser .................................................................................................... 25
3.1.5 Gesture .................................................................................................. 26
3.1.5.1 Selection ...................................................................................................... 26
3.1.5.2 Page turning ................................................................................................ 29
3.1.5.3 Zoom ........................................................................................................... 29
3.1.5.4 Roam ........................................................................................................... 29
3.1.6 Unfold .................................................................................................... 29
3.2 Basic Tools ............................................................................................... 31
3.2.1 Undo ...................................................................................................... 31
Page 3

3.2.2 Redo ...................................................................................................... 31
3.2.3 Add Page ............................................................................................... 31
3.2.4 Delete Page ........................................................................................... 32
3.2.5 Previous Page ........................................................................................ 33
3.2.6 Next Page .............................................................................................. 33
3.2.7 Copy ...................................................................................................... 33
3.2.8 Paste ...................................................................................................... 33
3.2.9 Zoom out ............................................................................................... 33
3.2.10 Zoom in ............................................................................................... 33
3.2.11 Template Library ................................................................................. 33
3.2.12 Adaptive page ..................................................................................... 34
3.2.13 Set background ................................................................................... 34
3.2.14 Text ...................................................................................................... 35
3.2.15 Screenshot .......................................................................................... 37
3.2.16 Thumbnail ........................................................................................... 39
3.3 Small Tools ............................................................................................... 43
3.3.1 Panel-in-panel ....................................................................................... 43
3.3.2 coordinate system ................................................................................. 45
3.3.3 Form ...................................................................................................... 46
3.3.4 Calendar ................................................................................................ 47
3.3.5 Clock ...................................................................................................... 48
3.3.6 Timer ..................................................................................................... 49
3.3.7 Screen Recording .................................................................................. 49
3.3.8 Central Control ...................................................................................... 50
3.3.9 Calculator .............................................................................................. 53
3.3.10 Video Conference ............................................................................... 54
3.4 Operation ................................................................................................ 54
3.5 Shortcuts ................................................................................................. 54
3.6 Desktop Mode ......................................................................................... 55
Page 4

1.Introduction to the software
EasiMeeting is easy-to-use whiteboard software, running on all-in-one touch
panel, is specially designed for conferencing.
Convenient and user-friendly interface, powerful meeting function, real writing
effect and abundant personalized settings, etc., are all outstanding parts of
EasiMeeting software.
★ Clear and concise menu. Toolbar buttons can be set according to user needs,
improve the software applicability in different scenarios.
★ Convenient and practical lectures functionality. Timers, screen recording,
comments at any time, blend in the traditional blackboard writing on computer
intelligence. It is not only the continuation of the traditional operating practices, but
also enhances the software's usability and convenience.
★ Simulate brush. Brush feature provides a simulated feeling of brush writing,
writing process simulate brush handwriting effect, and it provides users with better
writing experience.
★ Personalized custom settings. Users can custom brushes and canvas
background settings as required, from every detail to fully meet the demand of
demonstration.
With EasiMeeting, you can enjoy the new experience of cutting-edge
conference and technology!
User Manual EasiMeeting (Application Software) 1
Page 5
2.Installation instructions
The software supports cover installation, and can be installed directly without
uninstallation.
2.1 Operating Environment
Windows XP/ 7/ 8 system
. Net Framework 4.0 or above version
Microsoft Media 10.0 or above version
Microsoft Office 2007 and 2010 version
2.2 To install EasiMeeting
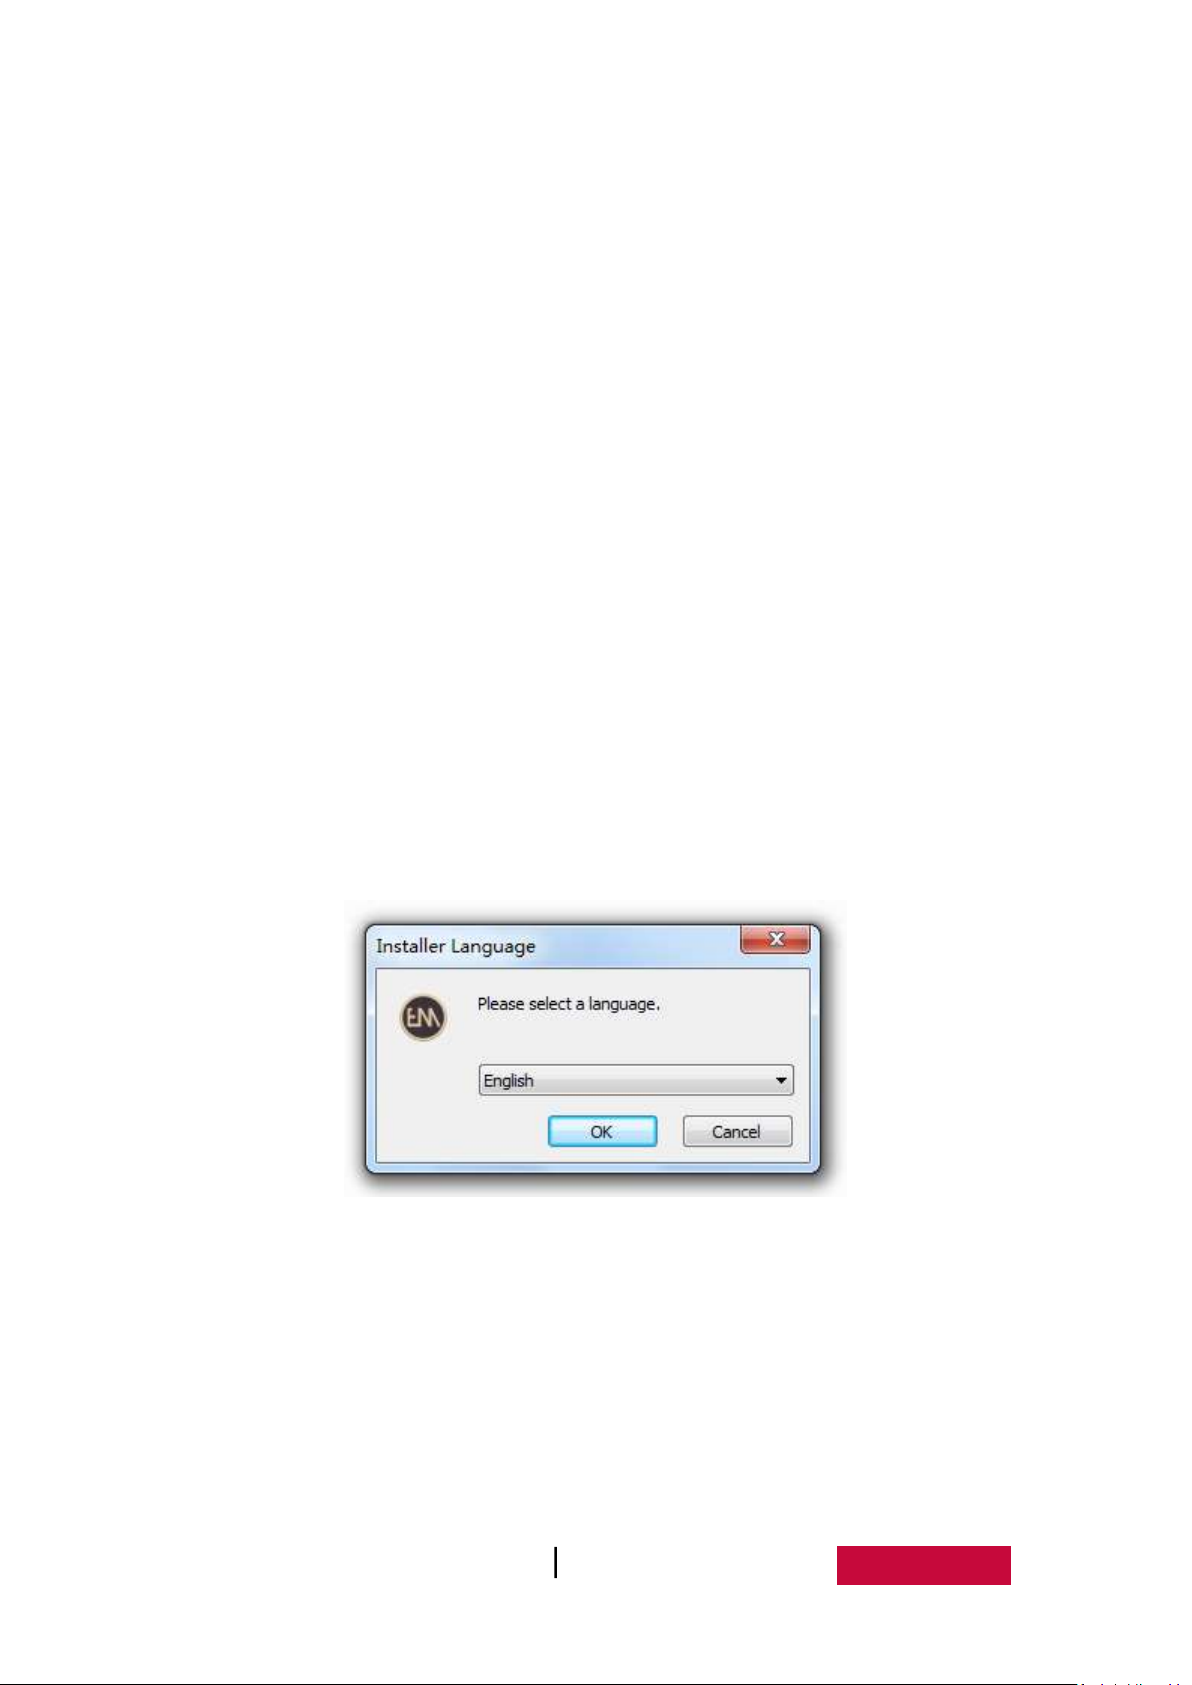
Select setup.exe – the application software installer. Double click the installer
icon to extract the software. After extracting the software, pop up the Language
Selection dialogue box as shown in Figure2-2-1, the user can select the language to
install the software.
Figure 2-2-1 Language Selection
Click “Ok” to enter to the Ready to Install Screen as shown in Figure 2-2-2.
User Manual EasMeeting (Application Software) 2
Page 6
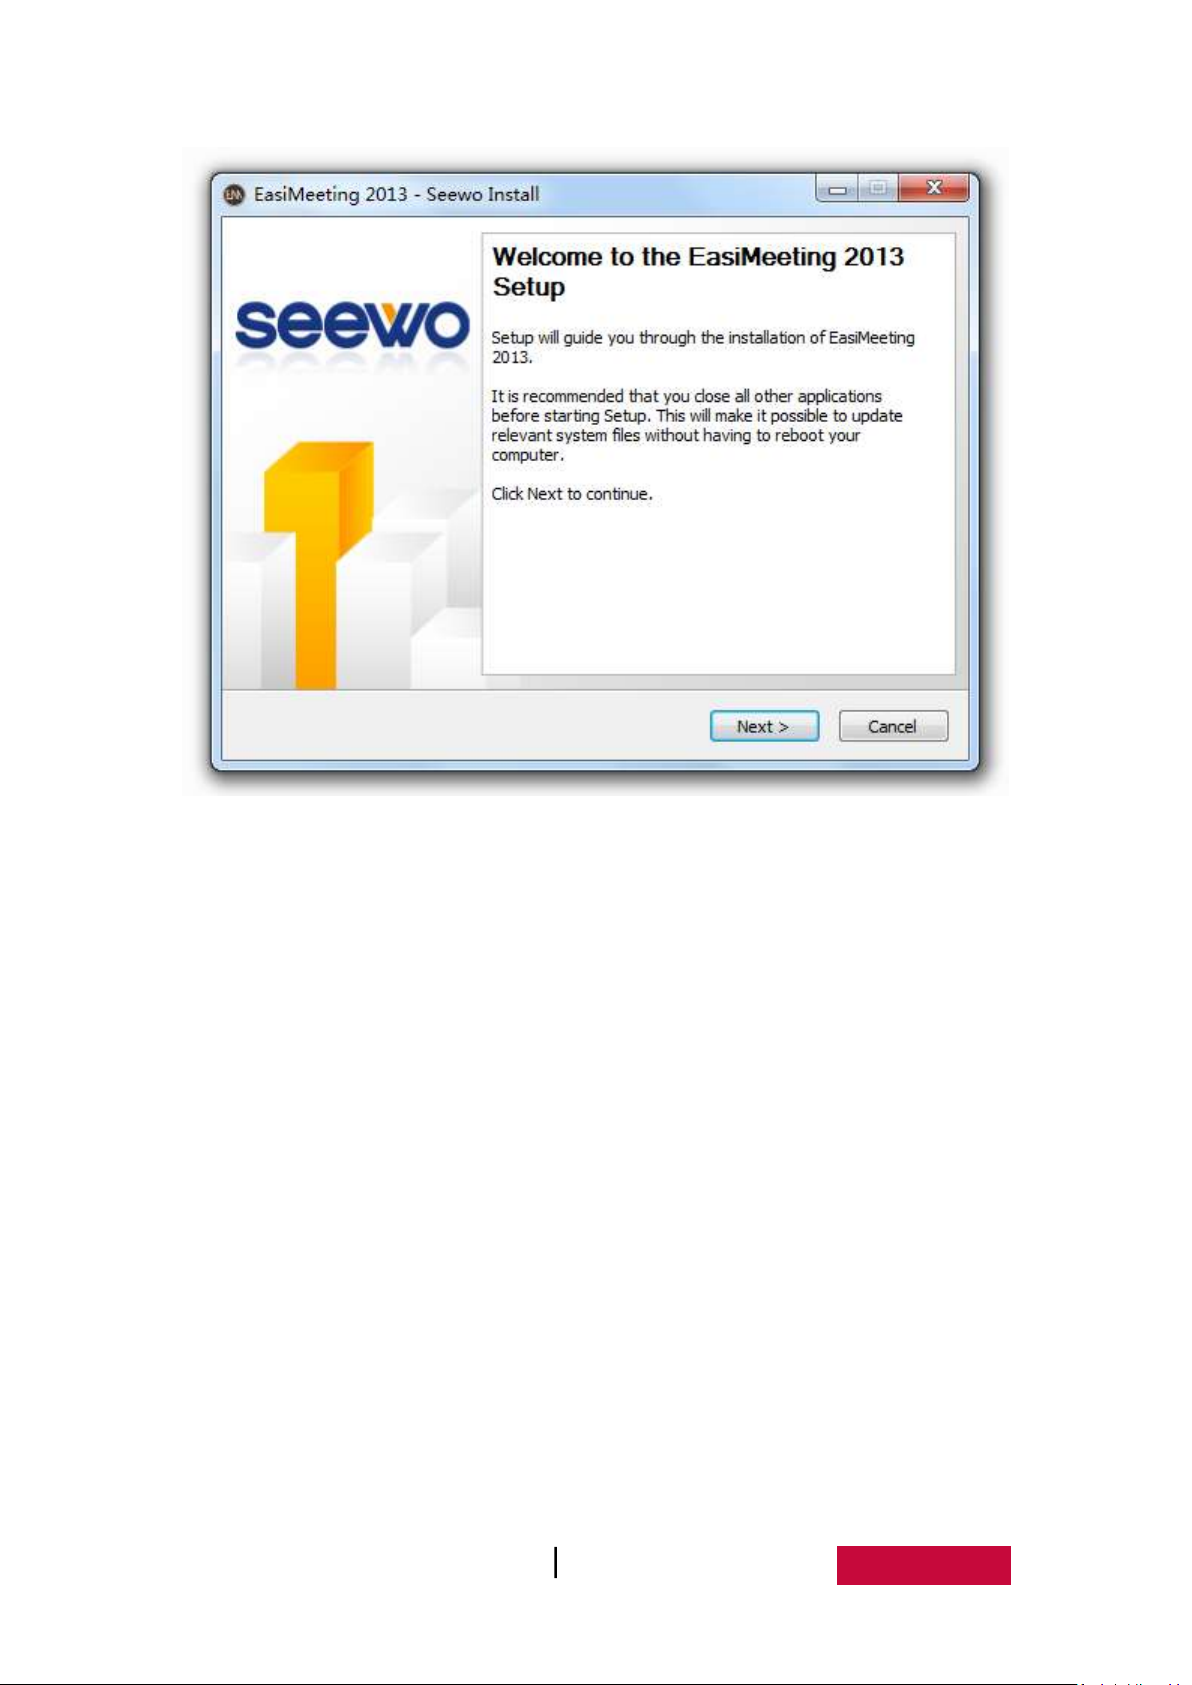
Figure 2-2-2 Ready to Install Screen
Click “Next” to Software End-user License Agreement Screen as shown in Figure
2-2-3.
User Manual EasMeeting (Application Software) 3
Page 7
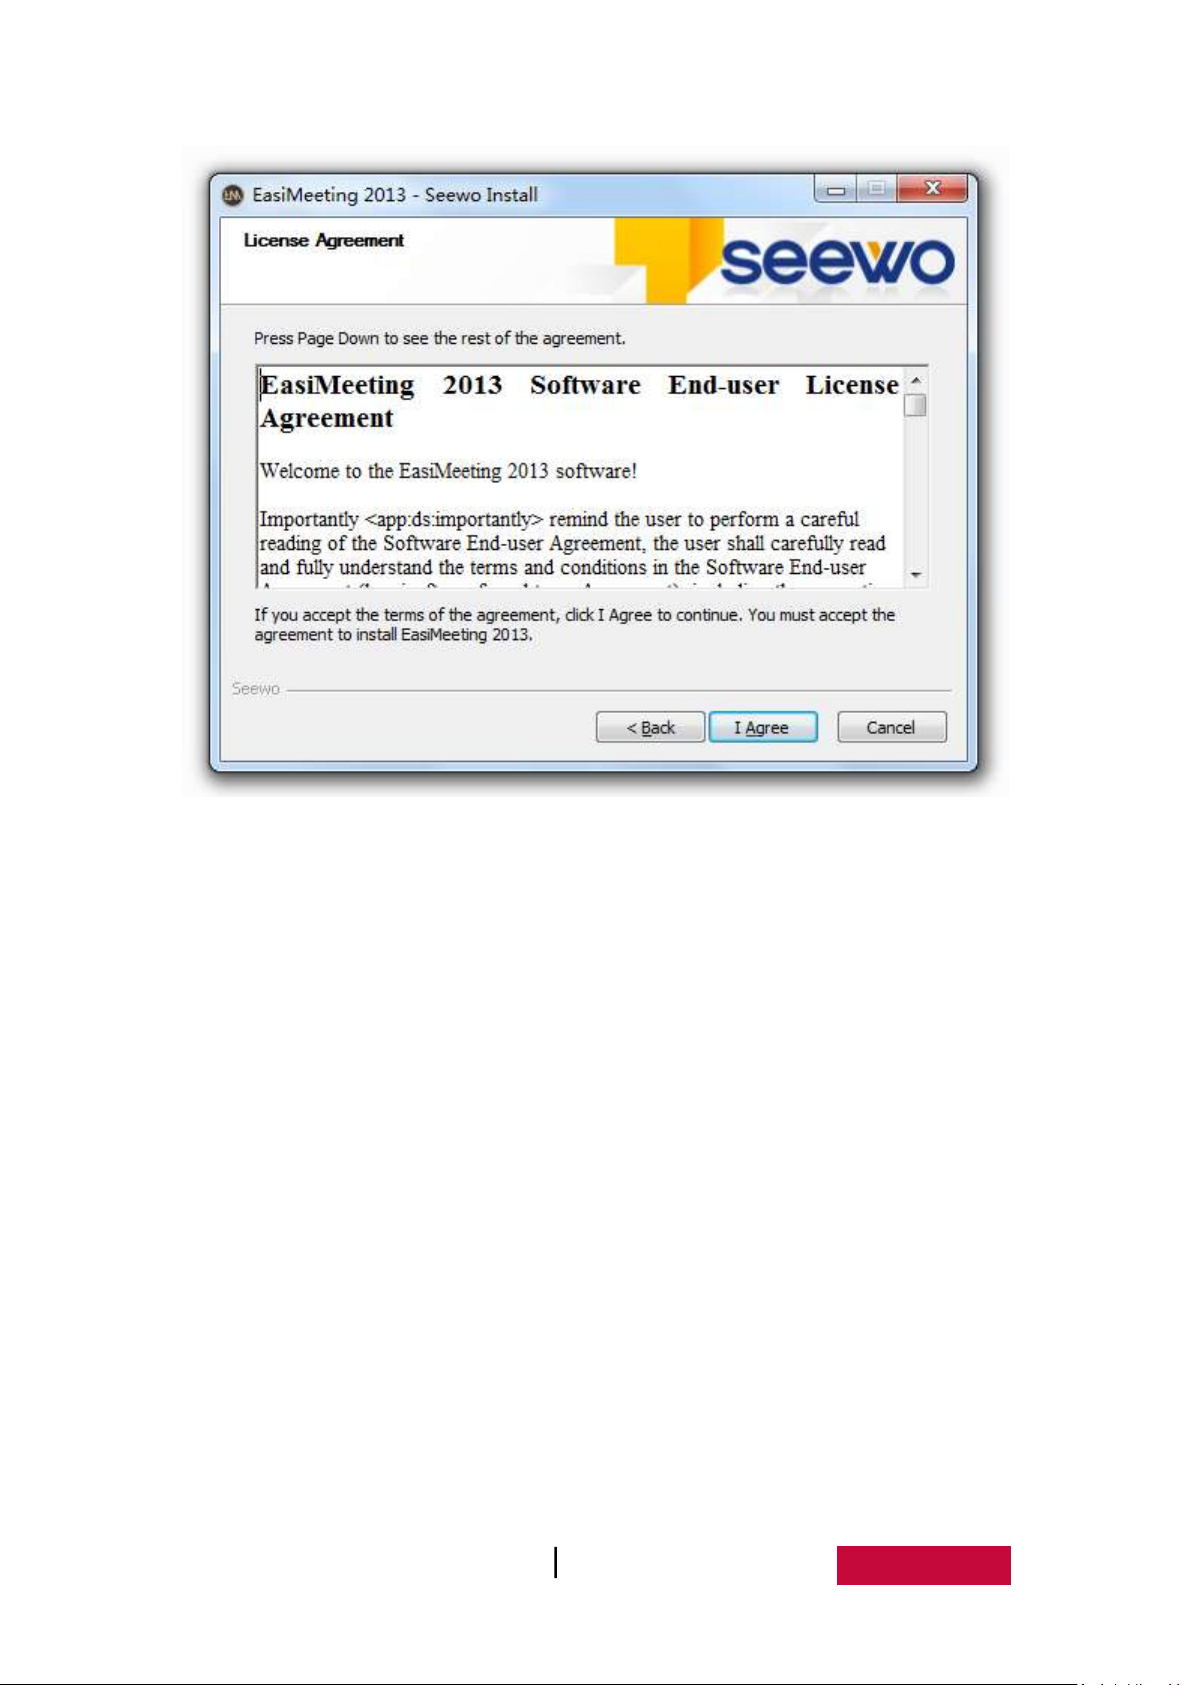
Figure 2-2-3 End-user License Agreement Screen
Click “I Agree” to install the software as shown in Figure 2-2-4.
User Manual EasMeeting (Application Software) 4
Page 8
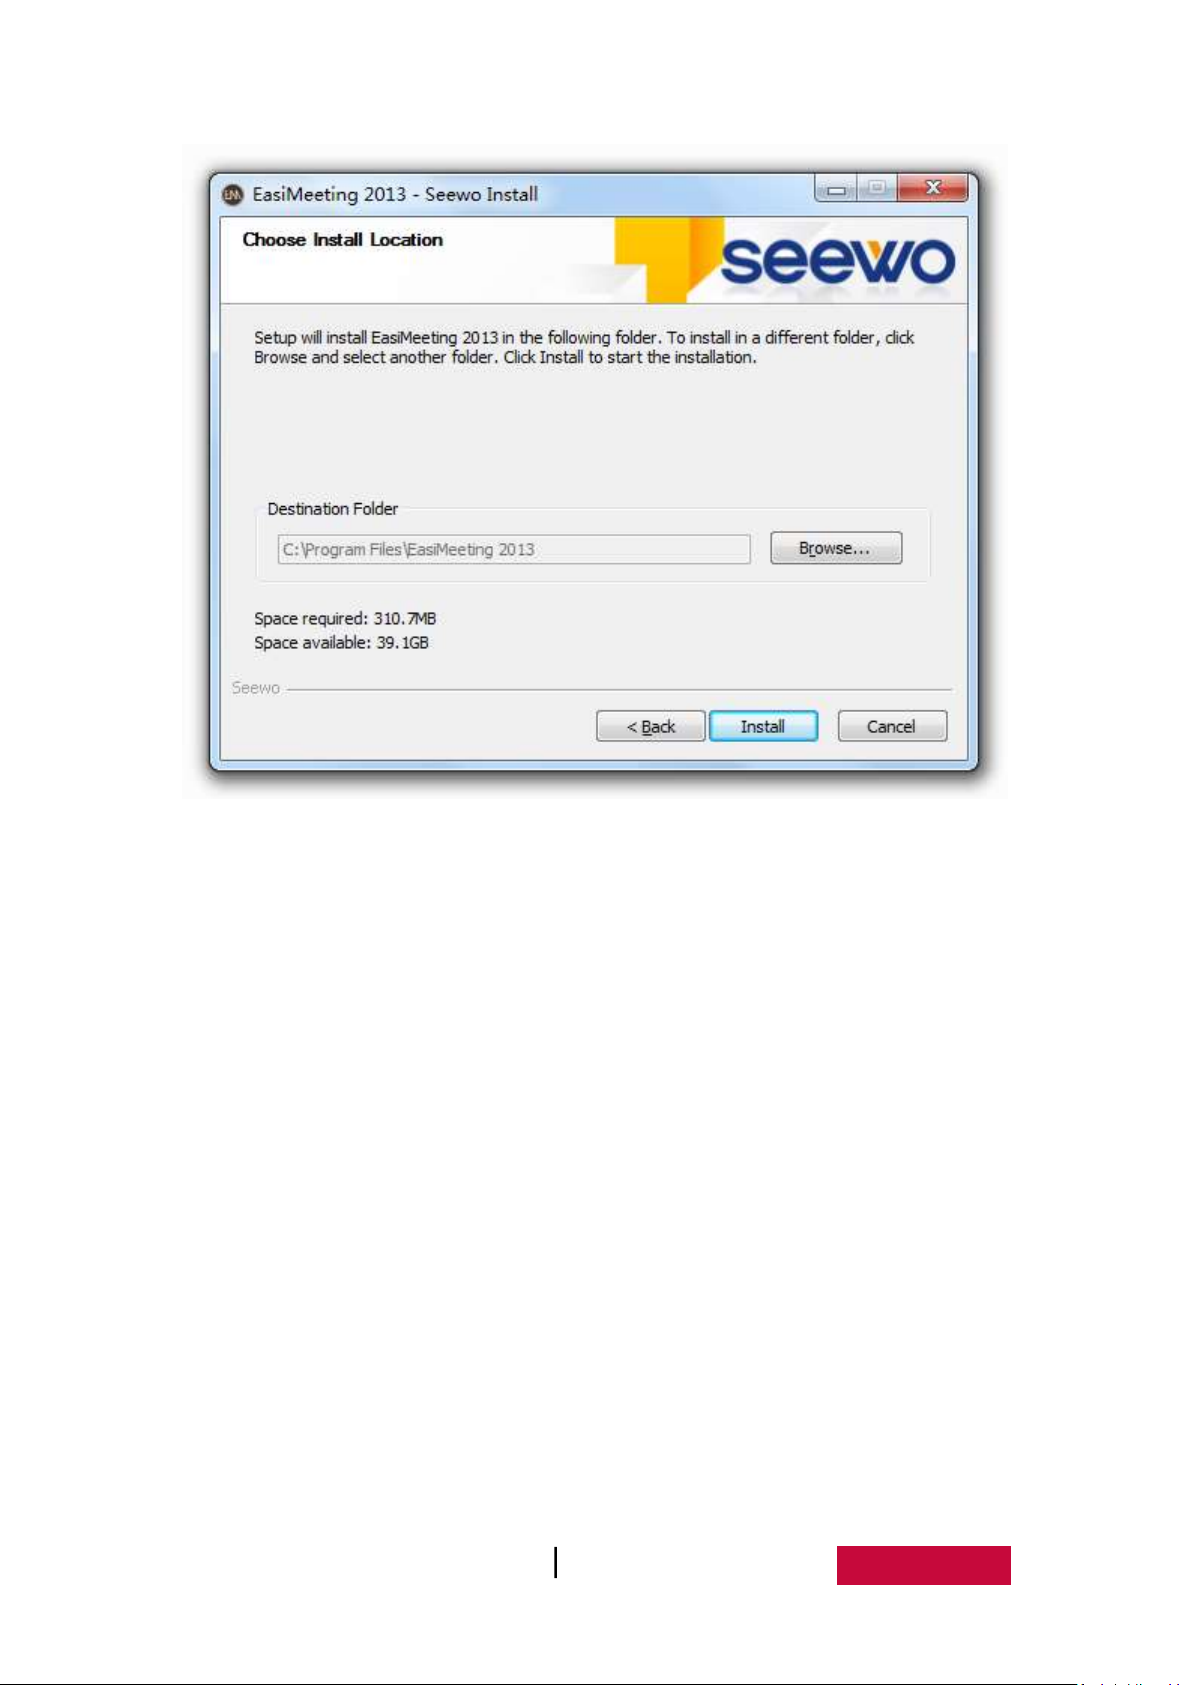
Figure 2-2-4 Installation Path Selection
Click “Install” to enter to the install interface, as shown in Figure 2-2-5. If you have not
installed Microsoft .Net Framework4.0 and Flash Player, you should silent
installation .Net Framework4.0 and Flash Player.
User Manual EasMeeting (Application Software) 5
Page 9
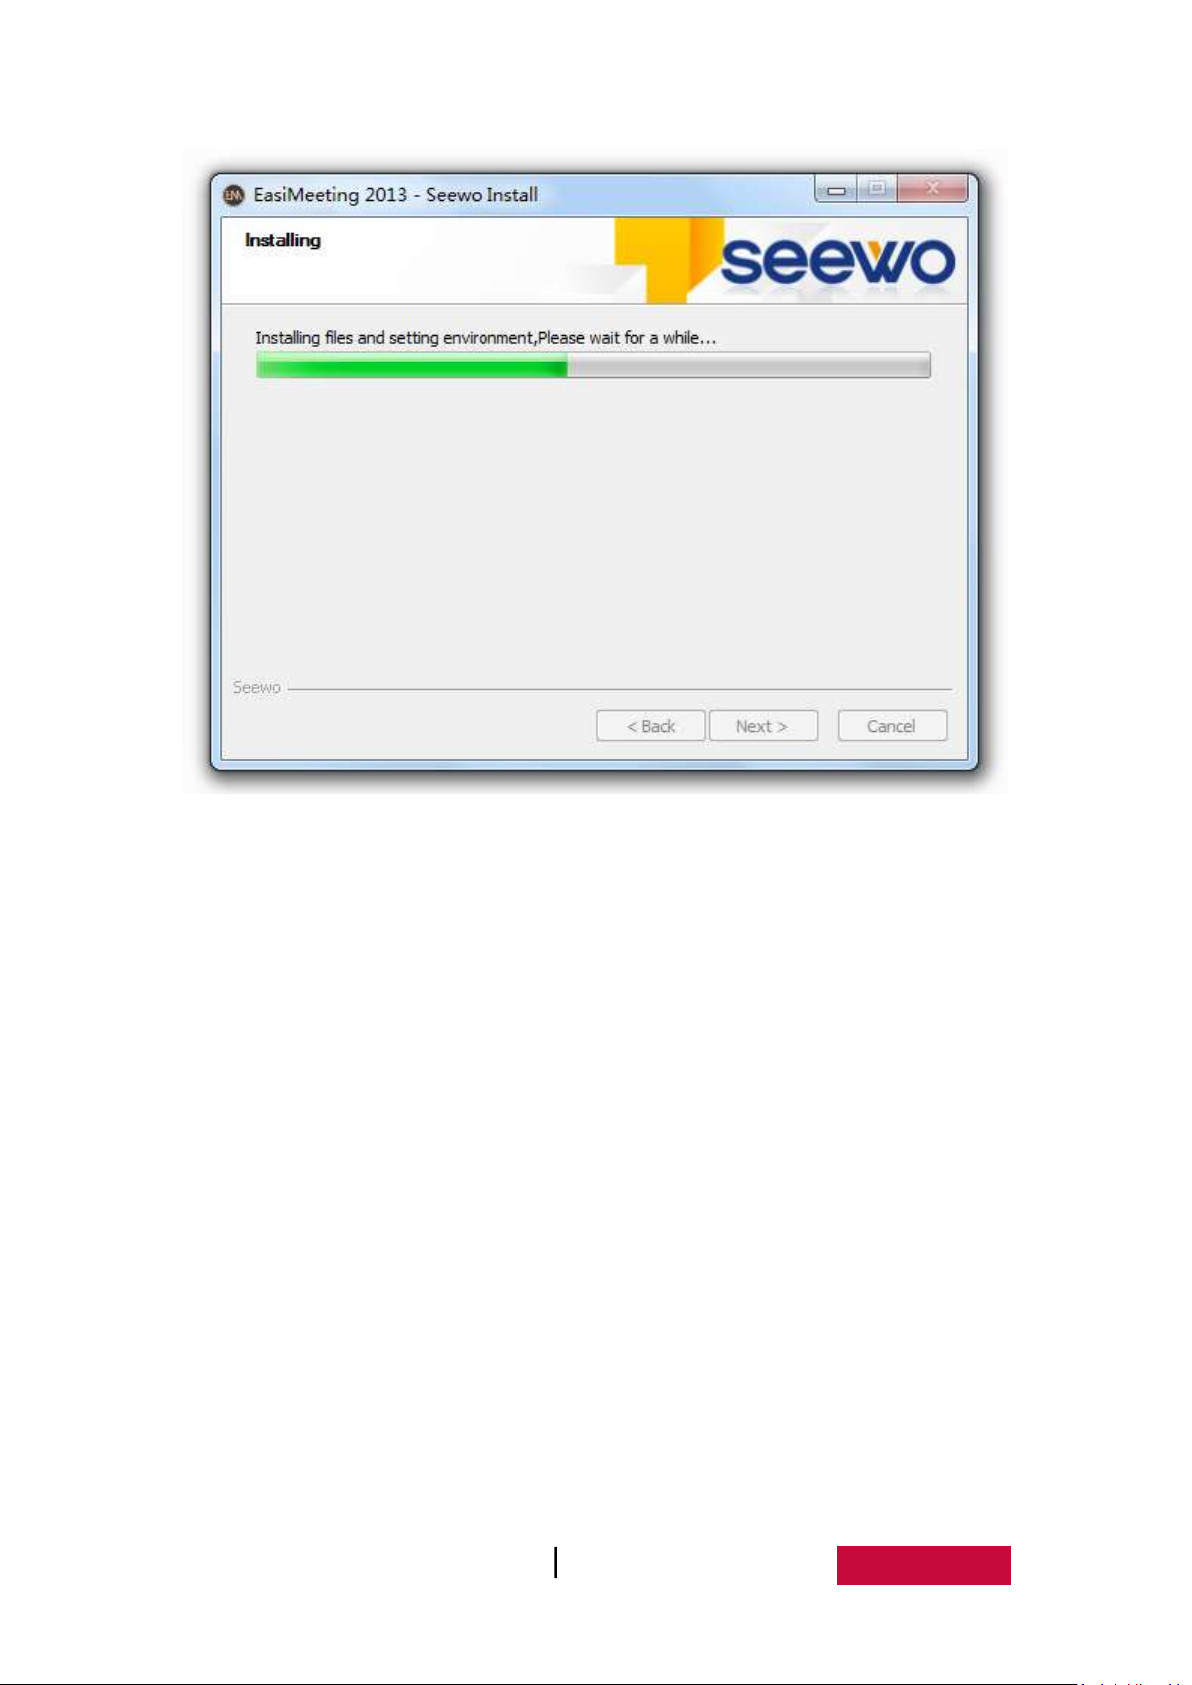
Fig.2-2-5 Install software
In the Installation Finish screen as shown in Figure 2-2-6, click Finish to finish
the installation.
User Manual EasMeeting (Application Software) 6
Page 10
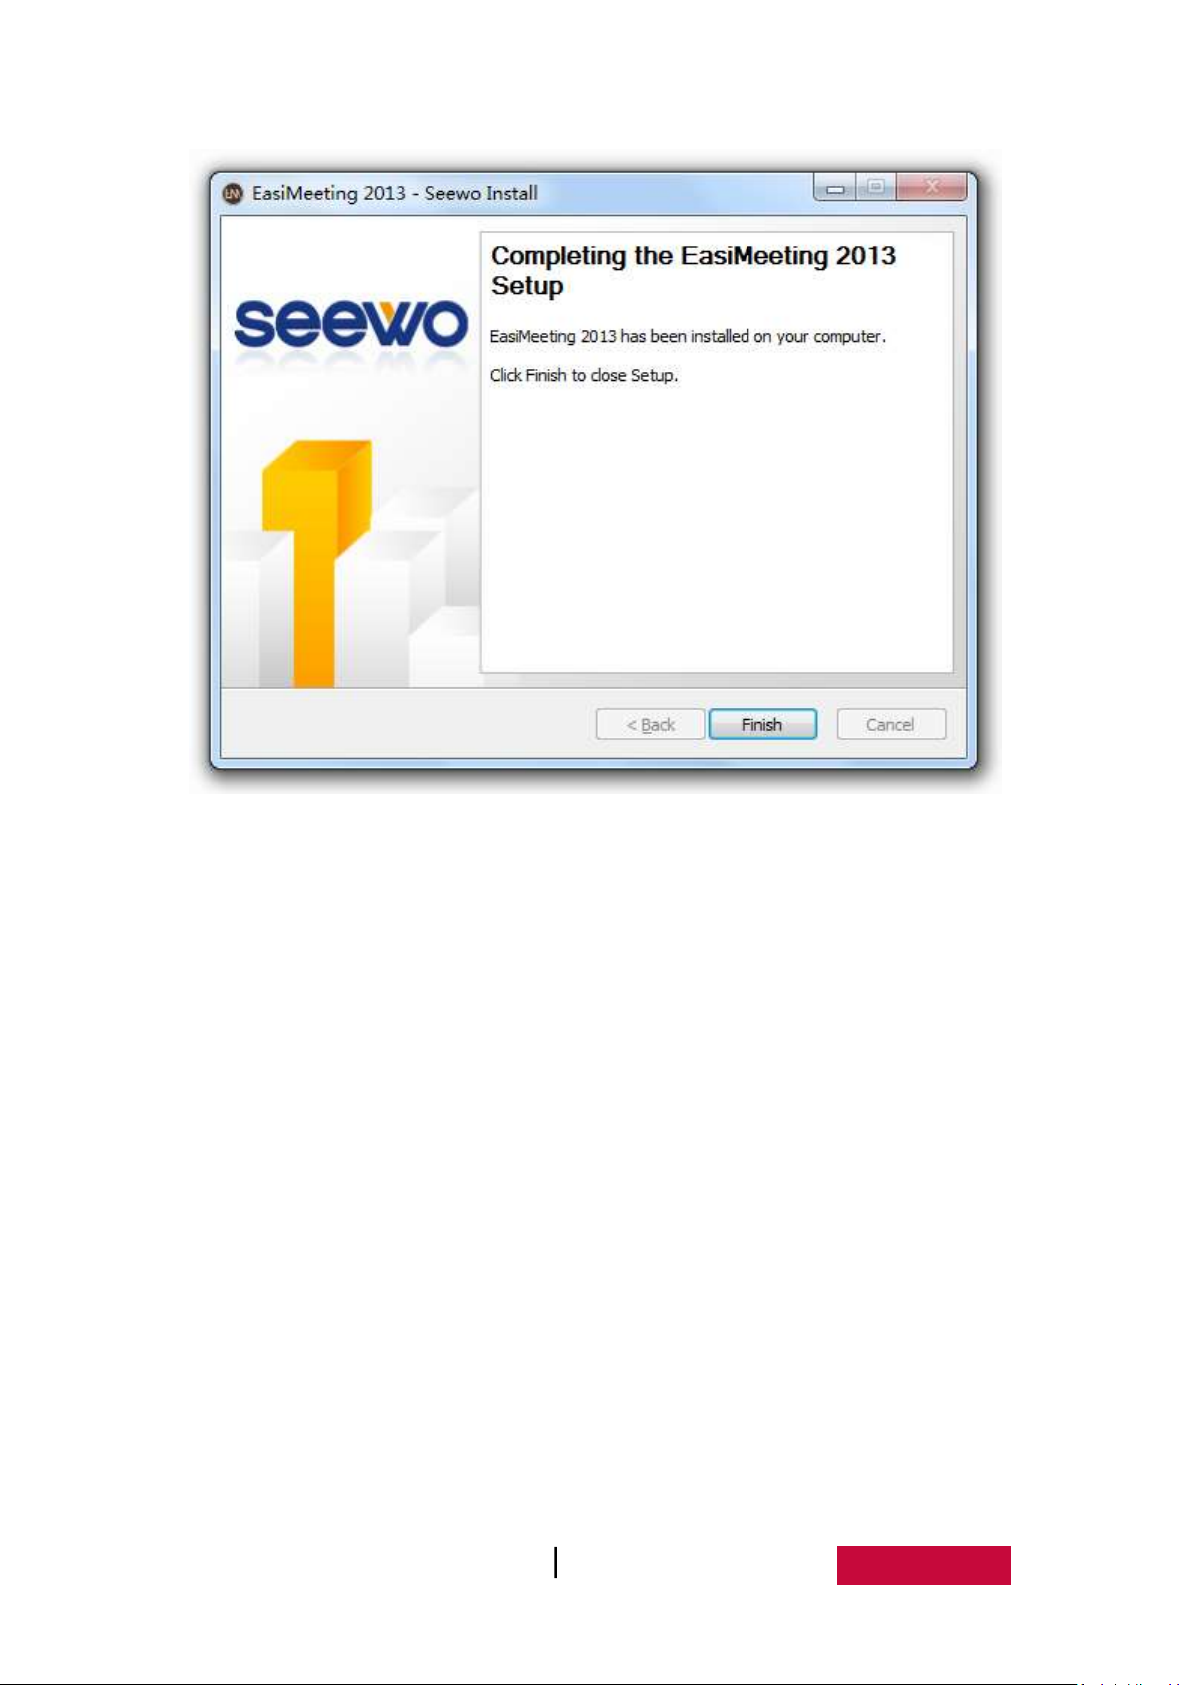
Figure 2-2-6 Finish Installation
User Manual EasMeeting (Application Software) 7
Page 11
3.Use description
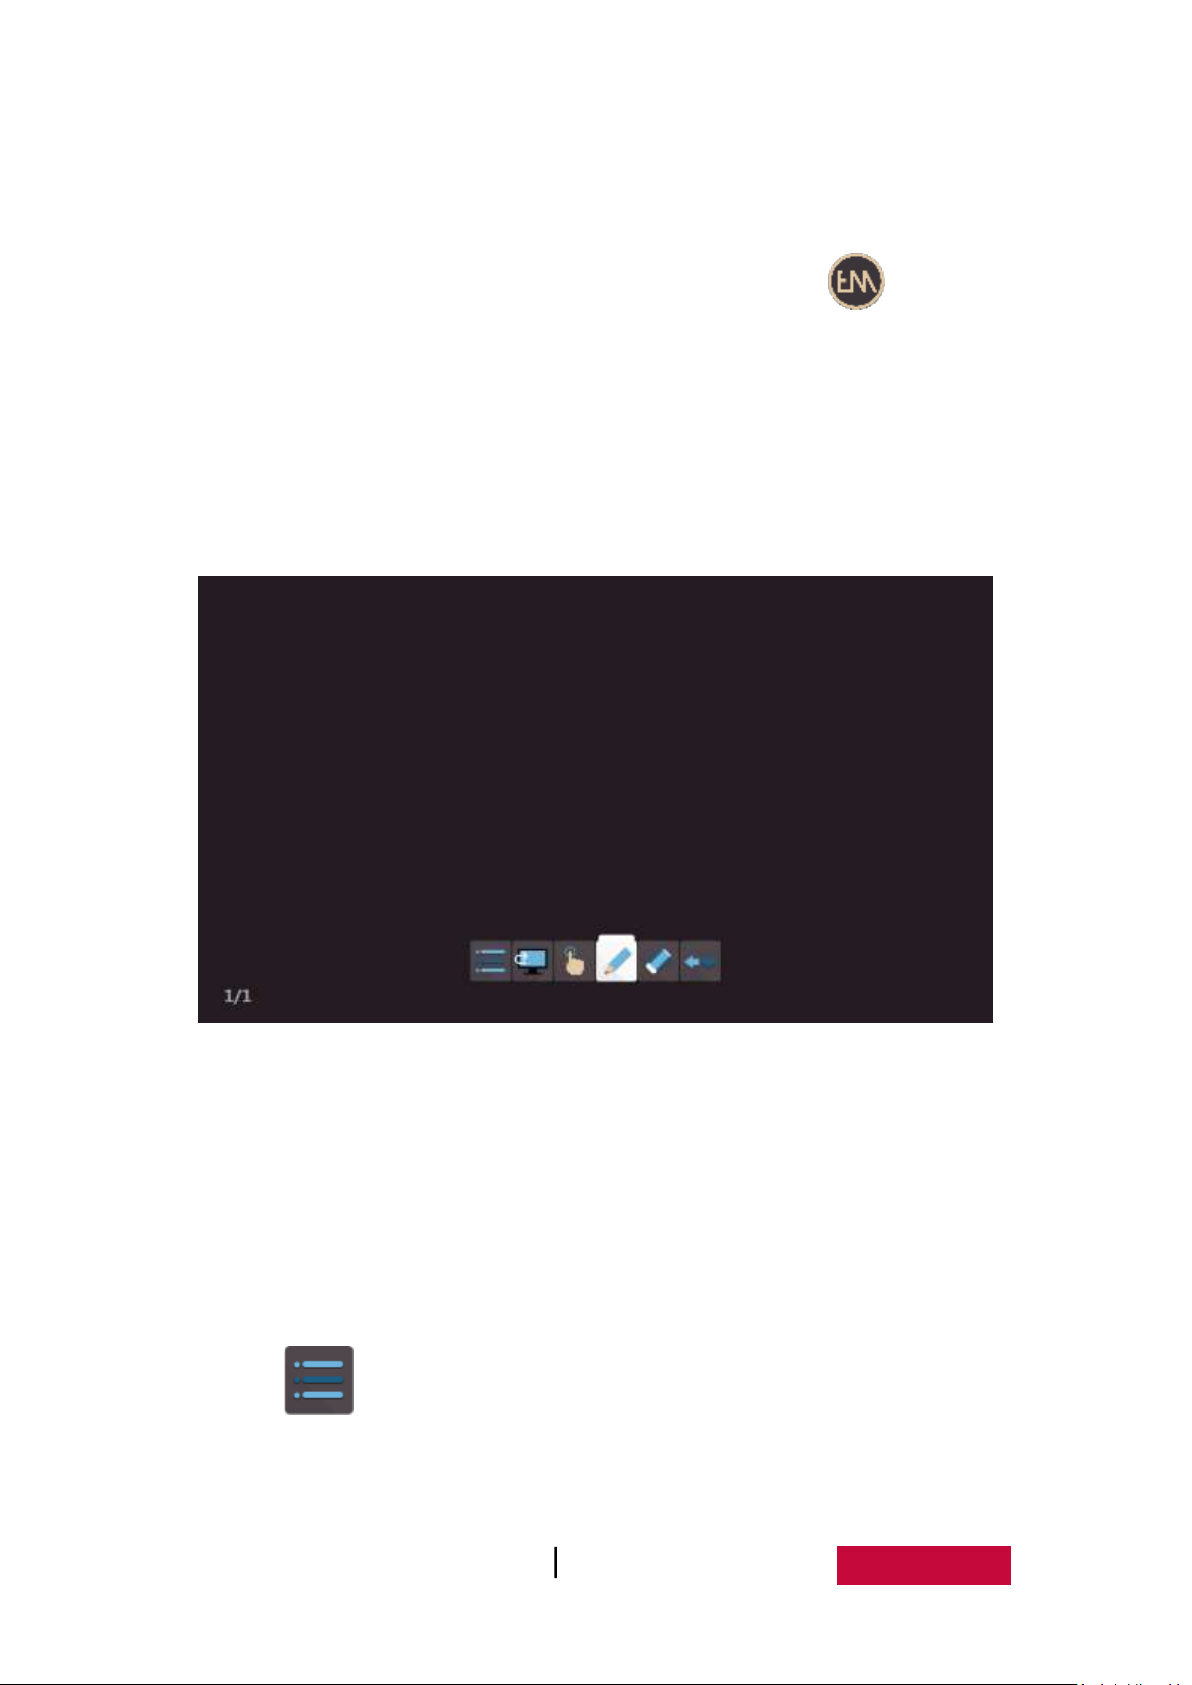
When the software installation is finished, double click the icon on the
desktop or select EasiMeeting from the Programs drop-down list in Start menu to
start EasiMeeting application software, as shown in Figure 3. In which the black
background area is the main operation screen. The user can change the background
color of the main screen as needed. Floating toolbar is displayed in the bottom of the
page in the middle position, the user can drag toolbar as requires.
Fig.3 the Initial Interface
If the software is not the first time start, the software will be quick start 2
seconds.
3.1 Common Function
3.1.1 Menu
Click and it will pop up drop-down menu as shown in Figure.3-1-1.
Drop-down menu provides users with function options such as file, import, export,
print, as well as setting, help, and exit software.
User Manual EasMeeting (Application Software) 8
Page 12
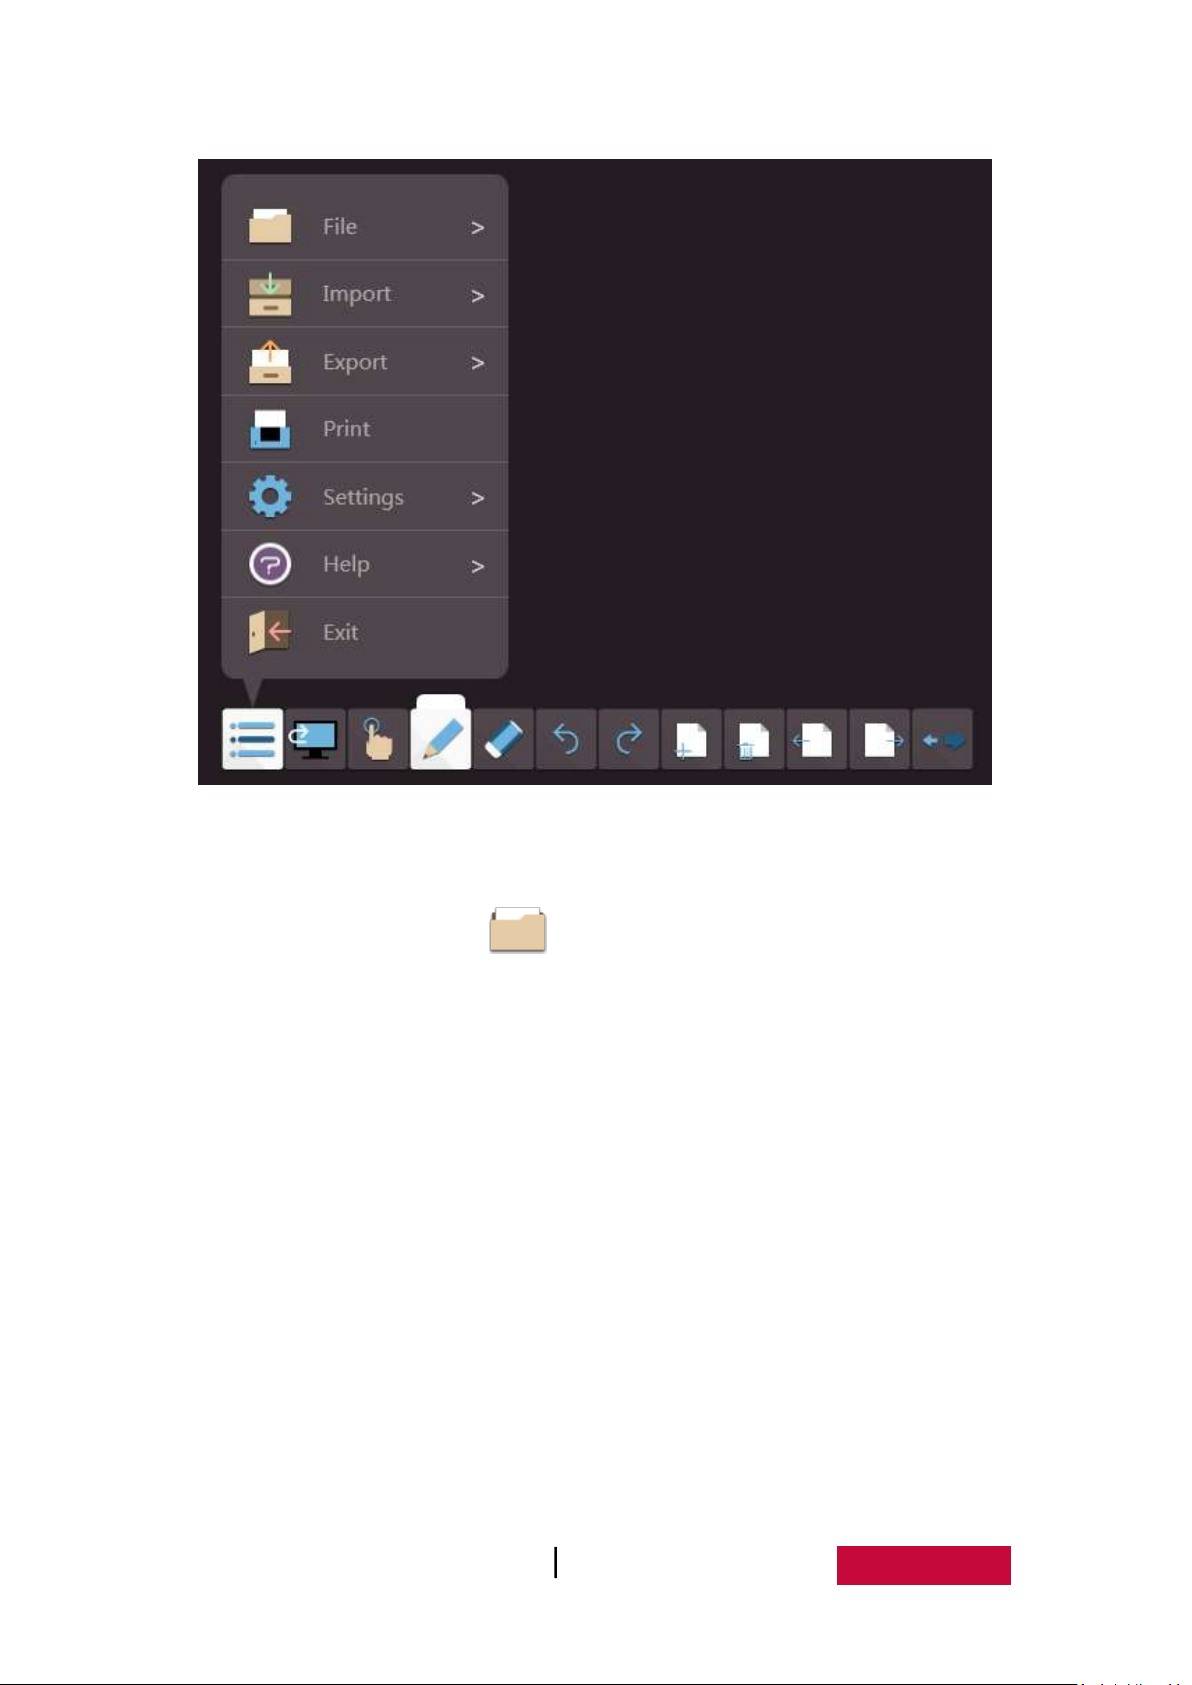
Fig.3-1-1 Start Menu
3.1.1.1 File
Click menu and select File , and the submenu will pop up where you can
New, Open, Save and Save As files, as shown in Figure 3-1-1-1. Each file can contain
more than one page according to the needs of the user.
User Manual EasMeeting (Application Software) 9
Page 13
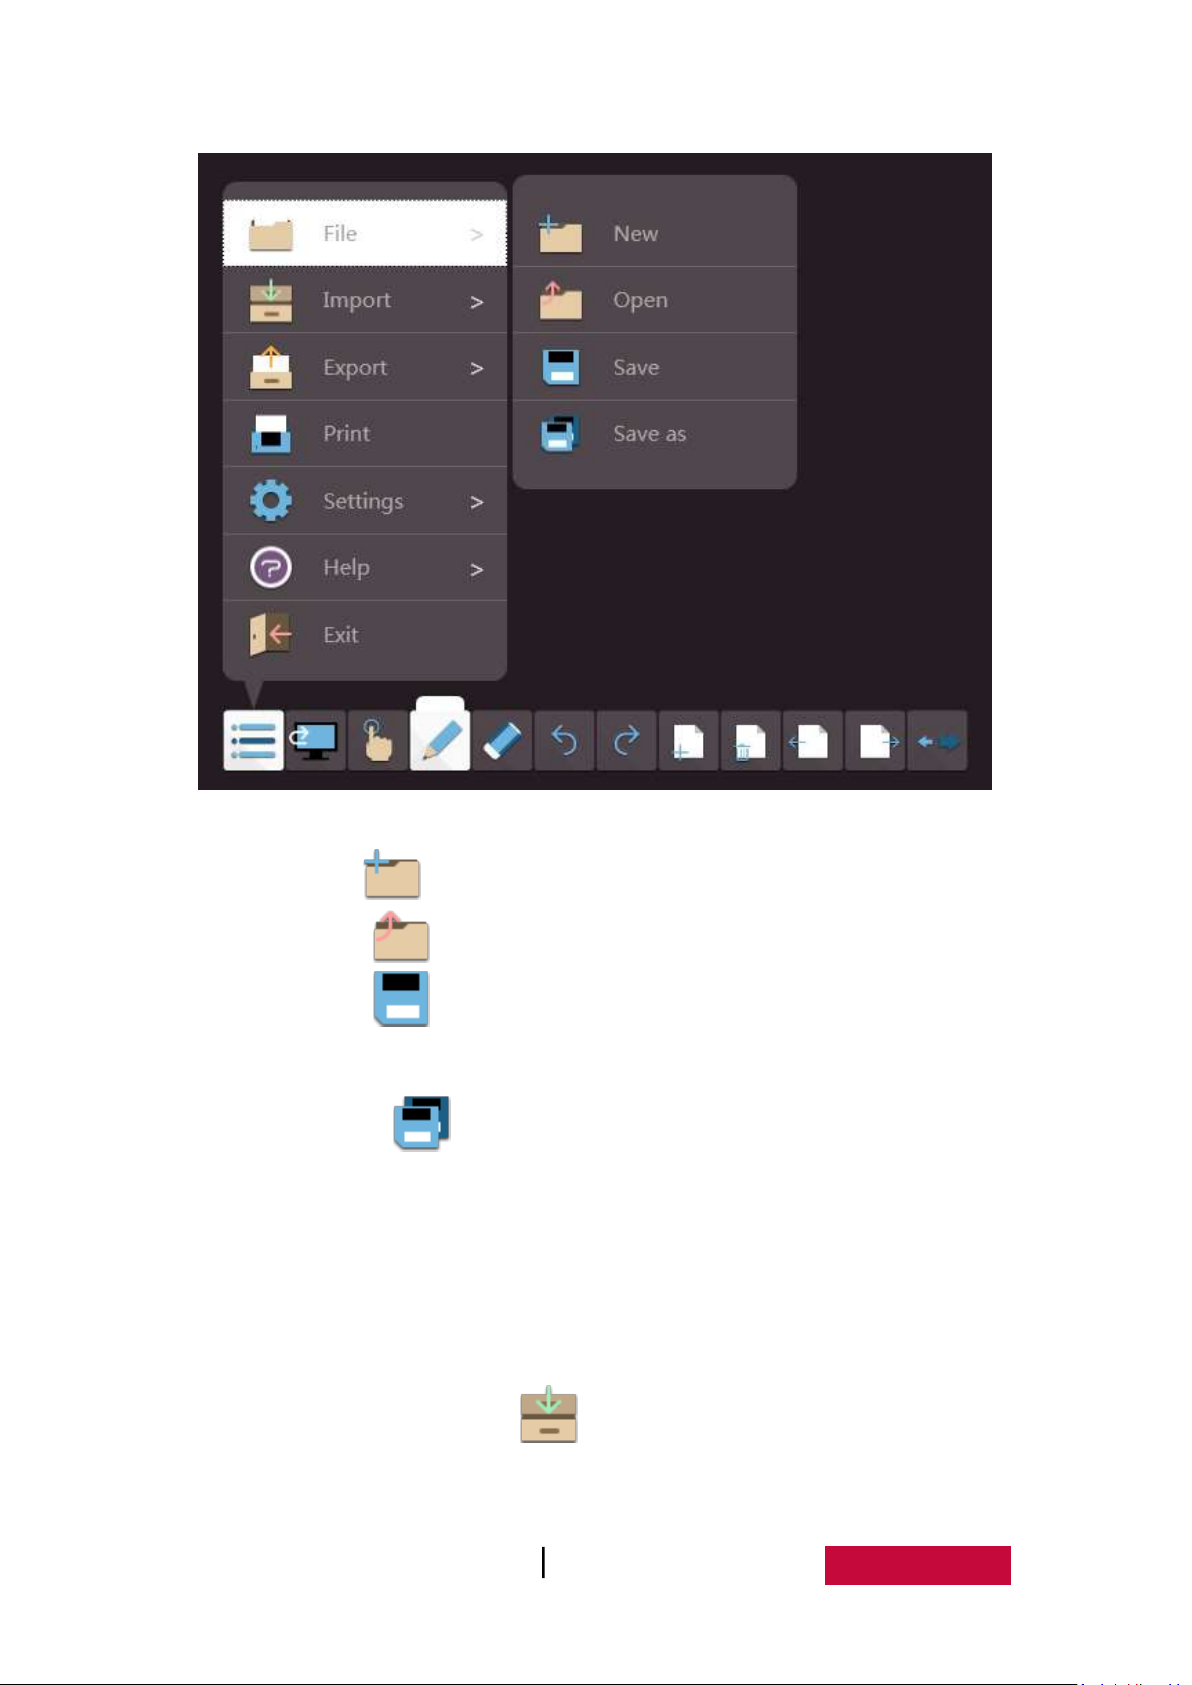
Fig.3-1-1-1 File Operation
New. Click to create a new file.
Open. Click to open the saved .em format file.
Save. Click to save current document as software supported .em
format file.
Save As. Click to save current document as .em format file.
Note: If the current panel-in panel has handwriting, the handwriting will be
automatically saved in the panel-in-panel; Open the file, and open the
plate in the plate, you can continue to use the saved handwriting.
3.1.1.2 Import
Click Menu and select Import to import office document, pdf document,
Picture, audio and video file to the current page, as shown in Figure 3-1-1-2-1.
User Manual EasMeeting (Application Software) 10
Page 14
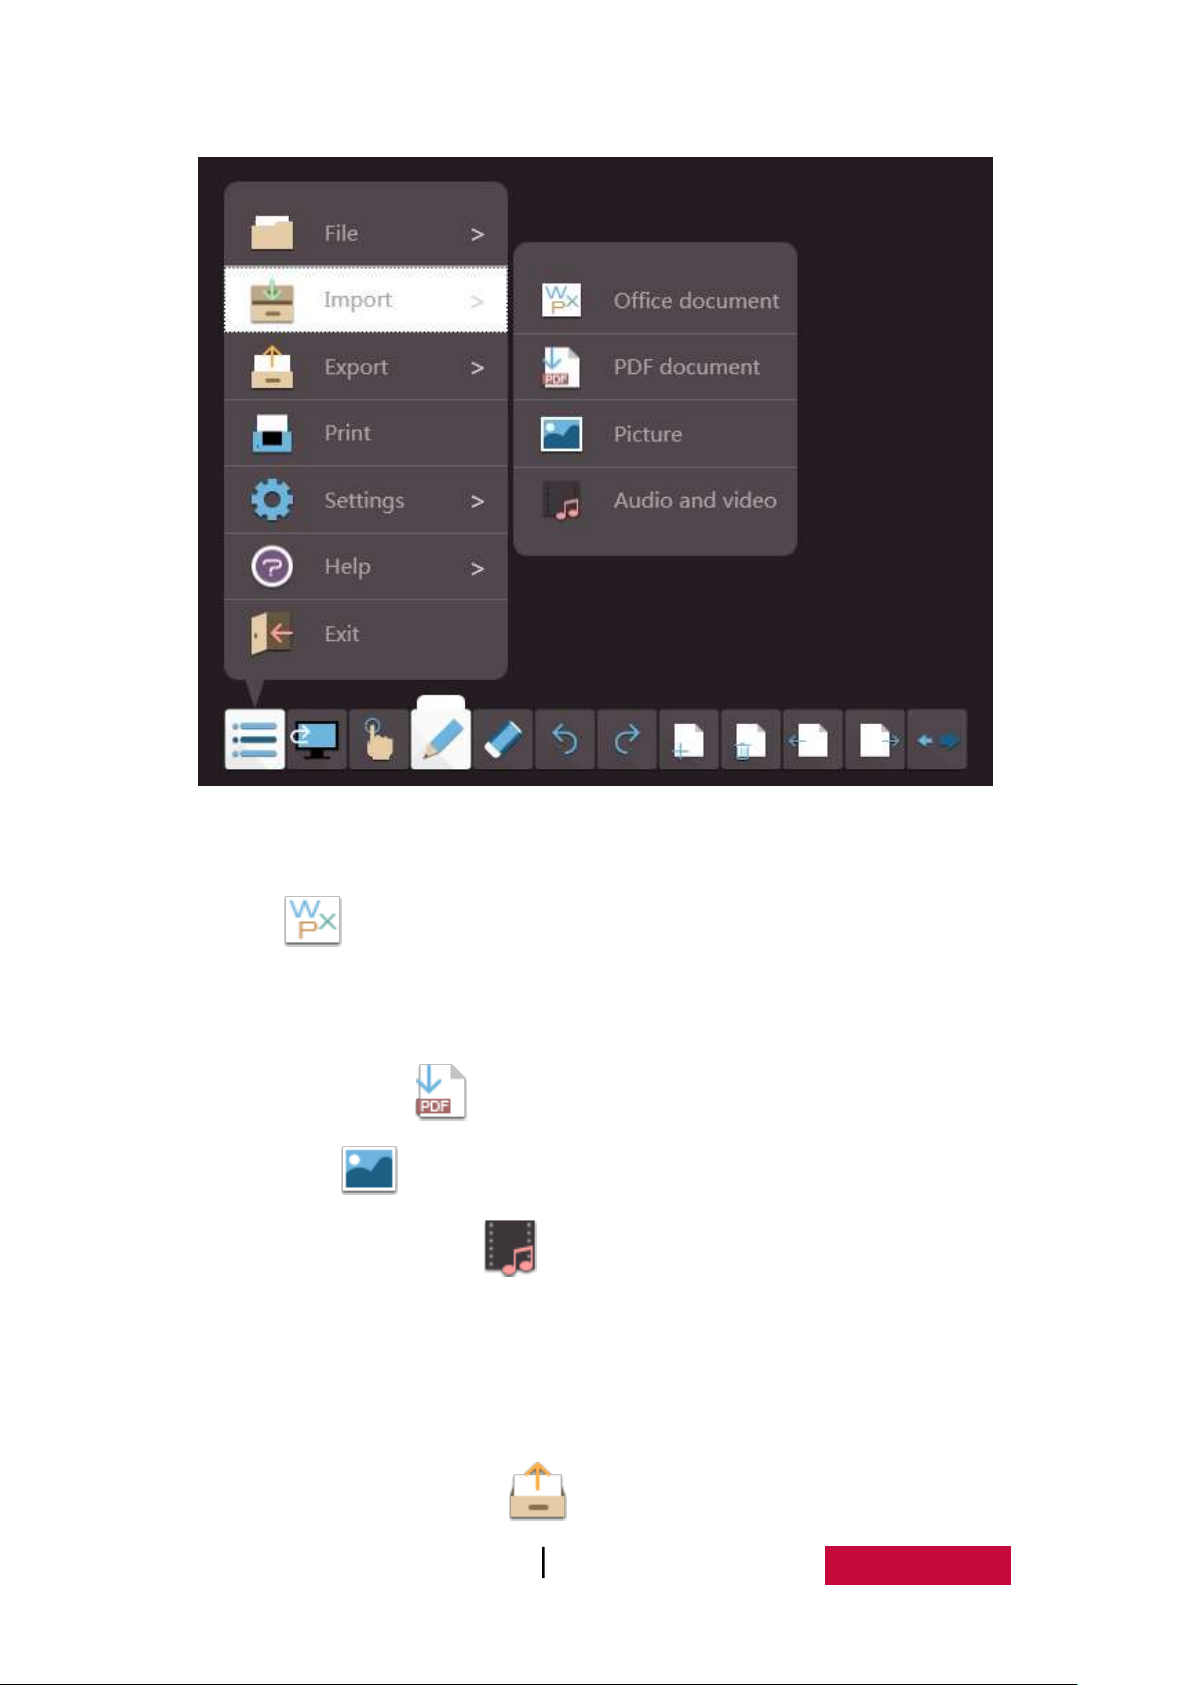
图 3-1-1-2-1 Import Operation
(1) Office document
Click to import office document, include doc, docx, ppt, pptx, xls, xlsx,
with the import process having a progress bar prompt, and imported document is
inserted image form.
(2) PDF document. Click to import pdf document.
(3) Picture. Click to import picture, include bmp, gif, jpeg, jpg and png.
(4) Audio and Video files. Click to import audio and video file, include swf, avi,
wmv, mp3, mp4, mid, wma, rmvb, rm, mov, mpg, 3gp, asf, flv, f4v, mkv, mpeg, ts
and vob.
3.1.1.3 Export
Click Menu and select Export to export the current file as .jpg or ppt, pdf,
User Manual EasMeeting (Application Software) 11
Page 15
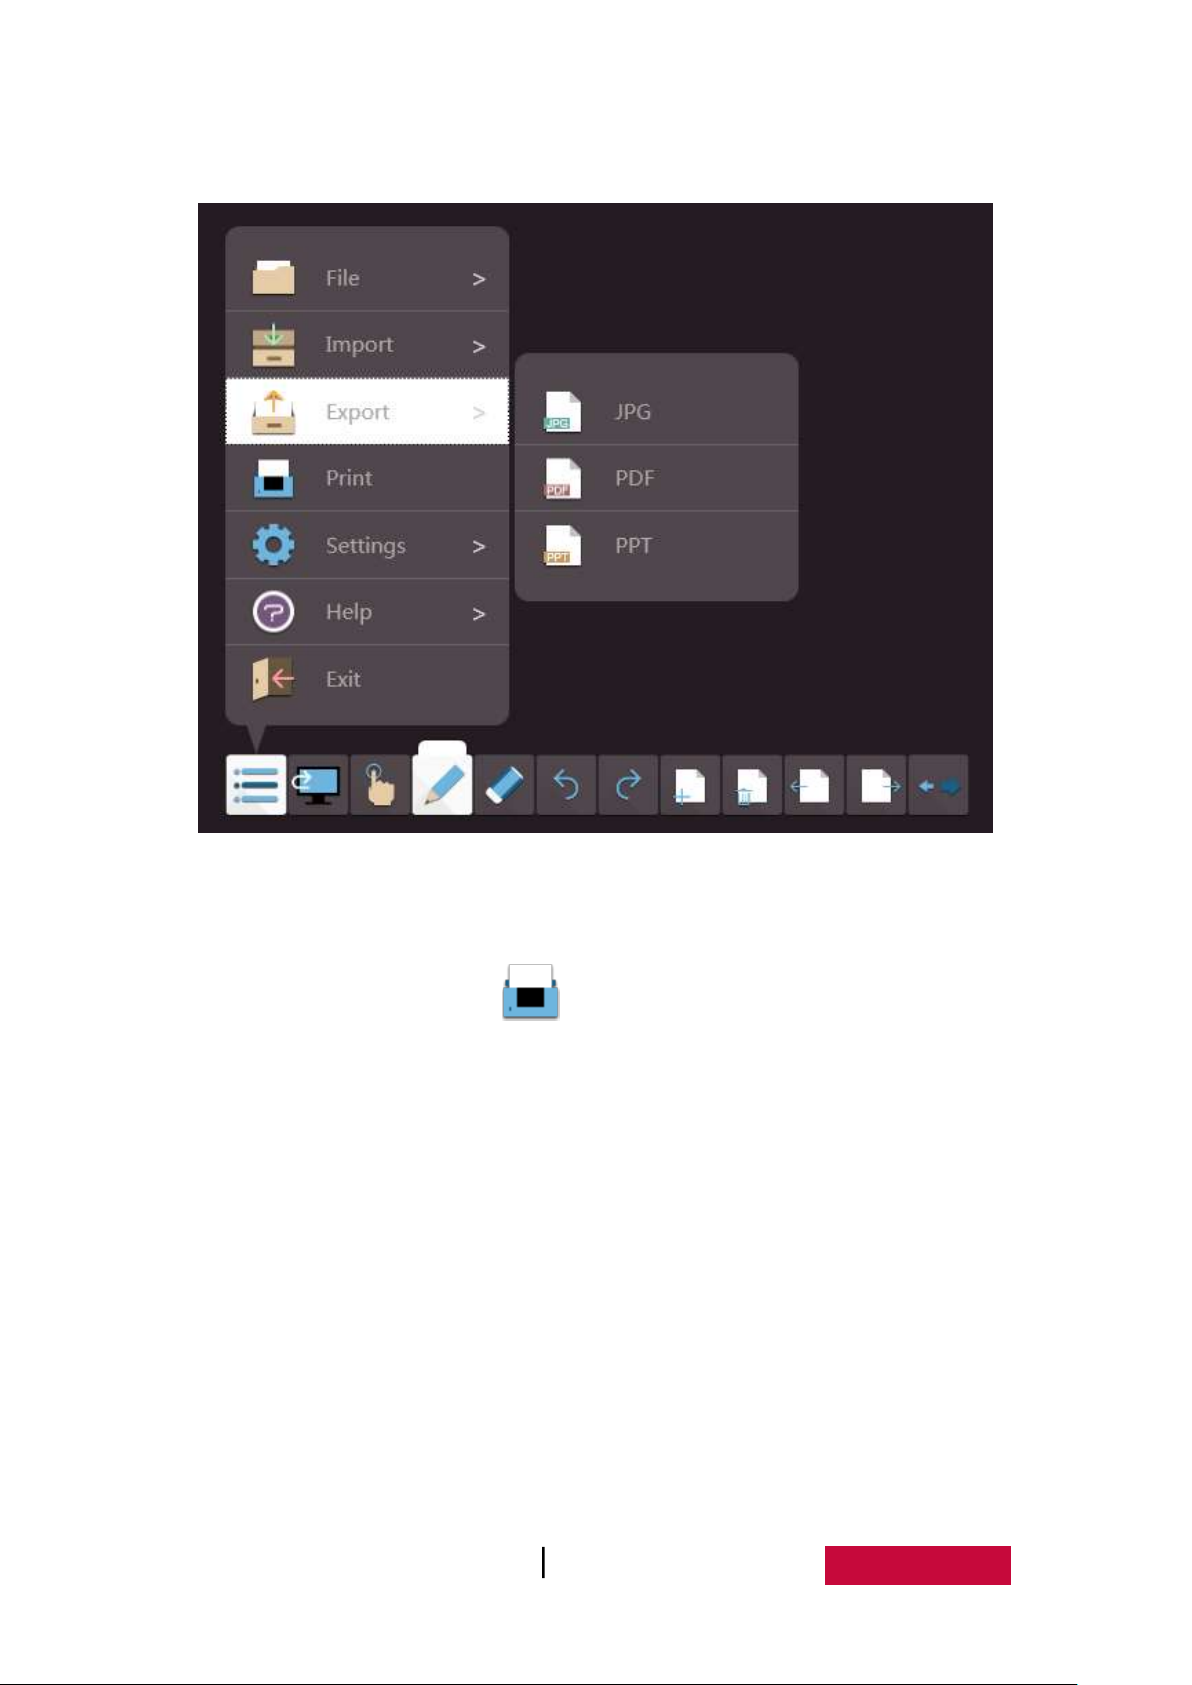
as shown in Figure 3-1-1-3.
Fig.3-1-1-3 Export Operation
3.1.1.4 Print
Click Menu and select Print to directly print the current file. The system
will first pop up a dialogue box. After selecting the corresponding printer and setting
the number of copies, print range, etc., click Print, as shown in Figure 3-1-1-4.
User Manual EasMeeting (Application Software) 12
Page 16
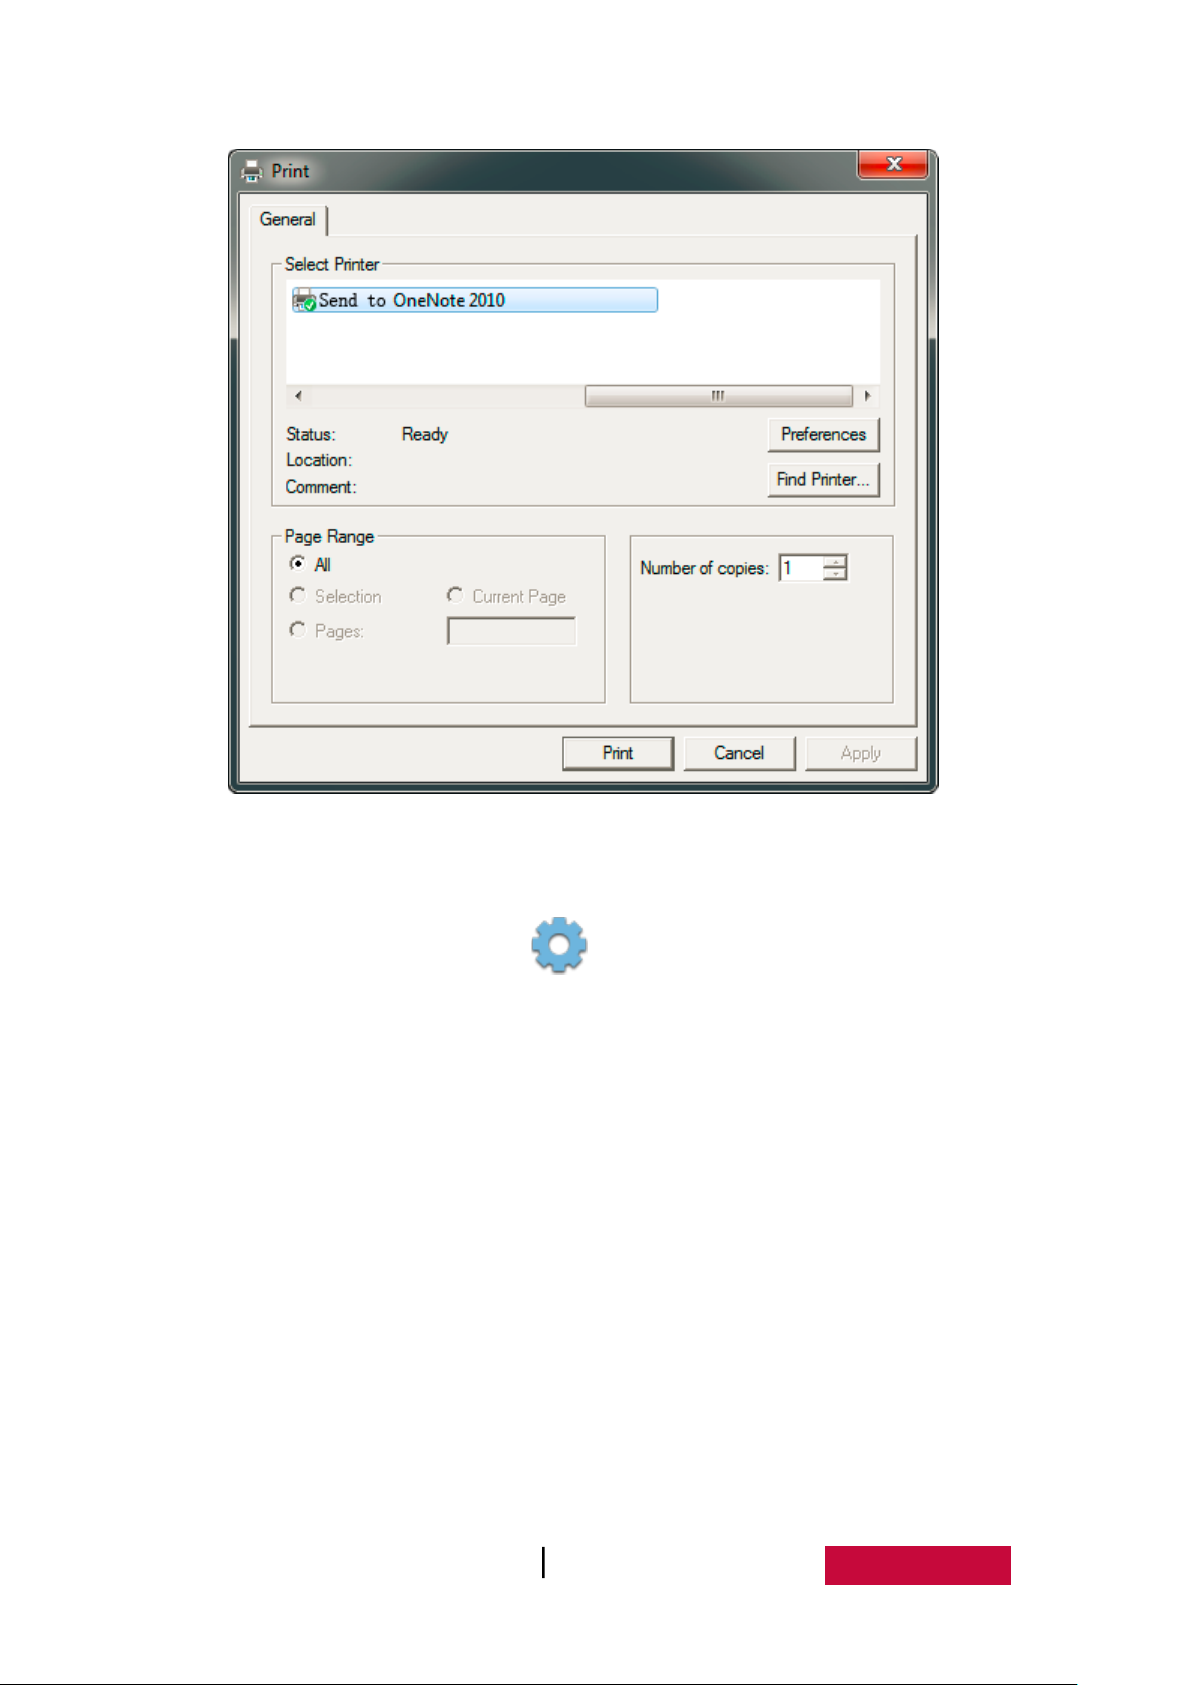
Fig.3-1-1-4 Print
3.1.1.5 Settings
Click Menu and select Settings , and the submenu will pop up; it includes
language selection, background color, whether to display page number, whether to
automatically save file, whether to start software with system start up, whether to
display toolbar text prompt and direction of toolbar, as shown in Figure 3-1-1-5-1.
User Manual EasMeeting (Application Software) 13
Page 17
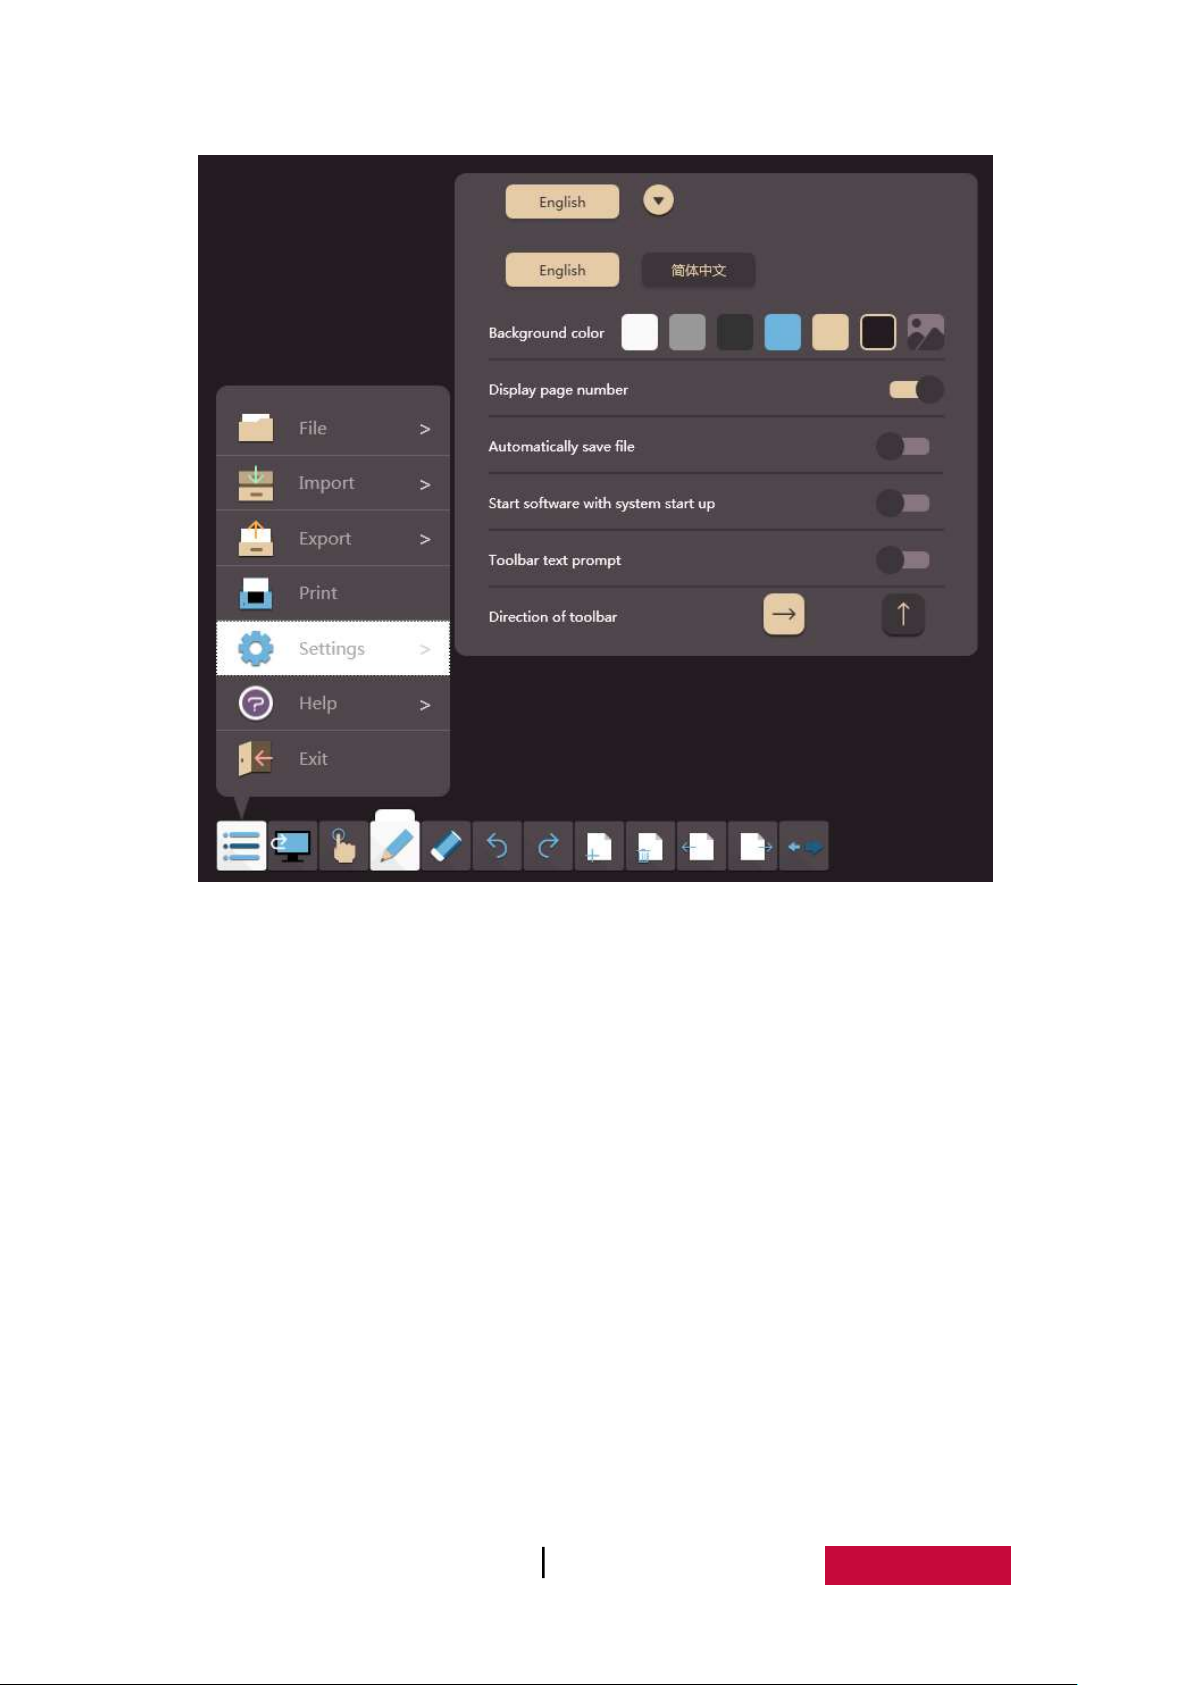
Fig.3-1-1-5-1 Settings
(1) Language. Click language drop-down box, and it can switch software display
languages, including Chinese and English;
(2) Background Color. Select the color of the switch to switch the current background
color, it is a total of six colors, and the default background is black; At the same
time, the user can custom the page background as required, and the custom
background default full screen drawing. When the user roaming, the custom
background does not move with roaming, as shown in Figure 3-1-1-5-2;
User Manual EasMeeting (Application Software) 14
Page 18
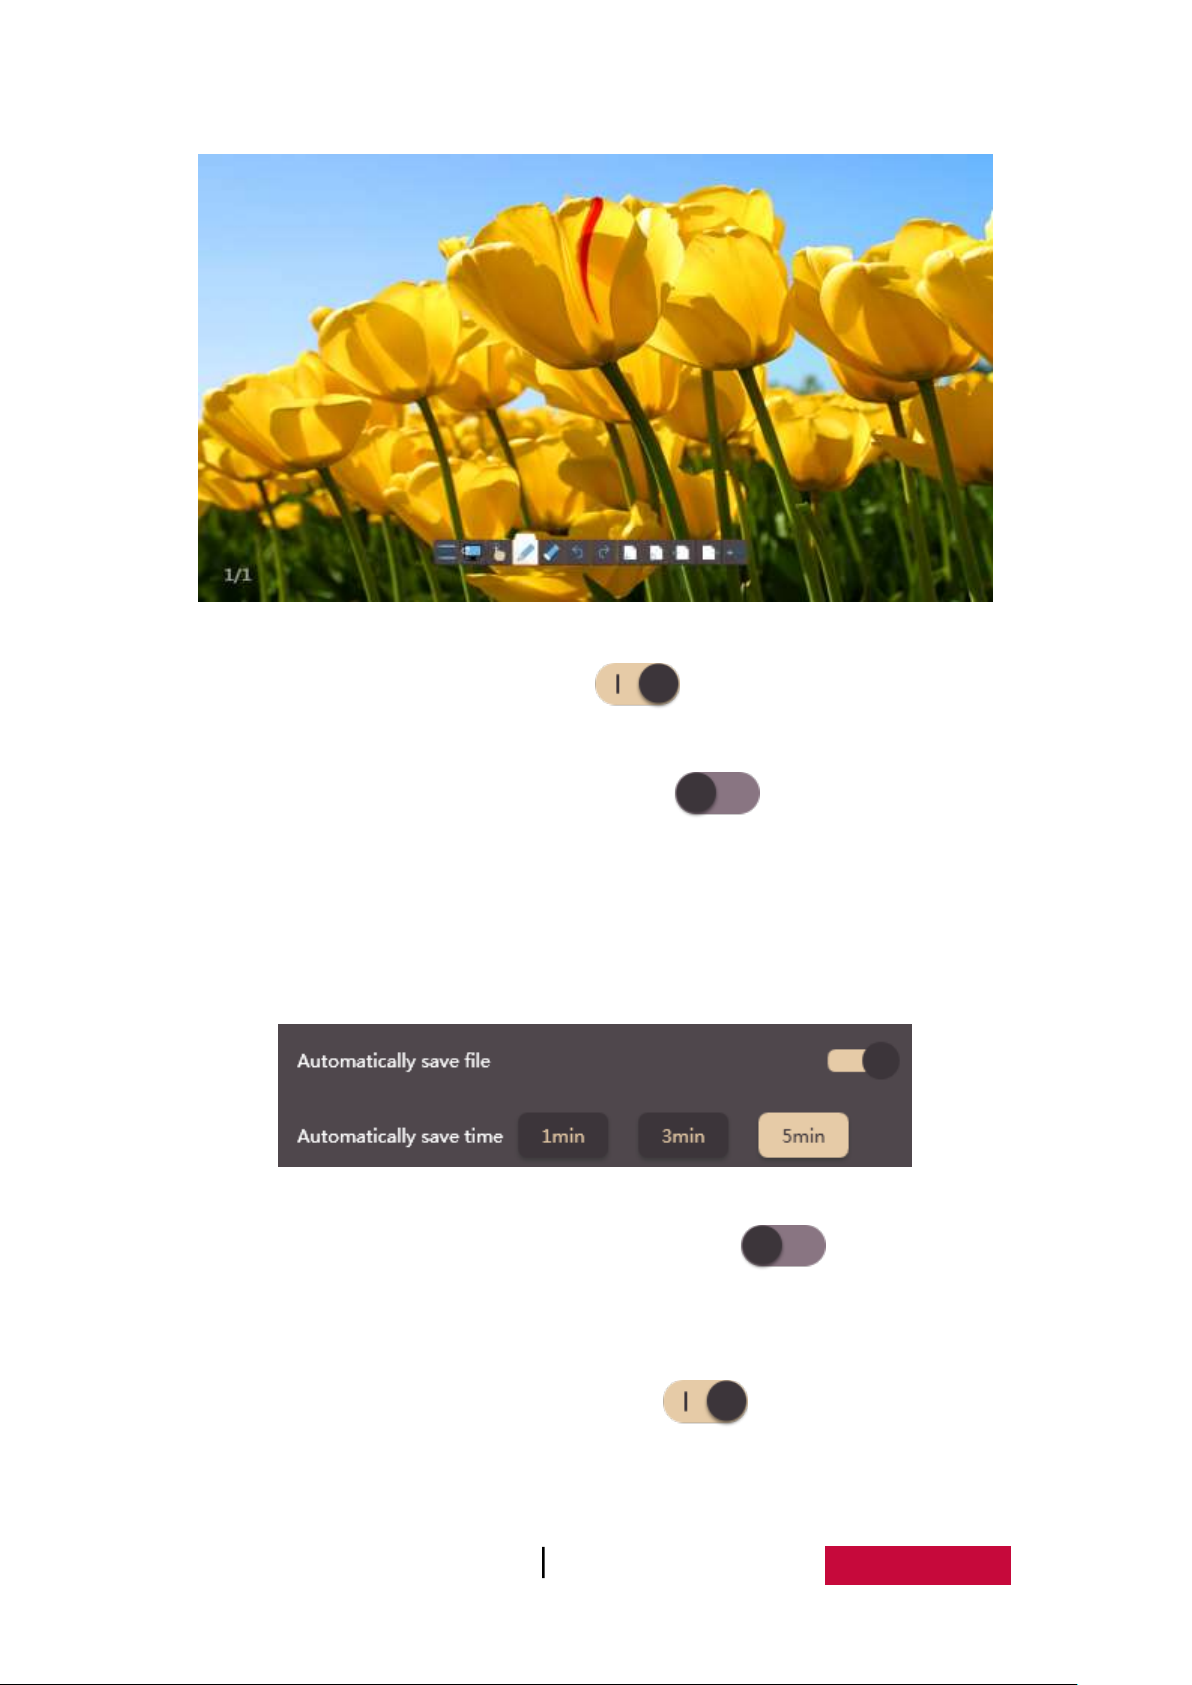
Fig.3-1-1-5-2 Custom Background
(3) Display page number. Drag the button to choose whether to display the
page number, the software default display page number;
(4) Automatically save file. Drag the button to choose whether to
automatically save file, the default is not automatically save file. If you choose
to automatically save file, the file will automatically save the file at intervals in
the current file saved, and the user can set up the auto-save interval for 1min,
3min, or 5min, as shown in Figure 3-1-1-5-3;
Fig.3-1-1-5-3 Automatically Save File
(5) Start software with system start up. Drag the button to choose whether
to start software with system start up, the default boot does not start the
software;
(6) Display toolbar text prompt. Drag the button to choose whether display
toolbar text prompt, the default display toolbar text prompt;
User Manual EasMeeting (Application Software) 15
Page 19

(7) Direction of toolbar. Click or to choose the toolbar is horizontal or
vertical, the default toolbar is horizontal.
3.1.1.6 Help
Click Menu and select Help , and the submenu will pop up, including
Register, About, Manual, Contact us, Update Online, as shown in Figure 3-1-1-6.
Fig.3-1-1-6 Help
(1) Register. Click icon to register the software.
① If software is not installed on PRESTIGIO all-in-one machine or not registered,
it will pop up trial day’s window, as shown in Figure.3-1-1-6-1-1, click
to enter registration interface, click to cannel registration, and
return to software interface. Software can be 30 days trial by default.
User Manual EasMeeting (Application Software) 16
Page 20

Fig.3-1-1-6-1-1 Trial Days Prompt Interface
Confirm registration to pop up registration code input interface, and at the
same time, pop up keyboard for user to input password, as shown in
Figure.3-1-1-6-1-2. Normally, the software needs to register online, and see
software query manual or contact us for information on offline registration.
Fig.3-1-1-6-1-2 Enter Authorization Code Interface
After enter registration code, click to enter network authentication
interface, as shown in Figure.3-1-1-6-1-3; Click to cannel registration,
and return to software interface.
User Manual EasMeeting (Application Software) 17
Page 21

Fig.3-1-1-6-1-3 Network Authentication Interface
In case of registration code input errors, it will pop up interface as shown in
Figure.3-1-1-6-1-4.
Fig.3-1-1-6-1-4 Registration Code Error
In case of correct registration code input, it will pop up interface as shown in
Figure.3-1-1-6-1-5.
Fig.3-1-1-6-1-5 Registration Code Correct
② If the software has been registered before, it does not need to register again.
③ If the software is installed on all-in-one machine, it does not need to register
can be used.
User Manual EasMeeting (Application Software) 18
Page 22

④ If software is installed in external PC, but connected to PRESTIGIO whole
machine with touch line, it does not need to register can be used.
⑤ If currently there is no Internet connection, click registration button under
unregistered status and enter registration code correctly, it will pop up check
the network prompt window, as shown in 3-1-1-6-1-6.
Fig.3-1-1-6-1-6 No Internet Connection Interface
(2) About. Click the icon to display the dialogue box containing the
information related to the EasiMeeting application software, from which the user
can obtain the information on Software name, Software version, Company name,
Company website, etc. As shown in Figure 3-1-1-6-2.
Fig.3-1-1-6-2 About
User Manual EasMeeting (Application Software) 19
Page 23

(3) Manual. Click the icon to open the help file of the software. The user can
view the detailed functions of the software according to the help file, as shown in
Figure 3-1-1-6-3.
Fig.3-1-1-6-3 Manual
(4) Contact us. Click the icon to pop up interface as shown in Figure 3-1-1-6-4.
Click to input text editing email content, click to send E-mail to
contract software R&D personnel, and click to close the window.
Fig.3-1-1-6-4 Contract Us Interface
User Manual EasMeeting (Application Software) 20
Page 24

(5) Update Online. Click to upgrade the software to new vision.
① If the software is not the latest version and current PC has been connected to
Internet, opening software will automatically pop up software update online
inquiry window, as shown in Figure 3-1-1-6-5-1.
Fig.3-1-1-6-5-1 Check Update Interface
Click to upgrade software online, software is shut down, and
automatically updates, popping up software upgrade interface, as Figure
3-1-1-6-5-2. Click to cancel software updating. If file contents need to
save, click to cancel update first, conduct update operation after
saving file contents. During updating process, click button, to conceal
updating interface into background.
User Manual EasMeeting (Application Software) 21
Page 25

Fig.3-1-1-6-5-2 Check Whether File is Saved Window
After software update is completed, it will pop up interface as shown in
Figure 3-1-1-6-5-3.
Fig.3-1-1-6-5-3 Software Update Completed
② If the software is already the latest version, it does not pop up automatically
online updates window. Click icon to pop up prompt window, as
shown in Figure 3-1-1-6-5-4。
User Manual EasMeeting (Application Software) 22
Page 26

Fig.3-1-1-6-5-4 Already The Latest Version
③ If currently PC has no network connection, it cannot perform online update,
and it needs to manually install new software after uninstalling software.
Click icon to pop up no network prompt window, as shown in Figure
3-1-1-6-5-5.
Fig.3-1-1-6-5-5 Currently No Network Connection
3.1.1.7 Exit
Click to exit and close the application software. If there are files that are
not saved when exiting the software, the system will remind user whether to save, as
shown in Figure 3-1-1-7.
User Manual EasMeeting (Application Software) 23
Page 27

Fig.3-1-1-7 Save or Not Prompt Dialog Box
3.1.2 Switch to Desktop
Click to switch to desktop mode, see 3.5 Desktop Mode for details.
3.1.3 Pen type
Click the button to the right of the pop-up pen set and pen type toolbar,
the user can choose different types of pens as required. The default pen for initially
is hard brush and white handwriting. Click pen can switch colors, there are three
kinds of colors can be switched default, white, yellow and blue.
Hard brush. Click and enable hard brush (default color is white), the
user can write on the page. When the user writing, the stroke width is no
affected by writing speed. The color and stroke width can be adjusted in the
"Pen Settings".
Fluorescent pen. Click and enable the fluorescent pen (default color is
white); it can be used to annotate the content. The color and strokes width
can be adjusted in the "Pen Settings".
Multi-point writing. Click and enable the pen of multi-point writing. In
the multi-touch box, it can achieve the corresponding points to write.
User Manual EasMeeting (Application Software) 24
Page 28

NOTE: Hard brush and Fluorescent pen can only be a single point of writing, if
enable the pen multi-point, it can writing multi-point.
Brush setting。Click and enable brush setting, as shown in Figure
3-1-3 Brush Settings dialog box. The user can set the stroke width and color
of the currently selected brush, and a variety of brush settings between each
other. Select any color, it will replace the first one to switch colors.
Fig.3-1-3 Brush Setting
3.1.4 Eraser
Click to select eraser, with default eraser is point erasing, as shown in
Figure 3-1-4. Eraser is divided into point erasing, cycle erasing, and sliding page
erasing.
Fig.3-1-4 Eraser
Point erasing. Click to select point wiping eraser, which can erase
ordinary brush handwriting, including hard brush, fluorescent pen, ink brush,
and row brush.
User Manual EasMeeting (Application Software) 25
Page 29

Cycle erasing. Click to select cycle wiping eraser, select loop the
handwriting requiring erase can erase selected handwriting, the eraser can
erase ordinary brush (hard brush, fluorescent pen and ink brush), lines,
image, 3D figure and, text, image, audio and video handwritings.
Page erasing. Slide to the right, to remove contents of the current
page.
3.1.5 Gesture
Click the button to pop up the secondary menu, including selection, page
turning, zoom and roam.
3.1.5.1 Selection
Click to realize following options by drawing a closed image or click on
the selected interface: moving, scaling, rotating, deleting, cutting, copy, sorting and
etc.
(1) Handwriting/Image/Text
Select loop object, to conduct operation of selected object as moving, zooming,
rotating, deleting, cutting, copying, and sorting, as shown in Figure 3-1-5-2-1.
User Manual EasMeeting (Application Software) 26
Page 30

Fig.3-1-5-2-1 Select Object
Moving. Click and drag selected object, to move current object to any
position;
Uniform zooming. Hold down icons of on the upper left, on the
bottom left, and on the bottom right, to realize object uniform scaling
zooming operations respectively;
One-way zooming. Hold down icons on each side to realize
object zooming operation in single direction;
Rotating. Click to rotate the currently selected object;
Click to open the button of deleting, cutting, copy and sorting;
Delete. Click to delete currently selected object;
Cutting. Click to cut currently selected object;
Copying. Click to copy currently selected object, and paste it to
lower right of the object;
User Manual EasMeeting (Application Software) 27
Page 31

Sorting. Click to pop up secondary menu, which can make settings
for layer relationship of multiple objects (including handwriting, image,
audio and video, etc.) (handwriting has the same object level with others),
including move one level up, move one level down, place on the top, and
place on the bottom;
(2) Audio and Video
Select loop audio and video object, to conduct operation of selected audio and
video as playing, pausing, dragging process bar, sound adjusting, moving, scaling,
rotating, screenshot, deleting, cutting, copying, sorting, as shown in Figure 3-1-5-2-2.
Fig.3-1-5-2-2 Select Audio and Video
Functions of audio and video moving, scaling, rotating, deleting, cutting,
copying, sorting are the same as handwriting. See “(1) Handwriting/ Image/
Text” for details;
Play. Click to play audio and video;
Pause. Click to pause playing of audio and video;
Stop. Click to stop playing audio and video;
User Manual EasMeeting (Application Software) 28
Page 32

Drag progress bar. Drag audio and video playing progress bar, to customize
playing position of audio and video;
Voice control. Drag sound adjusting scroll bar, to adjust the volume;
Mute. Click to turn the volume silently;
Screenshot. Click to insert screenshot image of current audio and
video image into the page.
3.1.5.2 Page turning
Click button, and sliding page left and right to simulate flip operation.
3.1.5.3 Zoom
Click button, and sliding up and down the page to zoom the page.
Slide up to zoom in the page, and slide down to zoom out the page.
3.1.5.4 Roam
Click the button , then click on the current page (or click the left mouse
button) and move, the user can move the current page.
3.1.6 Unfold
Click or drag the button to the right of the toolbar, as shown in
Figure 3-1-6-1.
Fig.3-1-6-1 Expand Toolbar
Click again or drag the button to the left toolbar can be retracted, as shown
in Figure 3-1-6-2.
User Manual EasMeeting (Application Software) 29
Page 33

Fig.3-1-6-2 Retract the Toolbar
Toolbar fully expanded state drag right expand button to pop up more
button to set the interface. The user can in order to add a button to the
toolbar as required, according to the different resolution, adaptive to
number of different buttons, as shown in Figure 3-1-6-3. Click the Close
button on the top right corner toolbar button to remove the button;
click and drag the button and the user can drag the button to the desired
location.
Fig.3-1-6-3 Toolbar Setting
When hidden expandable functions, animation prompt will pop up.
① When you first time open the software, the toolbar is automatically
operable animation tips after the button expanded;
② All toolbar buttons is displayed, the pop-up animation tips of set
operation.
Note:
User Manual EasMeeting (Application Software) 30
Page 34

① If the floating toolbar stay on the edge of the interface (horizontal toolbar
docked on the edge of interface left and right, vertical docked on the edge of
the interface up and down), the toolbar will automatically be reduced to an
icon, and adsorbed on the edge;
② In the desktop mode, if the software do not operate for a while, the floating
toolbar will automatically be reduced to an icon, and adsorbed on the edge;
3.2 Basic Tools
3.2.1 Undo
Click to undo previous operation.
3.2.2 Redo
Click to restore previous undo operation.
3.2.3 Add Page
Click to add a new page. When add a page, it dynamic prompts new
page number among the page, and display from light to dark and then lighter until it
disappears, as shown in Figure 3-2-3;
User Manual EasMeeting (Application Software) 31
Page 35

Fig.3-2-3 Dynamic Prompts of New Page
3.2.4 Delete Page
Click to delete the current page. When delete a page, it dynamic
prompts delete page on the lower right corner, and the page to the lower right
corner to delete at the same time, as shown in Figure 3-2-4;
Fig.3-2-4 Dynamic Prompts of Delete Page
User Manual EasMeeting (Application Software) 32
Page 36

3.2.5 Previous Page
Click to switch to previous page in full screen mode.
3.2.6 Next Page
Click to switch to the next page in full screen mode.
3.2.7 Copy
Click the icon into the state of choice,lasso the target, and click the
icon .
3.2.8 Paste
After using Copy function, click Paste icon to paste the chosen target.
3.2.9 Zoom out
Click to zoom out the screen.
3.2.10 Zoom in
Click to zoom in the screen.
3.2.11 Template Library
Click to pop up template library, as shown in Figure 3-2-11, including
5W1H, Breakeven Analysis, Priority Matrix, Risk Assessment, SMART, SWOT, Venn
Diagram, etc.
User Manual EasMeeting (Application Software) 33
Page 37

Fig.3-2-11 Template library
3.2.12 Adaptive page
Click the button can be adaptive full screen page. Roaming after Writing,
click this button to display the whole content writing full screen zoom. If the page
content more than full screen, it will automatic shrink to full screen; If the page
content is not full screen, then automatically zoom to full screen.
3.2.13 Set background
Click the button to change the background of the current page pattern
and color, as shown in Figure 3-2-13.
User Manual EasMeeting (Application Software) 34
Page 38

3.2.14 Text
Fig.3-2-13 Set Background
Click to pop up text sub-menu, as shown in Figure 3-2-14-1, including
text editing and handwriting recognition function.
Fig.3-2-14-1 Text Input Function Options
Click button to open text editing function. Click location for inputting
text on the page, and input text (input by text toolbar keyboard or PC
external keyboard, maximum height by default is 200 lines), the default text
font is song typeface, size is 40, and color is black, as shown in
Figure3-2-14-2.
User Manual EasMeeting (Application Software) 35
Page 39

Fig.3-2-14-2 Text Editing
① Font. Click drop-down menu of font box to select text font;
② Font size. Click drop-down menu of font size box to select text font size;
③ Bold. Click button to set current text to bold, and at the same
time, the button is changed into , click this button again to restore
font thickness;
④ Italic. Click button to set current text to italic, and at the same
time, the button is changed into , click this button again to restore
font;
⑤ Underline. Click button to set current text to underlined, and at
the same time, the button is changed into , click this button again
to remove underline of font;
⑥ Font color. Click button to pop up color plate, to set font color of
current text;
⑦ Keyboard input. Click to call out keyboard for text input;
User Manual EasMeeting (Application Software) 36
Page 40

⑧ Delete. Click to delete the current input text content, without
closing text editor toolbar.
Click button to open handwriting recognition function. After writing
on the page, handwriting will be identified automatically and displayed on
the page. The default displayed text is selected state, as shown in Figure
3-2-14-3;
Fig.3-2-14-3 Handweiting Recognition
3.2.15 Screenshot
Click button to open screenshot tools, as shown in Figure 3-2-15-1.
Fig.3-2-15-1 Screenshot Tool
① Click directly for full-screen snip, after clicking this button, it will
automatically screenshot full-screen, and insert to current page as image, as
shown in Figure 3-2-15-2;
User Manual EasMeeting (Application Software) 37
Page 41

Fig.3-2-15-2 Full Screen Screenshot Inserting Page
② Click and drag a rectangle on page, as shown in Figure 3-2-15-3,
which can arbitrarily adjust position and shape of the rectangular.
Fig.3-2-15-3 Rectangular Screenshot
Click to inert screenshot into the page, as shown in Figure 3-2-15-4,
click to cancel screenshot;
User Manual EasMeeting (Application Software) 38
Page 42

Fig.3-2-15-4 Rectangular Screenshot Inserting Page
③ Click to perform arbitrary free screenshot. Arbitrarily select required
screenshot object, as shown in Figure 3-2-15-5, and screenshot will be
automatically inserted into the page;
Fig.3-2-13-5 Arbitrary Screenshot
3.2.16 Thumbnail
Click the button to pop-up the page thumbnail as shown in Figure
3-2-16-1;
User Manual EasMeeting (Application Software) 39
Page 43

Fig.3-2-16-1 Page Thumbnail
Click on any page to return to the page;
In touch mode, long press any page, and the button will pop up as shown in
Figure 3-2-16-2, including copy page, the export file, add page and delete
page;
Fig.3-2-16-2 Page Operation Button
In touch mode, long press any page and slide to the left to the copy button
, the current page will be copied, as shown in Figure 3-2-16-3;
User Manual EasMeeting (Application Software) 40
Page 44

Fig.3-2-16-3 Copy Page
In touch mode, long press any page and slide up to the export file button
, the current page is exported, and the page will sent to the relevant
one, as shown in Figure 3-2-16-4;
Fig.3-2-16-4 Send Email
① Manually configure the SMTP, port number, Account and password;
User Manual EasMeeting (Application Software) 41
Page 45

② Click to save the current configuration information;
③ Click to hide configuration interface;
④ Fill in the recipient email address, subject and message content;
⑤ Click to send all pages of the current interface to user specified
mailbox;
Note: The users can use the configured default mailbox to send the current
page, as shown in Figure 3-2-16-5.
Fig.3-2-16-5 the Default Mailbox Interface
In touch mode, long press any page and slide to the right to the new page
button , on the current page next will be add a new page;
In touch mode, long press any page and slide down to the delete page
button , the current page will be deleted;
Click the button to return to the current page;
User Manual EasMeeting (Application Software) 42
Page 46

Click the button pop-up the page batch interface ash shown in Figure
3-2-16-5, it can be batch export and e-mail page;
Fig.3-2-16-5 Batch Page
3.3 Small Tools
Select small tool buttons to add to the toolbar, including panel-in-panel,
calendar, clock, coordinate system, screen recording, form, timer, central control,
calculator, video conference, etc.
3.3.1 Panel-in-panel
Click to open panel-in-panel, as shown in Figure 3-3-1-1. The button is
displayed in the desktop mode, and the user can call in desktop mode.
User Manual EasMeeting (Application Software) 43
Page 47

Fig.3-3-1-1 Open Panel-In-Panel
① Writing. Click the button to write on whiteboard, with default
handwriting is thin, and color is black. The handwriting’s thickness and color
cannot be changed;
② Eraser. Click the button to erase the handwriting as required;
③ Export. Click the button to export the handwriting as .jpg in the
current panel-in-panel;
④ Clear handwriting. Click to clear all the writing on white board;
⑤ Retract whiteboard. Click blue ring on top of page, dragging down white
board. If the whiteboard is dragged half distance of page, the white board
can fix to the current position; if the whiteboard is dragged to a distance of
less than half page, whiteboard will retract automatically.
⑥ Close. Click the button to close the panel-in-panel.
User Manual EasMeeting (Application Software) 44
Page 48

3.3.2 coordinate system
Click to open mathematics tool coordinate system, pop-up settings
window as shown in Figure 3-3-2-1.
Fig.3-3-2-1 Mathematics Coordinate System Parameter Settings
Sliding scroll bars can be set up coordinates, as shown in Figure 3-3-2-2.
Fig.3-3-2-2 Math Coordinate System
Click color block to set the color coordinates, as shown in figure 3-3-2-3.
User Manual EasMeeting (Application Software) 45
Page 49

Fig.3-3-2-3 Select Color Block
Click the button to put the coordinates into a page, click to
cancel coordinates inserted.
3.3.3 Form
Click the button to bring up the form tool, as shown in Figure 3-3-3-1,
slide and set the form row and columns number.
Fig.3-3-3-1 Set Form Row and Column
Drag it to the required position and click to insert the ranks number required
forms, as shown in Figure 3-3-3-2.
User Manual EasMeeting (Application Software) 46
Page 50

Fig.3-3-3-2 Set Ranks Width
Click the button and drag to adjust the form row height;
Click the button and drag to adjust the form row height and column
width geometric;
Click the color block can be set up the form frame color;
Click the button to put the form into a page, click to cancel form
inserted.
3.3.4 Calendar
Click the button to call the calendar function, as shown in Figure3-3-4.
The user can check the date as needs. The button is displayed in the desktop mode,
and the user can call in desktop mode. At the same time, Click on the close button on
the upper right corner to close the calendar.
User Manual EasMeeting (Application Software) 47
Page 51

Fig.3-3-4 Calendar
3.3.5 Clock
Click the button to call the clock function, as shown in Figure 3-3-5. The
user can see the time as needs. The button is displayed in the desktop mode, and the
user can call in desktop mode. Click on the close button on the upper right corner to
close the clock.
Fig.3-3-5 Clock
User Manual EasMeeting (Application Software) 48
Page 52

3.3.6 Timer
Click to open the timer, as shown in Figure 3-3-6. By default, the timer
number starts from 00:00:00, and click to set countdown time. After setting
up, click again to save and exit the setting. The button is displayed in the
desktop mode, and the user can call in desktop mode.
Fig.3-3-6 Timer
3.3.7 Screen Recording
Click to open screen recording tools, with screen recording toolbar
shown in Figure 3-3-7. Buttons from left to right are start/stop, play, save and close
buttons. Recorded video is saved as wmv format, directly click play button to play
video files that are just recorded after saved. The button is displayed in the desktop
mode, and the user can call in desktop mode. Click on the close button on the upper
right corner to close the screen recording.
User Manual EasMeeting (Application Software) 49
Page 53

Fig.3-3-7 Screen Recorder
In the non-XP system, you must install the corresponding screen recording
software (EasiMeeting built-in screen recording software installation package, the
user can start the installation when it needs) to record video; Meanwhile, the system
must be installed video player in order to play the recorded video.
3.3.8 Central Control
Click the button to open the Central Control tool, as shown in Figure 3-3-8,
including the Air-condition adjustment, light switch control, volume control, etc.
Fig.3-3-8 Control Tool
Air-condition
① Click button to switch the open/close state of Air-condition,
the default is Open.
② Click button to start the cool mode.
③ Click button to start the heat mode.
User Manual EasMeeting (Application Software) 50
Page 54

Control Mode
Control
Numerical
JoinNumber
Operation
Button Control(0x01)
Press(0x01)
1
RELAY1_OPEN
Button Control(0x01)
Press(0x01)
2
RELAY1_CLOSE
Button Control(0x01)
Press(0x01)
3
RELAY2_OPEN
Button Control(0x01)
Press(0x01)
4
RELAY2_CLOSE
Button Control(0x01)
Press(0x01)
5
RELAY3_OPEN
Button Control(0x01)
Press(0x01)
6
RELAY3_CLOSE
Button Control(0x01)
Press(0x01)
7
RELAY4_OPEN
Button Control(0x01)
Press(0x01)
8
RELAY4_CLOSE
Button Control(0x01)
Press(0x01)
9
RELAY5_OPEN
Button Control(0x01)
Press(0x01)
10
RELAY5_CLOSE
④ Click button to start the fan mode.
⑤ Click button to start the auto mode.
⑥ Click to adjust the speed of fan.
⑦ Click button or to adjust the temperature of Air-condition.
Light. Click the button of light groups to switch the open/close state of
the light. The default is close.
Volume. Drag the progress bar after the button to adjust the volume
of the equipment.
Note: The Central Control tool only supports creator control system
temporarily. If you want to user the control system, please refer to the
following protocol configuration.
User Manual EasMeeting (Application Software) 51
Page 55

Button Control(0x01)
Press(0x01)
11
RELAY6_OPEN
Button Control(0x01)
Press(0x01)
12
RELAY6_CLOSE
Button Control(0x01)
Press(0x01)
13
RELAY7_OPEN
Button Control(0x01)
Press(0x01)
14
RELAY7_CLOSE
Button Control(0x01)
Press(0x01)
15
RELAY8_OPEN
Button Control(0x01)
Press(0x01)
16
RELAY8_CLOSE
Button Control(0x01)
Press(0x01)
41
Air-conditioner_OPEN
Button Control(0x01)
Press(0x01)
42
Air-conditioner_CLOSE
Button Control(0x01)
Press(0x01)
46
TEMP_16℃
Button Control(0x01)
Press(0x01)
47
TEMP_17℃
Button Control(0x01)
Press(0x01)
48
TEMP _18℃
Button Control(0x01)
Press(0x01)
49
TEMP_19℃
Button Control(0x01)
Press(0x01)
50
TEMP_20℃
Button Control(0x01)
Press(0x01)
51
TEMP_21℃
Button Control(0x01)
Press(0x01)
52
TEMP_22℃
Button Control(0x01)
Press(0x01)
53
TEMP_23℃
Button Control(0x01)
Press(0x01)
54
TEMP_24℃
Button Control(0x01)
Press(0x01)
55
TEMP_25℃
Button Control(0x01)
Press(0x01)
56
TEMP_26℃
Button Control(0x01)
Press(0x01)
57
TEMP_27℃
Button Control(0x01)
Press(0x01)
58
TEMP_28℃
Button Control(0x01)
Press(0x01)
59
TEMP_29℃
Button Control(0x01)
Press(0x01)
60
TEMP_30℃
Button Control(0x01)
Press(0x01)
62
TEMP_31℃
Button Control(0x01)
Press(0x01)
62
TEMP_32℃
Button Control(0x01)
Press(0x01)
63
TEMP_33℃
Button Control(0x01)
Press(0x01)
71
AUTO
Button Control(0x01)
Press(0x01)
72
COOL
Button Control(0x01)
Press(0x01)
73
HEAT
User Manual EasMeeting (Application Software) 52
Page 56

Button Control(0x01)
Press(0x01)
74
FAN
Button Control(0x01)
Press(0x01)
80
FAN SPEED_0
Button Control(0x01)
Press(0x01)
81
FAN SPEED_1
Button Control(0x01)
Press(0x01)
82
FAN SPEED_2
Button Control(0x01)
Press(0x01)
83
FAN SPEED_3
Button Control(0x01)
Press(0x01)
84
FAN SPEED_4
Button Control(0x01)
Press(0x01)
85
FAN SPEED_5
Volume Control(0x02)
0-100
90
Volume
3.3.9 Calculator
Click the button to call the calculator function, as shown in Figure3-3-9.
The user can perform simple mathematical calculations. The button is displayed in
the desktop mode, and the user can call in desktop mode. At the same time, Click on
the close button on the upper right corner to close the calculator.
Fig.3-3-9 Calculator
User Manual EasMeeting (Application Software) 53
Page 57

3.3.10 Video Conference
Click the button to call the video conference function quickly (If and
only if the machine has been installed the video conference software, it can use this
button to quickly call the video conference).
3.4 Operation
In touch mode, it can be directly touch to select, page turning, zoom, roam,
page thumbnails and gestures erase, etc.
Select. Single-touch touch can select operations, detailed operations see
3.1.5.1 Selection;
Page turning. Two-point touch the page, and sliding page left and right to
simulate flip operation. Slide to the left to simulation the previous page
operation, and slide to the right to simulation the next page operation.
Zoom. Four-point touch can slide up and down to zoom for full-screen.
Slide up to simulation the zoom in operation, and slide down to simulation
the zoom out operation.
Roam. Five-point touch and move, it can roam opera the page, with 3.1.5.4
Roam;
Page Thumbnail. Five-point touch and contract internal to enter the page
thumbnail, see 3.2.15 Thumbnail.
Gesture erases. In the condition of not started multi-point writing, use the
size of touch surface like three fingers, it can start the gesture erase
function, which can erase various types of brush marks. (Note: Desktop
mode and standard mode can start gestures erased.)
3.5 Shortcuts
Call out screen keyboard or external keyboard, to realize functions of new, open,
save, copy, paste, undo, redo, and delete by shortcuts.
User Manual EasMeeting (Application Software) 54
Page 58

New:Ctrl+N
Open:Ctrl+O
Save:Ctrl+S
Copy:Ctrl+C
Paste:Ctrl+V
Undo:Ctrl+Z
Redo:Ctrl+Y
Delete:Delete
3.6 Desktop Mode
Click on the toolbar to switch to desktop mode, as shown in Figure 3-6.
Desktop mode only has functions of returning to standard mode, desktop operation,
pen, eraser, screenshot and small tools.
Fig.3-6 Desktop Mode
Return. Click to return to standard mode;
Desktop operation. Click to return to desktop operation mode, and
the user can operate the other program on the computer;
Hard brush. Click to enter to the desktop annotation mode, then the
user can use the hard brush to annotate on the current interface(brush color
is the same as the current brush color on the standard mode);
Eraser. Click to erase desktop notation handwriting;
Screenshot. Click to call out screenshot tool. See 3.2.14 Screenshot;
User Manual EasMeeting (Application Software) 55
Page 59

Small tools. Click to call out Clock, Calendar, Panel-in-Panel, Timer,
Screen Recorder tool, central control, calculator and video conference, see
3.3 Small Tools.
Icon adsorption and hidden. When the software does not operate 3s,
toolbar will automatically adsorption to the edge of the page, and hide into
a translucent icon. Click on the translucent icon, toolbar will automatically
pops up;
Play PPT. On the desktop mode, the screen will appear the flip up and down
button on the left/right corner. Click the button to flip up and
down the PPT, as shown in Figure 3-6-2.
Fig.3-6-2 Desktop Play PPT
Above is the complete content of the EasiMeeting Touch Screen
Application Software Instructions. The Instructions are subject to
change without notice.
User Manual EasMeeting (Application Software) 56
Page 60

Thanks again for selecting our products!
User Manual EasMeeting (Application Software) 57
 Loading...